When you click on links to various merchants on this site and make a purchase, this can result in this site earning a commission. Affiliate programs and affiliations include, but are not limited to, the eBay Partner Network.
So in the grand scheme of things, do we have a link to a seal that actually fits and works with the 84-88(89) windshields?
Excellent question. I'd like to replace my cracked windshield one of these days, and eliminate the chrome trim and replace with the rubber seal. A link to the proper seal would be great.
Excellent question. I'd like to replace my cracked windshield one of these days, and eliminate the chrome trim and replace with the rubber seal. A link to the proper seal would be great.
Same here. my windshield is cracked to all hell... would be nice to just do it all at once.
I haven�t used this product yet but found this result when recently searching to do away with my chrome trim. They also sell a version that will allow the trim to clip into the rubber trim as well.
They also sell a version that will allow the trim to clip into the rubber trim as well.
You can't clip the OEM chrome trims in the "windshield weatherstrip" they sell. They offer an aftermarket "flexible chrome plastic trim" you have to glue on the ""windshield weatherstrip". The product is similar at the one you can see in this video at 2:50:
You can't clip the OEM chrome trims in the "windshield weatherstrip" they sell. They offer an aftermarket "flexible chrome plastic trim" you have to glue on the ""windshield weatherstrip". The product is similar at the one you can see in this video at 2:50:
Ah ok thanks for clarifying! I wonder how that worked, I was looking to ditch my chrome trim entirely when I got my truck painted anyway but still useful for others who might see this!
Ah ok thanks for clarifying! I wonder how that worked, I was looking to ditch my chrome trim entirely when I got my truck painted anyway but still useful for others who might see this!
I believe that "flexible chrome plastic trim" is a good idea in case you want to keep the chrome trim look without the rust risk around the windshield and wheel arches.
MY PROCESS FOR TOTALLLY ELIMINATING RUST-PROMOTING WINDSHIELD TRIM - NO CHROME NOR RUBBER TRIM THAT TRAPS MOISTURE AND DIRT.
FALL OF 2016:
Adhesive of previous replacement was not sticking to the spray paint- repaired surfaces. This time I did a thorough prep.
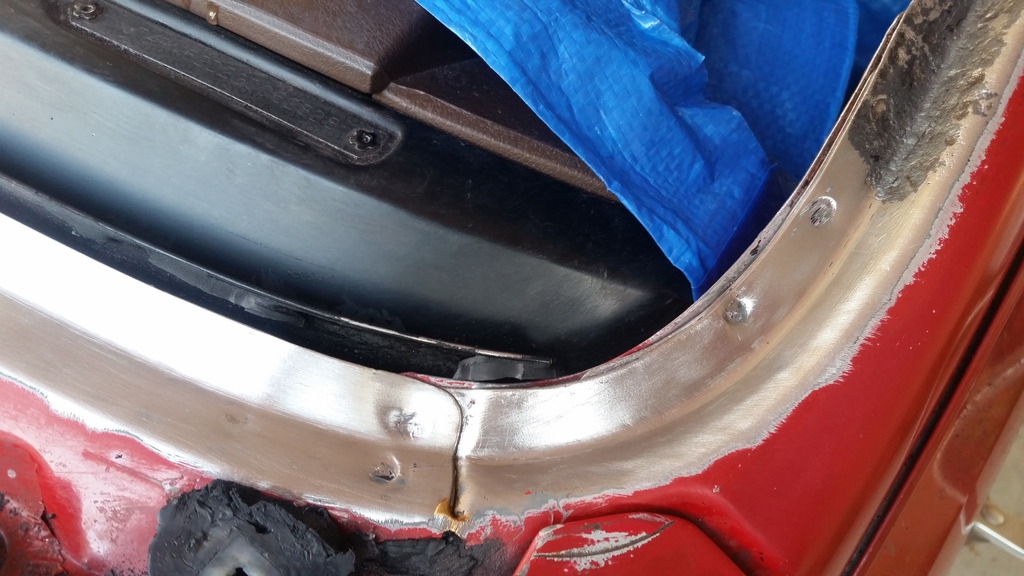
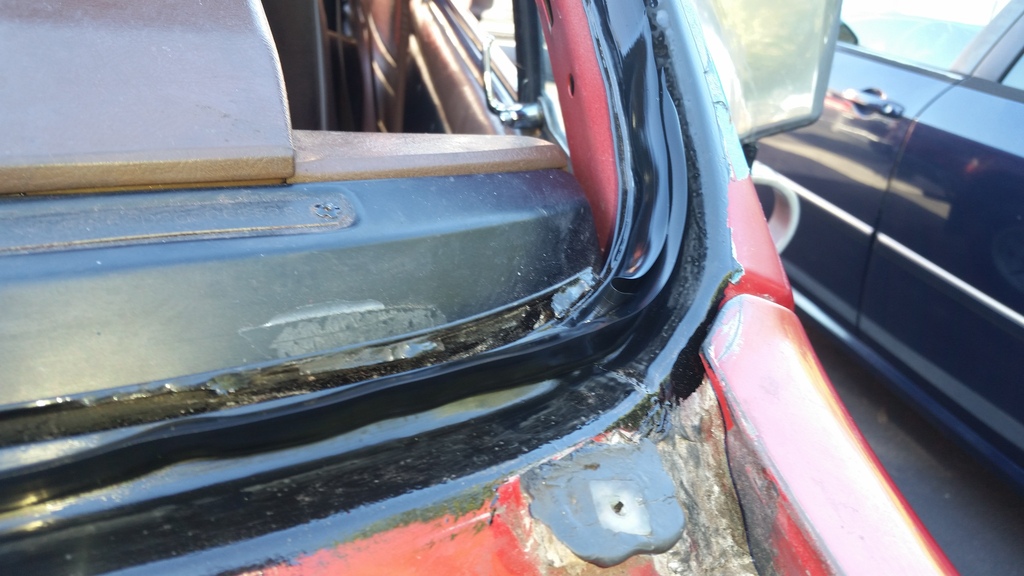
As you can see, the rusted spots are were clips for the stupid chrome trim trapped dirt and moisture. That is why I detest the chrome trim with a passion!
This time I used POR-15 Starter Kit:
I removed all finish and most rust on the pinch weld and its sidewalls with a steel-brush.
Steel brush does not completely remove loose (brown) rust (merely glazes over it and makes it seems like you had hit bare metal) so I used tiny grinding wheels (part of Dremel-style kit) that I attached to my drill. This removed all the loose, brown rust, and I was left with tiny spots of grey metal where there was pitting. I think POR-15 would take care of sealing that.
A video of the pinch weld in process. I would further grind the brown, loose rust from pitted areas is HERE.
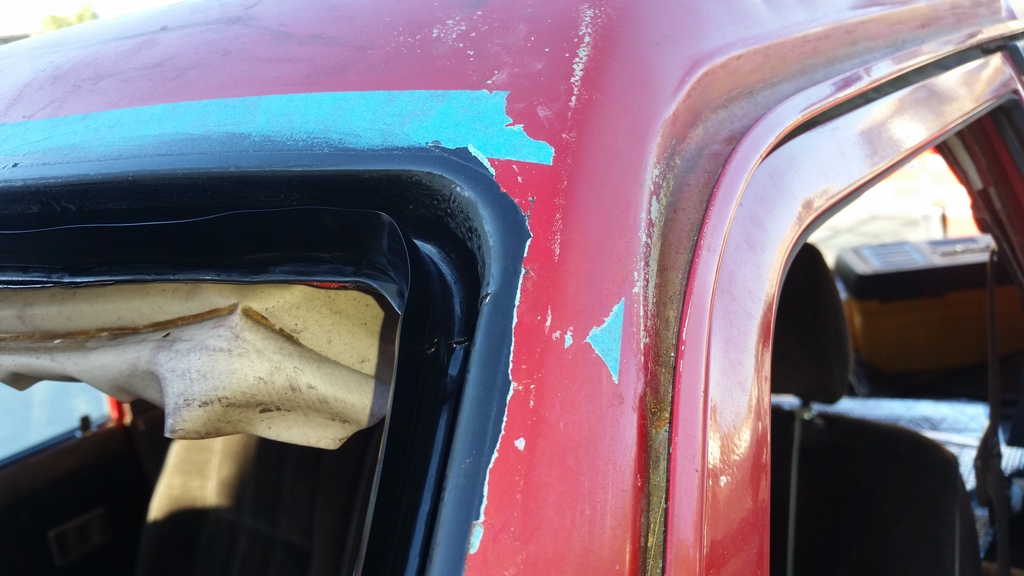
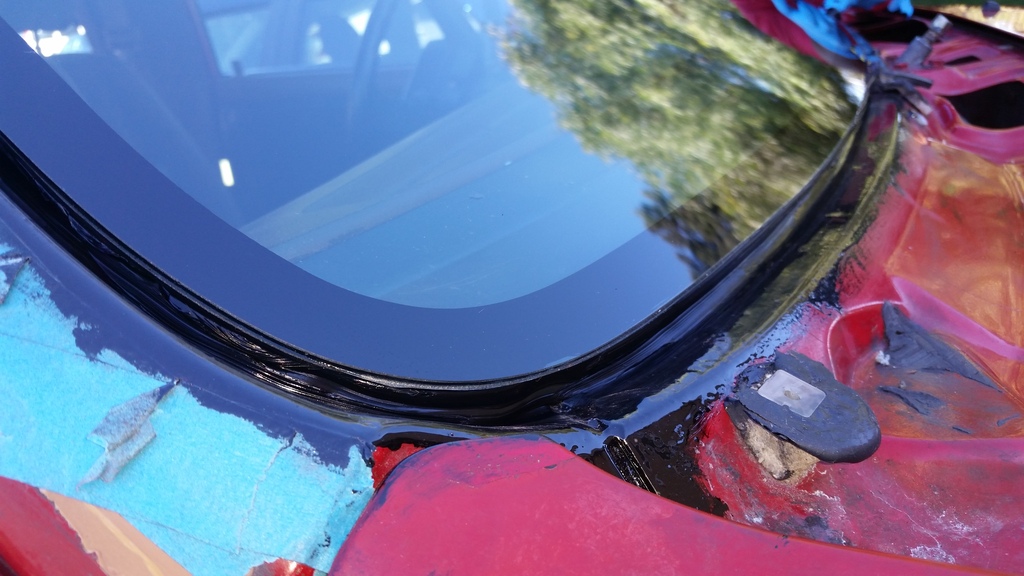
I used POR degreaser and then Metal Prep, then applied 3 coats of POR-15 (waited for each coat to get tacky before applying next coat). I was too busy to take picture of the POR'ed pinch weld and wall, but here's one already with bead of Sika brand windshield adhesive on it...
A picture of bead being applied to bottom pinch weld. Bead is pretty thick so I hope that helps with sealing.
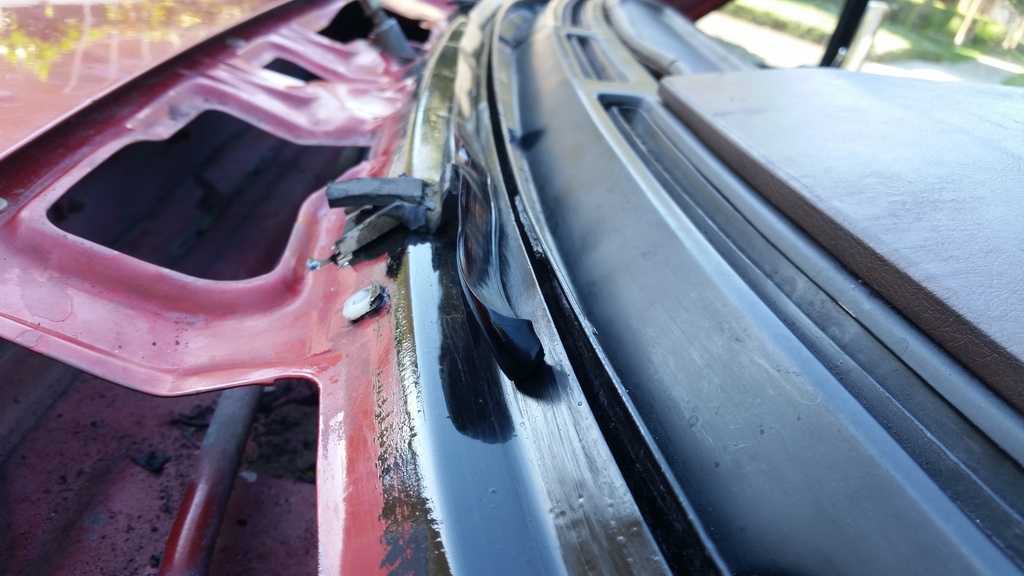
Glass now installed:
Adhesive squeeze-out completely fills underneath edge of the glass.
NEXT STEPS:
Prime the POR-treated area inside the gap, feather the POR and paint on the lip, then repaint.
FALL of 2020:
Adventures got in the way, so ALMOST 4 YEARS LATER (LOL!) I FINALLY HAD THE CHANCE TO FILL GAP AROUND THE WINDSHIELD WITH BLACK SILICONE.
Lessons Learned:
1) Paint the POR-15 as soon as cured to protect it from the elements, AND
2) When applying silicon sealant, squeegee it right away - before it forms a "skin"
See below.
POR-15 HAD DETERIORATED AND SOME EXPOSED METAL HAD RUSTED SO I HAD TO PREP AND PAINT THE METAL AGAIN. I MASKED THE GLASS AND THE URETHANE ADHESIVE SO SILICONE WOULD BOND DIRECTLY TO THEM.
POR-15 HAD DETERIORATED AND SOME EXPOSED METAL HAD RUSTED SO I HAD TO PREP AND PAINT THE METAL AGAIN. I MASKED THE GLASS AND THE URETHANE ADHESIVE SO SILICONE WOULD BOND DIRECTLY TO IT.
POR-15 HAD DETERIORATED AND SOME EXPOSED METAL HAD RUSTED SO I HAD TO PREP AND PAINT THE METAL AGAIN. I MASKED THE GLASS AND THE URETHANE ADHESIVE SO SILICONE WOULD BOND DIRECTLY TO IT.
Since there is no longer a trim to hold down / finish the rear edge of cowl cover I did the following:
Last edited by RAD4Runner; Oct 10, 2020 at 10:16 AM.
Just wanted to post a pic. I installed new glass and the rubber trim from ToyHead when I had my truck painted. Came out great, even has the correct gasket thickness and “relief” cut into it to support the front hood cowl. 100% recommend.
Sorry I dont have any info on that unfortunately, I just dont have the patience for body work. But my guy at the shop said it went in fairly easy and without issues. The OEM glass broke taking it out, so had to replace the glass.
Yup! My body shop guy was worried once he got the glass out since the clips that support the trim also support he cowl so we talked about just building up some RTV behind the cowl, but we all figured out the rubber trim it all
worked out perfectly.
I installed new glass and the rubber trim from ToyHead when I had my truck painted. Came out great, even has the correct gasket thickness and �relief� cut into it to support the front hood cowl. 100% recommend.


 Feb 9, 2016, 09:59 AM