
Another 88 rebuild/questions thread (in Hawaii)
 Mar 23, 2010 | 06:43 PM
#81
Thread Starter
Registered User
Joined: Jul 2005
Posts: 195
Likes: 0
From: Currently Hilo Hawaii, Saipan 670 Is Home
damn thanks alot blknblu. I think I'll order the first ebay one. Damn man I'm really discouraged right now. I couldn't get the intake manifold off so I pulled the head with it still on. Damn that thing weighs a ton. I'm starting to think that I made a mistake and maybe I should have gotten professional help... Man I need a pick me up..
Mar 23, 2010 | 07:18 PM
#82
Thread Starter
Registered User
Joined: Jul 2005
Posts: 195
Likes: 0
From: Currently Hilo Hawaii, Saipan 670 Is Home
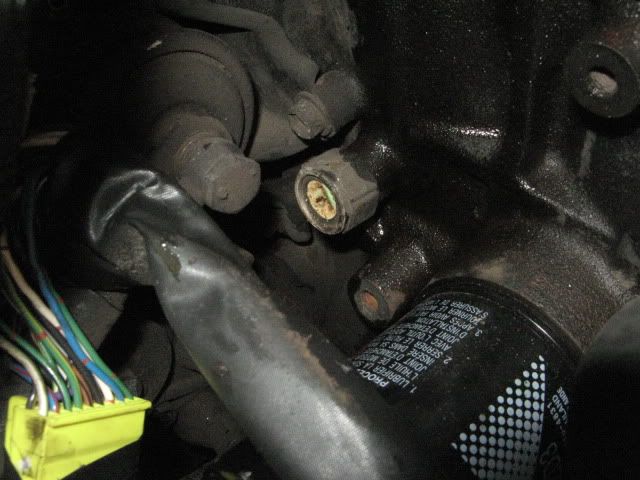
Alright so I closed up early after snaping my knock sensor in half.
This really depressed me.
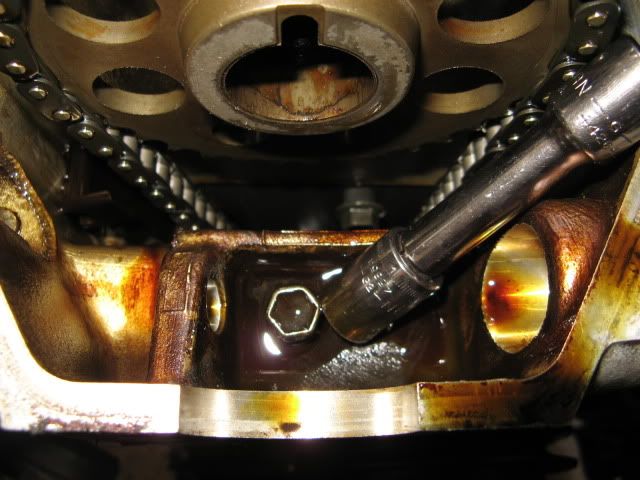
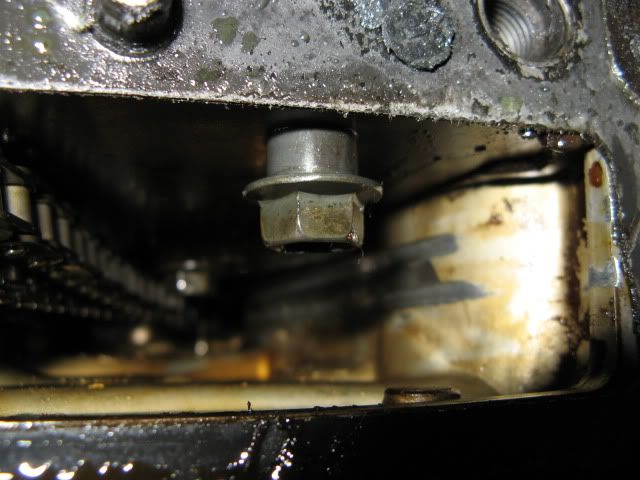
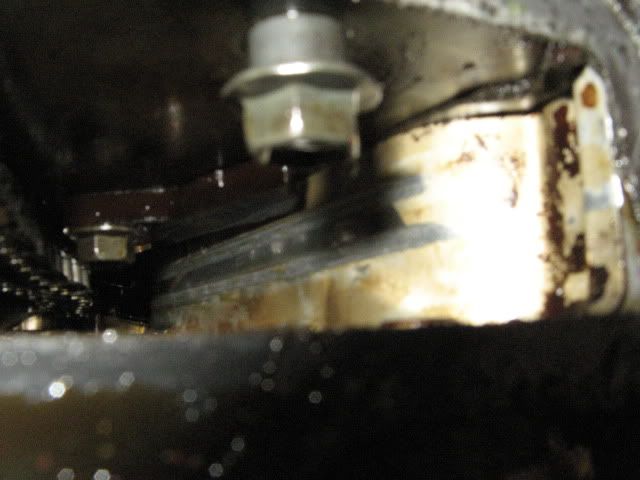
Next the reason pulled the head with the lower intake manifold on is due to this little bia right here:
I didn't have the correct allen wrench and really didn't feel like rounding it out. So I figured I'll just pull the harness out and thread it through the manifold. It worked but at the cost of the knock sensor.
I pulled the head off paying close attention to the removal the procedure laid so vaguely out by the fsm
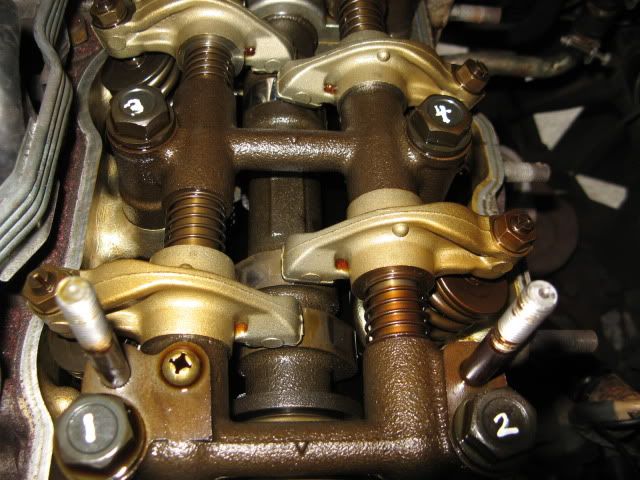

For the record: To remove the camshalf bolt, One should put the truck in gear (4th or 5th) then you may remove it.
Next step that is also a problem. the Chary bolt (sp) which is a 10/12 mm bolt in the front chilling in a pool of oil.
I pulled removed all the head bolts and was noted that the two front and two rear headbolts came out clean (bolts 1,2,11, 12) The rest were a mix. two were very dry, one rusted and one oily. interesting.
Now, I noticed that in most rebuilds most have trouble removing the head. I used a small pry bar and it popped off.

Now it's off! I'm not as excited as I should be for some reason. I feel like I made a huge mistake..
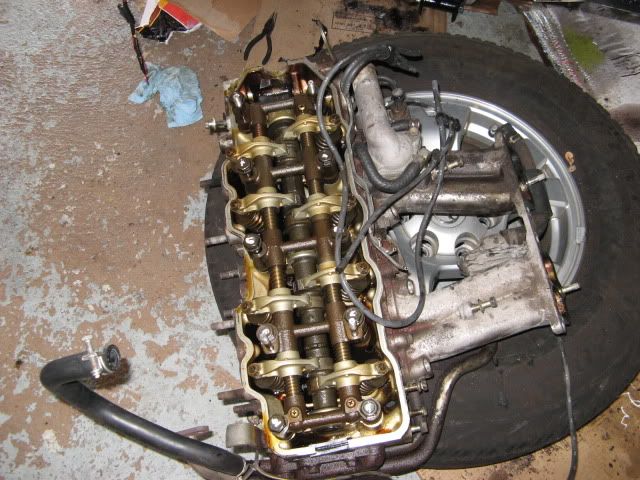
I noticed the opening in the headgasket as 92 put it "like foil that needs to be opened" Is this normal?
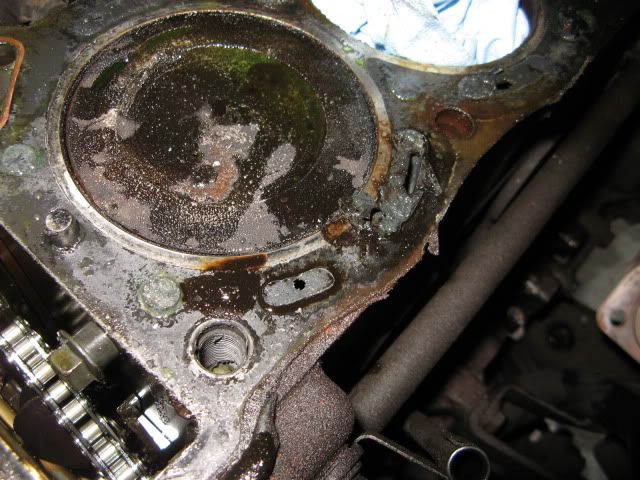
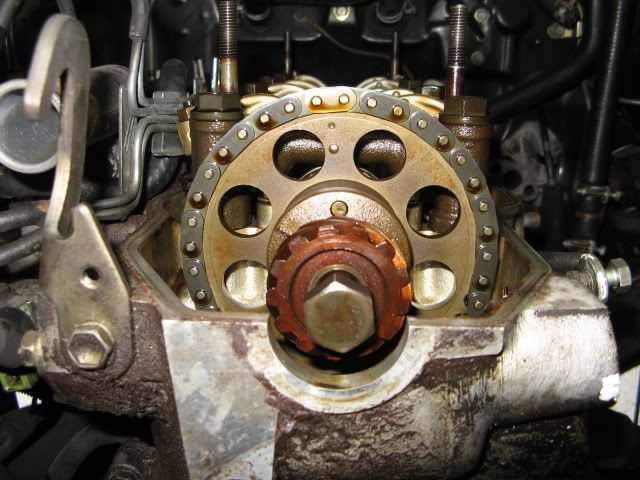
Now for the timing chain carnage
The guide is gone and the grooves are pretty deep. Scary..
After the knock sensor snapped I decided I should stop before I screw more stuff up.
What should I do tomorrow? Should I remove the timing cover? drop the pan? Stop being a wussy and fix your damn truck? haha Sorry guys just feeling really overwhelmed
This really depressed me.
Next the reason pulled the head with the lower intake manifold on is due to this little bia right here:
I didn't have the correct allen wrench and really didn't feel like rounding it out. So I figured I'll just pull the harness out and thread it through the manifold. It worked but at the cost of the knock sensor.
I pulled the head off paying close attention to the removal the procedure laid so vaguely out by the fsm
For the record: To remove the camshalf bolt, One should put the truck in gear (4th or 5th) then you may remove it.
Next step that is also a problem. the Chary bolt (sp) which is a 10/12 mm bolt in the front chilling in a pool of oil.
I pulled removed all the head bolts and was noted that the two front and two rear headbolts came out clean (bolts 1,2,11, 12) The rest were a mix. two were very dry, one rusted and one oily. interesting.
Now, I noticed that in most rebuilds most have trouble removing the head. I used a small pry bar and it popped off.
Now it's off! I'm not as excited as I should be for some reason. I feel like I made a huge mistake..
I noticed the opening in the headgasket as 92 put it "like foil that needs to be opened" Is this normal?
Now for the timing chain carnage
The guide is gone and the grooves are pretty deep. Scary..
After the knock sensor snapped I decided I should stop before I screw more stuff up.
What should I do tomorrow? Should I remove the timing cover? drop the pan? Stop being a wussy and fix your damn truck? haha Sorry guys just feeling really overwhelmed
Mar 23, 2010 | 08:09 PM
#83

You're doing fine. Yes, the sensor is a setback and unfortunately a somewhat expensive one. On the other hand, it is an easily replaced part and not like something long term and internally damaging.
I can't see your chain guide pics very well. When you say "gone" do you mean pieces of it missing? If pieces are missing they may be in your oilpan and you'll need to get them out. If everything is in one piece you can try removing the timing cover and leave the oilpan in place. If you can get a nice clean surface to apply new gasket material to you might be OK. You would have to make the call when you get that far. Again, this assumes your t chain guide parts are intact. Personally I'd start with pulling the cover and see what you've got. Also, if you leave the pan in place, cover it up so crap doesn't fall in it while you are working above it.
I can't see your chain guide pics very well. When you say "gone" do you mean pieces of it missing? If pieces are missing they may be in your oilpan and you'll need to get them out. If everything is in one piece you can try removing the timing cover and leave the oilpan in place. If you can get a nice clean surface to apply new gasket material to you might be OK. You would have to make the call when you get that far. Again, this assumes your t chain guide parts are intact. Personally I'd start with pulling the cover and see what you've got. Also, if you leave the pan in place, cover it up so crap doesn't fall in it while you are working above it.
Mar 23, 2010 | 10:35 PM
#84
Thread Starter
Registered User
Joined: Jul 2005
Posts: 195
Likes: 0
From: Currently Hilo Hawaii, Saipan 670 Is Home
Thanks Blknblu that's what I needed. The driver side guide is nowhere in sight. it's gotta be in the pan. I'm gonna drop it maybe tomorrow, Depends on when I wake up haha. I ordered that knock sensor from mmccul and hopefully it gets here soon. I just have the strongest feeling putting it back together is going to be a real pain.
Mar 24, 2010 | 12:21 AM
#85

Registered User
Joined: May 2009
Posts: 586
Likes: 2
From: Arizona
At times during my rebuild I've felt like throwing my engine in the trash. Taking on a job big to you, bordering on overwhelming, can be quite frustrating at times. Even more so when you have a lot of money into the project. You're certainly not alone.
As 92 TOY said, when you find yourself feeling in too deep, stop and take a break. Read, ask and learn. The anxiety eventually dies down, and then you progress.
You're obviously intelligent and can work your way through whatever problems you may encounter. Expect issues along the way. That's just the nature of wrenching in general and on older vehicles in particular.
This is an excellent thread. Keep going and you'll git r done.
Mar 24, 2010 | 01:34 AM
#86
YotaTech Milestone-Two Millionth Post
Joined: Jan 2009
Posts: 12,009
Likes: 122
From: Northeast Pennsylvania
g'morning....
OK , I see you've got some carnage.
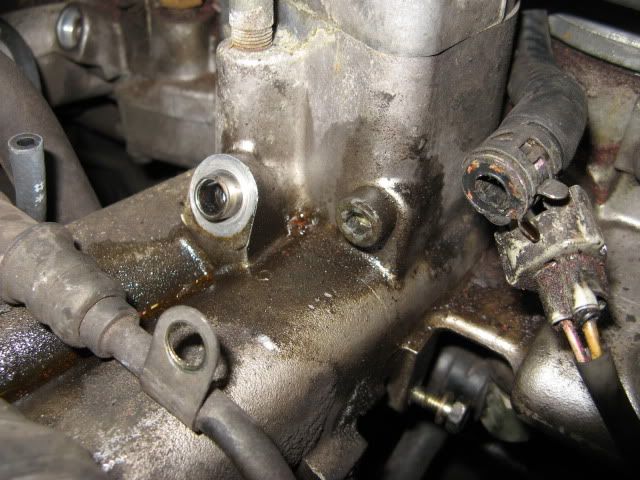
Knock sensor...seems like you got your answer, dang. Sorry to see that,
That little blot (the allen one you killed)....I also rounded out the allen head and ended up using vice grips to get it out.....you will probably have to use an "easy out" or something like that to get it out. I ordered a new one from LC Engineering ...for me it's part # 8012418 http://www.toyotacatalog.net/M1WebGe...iteria=8012418
OK , I see you've got some carnage.
Knock sensor...seems like you got your answer, dang. Sorry to see that,
That little blot (the allen one you killed)....I also rounded out the allen head and ended up using vice grips to get it out.....you will probably have to use an "easy out" or something like that to get it out. I ordered a new one from LC Engineering ...for me it's part # 8012418 http://www.toyotacatalog.net/M1WebGe...iteria=8012418
Mar 24, 2010 | 01:38 AM
#88
YotaTech Milestone-Two Millionth Post
Joined: Jan 2009
Posts: 12,009
Likes: 122
From: Northeast Pennsylvania
for me, the LC Engineering site was a good place to get some odd parts.....that bolt, a crankshaft bolt, little gasket for where the oil uptake tube meets the block and a oil pan drain plug bolt

 Mar 24, 2010 | 01:51 AM
#92
YotaTech Milestone-Two Millionth Post
Joined: Jan 2009
Posts: 12,009
Likes: 122
From: Northeast Pennsylvania
I will post up a pic of what my block looks like right now.....just give me a little bit to do that.
don't get discouraged, we are all here.......man oh man, I have been discouraged as well....but with some nudging and guidance I have pressed on...you will do fine.
i think you are having problems because it was tooooo easy to get your crankshaft bolt off (for God's sake, I had a heart attack doing that and getting my pan off)and you must have a "trial of fire" somewhere.......just trying to cheer you up.
 Mar 24, 2010 | 03:21 AM
#95
Thread Starter
Registered User
Joined: Jul 2005
Posts: 195
Likes: 0
From: Currently Hilo Hawaii, Saipan 670 Is Home
Thanks alot 92! I keep reading your thread (and everyone else's) and it motivates me to keep working. Sometimes I feel like I'm mirroring you just many years younger (college student- rebuild before milkshake, Father- post Milkshake) haha. Thank you very much guys, honestly couldn't do it without the good folks at yotatech! Gonna get a sticker or make my own after I put this thing back together.
I decided that tomorrow I'm going to take the timing stuff off and If time permits, get the oil pan off. wish me much luck!
I decided that tomorrow I'm going to take the timing stuff off and If time permits, get the oil pan off. wish me much luck!
Mar 24, 2010 | 03:21 AM
#96
YotaTech Milestone-Two Millionth Post
Joined: Jan 2009
Posts: 12,009
Likes: 122
From: Northeast Pennsylvania
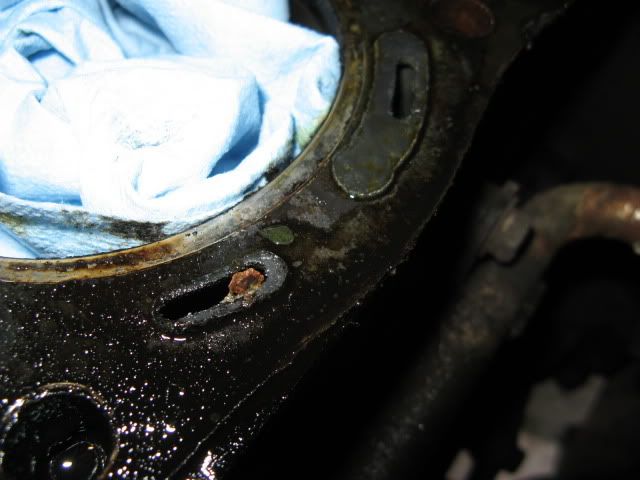
take some saran wrap and cover your head (not your head to smother yourself but your engine's head to keep out the dirt and stuff)

take a small something and pick out those holes....for me a nice sheetrock screw did it so you can actually pull the stuff out....I'm not sure what all those little holes do, but they are not right to be plugged up like that.

take a small something and pick out those holes....for me a nice sheetrock screw did it so you can actually pull the stuff out....I'm not sure what all those little holes do, but they are not right to be plugged up like that.
Mar 24, 2010 | 03:24 AM
#97
YotaTech Milestone-Two Millionth Post
Joined: Jan 2009
Posts: 12,009
Likes: 122
From: Northeast Pennsylvania
Thanks alot 92! I keep reading your thread (and everyone else's) and it motivates me to keep working. Sometimes I feel like I'm mirroring you just many years younger (college student- rebuild before milkshake, Father- post Milkshake) haha. Thank you very much guys, honestly couldn't do it without the good folks at yotatech! Gonna get a sticker or make my own after I put this thing back together.
I decided that tomorrow I'm going to take the timing stuff off and If time permits, get the oil pan off. wish me much luck!
I decided that tomorrow I'm going to take the timing stuff off and If time permits, get the oil pan off. wish me much luck!
don't make me fly to Hawaii to kick your ass!
I never aged a day since 19........I'm mentally still there and physically too......hahahahhahaa.
 Mar 24, 2010 | 03:30 AM
#99
YotaTech Milestone-Two Millionth Post
Joined: Jan 2009
Posts: 12,009
Likes: 122
From: Northeast Pennsylvania
what the hell time is it in Hawaii anyway...is it still yesterday? It's 728am on March 24th here.....that means I'm talking to you from the future..........
timing stuff off+ pan off= fresh start.....you will feel much better then.
timing stuff off+ pan off= fresh start.....you will feel much better then.
Mar 24, 2010 | 04:29 AM
#100
Registered User
Joined: Jan 2010
Posts: 1,803
Likes: 14
From: Bryan Tx,
You need a 6mm allen wrench to get that bolt off of the lower intake, I would try to et one before you damage the bolt.
I agree with 92 TOY, get the timing cover off next & then the oil pan. Be sure to keep the timing cover bolt strait, they are all different lenghts. Here is a pic for reference.

I agree with 92 TOY, get the timing cover off next & then the oil pan. Be sure to keep the timing cover bolt strait, they are all different lenghts. Here is a pic for reference.


