
3vze Top End rebuild...W/pics...slowly
 Mar 15, 2005 | 03:29 AM
#101
Contributing Member
Joined: Nov 2002
Posts: 10,666
Likes: 5
From: Oklahoma State
Yeah there is a special RTV (or so they say) for anything in contact with coolant.
Have you given any consideration to cutting the header flanges? It is supposed to help solve header gasket leaks. I'm thinking about doing it if I get some headers but I haven't found much info on it except this: https://www.yotatech.com/forums/f2/cut-headers-15973/
Have you given any consideration to cutting the header flanges? It is supposed to help solve header gasket leaks. I'm thinking about doing it if I get some headers but I haven't found much info on it except this: https://www.yotatech.com/forums/f2/cut-headers-15973/
Mar 15, 2005 | 07:31 AM
#102
Thread Starter
Registered User
Joined: Jan 2005
Posts: 571
Likes: 0
From: Moreno Valley, Ca
Thanks for the responses. I just got back from picking up the RTV for the water pump. Their are forces determined not to let me finish, as work called and the staff is in a bind and need me to come in early. Oh, well my truck isn't going anywhere and this just means more $$$ to spend on her later.
mt_goat - I read through that post again, I think for this first time I'll leave the headers alone. The information didn't seem quite thorough enough yet. If you find more info please let me know for my "NEXT" major rebuild.
-=Morphine=-
mt_goat - I read through that post again, I think for this first time I'll leave the headers alone. The information didn't seem quite thorough enough yet. If you find more info please let me know for my "NEXT"
major rebuild.-=Morphine=-
Mar 15, 2005 | 07:36 PM
#103
Registered User
Joined: Mar 2004
Posts: 511
Likes: 0
From: Salem,Oregon
If you are looking for the FIPG (Form In Place Gasket) stuff may I suggest this stuff.
way better than any RTV or silicone
I bought a tube for a small caulking gun when I was last into my motor and after tearing my motor apart again 8 mos later I must say Im impressed at how well this stuff works. The stuff is like engine glue and nothing leaked on my last assembly.
As far as header gaskets go I used the stock Steel gaskets. I doubt you will ever blow out a stainless multilayer gasket. Im going to cut my next set of gaskets into individual pieces. Maybe I will do that tomorrow and post some pics.
Last edited by Ganoid; Mar 15, 2005 at 07:38 PM.
Mar 16, 2005 | 04:33 AM
#104
Contributing Member
Joined: Nov 2002
Posts: 10,666
Likes: 5
From: Oklahoma State
Originally Posted by Ganoid
If you are looking for the FIPG (Form In Place Gasket) stuff may I suggest this stuff.
way better than any RTV or silicone
I bought a tube for a small caulking gun when I was last into my motor and after tearing my motor apart again 8 mos later I must say Im impressed at how well this stuff works. The stuff is like engine glue and nothing leaked on my last assembly.
As far as header gaskets go I used the stock Steel gaskets. I doubt you will ever blow out a stainless multilayer gasket. Im going to cut my next set of gaskets into individual pieces. Maybe I will do that tomorrow and post some pics.
way better than any RTV or silicone
I bought a tube for a small caulking gun when I was last into my motor and after tearing my motor apart again 8 mos later I must say Im impressed at how well this stuff works. The stuff is like engine glue and nothing leaked on my last assembly.
As far as header gaskets go I used the stock Steel gaskets. I doubt you will ever blow out a stainless multilayer gasket. Im going to cut my next set of gaskets into individual pieces. Maybe I will do that tomorrow and post some pics.
Did you use any kind of sealer on your stock steel gaskets?
Last edited by mt_goat; Mar 19, 2005 at 05:53 PM.
Mar 18, 2005 | 07:27 PM
#105
Thread Starter
Registered User
Joined: Jan 2005
Posts: 571
Likes: 0
From: Moreno Valley, Ca
OK I've been under the weather and working. Making progress but nothing note worthy. I've been following Silver_Trucks build to help motivate me. Click here for Silver_trucks build
Well I'm learning alot:
1.) Buy rtv in large tube for gun, not the small hand squeezable kind. Hands hurt on large surface area's.
2.) Order everything before hand to eliminate down time (down time allows for more thought and $$$)
3.) Don't plan a vacation in the middle of the build.
4.) For us "rookie" mechanics allow alot more time than expected.
5.) Quit writing Computer viruses to drum up business, especially when trying to finish a build. (Computer Consultant for a iving) (J/K about the virus stuff :looks over his shoulder for the FBI: )
6.) Order fiances' "Mechanix gloves in purple" before the build so she'll help more than holding the light.
Once I can stand without getting dizzy or can hear out of my right ear again I'll pick up the pace.
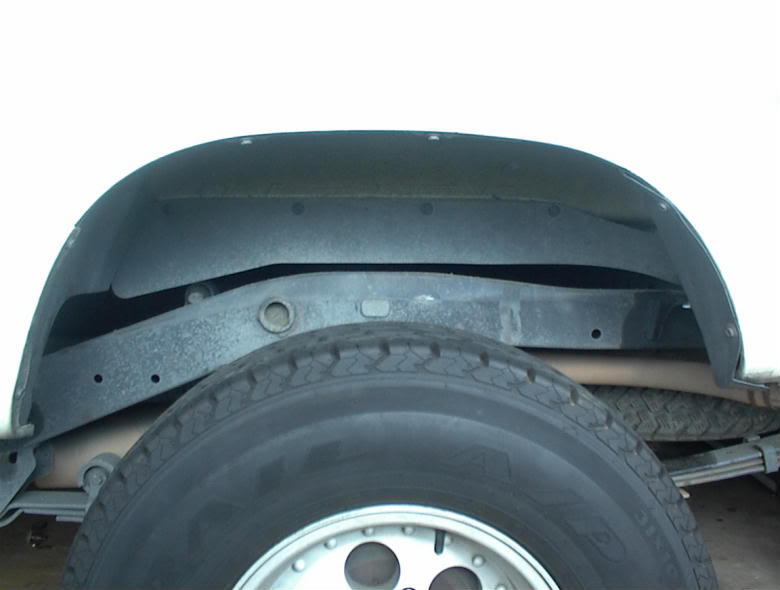
Sorry for the thread jack early Silver_Truck, but the freeze plugs were buggin' me. If anyone wants to chimne in on freeze plugs here please do: How many?, Where are they at? Pics!!!
-=Morphine=-
Well I'm learning alot:
1.) Buy rtv in large tube for gun, not the small hand squeezable kind. Hands hurt on large surface area's.
2.) Order everything before hand to eliminate down time (down time allows for more thought and $$$)
3.) Don't plan a vacation in the middle of the build.
4.) For us "rookie" mechanics allow alot more time than expected.
5.) Quit writing Computer viruses to drum up business, especially when trying to finish a build. (Computer Consultant for a iving) (J/K about the virus stuff :looks over his shoulder for the FBI: )
6.) Order fiances' "Mechanix gloves in purple" before the build so she'll help more than holding the light.
Once I can stand without getting dizzy or can hear out of my right ear again I'll pick up the pace.
Sorry for the thread jack early Silver_Truck, but the freeze plugs were buggin' me. If anyone wants to chimne in on freeze plugs here please do: How many?, Where are they at? Pics!!!
-=Morphine=-
Mar 19, 2005 | 10:40 AM
#108
Contributing Member
Joined: Nov 2002
Posts: 10,666
Likes: 5
From: Oklahoma State
I think I saw somewhere there are 2 in the heads.
As I promised here are some pics of thermal expansion of a grate over a stove top.
The first pic shows the grill (which has a crack in it) cold. http://community.webshots.com/photo/...99086396uviUWD
The next pic shows the same crack after the stove top has warmed up a few minutes:http://community.webshots.com/photo/...99086643pzglTo
As you can see in this pic the crack widens big enough to drop a quarter into, showing it's grown about .070 of an inch in just a few minutes of the burner on. http://community.webshots.com/photo/...99086514WXkNDF
This expansion is from uneven heating the of the grate, the center section is heating up faster than the edges and the force of the expansion was enough to break the grate while I was cooking one night.
I'm thinking the header flange is going to be doing the samething in relation to the head, heating up much faster than the head. That would mean there would be a constant movement between the header flange and the head every time the engine warms up and then cools back down. By cutting a slot in the header flanges between the exhaust ports the header pipes would not be forced to move due to the expansion of the metal in between the pipes. That should make the gaskets last much longer don't you think?
Last edited by mt_goat; Mar 19, 2005 at 05:52 PM.
Mar 22, 2005 | 12:50 PM
#109
Thread Starter
Registered User
Joined: Jan 2005
Posts: 571
Likes: 0
From: Moreno Valley, Ca
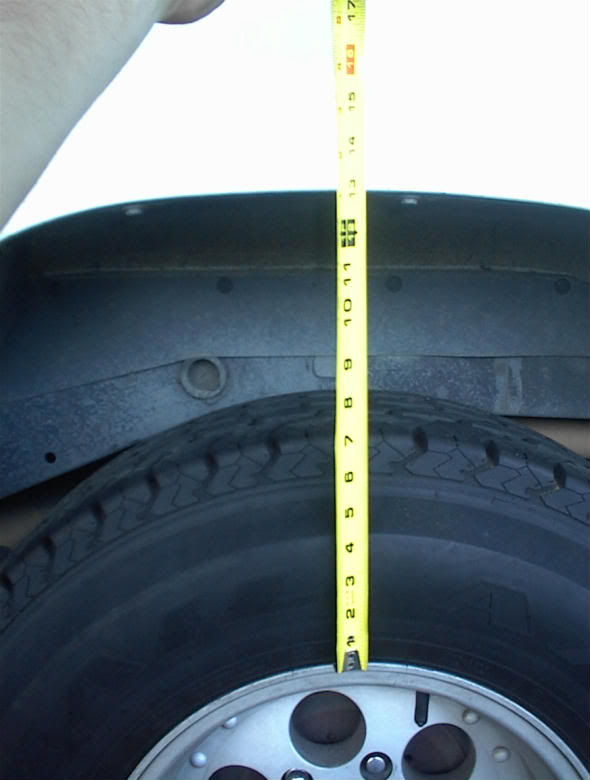
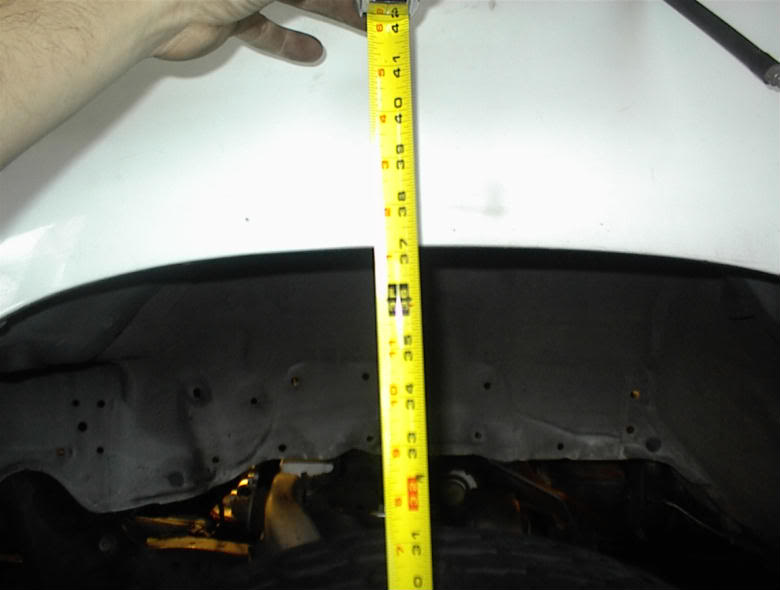
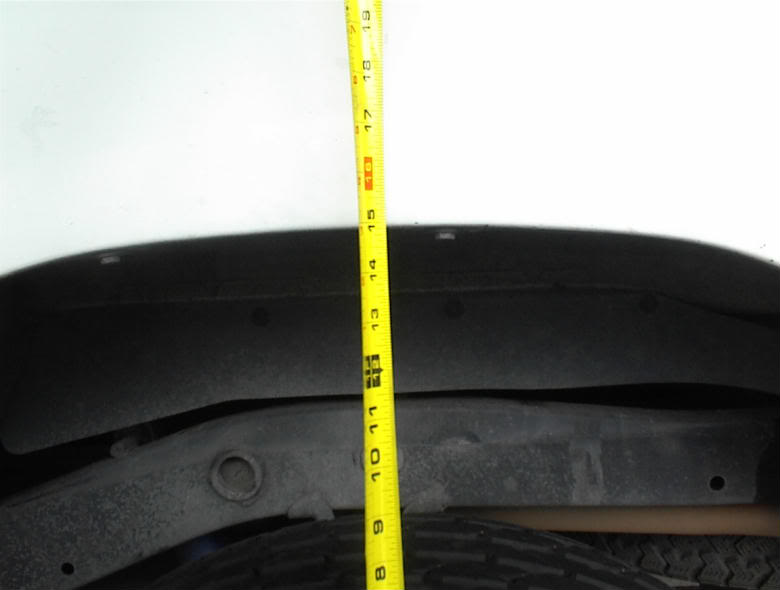
I'm alive...and the 2"BL is on!
Ok, longest non SAS build up in YotaTech history. This is my Goal  So I got today off and went out to work on my truck. Taking a break from my engine I did the BL, surprisingly easy. Only 3 1/2 hours. Now it appears I have more room to work under neath and in the engine bay. Ok pictures..(Not all of the bolts are fully tightened yet, I'm replacing the 2 rear cab bolts for slightly shorter bolts. To much overhang....I should have spent the money and got the "4Crawler bodylift"...Stupid, stupid, stupid Morphine...Pinching pennies :cry: )
Rear stock
Front stock
Rear After
Front After

Cab on not the bed

Fully on
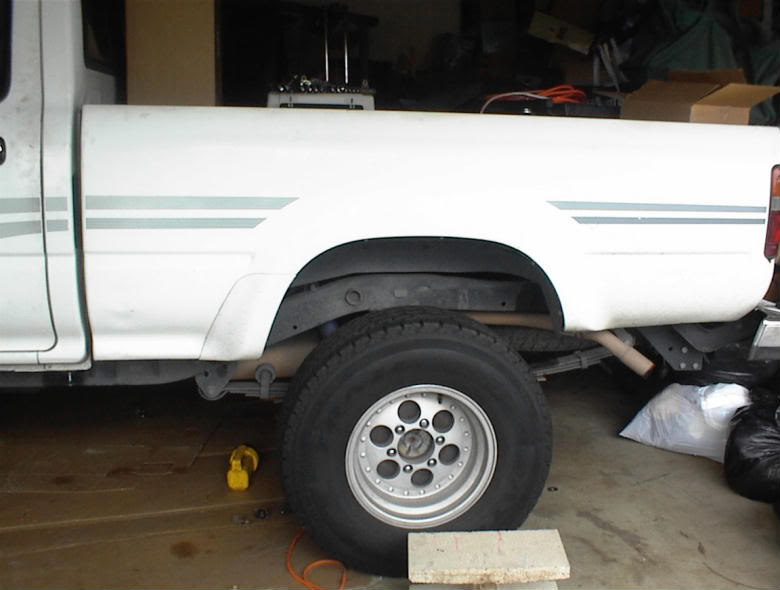
Minimal gap - I'm surprised
Ok back to the engine, I'm burning day light updating here.

-=Morphine=-
So I got today off and went out to work on my truck. Taking a break from my engine I did the BL, surprisingly easy. Only 3 1/2 hours. Now it appears I have more room to work under neath and in the engine bay. Ok pictures..(Not all of the bolts are fully tightened yet, I'm replacing the 2 rear cab bolts for slightly shorter bolts. To much overhang....I should have spent the money and got the "4Crawler bodylift"...Stupid, stupid, stupid Morphine...Pinching pennies :cry: )Rear stock
Front stock
Rear After
Front After
Cab on not the bed
Fully on
Minimal gap - I'm surprised
Ok back to the engine, I'm burning day light updating here.
-=Morphine=-
Mar 22, 2005 | 01:07 PM
#110
Contributing Member
Joined: Nov 2002
Posts: 10,666
Likes: 5
From: Oklahoma State
You can buy some rubber in sheets and cover that gap. Like this:http://community.webshots.com/photo/...71947295nKgvpi
Mar 22, 2005 | 01:11 PM
#111
Thread Starter
Registered User
Joined: Jan 2005
Posts: 571
Likes: 0
From: Moreno Valley, Ca
I was thinking..
Diamond plate. 1/8th" thick. I saw on another members truck (on their website) and it looked sweet. I'll edit soon with a link to it.
edit: I found the pics. YotaTech user SloPoke has them on his site Here

-=Morphine=-
edit: I found the pics. YotaTech user SloPoke has them on his site Here
-=Morphine=-
Last edited by Morphine; Mar 22, 2005 at 01:30 PM. Reason: Found the link
Mar 22, 2005 | 10:18 PM
#113
Thread Starter
Registered User
Joined: Jan 2005
Posts: 571
Likes: 0
From: Moreno Valley, Ca
Help
Ok, so I got the BL on and when I did my final check of the bolts and adapters my fuel filler line is to short. Now I've read of people replacing the filler line, others cut the tube and added a longer tube in and 2 hose clamps (why cut the tube? Can't I add one straight from the filler door, clamp it on and have the other end tapered into the remaining original line and hose clamp it?) What should I do??? Part numbers are greatly appreciated as are pics.
Thanks
-=Morphine=-
PS..my water pump is back on as well as my new shifter seat and socket---man what a difference it makes even just testing it out!! Still cleaning up the block before the heads go on.
Thanks
-=Morphine=-
PS..my water pump is back on as well as my new shifter seat and socket---man what a difference it makes even just testing it out!! Still cleaning up the block before the heads go on.
Last edited by Morphine; Mar 22, 2005 at 10:20 PM. Reason: Can't spell and left out words.
Mar 22, 2005 | 10:25 PM
#114

Registered User
Joined: Feb 2005
Posts: 344
Likes: 0
From: Atsugi Japan
Morph, on the fuel filler...as long as a seal is there should not matter too much how you get it......2"bl on my runner was just loosen the clamps and reseat the hose...it was fine...guess that is one of the differences tween the runners and the trucks....
Mar 22, 2005 | 10:29 PM
#115
Thread Starter
Registered User
Joined: Jan 2005
Posts: 571
Likes: 0
From: Moreno Valley, Ca
I guess so. I loosened he clamp and tried to snug it up, but the line is to short by about .5" I guess I'm off to Autozone or kragens tomorrow if I get time. Hey, I'm working on my truck again Dragon, glad to see your still following it. I'm hoping to make some real head way in the next 4-5 days. I'd love to crank her over on Saturday since I have that day off (for now).
-=Morphine=-
-=Morphine=-
Mar 22, 2005 | 10:45 PM
#116
Registered User
Joined: Feb 2005
Posts: 344
Likes: 0
From: Atsugi Japan
Okay then I will hope to see the post cranking report on my sunday.....wouldn't miss this one.....I really wanna hear about the headers and see if you think the bigger valves gave you some power....and the post rebuild compression checks....I have to do the head on my new one.....looking to start in Apr when the wife and son go home Korea for vacation......I'll have at least a month to spend getting the work done....
Mar 23, 2005 | 03:10 AM
#117
Registered User
Joined: Mar 2004
Posts: 511
Likes: 0
From: Salem,Oregon
I been thinking about that header cutting idea and the more I think about it the less I actually want to consider it. Im sure the expansion thing is an issue but how many cars do you see driving around with aluminum heads AND aluminum exhaust manifolds? Yeah thats what I thought ... None. I think If you use the stock steel gaskets with the headers thay will allow your header to slide with the expansion much the same way the stock manifold had to or even the head sliding on the block with heat. The only instances I have herd of about header gaskets going south are when people use aftermarket gaskets. Im going to cut my stock steel gaskets into more managable items.
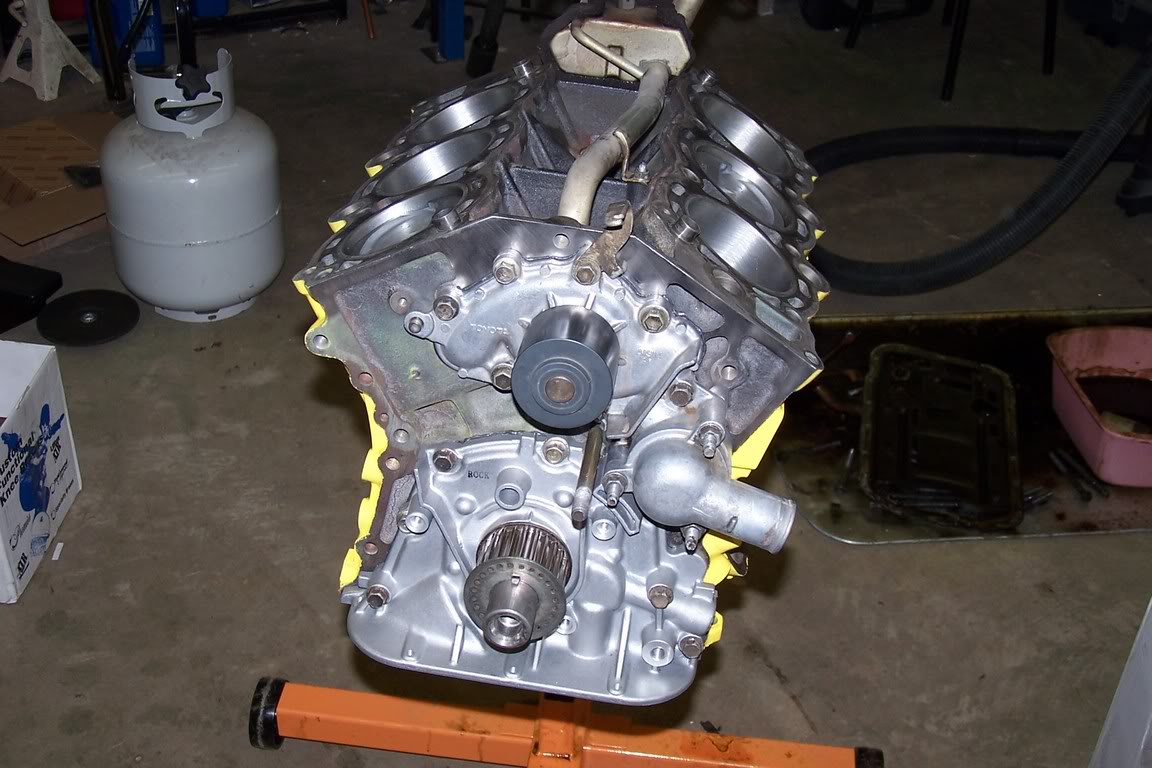
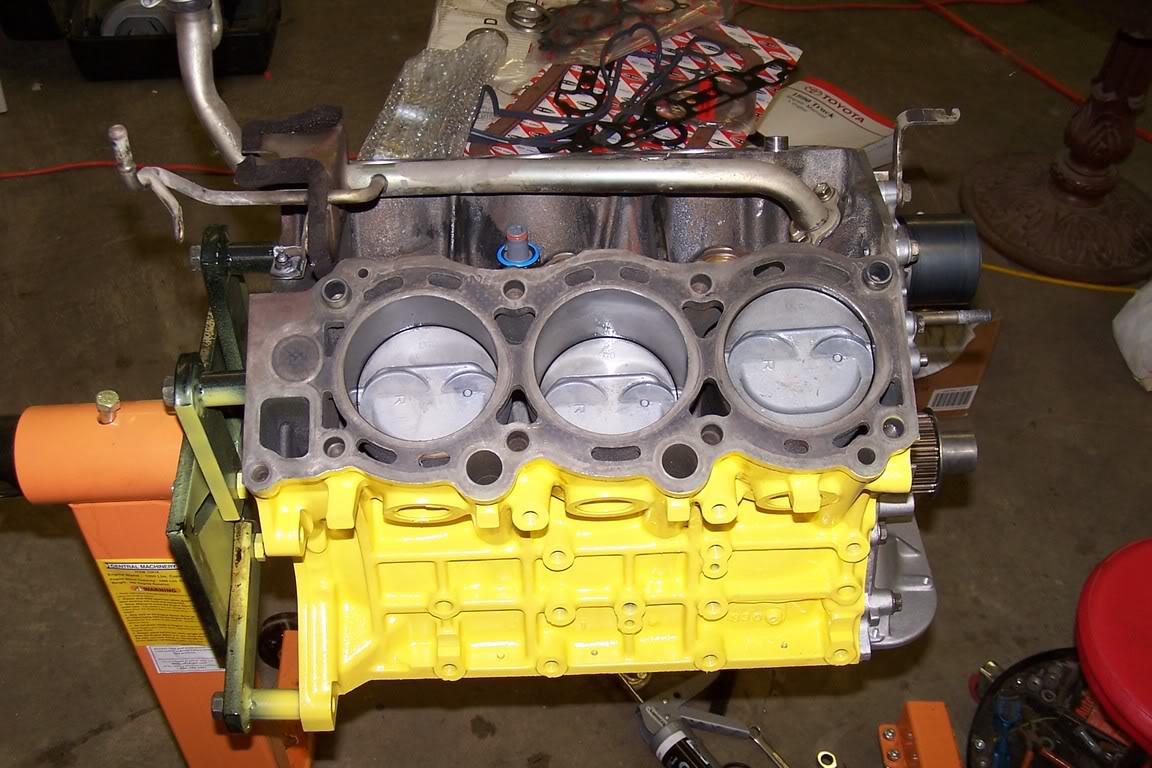
Ohh I finally got all my parts for my engine so I thought I would post a pic.
Before any one bags on my yellow motor just think about how long it would take to find an oil leak on it

Ohh I finally got all my parts for my engine so I thought I would post a pic.
Before any one bags on my yellow motor just think about how long it would take to find an oil leak on it
Mar 23, 2005 | 04:53 AM
#118
Contributing Member
Joined: Nov 2002
Posts: 10,666
Likes: 5
From: Oklahoma State
[QUOTE=Ganoid]I been thinking about that header cutting idea and the more I think about it the less I actually want to consider it. Im sure the expansion thing is an issue but how many cars do you see driving around with aluminum heads AND aluminum exhaust manifolds? Yeah thats what I thought ... None. I think If you use the stock steel gaskets with the headers thay will allow your header to slide with the expansion much the same way the stock manifold had to or even the head sliding on the block with heat. The only instances I have herd of about header gaskets going south are when people use aftermarket gaskets. Im going to cut my stock steel gaskets into more managable items.
Ohh I finally got all my parts for my engine so I thought I would post a pic.
Before any one bags on my yellow motor just think about how long it would take to find an oil leak on it [QUOTE]
__________________
That's funny because the more I think about it the more I'm wanting to do it. What do you see as the down side to doing it? I only see advantages, no disadvantages that I can think of. The stock manifolds are so thick and heavy I'm thinking they expand and contract closer to the same rate as the heads. Here is what Chris said in a PM to me about his:
Dale-
I don't have the truck anymore, but at the time that I sold it the headers were still leak free... which was probably the longest amount of time they went that long without leaks. There's no doubt in my mind this was due to the cut flanges.
I don't have a way of hosting any pics at the moment, but I can email you one if you'd like. Basically, you just take a dremel tool and slowly cut away at the middle of each flange holding each pipe together until the pipes are all independent from each other.
Hope this helps some.
He e-mailed me the pic, I have it hosted here: http://community.webshots.com/photo/...69352074WnAXiX
Nice pics! I like the yellow, hell I'd be happy just having mine that clean.
Ohh I finally got all my parts for my engine so I thought I would post a pic.
Before any one bags on my yellow motor just think about how long it would take to find an oil leak on it
[QUOTE]__________________
That's funny because the more I think about it the more I'm wanting to do it. What do you see as the down side to doing it? I only see advantages, no disadvantages that I can think of. The stock manifolds are so thick and heavy I'm thinking they expand and contract closer to the same rate as the heads. Here is what Chris said in a PM to me about his:
Dale-
I don't have the truck anymore, but at the time that I sold it the headers were still leak free... which was probably the longest amount of time they went that long without leaks. There's no doubt in my mind this was due to the cut flanges.
I don't have a way of hosting any pics at the moment, but I can email you one if you'd like. Basically, you just take a dremel tool and slowly cut away at the middle of each flange holding each pipe together until the pipes are all independent from each other.
Hope this helps some.
He e-mailed me the pic, I have it hosted here: http://community.webshots.com/photo/...69352074WnAXiX
Nice pics! I like the yellow, hell I'd be happy just having mine that clean.
Last edited by mt_goat; Oct 6, 2005 at 07:58 AM.
Mar 23, 2005 | 05:00 AM
#119
Contributing Member
Joined: Nov 2002
Posts: 10,666
Likes: 5
From: Oklahoma State
After looking at your pics closely I noticed they didn't resurface the deck (where the head gaskets sits) was there no need to or is it better not to? I've heard it needs to be in perfect shape to make the HGs last, but I'm new to this stuff so I don't know. 
Last edited by mt_goat; Mar 23, 2005 at 05:08 AM.
Mar 23, 2005 | 06:47 AM
#120
Contributing Member
Joined: Nov 2002
Posts: 10,666
Likes: 5
From: Oklahoma State
Were your stock steel exhaust gaskets still useable? If not have you found a good price on them, my stealer wants $80 each for them. I guess the heat shield is part of that cost. I'm worried about reusing the old gaskets, I know Roger Brown said he reused his though with no problems (he has the 4 cyl I think).


