
22R Rebuild
 Oct 8, 2009 | 06:39 PM
#42

Thread Starter
Registered User
Joined: May 2009
Posts: 586
Likes: 2
From: Arizona
Machined how? Welded and turned?
I had read about using 7mm thick seals instead of the usual 11mm, so the seal can be set in just deep enough for its lip to ride on a different place on the pulley. I asked engnbldr about that trick, and he said it caused too many leaks.
I had read about using 7mm thick seals instead of the usual 11mm, so the seal can be set in just deep enough for its lip to ride on a different place on the pulley. I asked engnbldr about that trick, and he said it caused too many leaks.
Oct 9, 2009 | 06:27 PM
#44
Thread Starter
Registered User
Joined: May 2009
Posts: 586
Likes: 2
From: Arizona
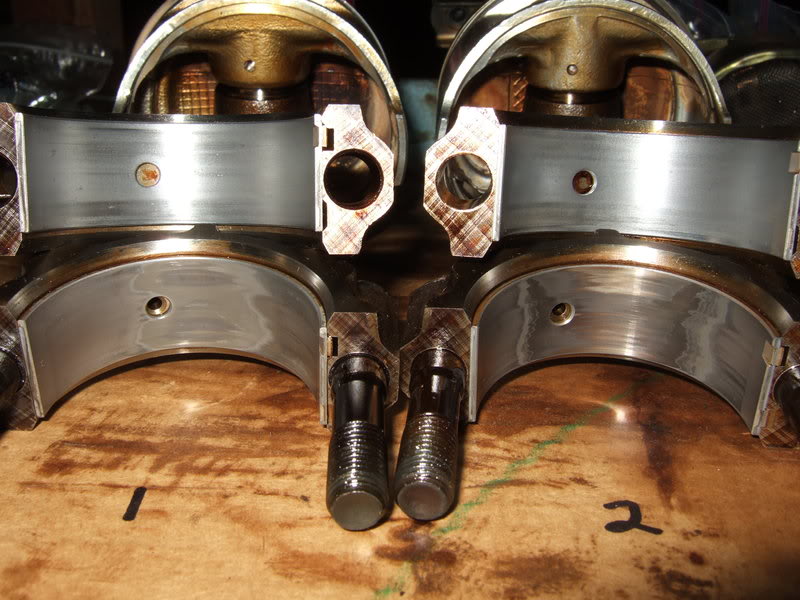
I numbered the rod ends and caps using an electric engraver I found after digging around in my shed. The main caps are already numbered, so no need to worry about them.
When you take a rod cap off, slide some short pieces of tubing over the studs to protect the rod journals from the threads. Do the same when reinstalling the pistons/rods.
Pistons 2 and 3 pushed out by hand. 1 and 4 were a little stubborn. I used steel wool to clean some of the crud out from the topmost part of the cylinders. I tapped the pistons through using a wooden hammer handle. The cylinders didn't seem to have an actual ridge (in which case you'd want to use a ridge reamer), just some gunk in the way.
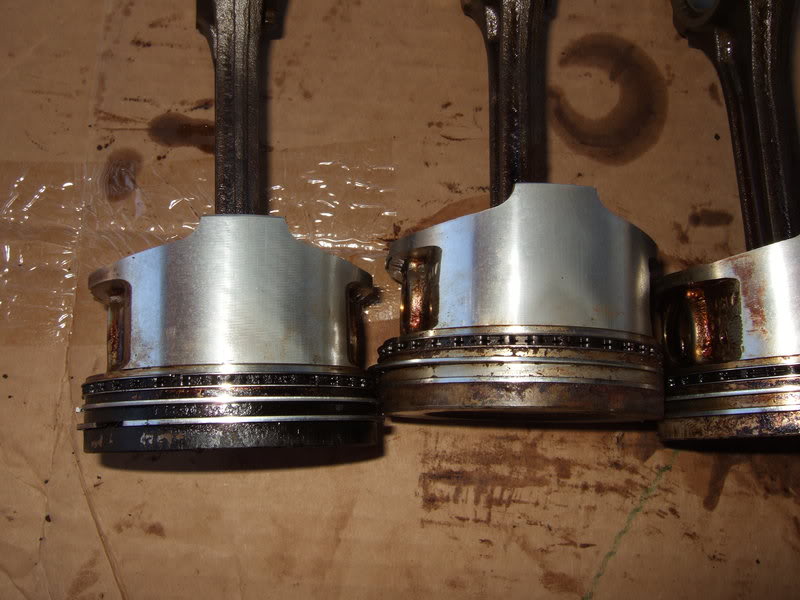
Pistons out. 1-4 left to right.
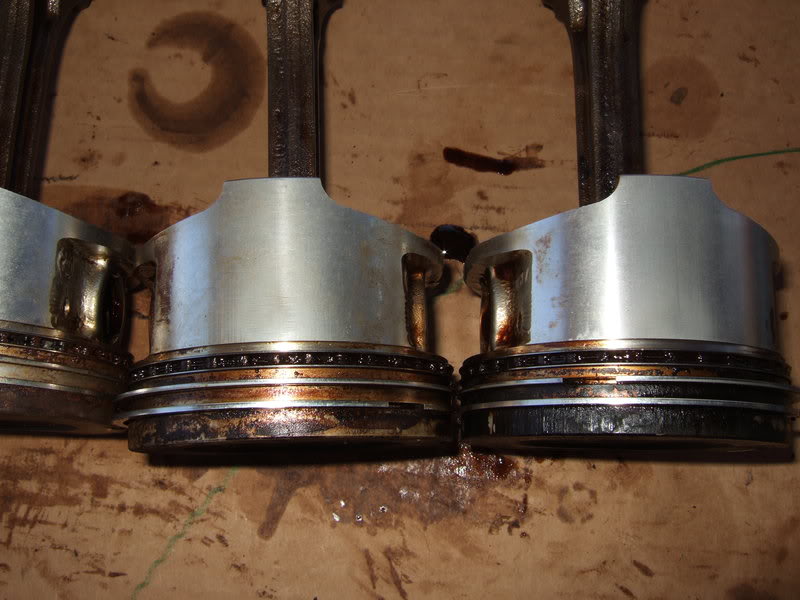
Number 2 has a stuck ring.
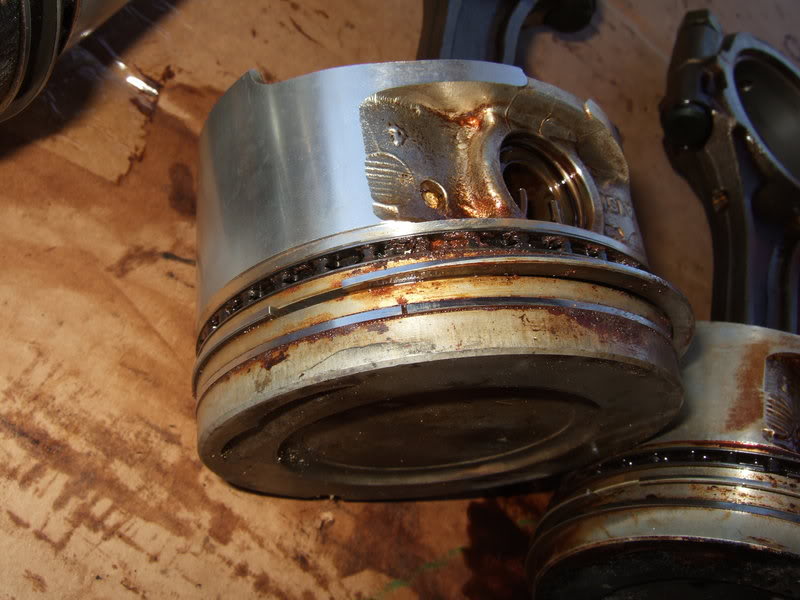
Number 2's wrist pin is also the loosest. It not only easily presses back and forth, but wobbles around in the piston. 1 and 4 also have some play. 3 is snug like they all should be.
The FSM says that if any movement is felt between piston and pin, replace both. You're supposed to have to heat the piston to 140 F, then tap out the pin. Sized correctly, to reinstall, pins should press into the piston using thumb pressure with the piston heated to 176 F.
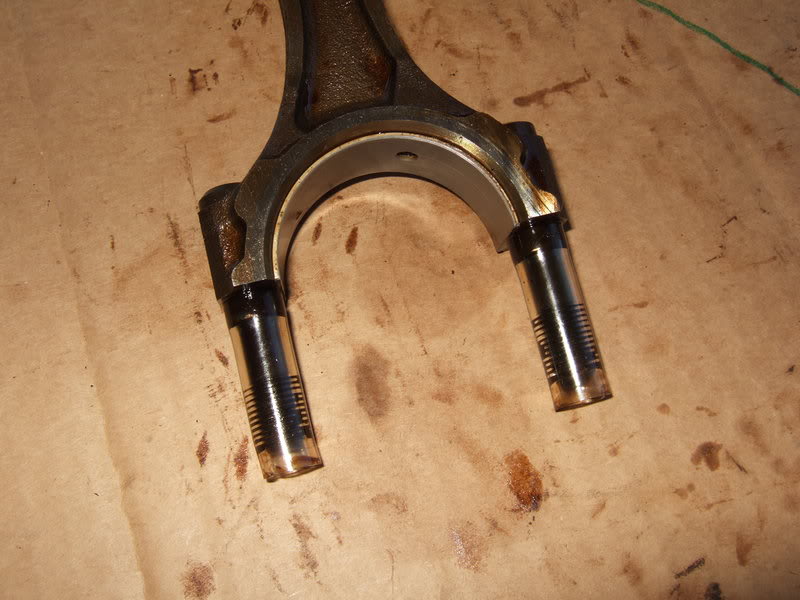
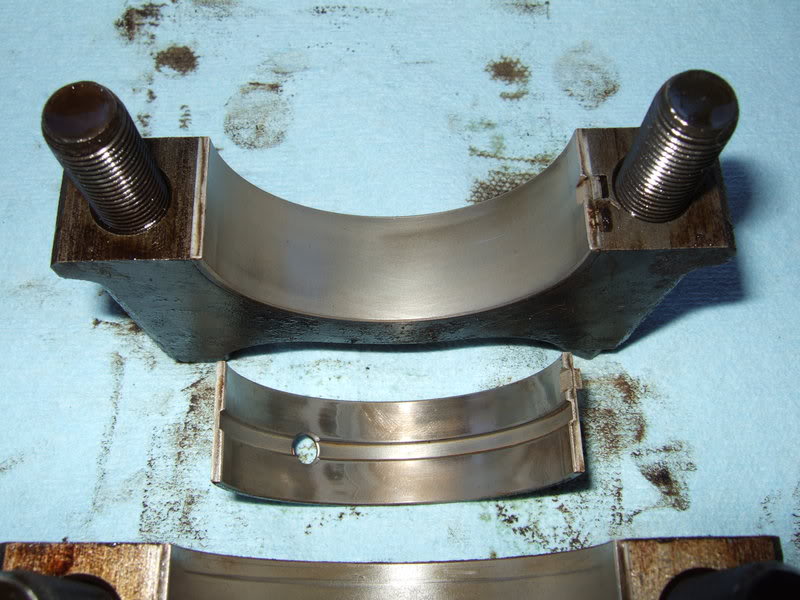
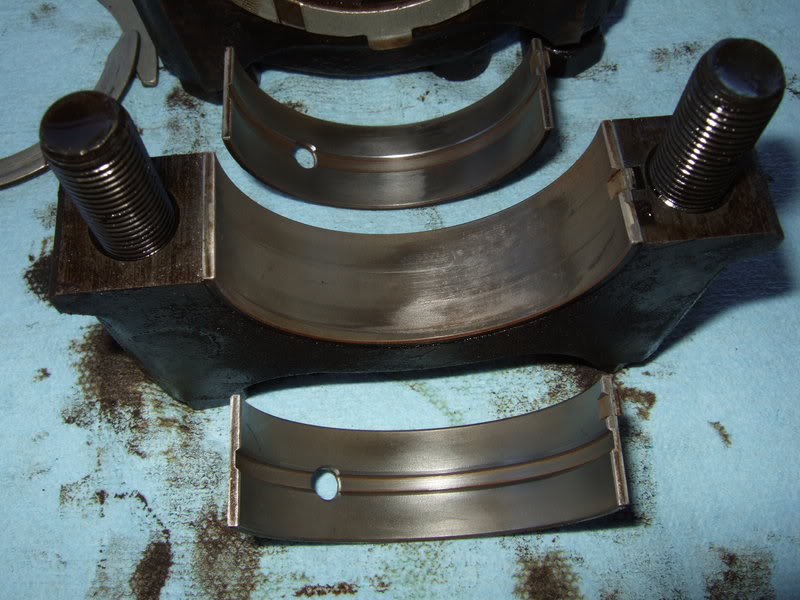
My rod bearings:
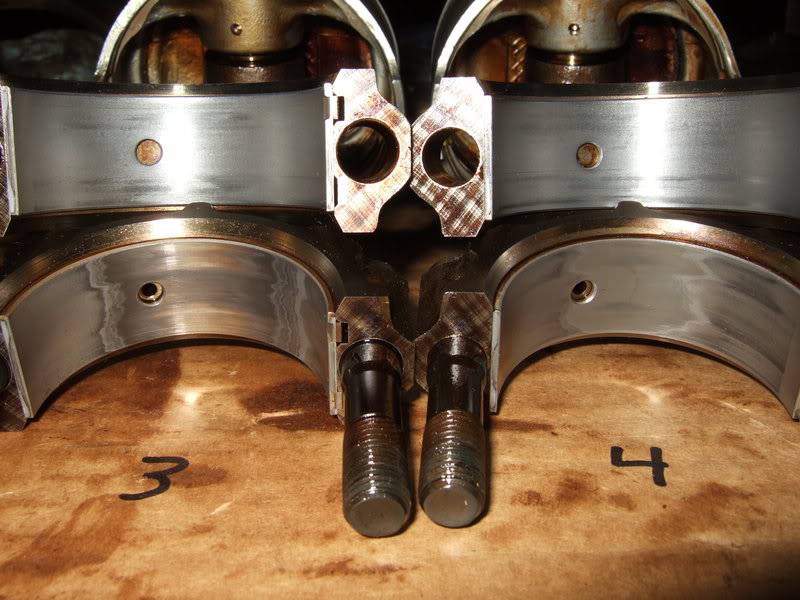
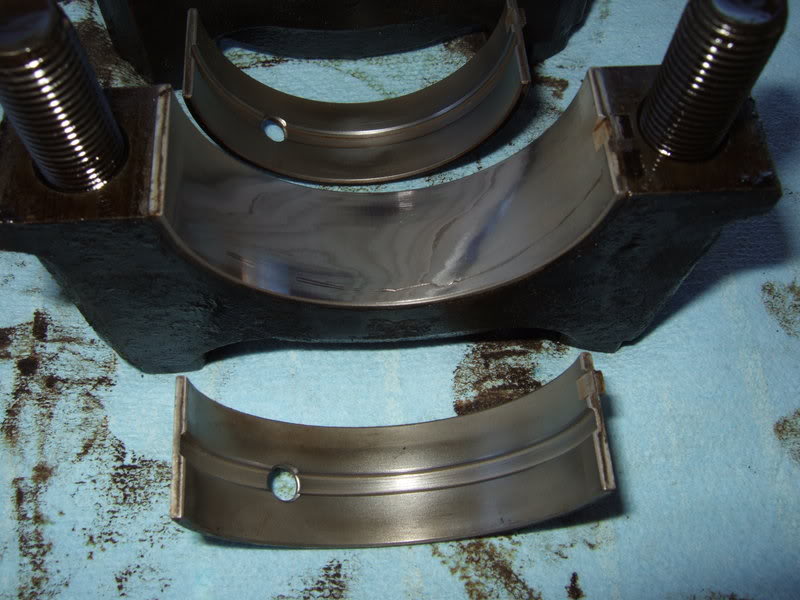
Crank bearings. #1 is at the top.
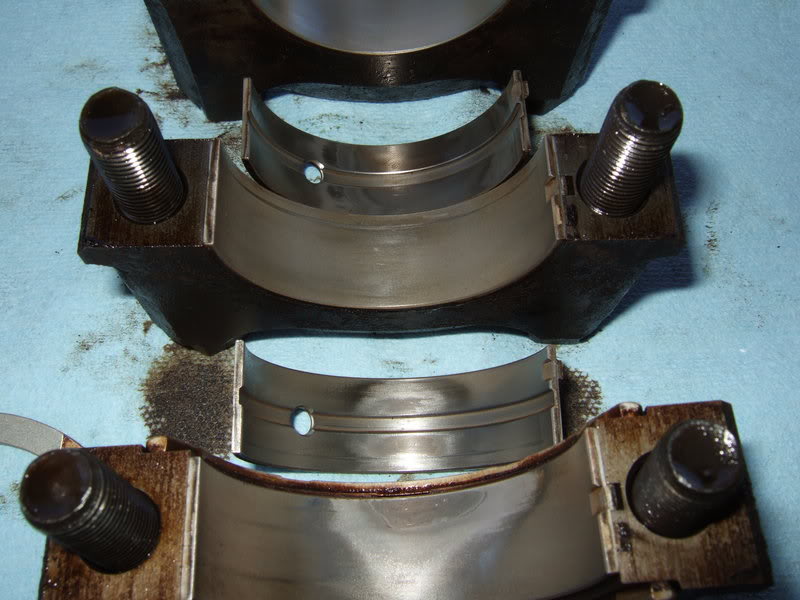

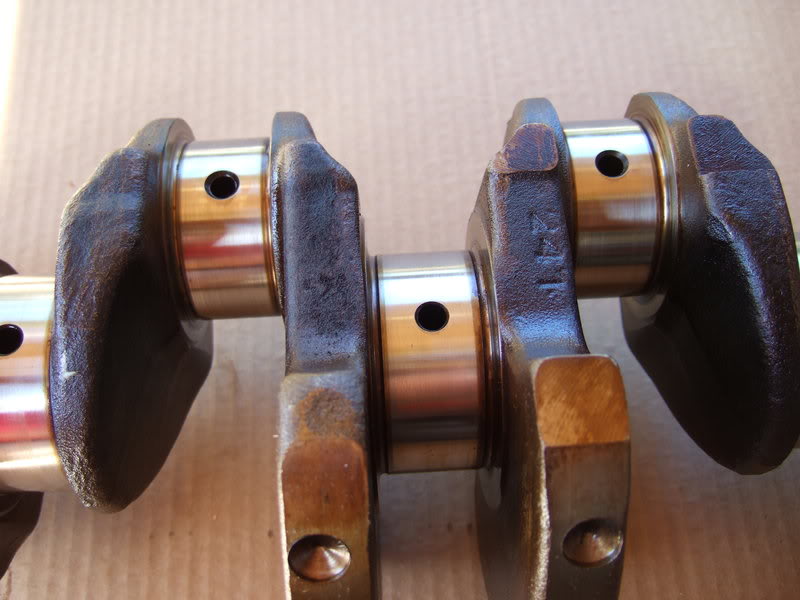
The main and rod journals looked pretty good. The worst one can be seen in the second pic below.
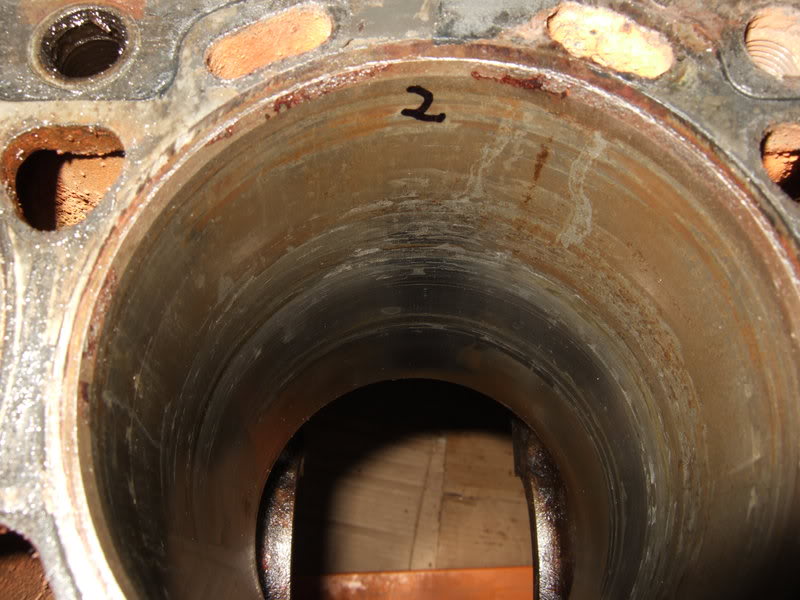
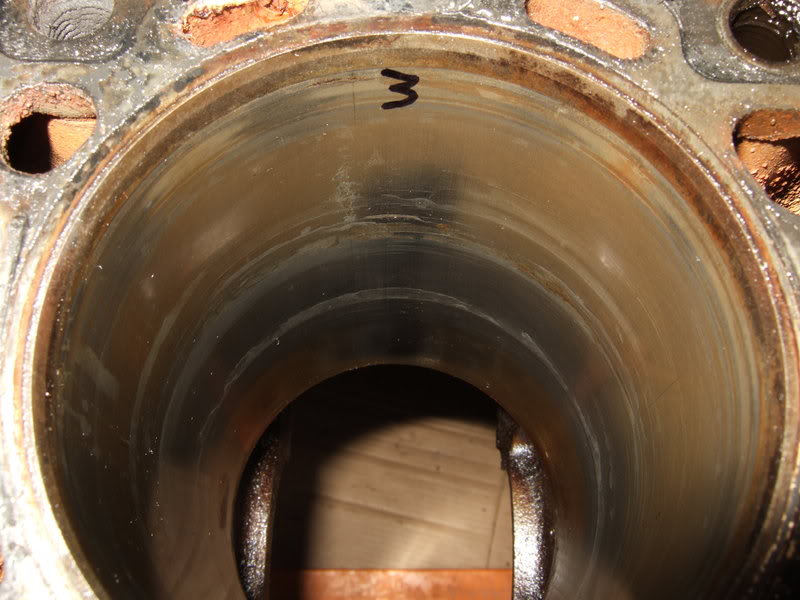
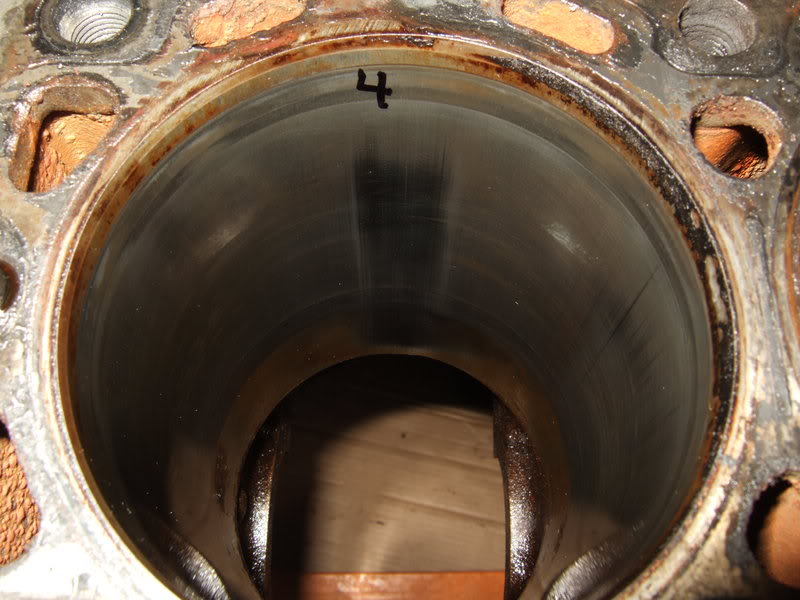
Cylinders after I wiped them out:

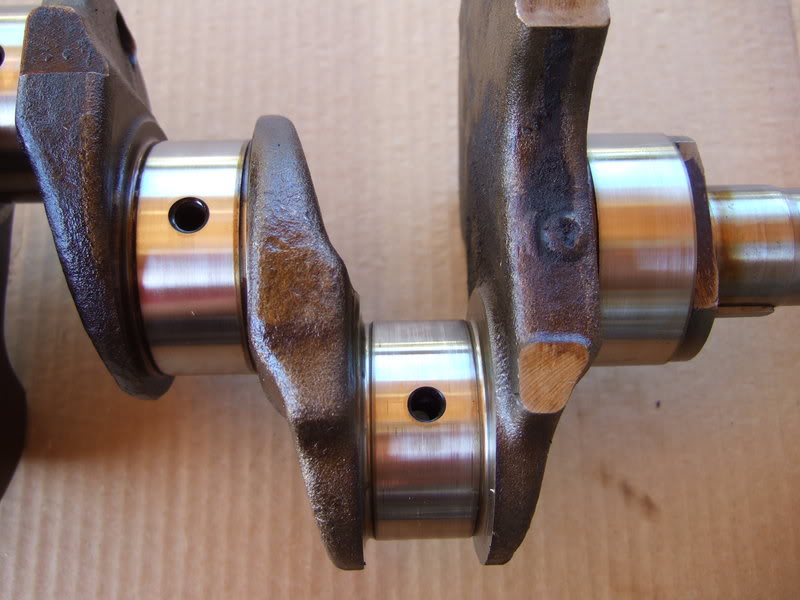
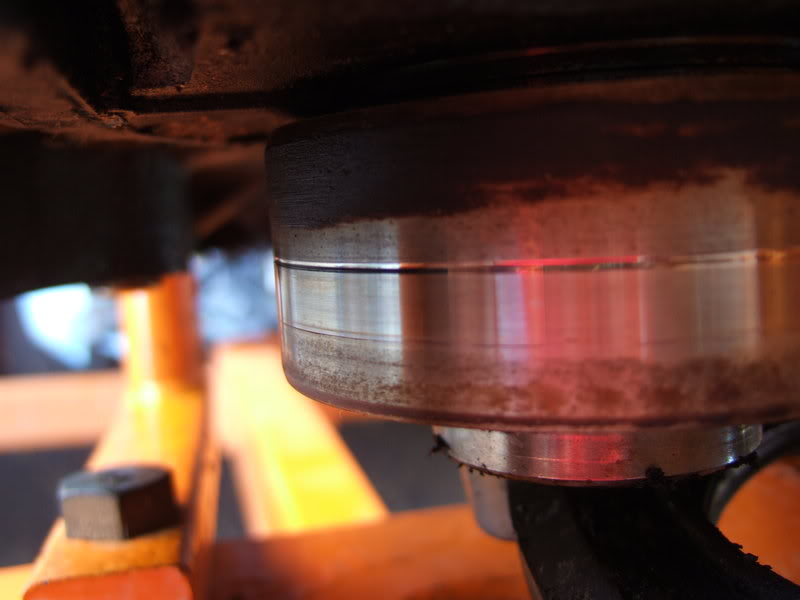
Groove in crank from rear seal:
When you take a rod cap off, slide some short pieces of tubing over the studs to protect the rod journals from the threads. Do the same when reinstalling the pistons/rods.
Pistons 2 and 3 pushed out by hand. 1 and 4 were a little stubborn. I used steel wool to clean some of the crud out from the topmost part of the cylinders. I tapped the pistons through using a wooden hammer handle. The cylinders didn't seem to have an actual ridge (in which case you'd want to use a ridge reamer), just some gunk in the way.
Pistons out. 1-4 left to right.
Number 2 has a stuck ring.
Number 2's wrist pin is also the loosest. It not only easily presses back and forth, but wobbles around in the piston. 1 and 4 also have some play. 3 is snug like they all should be.
The FSM says that if any movement is felt between piston and pin, replace both. You're supposed to have to heat the piston to 140 F, then tap out the pin. Sized correctly, to reinstall, pins should press into the piston using thumb pressure with the piston heated to 176 F.
My rod bearings:
Crank bearings. #1 is at the top.
The main and rod journals looked pretty good. The worst one can be seen in the second pic below.
Cylinders after I wiped them out:
Groove in crank from rear seal:
Last edited by flyingbrass; Oct 9, 2009 at 07:53 PM.
 Oct 9, 2009 | 07:49 PM
#47
Contributing Member
Joined: Dec 2006
Posts: 3,607
Likes: 2
From: maryland
I just got done doing the same thing and I can tell you this the closer you get to getting done the more you want to get it done so don't rush even though you want to get it done. I think I may finally be done with mine now and I started in July granted I have done a lot of other things as well but I have let it sit more then a few times because I wanted it done right now I got to get the new tie rod ends on the HI STEER and an alignment done and I think she will be ready to roll.
Heres a link to my rebuild may find some info in it you can use to get yours done I had no experience with building one of these or manuals to get me through I built it completely with info found on this site and info from other members on here.
https://www.yotatech.com/forums/f116...begins-185041/
Heres a link to my rebuild may find some info in it you can use to get yours done I had no experience with building one of these or manuals to get me through I built it completely with info found on this site and info from other members on here.
https://www.yotatech.com/forums/f116...begins-185041/
Oct 9, 2009 | 09:19 PM
#48
Registered User
Joined: Feb 2008
Posts: 109
Likes: 0
From: covington, ga
remember carbs are the devil....
efi is heaven..
just saying.. do it
i baught my lil brother a 94 2wd yota efi with 360Kmiles thats right 360,000.. for his graduation gift. it runs better then my carbed 22r ever thought about. i have new carb, pump, lines, and tank... i'm so doing and efi swap down the road.
efi is heaven..
just saying.. do it
i baught my lil brother a 94 2wd yota efi with 360Kmiles thats right 360,000.. for his graduation gift. it runs better then my carbed 22r ever thought about. i have new carb, pump, lines, and tank... i'm so doing and efi swap down the road.
Oct 9, 2009 | 09:45 PM
#50
Thread Starter
Registered User
Joined: May 2009
Posts: 586
Likes: 2
From: Arizona
If an EFI swap only involved putting on an EFI intake and plugging in a few wires, I'd do it. But it's not nearly that simple, and I hate dealing with wiring.
An EFI swap for me would be transplanting this engine into a vehicle that already has it.
An EFI swap for me would be transplanting this engine into a vehicle that already has it.
Oct 9, 2009 | 09:51 PM
#51
Registered User
Joined: Apr 2009
Posts: 10
Likes: 0
From: pacifica
need advice
how can you tell if a motor was rebuilt? I got this motor from a tweeker he said it had a bad head gasket messed up timing chain any ways he said it was rebuilt but i dnt trust tweeks the odometer said 267 thousand so i pulled the free motor any suggestions
Oct 9, 2009 | 09:58 PM
#52
Contributing Member
Joined: Dec 2006
Posts: 3,607
Likes: 2
From: maryland
pull the spark plugs and look at the top of the pistons if it is rebuilt they should look clean or have little carbon build up on them.
Oct 9, 2009 | 10:37 PM
#55
Thread Starter
Registered User
Joined: May 2009
Posts: 586
Likes: 2
From: Arizona
I'm finding conflicting advice how to deal with the grooves worn by seals in my crank and pulley.
Marlin's take: http://board.marlincrawler.com/index.php?topic=17150.0
And similar use of thinner front crank seal: http://home.earthlink.net/~twopapa/toytech.htm
I asked Engnbldr how thick his seals are, since I was wanting a thinner one as described in the second link above. Ted replied:
Hmm? Marlin says sleeves leak (somewhere else he explained why -- something about them being too hard), but Ted says sleeves work better than the thinner seals. Having no experience with either, I'm left scratching my head.
Here's another picture of the groove in the crank.

Marlin's take: http://board.marlincrawler.com/index.php?topic=17150.0
And similar use of thinner front crank seal: http://home.earthlink.net/~twopapa/toytech.htm
I asked Engnbldr how thick his seals are, since I was wanting a thinner one as described in the second link above. Ted replied:
We supply the Viton seal, it is the same as original. We use the sleeveNseal repair ring if we need to repair the dampner groove. We did try the narrow seal sets for awhile, that vastly increased problems with leaks so we went back to what works best for us.
Here's another picture of the groove in the crank.
Last edited by flyingbrass; Oct 10, 2009 at 12:21 AM.
Oct 10, 2009 | 06:20 AM
#56
Registered User
Joined: Oct 2009
Posts: 95
Likes: 0
From: Virginia Beach

though I have considered one of the SDS EFI kits from LCE. and then there's a guy I know here who does Mega Squirt EFI conversions, and he says it's the deal.
I'm finding conflicting advice how to deal with the grooves worn by seals in my crank and pulley.
Marlin says sleeves leak (somewhere else he explained why -- something about them being too hard), but Ted says sleeves work better than the thinner seals. Having no experience with either, I'm left scratching my head.
Marlin says sleeves leak (somewhere else he explained why -- something about them being too hard), but Ted says sleeves work better than the thinner seals. Having no experience with either, I'm left scratching my head.
funny though -- the input shaft seal's been leaking in my transmission. I bought a new seal when I had it out last for clutch replacement only to find that the shaft was grooved! I asked around about Speedy Sleeves for that at the time, but no dice. So I just put it all back together. the odd bit is that at the time, I decided I'd be ordering a transmission from Marlin when the time comes
Oct 10, 2009 | 09:24 AM
#57
Thread Starter
Registered User
Joined: May 2009
Posts: 586
Likes: 2
From: Arizona
Yep, I meant pilot bearing.
My Aisin carb has been relatively trouble free. So far. Knock on wood.
I found what Marlin wrote: http://board.marlincrawler.com/index.php?topic=57731.0
Having the groove filled and turned would probably be terribly expensive, so it's either sleeve or make the seal thinner.
I planned to replace my input shaft seal, but it's probably grooved like yours. Did you install the new seal anyway? I'm wondering if that would help or hurt.
My transmission needs to be rebuilt or replaced before long. It's a G52. I'm keeping an eye out for a used, good condition G52, G54 or forward shifting W56 (also need the transfer with the W56) to swap in. I'd prefer to buy one from Marlin, but I can't afford $1200, especially after this project.
My Aisin carb has been relatively trouble free. So far. Knock on wood.
I found what Marlin wrote: http://board.marlincrawler.com/index.php?topic=57731.0
Never use a stainless steel speedy sleeve on the front or rear hubs of the crankshaft. They are very difficult to install straight, and because the steel is so hard, the seal does not lap in correctly and will always leak in time.
I planned to replace my input shaft seal, but it's probably grooved like yours. Did you install the new seal anyway? I'm wondering if that would help or hurt.
My transmission needs to be rebuilt or replaced before long. It's a G52. I'm keeping an eye out for a used, good condition G52, G54 or forward shifting W56 (also need the transfer with the W56) to swap in. I'd prefer to buy one from Marlin, but I can't afford $1200, especially after this project.
Oct 11, 2009 | 08:45 AM
#58
Registered User
Joined: Oct 2009
Posts: 134
Likes: 0
From: NW Phoenix
Just a few things. Sleeve the front and rear. Got each on my rebuild, doing great. Your original bearings with those miles look fantastic. Just a journal polish is the only thing required for your crank. Replace all bearings with standard size. Cylinders look as if they will need minimal machining. Mabe .010 over. Get the goods to a machine shop so you'll know exactly what goods to get. Trust me, it gets funner from here.
Oct 12, 2009 | 02:11 PM
#59
Thread Starter
Registered User
Joined: May 2009
Posts: 586
Likes: 2
From: Arizona
I took my parts to the shop today. The guy said he'll clean and check things and call probably on Friday. They were busy, which I take as a good sign.
I forgot to ask about the crank groove. And I forgot to take my front crank pulley. Might drop it off later this week. The shop is only a few blocks away.
Re: standard size bearings, according to the FSM Toyota used several slightly different sizes as standard. A, B or C on the rods and 3, 4 or 5 on the crank. I'm wondering if turning everything is necessary, at least in some cases, to get uniformity. I've read about people encountering size problems when replacing stock bearings with aftermarket "standards" that are all the same size.
My rods were marked C3, B3, C3, C3. I'm not sure where the dots on the mains are supposed to be, but I have a big "4" stamped -- as in ink -- on the underside of each bearing.
Last edited by flyingbrass; Oct 12, 2009 at 02:37 PM.


