
22R Rebuild
 Jan 20, 2010 | 06:40 PM
#241

Thread Starter
Registered User
Joined: May 2009
Posts: 586
Likes: 2
From: Arizona
For those keeping tabs on my progress, I'm deciding what to do about valve adjusting screws being misaligned with the valve stems. I started a separate thread about that here.
I'll paste the pics in here too. This is #1 intake, one of the three I'm concerned about:
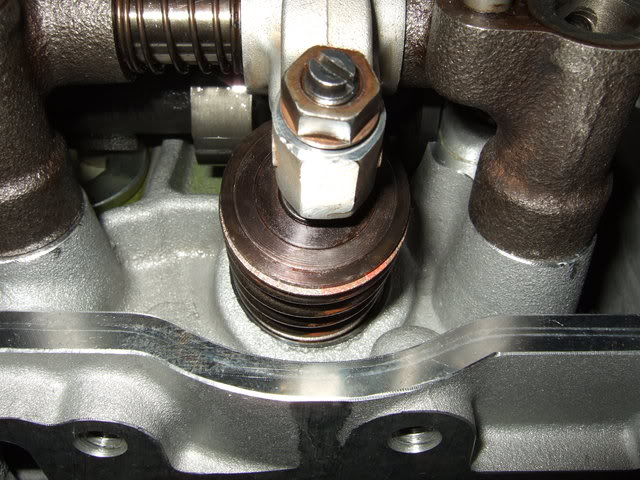
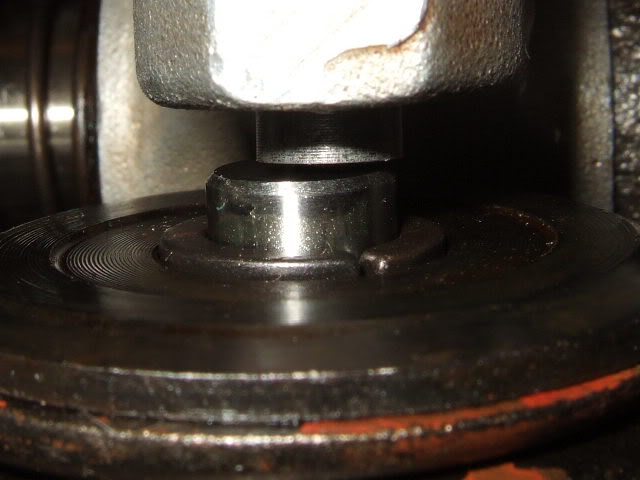
I'll paste the pics in here too. This is #1 intake, one of the three I'm concerned about:

 Jan 20, 2010 | 07:56 PM
#244
Thread Starter
Registered User
Joined: May 2009
Posts: 586
Likes: 2
From: Arizona
Thanks, bend.
I sent him the measurements and links to the scaled down pics. I don't know if he looked at the pictures. His dial-up connection is a handicap. His replies are in the other thread: https://www.yotatech.com/forums/f116...gnment-201856/
If I can't easily find some shims locally I'll order some from McMaster-Carr unless someone knows of a source selling ones intended for this purpose.
Last edited by flyingbrass; Jan 20, 2010 at 08:05 PM.
Jan 22, 2010 | 12:43 PM
#246
Thread Starter
Registered User
Joined: May 2009
Posts: 586
Likes: 2
From: Arizona
To see if maybe the sides of my rockers are more worn than I think, I switched them around so the fresh, unworn former spring sides ride against the towers. I swapped #1's rockers with #2's and the same with #3 and #4. I'm using a new cam, so position shouldn't matter. I didn't remeasure, but some of the screws are still pretty far out.
I numbered before moving them.

The local Ace Hardware didn't have any shims, so I ordered some from McMaster-Carr.
I numbered before moving them.
The local Ace Hardware didn't have any shims, so I ordered some from McMaster-Carr.
Last edited by flyingbrass; Jan 26, 2010 at 08:14 PM.
Jan 26, 2010 | 05:13 PM
#247
Thread Starter
Registered User
Joined: May 2009
Posts: 586
Likes: 2
From: Arizona
I replaced the input shaft seal today. While not rebuild specific, it's a good idea while the engine is out. Iamsuperbleeder and a few others here wished they had done it at the time.
Something had been leaking slightly, either the rear main seal, input shaft seal, or maybe even the input bearing cover gasket. It's not easy to determine what kind of oil has leaked after it has mixed with the crud in the bellhousing.
I drained the transmission oil, removed the clutch fork and took the cover plate off. I cleaned everything. The old paper gasket plucked right off the cover. Actually, too easily. It may have been leaking.
I used a wire wheel in a dremel to clean the old sealant off the bolt threads. Cleaned everything else up and did a final spray/wipe with brake cleaner. Surfaces need to be completely degreased for RTV to adhere.
The old seal came out easily, and the new one went in the same. I used a big socket and pushed it in all the way by hand. I wiped a thin smear of Permatex #2 around the hole before putting the seal in, figuring that should help stop any seeps around the edges. Jim Brink does the same with rear main seals.
Following Marlin's advice, I used Ultra Gray RTV on the cover instead of a paper gasket and Permatex #2 on the bolt threads. The bolt holes go through, so be sure to use some sort of sealant.
See Marlin's post in reply #11 here: http://board.marlincrawler.com/index.php?topic=57731.0
BTW, G series transmissions like mine have 8 bolts on the cover; the W56's have 7. I don't know about the R151's. Remember that if shopping for a used one. Before discovering that I almost drove across town to look at good deal on a "W56" that was actually a G58.
Don't use too much RTV. You're mating relatively flat surfaces together. The excess will squish out to the sides. I applied RTV to the cover where the old gasket was about paper thick. When tightened, I had a small squish out visible around the sides, but not a huge amount. I figure you probably get about the same amount of blob on the inside, which for this application probably doesn't matter much, but you sure don't want big gobs of RTV waiting to break loose in engine oil or water passages.
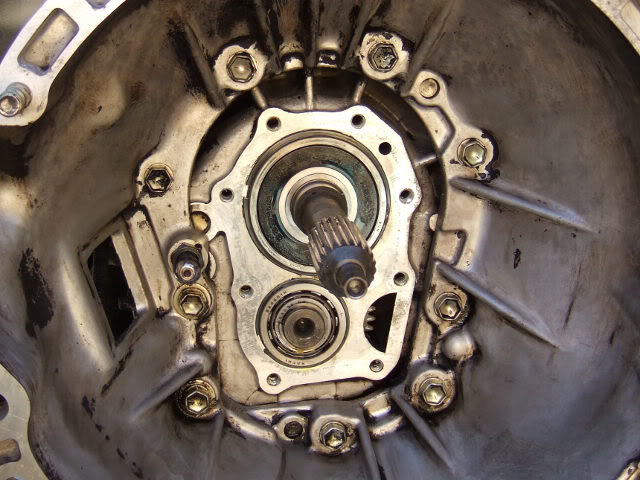
I didn't have any sockets or pipes the right size to deal with my throwout bearing, so I had the shop put my new one on the collar. $5.
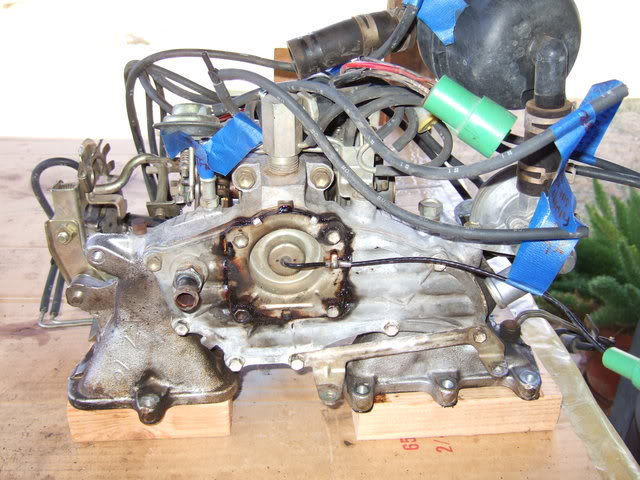
What's under the cover. This is a G52 transmission.
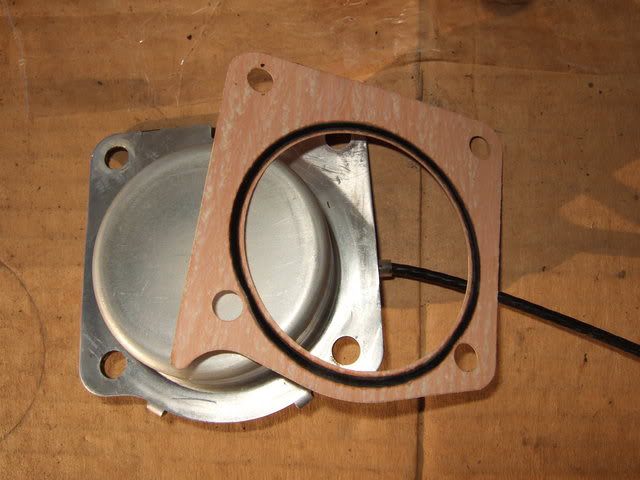
Old input shaft seal in the cover.

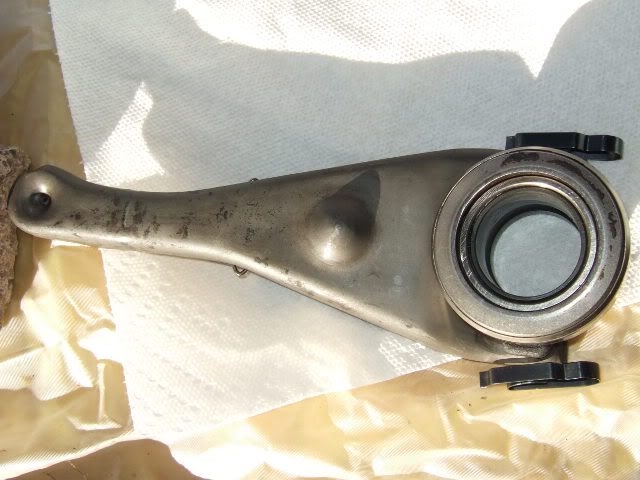
Retaining spring on the back of the clutch fork. I don't know how you're supposed to deal with this when taking the fork off, but I managed. Reinstalling is easy. Just push it straight on over the pivot ball.
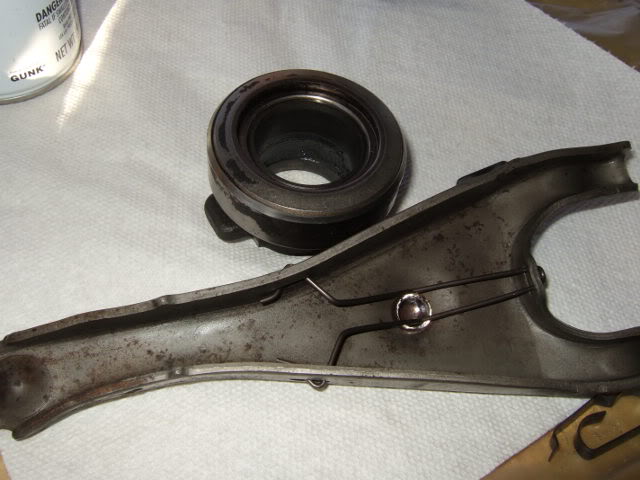
I've seen some ask which way the clips go. This shows them. Flat side toward the front.
Something had been leaking slightly, either the rear main seal, input shaft seal, or maybe even the input bearing cover gasket. It's not easy to determine what kind of oil has leaked after it has mixed with the crud in the bellhousing.
I drained the transmission oil, removed the clutch fork and took the cover plate off. I cleaned everything. The old paper gasket plucked right off the cover. Actually, too easily. It may have been leaking.
I used a wire wheel in a dremel to clean the old sealant off the bolt threads. Cleaned everything else up and did a final spray/wipe with brake cleaner. Surfaces need to be completely degreased for RTV to adhere.
The old seal came out easily, and the new one went in the same. I used a big socket and pushed it in all the way by hand. I wiped a thin smear of Permatex #2 around the hole before putting the seal in, figuring that should help stop any seeps around the edges. Jim Brink does the same with rear main seals.
Following Marlin's advice, I used Ultra Gray RTV on the cover instead of a paper gasket and Permatex #2 on the bolt threads. The bolt holes go through, so be sure to use some sort of sealant.
See Marlin's post in reply #11 here: http://board.marlincrawler.com/index.php?topic=57731.0
3. Transmission front seal.
This will damage the clutch disk and if left unattended, will drain down the fork arm and swell the fork boot as well.
Gear oil is clear and does smell difference than motor oil.
Drop the trans/t-case, remove the transmission front cover and replace the input seal. Because these bolts thread completely through the case, you will need to raise the front of the trans, or drain the oil before removing the 7 bolts. Always lightly sand the input sealing surface so the seal can lap in and remember to always prelube the seal lip with grease. Ditch the front gasket and use ultra grey silicon and permatex #2 sealent on the threads.
Don't use too much RTV. You're mating relatively flat surfaces together. The excess will squish out to the sides. I applied RTV to the cover where the old gasket was about paper thick. When tightened, I had a small squish out visible around the sides, but not a huge amount. I figure you probably get about the same amount of blob on the inside, which for this application probably doesn't matter much, but you sure don't want big gobs of RTV waiting to break loose in engine oil or water passages.
I didn't have any sockets or pipes the right size to deal with my throwout bearing, so I had the shop put my new one on the collar. $5.
What's under the cover. This is a G52 transmission.
Old input shaft seal in the cover.
Retaining spring on the back of the clutch fork. I don't know how you're supposed to deal with this when taking the fork off, but I managed. Reinstalling is easy. Just push it straight on over the pivot ball.
I've seen some ask which way the clips go. This shows them. Flat side toward the front.
Last edited by flyingbrass; Jan 26, 2010 at 09:09 PM.
Feb 3, 2010 | 10:41 AM
#249

Registered User
Joined: Feb 2010
Posts: 10
Likes: 0
i also didnt want to hijack any threads so im going to post here to. have u tried to manually turn the motor over. i am having trouble with turning the engine over its like the main bearings a way to big but they are standard as is the crank and block. any help if u had this problem or heard of it.
Feb 3, 2010 | 12:38 PM
#250
i also didnt want to hijack any threads so im going to post here to. have u tried to manually turn the motor over. i am having trouble with turning the engine over its like the main bearings a way to big but they are standard as is the crank and block. any help if u had this problem or heard of it.
Feb 3, 2010 | 10:45 PM
#252
Registered User
Joined: Feb 2010
Posts: 10
Likes: 0
well i have it sitting here on my kitchen floor and it was all the way together minus the head and i went to turn the bolt that hold the harmonic balancer on and it wouldnt budge. 150foot pounds and it still wouldnt. so i tore it all the way apart and started with just putting the crank in and i cant get it to spin when fully tightened down to spec....
Feb 4, 2010 | 03:04 AM
#253
Thread Starter
Registered User
Joined: May 2009
Posts: 586
Likes: 2
From: Arizona
Did a shop measure everything? If so, are you sure the bearings you're using are actually standard size?
I suggest you start a new thread and provide some background of what has been done so far.
I suggest you start a new thread and provide some background of what has been done so far.
Feb 8, 2010 | 03:14 PM
#255
Thread Starter
Registered User
Joined: May 2009
Posts: 586
Likes: 2
From: Arizona
I set the head on and installed the timing parts. As I noticed before, when the driver side timing guide is in its best position relative to the chain, the edge contacts the inside of the timing cover's water jacket, preventing the cover from fully seating.
Seems like it's a good idea to dry fit timing covers after installing a metal guide to make sure you don't have this problem. Here is where it contacts:

I rocked the cover back and forth to make a wear mark on the guide:

Then clearanced the area.

With that solved, I decided to put in the head bolts. I figured I had better thread them all in by hand to make sure there aren't any issues. Well, of course there is one.
One of the new Topline bolts from Engnbldr is crooked, enough that it won't thread in by hand into any hole. The top rubs and binds against the rocker tower. Here's an animated gif turning it in with me pressing lightly to the right: http://i859.photobucket.com/albums/a...oked_bolt2.gif
It doesn't roll across the floor evenly either -- obviously crooked. I'll e-mail Ted.
The cold mixture heater lives in the intake under the carb. Mine had ugly black gunk around the edges.
That stuff came from within the heater itself. It is two plates, and the black stuff squeezed out from between them. What's that about? Is it supposed to be filled with that goop? Strange.
Went to bolt it back on using the new Toyota gasket and found the corners of the heater plate make contact before the sides, leaving a gap when tightened that I can see daylight through. I can't tell if that inner precoated O section is sealing or not. The old gasket didn't leak, and it seemed to be about the same thickness. Not sure if I should try to bend the heater corners out, use some RTV, or leave it as is and hope that inner area is sealing. This wouldn't be a fun thing to fix later.
Cleaned up. Still, some of the black garbage is oozing out from between the plate halves.

Inside view of the heater. New factory gasket.
Seems like it's a good idea to dry fit timing covers after installing a metal guide to make sure you don't have this problem. Here is where it contacts:
I rocked the cover back and forth to make a wear mark on the guide:
Then clearanced the area.
With that solved, I decided to put in the head bolts. I figured I had better thread them all in by hand to make sure there aren't any issues. Well, of course there is one.
One of the new Topline bolts from Engnbldr is crooked, enough that it won't thread in by hand into any hole. The top rubs and binds against the rocker tower. Here's an animated gif turning it in with me pressing lightly to the right: http://i859.photobucket.com/albums/a...oked_bolt2.gif
It doesn't roll across the floor evenly either -- obviously crooked. I'll e-mail Ted.
The cold mixture heater lives in the intake under the carb. Mine had ugly black gunk around the edges.
That stuff came from within the heater itself. It is two plates, and the black stuff squeezed out from between them. What's that about? Is it supposed to be filled with that goop? Strange.
Went to bolt it back on using the new Toyota gasket and found the corners of the heater plate make contact before the sides, leaving a gap when tightened that I can see daylight through. I can't tell if that inner precoated O section is sealing or not. The old gasket didn't leak, and it seemed to be about the same thickness. Not sure if I should try to bend the heater corners out, use some RTV, or leave it as is and hope that inner area is sealing. This wouldn't be a fun thing to fix later.
Cleaned up. Still, some of the black garbage is oozing out from between the plate halves.
Inside view of the heater. New factory gasket.
Last edited by flyingbrass; Feb 8, 2010 at 03:41 PM.
Feb 8, 2010 | 04:22 PM
#256
Thread Starter
Registered User
Joined: May 2009
Posts: 586
Likes: 2
From: Arizona
I discovered another head bolt is crooked enough to bind going in, so I checked them all against a flat surface. None are perfectly straight, but a few are quite bad. Ted said send them back. Hopefully Tod will cross ship a new set. I was hoping to get the engine back in this weekend.
Feb 11, 2010 | 07:12 AM
#259
Registered User
Joined: Sep 2009
Posts: 31
Likes: 0
Hey FB, been following this for a while now while I rebuild my '84, been a big help. I'm a little behind you, but I did just pull out my intake the other day to look at reassembly. I cleaned it all up a month or so ago and don't remember all that black gunk. There is a link on toyotanation.com where a guys says, depending on the heater, the resistance should be either 1 or 2 ohms. I think I've read you say you have the FSM for your truck? I think you should test it and if it's no good tear that little bastard apart and see whats going on in there, cause now I'm curious. I've got an extra (from an '84). If mine are both good, and you need one, I'll send it to you.
Good luck, look forward to final assemble pics.
Good luck, look forward to final assemble pics.


