
Rear bumper brackets on aftermarket swingout
 Dec 15, 2009 | 11:51 AM
#61
Get rid of those chrome beauty rings. Those are what make these rigs rust in the rear quarter panels and front fenders.
Then take a grinder to the back of the wheel well and grind down the pinch weld a little more. Then repaint it.
You could run the triple drilled perches in the rear and move the axle fwd an inch to help clear.
Then take a grinder to the back of the wheel well and grind down the pinch weld a little more. Then repaint it.
You could run the triple drilled perches in the rear and move the axle fwd an inch to help clear.
Last edited by ScottyC; Dec 15, 2009 at 11:53 AM.


 Dec 22, 2009 | 04:22 PM
#67
Thread Starter
Joined: Dec 2006
Posts: 15,192
Likes: 190
From: Sedro-Woolley, WA
Update, 22DEC09
Ok, well, totally failed today...
So, I drilled my spring perches out today and instead of going 1" I went 1.25". Now I can't get the axle to go forward enough to get the center pins engaged into the new holes. I now they make plates to move the axle forward/backward so I'm pretty sure what I did should work. I did notice that even getting the axle back into the OEM center pin hole took effort. Meaning that even going a 1/4" forward wouldn't be possible.
SOOOOO, I'm thinking that I need to take my driveshaft off and clean it out where it engages the yoke. Possibly theres 23+ years of old built up grease/crap inside causing the shaft to not fully compress.
DOES THIS MAKE SENSE??!?!!??!!?!
Dec 22, 2009 | 04:25 PM
#68
Likely the hole at the end of the slip yoke (up inside the end u-joint) is plugged. That is what lets out excess grease. Good idea to not have the shaft unable to compress like that becuase if you were to bottom out the suspension and compress the shaft, it can force itself into the back of the t-case and take out bearings there.
Dec 22, 2009 | 05:34 PM
#70
Thread Starter
Joined: Dec 2006
Posts: 15,192
Likes: 190
From: Sedro-Woolley, WA
Roger-yeah I was thinking it needed to be cleaned out anyway because it's obviously gonna be a problem if I don't fix it.
Scotty-LOL! Funny thing is I figured THAT out a little late too. LOL!!
Positive thing is, I bought a new chuck for my cordless to take 1/2" shank drill bits. Not a bad deal for less than $30!
Scotty-LOL! Funny thing is I figured THAT out a little late too. LOL!!
Positive thing is, I bought a new chuck for my cordless to take 1/2" shank drill bits. Not a bad deal for less than $30!
Dec 23, 2009 | 05:15 PM
#71
Thread Starter
Joined: Dec 2006
Posts: 15,192
Likes: 190
From: Sedro-Woolley, WA
Update, 23DEC09
O M G... FAIL.
Grrrrrr.
Ok, so today I took the Drive Shaft off and gave it an enema and SHAZAM worked like a champ!! I now have full compression of the DS!!! Too bad it isn't enough for the now repositioned axle at 1.25" forward...
So, now I get to fill in the holes I drilled and drill it back out at one (1) inch. Figures. It might work the way it is now IF I put the OEM shackles back on...
FAIL.Grrrrrr.
Ok, so today I took the Drive Shaft off and gave it an enema and SHAZAM worked like a champ!! I now have full compression of the DS!!! Too bad it isn't enough for the now repositioned axle at 1.25" forward...
So, now I get to fill in the holes I drilled and drill it back out at one (1) inch. Figures. It might work the way it is now IF I put the OEM shackles back on...
Dec 27, 2009 | 05:32 PM
#72
Thread Starter
Joined: Dec 2006
Posts: 15,192
Likes: 190
From: Sedro-Woolley, WA
Update, 27DEC09
Man that was fun...filled in the holes I made with my fluxcore welder and redrilled the perches to 1". I actually had to weld/drill/weld/drill a couple of times to get a good fill. It's not the best but the holes are centered and where I need them. Put the axle at maximum droop and the DS went on with no issues. So, when I jump this thing the axle shouldn't push the DS into the transfercase. LOL! So, 1" seems to be the number.
Oh, and I still forgot to drill out my ubolt plate...lol
Oh, and I still forgot to drill out my ubolt plate...lol
 Feb 4, 2010 | 07:17 PM
#74
Thread Starter
Joined: Dec 2006
Posts: 15,192
Likes: 190
From: Sedro-Woolley, WA
Update, 04FEB10
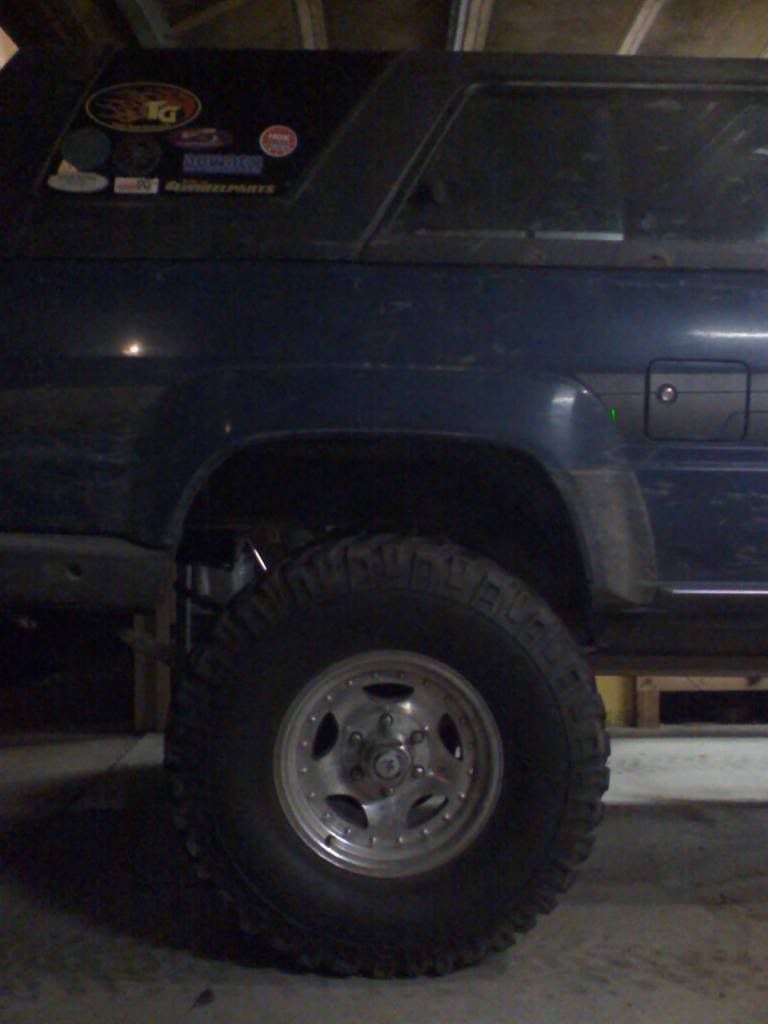
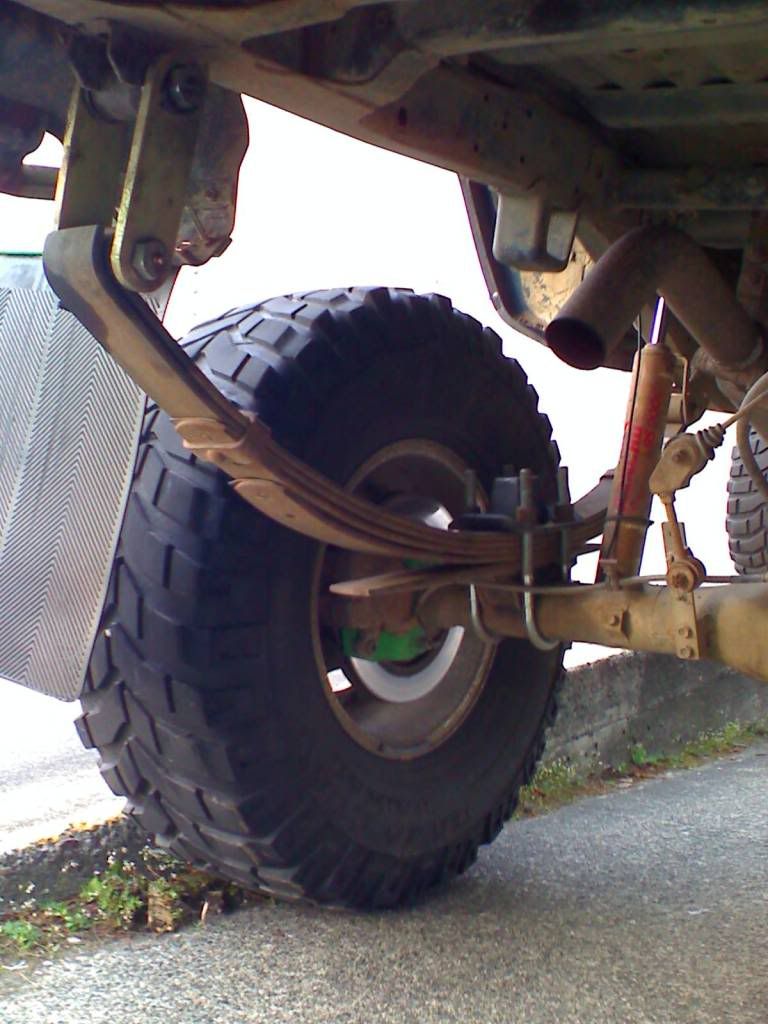
Today I installed my mud flaps to prevent collateral damages due to my horrifically oversized mud/rock/snow/water/squirrel flinging tires that I moved out and 1.5" to help clear the frame rails under stuff.
Ingredients:
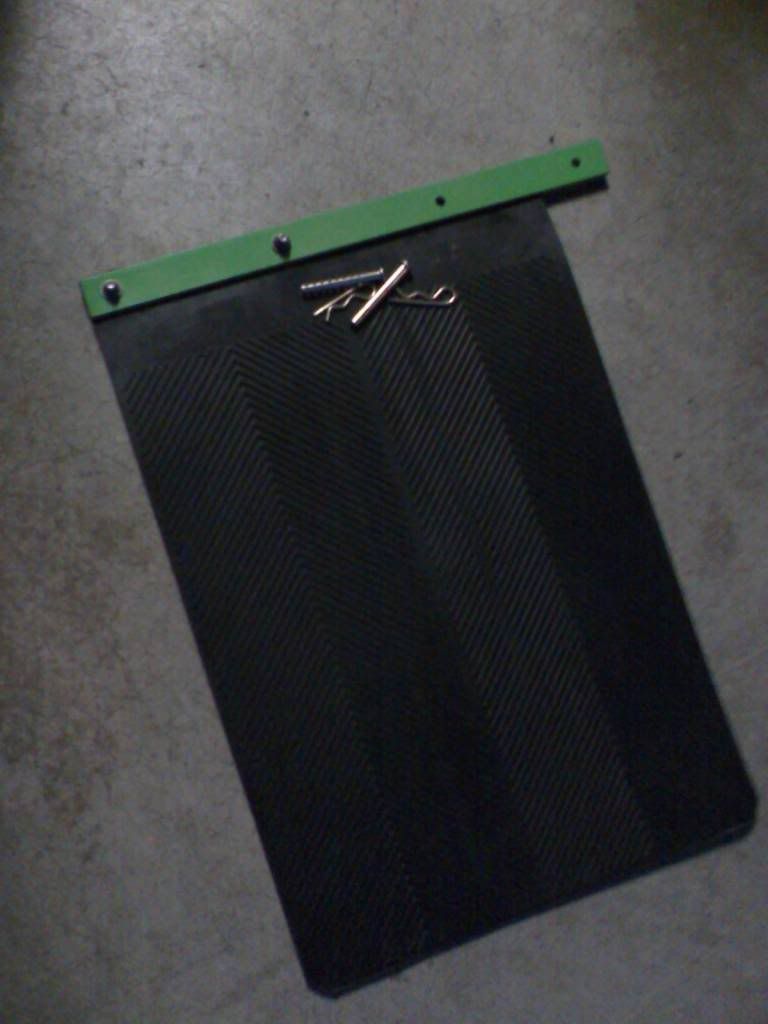
x1- set of 12"x18" mud flaps from the auto parts store
x1- 1" barstock
x4- 1/4" diameter bolts
x4- self locking nuts
x4- small washers(nut side)
x4- fender washers(bolt head size)
x4- retaining pins
x4- clevis pins
Basically attached the barstock to the mud flap with the two bolts, but drilled four holes total.
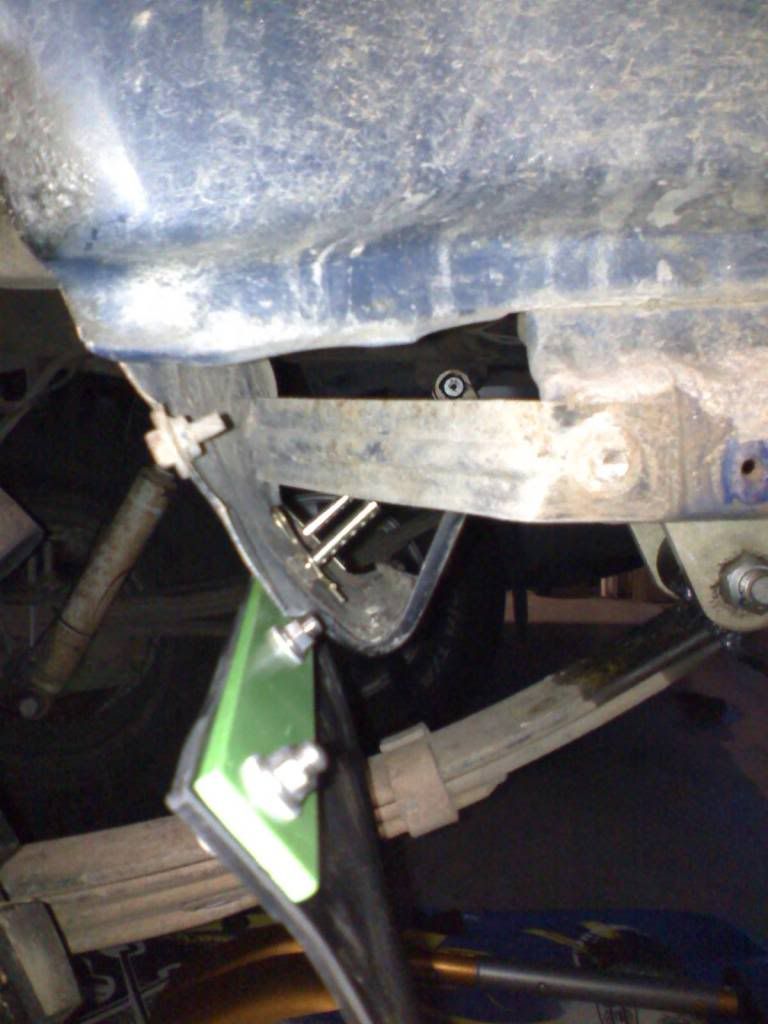
Using the stock mud flap location I simply ran a 1/4" drill bit thru the OEM mounts to run the clevis pins thru. Obviously, I've bent that factory bracket back enough to clear the tires during full stuff.
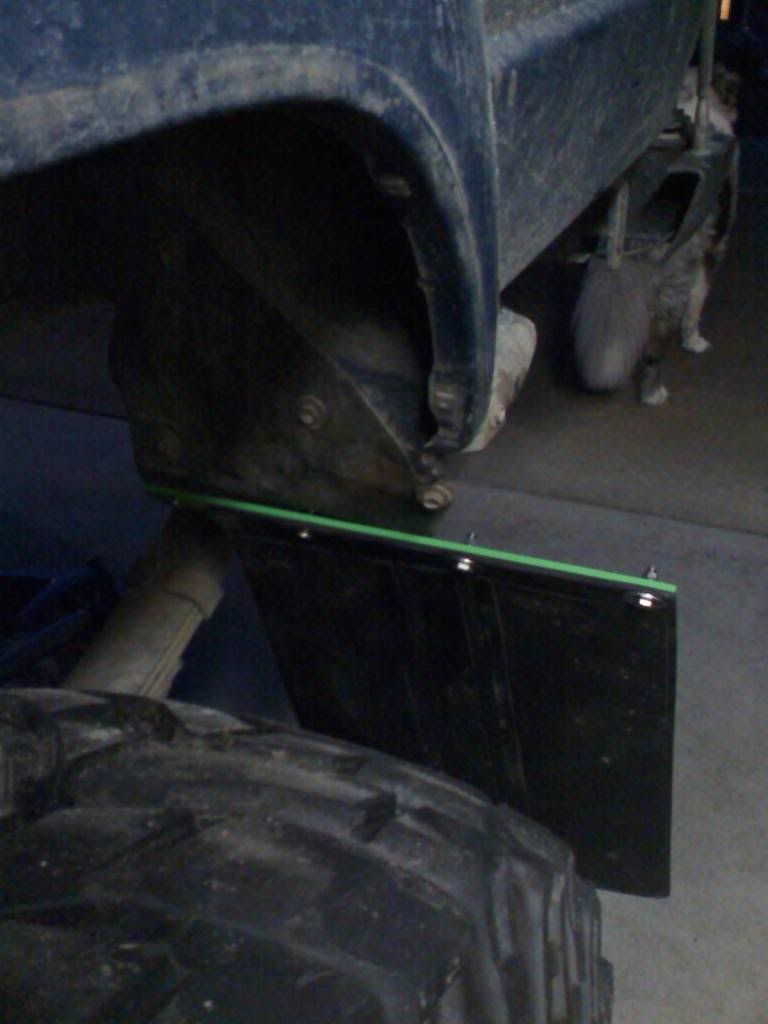
The mud flaps cover the tread pattern effectively.
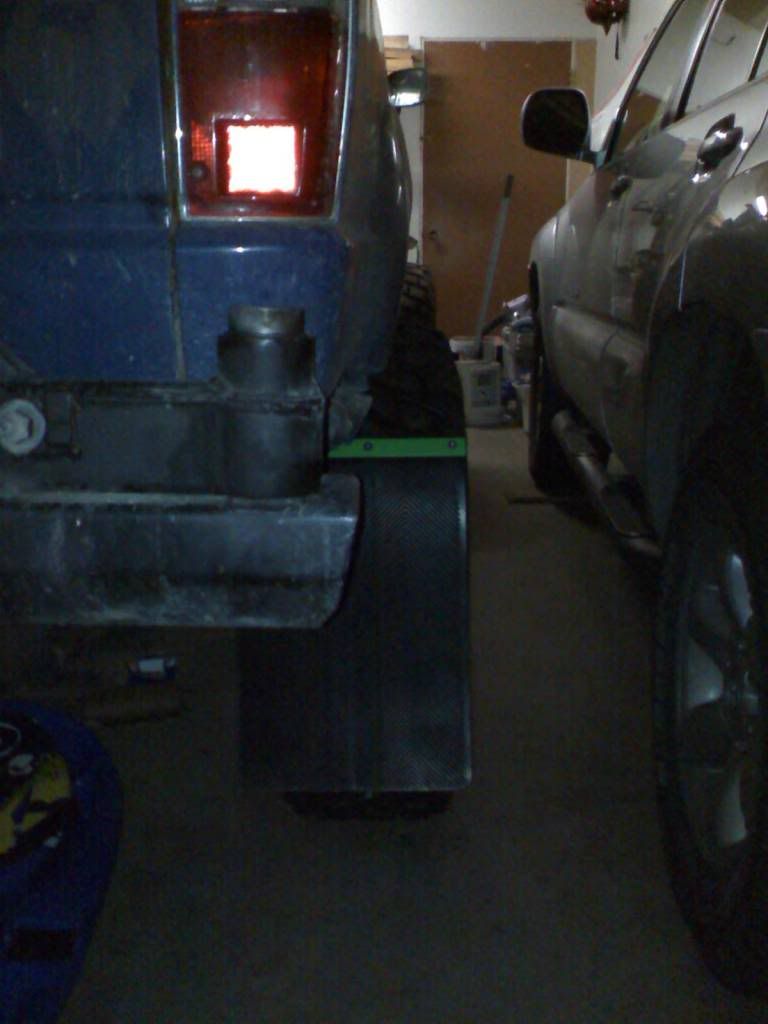
They also hang down low enough to be well below the axle tube.
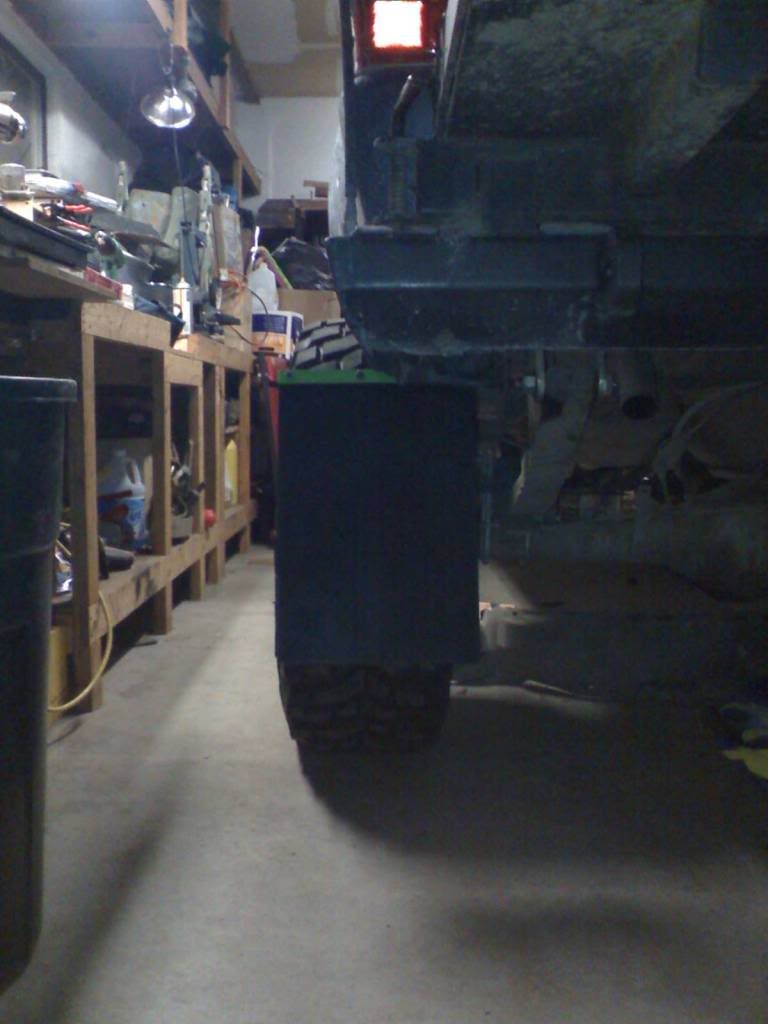
Honestly, I have NO idea if these are going to last, but that's why they're quick disconnects. I think I spent less than $25 on this total, I had the bolts/nuts/washers on hand already.
So, there ya go. Simple and effective. WA state patrol approved...hopefully...
Ingredients:
x1- set of 12"x18" mud flaps from the auto parts store
x1- 1" barstock
x4- 1/4" diameter bolts
x4- self locking nuts
x4- small washers(nut side)
x4- fender washers(bolt head size)
x4- retaining pins
x4- clevis pins
Basically attached the barstock to the mud flap with the two bolts, but drilled four holes total.
Using the stock mud flap location I simply ran a 1/4" drill bit thru the OEM mounts to run the clevis pins thru. Obviously, I've bent that factory bracket back enough to clear the tires during full stuff.
The mud flaps cover the tread pattern effectively.
They also hang down low enough to be well below the axle tube.
Honestly, I have NO idea if these are going to last, but that's why they're quick disconnects. I think I spent less than $25 on this total, I had the bolts/nuts/washers on hand already.
So, there ya go. Simple and effective. WA state patrol approved...hopefully...
Mar 7, 2010 | 08:06 AM
#75
Thread Starter
Joined: Dec 2006
Posts: 15,192
Likes: 190
From: Sedro-Woolley, WA
Update, 07MAR10
Since I moved the axle forward 1" I had driven all over the place but hadn't had a chance to flex it out and see if my idea worked. As you can see, much better!!!
Before:
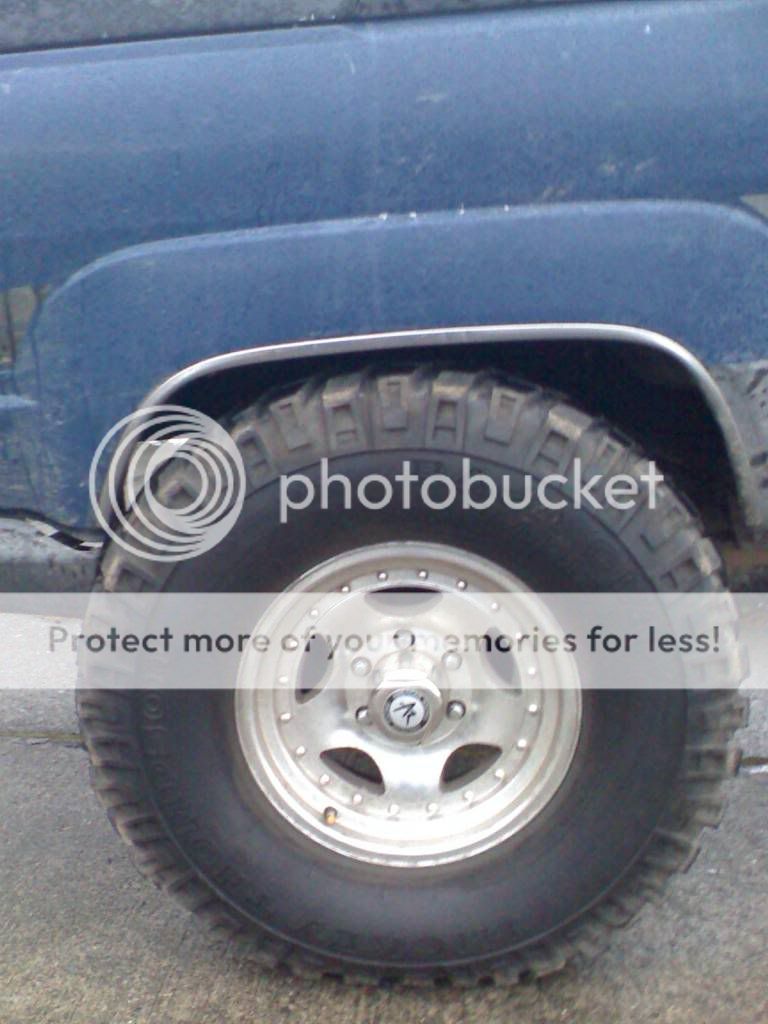
After:
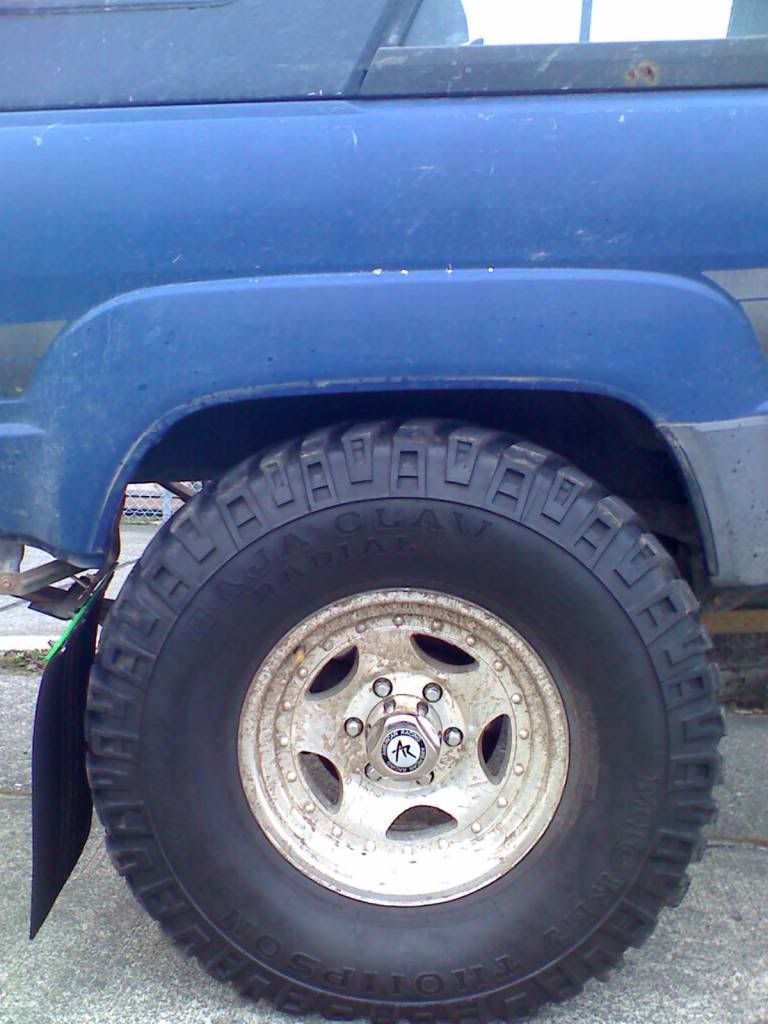
Full extension looks good.
Here the overload is working as advertised and that's 'bout all I'm gonna get for compression.

Some notes:
1) The wheel spacers are working fine and maintaining torque.
2) I could raise the lower shock mounts up probably a 1/2" to an 1".
3) I'm thinking the sway bar is the next thing to go. I am running quick disconnects, but they DO NOT quick disconnect in any way! LOL!! Soooo, I may either design my own hub style disconnect or just use my 9000x's to provide sway control...which ever is easier! Most things I've read have noted not alot of difference with the bar removed while driving.
Before:
After:
Full extension looks good.
Here the overload is working as advertised and that's 'bout all I'm gonna get for compression.
Some notes:
1) The wheel spacers are working fine and maintaining torque.
2) I could raise the lower shock mounts up probably a 1/2" to an 1".
3) I'm thinking the sway bar is the next thing to go. I am running quick disconnects, but they DO NOT quick disconnect in any way! LOL!! Soooo, I may either design my own hub style disconnect or just use my 9000x's to provide sway control...which ever is easier!
Most things I've read have noted not alot of difference with the bar removed while driving.
Nov 11, 2010 | 03:25 PM
#77
Thread Starter
Joined: Dec 2006
Posts: 15,192
Likes: 190
From: Sedro-Woolley, WA
Update, 11NOV10
Have been pretty satisfied with the modifications so far and the performance off road. I have noticed that I do catch the fender flares occationally and I do bend the bracket the mudflaps hang from. Meh...
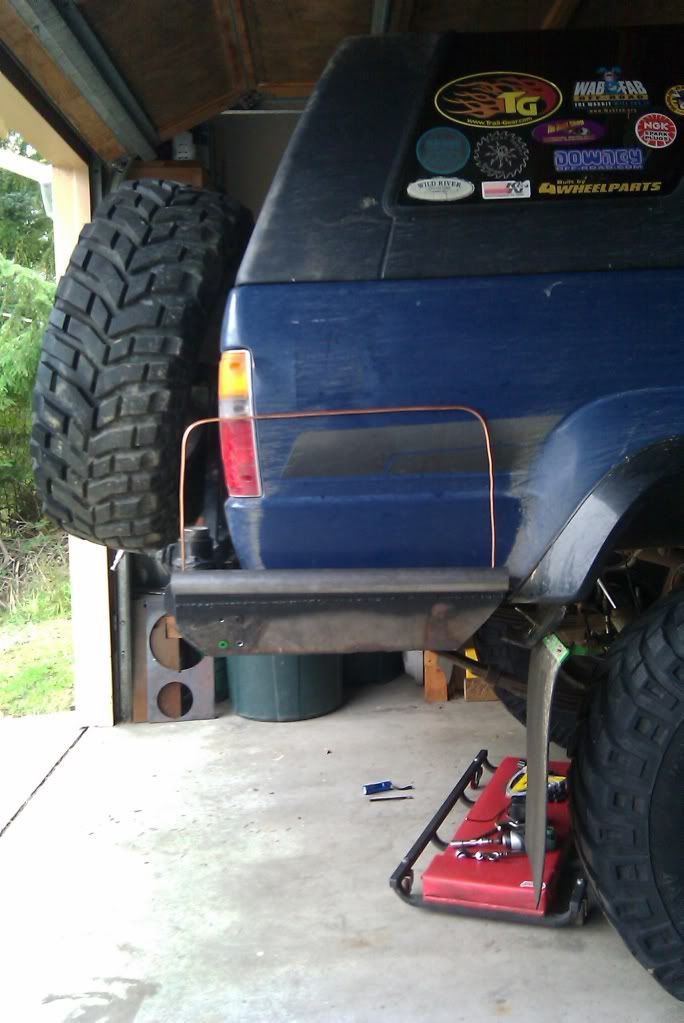
So, with that I've begun the process...slow process...of fabricating the "wing" rear quarter panel protection. Completely bolt on, flat steel/u-channel/tube construction. I've mocked up the basic shape and recently purchased my tubing(1.75", .120 wall). I mocked up the hoop with some copper tubing to get the basic shape so I can transfer that to the tube when I bend it up.
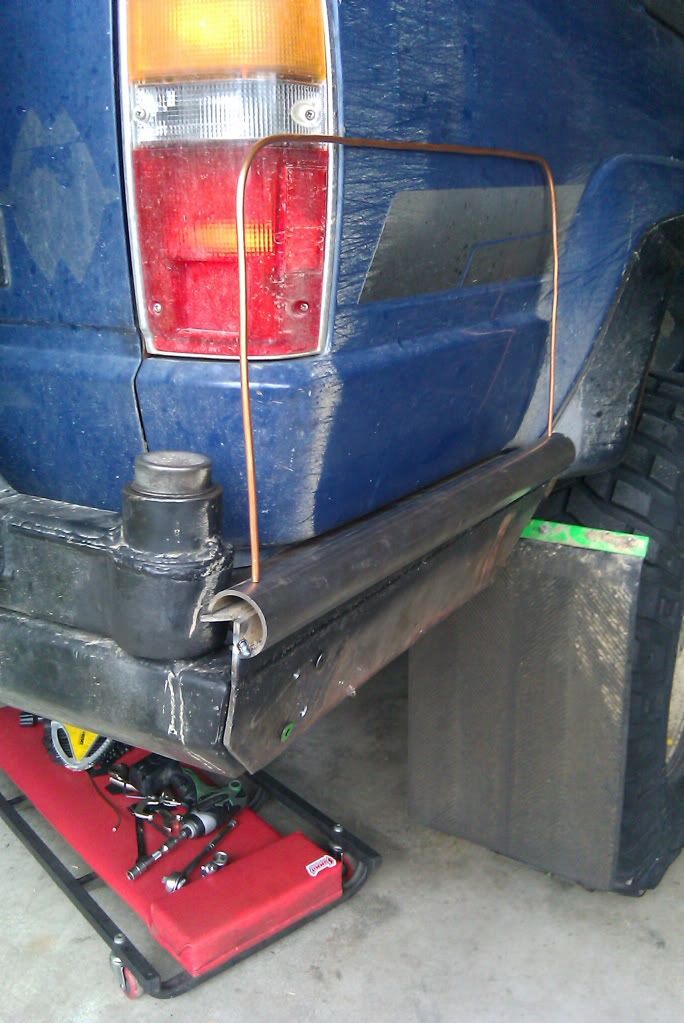
I'm going to cut down by half the leg length on the hoop there. So, the top of the tube will be flush with the body contour ridge.
So, with that I've begun the process...slow process
...of fabricating the "wing" rear quarter panel protection. Completely bolt on, flat steel/u-channel/tube construction. I've mocked up the basic shape and recently purchased my tubing(1.75", .120 wall). I mocked up the hoop with some copper tubing to get the basic shape so I can transfer that to the tube when I bend it up.I'm going to cut down by half the leg length on the hoop there. So, the top of the tube will be flush with the body contour ridge.
Feb 5, 2011 | 08:30 AM
#78
Thread Starter
Joined: Dec 2006
Posts: 15,192
Likes: 190
From: Sedro-Woolley, WA
Update, 05FEB11
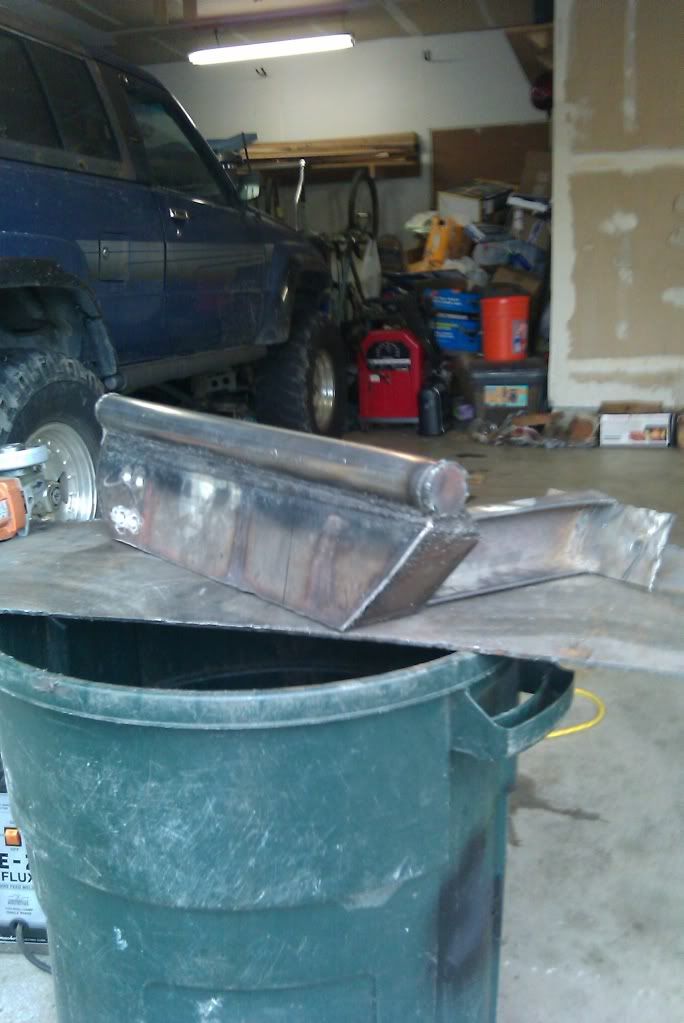
Got a chance to do some fab today. Nothing crazy, just cutting out stuff to finish "boxing" it in. Still debating how I'm gonna do the upper hoop. Whether I get it bent or just cut three pieces and burn it together...
I may try to tack all the pieces together today. Then I'll get the whole piece media blasted and finish burning it all together.
Found some foam craft board at Target that's the same thickness as the metal I'm using. I've always used cardboard but this stuff works great!!
I may try to tack all the pieces together today. Then I'll get the whole piece media blasted and finish burning it all together.
Found some foam craft board at Target that's the same thickness as the metal I'm using. I've always used cardboard but this stuff works great!!
Feb 6, 2011 | 04:27 PM
#79
Thread Starter
Joined: Dec 2006
Posts: 15,192
Likes: 190
From: Sedro-Woolley, WA
Update, 06FEB11
Today I was able to fully weld in all the pieces and bracketry. Now, it's off to get media blasted and primered. Eventually, I'll make the hoop but for now this is good enough.
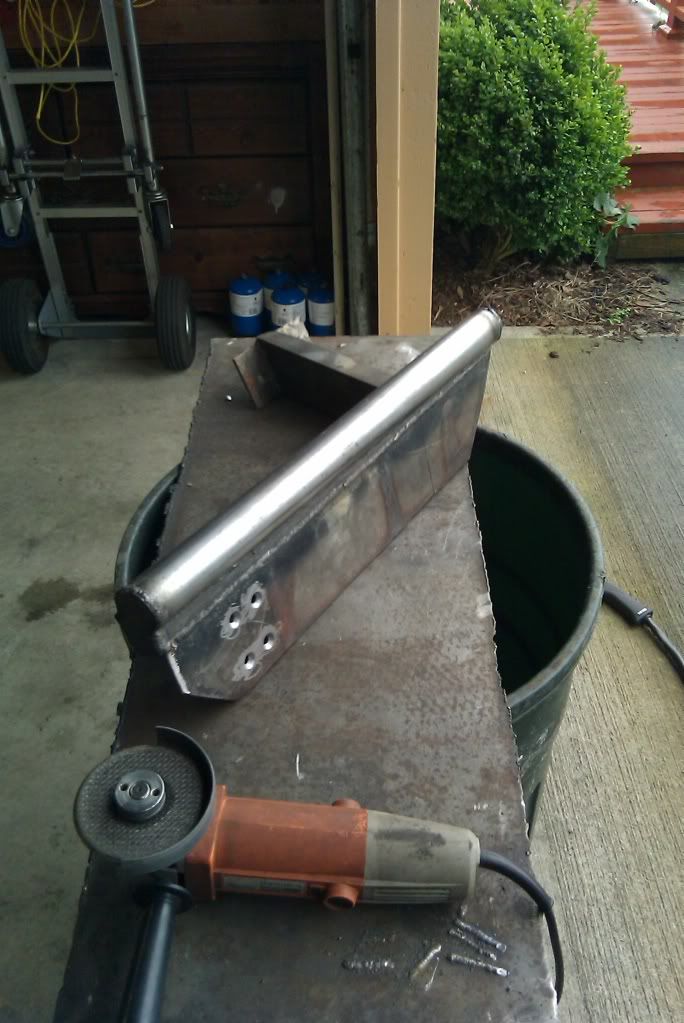
Geeezuuuss....now I have to do the other side...ugh...
Now, it's off to get media blasted and primered. Eventually, I'll make the hoop but for now this is good enough. Geeezuuuss....now I have to do the other side...ugh...


