
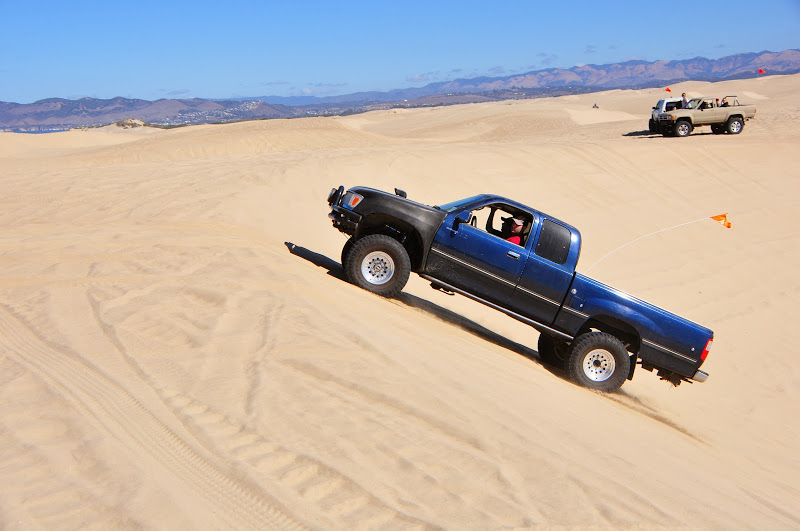
1996 t100 4x4 work in progress
 Nov 22, 2013 | 05:08 PM
#67
Registered User
Joined: Jun 2009
Posts: 977
Likes: 4
From: Southern California
Hey Zack, I was trying to do a search for "Blazeland" and its coming up with hundreds of threads now. I am creating a bump on threads that are pertinent to the subject. I'm marking them with keywords, Blazelander2013 if its a rig that actually has a kit or good info.
Last edited by BlazeN8; Nov 22, 2013 at 05:10 PM.
 Jan 4, 2014 | 03:26 PM
#72
Registered User
Joined: Jun 2009
Posts: 977
Likes: 4
From: Southern California
Hey Nate,
I'm getting close to being able to install the 4" procomp lift kit. Do you have a picture of one of your rigs using the stock upper bucket/shock mount for a coilover? I'm going to have my local Fab guy do some reinforcement as well as an engine cage and hydro bumps. Maybe not all at once though.
Do you use the stock mount or is there a need to relocate the tab on the LCA?
I was looking at the stock shock tab and I realized it is slightly further out than the tab I'm using now which actually will be good. (Less leverage on shock meaning a little stiffer ride?)
Thanks,
Zach
Zack,
I hope its okay to answer your e-mail here on your YT Build Thread. I think it will easy to explain in the forum format with some pictures along with narration. Here is the photo I had posted a few years back here on YT that I think you probably saw and the image may be floating around in your subconscious as it pertains to some of your questions.
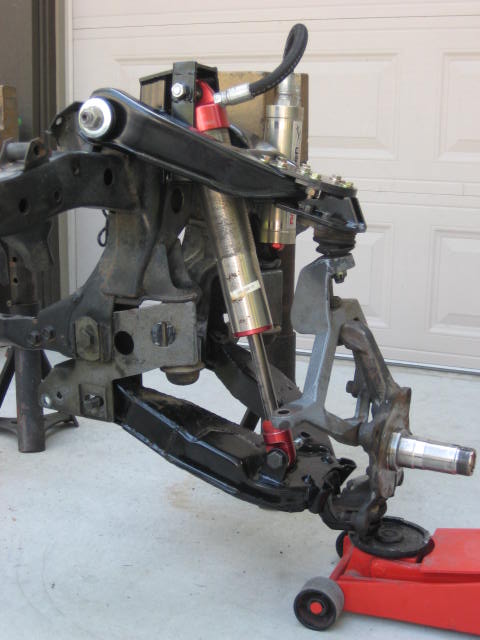
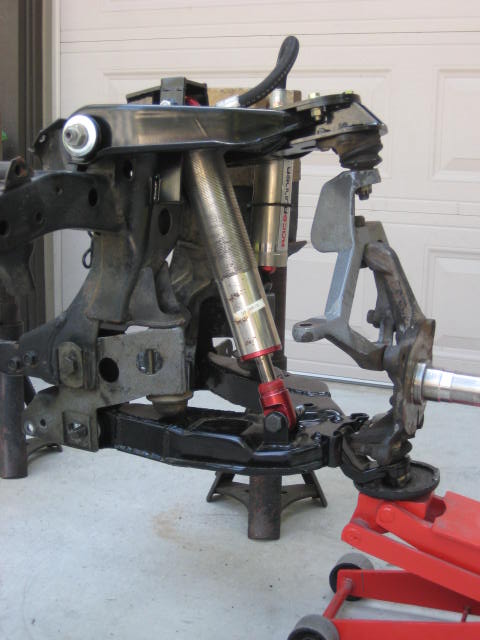
The SAW Race Runners are a 2.5 Threaded Body 10" travel. I believe you said you have 2.0 Fox 8" travel, right? If you study the droop photo you can see if there were a coil spring it would have to sit low on the shock body to clear the UCA. In the compressed suspension photo the reservoir hose just clears the UCA but with bump stop compression may not. In your 8" travel configuration the upper shock mount will want to be lowered a couple of inches and that may complicate things.
I'm getting close to being able to install the 4" procomp lift kit. Do you have a picture of one of your rigs using the stock upper bucket/shock mount for a coilover? I'm going to have my local Fab guy do some reinforcement as well as an engine cage and hydro bumps. Maybe not all at once though.
Do you use the stock mount or is there a need to relocate the tab on the LCA?
I was looking at the stock shock tab and I realized it is slightly further out than the tab I'm using now which actually will be good. (Less leverage on shock meaning a little stiffer ride?)
Thanks,
Zach
Zack,
I hope its okay to answer your e-mail here on your YT Build Thread. I think it will easy to explain in the forum format with some pictures along with narration. Here is the photo I had posted a few years back here on YT that I think you probably saw and the image may be floating around in your subconscious as it pertains to some of your questions.
The SAW Race Runners are a 2.5 Threaded Body 10" travel. I believe you said you have 2.0 Fox 8" travel, right? If you study the droop photo you can see if there were a coil spring it would have to sit low on the shock body to clear the UCA. In the compressed suspension photo the reservoir hose just clears the UCA but with bump stop compression may not. In your 8" travel configuration the upper shock mount will want to be lowered a couple of inches and that may complicate things.
Jan 4, 2014 | 03:28 PM
#73
Registered User
Joined: Jun 2009
Posts: 977
Likes: 4
From: Southern California
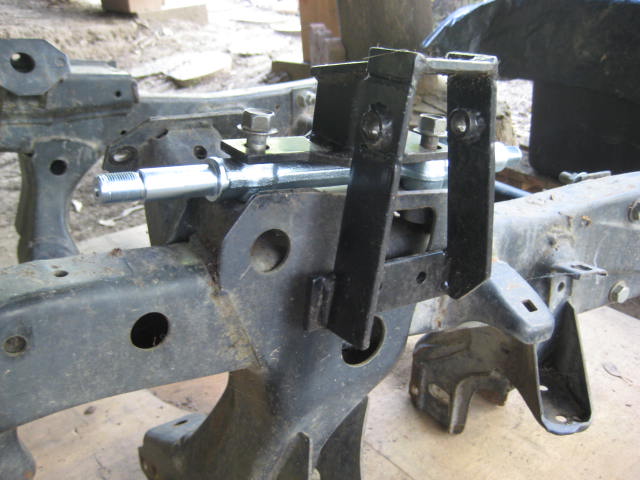
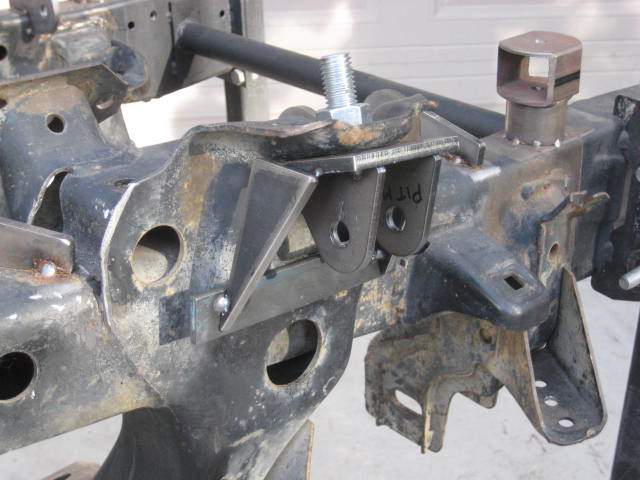
In my case I had cut the factory upper pin style shock tabs off. I had done this to install Downey's double shock hoop contraption.
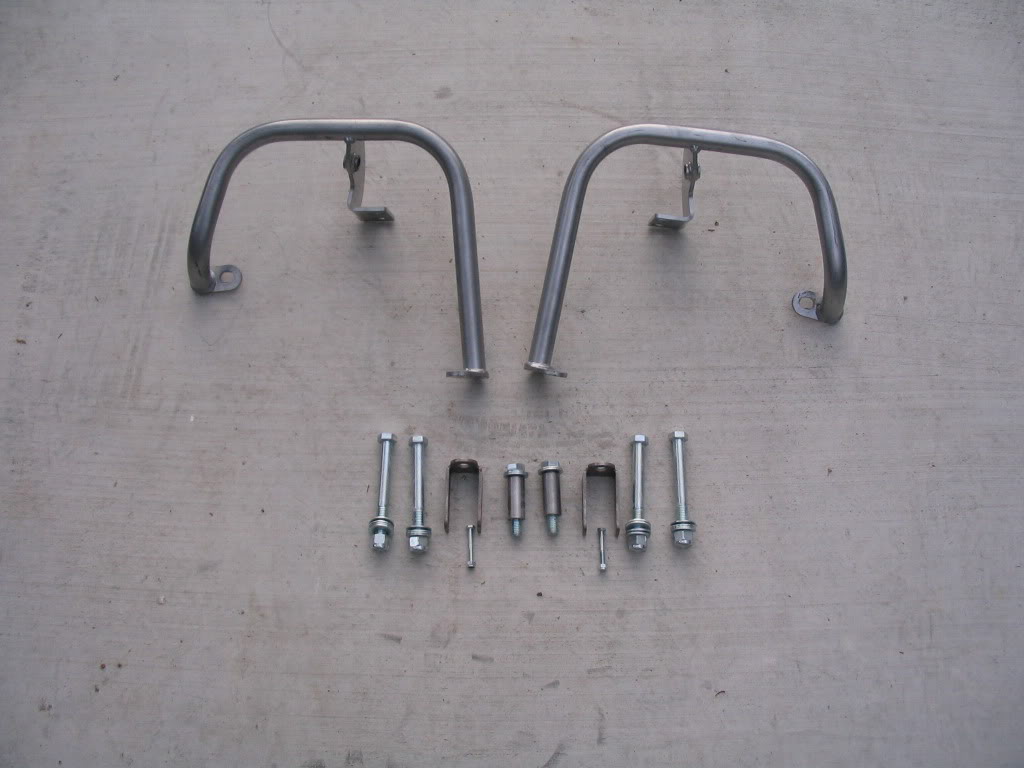
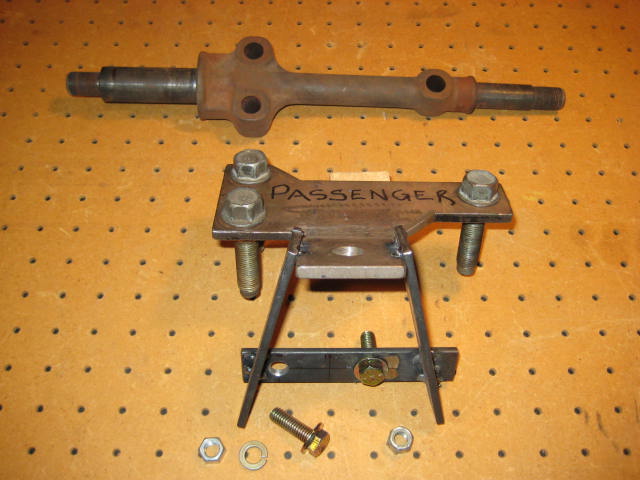
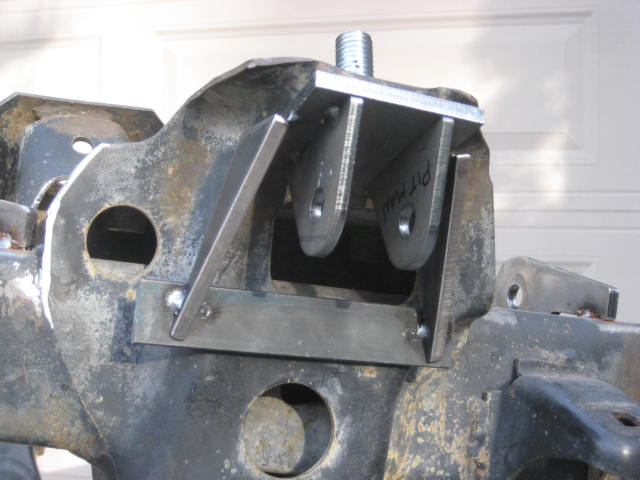
Later I wanted to convert back to a pin style shock to run LT and that meant re-create some substitute type bracket. I called this a Mini shock Hoop.
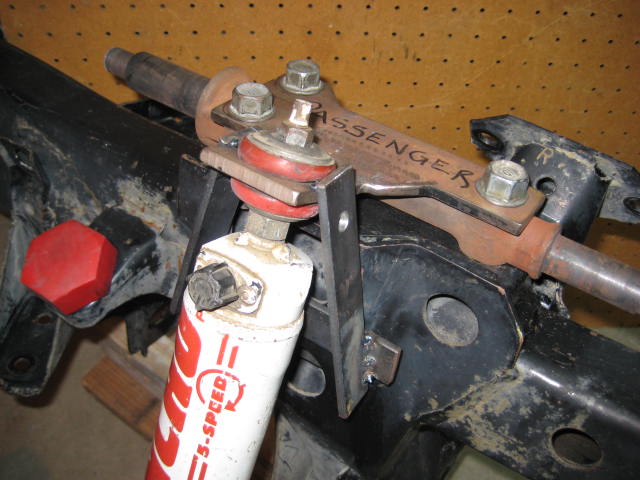
As you can see its a bolt on configuration using the (3) cross shaft bolts and (2) additional bolts attached lower to the side of the frame. This installation requires drilling (2) 3/8" holes to fasten the bolts.
Later I wanted to convert back to a pin style shock to run LT and that meant re-create some substitute type bracket. I called this a Mini shock Hoop.
As you can see its a bolt on configuration using the (3) cross shaft bolts and (2) additional bolts attached lower to the side of the frame. This installation requires drilling (2) 3/8" holes to fasten the bolts.
Jan 4, 2014 | 03:29 PM
#74
Registered User
Joined: Jun 2009
Posts: 977
Likes: 4
From: Southern California
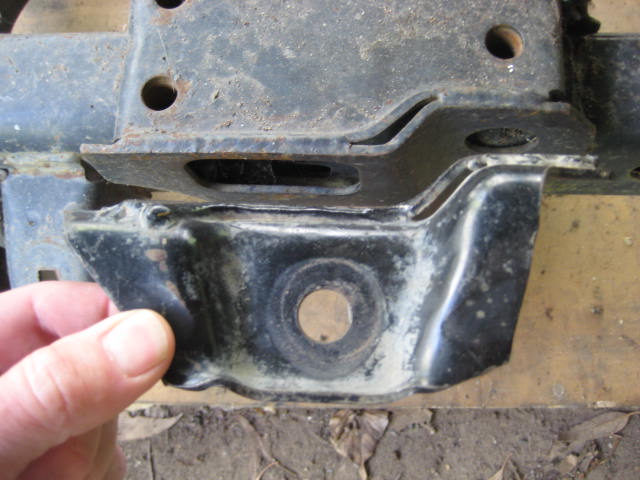
In your case you have not cut the upper shock tabs yet. I would consider leaving them in place if possible. Because of the 4" drop bracket and because you are using an 8" travel you might be able to install a bracket below the factory tabs. Here is a mock up of what I had in mind.
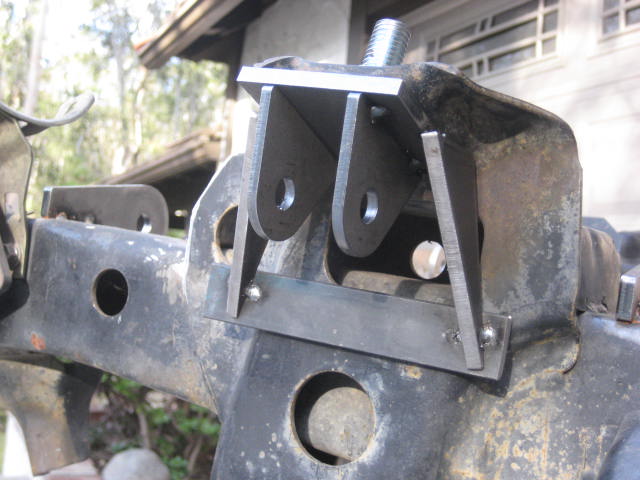
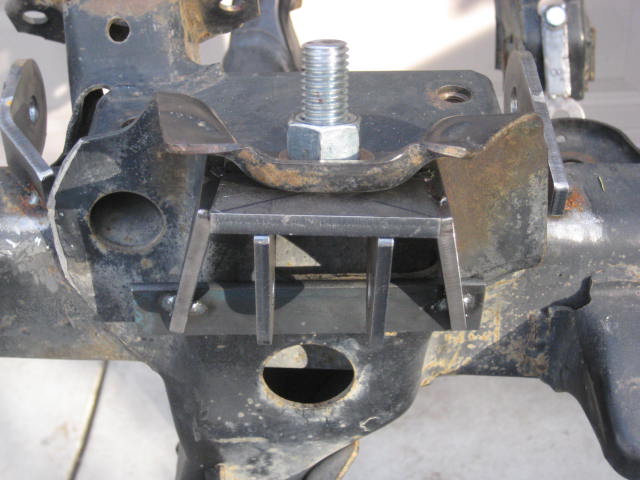
I think you will want to reinforce the bracket with some out rigger gussets that connect lower to the side of the frame like I mentioned earlier. I suspect the factory shock tab alone cannot handle the weight of a coil over conversion.
As for the LCA shock mounts, the factory front ones use a wider tab width and a larger diameter bolt. If you can get some 1/2" SAE structural washers (no zinc, easy to weld) you can have them welded to the inside of the factory tabs to get the right width and diameter hole.
If you want me to send you my conceptual bracket to or have me build you a pair of further developed brackets and send the LCA shim washers I used hit me up off line.
Jan 4, 2014 | 03:48 PM
#75
Registered User
Joined: Jun 2009
Posts: 977
Likes: 4
From: Southern California
If you were to use brackets similar to what I just showed with your Fox shocks you would be up and running right away with out having to hit up your local fabricator. Drill a couple of holes and bolt it on. You will need to mock it up to make sure the shock stroke spec works within the shock tab distances. You need to check the adjustment collar is still accessible. You need to check that the res. hose clears the UCA. A 90 degree fitting or some clocking its orientation may be needed.
I think at a later date beefing up the shock hoops and building an engine cage sound great. I think running a secondary bypass shock in the Aux. mount would be cool.
The bump stop brackets that came with the drop bracket kits are a bit tall for LT so building some smaller ones will maximize the up travel. And I like where your going with substituting the front bracket for an hydro bump like we talked about at Pismo.
Last edited by BlazeN8; Jan 4, 2014 at 03:57 PM.
Jan 4, 2014 | 10:08 PM
#76
Thread Starter
Registered User
Joined: Mar 2011
Posts: 505
Likes: 1
From: Socal
Thanks Nate. That helps a LOT. I will also be trying to get into some uniballs to replace the ball joints... Had a failure today which I mentioned earlier to you.
Will post some pictures at some point.
Big thanks to everyone who helped me with the trail fix! Borrowed a second highlift and even a parts run.... Then another parts run..
Will post some pictures at some point.
Big thanks to everyone who helped me with the trail fix! Borrowed a second highlift and even a parts run.... Then another parts run..
Jan 5, 2014 | 04:28 PM
#77
Registered User
Joined: Jun 2009
Posts: 977
Likes: 4
From: Southern California
Sorry to hear about your breakdown! I hope you are able to get repaired and back home with minimal cost and labor. BJs are a good item to have in the spare parts kit. Small and cheap but when your on the trail a lifesaver. I am curious as to why the BJ failed? Cheap aftermarket made in china or just a fluke? I don't believe the upper BJ failure is all that common. Keep us posted on your findings.
There was a guy who was making a bolt on upper uniball conversion but I wasn't able to find it in my Google search. For the lower BJ conversion you can use a TC item as you all ready know.
There was a guy who was making a bolt on upper uniball conversion but I wasn't able to find it in my Google search. For the lower BJ conversion you can use a TC item as you all ready know.
Jan 5, 2014 | 04:55 PM
#78
Thread Starter
Registered User
Joined: Mar 2011
Posts: 505
Likes: 1
From: Socal
Got home around 10. Not too bad for what happened. The truck seems to be fine. i need to replace the ball joints, some steering components and then go through everything to make sure there is not any damage I missed. Im just happy my fiberglass is ok!!!
Im not sure why it failed. I had supposedly the best aftermarket ones available supposedly not from china... But who knows. They were less than a year old and the truck is not my Daily driver anymore so im suspecting a fluke. Or they were just crap from china.
Either way im going all OEM from now on and adding some ball joints to my parts kit.
I cant find an upper uniball conversion either. I think im going to start drawing up a print next weekend and maybe get some help programming it for CNC.
Last edited by Zpd426; Jan 5, 2014 at 04:57 PM.
 Jan 5, 2014 | 05:11 PM
#80
Registered User
Joined: Jun 2009
Posts: 977
Likes: 4
From: Southern California
You might also want to take a look at this website speedwaymotors.com Look at the Howe precision BJs. These are some upgrades I am considering for the MT. I was also considering making UCA Extension Brackets with Howe BJs with screw on weld in cups. The Howe design may be a good alternative to uniball. Compared to OME Howe may be stronger? Another advantage is the Howe is serviceable and will allow a 32 degree angle range compared to 23 degree angle of the stock Toyota units.


