
jason in tn's 1997 4Runner Build-Up Thread - "the family truckster"
 Jul 31, 2016 | 07:23 AM
#801
Contributing Member


Joined: Sep 2005
Posts: 8,247
Likes: 497
From: mo
Daily driver builds...
Over the river (no snorkle, so over) and through the woods to grocery getting we goooo! Patch it together after the woods, and take the kid to school!

Just checking in to see what-all you've got going on in the 3rd gen department, Jason.
Over the river (no snorkle, so over) and through the woods to grocery getting we goooo! Patch it together after the woods, and take the kid to school!
Just checking in to see what-all you've got going on in the 3rd gen department, Jason.
Jul 31, 2016 | 06:00 PM
#802
Thread Starter
Registered User
Joined: Aug 2009
Posts: 2,173
Likes: 0
From: hohenwald tn.
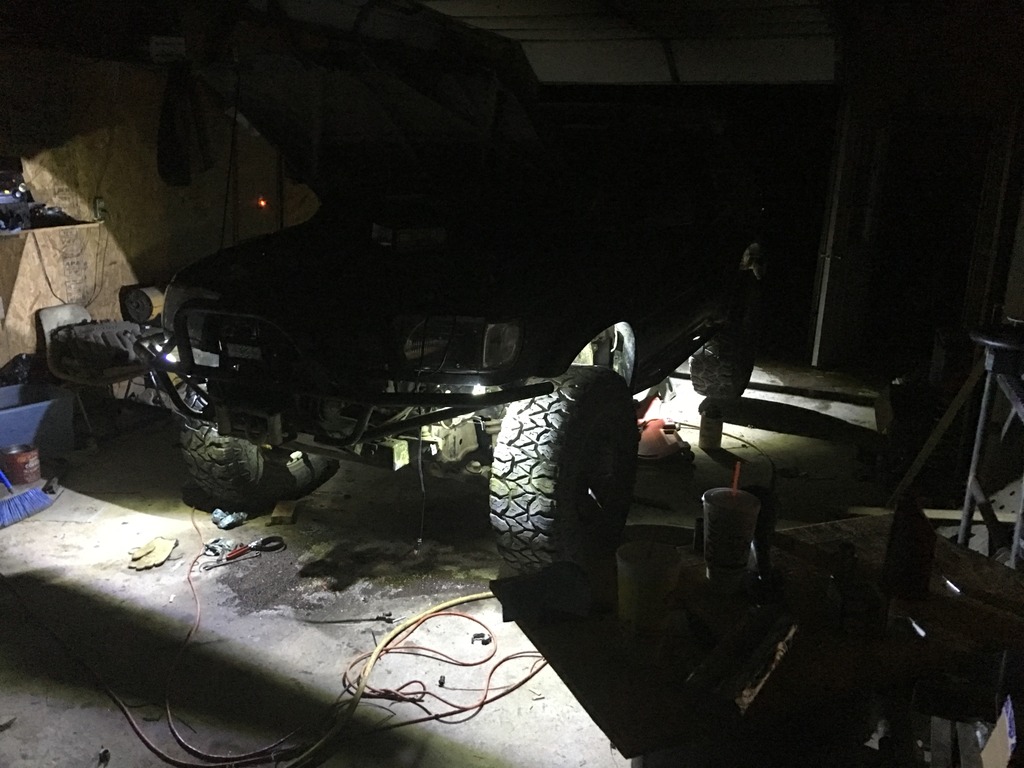
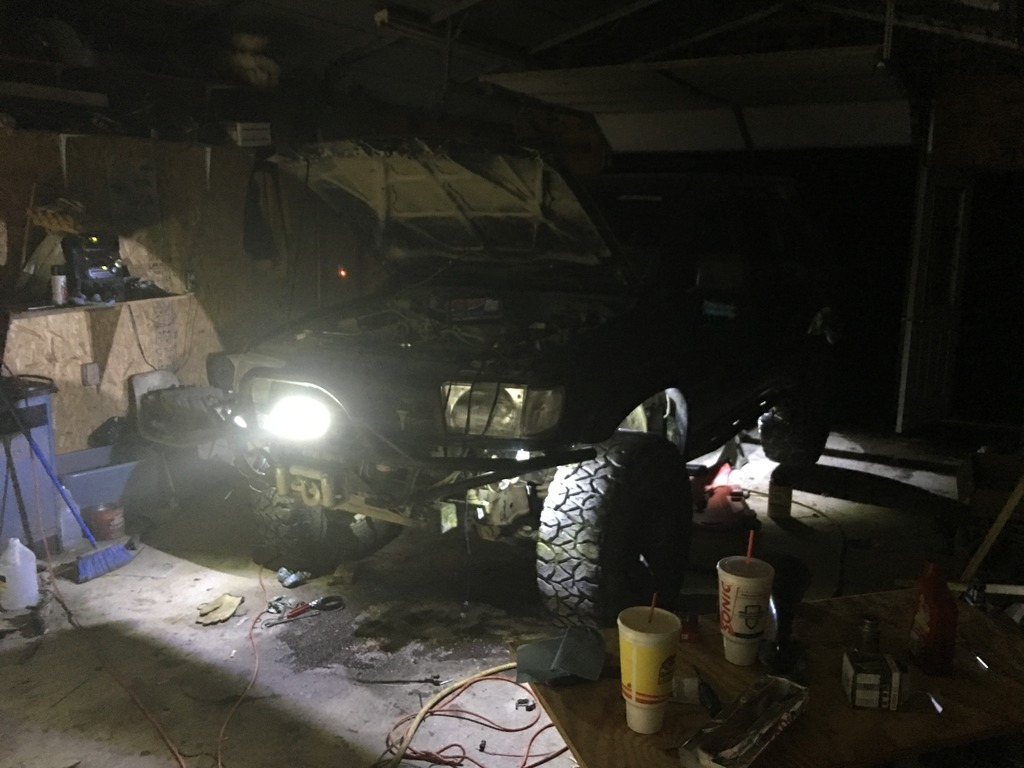
Wow It's been awhile since I I've updated this thread. Well the short story is the 4Runner has been sitting on my trailer since mid May immobile. The four lower ball joint bolts sheared while on a wheeling trip, and honestly I just haven't had time to get to fixing it. Well with another trip coming up soon I decided I had better make time, I've also been wanting to change things around and see if I couldn't get the old truck a little more street friendly.
So trail damage pics.
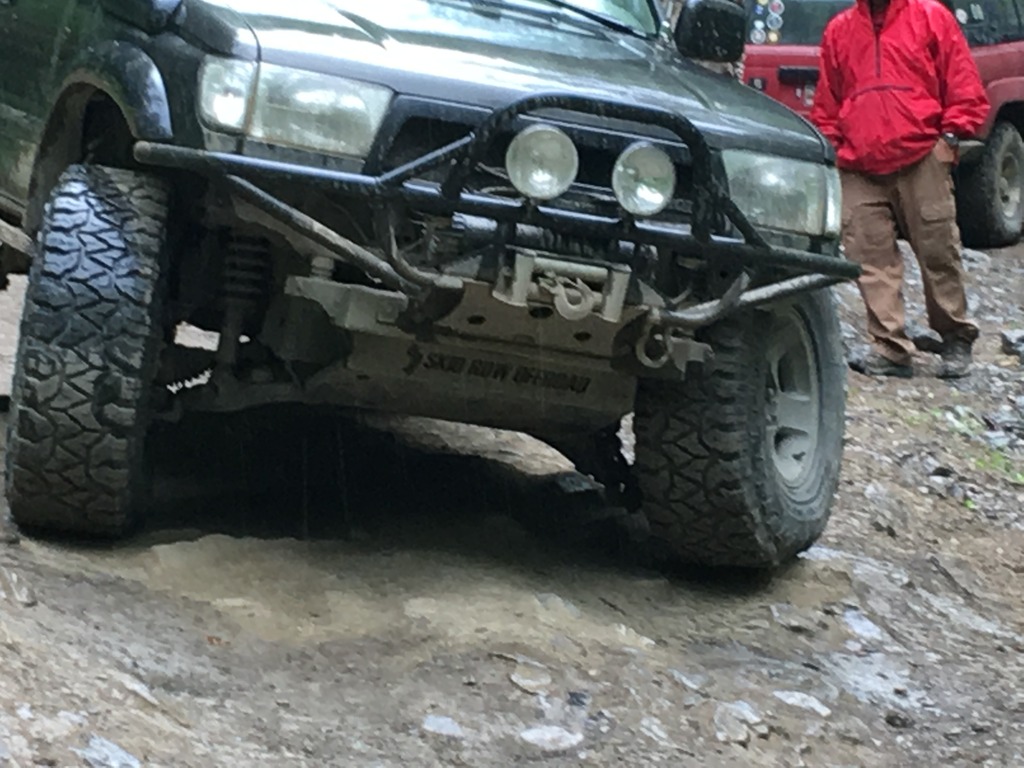

Only took a couple months to get a knuckle back on.
And some new parts.
So trail damage pics.


Only took a couple months to get a knuckle back on.

And some new parts.


 Jul 31, 2016 | 06:05 PM
#804
Thread Starter
Registered User
Joined: Aug 2009
Posts: 2,173
Likes: 0
From: hohenwald tn.
I'm also replacing the steering rack, planning to do new SPC upper control arms and a few other different things upfront. I will try and do a better job of updating here. Thanks for checking in.
Jul 31, 2016 | 06:56 PM
#805
Contributing Member
Joined: Sep 2005
Posts: 8,247
Likes: 497
From: mo
Dreaded ball joint bolts! 4 stupid bolts and a ball joint holding it all together is a little alarming. Care to share the moments preceding the fail, if you know what caused it? I'm learning much from you.
Glad your recovery wasn't as bad as it could have been.
Gotta catch up on the pod casts...didn't get a chance to listen to any while we were playing out west.
Glad your recovery wasn't as bad as it could have been.
Gotta catch up on the pod casts...didn't get a chance to listen to any while we were playing out west.
Jul 31, 2016 | 08:39 PM
#806
Thread Starter
Registered User
Joined: Aug 2009
Posts: 2,173
Likes: 0
From: hohenwald tn.
Hey Hab, yes the ball joint design on these seems a bit weak, probably why toyota changed it a little on the next generation trucks, along with better wheel bearings and brakes.
I have to guess that when the final bolts failed for lack of a better way to put it that there were only two still holding, I dropped off a 4-6 inch ledge, about like a curb, and pop it was done.
My truck has been so neglected over the past year or so probably longer, a lot of maintenance has been put off and things overlooked, I'm hoping to remedy a lot of that before it leaves my shop.
No time to listen to the podcast while out west, well that would have been the perfect time to catch up, all I do all day is drive and listen too podcasts. But things are rolling along and I think there are a couple interviews you will enjoy.
Aug 1, 2016 | 01:38 PM
#807
Contributing Member
Joined: Sep 2005
Posts: 8,247
Likes: 497
From: mo
I know! I had what I needed all downloaded and ready to go but it took longer to listen to a couple of books I was trying to catch up on than I thought it would. I'll have to queue them up when I'm replacing the front shocks and 1 rear airbag on the 96....you know, 'round tuits....
That makes sense on the ball joint bolts. Have seen a few threads about them backing off and dropping out, too, just to add a little fun to the mix. Who was it that made it out of a mild wheeling trip with 1 solid bolt left on one side, and maybe a bent one? That had to be harrowing! Glad it was a pretty mild drop when it gave, and prolly not at speed.
That makes sense on the ball joint bolts. Have seen a few threads about them backing off and dropping out, too, just to add a little fun to the mix. Who was it that made it out of a mild wheeling trip with 1 solid bolt left on one side, and maybe a bent one? That had to be harrowing! Glad it was a pretty mild drop when it gave, and prolly not at speed.
Aug 2, 2016 | 12:30 AM
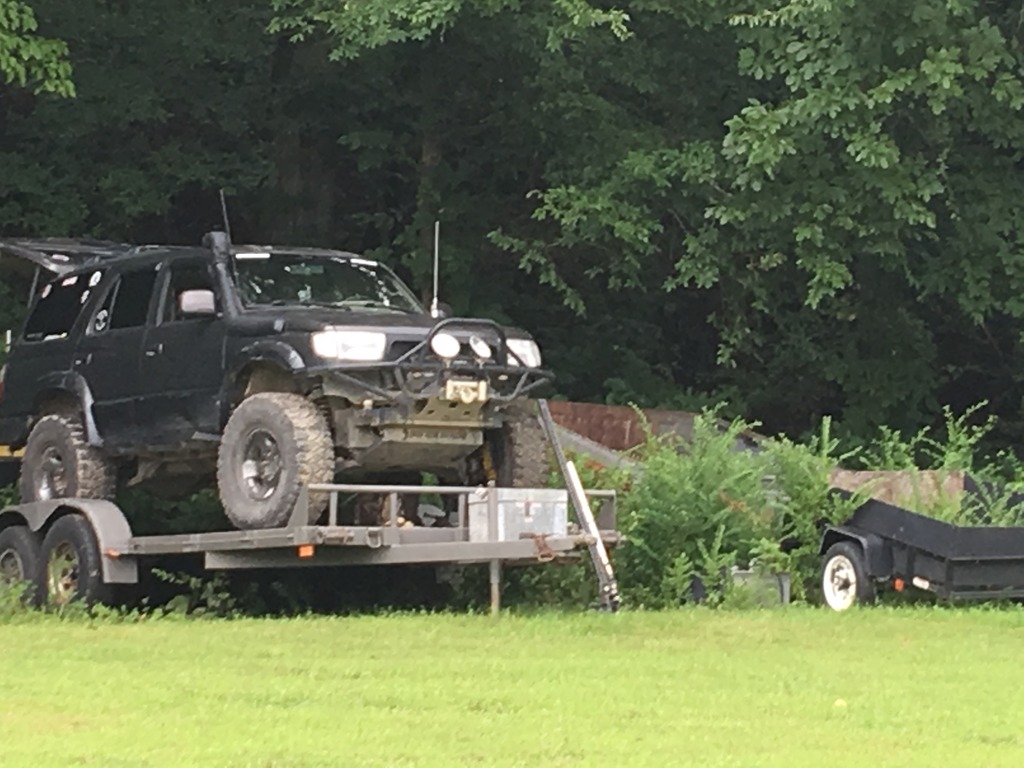
#808
The new tool box looks nice. I was trying to avoid getting one for the longest time but now I can see where it would be handy to have. Looks like you are making some progress on the runner. Glad to see it on all 4s now.
Aug 11, 2016 | 06:29 PM
#809
Thread Starter
Registered User
Joined: Aug 2009
Posts: 2,173
Likes: 0
From: hohenwald tn.
Worked on the old truck all weekend again, managed to get a lot done and a lot more tore apart.
Did the timing belt and water pump, new clutch and idler pulley on the A/C. Got the steering rack swapped out. Pulled the upper control arms to make room for the new SPCs, also pulled the lower ball joints. Still hunting a source for GOOD lower control arm bushings, I really don't want to put it back together with out them.
I will get a few pics up when I have more time.
Aug 12, 2016 | 02:58 AM
#810
Contributing Member
Joined: Sep 2005
Posts: 8,247
Likes: 497
From: mo
Worked on the old truck all weekend again, managed to get a lot done and a lot more tore apart.
Did the timing belt and water pump, new clutch and idler pulley on the A/C. Got the steering rack swapped out. Pulled the upper control arms to make room for the new SPCs, also pulled the lower ball joints. Still hunting a source for GOOD lower control arm bushings, I really don't want to put it back together with out them.
I will get a few pics up when I have more time.
Did the timing belt and water pump, new clutch and idler pulley on the A/C. Got the steering rack swapped out. Pulled the upper control arms to make room for the new SPCs, also pulled the lower ball joints. Still hunting a source for GOOD lower control arm bushings, I really don't want to put it back together with out them.
I will get a few pics up when I have more time.
OE or poly for your LCA bushings?
Aug 12, 2016 | 03:30 AM
#811
Thread Starter
Registered User
Joined: Aug 2009
Posts: 2,173
Likes: 0
From: hohenwald tn.
Hab I have to admit I've had a little elf doing a lot of work for me while I'm out of town "my youngest son", he managed to get the Rack out by himself as well as having the front of the engine stripped down all but the crank shaft pulley, so all I've had to is basically put new parts in.
I'm really wanting to go Polly bushing in the lowers, I just don't think rubber can take the abuse of the lift and how I treat the truck.
I'm really wanting to go Polly bushing in the lowers, I just don't think rubber can take the abuse of the lift and how I treat the truck.
 Aug 14, 2016 | 07:28 PM
#813
Contributing Member
Joined: Sep 2005
Posts: 8,247
Likes: 497
From: mo
Always nice to have a capable pair of extra hands to get things rolling!
Loved episodes 11 and 12 of the Toyota Trucks and Trails podcasts! Great listening while working on my own suspension, gives my ears something good to do. Episode 13 made me want to make to Windrock for the event there even if I'm not a guy.
Curiosity- I was doing some reading on poly because of the squeak potential but saw some say lowers don't have an issue? I'm sporting oe rubber so no clues for you there. My poly sway bar bushings do need the occasional greasing but I haven't had to replace them since install a couple of years ago and I was having to do the oe rubber sway bar bushings yearly.
Aug 15, 2016 | 05:41 PM
#814
Thread Starter
Registered User
Joined: Aug 2009
Posts: 2,173
Likes: 0
From: hohenwald tn.
The kid has been a big help over the years, maybe to much he has kinda made me lazy.
Thanks again for listening too the podcast it really means a lot, you and your family would really enjoy Windrock I think, wheeling and Mt biking are both abundant there, if you ever decide to hit it up let me know and maybe we can make a weekend of it.
I know Polly bushing tend to squeak and that is an issue for a lot of people, the fact that they don't bind like rubber and out last it are what I'm looking for. At this point it doesn't matter as there doesn't seem to be a set of Polly lower control arm bushing on the planet.
Aug 15, 2016 | 06:15 PM
#815
Contributing Member
Joined: Sep 2005
Posts: 8,247
Likes: 497
From: mo
Would love to do Windrock with you sometime, that'd be a good time for sure. 
Kids helping is how kids learn to help themselves. In other words, you're not lazy, you're parenting.
I really enjoy most of the podcasts, oddly especially the ones about the 4Runner, but also found the fj, landcruiser and nissan stuff good too. I need to comment more on your webpage, maybe not listen when I have greasy grimy mitts.
Hmmm, will have to try to remember if we've seen anyone do some poly lca bushings....hmmmm.....seemed jburt tried it but had fitment issues???.....Chuckles89 did his rear control arm bushings but I can't remember if he did the front....I'll fire up the old thinker, see if anything lights up.
Aug 15, 2016 | 06:27 PM
#816
Contributing Member
Joined: Sep 2005
Posts: 8,247
Likes: 497
From: mo
Some potentially interesting reading for you...
http://www.toyota-4runner.org/3rd-ge...ings-help.html
JBurt's thread... https://www.yotatech.com/forums/f2/e.../#post52042980
Replace how-to... https://www.yotatech.com/forums/f2/f...rd-gen-265072/
You know how your kid took the rack off? All that experience? Guess what has to come partway off to get the lca's off?
Last edited by habanero; Aug 15, 2016 at 06:29 PM.
Aug 16, 2016 | 06:49 PM
#818
Thread Starter
Registered User
Joined: Aug 2009
Posts: 2,173
Likes: 0
From: hohenwald tn.
Originally Posted by dirtdobberoffroad
Jason those uppers looks sweet those ball joints look like they will last a little while for ya!
Aug 21, 2016 | 08:50 AM
#819
Thread Starter
Registered User
Joined: Aug 2009
Posts: 2,173
Likes: 0
From: hohenwald tn.
Finally got it back together enough to test drive it, really nice not having to hear the noisy bearing, I can't believe how much easier it steers, it definitely needs an alignment but at least it's moveable. I got enough done to feel comfortable moving ahead with some "want to" projects, a buddy gave me a bag full of flush mount LEDs, I've been wanting to do some kind of under carriage lights "rock lights" and thought these would work good.
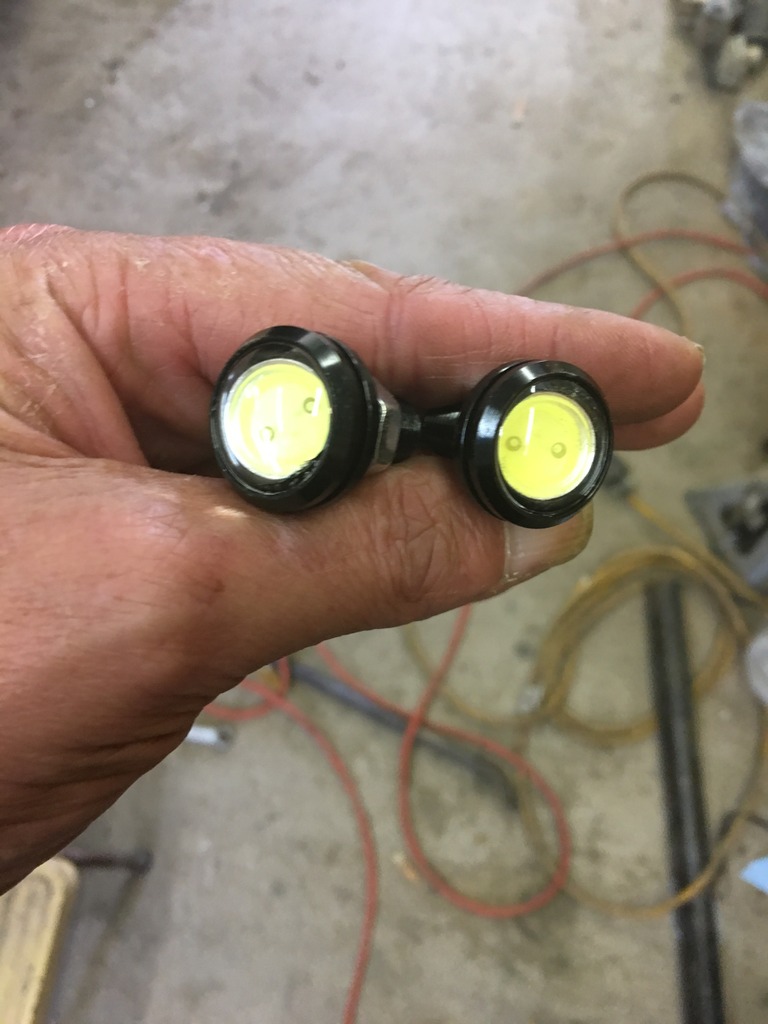
He also gave me a small LED bar so I swapped it in place of the round HELLAs I had on the front bumper, I never used them much but it's nice to have the extra light when you do need it.
I also started working on a better mount for my fridge but nothing picture worthy yet.
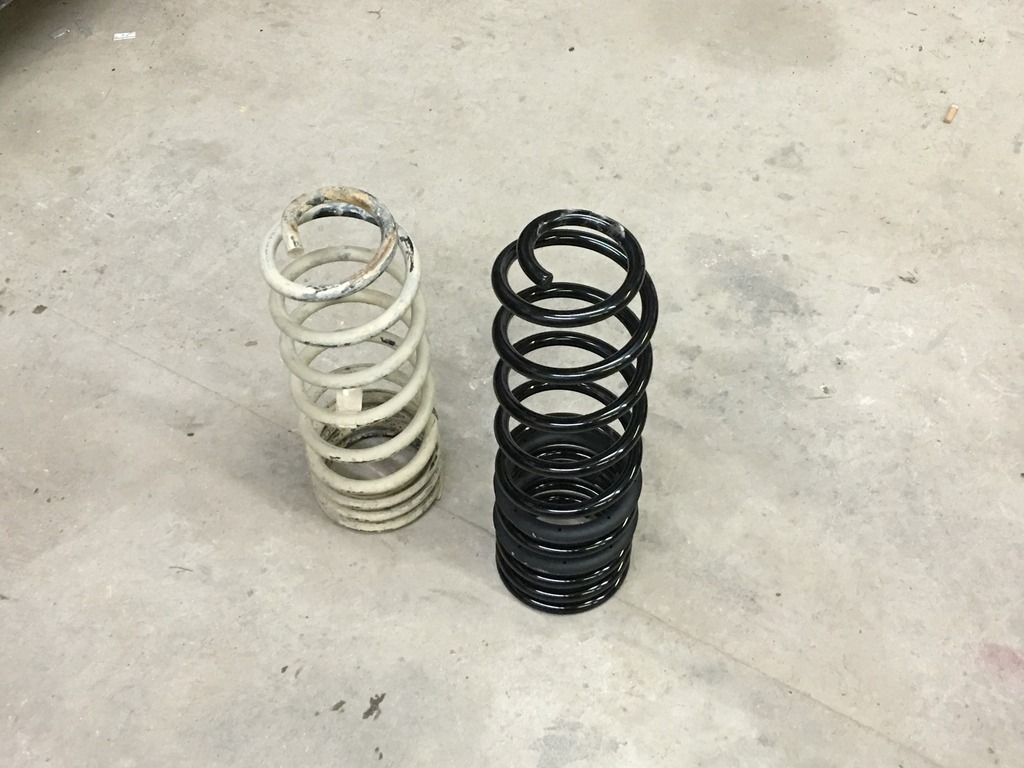
I was really hoping to do the LCA bushing while every thing was apart but after reading some of the material Hab posted I felt comfortable just putting it back together. Can't wait to get it on the trail and try out the new springs as well as maybe start driving it a little more.


He also gave me a small LED bar so I swapped it in place of the round HELLAs I had on the front bumper, I never used them much but it's nice to have the extra light when you do need it.

I also started working on a better mount for my fridge but nothing picture worthy yet.
I was really hoping to do the LCA bushing while every thing was apart but after reading some of the material Hab posted I felt comfortable just putting it back together. Can't wait to get it on the trail and try out the new springs as well as maybe start driving it a little more.
Aug 21, 2016 | 03:52 PM
#820
Thread Starter
Registered User
Joined: Aug 2009
Posts: 2,173
Likes: 0
From: hohenwald tn.
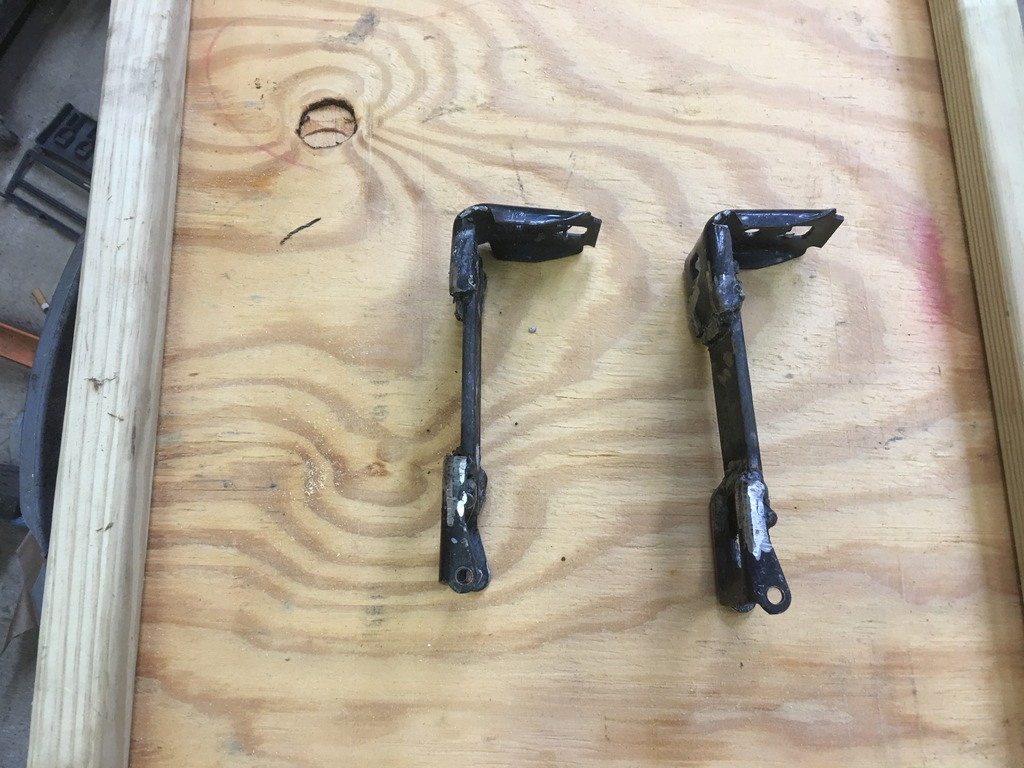
I've been wanting to figure out a better way to securing my fridge for awhile now, I already damaged one of the handles trying to keep it tied down, so I worked on that today.
I grabbed a set of seat base hinges at the salvage yard awhile back thinking I could use the as part of the mount.
I started with a piece of 3/4" plywood and bordered it with 11/4" square stock.
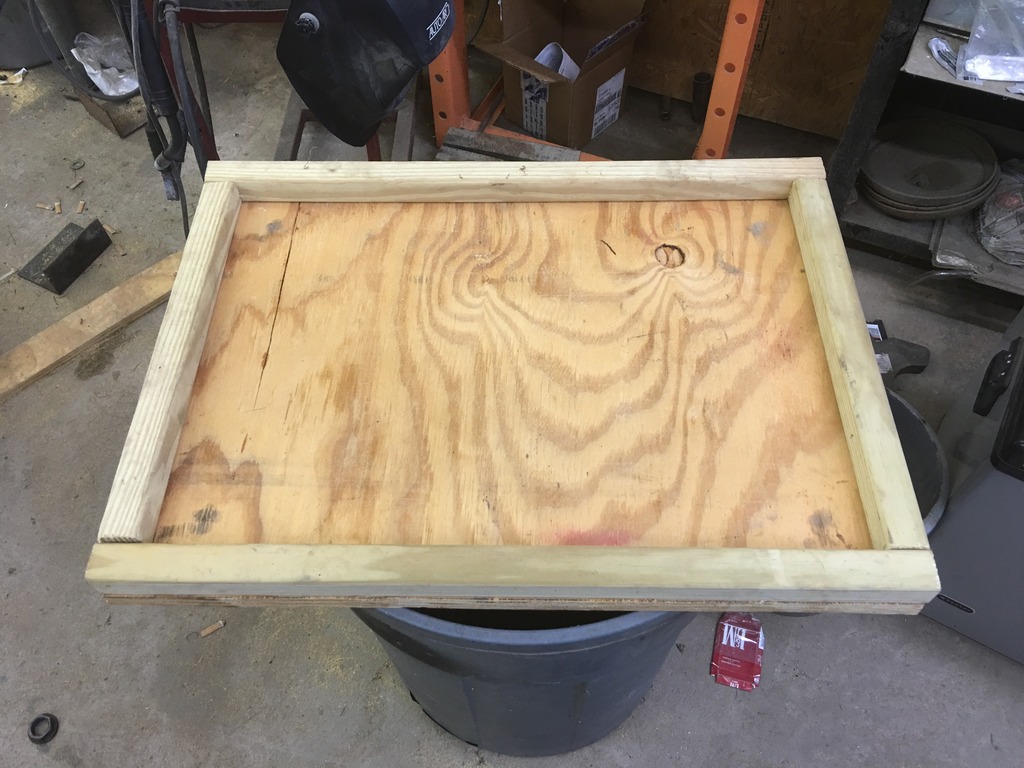
I laid it on top of the seat back hinges and figured out I would have to lengthen the base mount portion, I'm only using the part that bolts to the seat, some of you may remember I set my bases up so I could just pin them in place.
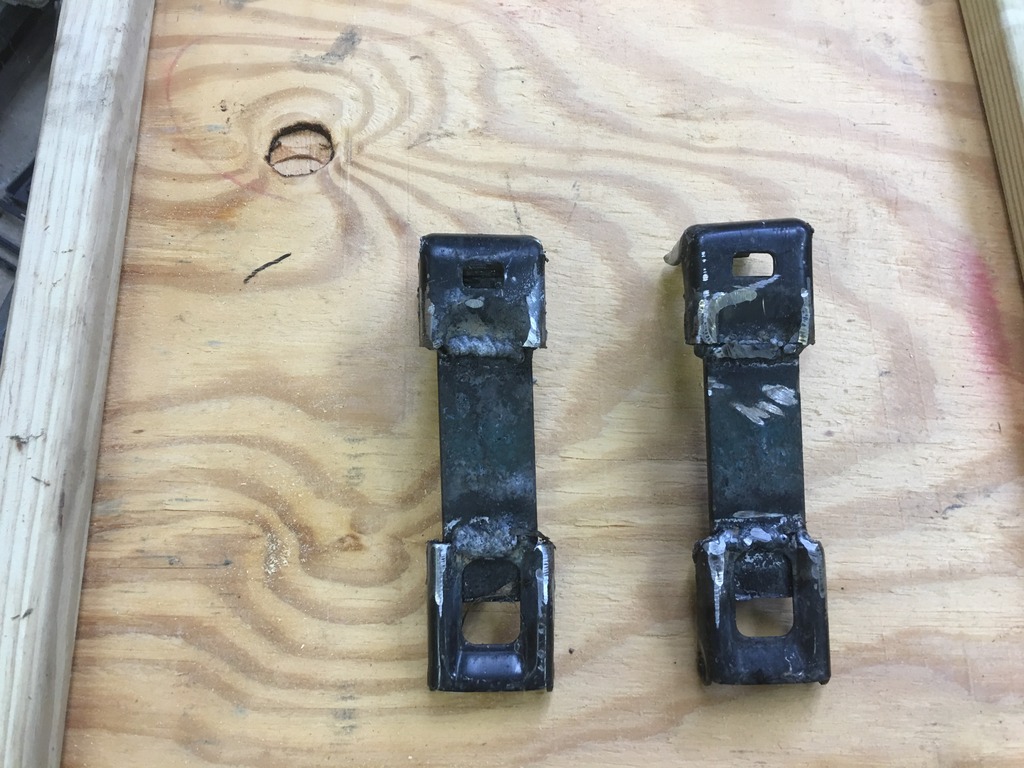
I had to modify the flat mounting surface as well as add 3" to the length.
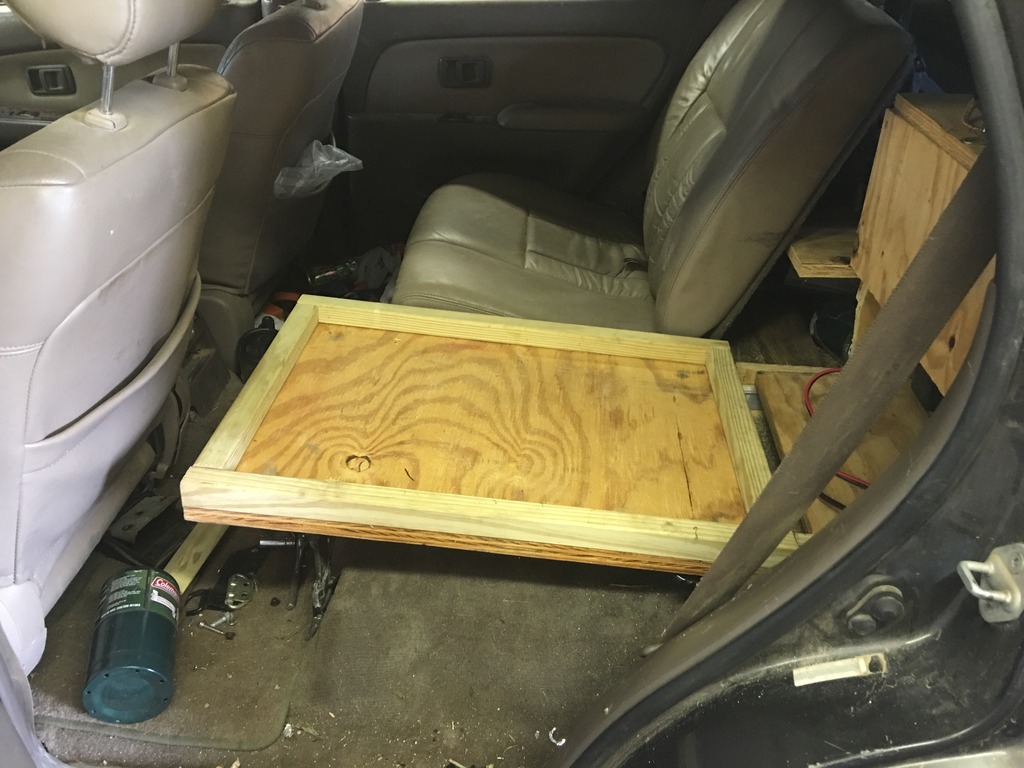
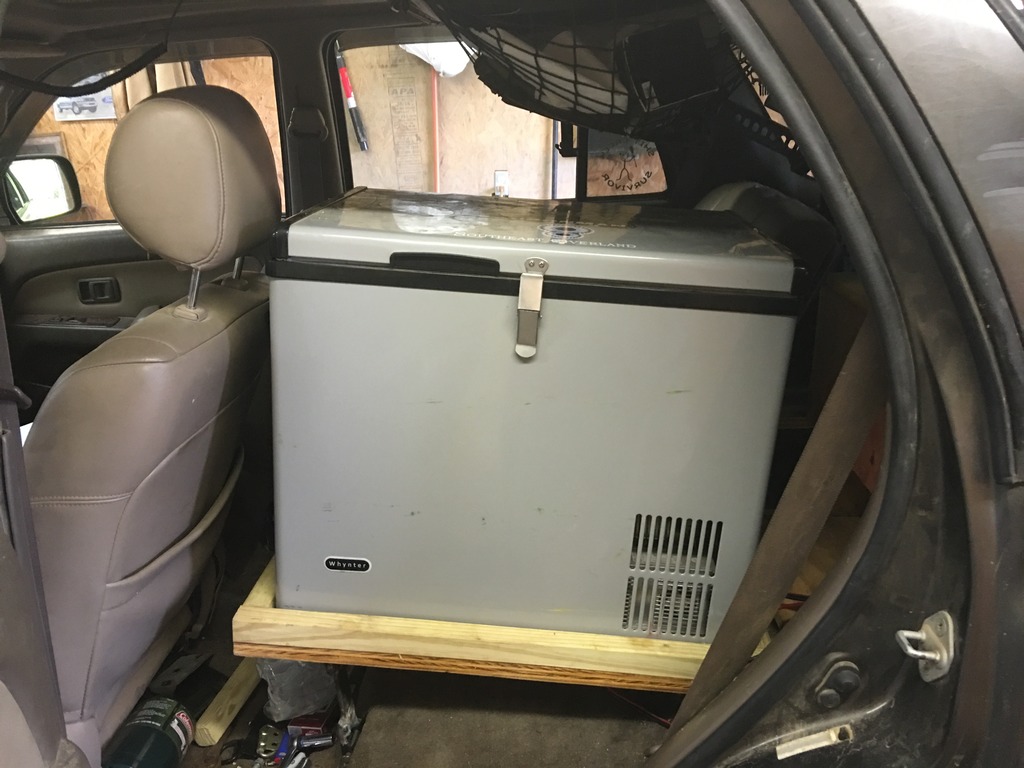
Need to add a couple hooks to strap it down, but I believe it will ride much better now, and if someone wants to steal it they are going to have to work at it, it's a tight fit.
I grabbed a set of seat base hinges at the salvage yard awhile back thinking I could use the as part of the mount.
I started with a piece of 3/4" plywood and bordered it with 11/4" square stock.

I laid it on top of the seat back hinges and figured out I would have to lengthen the base mount portion, I'm only using the part that bolts to the seat, some of you may remember I set my bases up so I could just pin them in place.


I had to modify the flat mounting surface as well as add 3" to the length.


Need to add a couple hooks to strap it down, but I believe it will ride much better now, and if someone wants to steal it they are going to have to work at it, it's a tight fit.


