
jason in tn's 1997 4Runner Build-Up Thread - "the family truckster"
 Jun 22, 2015 | 07:56 AM
#722
Thread Starter
Registered User
Joined: Aug 2009
Posts: 2,173
Likes: 0
From: hohenwald tn.
Jun 28, 2015 | 07:12 AM
#723
Thread Starter
Registered User
Joined: Aug 2009
Posts: 2,173
Likes: 0
From: hohenwald tn.
Ok so the rest of the parts I need should be here in the next few days, the only thing I know I'm going to need will be longer bell housing bolts but I can grab them locally. Probably still going to be a few weeks before I get going on it but I'm ready.
Jun 28, 2015 | 09:00 AM
#724
Registered User

Joined: Jan 2010
Posts: 953
Likes: 21
From: Imperial County CA
Wow! Somehow I missed the manual. There's only one problem I see. In the pictue of your tansmission you've only got one transfer case. I'm assuming the second one is in the pile of parts you're getting in the next few days. 
That's pretty awesome though. Are you going through all the wiring or just going to live with the cel? There has got to be a way to fool the auto ecu into thinking there are still shift solenoids. Anyways, I'm excited for your project. Good luck.
That's pretty awesome though. Are you going through all the wiring or just going to live with the cel? There has got to be a way to fool the auto ecu into thinking there are still shift solenoids. Anyways, I'm excited for your project. Good luck.
Jun 28, 2015 | 11:58 AM
#725
Contributing Member


Joined: Sep 2005
Posts: 8,247
Likes: 497
From: mo
(you got this....the cool big undertaking one of course!)
Jun 29, 2015 | 08:58 AM
#726
Thread Starter
Registered User
Joined: Aug 2009
Posts: 2,173
Likes: 0
From: hohenwald tn.
Wow! Somehow I missed the manual. There's only one problem I see. In the pictue of your tansmission you've only got one transfer case. I'm assuming the second one is in the pile of parts you're getting in the next few days.
That's pretty awesome though. Are you going through all the wiring or just going to live with the cel? There has got to be a way to fool the auto ecu into thinking there are still shift solenoids. Anyways, I'm excited for your project. Good luck.
That's pretty awesome though. Are you going through all the wiring or just going to live with the cel? There has got to be a way to fool the auto ecu into thinking there are still shift solenoids. Anyways, I'm excited for your project. Good luck.
I'm hoping to figure out how to get it done with out the CEL, I've been doing a ton of reading along with a buddy that is much better at electronic stuffs than I am to figure it out. At the moment my area does not require smog testing etc but I would like to do it as factory acting as possible.
Jul 7, 2015 | 01:13 PM
#727
Thread Starter
Registered User
Joined: Aug 2009
Posts: 2,173
Likes: 0
From: hohenwald tn.
Jul 21, 2015 | 05:45 PM
#732
Thread Starter
Registered User
Joined: Aug 2009
Posts: 2,173
Likes: 0
From: hohenwald tn.
Ok so after two days in grueling July heat, I have a manual 3rd gen. I have to say I think getting the old trans out was as hard or harder than putting the new one in, but it's done for the most part.
I will do a full write up when I have a little more time and can sort through the pics. I've only got to drive it a couple miles so far (I had to get back to work) but the trans seems tight no weird noises and it makes the old girl a heck of a lot more fun to drive. Like I said more later, maybe I can get enough information out to help someone else.
I will do a full write up when I have a little more time and can sort through the pics. I've only got to drive it a couple miles so far (I had to get back to work) but the trans seems tight no weird noises and it makes the old girl a heck of a lot more fun to drive. Like I said more later, maybe I can get enough information out to help someone else.
Aug 2, 2015 | 05:54 PM
#733
Thread Starter
Registered User
Joined: Aug 2009
Posts: 2,173
Likes: 0
From: hohenwald tn.
ok I finally have a few minutes and an actual key board so I wanted to post some info on how the manual swap went.
Ok to start, the auto trans and all that came with it were more than happy in their original home, everything faught us bell housing bolts, electrcal plugs everything, we had to pry it lose with a pry bar to break it lose from the block.the only stuff that came apart easy were the the interior parts, the console the shifter etc, there is a strap of metal in the floor thay seperates the shift levers that has to be cut out so I did that while I was inside[I meant to grab a pic of that but I forgot]. It took quite a bit longer than I expected but finaly it was out and on the floor.
we started reassembly with the new fly wheel and clutch assembly pilot bearing etc, that was all pretty straight forward and went smooth, wrestling the new trans and Tcase in was a bit of work but it finnaly dropped into place. contrary to what I had read online the auto crossmember slid rite into place with the new trans mount, a couple bell housing bolts and we called it a day.
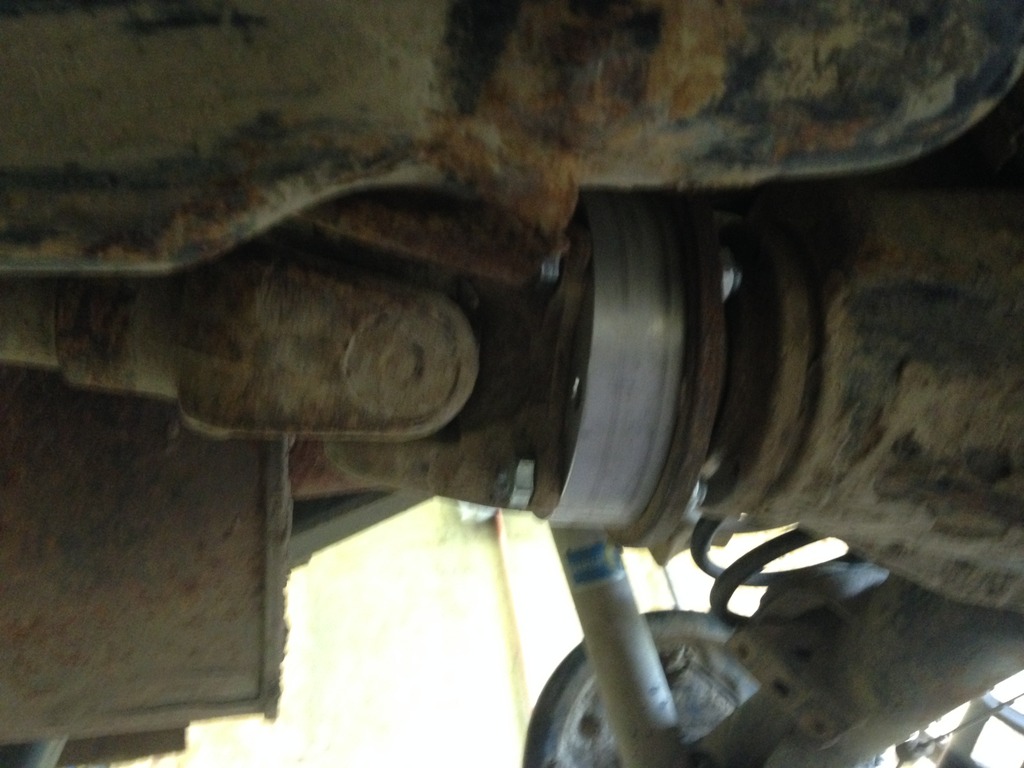
Day two startws with finishing up the bell housing bolts. If your doing this swap you will need three longer bell housing bolts the rest will swap over from the auto. next came drive shafts, evry where I read said that I would need new shafts or atleast the front shaft from a manual truck, I did not have a new front shaft and we planned to just build a shorter shaft for the front but I decided to just test fit my old one and wala it fit just fine [bonus for me]. the dear shaft I decided to compensate for the difference with a 1 inch spacer from TG.
Ok to start, the auto trans and all that came with it were more than happy in their original home, everything faught us bell housing bolts, electrcal plugs everything, we had to pry it lose with a pry bar to break it lose from the block.the only stuff that came apart easy were the the interior parts, the console the shifter etc, there is a strap of metal in the floor thay seperates the shift levers that has to be cut out so I did that while I was inside[I meant to grab a pic of that but I forgot]. It took quite a bit longer than I expected but finaly it was out and on the floor.
we started reassembly with the new fly wheel and clutch assembly pilot bearing etc, that was all pretty straight forward and went smooth, wrestling the new trans and Tcase in was a bit of work but it finnaly dropped into place. contrary to what I had read online the auto crossmember slid rite into place with the new trans mount, a couple bell housing bolts and we called it a day.
Day two startws with finishing up the bell housing bolts. If your doing this swap you will need three longer bell housing bolts the rest will swap over from the auto. next came drive shafts, evry where I read said that I would need new shafts or atleast the front shaft from a manual truck, I did not have a new front shaft and we planned to just build a shorter shaft for the front but I decided to just test fit my old one and wala it fit just fine [bonus for me]. the dear shaft I decided to compensate for the difference with a 1 inch spacer from TG.
 Aug 2, 2015 | 06:10 PM
#734
Thread Starter
Registered User
Joined: Aug 2009
Posts: 2,173
Likes: 0
From: hohenwald tn.
Reassembly went smooth for the most part with a few hickups along the way. the first was trying to bolt the starter back in, we hunted for an hour for starter bolts before discovering that we had them all along but one of themm need to be a longer bolt to fit thru the manual bell housing. I was pleasently suprised to discover that the trans dust sheild from the auto fit the manual because I didnt have one.
we welded on a bracket to hold the soft line hard line union.
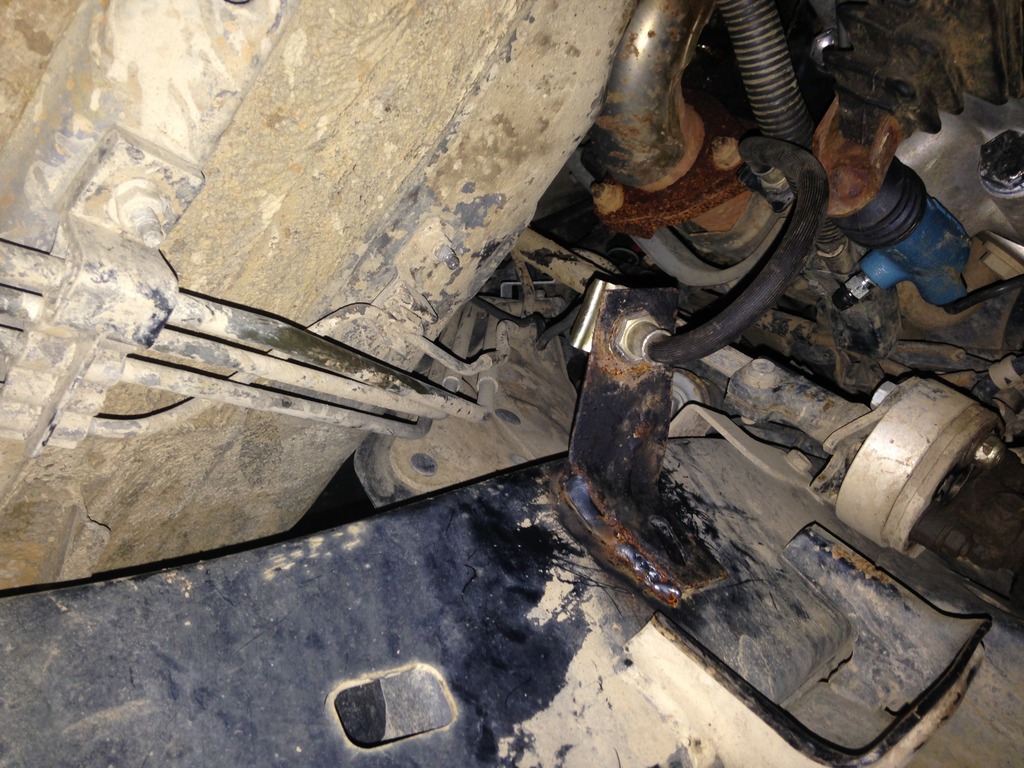
not sure were the factory one is mounted but this spot seemed to be best for what I was working with.
we welded on a bracket to hold the soft line hard line union.

not sure were the factory one is mounted but this spot seemed to be best for what I was working with.
Aug 2, 2015 | 06:26 PM
#735
Thread Starter
Registered User
Joined: Aug 2009
Posts: 2,173
Likes: 0
From: hohenwald tn.
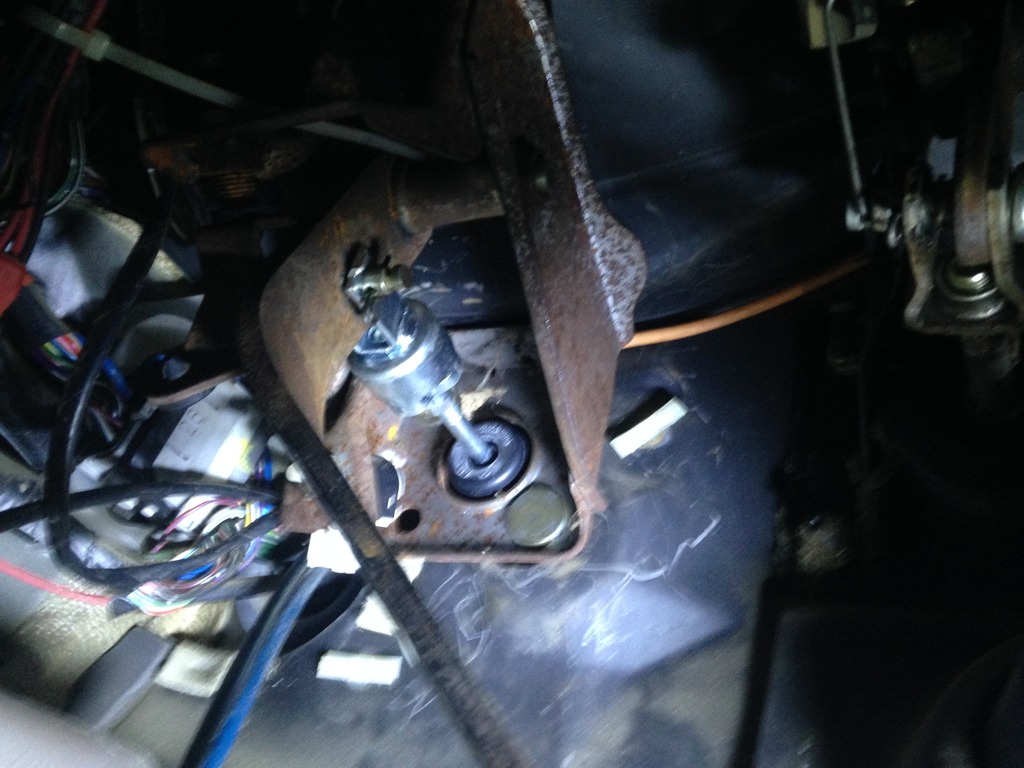
After finishing up evrything underneath we started on the pedal assembly and M/C etc.
I was supprised to see toyota had two perferated cut outs in the insulation on the fire wall and for the one bolt that goes into the dash support.

the hardest part of this process was figureing out a way to lay out the holes as toyota put no dimples or any kind of marks for reference.
we desided to disassemble the cluth bucket to its most basic parts fit it under the dash and mark for the hole, we drill pilot holes from the inside and then finished up from under the hood. the brake pedal was a matter of diconecting the push rod remove the pivot bolt remove pedal and reverse the procedure.
 Aug 2, 2015 | 06:31 PM
#736
Contributing Member
Joined: Sep 2005
Posts: 8,247
Likes: 497
From: mo
You were pretty darned close with your soft line/hard line union bracket....it's right above where you've mounted it, on the body next to the hard lines where it angles upwards from the floor pan doomahickey area you've got pictured there.
Excellent work and what an undertaking!
Excellent work and what an undertaking!
Last edited by habanero; Aug 2, 2015 at 06:33 PM.
Aug 3, 2015 | 04:44 PM
#737
Thread Starter
Registered User
Joined: Aug 2009
Posts: 2,173
Likes: 0
From: hohenwald tn.
You were pretty darned close with your soft line/hard line union bracket....it's right above where you've mounted it, on the body next to the hard lines where it angles upwards from the floor pan doomahickey area you've got pictured there.
Excellent work and what an undertaking!
Excellent work and what an undertaking!
Aug 3, 2015 | 04:59 PM
#738
Contributing Member
Joined: Sep 2005
Posts: 8,247
Likes: 497
From: mo

I only know because I went out and looked right after I saw your pic....curiosity. If you ever want pics from either the 96 or the 99 you know where to find me.
Gotta love a stick.
Aug 3, 2015 | 05:02 PM
#739
Thread Starter
Registered User
Joined: Aug 2009
Posts: 2,173
Likes: 0
From: hohenwald tn.
at this point the wiring started. my buddy and fellow club member Andy Ridge was in charge of this step.
I found this thread http://www.toyota-4runner.org/3rd-ge...es-nuthin.html and this is what he based the wiring on, I also got a lot of other usefull info from this thread. Im not going to lie here folks Im not sure what all was done, Andy was confident after looking over the thread and checking some wiring diagrams that it should work and after getting it together everything seems to be working as it should. Andy did an awesome job and the new harness looks factory.
one part of the wiring involved getting the ADD to work, we [as in the thread above] decided to use the switch in the original Tcase shift knob for this purpose. this set up gives me a very basic version of 2wd low range unless this button is engaged. Im really happy with how this all worked out.
Aug 3, 2015 | 05:21 PM
#740
Thread Starter
Registered User
Joined: Aug 2009
Posts: 2,173
Likes: 0
From: hohenwald tn.
hab I have been going thru your thread a bunch lately trying to find out how things are supposed to look lol. Im loving the trans so far, I kinda wondered if it was what I really wanted to do until I started driving it.


