
habanero's 1996 4Runner Build-Up Thread
 Apr 8, 2019 | 04:57 AM
#3821

Registered User


Joined: Feb 2010
Posts: 748
Likes: 135
From: St. Louis MO
No, that was the new 'fit it and sell it' project. A shop had diagnosed it with a 'scored cylinder wall' and low compression, I'm guessing they used a borescope? Just trying to verify the severity of its issues before pulling the motor out.
And 30 psi is a pretty solid verification. The only slight question left is what is leaking so much compression. After getting a 30 psi 'dry' (not totally dry, I had started and run it briefly prior) I poured some oil down the hole and tested again, and the pressure stayed right at 30 psi. Which... might mean that it's possibly an intake/exhaust valve? I thought ring issues usually showed some sort of improvement on a 'wet' test - with some oil to help then seal. Or maybe that's just worn rings, and these are broken.
Either way, might be worth whipping the front head off to take a look before buying a replacement engine and swapping them out.
Apr 8, 2019 | 05:49 AM
#3822
Thread Starter
Contributing Member


Joined: Sep 2005
Posts: 8,247
Likes: 497
From: mo

It's out in our driveway and I still think his truck when the Highlander is mentioned.

Maybe I should start calling it the Tall Camry?
Last edited by habanero; Apr 8, 2019 at 05:50 AM.

 Apr 9, 2019 | 04:41 AM
#3824
Registered User
Joined: Feb 2010
Posts: 748
Likes: 135
From: St. Louis MO
I sort of half-assed a leakdown. My compression tester gauge has an air hose fitting, pop the gauge off and pop an air hose on. The half assed part was that I didn't try to find TDC first, I just shot air in it, bumped it over a few times to try and find a spot where a valve wasn't open. And... it was hard to tell. I could hear hissing, it didn't sound like the intake tract, I pulled the PCV hose off and couldn't really feel air coming out there, possibly going out the exhaust? Not sure. I was using the 96's on board air as well, 2 gallon tank - and it really couldn't push air into the leak for very long before the compressor kicked on again.
I need to try again after finding TDC on #2. Another thought I had was to just run it with the oil cap off and see how much air is blowing out of that. Majorly blown rings or a holed piston and it's going to be chuffing like a locomotive. But if it's pretty normal... lends some credence to the theory that it's a valve leaking.
I need to try again after finding TDC on #2. Another thought I had was to just run it with the oil cap off and see how much air is blowing out of that. Majorly blown rings or a holed piston and it's going to be chuffing like a locomotive. But if it's pretty normal... lends some credence to the theory that it's a valve leaking.
Apr 10, 2019 | 08:22 AM
#3825
Registered User
Joined: Feb 2010
Posts: 748
Likes: 135
From: St. Louis MO
Only messed with it a couple of minutes last night, but the 'shade tree' leakdown test was... interesting. All I did was take the oil cap off, start it up, and feel for any excessive blowby. And there was practically none at idle. Put it in gear, gave it a little gas and... still practically none. This is starting to make me think cylinder head issues more than piston/rings/cylinder bores.
I might spend some time trying to do a better leakdown test (finding TDC on the low cylinder, more carefully listening for where it's coming out). Or the time might be better spent just whipping that head off. Luckily enough, it's the front head, easy to get to. Not the rear head underneath the intake and pointing back at the firewall.
I might spend some time trying to do a better leakdown test (finding TDC on the low cylinder, more carefully listening for where it's coming out). Or the time might be better spent just whipping that head off. Luckily enough, it's the front head, easy to get to. Not the rear head underneath the intake and pointing back at the firewall.
Apr 13, 2019 | 07:30 PM
#3826
Thread Starter
Contributing Member
Joined: Sep 2005
Posts: 8,247
Likes: 497
From: mo
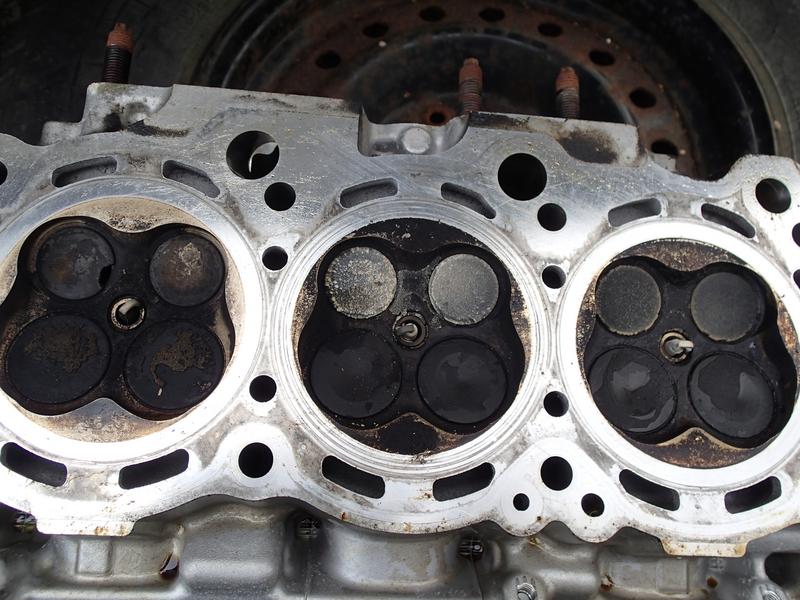
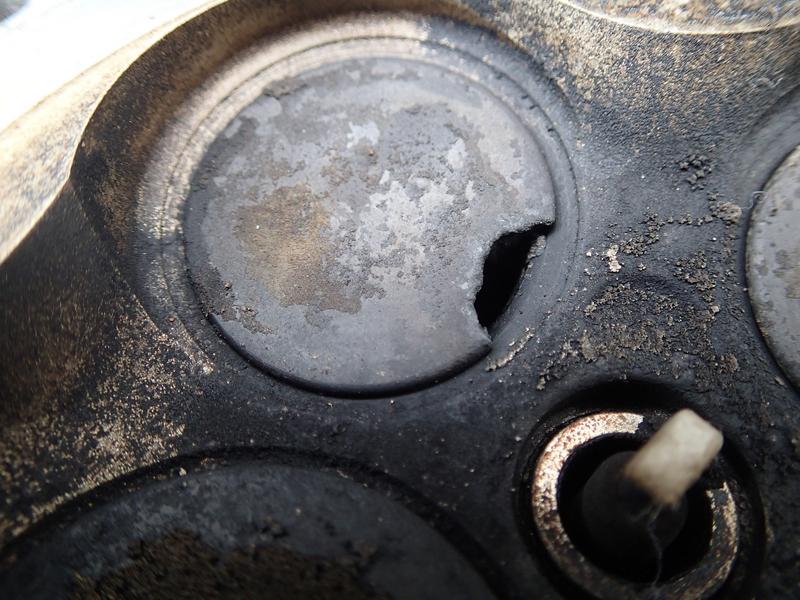
So the husbandio pulled the head off the Tall Camry Highlander and found a burnt n' broken valve. Cylinder itself looks good, as in looks like all the others.
Pick n' pull had an 03 Highlander (tall camry) with the correct engine so we pulled that today.
I've not done much to the 96, started digging into the wiring of an aftermarket alarm system of which only some remains. Ugh, what a mess. May have to back away not too slowly from this one. Or not. I do like a challenge-ish.
 Apr 14, 2019 | 04:25 AM
#3828
Thread Starter
Contributing Member
Joined: Sep 2005
Posts: 8,247
Likes: 497
From: mo
*duct tape holds juuuust long enough to sell* Buyer >
Us too. Valve seals are one of the things we're thinking about.
He's been doing most of the work so far, I'm thinking to avoid the drainage project.
He's actually done a lot on that too and I wish I'd have jumped on the Tall Camry project first to leave all the digging for...
somebody else.
 Apr 14, 2019 | 04:48 PM
#3829
Thread Starter
Contributing Member
Joined: Sep 2005
Posts: 8,247
Likes: 497
From: mo
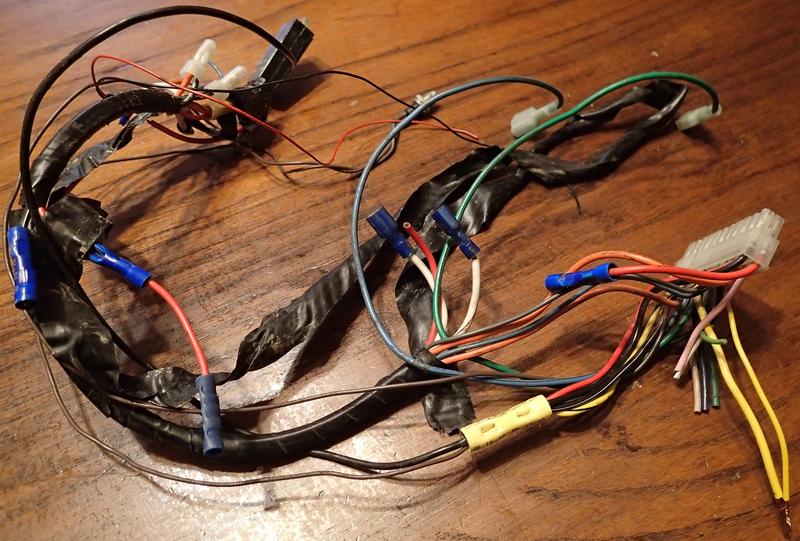
Today I removed the residual wiring from an aftermarket alarm system...no, I didn't do any wire cutting....
It's been cold and rainy all day, blech.
It's been cold and rainy all day, blech.
Last edited by habanero; Apr 14, 2019 at 04:49 PM.
Apr 14, 2019 | 05:46 PM
#3831
Thread Starter
Contributing Member
Joined: Sep 2005
Posts: 8,247
Likes: 497
From: mo
It wouldn't start once ages ago because one of the wires had become undone, but other than that it hasn't misbehaved anything.
Apr 15, 2019 | 11:39 AM
#3834
Thread Starter
Contributing Member
Joined: Sep 2005
Posts: 8,247
Likes: 497
From: mo
I didn't want to see theevil.
Imagine my surprise when it actually started!
Really, the alarm wasn't there any more, just this mess o' spaghetti. All I had to do is extract it, then reconnect one wire. Everything else was either butt connected, vampired, or cut. I do have a wire coming from the big connector on the fuse block that the two yellow wires were butt-connected to, I'll have to go over the schematic to figure that one out. It looks like an add-in, but that surely wouldn't fit in with the way the rest of the wiring was put together- other than the gauge and coloring of the wire, the same as wires it was connected to.
Apr 16, 2019 | 05:18 AM
#3835
Thread Starter
Contributing Member
Joined: Sep 2005
Posts: 8,247
Likes: 497
From: mo
96 4Runner 305,857 miles
Swapped out the spaghetti alarm wiring for an RS3000 I pulled out of a '97 at the junkyard on a lark. The RS's wiring harness is pretty much plug n' play-ish, with a few taps. If it turns out to be a stupid idea pulling it out won't take much work.
It recognizes the fob that was with it in the '97 so there's that.
May 1, 2019 | 06:48 PM
#3836
Thread Starter
Contributing Member
Joined: Sep 2005
Posts: 8,247
Likes: 497
From: mo
96 4Runner 306,068 miles
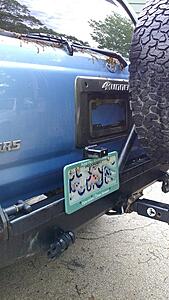
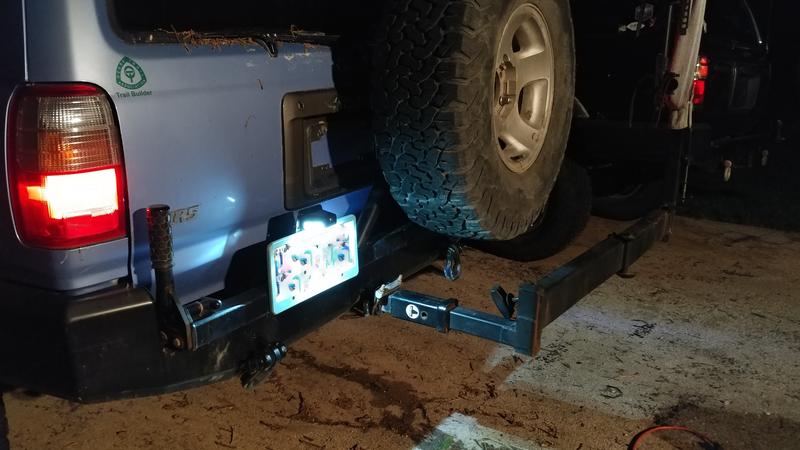
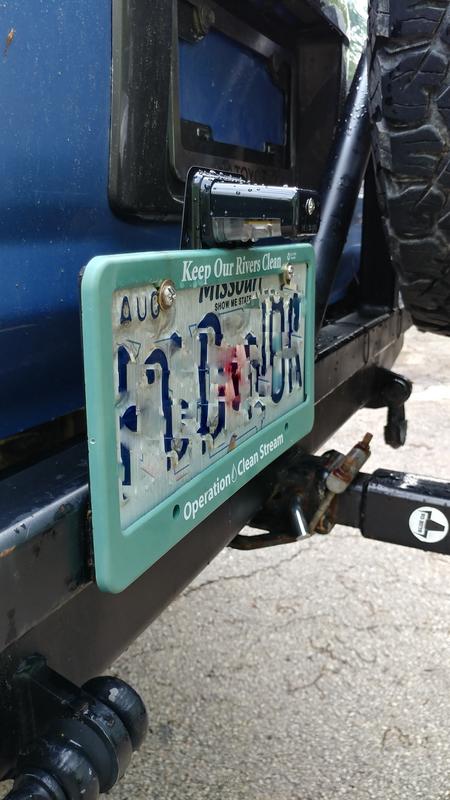
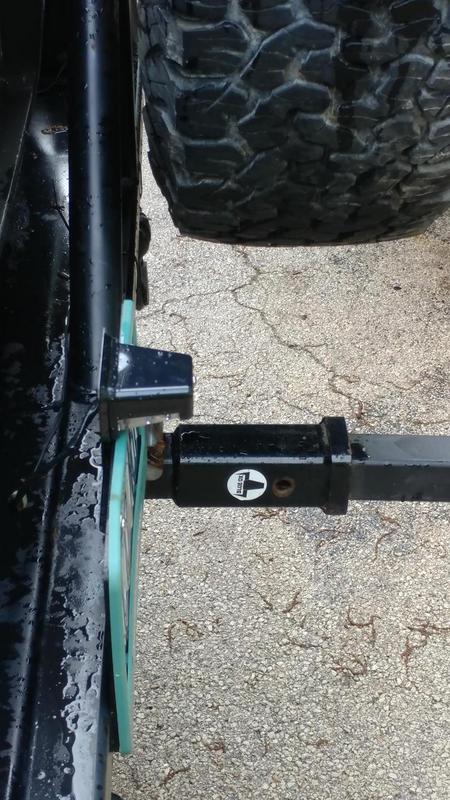
I have the 4xInnovations rear bumper with tire carrier which has a license plate holder on the swing-out itself. It came with 2 small led lights that are also the bolts to attach the plate to the holder. Simple and it worked great for awhile but there are a couple of things that needed changing. The most important is if you wire it up as I did, without a connector, you have to cut the wire to remove the plate. IF you do use connectors you have to make sure they will fit through the nut that holds the light on. The less important thing is one of them broke so I have to replace at least one of them anyway.
I wanted to be able to remove the plate when I get my new plates (MO has a new style plate and are replacing the old ones) and replace the broken light.
My solution:
Very bright, sticks out almost 2" from the plate. I would have liked something a little more slim, but considering how much more the tire sticks out from the back that little light doesn't look too weird.
This time I used a lamp cord I had laying around for the wiring between the taillight and the license plate light and also added a Toyota 2-wire connector though now I don't have to mess with the wiring just to remove the plate.
I finished up in the dark and couldn't get decent pics, will try to remember to through some up tomorrow.

Last edited by habanero; May 2, 2019 at 06:27 AM.
May 6, 2019 | 02:37 PM
#3837
Thread Starter
Contributing Member
Joined: Sep 2005
Posts: 8,247
Likes: 497
From: mo
96 4Runner 306,xxx miles
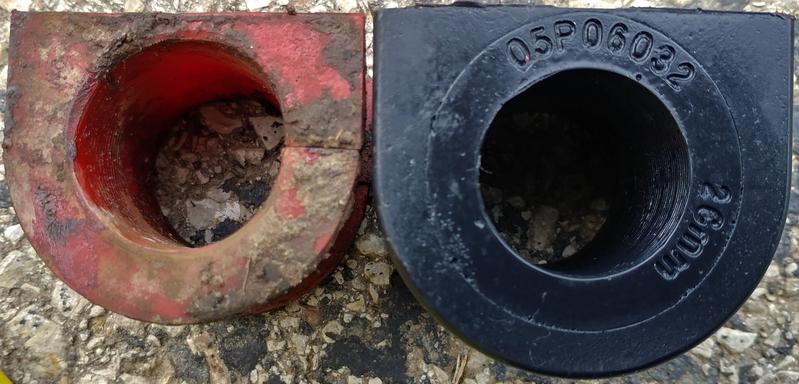
Found the 26mm poly sway bar bushings' holes have gotten bigger over time, it was one of my mild clunk sounds. Still lasted way longer than the oe rubber bushings.
New 26mm poly bushings
Energy Suspension 8.5141G Front Sway Bar Set 26mm
They look a lot different...hard to tell, but the black one has a smaller opening than the red one. Both were originally 26mm. No more clunk clunk.
Last edited by habanero; May 16, 2019 at 05:41 PM.
 May 16, 2019 | 05:38 PM
#3839
Thread Starter
Contributing Member
Joined: Sep 2005
Posts: 8,247
Likes: 497
From: mo
im new and cant make a thread yet. any chance 1 could be started for me or even get help in this thread.
so much wisdom from reading this forum last 40hr almost nonstop(still slept and ate and got mind blown). TY! i have so much to learn still. I am soon to be responsible for access to isp towers south of steamboat springs near winter park colorado. building my first 3ft+ deep snow yota suv and i need to know which platform to base it all on. 10k total build but 7k is really a better target. tires 1500 (cooper discoverer a/tw to handle mix of snow on ice w no trail under it and a 5th tire/rim. 285/65r18 or 285/70r17 but probably 285/75r16 depending on what comes with the purchase of the suv. ) https://www.google.com/shopping/prod...tbs=vw:l,ss:44
. winch 500. lightbar�2 800. wheel and shovel roof rack, skidplates, rolltube bumpers and slider bars im hoping to purchase w it but that we can fab too so 200??400??(always had some never paid for) in scrap. lift 1500-2000 depending on platform and what comes with it. i see 96 4runner w manualtranny and 4x4 as my best dollar use i think but no v8. u guyz kill me now w super comparison to it vs sequoia vs highlander vs 2000 4runner v8 for only the deep snow and hell(ice and/or no trail)for surface under it. and i can also listen to other suvs. any other needed equip? air compressor and inverter along w crapton of tools in welded into bed lockbox are coming from the company. how much lift do i need for the tire and is 285/75r16 big enough tire? ty everyone for any help or new thread. and super thx in advance for the fact that there is so much info in this forum i know the answers are here already i am just lacking experience w this much snow and have almost 0xp w suv or lifts. never needed a suv or lift until now. i think it totals at 5200 for everything else other than the suv, im guessing a margin for tune up and repairs is safe so a max price of 3800 for suv.
Last edited by habanero; May 16, 2019 at 05:39 PM.


