
Terrys87 88 4Runner Restoration/Build thread


 Aug 13, 2012 | 02:07 AM
#864
Thread Starter
Super Moderator
iTrader: (1)
Joined: Aug 2008
Posts: 11,787
Likes: 28
From: Anderson Missouri
Hello Redeth005...That mouse made the whole truck his mansion. Think I have finally got all of his belongings out of there.
Hello Jameser84...If I keep getting trucks with mice in them, I may be getting a cat. lol, Looking forward to meeting you in Springfield.
Hello Jameser84...If I keep getting trucks with mice in them, I may be getting a cat. lol, Looking forward to meeting you in Springfield.
Aug 13, 2012 | 02:12 AM
#865
Thread Starter
Super Moderator
iTrader: (1)
Joined: Aug 2008
Posts: 11,787
Likes: 28
From: Anderson Missouri
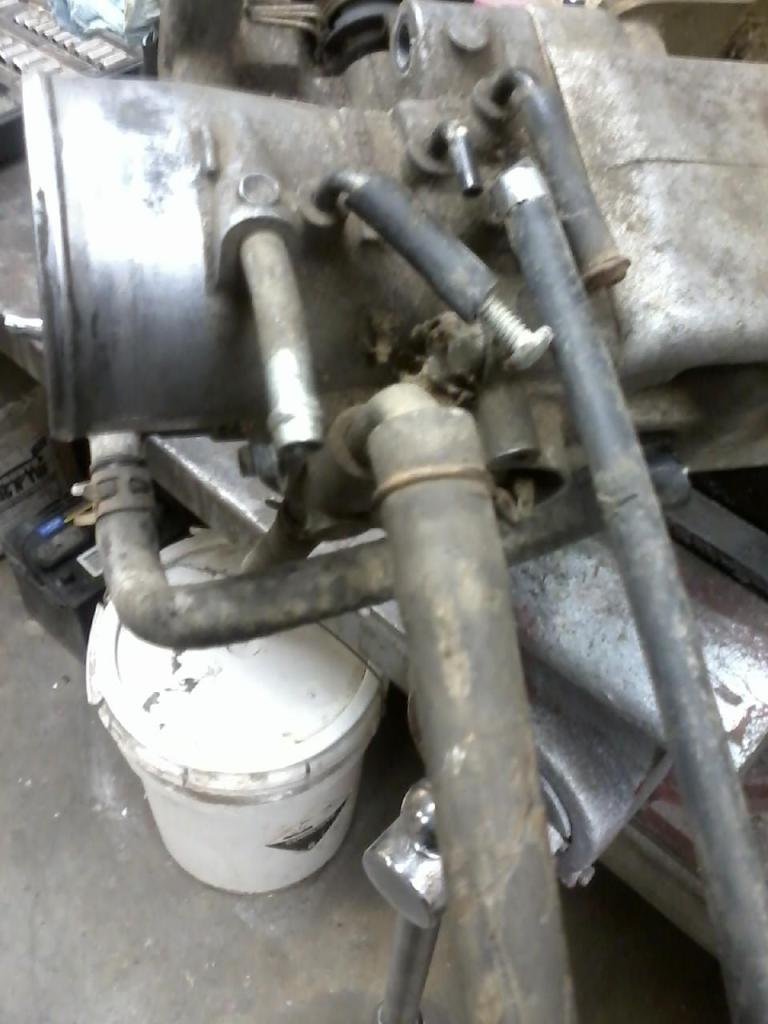
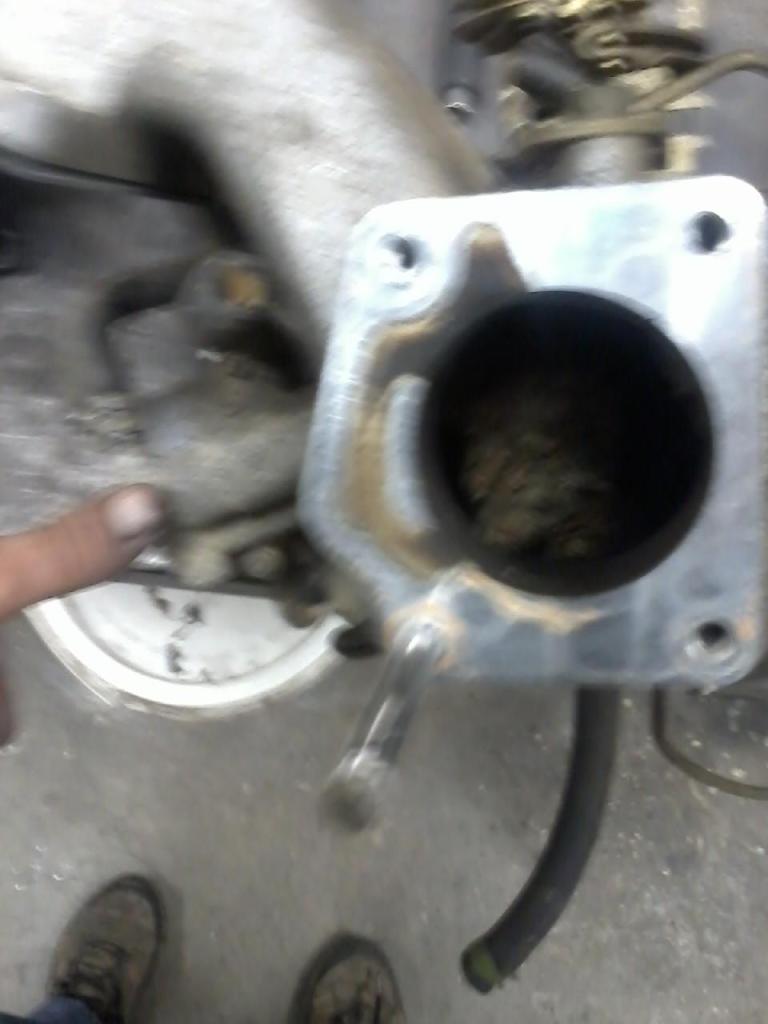
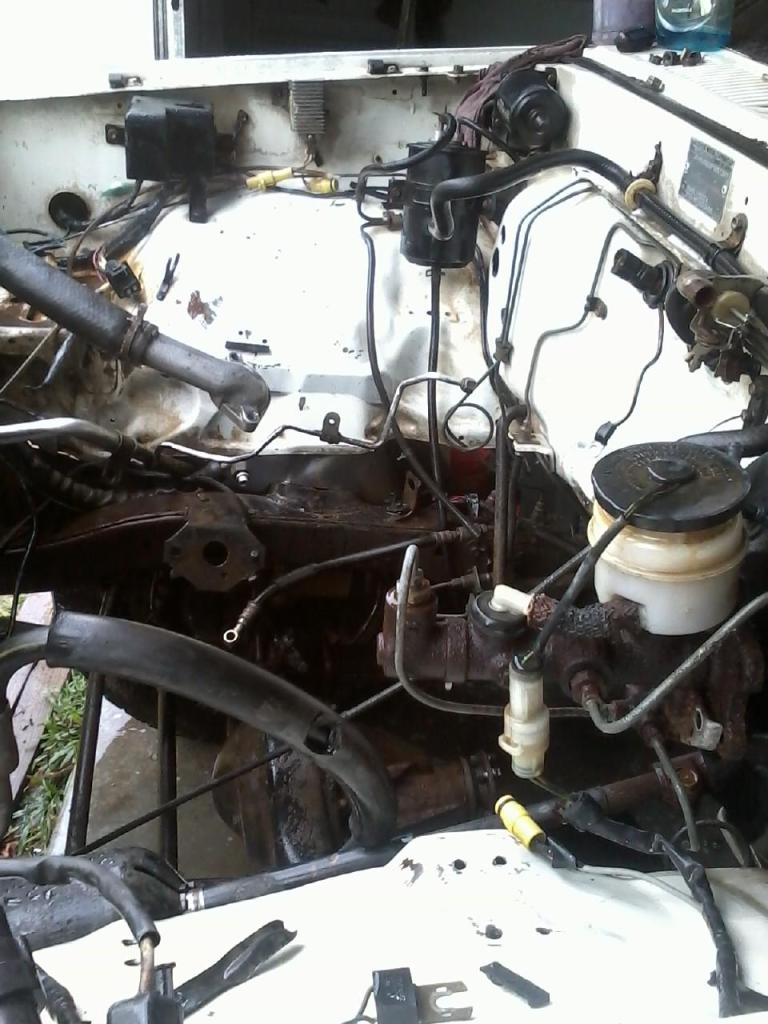
I finally got the truck in the shop. Still doing some cleaning and started to clean some parts. The intake on this 85 is a little different from other 22re's I have worked on. It has a valve of some sort under the throttle body. Unfortunately it has a piece broke off of it. I might be able to fix it, but have thought of putting a newer Plenum on it. Someone got the TPS off of it, so will be replacing it.
In the shop. Should be pulling motor tomorrow if all goes well.
Broke piece and differnent valve then what I have seen in past.
In the shop. Should be pulling motor tomorrow if all goes well.
Broke piece and differnent valve then what I have seen in past.
Aug 14, 2012 | 01:11 AM
#868
Thread Starter
Super Moderator
iTrader: (1)
Joined: Aug 2008
Posts: 11,787
Likes: 28
From: Anderson Missouri
I tried to make a video of getting the nut from behind the dash and didnt like the way it turned out. Will try it again tomorrow as I will be doing some things. Will do the dash removal in segments.
I have been washing the truck with bleach water trying to get it nice and sterile in there and still have a slight musty, old car smell. I think it is the headliner and it is falling down. I am thinking of pulling it out and will have to bear the cost of having a professional to install the headliner. It is looking raggedy anyways.
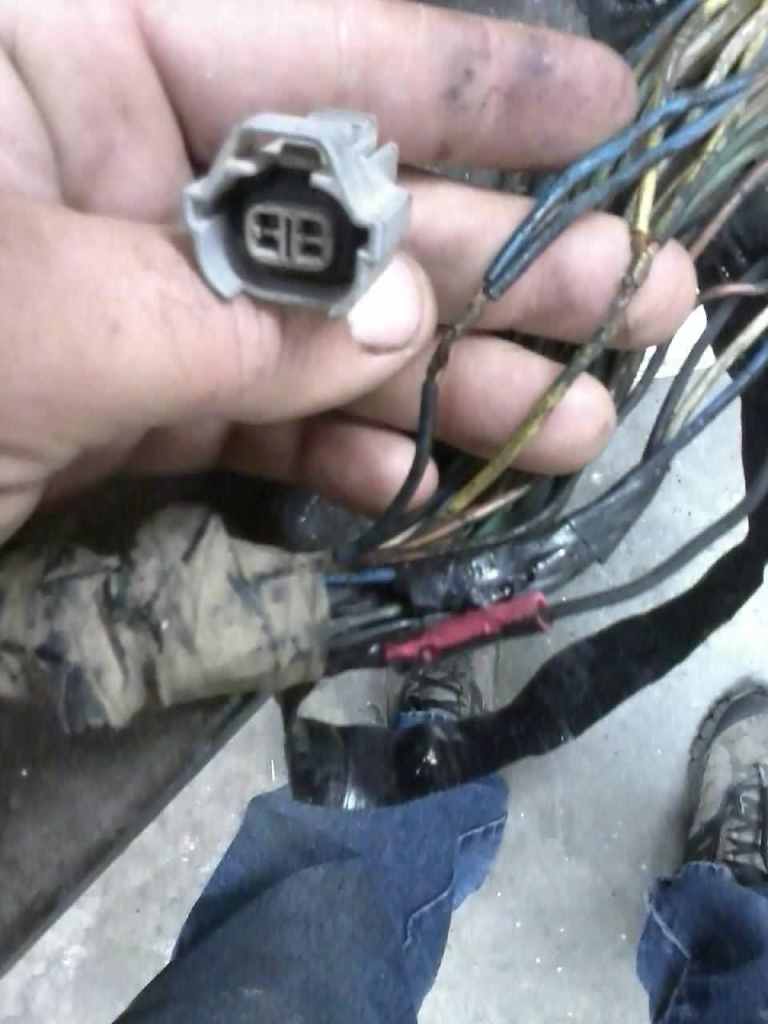
I pulled the injector harness out to check and make sure it is in good shape and if I even want to use it. I will repair it as I have those wonderful red butt connectors that just burn me up on it as well as the 88 truck I am working on.
Someone did put the newer style injector connections on it. These are a far better connector and if it will work on your truck is a great upgrade. They were on the 91s and up if I recall right. Just dont know if they will connect to the older style. 88s have a different injector. I will see if these will work on mine as I like them so much better then the wire clip.
I took this harness out just to make it easier to fix the other problems, but getting the injector connections is easily done in the truck. These caused me alot of headaches on my 86 runner build and I am determined to rid the world of these things. It just unplugs from the ECU and the cable is pushed out from the inside underneath the wiper motor. Might would be just as easy to get a complete one out of the boneyard for the newer style connectors, but dont know for sure.
The blue and yellow wire is to the injectors. These clips are through out the truck. Several within 6 inches of the computer, but they are in a dry area and dont corrode. Some in the tail light harness. Never had any proablems there either.
I have been washing the truck with bleach water trying to get it nice and sterile in there and still have a slight musty, old car smell. I think it is the headliner and it is falling down. I am thinking of pulling it out and will have to bear the cost of having a professional to install the headliner. It is looking raggedy anyways.
I pulled the injector harness out to check and make sure it is in good shape and if I even want to use it. I will repair it as I have those wonderful red butt connectors that just burn me up on it as well as the 88 truck I am working on.
Someone did put the newer style injector connections on it. These are a far better connector and if it will work on your truck is a great upgrade. They were on the 91s and up if I recall right. Just dont know if they will connect to the older style. 88s have a different injector. I will see if these will work on mine as I like them so much better then the wire clip.
I took this harness out just to make it easier to fix the other problems, but getting the injector connections is easily done in the truck. These caused me alot of headaches on my 86 runner build and I am determined to rid the world of these things. It just unplugs from the ECU and the cable is pushed out from the inside underneath the wiper motor. Might would be just as easy to get a complete one out of the boneyard for the newer style connectors, but dont know for sure.
The blue and yellow wire is to the injectors. These clips are through out the truck. Several within 6 inches of the computer, but they are in a dry area and dont corrode. Some in the tail light harness. Never had any proablems there either.
Aug 14, 2012 | 08:20 AM
#869
Thread Starter
Super Moderator
iTrader: (1)
Joined: Aug 2008
Posts: 11,787
Likes: 28
From: Anderson Missouri
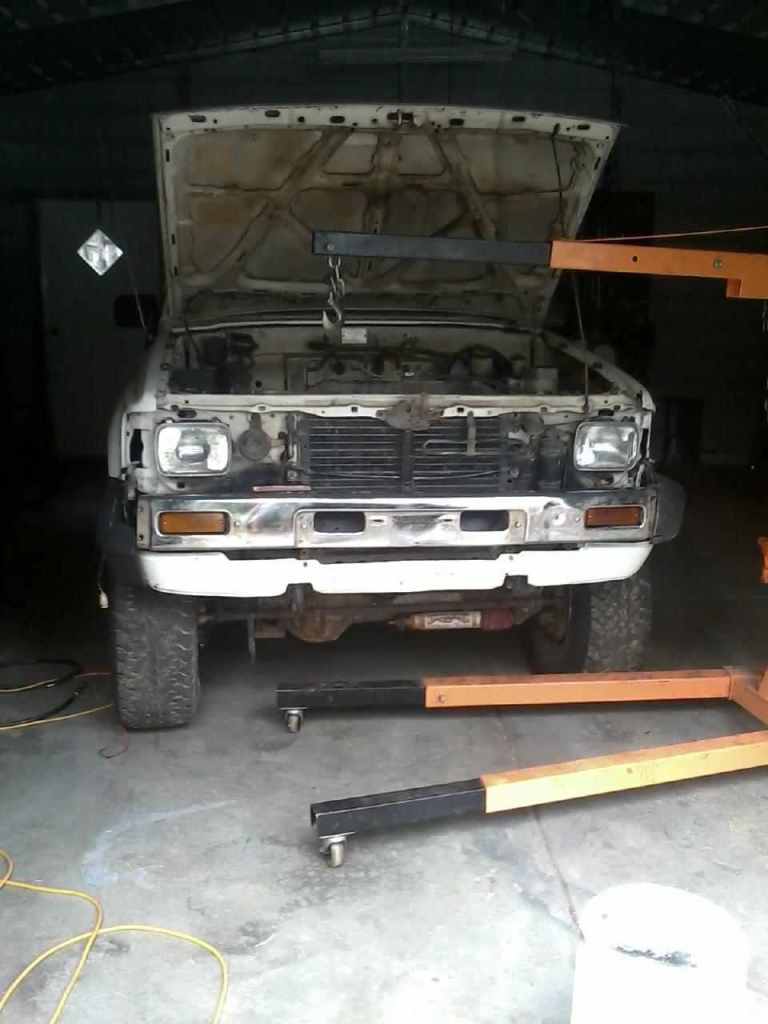
Went to change a ball joint on the 88 truck and parts store didnt have one in stock til later today. So did some cleaning on this truck. Got the motor out, the head is missing on it, other then the injector harness, it isnt really hacked up. Had few leaks but not major.
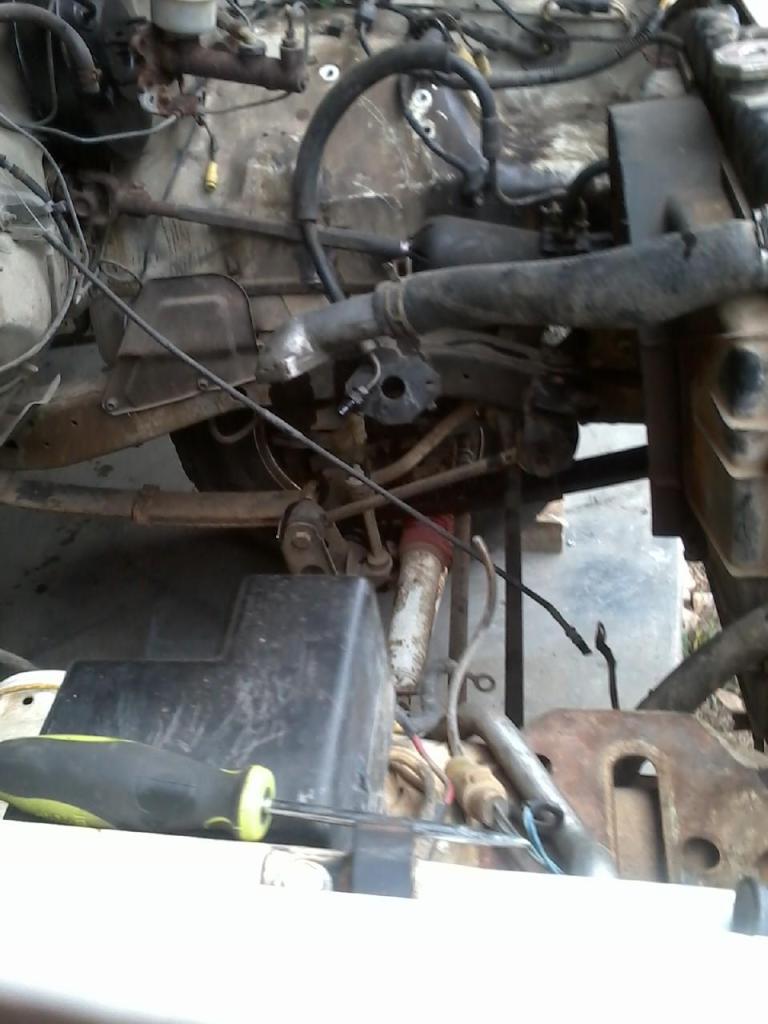
Will do some more cleaning later on and get some of the parts cleaned up as well. If you are using a high pressure wash over Purple Power,scrub brush, rag and some Dawn dish soap, you just dont know what you are missing out on. Someday I will own one.
Will do some more cleaning later on and get some of the parts cleaned up as well. If you are using a high pressure wash over Purple Power,scrub brush, rag and some Dawn dish soap, you just dont know what you are missing out on. Someday I will own one.
Aug 14, 2012 | 08:29 AM
#870
Registered User


Joined: May 2005
Posts: 1,977
Likes: 231
From: S. FL
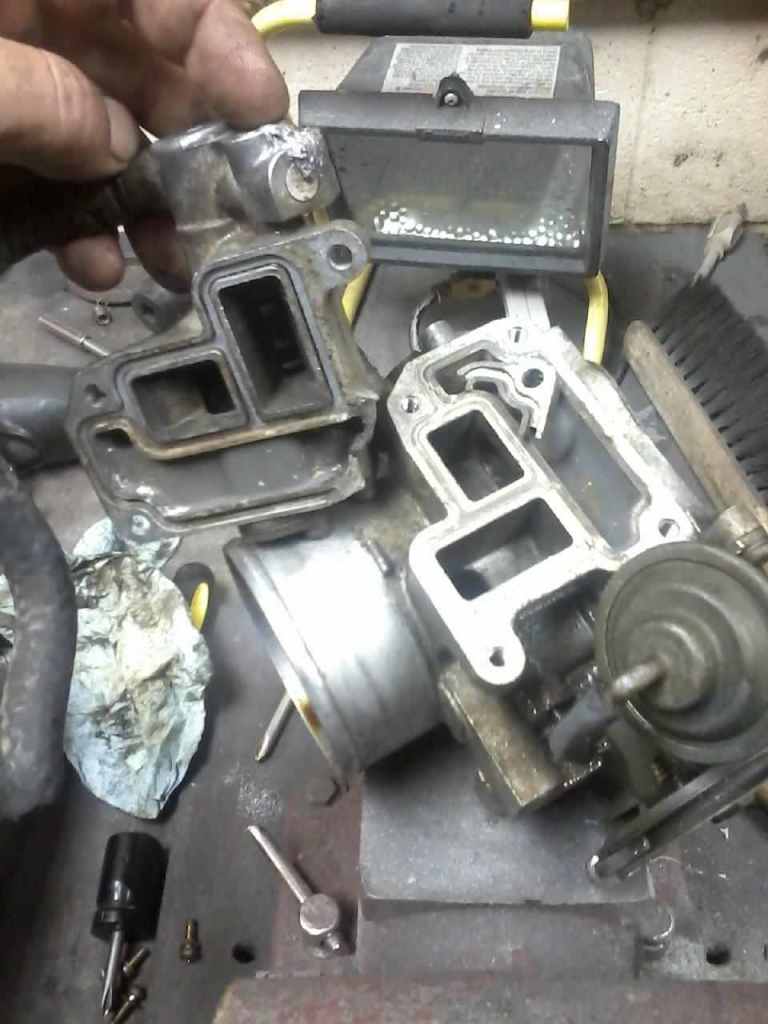
Terry - looks like your 85 has the newer style "straight" throttle body versus the older "slanted" style. That valve on it is the newer style idle air control valve. The 88 and older 22re's have the separate IACV that mounts under the intake and has hoses that go up to the throttle body. Supposedly you have a desirable upgrade there, a lot of people are moving to that style throttle body, the newer upper intake, and of course they get that newer style IACV along with the TB. I don't know if it actually makes a difference or not. Here is a neat link about it http://siestaoffroad.com/tbody.html
That person also had their Throttle body bored out...I think that stuff is years away for me, I'm still in get my truck back close to stock shape mode, then maybe I can do some of these extra power upgrades.
That person also had their Throttle body bored out...I think that stuff is years away for me, I'm still in get my truck back close to stock shape mode, then maybe I can do some of these extra power upgrades.
Aug 14, 2012 | 08:40 AM
#871
Thread Starter
Super Moderator
iTrader: (1)
Joined: Aug 2008
Posts: 11,787
Likes: 28
From: Anderson Missouri
Thanks Cory..I didnt even notice the straight over the tilt. I will get that piece fixed now, one way or the other. Thanks again for the link. That is a new one on me.
 Aug 14, 2012 | 10:57 AM
#874
Registered User
Joined: Jul 2012
Posts: 2,365
Likes: 4
From: Idaho
 Aug 14, 2012 | 12:15 PM
#876
Yep, he would seem to be a 'NUT' to many with all he takes on, lol.. but we know better.. I don't think it's PC to say nuts anymore.... So let's just say he has "TOYOTATICULITIS"!
 hehe........
  , Terry!
Aug 14, 2012 | 12:17 PM
, Terry!
Aug 14, 2012 | 12:17 PM
#877
YES, guys, good info, thanks!
Aug 14, 2012 | 07:01 PM
#878
Hi Terry, you're making some really fast progress, just trying to get caught up with your build! I had a question going back to the paint you used on your dash. Will the same paint work on the door panels? I've been contemplating changing my interior color over to gray, (since my cargo panels and dashpad would need painted anyway) I might as well do a color change, since my grey seats are in pretty good shape. So anyway, just wondering if you use the same paint on all the interior components. What would you use on the seatbelts? Thanks!
Last edited by rustED; Aug 14, 2012 at 07:03 PM.
Aug 15, 2012 | 12:38 AM
#879
Thread Starter
Super Moderator
iTrader: (1)
Joined: Aug 2008
Posts: 11,787
Likes: 28
From: Anderson Missouri
Hello Outsane..I somehow missed that on your thread. That was good info and I would probably never have caught the angle of the Throttle Body.
Hello Coryc85..Probably boring it out wont happen for me either, but I will take any extra horsepower that I just happen to stumble into.
Hello Cyberhorn The Dragon... That was funny. I got a kick out of it.
Hello Chef..You wont see it if in plain sight. The only way I would of noticed it was if it was next to the other style Plenum. Same way with tools, spent alot of time looking for something and it is in plain sight.
Aug 15, 2012 | 12:55 AM
#880
Thread Starter
Super Moderator
iTrader: (1)
Joined: Aug 2008
Posts: 11,787
Likes: 28
From: Anderson Missouri
Hi Terry, you're making some really fast progress, just trying to get caught up with your build! I had a question going back to the paint you used on your dash. Will the same paint work on the door panels? I've been contemplating changing my interior color over to gray, (since my cargo panels and dashpad would need painted anyway) I might as well do a color change, since my grey seats are in pretty good shape. So anyway, just wondering if you use the same paint on all the interior components. What would you use on the seatbelts? Thanks!
I do use the same interior paint on all of the materials. Never tried the headliner though but it should work. On the seatbelts if they are clean, I just spray it right on. I just undo the top bolt and stretch out the door and spray it straight on. I lay an old towel over the door thresh hold to prevent over spray.
I do about the same thing for cleaning them with a scrub brush and let them dry then spray them. There is plenty of length on the belt that you will never see the part that is unpainted, about 8 inches next to the spool.
Removing the seatbelt isnt a bad job, but nearly all of the panels need to come out.
I know you dont have the rear seat latch assembly on the upper part of the seats so this may not apply to your situation. But just incase there is something I am unaware of you may want to follow the tip below.
If you arent going to pull your top off and remove the roll bar, You need to unbolt the roll bar and slide it back and tilt it forward. The rollbar angles in just enough to let you get the rear panel off to clear the rear seat latch assembly. Those rear panels are BRITTLE and will snap, but with the rollbar tilted forward, laying on floor, it gives plenty of clearance. I havent found away of getting the rollbar out with out removing the top.


