
Terrys87 88 4Runner Restoration/Build thread
 Aug 4, 2012 | 02:29 PM
#801
Thread Starter
Super Moderator
iTrader: (1)
Joined: Aug 2008
Posts: 11,787
Likes: 28
From: Anderson Missouri
Thanks Jason..Appreciate the compliments. You are right about using the right tool. I am working on a core support for my 86 as if you remember how bad the one was rusted that I put on it. I got the core off of the 87 you helped me get. A spot weld cutter is worth its money in gold but they are cheap. I spent 4 hours and no telling how many drill bits I ruined drilling out the spot welds off of the core off of the rusty runner I parted.
I kid you not, I did 3 spot welds in like 3 minutes. I was shocked and still POed at myself for not buying a spot weld cutter. It was cheap and I got it at Harbor Freight so I am curious as to how long it will last. That will be coming up in a few days of getting the new core support ready for the runner.
I kid you not, I did 3 spot welds in like 3 minutes. I was shocked and still POed at myself for not buying a spot weld cutter. It was cheap and I got it at Harbor Freight so I am curious as to how long it will last. That will be coming up in a few days of getting the new core support ready for the runner.
Aug 4, 2012 | 02:37 PM
#802
Thread Starter
Super Moderator
iTrader: (1)
Joined: Aug 2008
Posts: 11,787
Likes: 28
From: Anderson Missouri
Hello Mark.. Mine had some rust on it and I used a wirebrush to clean it up and put some WD 40 for a protective coating at the pivot point or where it spins/twist on the bracket itself.
Make sure the wires slide in the cables easily. I replaced one that was hard to operate. The lever was fine, it was the cable, but it can still mess up where the wire connect to the lever and ruin the lever.
Make sure the wires slide in the cables easily. I replaced one that was hard to operate. The lever was fine, it was the cable, but it can still mess up where the wire connect to the lever and ruin the lever.
Aug 4, 2012 | 02:46 PM
#803
Right, but does this mean that in order to lube up/clean up that channel that the cable glides in.... I'd have to remove the dash half way to do so? I thought you were talking about spraying WD40 into the CABLE CHANNEL from the ENGINE BAY side..Ya know? Down in there, then working the lever a bit. I'm pretty sure my heater valve on the firewall is pretty frozen up in there too.... Like I said, I can move it by hand under the hood.. as I can move the GATE on the Box under the dash/on the floor/right side of under of the stereo, by hand, easily... You know, a combination of moving everything manually that get's moved by the CABLE LEVER...
I'm now assuming you mean that when/if I tear the dash down a bit, I can get to the cables from the top and clean/lube it all up? ???? >>>>>>>>>>>???? ?hhahahahaa.
Sorry man, I don't wanna clog up your thread. Just hitting you up while I'm thinking of it, ya know?
I'm now assuming you mean that when/if I tear the dash down a bit, I can get to the cables from the top and clean/lube it all up? ???? >>>>>>>>>>>???? ?hhahahahaa.
Sorry man, I don't wanna clog up your thread. Just hitting you up while I'm thinking of it, ya know?
Aug 4, 2012 | 02:49 PM
#804
PS> I wanna replace the Heater Hoses on both sides of the heater Core that lead to the hard lines to the timing cover/intake... While I'm in there. But I think replacing that valve with the later model plastic one is a GOOD MOVE, from everyone's having done it that I've read. I just can't remember how they modded it to fit where the old mounting spots were... I'll have to read back up on that. Right now, I also have this stupid bogging down thing... AHHHHHHH! So I'ma just keep at it all as I go and hopefully have an answer for everyone that has been asking me, "YEAH, why does mine drop down to 500RPM on restarts after sitting?".... Have to figure out why mine does, first, right? hahaha.
Aug 4, 2012 | 03:02 PM
#805
Registered User
Joined: Jul 2012
Posts: 2,365
Likes: 4
From: Idaho
chef bogging down still sounds like shes getting too much fuel an not enough air flow to mix it for burning
i took a quick google look an have you checked the throttle position sensor for proper readings? i know from reading your thread you've checked the O2 sens have ya cleaned the MAP sensor at the air cleaner end as well also check the centrifugal weights in the distributor (under the rotor) just ideas to look at
ducks head sorry terry for the subject theft
Aug 4, 2012 | 03:12 PM
#806
Thread Starter
Super Moderator
iTrader: (1)
Joined: Aug 2008
Posts: 11,787
Likes: 28
From: Anderson Missouri
Hello Mark...I just started having a gremlin with Mistys. It acts like it is cutting out for a few moments and then it will run great. Somedays it will only do it for a moment and then it will go several days without ever having a problem at all. It can be after running for quite awhile.
I put new plugs in it and the old ones were in great shape and werent very old at all. I get my plugs from Toyota. I am using store brand wires and found that you can get Densos off of ebay for around $26 so have thought of trying a set of those. I changed the fuel filter a while back. I removed the catalytic converter so I know that isnt holding it up. The truck will run like a scalded dog. For a 4 banger it runs great.
I am not getting any codes and am going to start testing all of my parts, but like I said, it doesnt do it all of the time so really am not expecting any fualts. I was occasionally getting a puff of smoke and got to thinking some idiot (me) didnt replace the valve seals when I did the top end rebuild on it. Got the head from the machine shop and it was good and never even thought of the valve seals. Hasnt done it in awhile, but was wondering if the two some how arent related.
It just hesitates for a few moments, no smoke or anything and then it will just get up and run. I have suspected bad gas. I am waiting til I get one of my other trucks on the road and this winter I want to pull the motor and give it a rebuild as I just did the top end and it has a small oil leak in the back, Im thinking a rear main seal and I know I have a broken tooth on the flywheel so am wanting to take care of it all at once.
It still has great compression but with 306k miles on the bottom end, I would rather be safe then sorry.
Aug 4, 2012 | 03:17 PM
#807
Thread Starter
Super Moderator
iTrader: (1)
Joined: Aug 2008
Posts: 11,787
Likes: 28
From: Anderson Missouri
I will look into a newer control valve. Had heard of the upgrade but never did it.
Never thought of the distributor. That is something that just gets overlooked, but how many billion times has it been around? Good call Cyber.
No worries Cyber and Mark, dont ever worry about thread jacking on my thread. I try to make my thread a comfortable place to be.
Never thought of the distributor. That is something that just gets overlooked, but how many billion times has it been around? Good call Cyber.
No worries Cyber and Mark, dont ever worry about thread jacking on my thread. I try to make my thread a comfortable place to be.
Last edited by Terrys87; Aug 4, 2012 at 03:24 PM.
Aug 4, 2012 | 03:24 PM
#808
Thread Starter
Super Moderator
iTrader: (1)
Joined: Aug 2008
Posts: 11,787
Likes: 28
From: Anderson Missouri
Hello Mark..I just replace the cables, I did try lubing the cables, but there just isnt a way. When in the boneyard I try to get even the broken controls. Seems like the blue cable and one of the other cable is most likey to be broken or deformed and it doesnt take much to bind it. Same thing does apply to putting it in.
I move my cables in and out with BIG arches when going back into the dash. Seems like I do the left side first but wont remember til I reinstall it again into the dash.
I move my cables in and out with BIG arches when going back into the dash. Seems like I do the left side first but wont remember til I reinstall it again into the dash.
Last edited by Terrys87; Aug 4, 2012 at 03:26 PM.
Aug 4, 2012 | 09:57 PM
#809
Thanks for answering, buddy! Honestly? I'll reach under the dash and take 5 seconds to put it back to 'AIR' or 'HEAT', ya KWIMean? hahah. OH, yes, ...and open the hood really quick and move the heater control valve either way. Mine is still moving if I assist it... BUT, ... it's clearly tweaked! NO WAY am I taking on that project right now.... BUT, if I ever do a... Wait, WHEN I do a motor swap, I'll be in there, anyhow,... so I'll switch to 2nd Gen 4Runner Cable set up... as it opens the same way and seems to be EXACTLY the same set up on the dash... Just different types of cables and looming? They seem to be routed the same, ya know? THEN, I'll definitely fix the lever/cables. Why not, I'd be in there, right? 
Sorry bout the gremlin, GRRR! Not sure if it's related.... Need to know more, first.
1. WHEN is it happening... like mine? After restart? ONLY when fully warm?
2. Are you only experiencing this at idle?
3. On the smoke issue... Depends on the seals... If they're tired, THEY CAN, INDEED, leak oil down into the hole. MOST OF IT is TOTALLY vaporized and travels out with the consumed fuel.. But it can at times limit combustion, as I was told by my machinist(the good guy! NOT THAT KNOB! lol).. He said if the seals are toast, and ESPECIALLY if the guides weren't changed at the same time... Oil can work it's way down to the hole and obviously this would be when the valve is 'DOWN'/'OPEN'/'BEING PUSHED ON'... So oil CAN, under the right circumstances, make it's way down the guide into the hole and cause a plume here and there. MINE LEAKED PRETTY BADLY, the guides were WAY loose, thanks to that first machinist... Yet I couldn't get it to smoke if I TRIED! haha. BUT, I did have lots of 'washing' on the corners of the pistons... The machinist felt it was likely due to the original guides being used...
So I don't know that's your issue. I would do a leak down and listen really carefully to the bottom end for any bearing noise as well. While you're at it, first thing, EVERY TIME, would be to check......... the PCV! That sucker can cause VERY similar symptoms to what you're saying... as well as a lil smokey-FACTOR! haha... I mean, if that valve fails a bit or sticks open... what happens? OIL IN YOUR INTAKE and then back out with the combustion process.... THEN you can see smoke, for sure.
Aug 5, 2012 | 02:21 AM
#810
Thread Starter
Super Moderator
iTrader: (1)
Joined: Aug 2008
Posts: 11,787
Likes: 28
From: Anderson Missouri
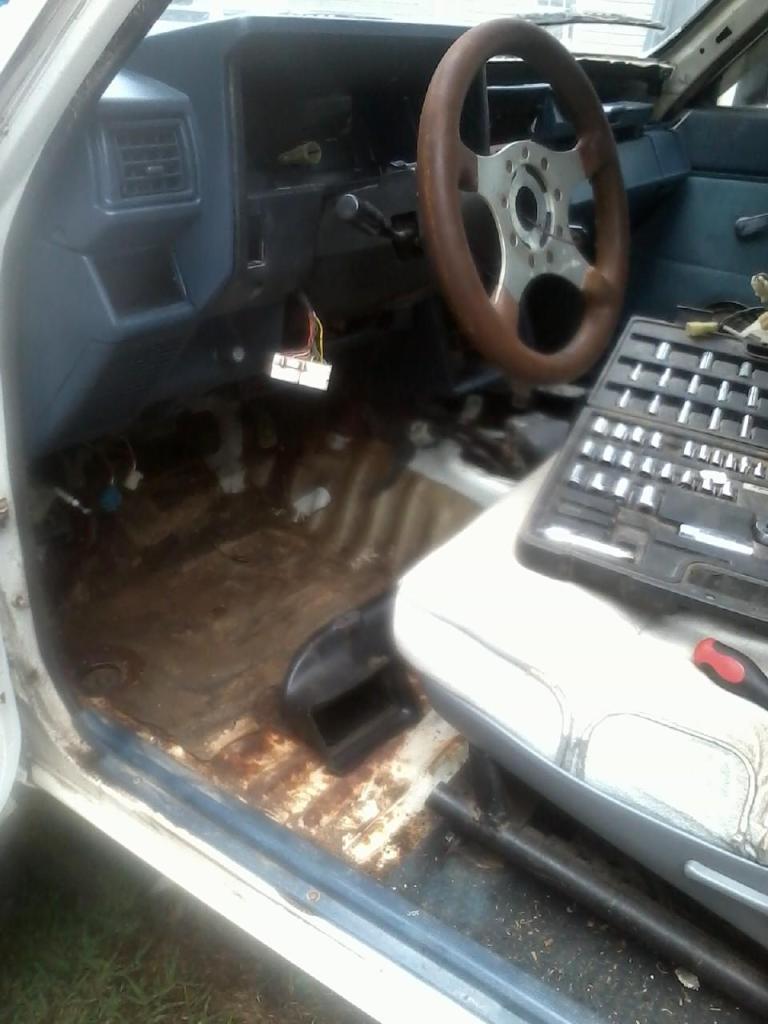
I will be working on my dashpad in the next few days, but wanted to show how I get the rest of my dash in better shape.
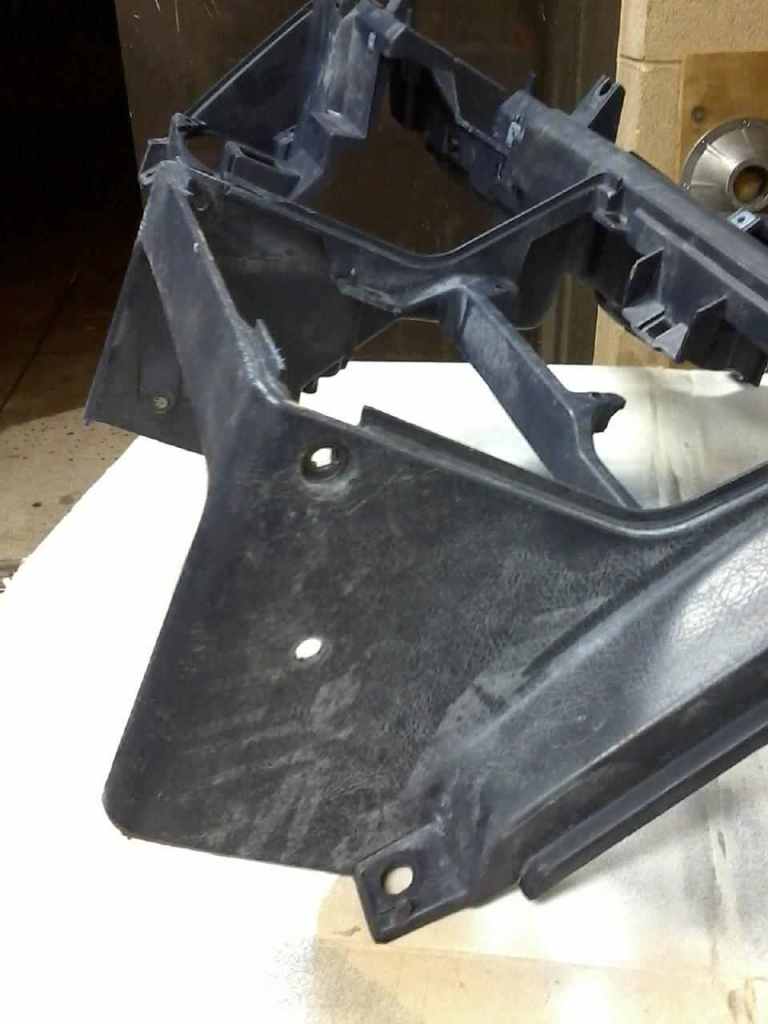
Here is the blue glove box that was orginally in my 86 4Runner. Someone had screw holes in it and my mouse friend had chewed part of the inside up where my finger is pointing. Also a hinge was broken and had to swap one over. It was a pain getting the hinge moved over and had to take the inside piece and add it to the gray glove box to make one complete glove box.

Here is where part of the dash was faded/bleached. You have to spend a good deal of time cleaning and getting the pieces cleaned. I could not get the white off. No worries though, it is typical of what you will see. I just use Simple Green and make sure it is rinsed off well.
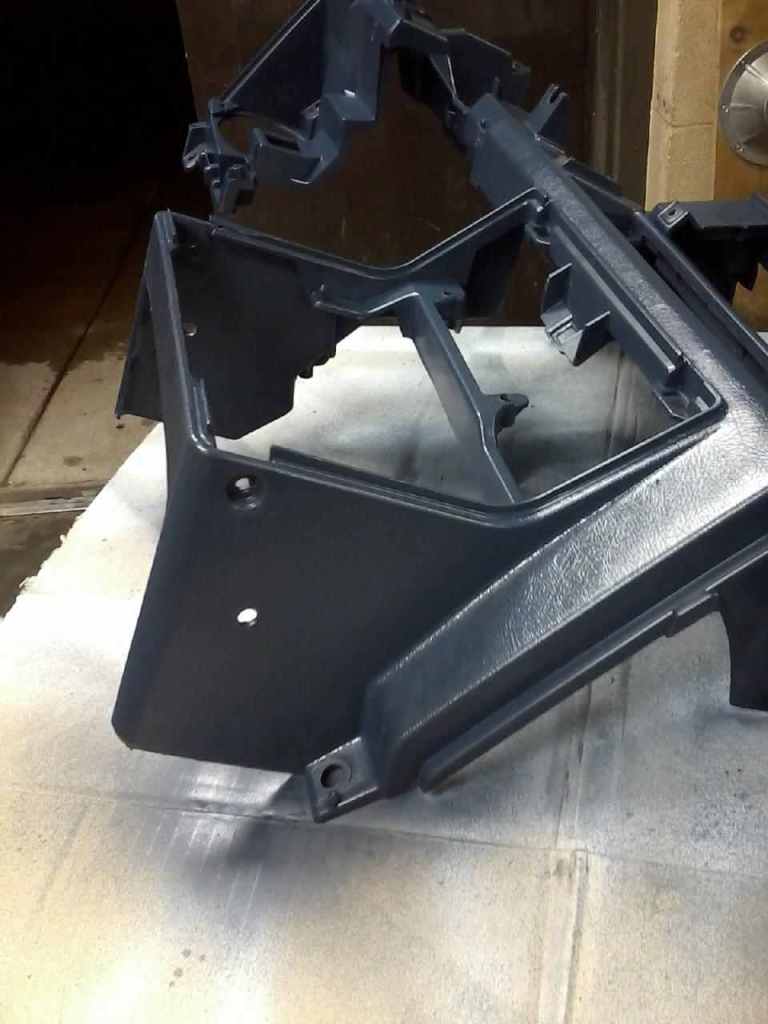
Here it is painted. Since using the same color, it only took two light coats.
Here is what I used. I had it custom mixed. $24 a can. Still have alot left over. It is nice when you have the same color panels. Might be a shade off as it was a new kid mixing. He was concerned, I told him not to worry about it. You can get it even more closer if you have an experienced paint mixer.

Here it is completed and halfway assembled. Will get some black interior paint later and do the speedo housing. Bottom glovebox lid is orgianl color. Also the window pillars were gray as was my glove box. The before pics are worse then they appear and the after pics are better then it appears. Am happy with the way it turned out.

Here is the blue glove box that was orginally in my 86 4Runner. Someone had screw holes in it and my mouse friend had chewed part of the inside up where my finger is pointing. Also a hinge was broken and had to swap one over. It was a pain getting the hinge moved over and had to take the inside piece and add it to the gray glove box to make one complete glove box.
Here is where part of the dash was faded/bleached. You have to spend a good deal of time cleaning and getting the pieces cleaned. I could not get the white off. No worries though, it is typical of what you will see. I just use Simple Green and make sure it is rinsed off well.
Here it is painted. Since using the same color, it only took two light coats.
Here is what I used. I had it custom mixed. $24 a can. Still have alot left over. It is nice when you have the same color panels. Might be a shade off as it was a new kid mixing. He was concerned, I told him not to worry about it. You can get it even more closer if you have an experienced paint mixer.
Here it is completed and halfway assembled. Will get some black interior paint later and do the speedo housing. Bottom glovebox lid is orgianl color. Also the window pillars were gray as was my glove box. The before pics are worse then they appear and the after pics are better then it appears. Am happy with the way it turned out.
Last edited by Terrys87; Aug 5, 2012 at 03:24 AM.
Aug 5, 2012 | 03:26 AM
#811
Thread Starter
Super Moderator
iTrader: (1)
Joined: Aug 2008
Posts: 11,787
Likes: 28
From: Anderson Missouri
Hello Mark... I will get back with you on the gremlins. I tried to make a video of getting the dash vent out. I will try and get it posted later today or tomorrow. I will add more pics when I actually start doing the heater control. But getting the passenger vent out is the hardest part on getting the pad off.
Aug 5, 2012 | 08:39 AM
#812
Thread Starter
Super Moderator
iTrader: (1)
Joined: Aug 2008
Posts: 11,787
Likes: 28
From: Anderson Missouri
Been trying to get some progress while dealing with this heat. If I would of known two of my projects were going to be homes to mice, instead of having Terrys87 as my screen name, I might of chosen Mouse Trap or Mouse Crap instead.Grrr...
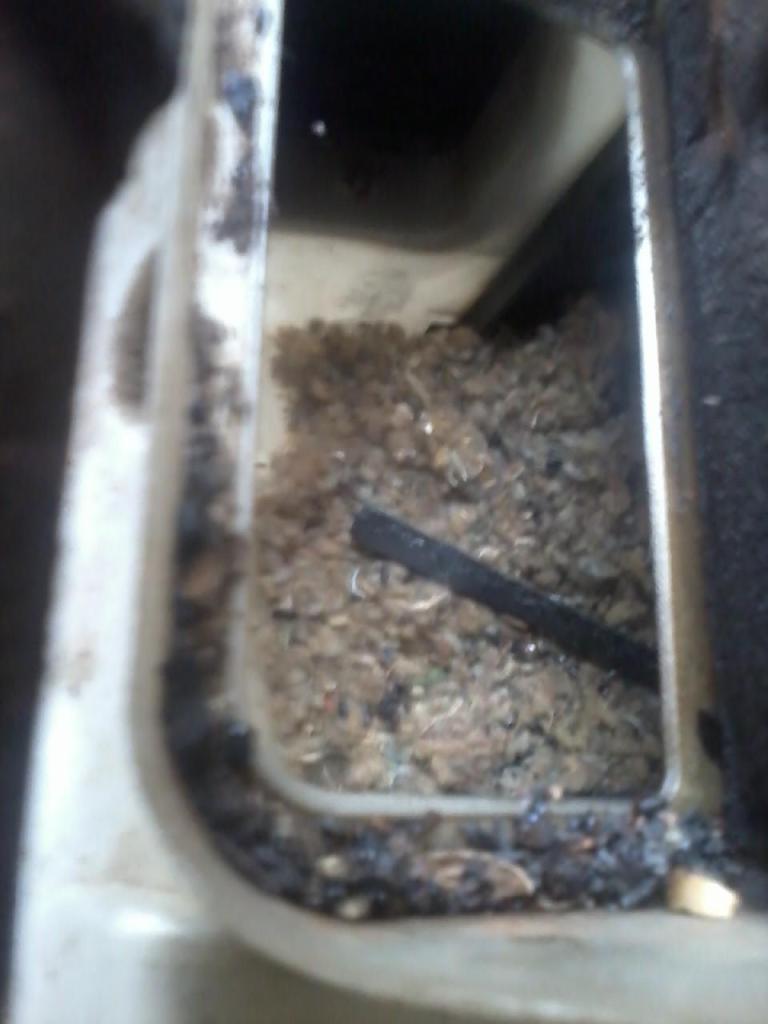
While trying to replace the vents from 89-95 ventilation to the 84-88 style, I knew I had a mouse in there at one time. Found where he was living.
Probably not as good as my hole drilling abilities, but my shop vac doesnt have the small nozzle so I took an old tent pipe and made it work.

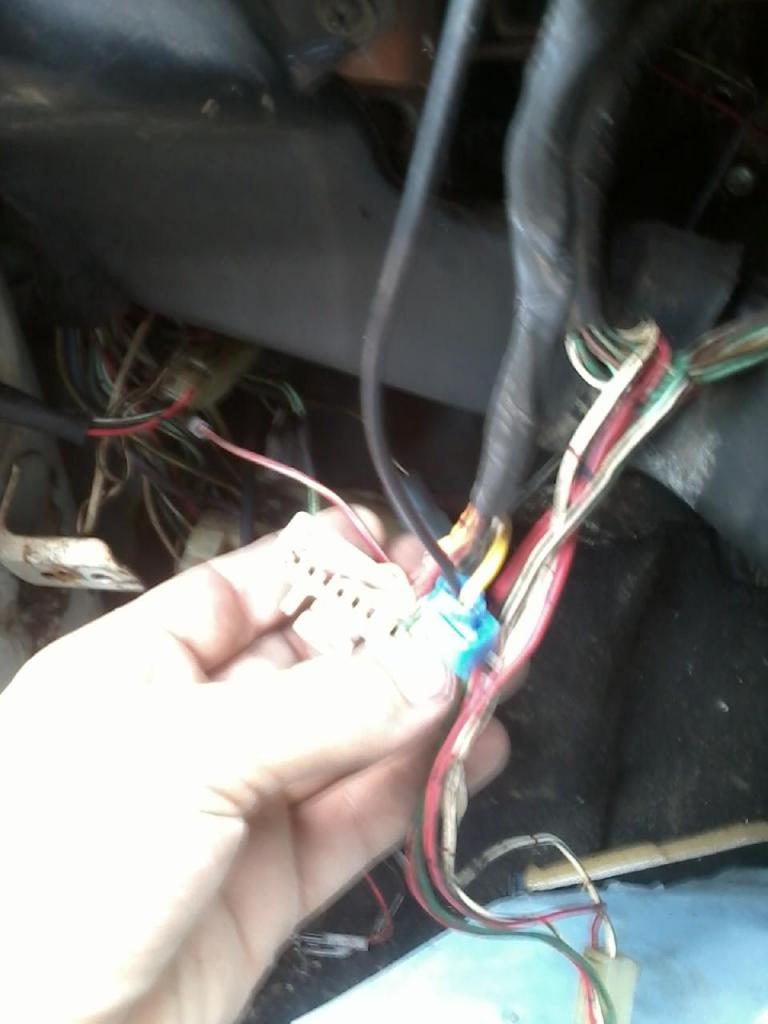
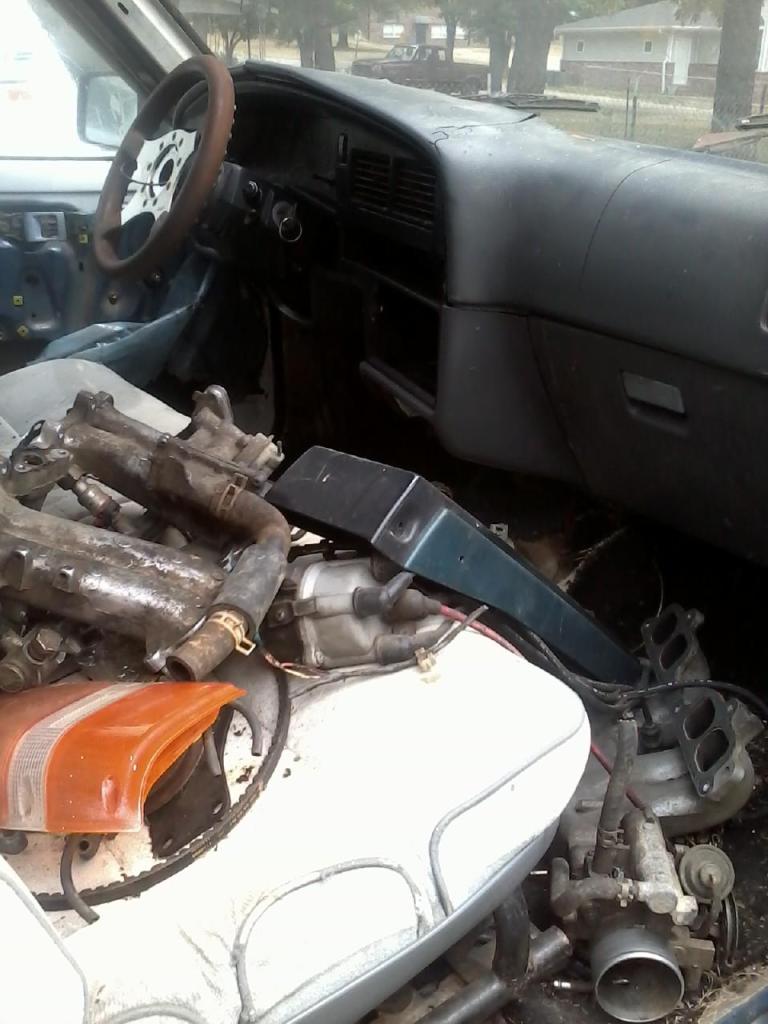
Found some more wiring issues. Not sure what the previous owner was thinking. Will look up the wiring and see what he was trying to accomplish.
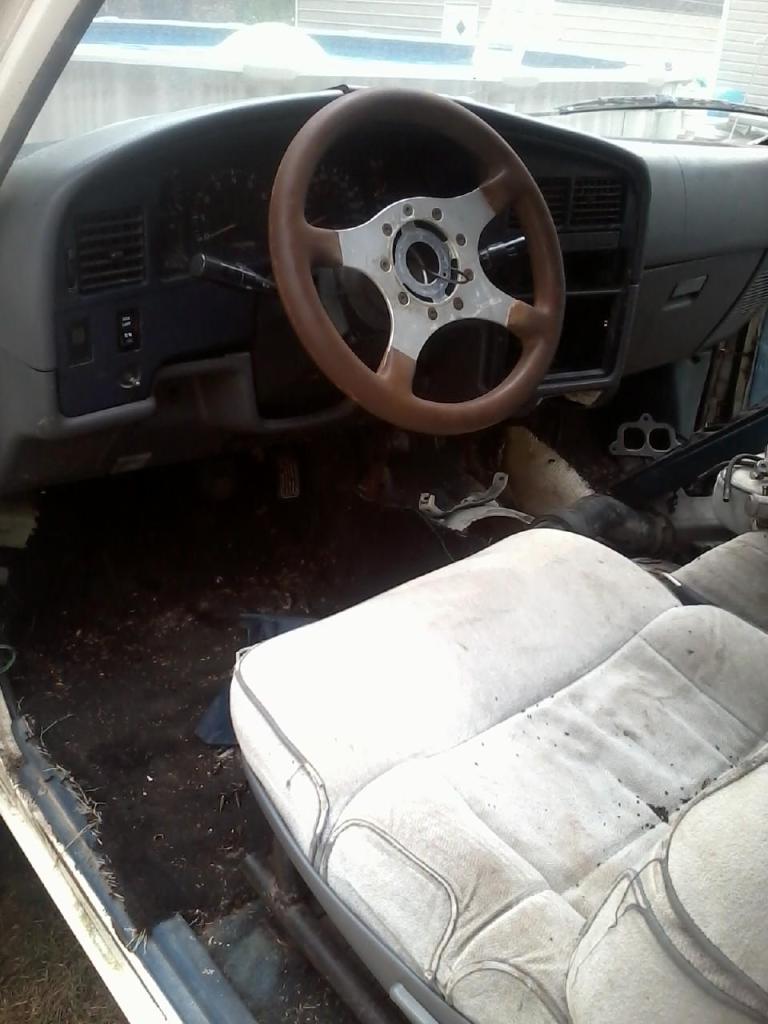
Never understood why car builders always assembled and disassembled their cars. I got my dash sitting in to form back to shape from having been in the shed for so long. Replacing missing vents and getting all of the nuts and bolts around. Starting to look like a truck again. Will have to take it back out and do some deep cleaning. Slowly getting there.

Here is what was in it and was held in with 5 sheet metal screws. A really poor job at that and probably not safe to drive the way they had it. Could of fell in your lap.
While trying to replace the vents from 89-95 ventilation to the 84-88 style, I knew I had a mouse in there at one time. Found where he was living.
Probably not as good as my hole drilling abilities, but my shop vac doesnt have the small nozzle so I took an old tent pipe and made it work.
Found some more wiring issues. Not sure what the previous owner was thinking. Will look up the wiring and see what he was trying to accomplish.
Never understood why car builders always assembled and disassembled their cars. I got my dash sitting in to form back to shape from having been in the shed for so long. Replacing missing vents and getting all of the nuts and bolts around. Starting to look like a truck again. Will have to take it back out and do some deep cleaning. Slowly getting there.
Here is what was in it and was held in with 5 sheet metal screws. A really poor job at that and probably not safe to drive the way they had it. Could of fell in your lap.
Last edited by Terrys87; Aug 5, 2012 at 08:45 AM.
Aug 5, 2012 | 08:50 AM
#813
Thread Starter
Super Moderator
iTrader: (1)
Joined: Aug 2008
Posts: 11,787
Likes: 28
From: Anderson Missouri
I will go back and edit this. Havent watched the entire video. I am trying to set up a post on replacing the heater contols and what I have done to make it a little easier. Got some more to add to this so might want to skip this post as it is far from finished.
2nd post, look at thumbnail pics for pad removal.... Link https://www.yotatech.com/forums/f115...emoval-189633/
Screw located behind glovebox that needs removed to get vent pipe out of way to access dash pad bolt.

Vent pipe that blocks dashpad nut.

2nd post, look at thumbnail pics for pad removal.... Link https://www.yotatech.com/forums/f115...emoval-189633/
2nd post, look at thumbnail pics for pad removal.... Link https://www.yotatech.com/forums/f115...emoval-189633/
Screw located behind glovebox that needs removed to get vent pipe out of way to access dash pad bolt.
Vent pipe that blocks dashpad nut.
2nd post, look at thumbnail pics for pad removal.... Link https://www.yotatech.com/forums/f115...emoval-189633/
Last edited by Terrys87; Aug 21, 2012 at 12:43 AM.
 on that dash. It looks brand new. thats awesome!
Aug 5, 2012 | 10:30 AM
on that dash. It looks brand new. thats awesome!
Aug 5, 2012 | 10:30 AM
#816
Registered User
Joined: Apr 2012
Posts: 2,817
Likes: 2
From: Los Angeles CA
Sorry to hear about the mouse problem you had. at least you dont have it anymore right.
I found a rat in my car once. it was on top of the motor. had ran it about 20-30 min before so the engine was still warm. And when i popped the hood i seen the sucker just sitting there on top of the motor before i could think i closed the hood as if thinking "maybe if i close it he'll stay put while i grab a stick or something to fling it out or stab it. So i did just that. lol Closed the hood and ran back to my house and grabbed my breaker pipe and a 2-3 foot stick with a pointy tip, ran back to the car and popped the hood AND SURE ENOUGH IT WAS STILL THERE. and it just stayed there iand looked that me. You can almost hear its thoughts "OH CRAP!" and it slowly hid itself toward the back of my motor. Before i had a chance to get it it was well tucked into a nook and crany hard to get place and i sure as hell wasnt going to stick my hand in there to get it lol. So I got my stick and i got as close as i possibly could and with all my force i quickly and firmly pressed it on its stomach. AND IT SCREAMED!!! i couldnt believe it. i'd never heard a rat scream. Unfortunately i didnt kill it nor did i pierce its gut. but when i thought i had finally killed it i stopped pressing on it and as soon as it all happened this rat quickly moved up on top of my motor and with my breaker pipe i smacked it on its rear end Just barely gettings its tail but that sucker jumped off my car and headed our scurring under one of my neighbors houses. lol
At this time i had my nosey next door neighbor watching me the whole time trying to figure out what i was doing and when he saw that rat hop off and run for its life i heard him "OMG" lol then started laughing and told me where it had ran off to. luckily i got rid of that rat problem quick. especially because i have a pretty clean running corolla. and thats the last thing i need is for it to feast on my wires. ugh!!! I will tell you one thing though. That rat's body was probably about 1 foot 2 inches long an the tail was just as long. That was one big rat. scary lol
anyway seeing your mouses nest in that picture just made me have a flashback of that experience haha
Aug 5, 2012 | 04:45 PM
#817
Registered User
Joined: Jul 2012
Posts: 2,365
Likes: 4
From: Idaho
the dash looks awesome terry you might want to spray some lysol in that mouse nesting pocket to get rid of the urine they leak constantly acts as a lead line for babies an other mice
Last edited by Cyberhorn The Dragon; Aug 5, 2012 at 04:47 PM.
Aug 5, 2012 | 10:32 PM
#818
Doesn't matter where you park... STRANGER MICE will find it inviting! lol.
Aug 6, 2012 | 02:10 AM
#819
Thread Starter
Super Moderator
iTrader: (1)
Joined: Aug 2008
Posts: 11,787
Likes: 28
From: Anderson Missouri
Hello Redeth005. I have been a busy little beaver. Trying to get this truck up and running as soon as possible. Got alot more things to post, just am slow at it. Mice are a real pain, but that is part of working on cars that have sat in the field. I know a guy that works on a wrecker service and some that are on the road arent as bad as some that have been in the field. You would be surprised at how some came in from the road.
Hello Mark..Your welcome on the video, nothing to brag about with my great camera operation abilities, but hope it helps with the dash pad. I will be adding more to it and will arrange it where it makes sense. When I get done with it, I will make a little sticky of it on the first page of this build.
Thanks Cyberhorn..I am vacuuming the interior and then will take an air hose and blowout all of the nooks and crannies. Then I will follow it with some bleach water. I want it clean in there.
Aug 6, 2012 | 02:17 AM
#820
Thread Starter
Super Moderator
iTrader: (1)
Joined: Aug 2008
Posts: 11,787
Likes: 28
From: Anderson Missouri
I took the best dash I have and tried to fill it in. Have done this in the past. It is better then it was, it will have to work for now.
Took some bondo and worked into the cracks.

Here are the cracks sanded down, used 80 grit paper.

Here it is done. Used one coat of adhesion and let it flash off for a minute and then 4 light coats of paint.

Here is a before pic.

Took some bondo and worked into the cracks.
Here are the cracks sanded down, used 80 grit paper.
Here it is done. Used one coat of adhesion and let it flash off for a minute and then 4 light coats of paint.
Here is a before pic.


