
Terrys87 86 4Runner with a 2nd Chance
 Dec 19, 2013 | 06:18 AM
#1662
Thread Starter
Super Moderator
iTrader: (1)
Joined: Aug 2008
Posts: 11,787
Likes: 28
From: Anderson Missouri
Hello kornhuskerwizard...It is going to get uglier before it gets better. Bed comes off to replace fuel tank, seats come out, steering shaft... It will look like a disaster. Misty and I went out to eat and was in my runner and she liked how my interior and dash was. I said mine was worse then what Toms looks like now. I even took a good look at it and was actually quite impressed at how mine has come along. Even seeing it everyday, you still get blind to seeing the progress you make on a daily basis. I am trying to beat the cold weather. I get cold and I stop. Am hoping for some big steps today.
Hello cyberhorn...I bought one of those mirrors, dont remember which company it was and it is on the highway somewhere. Currently I only have one on the drivers side. I actually need the one with the big brackets and they are hard to find. Mine are 2 bolts at the top and 1 bolt near the middle of the door. I tried the aftermarkets for a temp fix on mine but the ones I tried were junk. Just driving down the road.
Hello Mark...The red runner has the electric mirrors. I personally am not to fond of electric equipment. Works great when in great shape, but I have always had problem with things like that. I havent messed with your type of mirror. This coming summer, I am going to see if I can start checking out red and see if they are worth while messing with. I had a chance to get a set of electric doors for my 85 but turned them down. I like it when it works but was afraid it would be problematic. Otherwise I dont have any experience on them. Would like to learn about them though.
Dec 19, 2013 | 06:29 AM
#1663
Thread Starter
Super Moderator
iTrader: (1)
Joined: Aug 2008
Posts: 11,787
Likes: 28
From: Anderson Missouri
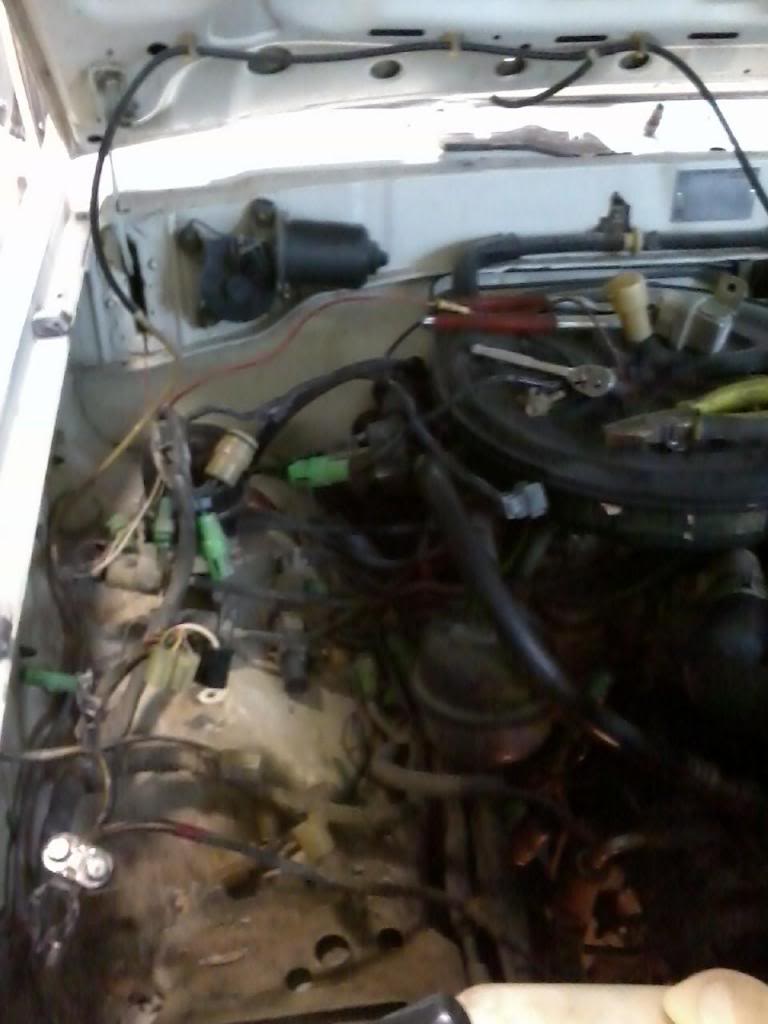
There several different ways to do this but I am trying to keep it easy to do. I am starting on the drivers side and will work my over to the passenger side.
Remove Marker Light, Inner Fender and Mudflap. Disconnect the bumper blinker plug. You can leave the blinker in.
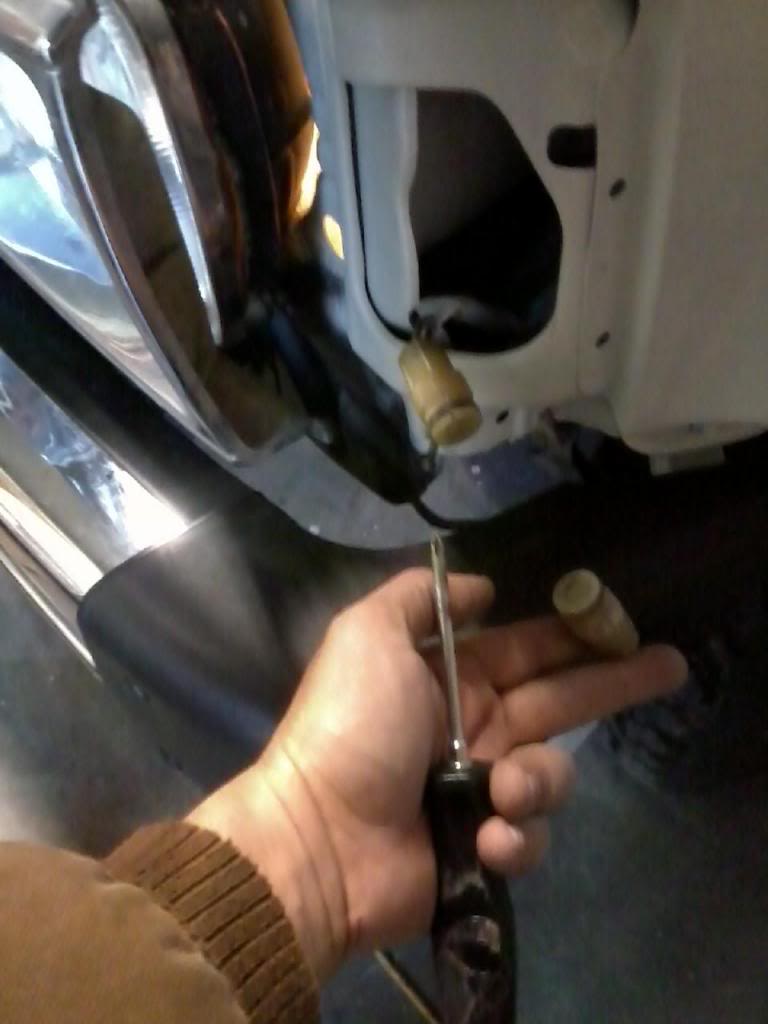
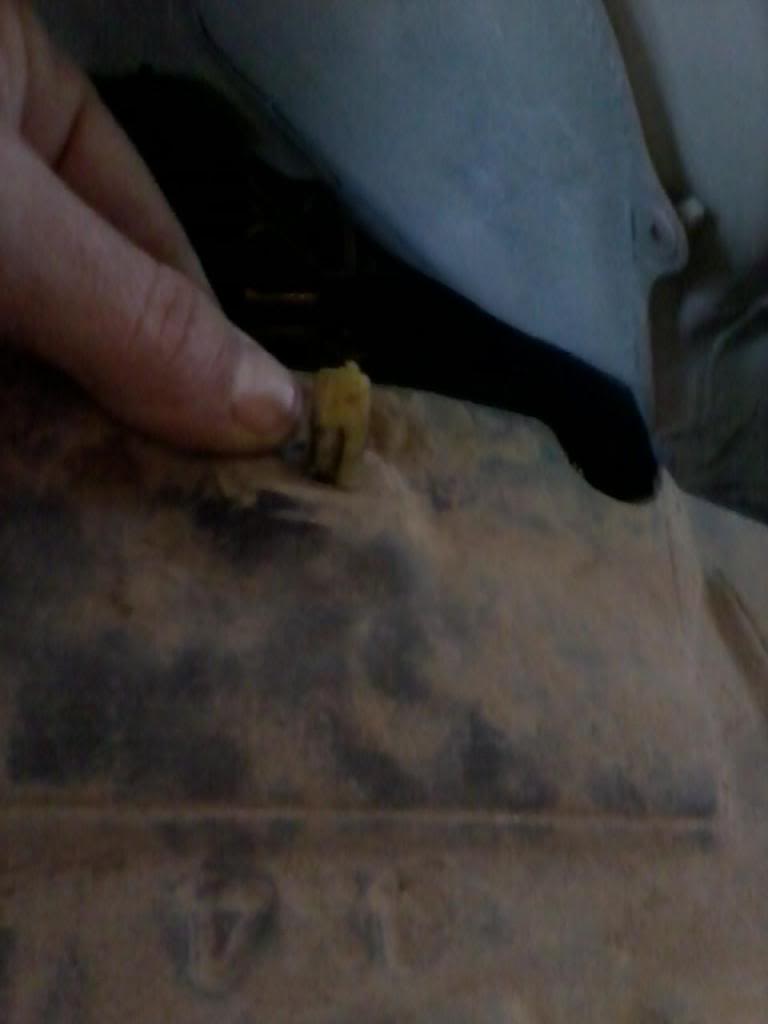
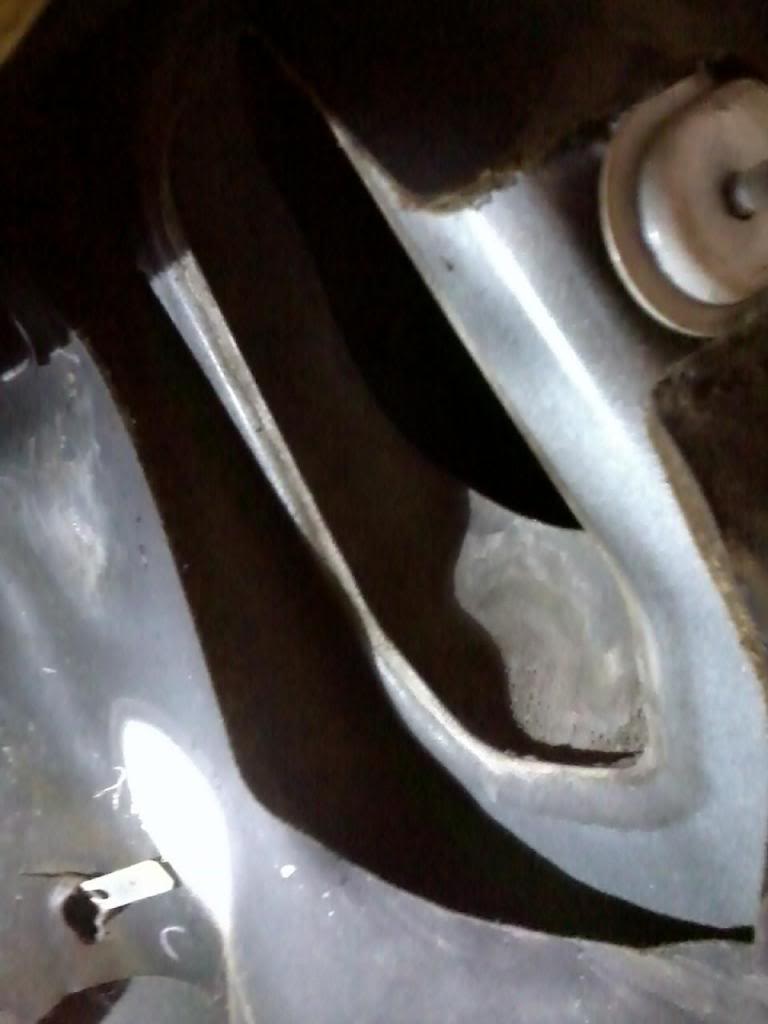
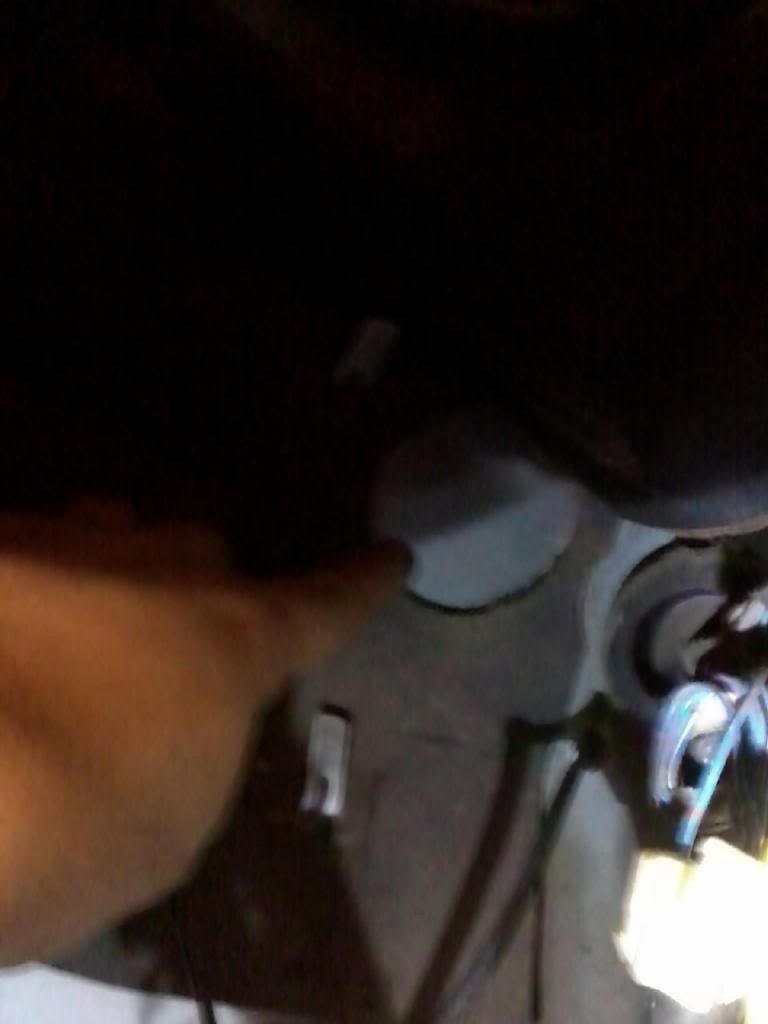
This white tab behind the coil is a pain to get out. It just has two squeeze tabs and it pops thru the inner fender. It holds the inner fender plastic piece in.

Picture of it out and what it looks like on plastic inner fender.
Disconnect remaing plugs from Coil, Brake Fluid Container, and any other I may have missed mentioning. I will remove the Coil at a later time. I gets replaced with a different Coil/Igniter later on. I am doing just disassembly at this time. Trying to make it easy.
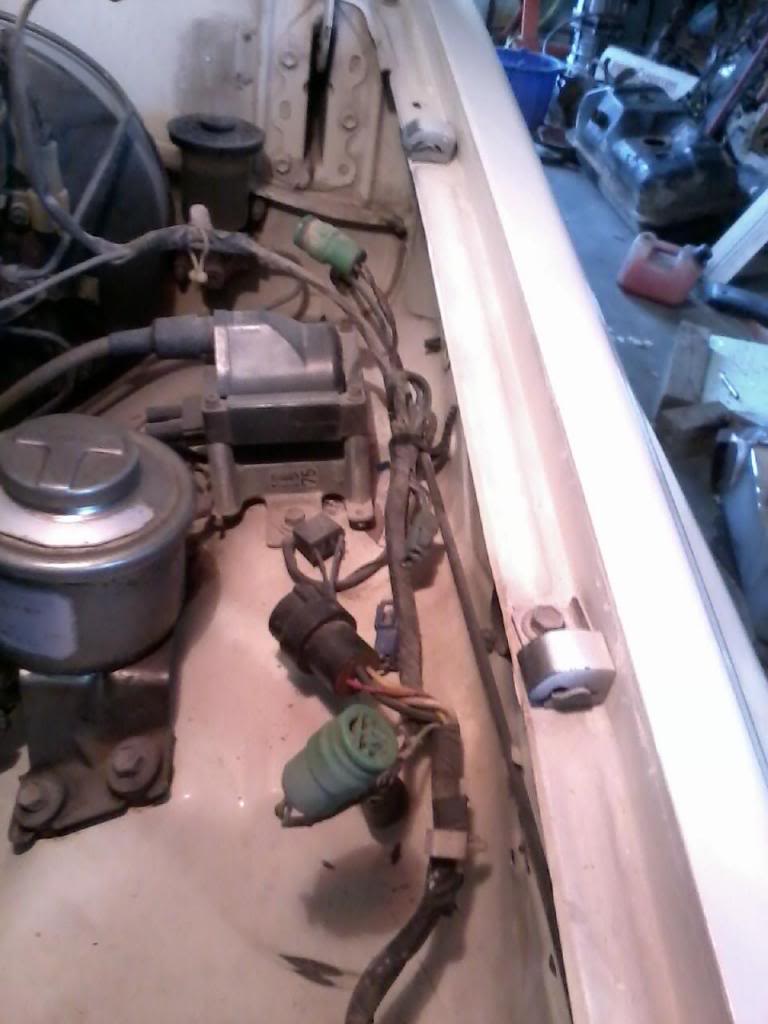
The hole in the inner fender, behind the headlight, is where all of this harness goes thru. There is a brown plastic piece that needs removed that isnt showing.
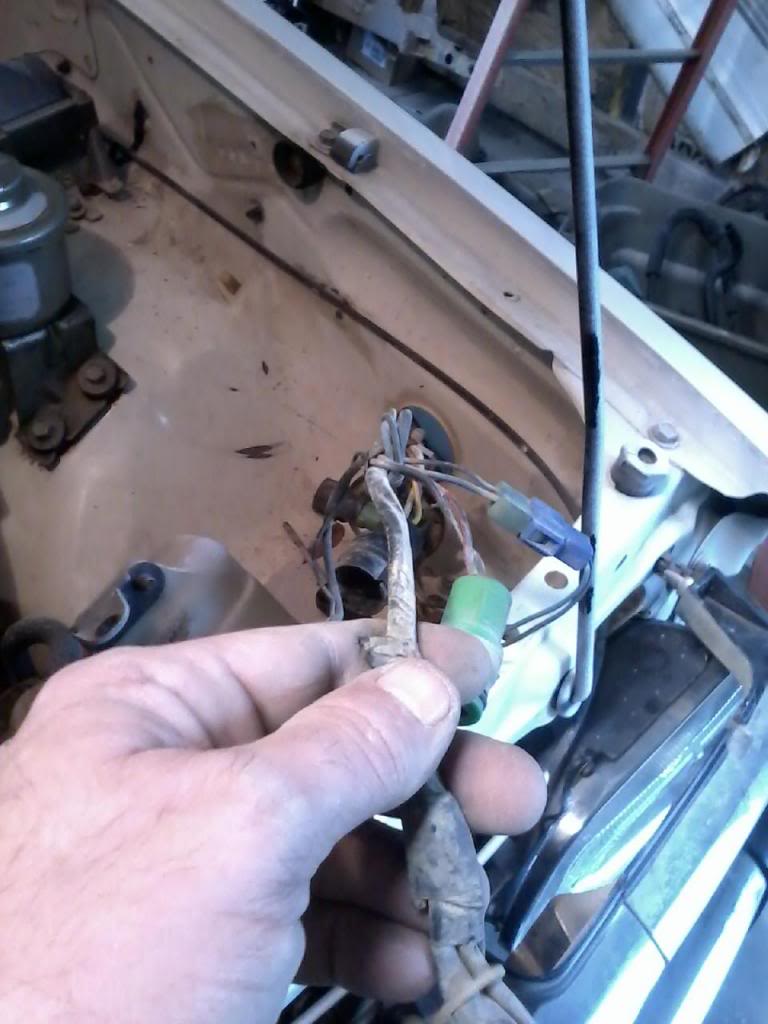
I now have the harness thru the inner fender. With the plastic inner fender out, this is where the harness goes thru to inside the cab thru the firewall. I pushed the rubber boot inside the cab to helps show direction and how it needs to be done.

Remove Marker Light, Inner Fender and Mudflap. Disconnect the bumper blinker plug. You can leave the blinker in.

This white tab behind the coil is a pain to get out. It just has two squeeze tabs and it pops thru the inner fender. It holds the inner fender plastic piece in.

Picture of it out and what it looks like on plastic inner fender.

Disconnect remaing plugs from Coil, Brake Fluid Container, and any other I may have missed mentioning. I will remove the Coil at a later time. I gets replaced with a different Coil/Igniter later on. I am doing just disassembly at this time. Trying to make it easy.

The hole in the inner fender, behind the headlight, is where all of this harness goes thru. There is a brown plastic piece that needs removed that isnt showing.

I now have the harness thru the inner fender. With the plastic inner fender out, this is where the harness goes thru to inside the cab thru the firewall. I pushed the rubber boot inside the cab to helps show direction and how it needs to be done.

Last edited by Terrys87; Mar 20, 2014 at 07:56 AM.
Dec 19, 2013 | 06:32 AM
#1664
Thread Starter
Super Moderator
iTrader: (1)
Joined: Aug 2008
Posts: 11,787
Likes: 28
From: Anderson Missouri
I am now going over to the passenger side and start removing the harness on that side. The harness on both side have to be removed from front to back and get completely taken out inside the cab.
I may be using cable and harness interchangeably. I will go back and change it all to harness at a later time. I will also add some videos from earlier projects that I have done on dash removal and such.
I may be using cable and harness interchangeably. I will go back and change it all to harness at a later time. I will also add some videos from earlier projects that I have done on dash removal and such.
Last edited by Terrys87; Dec 19, 2013 at 06:35 AM.
Dec 19, 2013 | 07:24 AM
#1665
Thread Starter
Super Moderator
iTrader: (1)
Joined: Aug 2008
Posts: 11,787
Likes: 28
From: Anderson Missouri
I had to remove the grill as the horn was repaired and I as unable to unplug it with the grill in. Also you need to remove MudFlap, Marker Light, and Plastic Inner Fender on Passenger side as well.
Grill, Marker, Mudflap and Inner Fender removed on passenger side

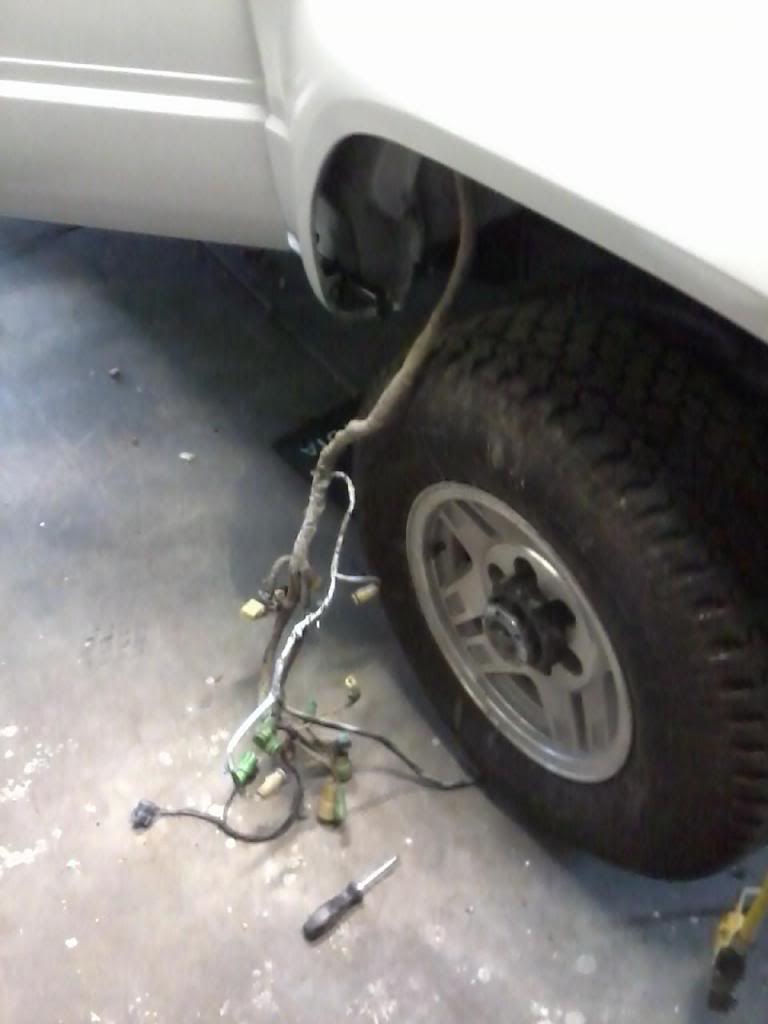
Start from the Wiper Motor and work all the way back to the Windshield Fluid Bottle. This is a California Emissions truck. If you want to stay with a carburator, go with a Webber. So much easier to work on in a 22r.
Passenger harness ready to go thru the fire wall. I still have some work to do on the inside to get the harness thru. Will post that next.
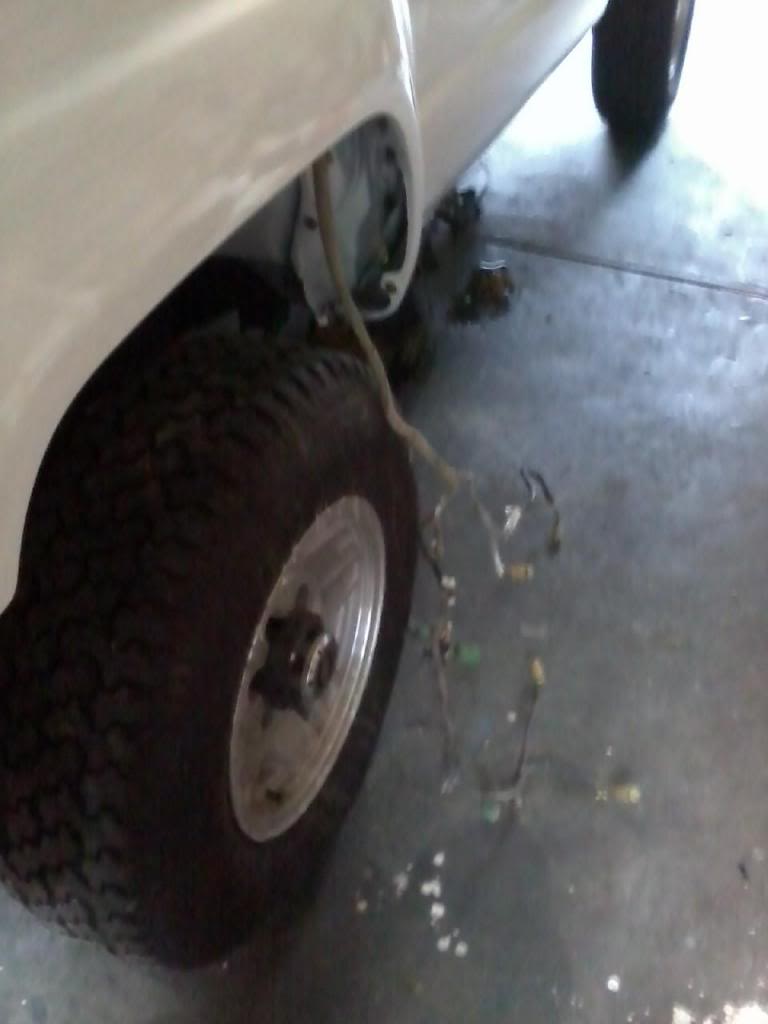
Drivers side ready.
Grill, Marker, Mudflap and Inner Fender removed on passenger side

Start from the Wiper Motor and work all the way back to the Windshield Fluid Bottle. This is a California Emissions truck. If you want to stay with a carburator, go with a Webber. So much easier to work on in a 22r.

Passenger harness ready to go thru the fire wall. I still have some work to do on the inside to get the harness thru. Will post that next.

Drivers side ready.

Last edited by Terrys87; Mar 20, 2014 at 07:57 AM.
 Dec 19, 2013 | 09:38 AM
#1667
Thread Starter
Super Moderator
iTrader: (1)
Joined: Aug 2008
Posts: 11,787
Likes: 28
From: Anderson Missouri
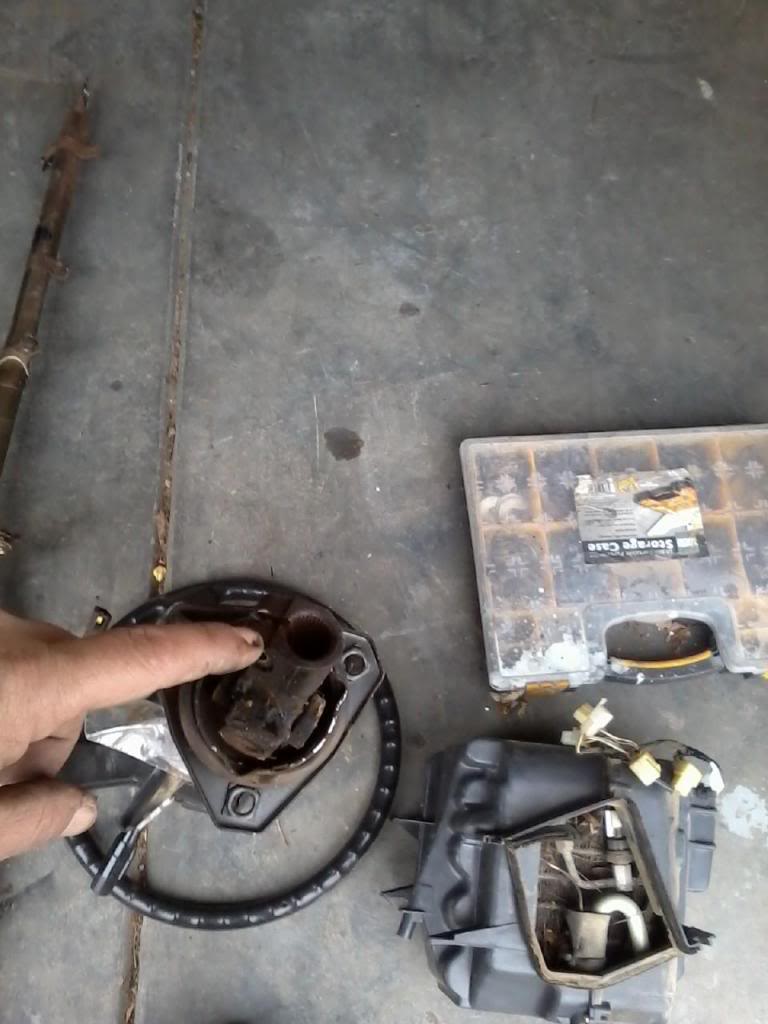
These pics wont be added into the swap thread I plan on creating later on. Just some pics of the dirt that gets trapped into the blower motor and ac condenser. I have posted similar pics in other threads but for new people that check in might not know of. Blower motor is just as bad. Pics didnt turn out.
Debri in condenser (if that is the correct name, I keep getting it mixed up with the one in the radiator area).
Comes from the Cowl area where windshield wipers are at.
I meant to add in this thread earlier. I will later on. Keeps it all together. Also keep putting your nuts and bolts back where they come from.

Debri in condenser (if that is the correct name, I keep getting it mixed up with the one in the radiator area).

Comes from the Cowl area where windshield wipers are at.

I meant to add in this thread earlier. I will later on. Keeps it all together. Also keep putting your nuts and bolts back where they come from.

Last edited by Terrys87; Mar 20, 2014 at 08:16 AM.
Dec 19, 2013 | 09:44 AM
#1668
Thread Starter
Super Moderator
iTrader: (1)
Joined: Aug 2008
Posts: 11,787
Likes: 28
From: Anderson Missouri
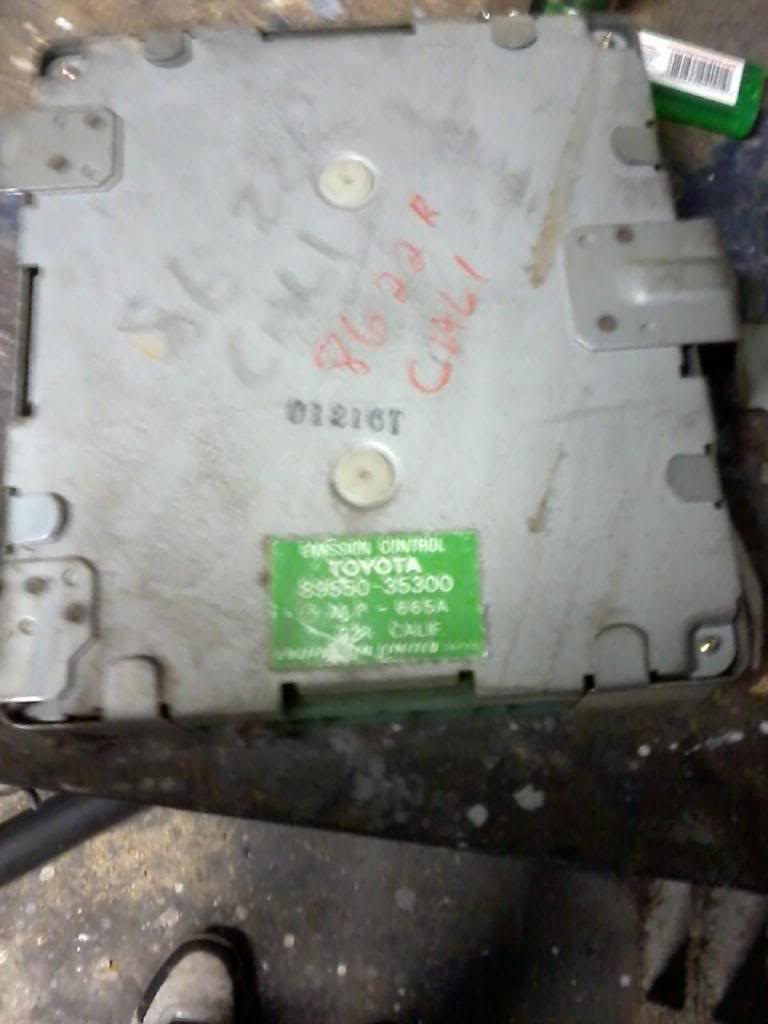
This being a California Emissions truck, I was suprised to see this size of control box. Remove passenger kick panel and control box.
86 22r California Control box. This truck even has the O2 sensor in it.
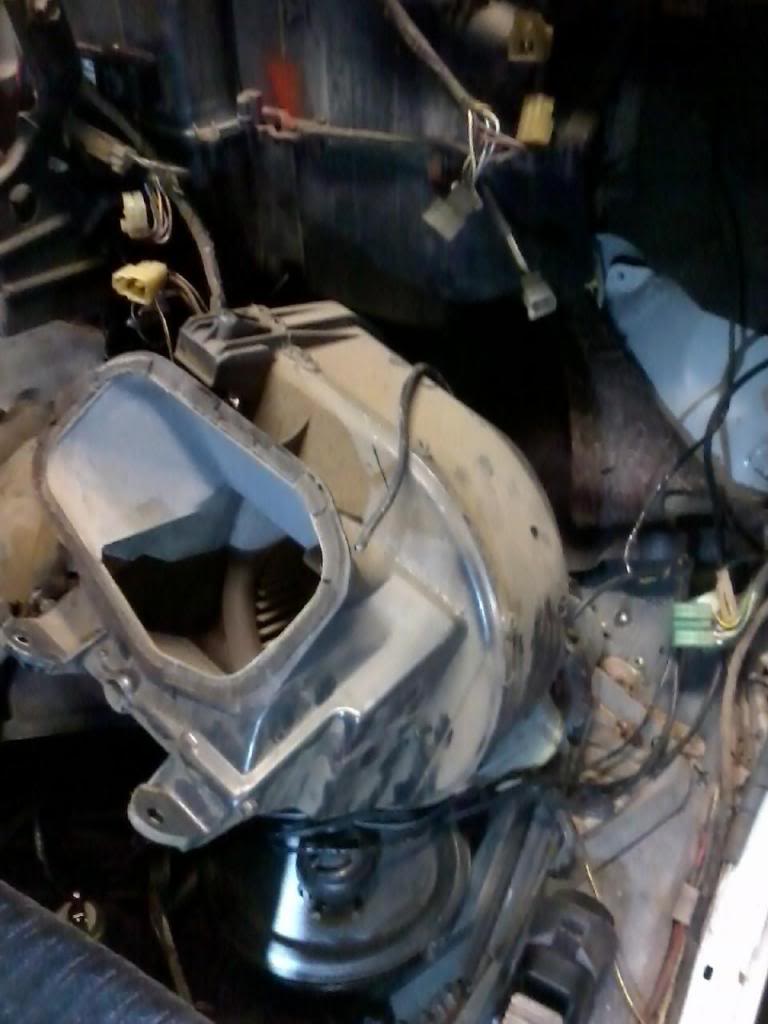
Remove Blower Motor Assembly. You will need to loosen the AC component next to the blower assembly. It takes a little manuvering to get it out and around the AC assembly.
Here is where the factory has the cutout for the Injector Harness on the firewall. You will need a hole saw to cut out the access. I will get to it later.

86 22r California Control box. This truck even has the O2 sensor in it.

Remove Blower Motor Assembly. You will need to loosen the AC component next to the blower assembly. It takes a little manuvering to get it out and around the AC assembly.

Here is where the factory has the cutout for the Injector Harness on the firewall. You will need a hole saw to cut out the access. I will get to it later.

Last edited by Terrys87; Mar 20, 2014 at 07:58 AM.
Dec 19, 2013 | 10:48 AM
#1669
Thread Starter
Super Moderator
iTrader: (1)
Joined: Aug 2008
Posts: 11,787
Likes: 28
From: Anderson Missouri
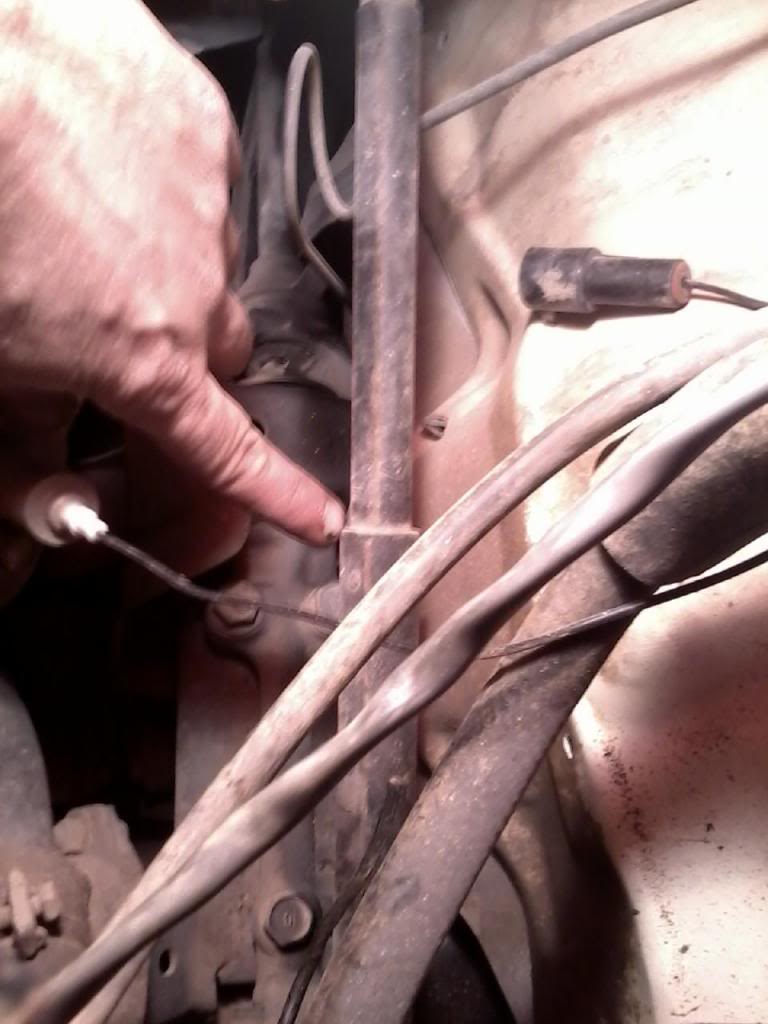
You need to remove 2 bolts that hold the Parking Brake. The cross bar that runs the width of the cab has to be removed to get harness out. It wont fit between the cross bar and firewall.
2 bolts to Parking Brake inside of cab.
Parking brake under hood on firewall. The 2 nuts on the socket.
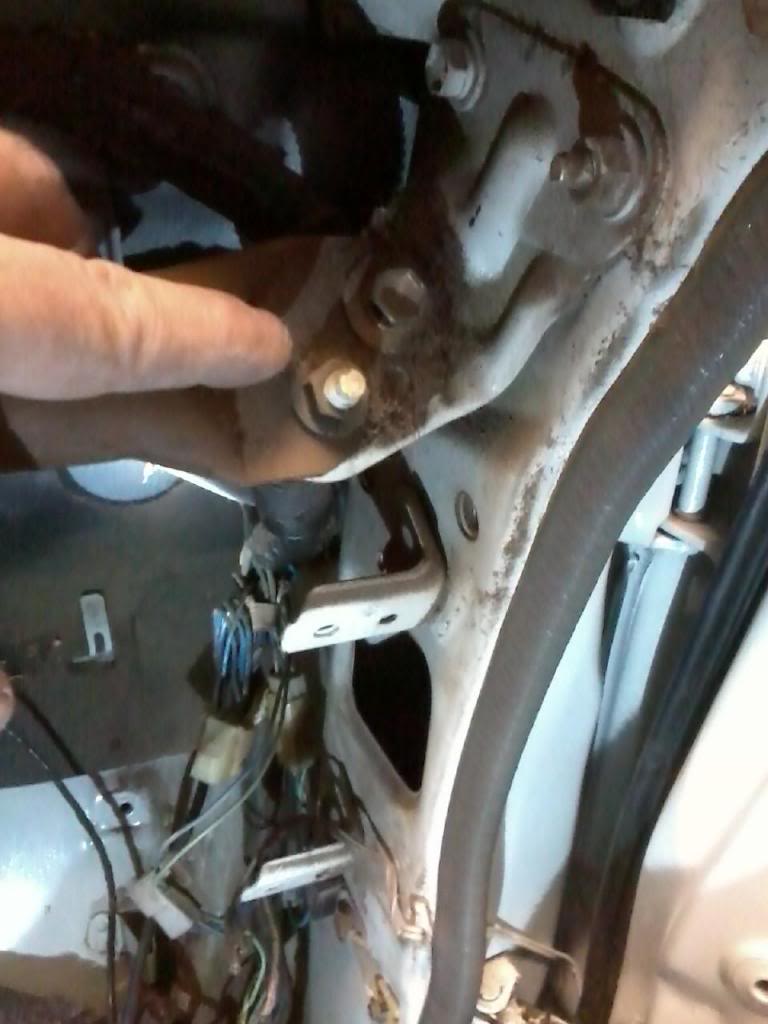
I remove the nut and bolt on the passenger side. You can do the 4 bolts that attach to the pillar.
Remove 2 bolts on each of the black brakets.
I keep all of the wiring to the heater and ac components attached to themselves. I may need to switch these out later but will mention it then. Most are interchangeable.
2 bolts on the far left of the picture where my finger is. One bolt is easily missed behind the one I am pointing to. You will need to remove the 3 bolts and 1 nut on the far left of picture that attaches the bar to the pillar.

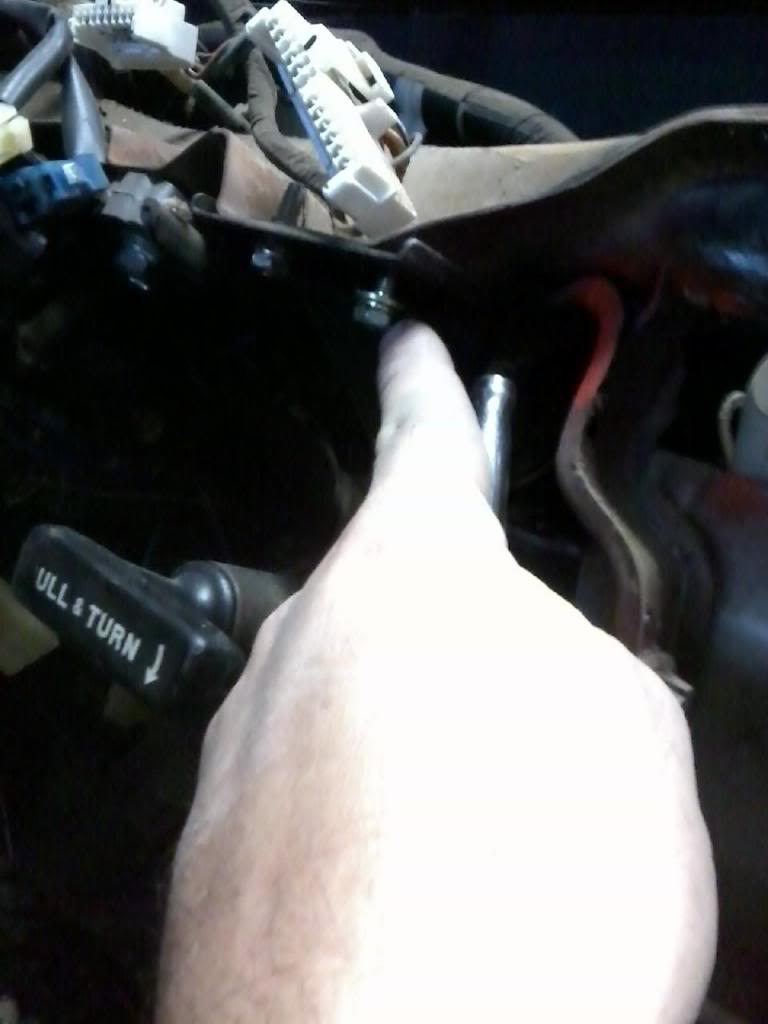
Remove the 2 silver bolts that attach the Steering Column. You could remove Steering Column at this time. I am focusing on wiring at this time.
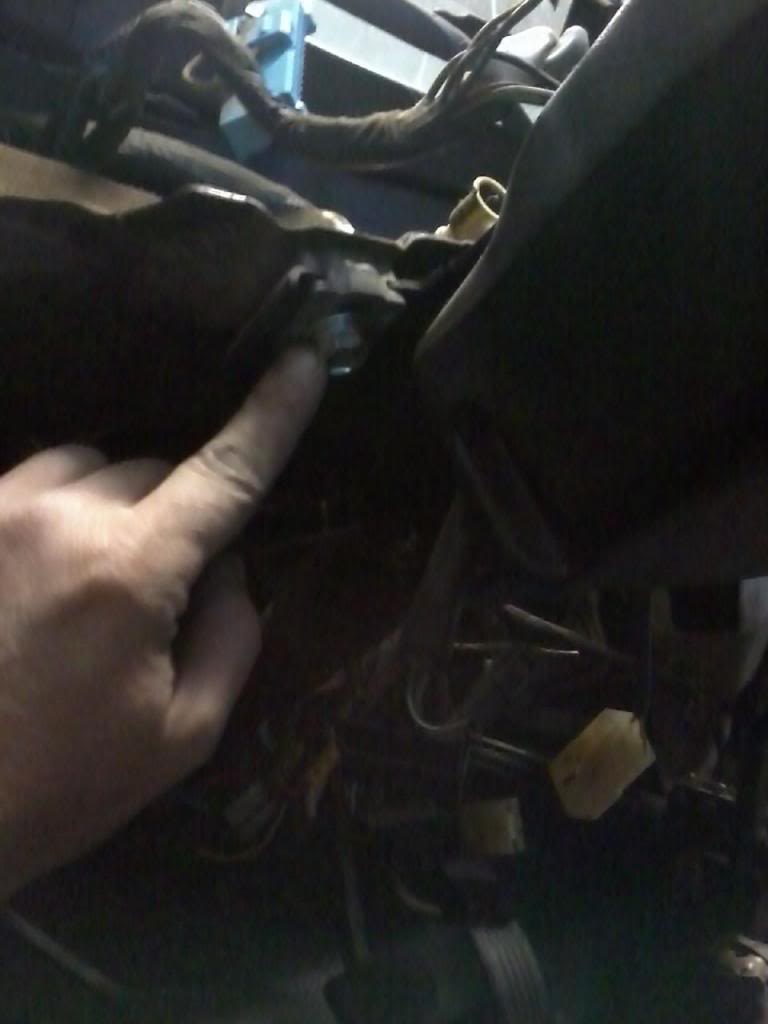
There are 2 springs. One ot the Clutch Pedal and one to the Brake Pedal. I disconnect them at the cross bar and leave them attached to the pedals.
Remove Crossbar.
Remove 1 bolt at the bottom of the Fusebox. Then with your middle finger under the tab, lift up on tab and slide fusebox to passenger side.
2 bolts to Parking Brake inside of cab.

Parking brake under hood on firewall. The 2 nuts on the socket.

I remove the nut and bolt on the passenger side. You can do the 4 bolts that attach to the pillar.

Remove 2 bolts on each of the black brakets.

I keep all of the wiring to the heater and ac components attached to themselves. I may need to switch these out later but will mention it then. Most are interchangeable.

2 bolts on the far left of the picture where my finger is. One bolt is easily missed behind the one I am pointing to. You will need to remove the 3 bolts and 1 nut on the far left of picture that attaches the bar to the pillar.

Remove the 2 silver bolts that attach the Steering Column. You could remove Steering Column at this time. I am focusing on wiring at this time.

There are 2 springs. One ot the Clutch Pedal and one to the Brake Pedal. I disconnect them at the cross bar and leave them attached to the pedals.

Remove Crossbar.

Remove 1 bolt at the bottom of the Fusebox. Then with your middle finger under the tab, lift up on tab and slide fusebox to passenger side.

Last edited by Terrys87; Mar 20, 2014 at 07:59 AM.
Dec 19, 2013 | 11:12 AM
#1671
Thanks buddy. I was going to delete that because I felt bad for posting it here in the midst of you doing a flurry of write ups! I apologize... I'm going to have to remove the mirror from the rear housing again and take a look. I had a good idea of how it's done at one point but I can't remember now. Its very careful work, & I believe with the spring-loaded things, you have to be very careful when adding a bushing or something to tighten it up. It is spring loaded as I remember... That's how you can turn the mirror in and then back out. Collapsible so to say. Only problem is the new to me driver one is not collapsing like a supposed to.  lol
lol
lol
Dec 19, 2013 | 12:35 PM
#1672
Thread Starter
Super Moderator
iTrader: (1)
Joined: Aug 2008
Posts: 11,787
Likes: 28
From: Anderson Missouri
Hello Mark..It is ok to post. No problems there. Glad to see some of the information is helpful. I have been trying ot to get so many pictures and then try to add the information in to it and get behind on it. On top of that Photbucket doesnt make it quite as easy to go back a page and add more. I plan on getting more familar with the electric mirrors this coming summer just for my own curiosity. I only have one runner in my area and it doesnt have electric mirrors. The red one out back has them and they arent in the best of shape. Dont worry about posting. It is fine with me.
Tomorrow is supposed to be cold so I plan on getting caught up on several builds. I am sure you have gotten alot done. These past few days has been the first time I have actually got to do any work and it has been nice. I am ready for spring. I have a ton of things that I want to do and parts are stacking up. Just the weather is keeping me in the house.
Tomorrow is supposed to be cold so I plan on getting caught up on several builds. I am sure you have gotten alot done. These past few days has been the first time I have actually got to do any work and it has been nice. I am ready for spring. I have a ton of things that I want to do and parts are stacking up. Just the weather is keeping me in the house.
Dec 19, 2013 | 12:45 PM
#1673
Thread Starter
Super Moderator
iTrader: (1)
Joined: Aug 2008
Posts: 11,787
Likes: 28
From: Anderson Missouri
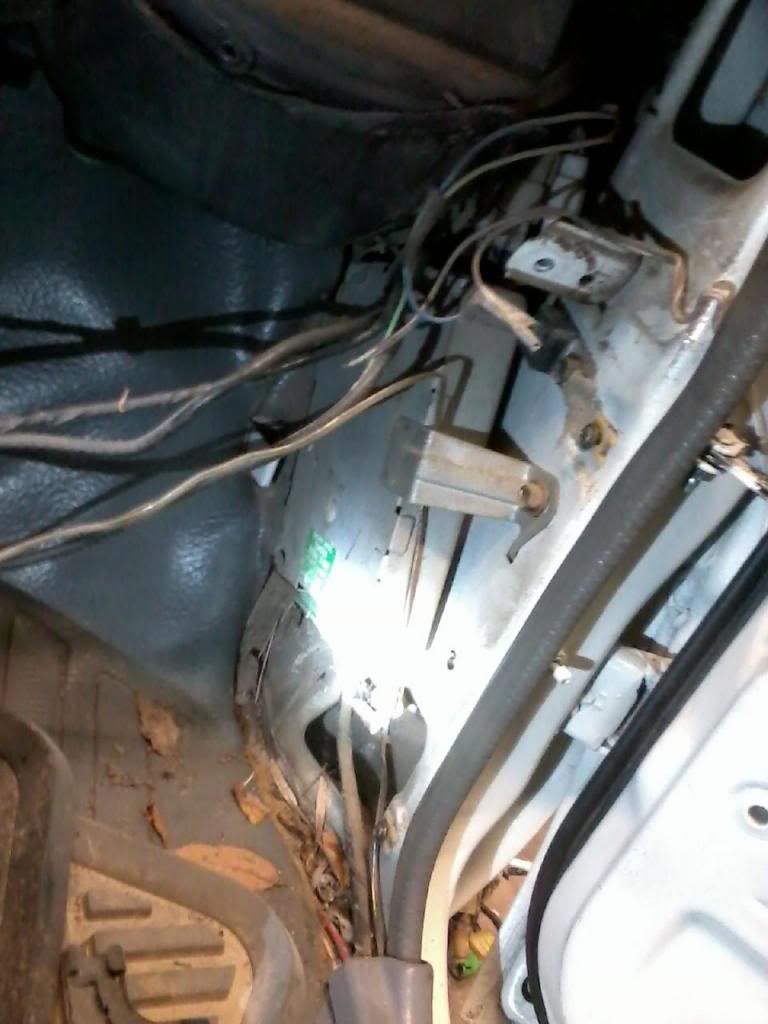
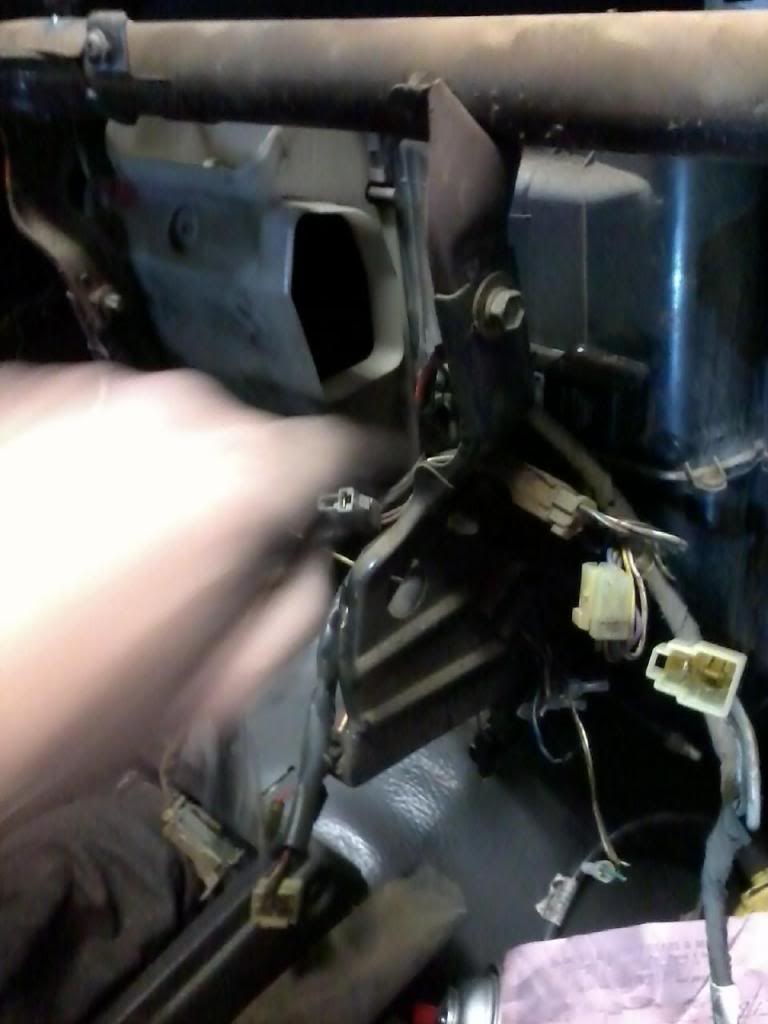
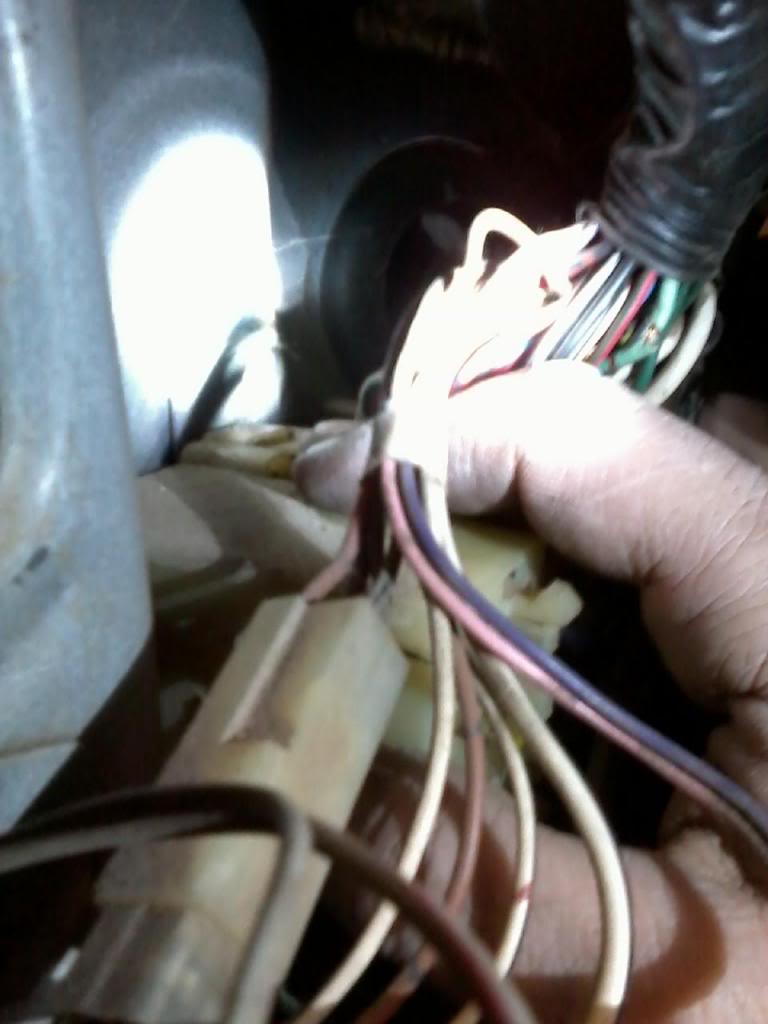
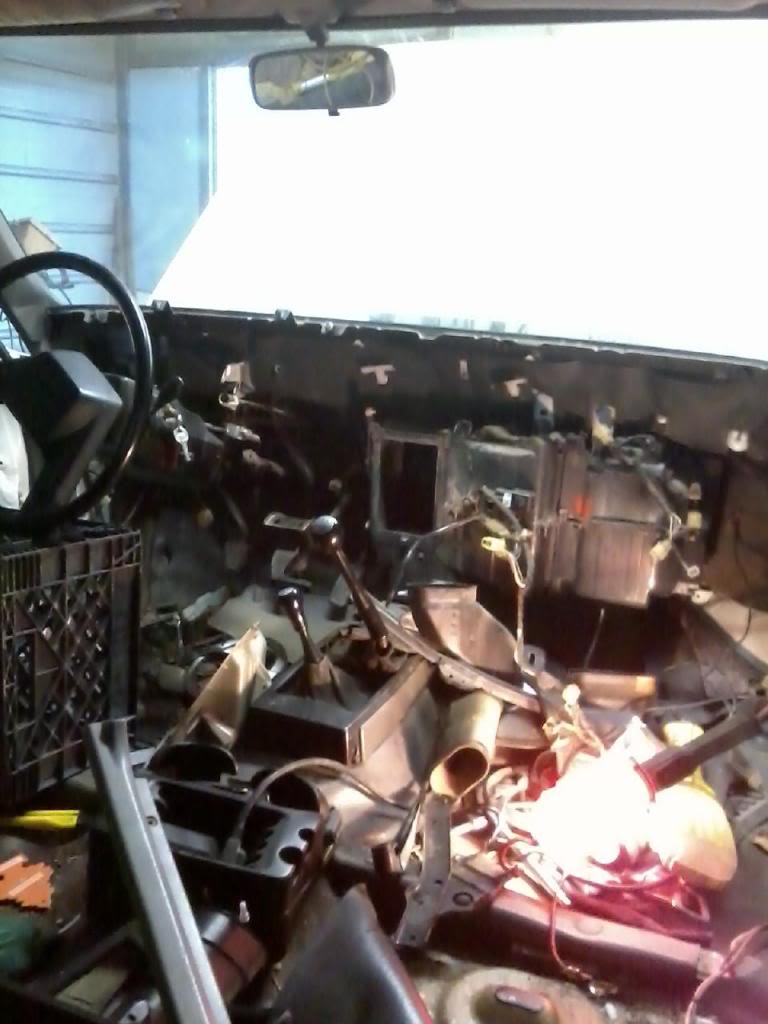
Remove seats. You will need to do this to get access to the plug under the passenger seat. It connect under seat to provide power to the lights and fuel guage. One fuel injected truck, it is power to the fuel pump.
Tail lights, Fuel Guage, and Fuel Pump connector sticking thru bottom of floor. Teh front part of the harness goes with the Main Harness.
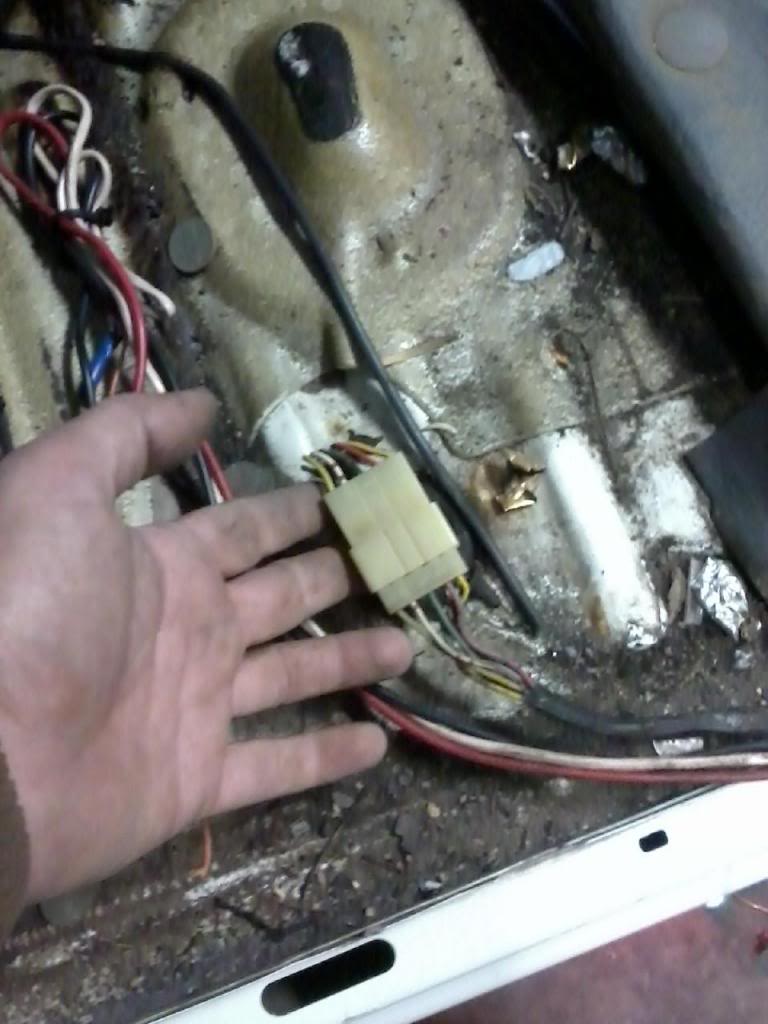
Reason for removing drivers seat is you need access to the seat belt connector. On a truck 88 or newer, it is how you get access to the O2 Sensor. 87 and older the O2 Sensor is in the exhaust manifold.

Last edited by Terrys87; Mar 20, 2014 at 08:00 AM.
Dec 19, 2013 | 12:54 PM
#1674
Thread Starter
Super Moderator
iTrader: (1)
Joined: Aug 2008
Posts: 11,787
Likes: 28
From: Anderson Missouri
Tom kept this truck clean when he had it. Dont know if you can see all the dirt and grime under the rubber floor mat, but this is typical of what you will find. You should see what carpet holds in. After 20 years of grime, I have taken carpets to the carwash and you would be suprised at what comes out of them. I will pull the rubber mat out and get it cleaned up. Will also clean the ventilation system while in there as well. This gives a truck a fresh smell.
After Mister Rat lived in my runner, I pulled the carpets and used bleach water and alot of elbow grease on mine. Also replacing the carpet in my runner, for as bad as it was, it is completely sanitary in there.
After 20 plus years of dust and spills, it is nearly impossible to get all the gunk out. One reason I like to tear my trucks apart and give a good cleaning.
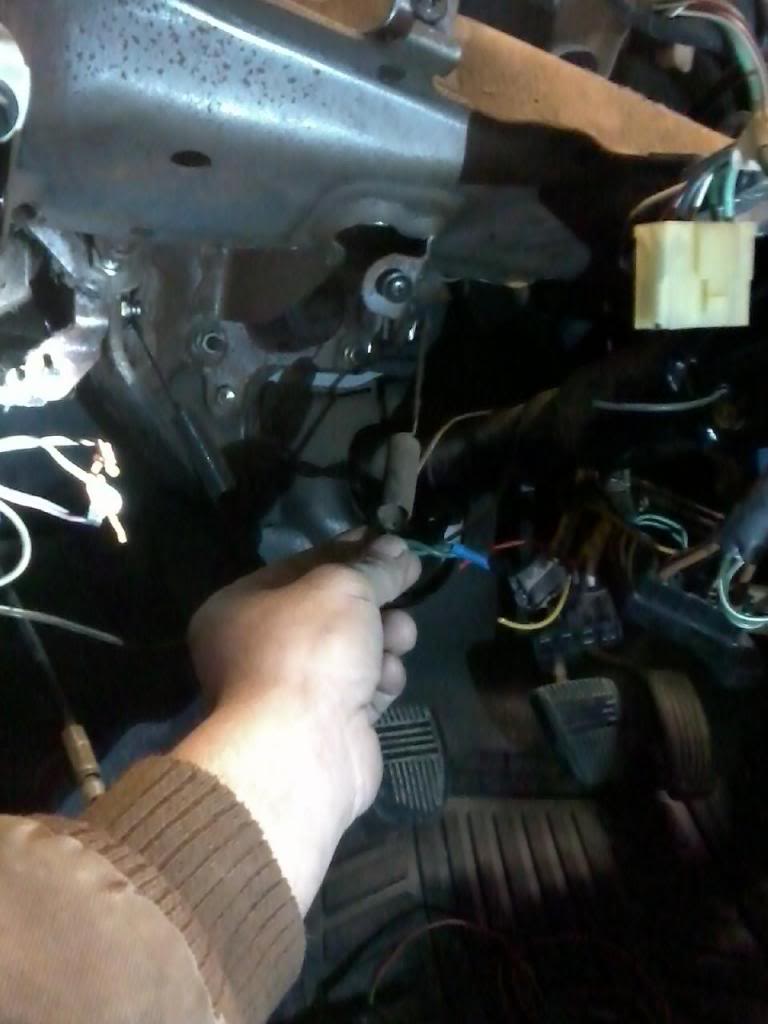
The harness is now ready to come out. Took awhile to get the passenger seat out as the slide mechanisim would not operate. Got it and now am going to pull the harness.
After Mister Rat lived in my runner, I pulled the carpets and used bleach water and alot of elbow grease on mine. Also replacing the carpet in my runner, for as bad as it was, it is completely sanitary in there.
After 20 plus years of dust and spills, it is nearly impossible to get all the gunk out. One reason I like to tear my trucks apart and give a good cleaning.
The harness is now ready to come out. Took awhile to get the passenger seat out as the slide mechanisim would not operate. Got it and now am going to pull the harness.
Dec 19, 2013 | 01:51 PM
#1675
Thread Starter
Super Moderator
iTrader: (1)
Joined: Aug 2008
Posts: 11,787
Likes: 28
From: Anderson Missouri
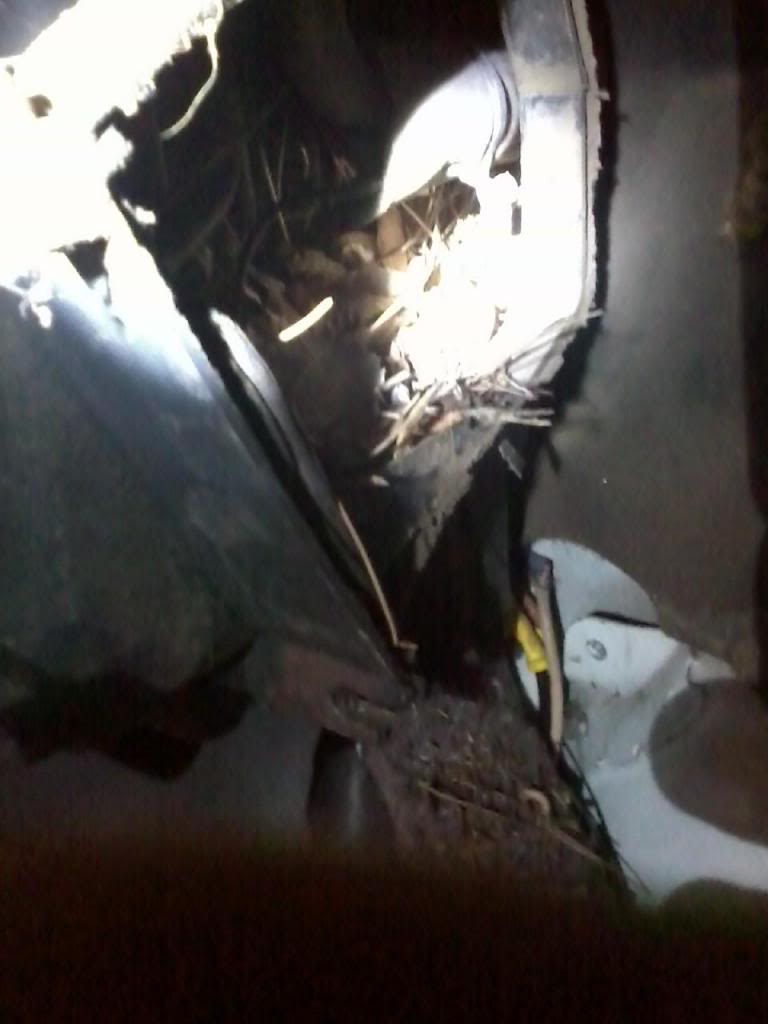
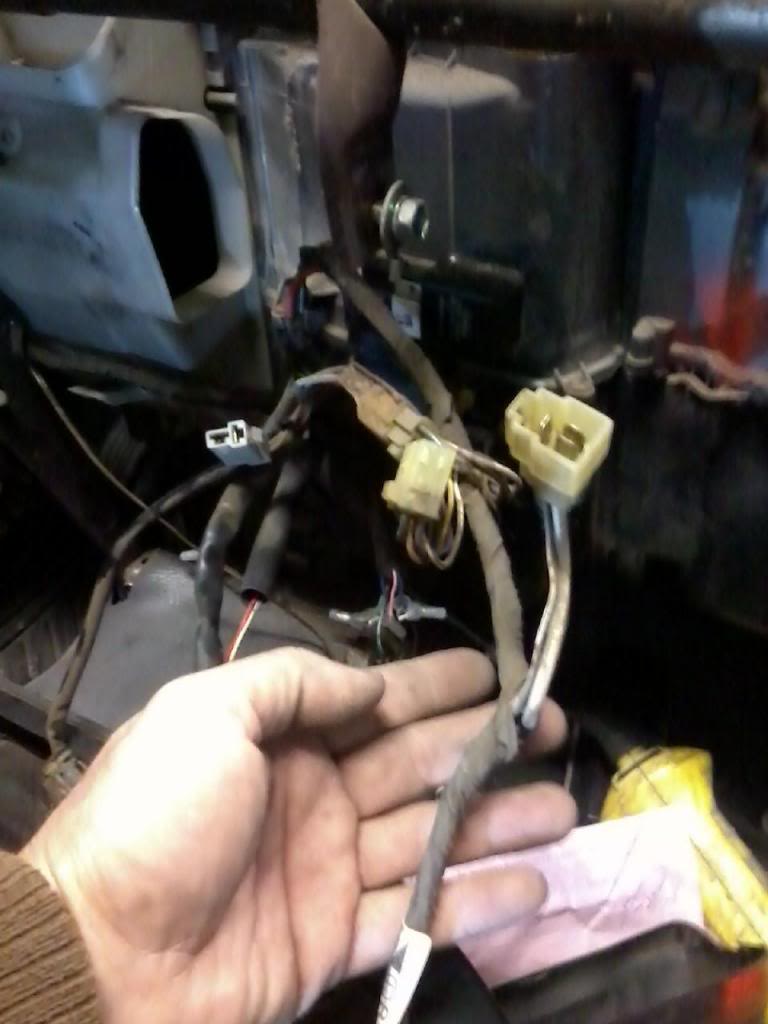
All of these plugs have to go from over the tire, thru the firewall.
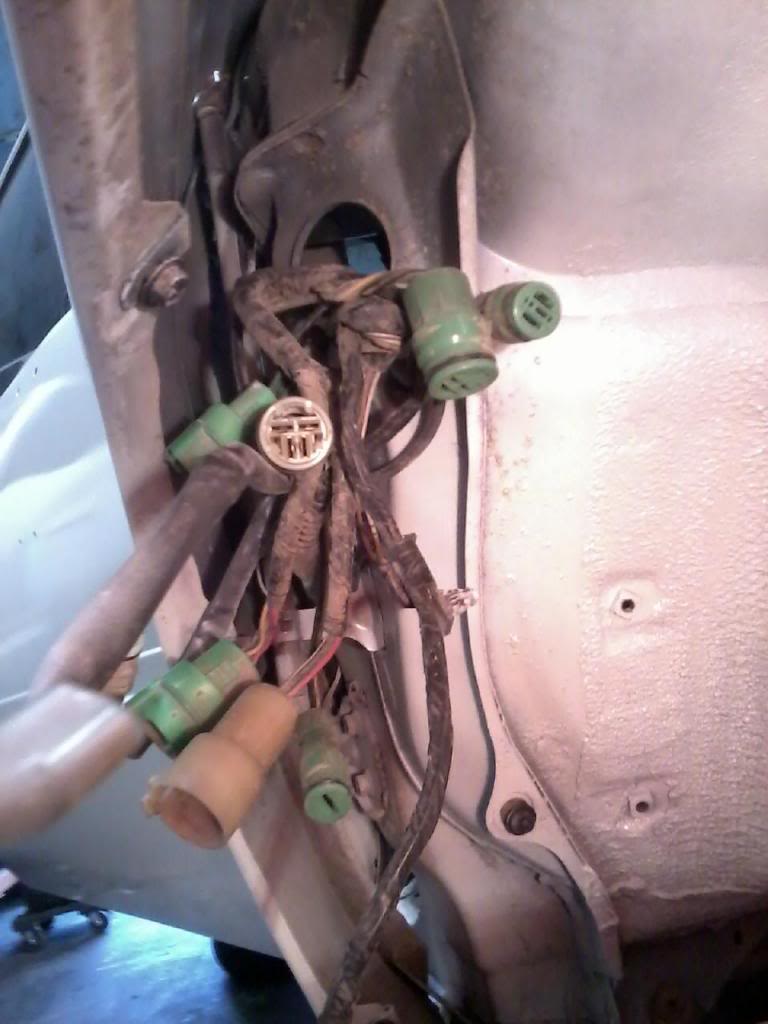
Here I am pulling them from inside of the cab thru the same hole, just a different view.

Harness is out.
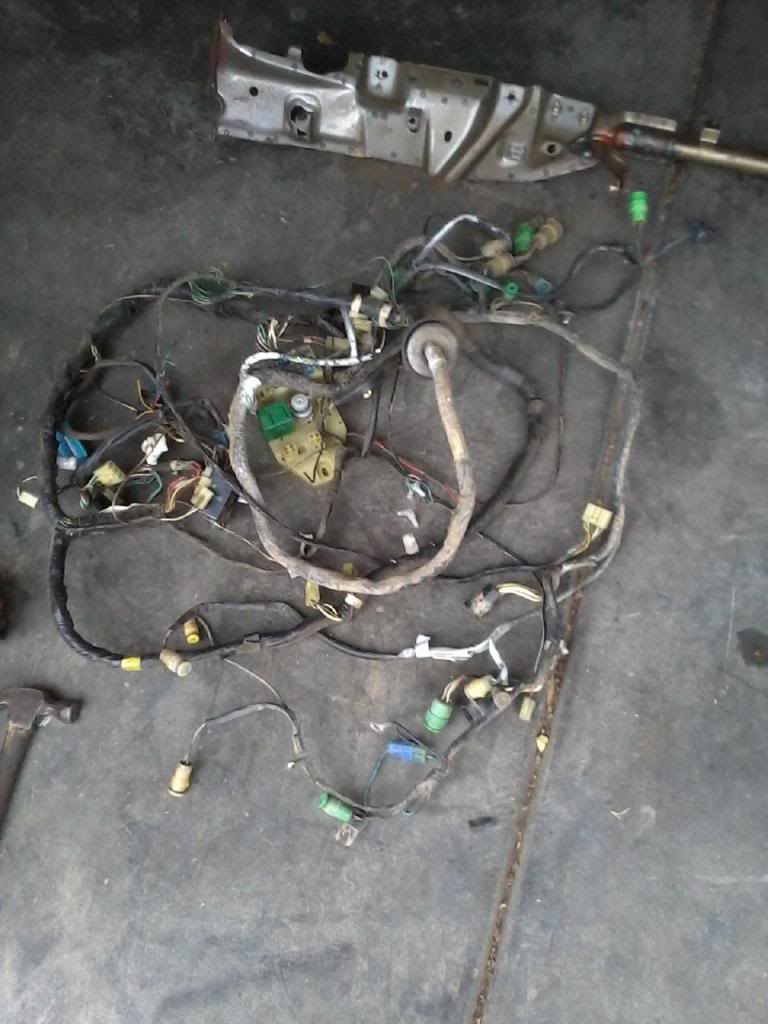
View of Main Harness out. The Fusebox harness is out as well. Still need to remove bed and pull the Taillight,Fuel Guage harness assembly out.

Here I am pulling them from inside of the cab thru the same hole, just a different view.

Harness is out.

View of Main Harness out. The Fusebox harness is out as well. Still need to remove bed and pull the Taillight,Fuel Guage harness assembly out.

Last edited by Terrys87; Mar 20, 2014 at 08:00 AM.
Dec 19, 2013 | 02:05 PM
#1676
Thread Starter
Super Moderator
iTrader: (1)
Joined: Aug 2008
Posts: 11,787
Likes: 28
From: Anderson Missouri
Half of dirt I pulled out of Evaporator.
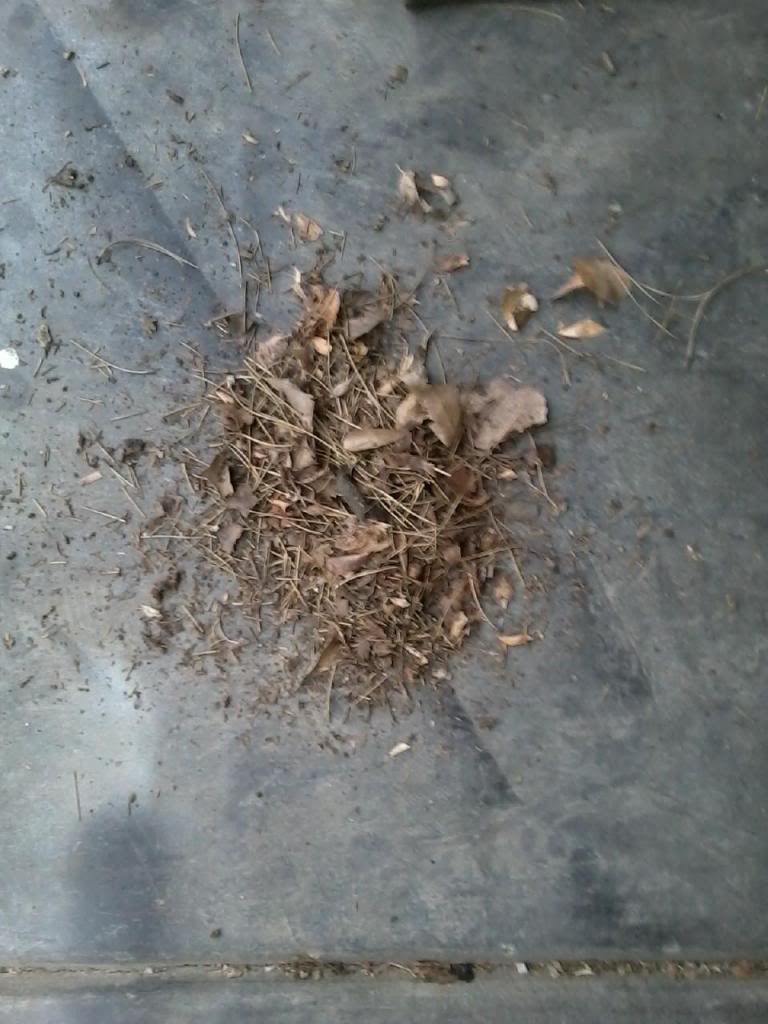
This AC system is charged, so I will just get a vacuum cleaner in there to get the other half out. This is from not having screens in the windshield cowl. Just posting to show what could be some your problem with your AC.


This AC system is charged, so I will just get a vacuum cleaner in there to get the other half out. This is from not having screens in the windshield cowl. Just posting to show what could be some your problem with your AC.

Last edited by Terrys87; Aug 25, 2014 at 11:39 PM.
Dec 19, 2013 | 02:09 PM
#1677
Thread Starter
Super Moderator
iTrader: (1)
Joined: Aug 2008
Posts: 11,787
Likes: 28
From: Anderson Missouri
I still have to pull the Steering Column, Fuel Tank, Fuel Rails, and Intake Sytem. Just trying to see what would be the next logical step for ease of explanation. I eventually want to create a thread "22r to 22re Swap" . I have seen several questions on what is involved in doing a swap. Not sure those that ask have what is involved. It is doable. Just finding a donor harness and pieces are the hardest part to find. Temperture is dropping so I am done for now. We have bad weather coming so I will work on things that I can in a heated shop.
Dec 20, 2013 | 07:38 AM
#1678
Thread Starter
Super Moderator
iTrader: (1)
Joined: Aug 2008
Posts: 11,787
Likes: 28
From: Anderson Missouri
I am going to work on the cab part first. Start taking out the carb later on when it warms back up. It was 60 degrees at 8 this morning. At 10:30 I froze out at 33degress. It dropped quick.
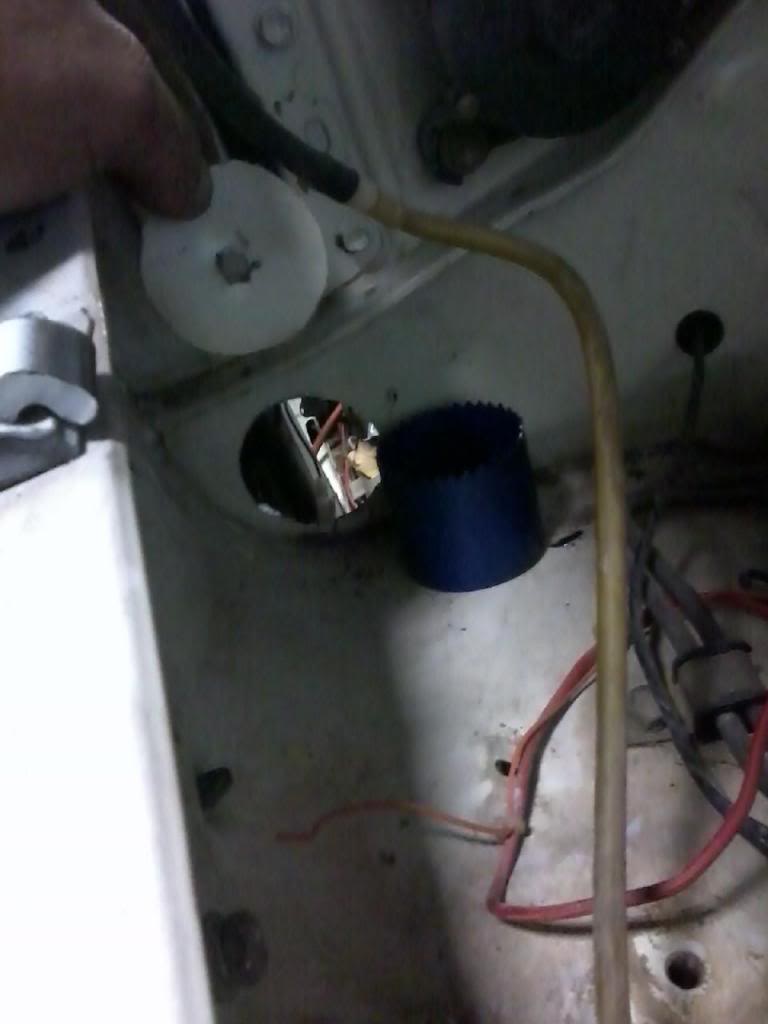
I measured the Injector Harness hole in my 85. I have several Hole Saws and it was 57mm. I have one but I used my 54mm Hole Saw. I can always go back and remove but you cant add to it as easily. The plugs will go thru as it is anyways. The harness has a rubber boot to seal out the air and to protect the wires.
Hole cut. Wanted to get it cut before putting in the harness. I have heard of people cutting whole harnesses getting it out of order.
Engine Bay side.
It may look like I cut the hole way small, but this is to allow for the seal to sit inside the firewall insulation. Really no good way of explaning the measurements. I used my 85 for all references. If you are going to try something like this, have a truck to refer to nearby.
View from inside of cab.

I measured the Injector Harness hole in my 85. I have several Hole Saws and it was 57mm. I have one but I used my 54mm Hole Saw. I can always go back and remove but you cant add to it as easily. The plugs will go thru as it is anyways. The harness has a rubber boot to seal out the air and to protect the wires.
Hole cut. Wanted to get it cut before putting in the harness. I have heard of people cutting whole harnesses getting it out of order.
Engine Bay side.

It may look like I cut the hole way small, but this is to allow for the seal to sit inside the firewall insulation. Really no good way of explaning the measurements. I used my 85 for all references. If you are going to try something like this, have a truck to refer to nearby.
View from inside of cab.

Last edited by Terrys87; Mar 20, 2014 at 08:01 AM.
Dec 20, 2013 | 07:53 AM
#1679
Thread Starter
Super Moderator
iTrader: (1)
Joined: Aug 2008
Posts: 11,787
Likes: 28
From: Anderson Missouri
Other random things I did in the shop before freezing out.
This motor is locked up tight. No plans of rebuilding it but wanted to use it to try things on. I have learned my lesson on pulling a truck out of a field and seeing how fast it will start. Usually the rings are going to be frozen to the cylinders. The starter is powerful enough to break the rings free but in about 2 months it will start smoking as the rings break and gouge the cylinder walls. I have learned on a Chevy Restore site, some of these motors can be saved and run great if enough time is taken to soak them in Marvel Mystery Oil.
The spark plugs were siezed into the head. I had been soaking them for a while and finally tried to get the plugs out. They were still stubborn. The Impact Wrench made light work of that. Been soaking them for two weeks. Use anti sieze on your plugs.
Filled cylinders with Marvel Mystery Oil and will see if I can get the motor to turn over in a couple of weeks. If that happens, I will continue to turn motor by hand for a while to get it turning smoothly.

I pulled the AC Condenser to give it a good cleaning while this deep into it. Cover the hoses with tape to keep moisture out. Did the same on the hoses in the engine bay.
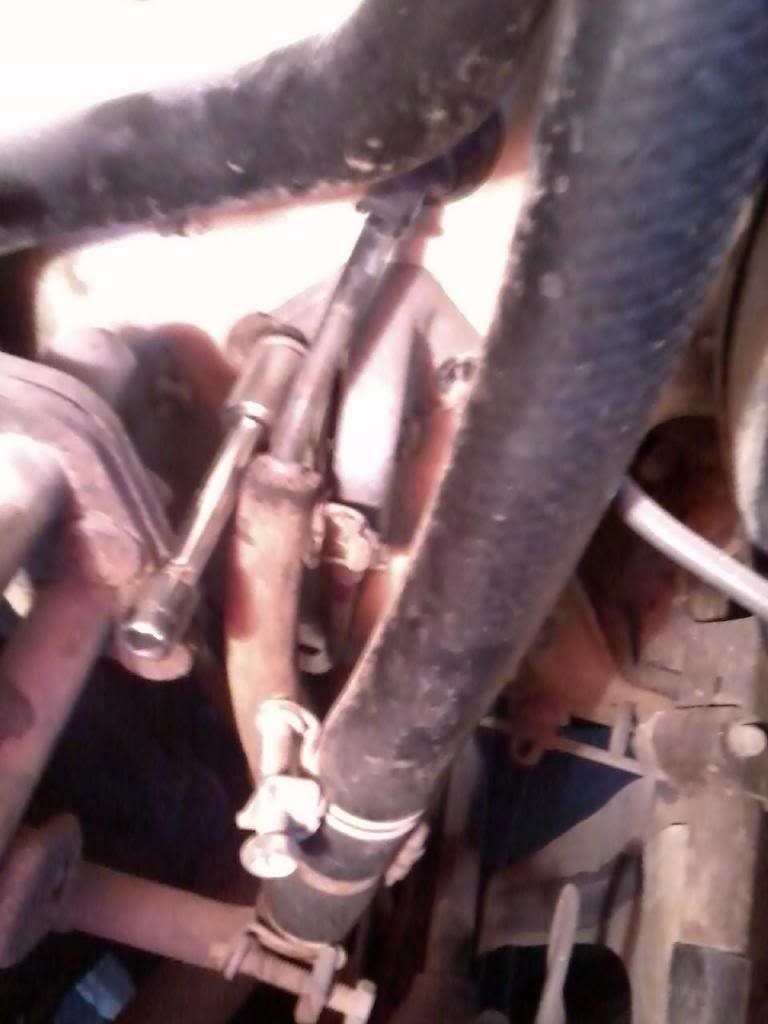
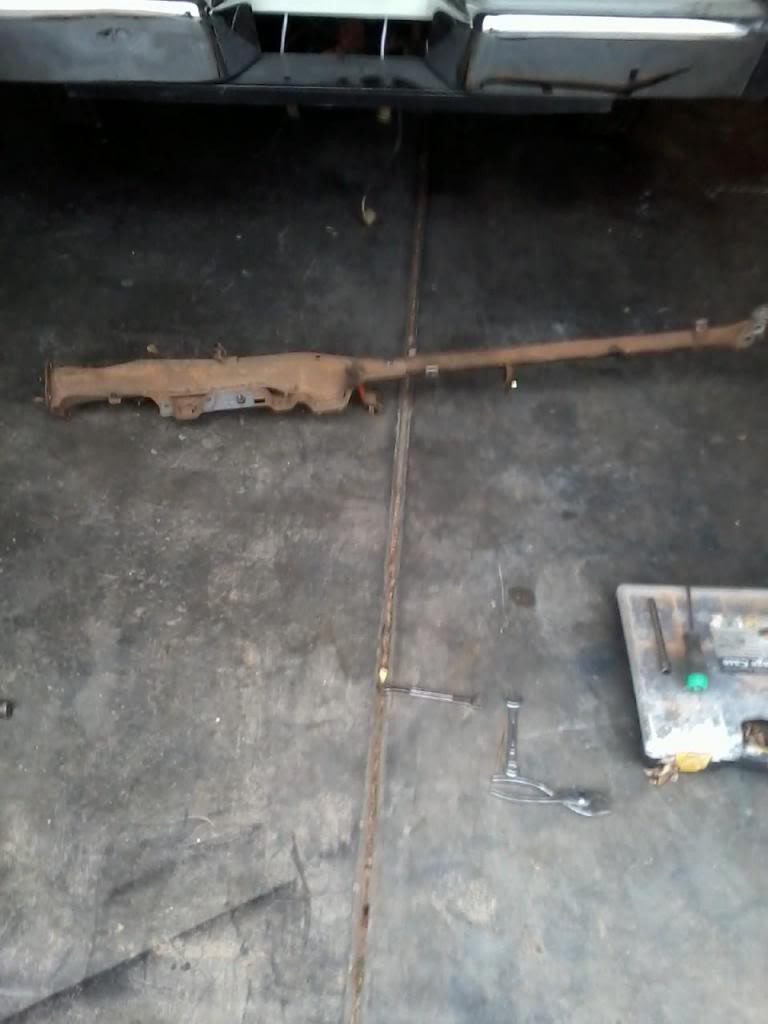
I am also going to check the Steering Column out before putting it in the truck. When removing the whole column, remove it at the firewall or at the gear box. I like the firewall myself.
Reason I like the fire wall as in most (all in my experience) cases the Steering Shaft will be frozen. It should slide in and out, but probably wont. Reason is in the event of a collision, it is to collapse. When pulling the whole Steering Column, it is extremely long. That is why I like the firewall removal. The rest of the shaft is easily removed from the gear box and then can be soaked in rust dissolver and with a rubber hammer tapped back and forth to free it up.
This motor is locked up tight. No plans of rebuilding it but wanted to use it to try things on. I have learned my lesson on pulling a truck out of a field and seeing how fast it will start. Usually the rings are going to be frozen to the cylinders. The starter is powerful enough to break the rings free but in about 2 months it will start smoking as the rings break and gouge the cylinder walls. I have learned on a Chevy Restore site, some of these motors can be saved and run great if enough time is taken to soak them in Marvel Mystery Oil.
The spark plugs were siezed into the head. I had been soaking them for a while and finally tried to get the plugs out. They were still stubborn. The Impact Wrench made light work of that. Been soaking them for two weeks. Use anti sieze on your plugs.
Filled cylinders with Marvel Mystery Oil and will see if I can get the motor to turn over in a couple of weeks. If that happens, I will continue to turn motor by hand for a while to get it turning smoothly.

I pulled the AC Condenser to give it a good cleaning while this deep into it. Cover the hoses with tape to keep moisture out. Did the same on the hoses in the engine bay.
I am also going to check the Steering Column out before putting it in the truck. When removing the whole column, remove it at the firewall or at the gear box. I like the firewall myself.

Reason I like the fire wall as in most (all in my experience) cases the Steering Shaft will be frozen. It should slide in and out, but probably wont. Reason is in the event of a collision, it is to collapse. When pulling the whole Steering Column, it is extremely long. That is why I like the firewall removal. The rest of the shaft is easily removed from the gear box and then can be soaked in rust dissolver and with a rubber hammer tapped back and forth to free it up.


