
Speedcrazy's 94 Pickup REV 2.0
 Dec 7, 2013 | 02:15 PM
#101
Registered User
Joined: Nov 2009
Posts: 2,025
Likes: 40
From: Northen Indiana
IM glad that worked. I learned that trick from someone on YT so Im happy to pass it along. There is nothing wrong with some rattle can paint. The wire wheel should work great. Put one on a drill and go to town
Dec 7, 2013 | 05:36 PM
#102
Thread Starter
Registered User
Joined: May 2013
Posts: 419
Likes: 0
From: SC Backwoods
The "54mm" wrench i borrowed is just a little too small. If i had to guess I'd say it was about 48-50mm. Called O'Reilly in town to see if they had one on their loaner program and he has what he calls a "axle spindle nut socket for a 4x4 Toyota" so i'm gonna run into town and pick it up and see if it works.
On a positive note I'm getting the truck nice and clean inside while i do all this waiting.
UPDATE: Forgot to post this earlier so i'm just going to add to it.
Couldn't find a 54mm anywhere in town... i have everything i can torn off all i need is that socket.
Dec 8, 2013 | 02:19 PM
#104
I just went through this on my T100. The previous owner used a damn chisel to remove and tighten the spindle nuts. Luckily I still had my 87 frame to steel the hardware from. I made a socket for my spindle nuts. If you got a welder you can make a socket out of 1/8" steel with ease. Weld a few tabs together like making a socket. Make sure they fit prior to fully welding. The. Weld a old socket to your tabs and here ya go. Works great for me.
Dec 9, 2013 | 12:31 PM
#105
Thread Starter
Registered User
Joined: May 2013
Posts: 419
Likes: 0
From: SC Backwoods
I just went through this on my T100. The previous owner used a damn chisel to remove and tighten the spindle nuts. Luckily I still had my 87 frame to steel the hardware from. I made a socket for my spindle nuts. If you got a welder you can make a socket out of 1/8" steel with ease. Weld a few tabs together like making a socket. Make sure they fit prior to fully welding. The. Weld a old socket to your tabs and here ya go. Works great for me.
I am looking for a local offroad shop that might have one i could borrow or rent cause i need this truck rolling, but i may end up having to buy one.
Dec 9, 2013 | 01:26 PM
#106
Thread Starter
Registered User
Joined: May 2013
Posts: 419
Likes: 0
From: SC Backwoods
Found one! On a "oh well what does it hurt to check" whim i stopped in at a local mom and pop hardware store and explained what i needed. He disappeared for a second then asked "you mean one of these?"
$30 for the socket and $5.50 for the 3/4 to 1/2 drive adapter.
Now i can get 'er done.
$30 for the socket and $5.50 for the 3/4 to 1/2 drive adapter.
Now i can get 'er done.
Dec 10, 2013 | 07:01 AM
#107
Thread Starter
Registered User
Joined: May 2013
Posts: 419
Likes: 0
From: SC Backwoods
Well i ran out of time last night to actually get much work done but i did find the source of my wobble, atleast i hope so. When i got the lock nut off, the adjustment nut was loose loose loose, like i could tighten it a few rotations with my fingers. Got this afternoon booked to finish this project up, rain or shine.
Dec 10, 2013 | 12:57 PM
#108
Thread Starter
Registered User
Joined: May 2013
Posts: 419
Likes: 0
From: SC Backwoods
Okay, i got the hub off. The hub to stud plate thing nuts out, but now i can't get that plate loose to get the studs out. How much force do y'all think is safe to use? I don't want to damage it but rapping it with a sledge is not working and its been soaking in pb blaster for a few hours.
On a more positive note, i have a coat of paint on my upper a-arm and the wheel well where the mud skirt rubs the paint off.
On a more positive note, i have a coat of paint on my upper a-arm and the wheel well where the mud skirt rubs the paint off.
Dec 10, 2013 | 03:29 PM
#109
Thread Starter
Registered User
Joined: May 2013
Posts: 419
Likes: 0
From: SC Backwoods
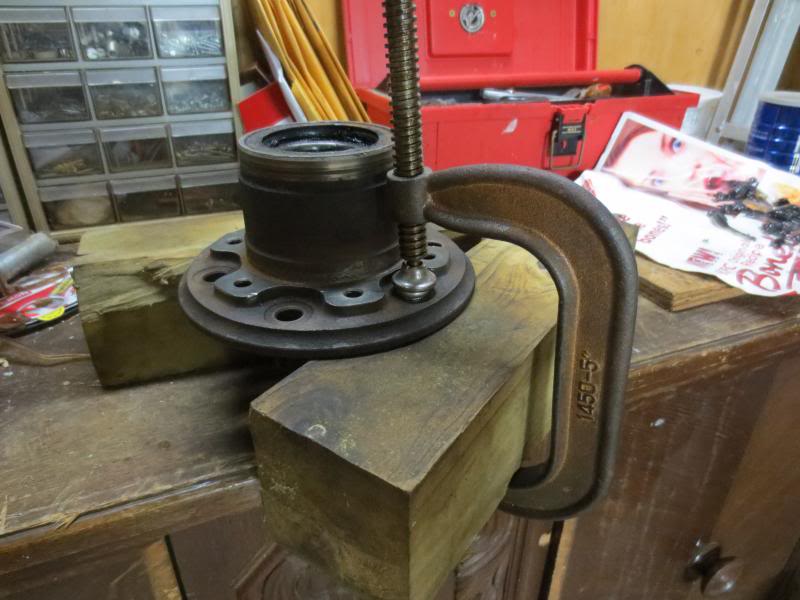
Painting finished and the rotor and hub separated. Soaked the studs in pb blaster and stopping for a bite to eat. For replacing the studs i have devised an improvised press. Will post a pic of it if it works.
Dec 10, 2013 | 03:40 PM
#111
Thread Starter
Registered User
Joined: May 2013
Posts: 419
Likes: 0
From: SC Backwoods
Thanks man. Anyone got any suggestions as to how to best repack the hub, that's a big ole cavity to fill....
Oh and is it necessary to remove the inner bearing or will enough grease get squeezed in there to be okay? I don't have a brass punch, would a piece of wood be safer than a steel punch to remove that?
Oh and is it necessary to remove the inner bearing or will enough grease get squeezed in there to be okay? I don't have a brass punch, would a piece of wood be safer than a steel punch to remove that?
Dec 10, 2013 | 07:07 PM
#112
Thread Starter
Registered User
Joined: May 2013
Posts: 419
Likes: 0
From: SC Backwoods
Soo my press didn't really work, i got one stud most of the way in before i broke the c-clap...
Gonna check with my mechanic friend to see if he had a press, if not i'll be buying some heavy duty washers.
This job is taking way too long, next time i'm gonna make sure i have every tool i might possibly need before i start.
Gonna check with my mechanic friend to see if he had a press, if not i'll be buying some heavy duty washers.
This job is taking way too long, next time i'm gonna make sure i have every tool i might possibly need before i start.
Dec 12, 2013 | 07:59 AM
#113
Thread Starter
Registered User
Joined: May 2013
Posts: 419
Likes: 0
From: SC Backwoods
Okay, pics time. Looking for a buddy with a press but i may not get to that ill the weekend due to work.
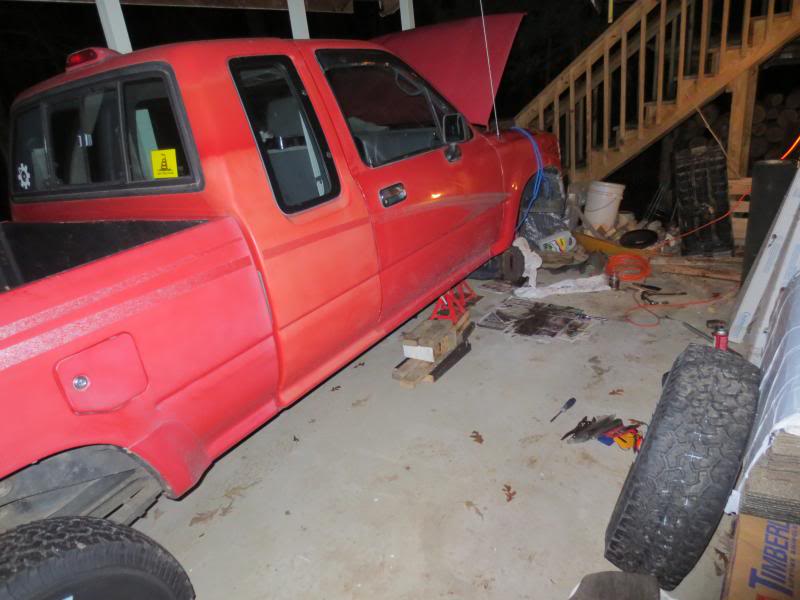
Here is how it sits right now:
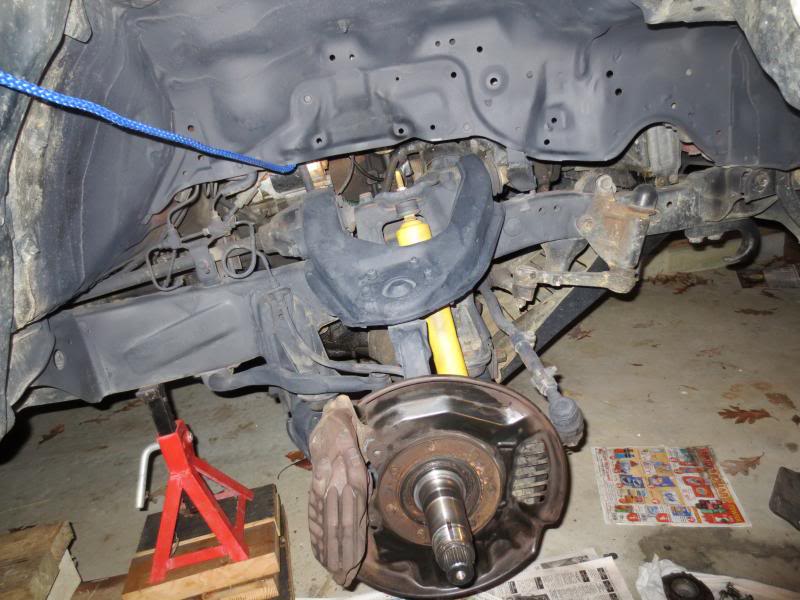
Then from the top:
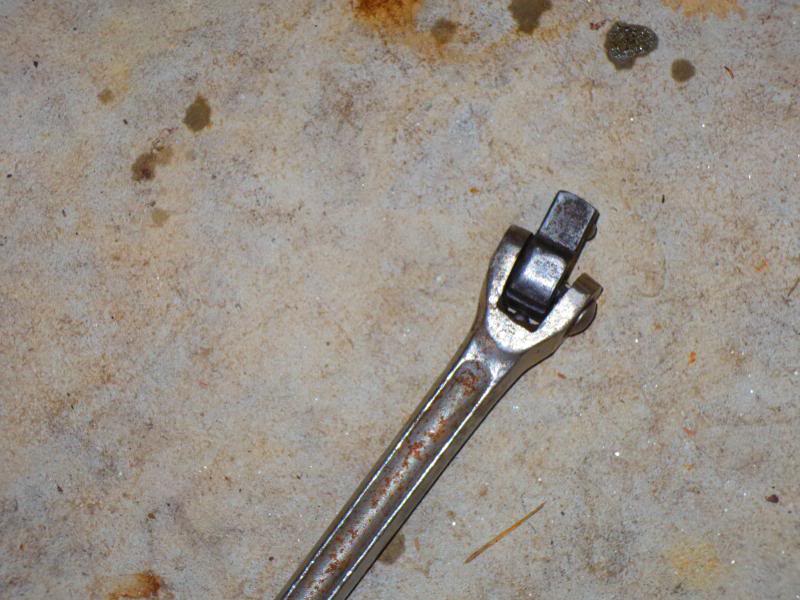
The wrench i bent and cracked taking the brake caliper off(crack doesn't really show up but i can flex the end - but its craftsman so i will try and get it replaced):
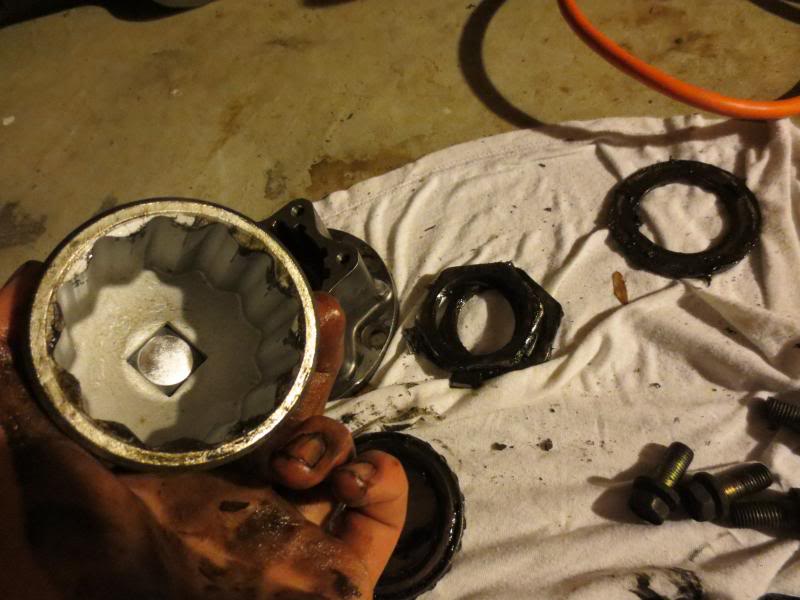
That elusive 54mm:
My ill fated press:
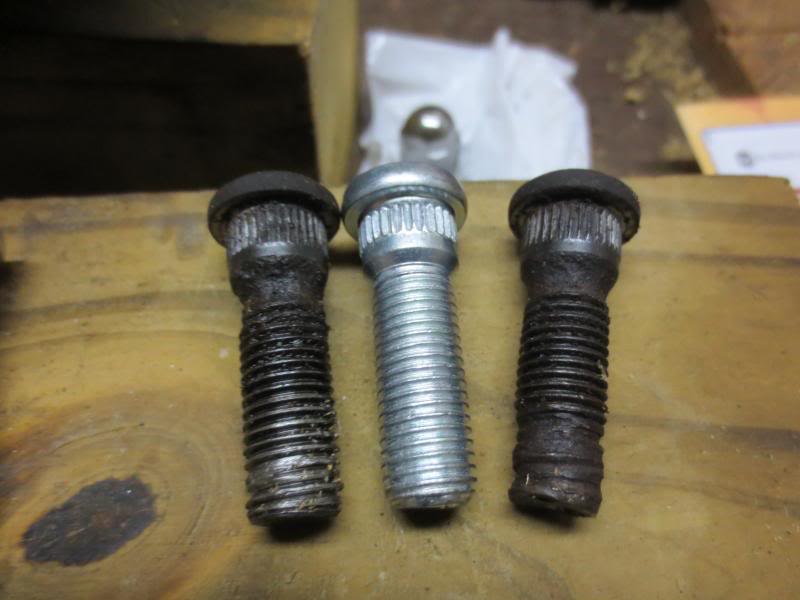
The old studs vs the new ones (just the two worst ones, but i went a head and did them all):
The seal between the hub and the dustcover... does that need replaced? Noe the grease stain below it was not there when i removed the hub, it was caused by my rinsing grease out of the cavity behind the seal.
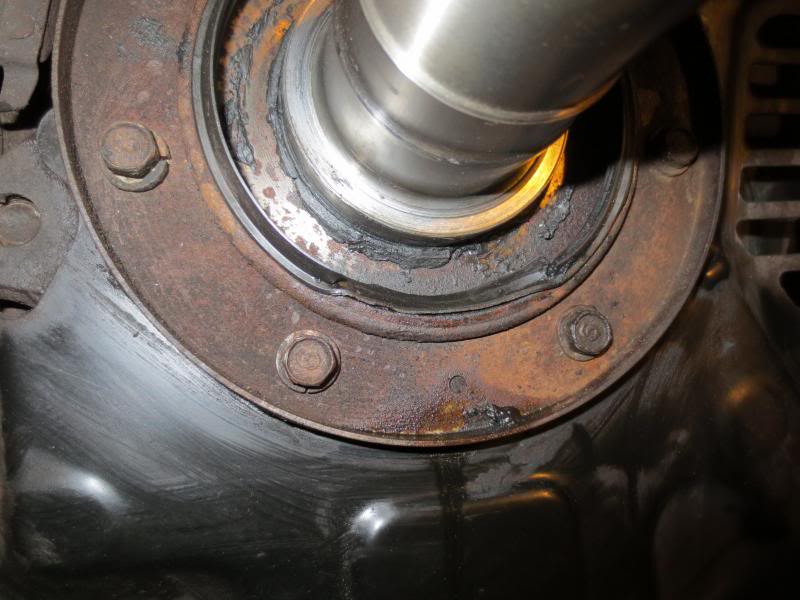
I only ask because the PO rounded the bolts holding the cover on and it would be a royal pain to remove.
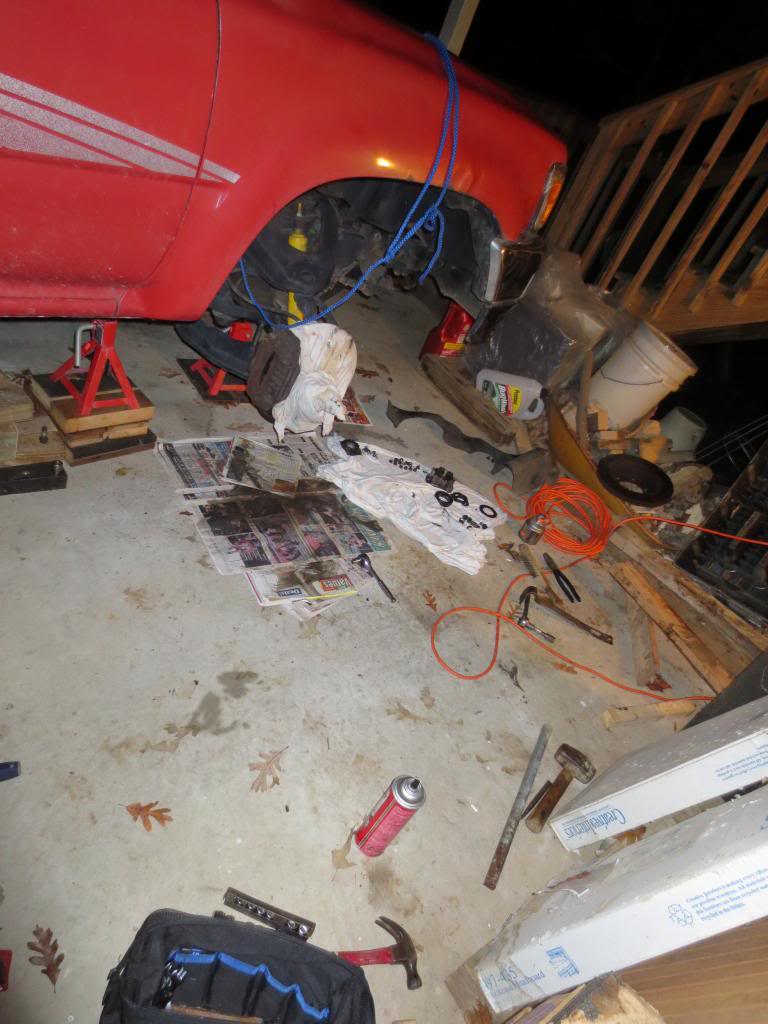
And my workspace:
Oh yeah and the new shoes are on in those pics. The flash kinda flattens the tread...
Here is how it sits right now:

Then from the top:
The wrench i bent and cracked taking the brake caliper off(crack doesn't really show up but i can flex the end - but its craftsman so i will try and get it replaced):

That elusive 54mm:

My ill fated press:

The old studs vs the new ones (just the two worst ones, but i went a head and did them all):

The seal between the hub and the dustcover... does that need replaced? Noe the grease stain below it was not there when i removed the hub, it was caused by my rinsing grease out of the cavity behind the seal.

I only ask because the PO rounded the bolts holding the cover on and it would be a royal pain to remove.
And my workspace:


Oh yeah and the new shoes are on in those pics. The flash kinda flattens the tread...
Last edited by SpeedCrazy; Dec 12, 2013 at 08:01 AM.
Dec 12, 2013 | 02:39 PM
#115
Thread Starter
Registered User
Joined: May 2013
Posts: 419
Likes: 0
From: SC Backwoods
I just reached that conclusion myself, but i appreciate the corroboration. I suppose my jig would help me keep them straight shouldn't be too hard. I'm ready to be done with this job.
Dec 12, 2013 | 04:59 PM
#116
Registered User
Joined: Dec 2008
Posts: 2,391
Likes: 1
From: tecumseh nebraska
Fill the hub full of grease, adjust the first nut til theres hardly any play, the second nut is to lock it in place. Put the lockout hub back on with the circlip that holds your cv in place then the rest of the lockout (the correct way!) and reinstall your brakes and wheel. BAM! Done dealio.
And the studs...big hammer. to install put the new one in and use some washers and a strong air impact to pull them in.
And the studs...big hammer. to install put the new one in and use some washers and a strong air impact to pull them in.
Dec 12, 2013 | 06:19 PM
#117
Thread Starter
Registered User
Joined: May 2013
Posts: 419
Likes: 0
From: SC Backwoods
Fill the hub full of grease, adjust the first nut til theres hardly any play, the second nut is to lock it in place. Put the lockout hub back on with the circlip that holds your cv in place then the rest of the lockout (the correct way!) and reinstall your brakes and wheel. BAM! Done dealio.
And the studs...big hammer. to install put the new one in and use some washers and a strong air impact to pull them in.
And the studs...big hammer. to install put the new one in and use some washers and a strong air impact to pull them in.
Circle clip? There is one on the cv but i did not have to remove it. the locking hubs should be straightforward, though on that point, how much grease should be in them? Or do i rely on centrifugal force to push it out to them?
But yes, if i'd had the right tools to begin with it would have been an easy job, but hey i'm learning.
Dec 17, 2013 | 04:38 AM
#118
Thread Starter
Registered User
Joined: May 2013
Posts: 419
Likes: 0
From: SC Backwoods
Well good news and bad news:
Good news is I got the hub all back together and drove the truck.
Bad news is i decided while i was out there that i should replace the worn out brake pads. Passenger side went in no problem, drivers side came out no problem and the outer pad went back in like butter... but the inner pad refuses. The lower piston is stuck.
I think it had been stuck for a while as the inner pad is about twice as thick as the outer one. I have hit it with brake cleaner and then penetrating oil, pulled on it with a screwdriver, flat bar, and pry bar and hit all the above with a sledge to try and brake it loose, all that i achieved was turning the steering wheel. I also tried steady pressure with a pair of vice grips but all that happened was that i popped the leverage arm out.
Any ideas y'all, i really want to be done with this and be able to get it back on the road.
Dec 17, 2013 | 05:48 AM
#119
Registered User
Joined: Sep 2013
Posts: 184
Likes: 0
Well good news and bad news: Good news is I got the hub all back together and drove the truck. Bad news is i decided while i was out there that i should replace the worn out brake pads. Passenger side went in no problem, drivers side came out no problem and the outer pad went back in like butter... but the inner pad refuses. The lower piston is stuck. I think it had been stuck for a while as the inner pad is about twice as thick as the outer one. I have hit it with brake cleaner and then penetrating oil, pulled on it with a screwdriver, flat bar, and pry bar and hit all the above with a sledge to try and brake it loose, all that i achieved was turning the steering wheel. I also tried steady pressure with a pair of vice grips but all that happened was that i popped the leverage arm out. Any ideas y'all, i really want to be done with this and be able to get it back on the road.
Your best bet would be to buy new ones, then you don't have to worry about them again.
Dec 17, 2013 | 06:25 AM
#120
Thread Starter
Registered User
Joined: May 2013
Posts: 419
Likes: 0
From: SC Backwoods


