
Grawg's 86 4Runner
 Feb 19, 2014 | 08:28 AM
#1
Thread Starter
Registered User
Joined: Feb 2014
Posts: 38
Likes: 0
From: Graham, WA
Grawg's 86 4Runner
I recently purchased an 86 4Runner with a knocking motor. My plan is to get it running and reliable first and foremost. Then make it more off road capable. Most of my gear head friends have crawlers, I'm not sure which way I'm going to go yet. I like the idea of long travel IFS, but living in Western Washington doesn't really have that many wide open spaces. So I guess we'll see. Here are the first pics, I'm in the process of pulling the motor, and seeing why it's knocking. BTW this is my first engine tear down. I've done suspension work, rebuilt carburetors, brake upgrades etc but never tore into a motor. Here we go!
Feb 19, 2014 | 09:35 AM
#3
Thread Starter
Registered User
Joined: Feb 2014
Posts: 38
Likes: 0
From: Graham, WA
The pics are 1. when I brought it home. 2. in the garage starting the engine removal. 3. The inclinometer that my Father-in-law found in the woods, and the box I am in the process of making.
Feb 21, 2014 | 07:30 AM
#4
Thread Starter
Registered User
Joined: Feb 2014
Posts: 38
Likes: 0
From: Graham, WA
Yesterday was a productive day. With the help of an experienced friend, we pulled the motor, and checked to make sure the timing was correct, and checked the valves. The Clutch on this is nearly new, and the PO said it was a marlin crawler. But upon inspecting it, I found out it was an AISIN. Oh and there is one bolt broken on the flywheel, so I'll have to fix that, and get a new set of clutch bolts. So maybe Marlin is just rebadging Toyota Clutches? Anyway, the plan for today is to pull the head, and check the head gasket. I really hope I can get this back together in a relatively short amount of time. I'd really like to drive this thing!
 Feb 21, 2014 | 06:01 PM
#7
Registered User
iTrader: (4)
Joined: May 2010
Posts: 720
Likes: 16
From: People's Republic of California
I'll be the first to chime in on your thread....I remember how it felt at first thinking I was just talking to myself and writing a diary 
Was the clutch cover or disc an Aisin? I believe Marlin uses an Aisin clutch cover and a Secco disc, someone who actually bought one from them may be able to chime in and confirm or deny. Or you can go to the website and check. Either way Aisin is OEM, so keep it unless you're building a rock crawling rig, you won't get any better than that in my opinion.
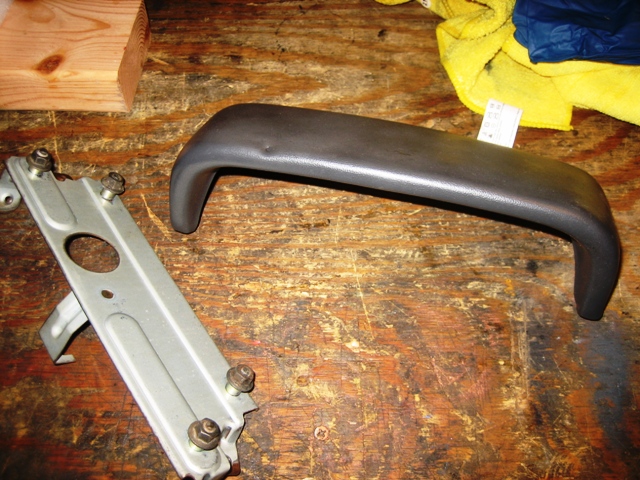
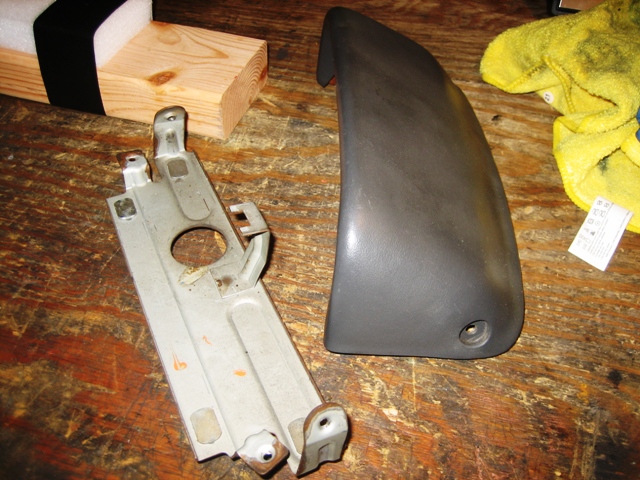
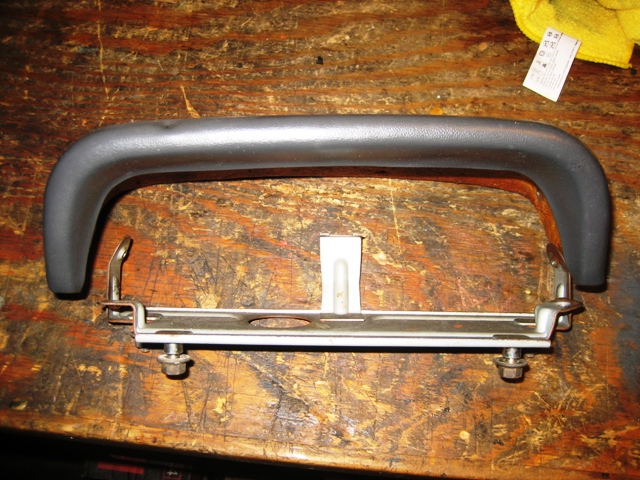
I came on here to let you know I have an extra inclinometer cover and mount. I totally forgot I had it in a box until I saw your post! otherwise I would have given it away to someone else not long ago. I'm not sure what years the cover and mount came from, they both came from the yard off of different 1st Gen 4runners though. They are yours if you want them, just pay the shipping, I'm in Cali. I have no use for them anymore and it appears you may. I'm almost positive that the shape of the covers are slightly different dependent on years, if you search the forum you'll find the posts I remember reading about. So i can't guarantee it will be a perfect fit for you, it may or may not need some modifications. But it's free except for shipping, just let me know.
You and I both have what appears to be a scarce inclino model in that it has "4WD Toyota" labeled on the face, not all of them have it. The majority I've seen don't have it, and I believe they came in the 85' model year.
This mine mounted in my 3rd Gen pickup...i changed the images to a picku-up because that's what I have.

Was the clutch cover or disc an Aisin? I believe Marlin uses an Aisin clutch cover and a Secco disc, someone who actually bought one from them may be able to chime in and confirm or deny. Or you can go to the website and check. Either way Aisin is OEM, so keep it unless you're building a rock crawling rig, you won't get any better than that in my opinion.
I came on here to let you know I have an extra inclinometer cover and mount. I totally forgot I had it in a box until I saw your post! otherwise I would have given it away to someone else not long ago. I'm not sure what years the cover and mount came from, they both came from the yard off of different 1st Gen 4runners though. They are yours if you want them, just pay the shipping, I'm in Cali. I have no use for them anymore and it appears you may. I'm almost positive that the shape of the covers are slightly different dependent on years, if you search the forum you'll find the posts I remember reading about. So i can't guarantee it will be a perfect fit for you, it may or may not need some modifications. But it's free except for shipping, just let me know.
You and I both have what appears to be a scarce inclino model in that it has "4WD Toyota" labeled on the face, not all of them have it. The majority I've seen don't have it, and I believe they came in the 85' model year.


This mine mounted in my 3rd Gen pickup...i changed the images to a picku-up because that's what I have.

Trending Topics
Feb 21, 2014 | 06:27 PM
#8
Thread Starter
Registered User
Joined: Feb 2014
Posts: 38
Likes: 0
From: Graham, WA
Changing it to a pickup is awesome! Is it in your build thread on how you did it? I was wondering if there was a way to refinish it. Who knows how long it sat in the woods till my father in law stumbled upon it.
The AISIN is printed on the clutch cover.
And it did seem a little weird posting without any replies, so thank you!
The AISIN is printed on the clutch cover.
And it did seem a little weird posting without any replies, so thank you!
Last edited by Grawg72; Feb 21, 2014 at 07:59 PM.
Feb 22, 2014 | 03:36 PM
#9
Registered User
iTrader: (4)
Joined: May 2010
Posts: 720
Likes: 16
From: People's Republic of California
It was on another forum...I think I mentioned it on my build thread or in the open forum. I can't for the life of me think of it right now. If your clear lense is all scratched up, you just have to do it the old fashion way. Wet sand and plastic polish. Or you can buy a 3m headlight lense restorer kit, everything you need is in it. 4crawler website has a how-to take it apart on the inclinometer if you need to fix it.
Feb 23, 2014 | 12:51 AM
#10
The allen head that you are mentioning, I have never gotten it out without having to use a set of vise grips on it. I get a good firm grip with the vise grips, but not so hard that it distorts the head and break it loose first. Then I use the allen wrench to remove it the rest of the way.
I did the same thing the first time I removed that bolt. It will strip every time, from my experience.
You will see mentioned on here a lot about needing and Factory Service Manual. I learned the 22re with just a Haynes Manual and it will work great. The 22 motor is a simple motor to work on and there have been several newbies that have done major work on one for the first time and did well. Just jump in and do it and you will get the hang of it in no time at all.
I have pulled a couple of runners out of the woods and done about the same thing you are doing. On my 88 runner build below, on the first page, I have listed a lot of the common problems that you are bound to run into and how to fix them. Most can be done for free or cheap. Looking forward to your build.
Feb 23, 2014 | 11:04 AM
#12
Thread Starter
Registered User
Joined: Feb 2014
Posts: 38
Likes: 0
From: Graham, WA
Terry- thanks for the info! I'm sure I'll be referring to your thread several times throughout my build. I really like how it's categorized.
Crapple- Yes! It did come with a soft top. Were you trying to purchase the whole rig, or just the top? It did take me a week and a half to work him down to a IMO reasonable price. If you are interested in the top, pm me. Maybe we can work something out?
Grego- I was actually referring to the back portion of the cover. The paint is coming off, and was wondering if there was a new sticker, or whatever to replace it.
No work on the runner for the last few days, I've been at work. Hopefully I'll be able to wrench on it either tonite, or tomorrow afternoon.
Feb 23, 2014 | 01:53 PM
#13
Registered User
iTrader: (4)
Joined: May 2010
Posts: 720
Likes: 16
From: People's Republic of California
Oh, no, I don't think so. It's paint so you would have to paint it again. Probably would need a paint artist or something to do it to replace the lettering and detailed stuff.
Feb 24, 2014 | 03:17 PM
#15
Thread Starter
Registered User
Joined: Feb 2014
Posts: 38
Likes: 0
From: Graham, WA
I am so stoked! A master tech at my work told me the secret to the intake hex bolt. All you need us a punch, big hammer, 6mm hex socket, and extension.
Simply place the punch on the hex bolt and hit it several times to reshrink the metal.
Then insert the socket, with extension and twist. Easy peasy! Worked the very first time. Thank you Rick!
On a side note, I tried uploading pics from photobucket, but they didn't load. Just the address was in here. That's why the edit. I'll try again.
Last edited by Grawg72; Feb 24, 2014 at 04:32 PM.


 Feb 25, 2014 | 07:44 PM
#18
Thread Starter
Registered User
Joined: Feb 2014
Posts: 38
Likes: 0
From: Graham, WA
Not much progress today. Pulled the oil pan, and made a mess on the floor. But so far the bottom end looks pretty good. We'll see when I actually pull the rod caps and give it a thorough inspection. A good friend who has been helping seems to think the noise was coming from the top end. So hopefully he is right, and I can get this pig back together, and have a bit of fun in it.
Feb 26, 2014 | 03:35 AM
#19
I will have to try your way of removing the bolt sometime. These trucks tend to rattle a little. I got a stethoscope from Harbor Freight and listen to my valves and sometimes just a slight tweaking or adjustment helps to quiten it down. Timing Chain can cause noise when it is getting worn.
Glad to see I am not the only one that makes a mess on the floor. I think that is just about mandatory when working on these. lol Gear oil is worse, Urghhhh!!
Glad to see I am not the only one that makes a mess on the floor. I think that is just about mandatory when working on these. lol Gear oil is worse, Urghhhh!!
Feb 27, 2014 | 10:59 AM
#20
Thread Starter
Registered User
Joined: Feb 2014
Posts: 38
Likes: 0
From: Graham, WA
The head went of to the shop to get checked out. The verdict is in and it's 0.020 beyond lowest spec. It can't be shaved any more, unless I get some kind of shim/spacer. Also, the pistons in it have 1.00 stamped into them. If I was told correctly, that's bored 0.040 over. So I am now wondering if this motor is salvageable. My buddy is coming over tonight to go through the bottom end with me. We shall see.


