
Dropzone's 1994 4runner Build AKA: Project Recycle:
 Nov 10, 2015 | 06:38 AM
#81
http://pages.ebay.com/motors/link/?n...465190&alt=web
Had them in less than 10 days from china, warp speed shipping.
A bracket is an idea will give it some thought
Last edited by dropzone; Nov 10, 2015 at 07:46 AM.
Nov 16, 2015 | 05:00 PM
#82
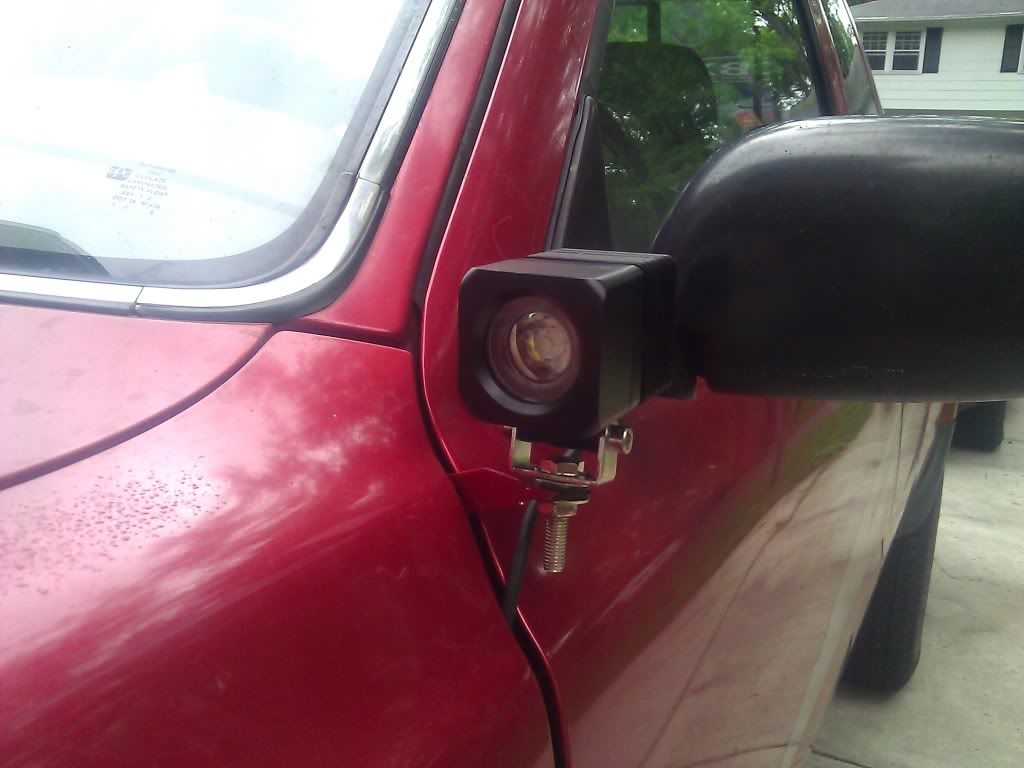
Started on my heated mirror experiment :
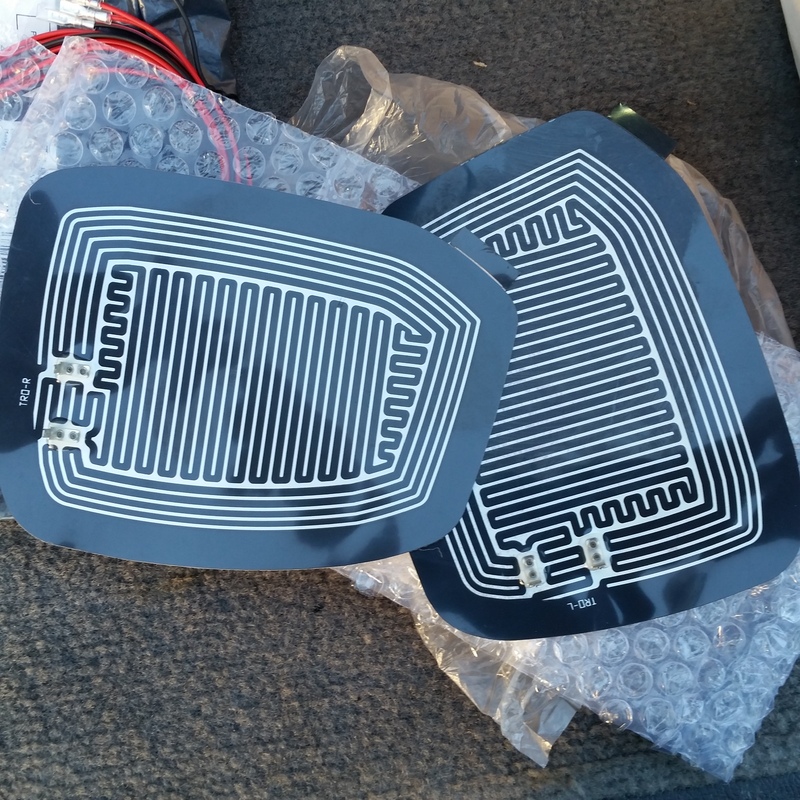
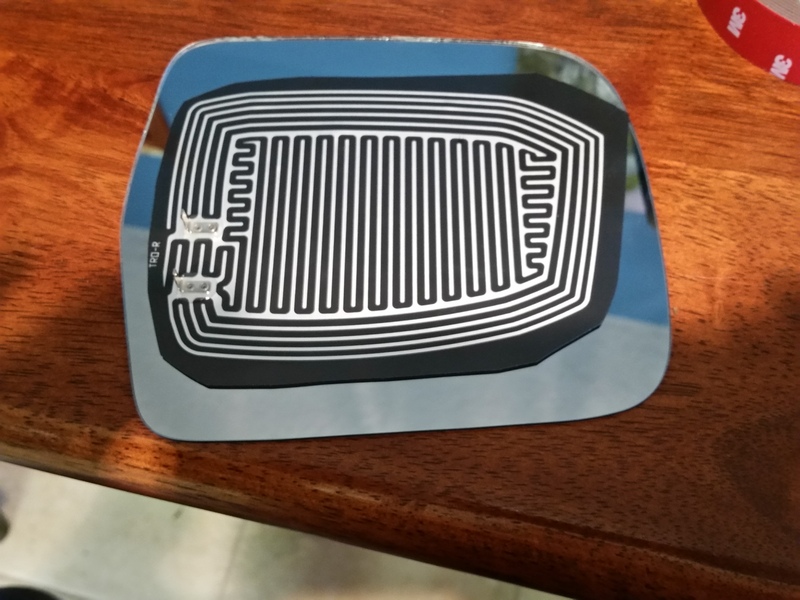
$15 heated inserts from eBay
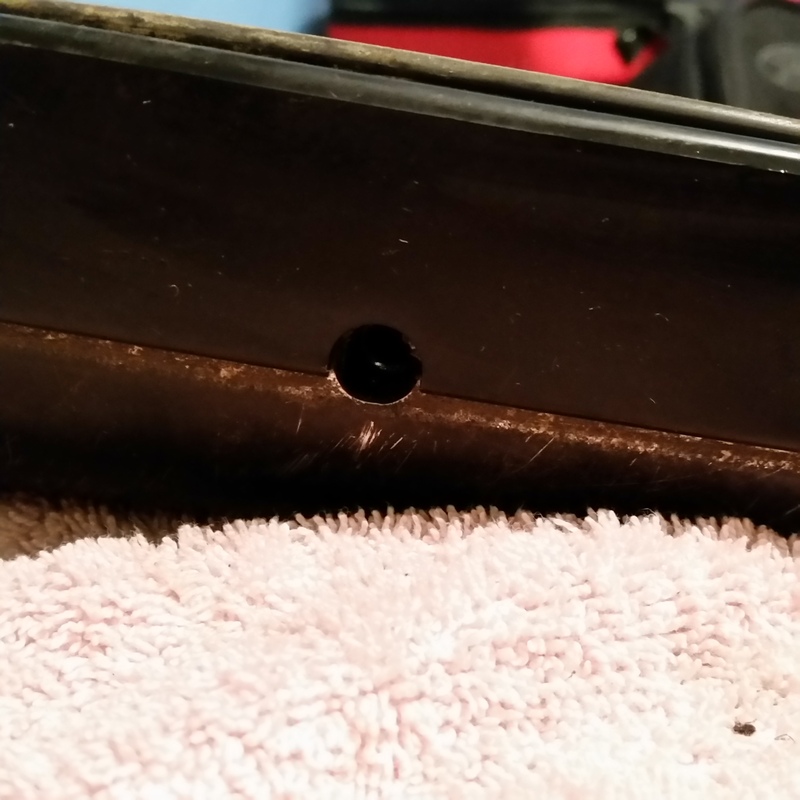
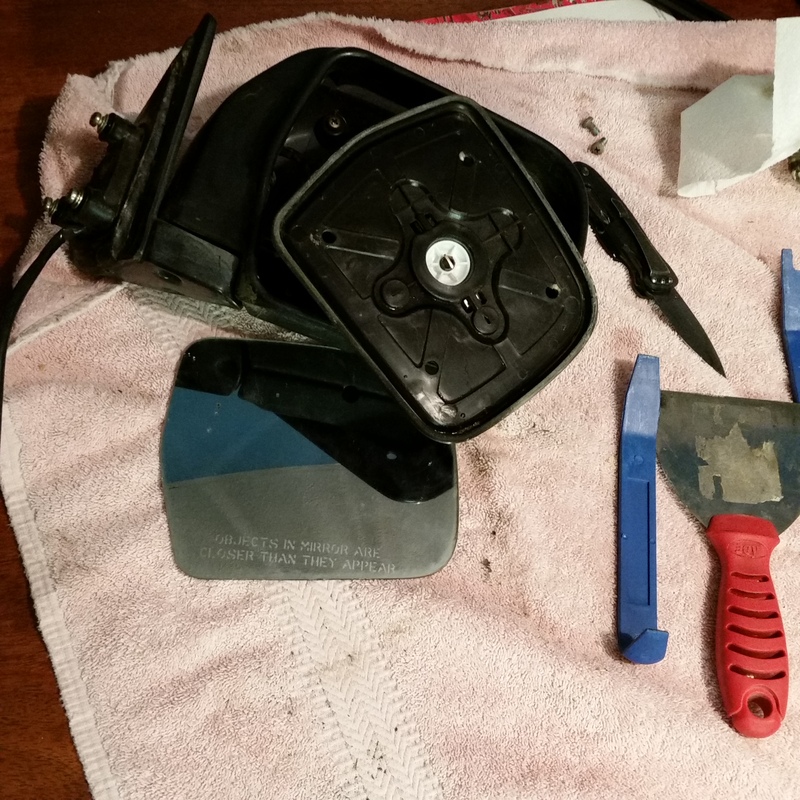
First step was to get the mirror apart, there is a screw on the bottom of the mirror that will allow you to get the motor assembly and mirror out from the housing
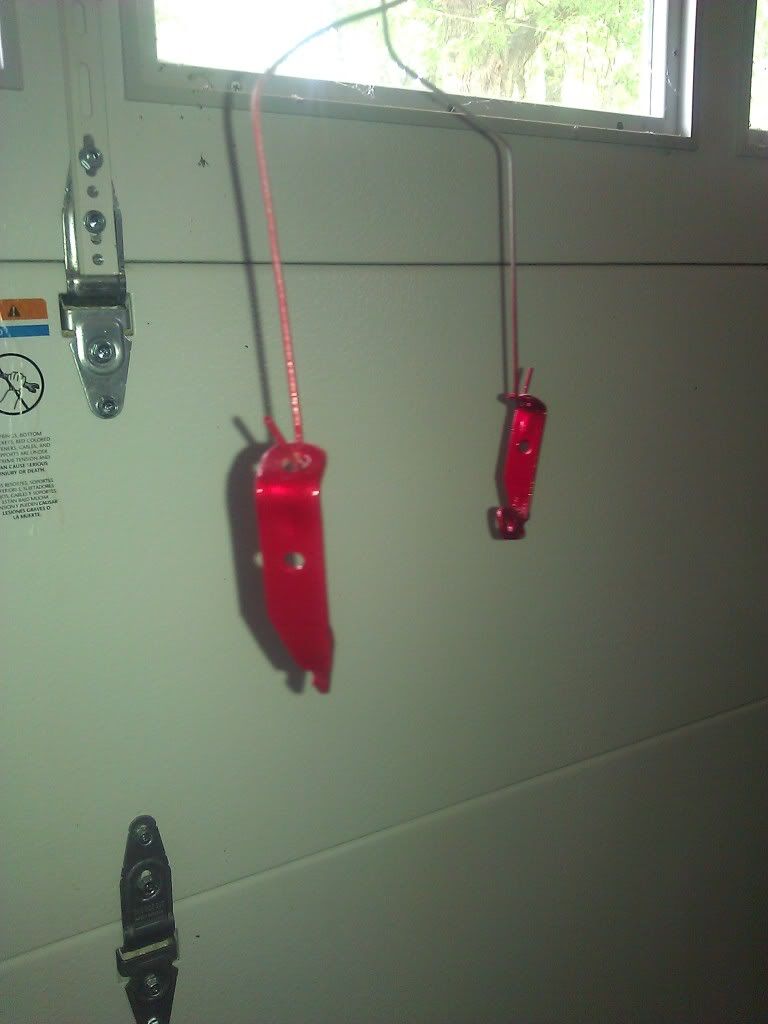
Assemble your chosen weapons:
Is this case a wide putty knife and plastic pry bars worked for separate the mirror from the mount
I trimmed the heated insert slightly
No pics but I drilled a couple of holes in the mount to allow the power wires for the heated insert power and remountEd the mirror with some 3M tape
There is a small screw you can remove disassemble the the pivot point on the mount
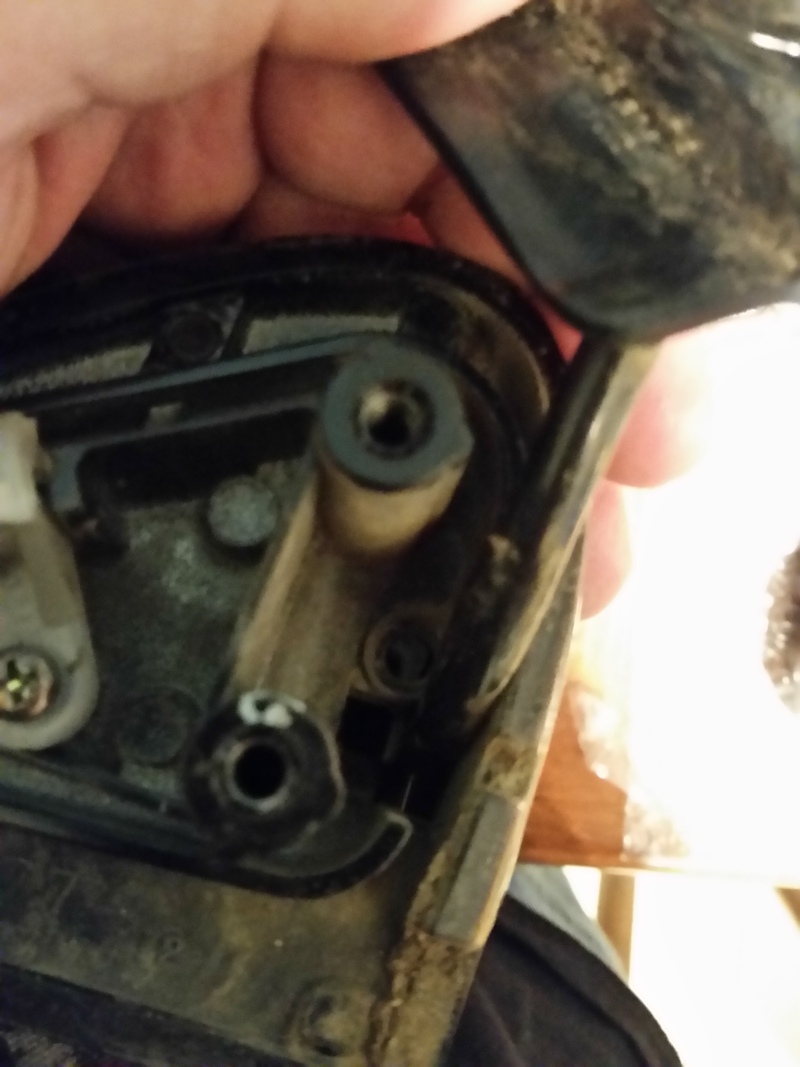
Remove that screw in addition to the 3 bigger screws on the bottom of the housing, this will allow access to feed your wires through.
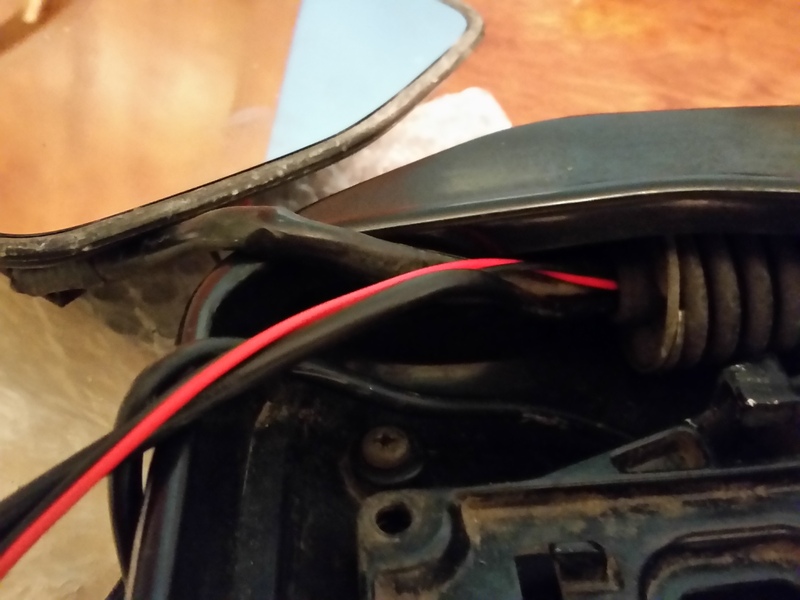
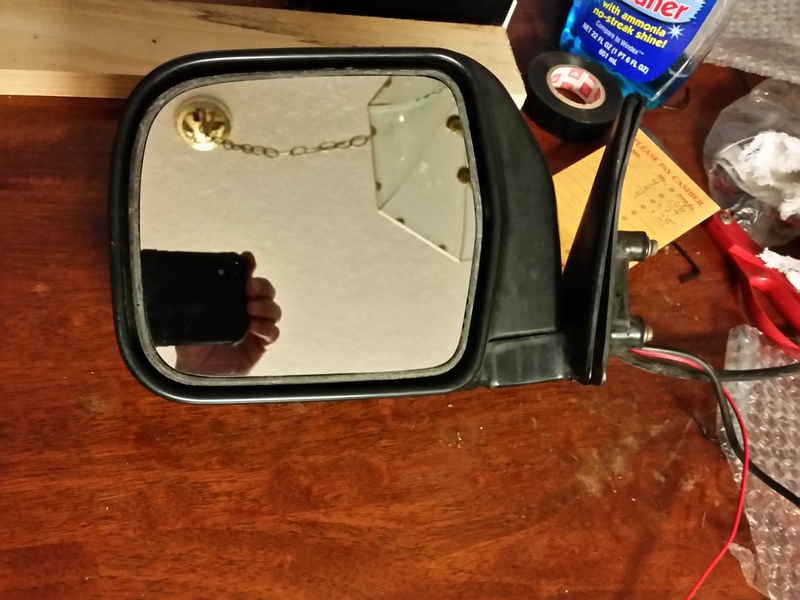
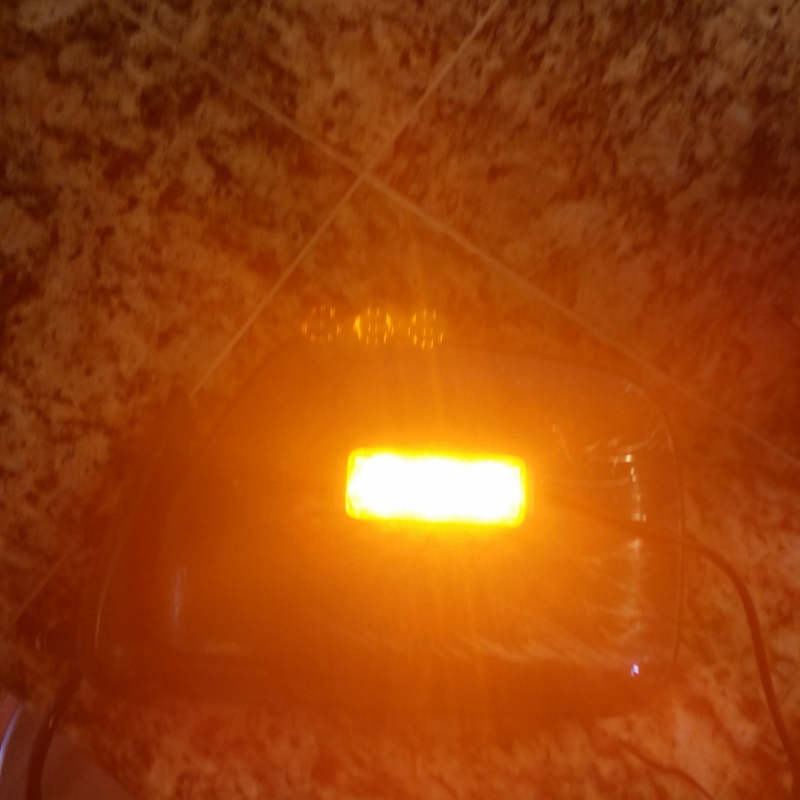
I went ahead and added a high power LED for a signal
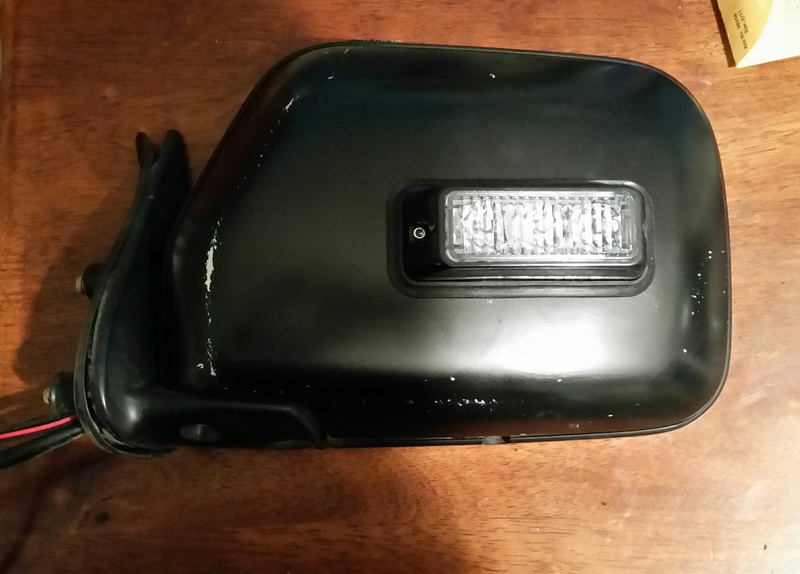
Should be pretty bright
I went ahead and threw it in the freezer so I can test the insert after dinner...update to see iF this was successful.
It needs some touch up paint later on
$15 heated inserts from eBay

First step was to get the mirror apart, there is a screw on the bottom of the mirror that will allow you to get the motor assembly and mirror out from the housing

Assemble your chosen weapons:
Is this case a wide putty knife and plastic pry bars worked for separate the mirror from the mount

I trimmed the heated insert slightly

No pics but I drilled a couple of holes in the mount to allow the power wires for the heated insert power and remountEd the mirror with some 3M tape
There is a small screw you can remove disassemble the the pivot point on the mount

Remove that screw in addition to the 3 bigger screws on the bottom of the housing, this will allow access to feed your wires through.


I went ahead and added a high power LED for a signal

Should be pretty bright

I went ahead and threw it in the freezer so I can test the insert after dinner...update to see iF this was successful.
It needs some touch up paint later on
Nov 16, 2015 | 05:28 PM
#83
Contributing Member


Joined: Sep 2005
Posts: 8,247
Likes: 497
From: mo
Nice work! I covet my husband's 99's heated mirrors, they're a nice little perk. Think he'd notice if I swapped internals? 
Was looking for a light a lot like the one on your mirror....toying around with some kind of unobtrusive ditch lighting. Something along that line or like Irab88's maybe.
Was looking for a light a lot like the one on your mirror....toying around with some kind of unobtrusive ditch lighting. Something along that line or like Irab88's maybe.
Nov 16, 2015 | 07:33 PM
#84
Nice work! I covet my husband's 99's heated mirrors, they're a nice little perk. Think he'd notice if I swapped internals?
Was looking for a light a lot like the one on your mirror....toying around with some kind of unobtrusive ditch lighting. Something along that line or like Irab88's maybe.
Was looking for a light a lot like the one on your mirror....toying around with some kind of unobtrusive ditch lighting. Something along that line or like Irab88's maybe.
The mirror mounted LED'S are for a turn signal. Will see how they work.
I am debating about doing a ditch light, if I do it I want it to be in such a way it doesn't look too Jeepish if you know what I mean.
So I threw the mirror in the freezer with some water on it for a couple of hours and went to grab some dinner with friends.

Hooked up the battery charger set to two amps

After about 3-4 minutes

I have an extra defroster switch that I might use or just wire them into the rear defrost circuit.
Am happy for an experiment they seem to work OK
 Nov 17, 2015 | 06:46 AM
#86
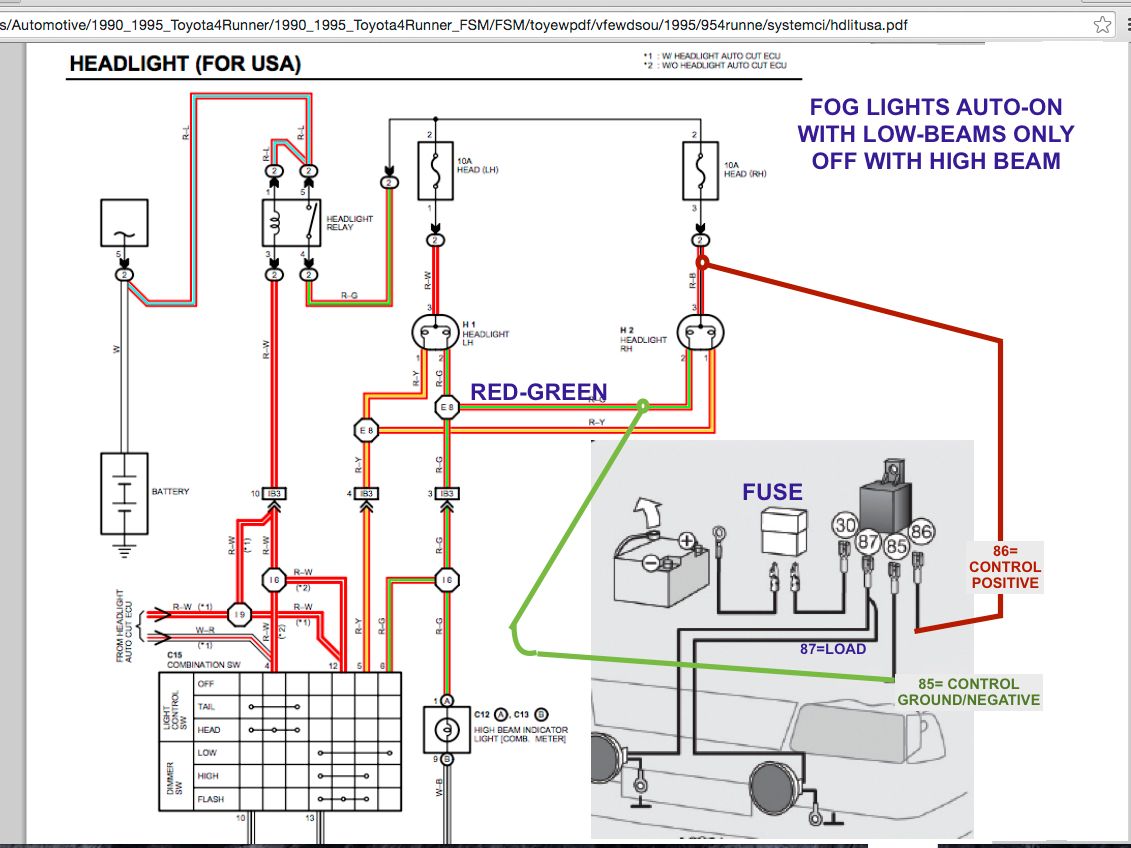
To Make Fog Lights Come On With Low Beams
From this thread:
https://www.yotatech.com/forums/f116.../#post52297725
Saving for future reference
https://www.yotatech.com/forums/f116.../#post52297725
1994 model trucks and 4Runners may still have switched ground control for headlights. If that is so, merely tapping positive of relay coil to positive side of low-beam beam wire and grounding the other side of relay coil will not work.
To simplify your wiring BUT STILL MAKE IT WORK LIKE YOU ORIGINALLY WANT:
(1) Tap positive side of relay coil to positive side of low-beam filament, and
(2) Tap negative side of relay coil negative side of low-beam filament
Do this very close to the bulb connector to be exactly sure of the wires.
However, best if you posted (1) schematic of your truck, and (2) schematic of your fog light kit so we can pinpoint exactly where to tap off of.
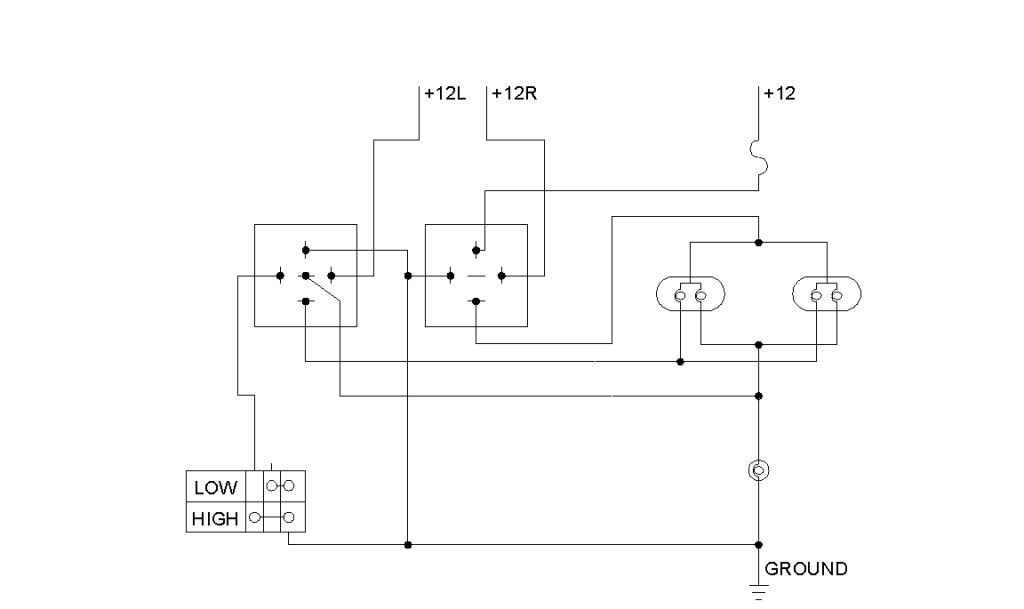
OK, found schematic for 1990-1995 4Runner. Should be the same.
Here's your circuit:
Before you do anything, probe pins 2 and 3 make sure there is 12V across them when, and only when, low-beams are on.
You can disconnect connector from bulb in order to prove for voltage. positive (red) probe on 3, negative (black) probe on 2
Here's your circuit:
Before you do anything, probe pins 2 and 3 make sure there is 12V across them when, and only when, low-beams are on.
You can disconnect connector from bulb in order to prove for voltage. positive (red) probe on 3, negative (black) probe on 2
Saving for future reference
Last edited by dropzone; Nov 18, 2015 at 11:56 PM. Reason: Added info
 Nov 20, 2015 | 05:30 AM
#89
also, i suggest putting the switch somewhere on the green ground (to the relay coil). it keeps the positive out of the cab, and worst case (a short), the lights turn on.
Nov 20, 2015 | 05:25 PM
#90
good diagram. a note: the relay has a high chance of back-feeding through the high-beam indicator bulb. this might activate the relay even when the high beams are on. i have a different schematic that will a) allow accessories to turn on without backfeed, and b) be an upgrade to the headlights. if you want, i can dig it up.
also, i suggest putting the switch somewhere on the green ground (to the relay coil). it keeps the positive out of the cab, and worst case (a short), the lights turn on.
also, i suggest putting the switch somewhere on the green ground (to the relay coil). it keeps the positive out of the cab, and worst case (a short), the lights turn on.
Nov 23, 2015 | 05:44 AM
#91
https://www.yotatech.com/forums/f116...88/index9.html
the +12L and +12R are from the factory harness, you can use both, left or right, doesn't matter. those turn on with the headlights.
the switched ground from the high beams is the only other factory wire you'll need.
the factory plug consists of +12 (switched on with the headlights), switched ground for lows, and switched ground for highs.
the high-beam indicator will back-feed through the relay contacts, not through any relay coil (to give normal, stock functionality)
the right relay activates the headlights, and stays on when the headlight switch is on.
the left relay activates when the high beams are on, switching between low and high
to use this circuit and a fog light circuit, use another relay with its coil in parallel with the left relay the added relay will be on with the high beams, so use the middle NC terminal (87a) and common (30) with the fog lights
i'll see about getting a better diagram for you (and me, when i need it again)
Nov 28, 2015 | 08:06 PM
#94
Dec 10, 2015 | 01:55 AM
#97
Hopefully have the suspension swap done sometime this summer
Dec 10, 2015 | 08:53 AM
#98
Registered User

Joined: Jan 2011
Posts: 695
Likes: 103
From: exo-reality -wave if you see me; Front Range, CO
I'm in no hurry. (Well, I need to be!)
After 4 (four?!) years in storage down in TX, finally got my 2 moved near-er so I can work on them on days off. Spent some time this week, and man am I screwed.
So I get the time/$$ thing.
After 4 (four?!) years in storage down in TX, finally got my 2 moved near-er so I can work on them on days off. Spent some time this week, and man am I screwed.
So I get the time/$$ thing.
Dec 16, 2015 | 03:00 PM
#99
Will eventually look into your heated mirrors, that would of come in handy this past week. Fog light is going to be moving up the list, we have been dealing with more fog lately and do a lot of night driving. Will be intrested in seeing what you come up with.
Dec 16, 2015 | 05:50 PM
#100
 Glad you got them closer
I haven't touch this once since I did the mirrors
I have a set of 25w LED Knock off Light Cannons that i have picked up a few sets of filters for. I can have flood, spot or fog lights with one set of lights.


