
the dragons 88 runner buildup/rebuild
 Jul 28, 2013 | 01:48 AM
#841
I need to check under my seats and see if there is any treasure there.lol To bad it wasnt worth more, but still a nice find. Your interior is coming aloong nicely as well as the whole truck. You have brought it back from the grave. Great job!!!
I have a soft spot for those old Celicas. They just look great.
I have a soft spot for those old Celicas. They just look great.
Jul 28, 2013 | 10:57 AM
#842
Thread Starter
Registered User
Joined: Jul 2012
Posts: 2,365
Likes: 4
From: Idaho
never driven a celica seen a lot of them
yeah the truck is better just wish i wasnt on such a short budget
found out the forward trim for removing the top the tabs that go under the rear trim were broken one was still in under the trim which is how i found out
terry / mark could one of you measure how far up an back the door pockets are supposed to be? i can do that an it not cost anything lol
Jul 30, 2013 | 09:30 AM
#844
Registered User
Joined: Apr 2012
Posts: 2,817
Likes: 2
From: Los Angeles CA
Dragon, What is under your center console? it kind of looks like the 2nd gen 4runner rear AC control. BTW great yob on the shifter pieces. Oh and i'm not sure if you mentioned it yet, but what is the cupholder normally to? that is an awesome mod to have; does it get in the way of 1st, 3rd and/or 5th gears?
What about the door pockets? You need to know the exact positioning of the front door pockets? I have my replacement door panels for hwne i do my power window upgrade just sitting in my room. I can check it out and send you a picture with measurments when i get home. If nobody does so before i do.
What about the door pockets? You need to know the exact positioning of the front door pockets? I have my replacement door panels for hwne i do my power window upgrade just sitting in my room. I can check it out and send you a picture with measurments when i get home. If nobody does so before i do.
Last edited by Redeth005; Jul 30, 2013 at 09:32 AM.
Jul 30, 2013 | 11:50 AM
#845
Thread Starter
Registered User
Joined: Jul 2012
Posts: 2,365
Likes: 4
From: Idaho
Dragon, What is under your center console? it kind of looks like the 2nd gen 4runner rear AC control. BTW great yob on the shifter pieces. Oh and i'm not sure if you mentioned it yet, but what is the cupholder normally to? that is an awesome mod to have; does it get in the way of 1st, 3rd and/or 5th gears?
What about the door pockets? You need to know the exact positioning of the front door pockets? I have my replacement door panels for hwne i do my power window upgrade just sitting in my room. I can check it out and send you a picture with measurments when i get home. If nobody does so before i do.
What about the door pockets? You need to know the exact positioning of the front door pockets? I have my replacement door panels for hwne i do my power window upgrade just sitting in my room. I can check it out and send you a picture with measurments when i get home. If nobody does so before i do.
it works real good ill say dried out the wet carpet on the hump right behind it fast! it was matted with dirt an ground in grime me an my daughter scrubbed it an vacuumed it several times an each time got more dirt an such out
the cup holder was on ebay it replaces the empty pocket that so many people put in it also has a small drawer over the cup holder pull out its not as big as a second gens so i honestly dont think its gona be as good as id hoped but least its not an empty catch all pocket i took her for a quick run down the road after fixing the muffler an the cupholder was well out of the way
yep need measurements so i can position them correctly on my door panels ill have to rill out holes for the pegs an get large head screws so its supported well
 Jul 30, 2013 | 02:45 PM
#846
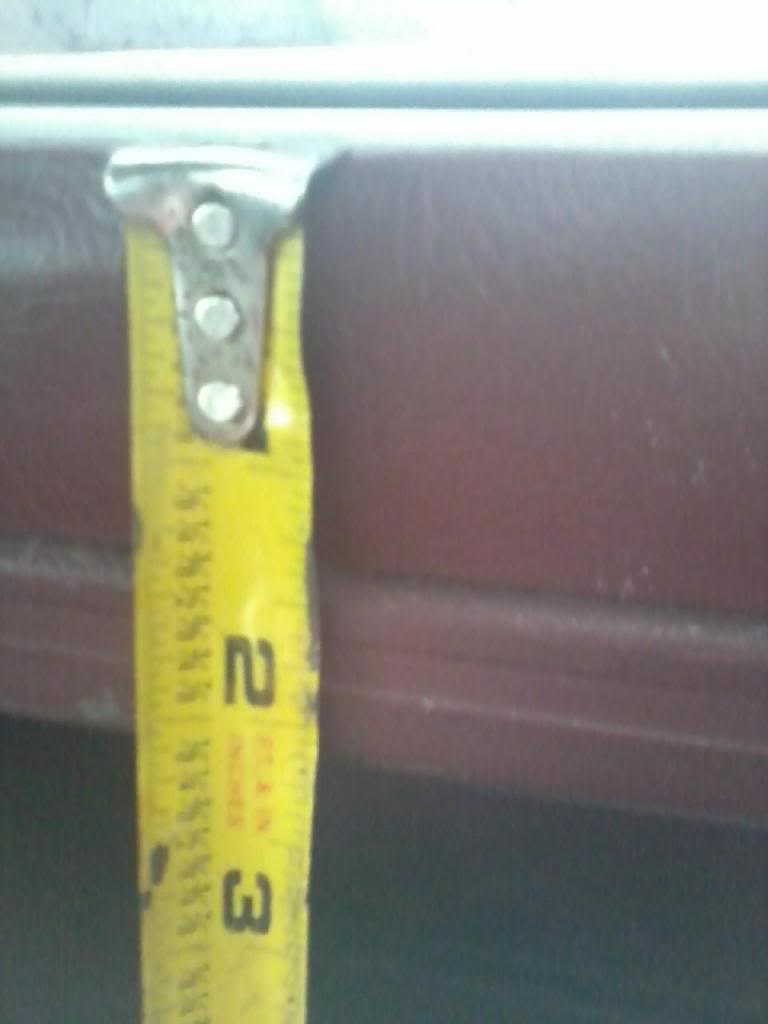
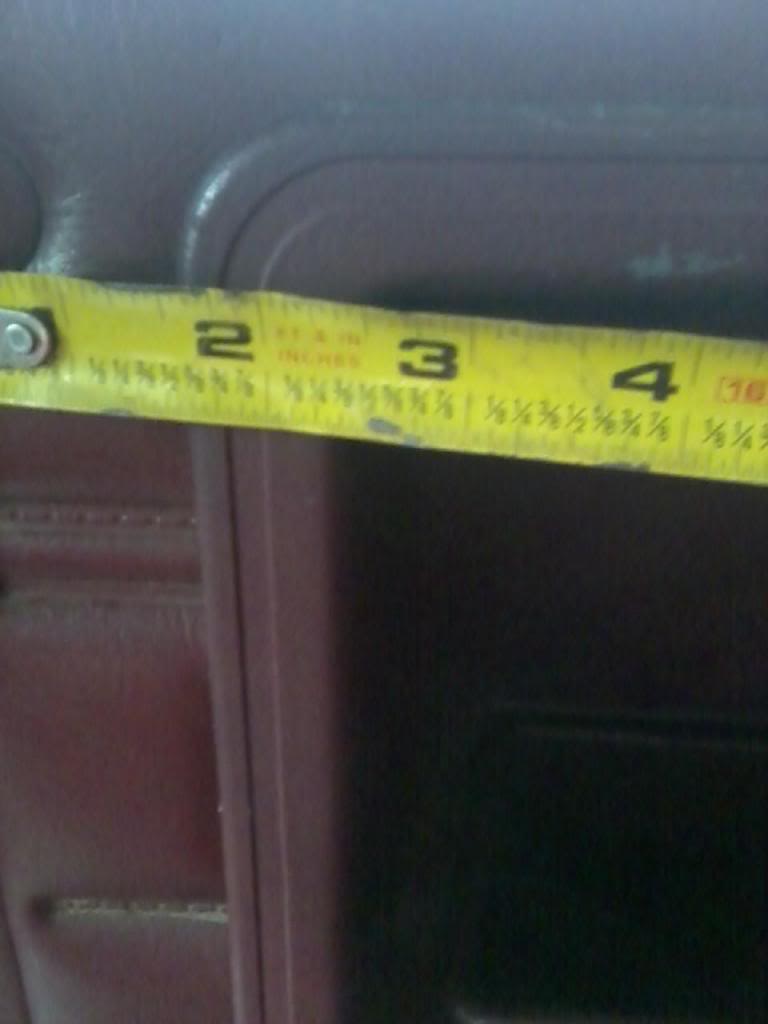
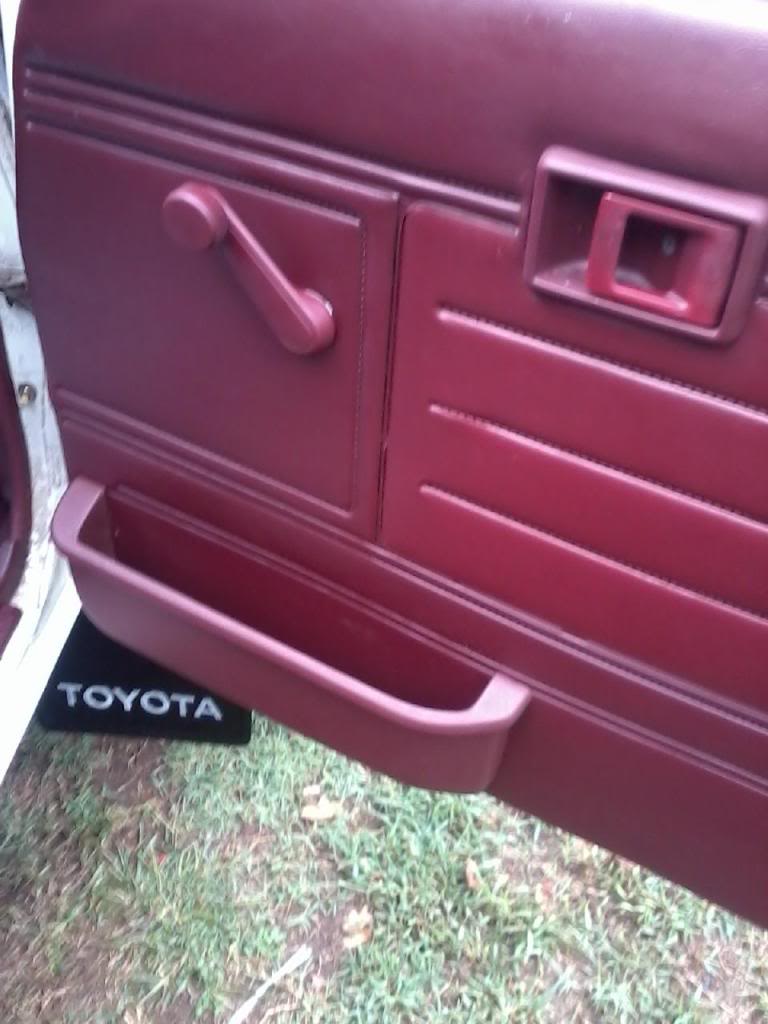
There is a little room for adjustments. It is 1 1/2 inch from the side and 1 and 1/2 from the top starting from the rear of the panel and without the trim on top. It is 1 1/2 to the very edge of the pockets. The hole is probably another 1/4 to 1/2 inch inside the trim.

 Jul 30, 2013 | 02:49 PM
#847
I have not pulled the heater,box out of the center of a runner. Not sure how it is assembled. I dont think it would be to hard to pull out. The core in the dash is something that you dont want to do for a first time. If you do decide you ever need to pull the one out of the dash, I got alot of info that would help you on that. It isnt bad if you have done it before and know what to do. It is a bear the first time.
Jul 30, 2013 | 03:02 PM
#848
Thread Starter
Registered User
Joined: Jul 2012
Posts: 2,365
Likes: 4
From: Idaho
um lol those are the rear seat pockets i was talking about the door pockets but thank you terry id like to get the rear pockets eventually as well
Last edited by Cyberhorn The Dragon; Aug 3, 2013 at 07:29 PM.
Jul 30, 2013 | 03:34 PM
#849
I took a door pocket and had to take a cut off wheel and knock down the tall tabs. On the Runner I pulled it from it was only being held by 4 screws. Haynes Manual has a great descrition for getting your door panel off.
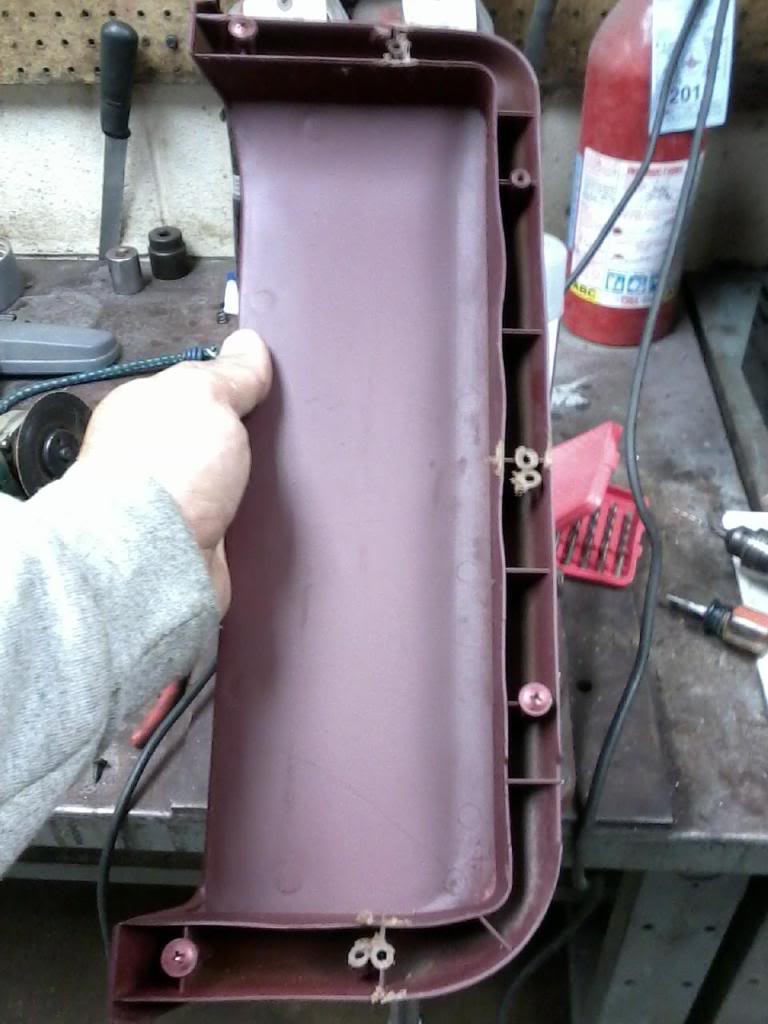
I then figured where I wanted it and put a dab of weater seal on the screw holes and set it where I wanted it so as to know where to make the screw holes. I used about the smallest drill bit I had and made a small hole and ran the screws in from the back side then mounted it to the door panel.
Here it is done and is the way the 2nd gen was mounted. Wont take heavy items but will work for what I need. I got it off of a brown truck and did have to paint it.
Jul 30, 2013 | 08:01 PM
#850
Registered User
Joined: Apr 2012
Posts: 2,817
Likes: 2
From: Los Angeles CA
It sits right above the pleather trim. So approx 0.5" from the bottom side.
The top lip of the pocket is exactly 1" away from the edge of the door panel(door hinge side)
If you wanna center it exactly then you can also measure from the other end. And that will be 21&3/4" from the left upper lip of the pocket to the left side edge of that door panel.
I hope I made sense. And I hope it helps. Let me know if you need anything else Will.
 Jul 30, 2013 | 11:00 PM
#852
Nooooooooo! Mounted upside down duct taped to the window! Geeeeesh, do I gotta come up with all the bitchin ideas around here?!?!?!?!?! Hahahaha
No I was only going to mention that I like the idea of putting in a couple different models that I've seen... Someone I believe used that collapsible style from a Range Rover or something? And I know that the 2nd Gen 4 runner or 3rd gen pickup has a longer and deeper and wider door pocket... Or at least that's what I remember. My doors are really clean so I just really didn't want to hack anything up... The 2nd Gen ones mount quite differently just like the grab handles... I really would like to do a custom build up on my grab handle/armrest ..... It's just a little too low, but I'm grateful just to have it! Lol. Actually I already have talked to my upholstery guy who built up my console armrest pad... I freaking love that! It probably cost me a little more than it should have but it will last for a long time! He said it wouldn't be that difficult to build up the armrest on the door but it is a bit more work because it has to be heat plastered on to there.... As well as some special stitching because it's super thick vinyl with fabric on the inside and its molded to fit. He said it would actually be a better idea to just remove the old stuff and replace it with new.
Okay that's enough rambling... I'm just excited about your truck! I'm really really desiring to be even more excited about you getting well man! I really feel horrible about all this and as I've said many times and hate to be annoying by repeating, I highly respect and admire your attitude!
 Jul 31, 2013 | 12:00 AM
#854
Thread Starter
Registered User
Joined: Jul 2012
Posts: 2,365
Likes: 4
From: Idaho
oh i like yours mark it'd actually be too tall for me i do want to replace mine as its brown, worn out, no padding left in it but
looks like my spair cash next month goes to getting a new old laptop my boy came in from the tent on the porch where hes been enjoying the cool nights with my laptop comes in in tears blubbering he punched the screen an its broke... oh he's not touching anything electronic for couple weeks if he's lucky
its a tablet laptop which i used to do some of my photoshop work on as it has a pen the screen works with their older units but i now have to replace the darn thing and cant replace the custom stuff id done to it
Last edited by Cyberhorn The Dragon; Jul 31, 2013 at 12:02 AM.
Jul 31, 2013 | 12:25 PM
#855
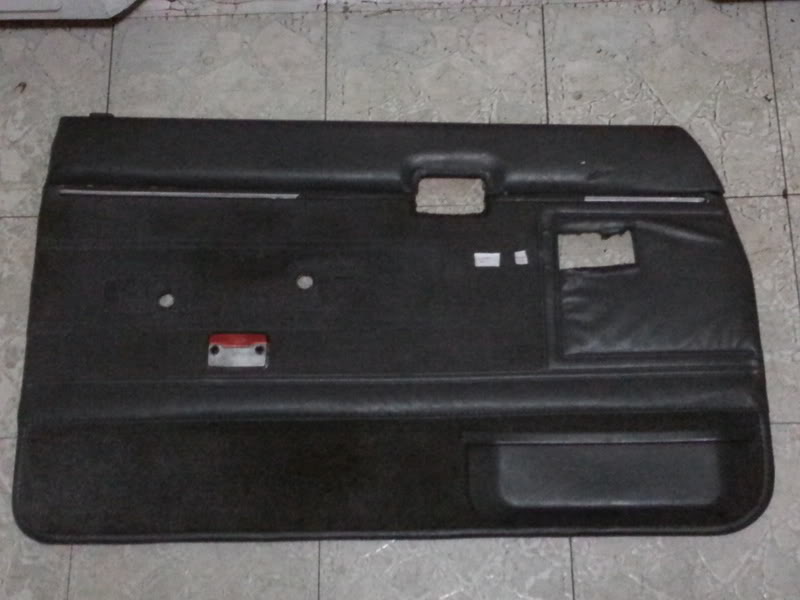
I had to go to town when I added the new information, so had to make it quick. Richards is the first gen style of side pockets. I got mine form a second gen runner. The first gens are thinner and shorter and second gens are longer and thicker. Which ones do you have? I prefer the second gen ones myself.
I used the top line for a guide on mine if it is vinyl. To do carpet, I will add how I did it on my 86.
Copied...
I put some 2nd gen side pockets in. The first gens just wont hold that much due to their size.
Showing the difference.

I stuck some finishing nails where I wanted to put some self tapping sheet metal screws and then pressed them thru the panel where I wanted them to be. (yeah,... I stuck myself in the leg with one trying to get it thru,lol)
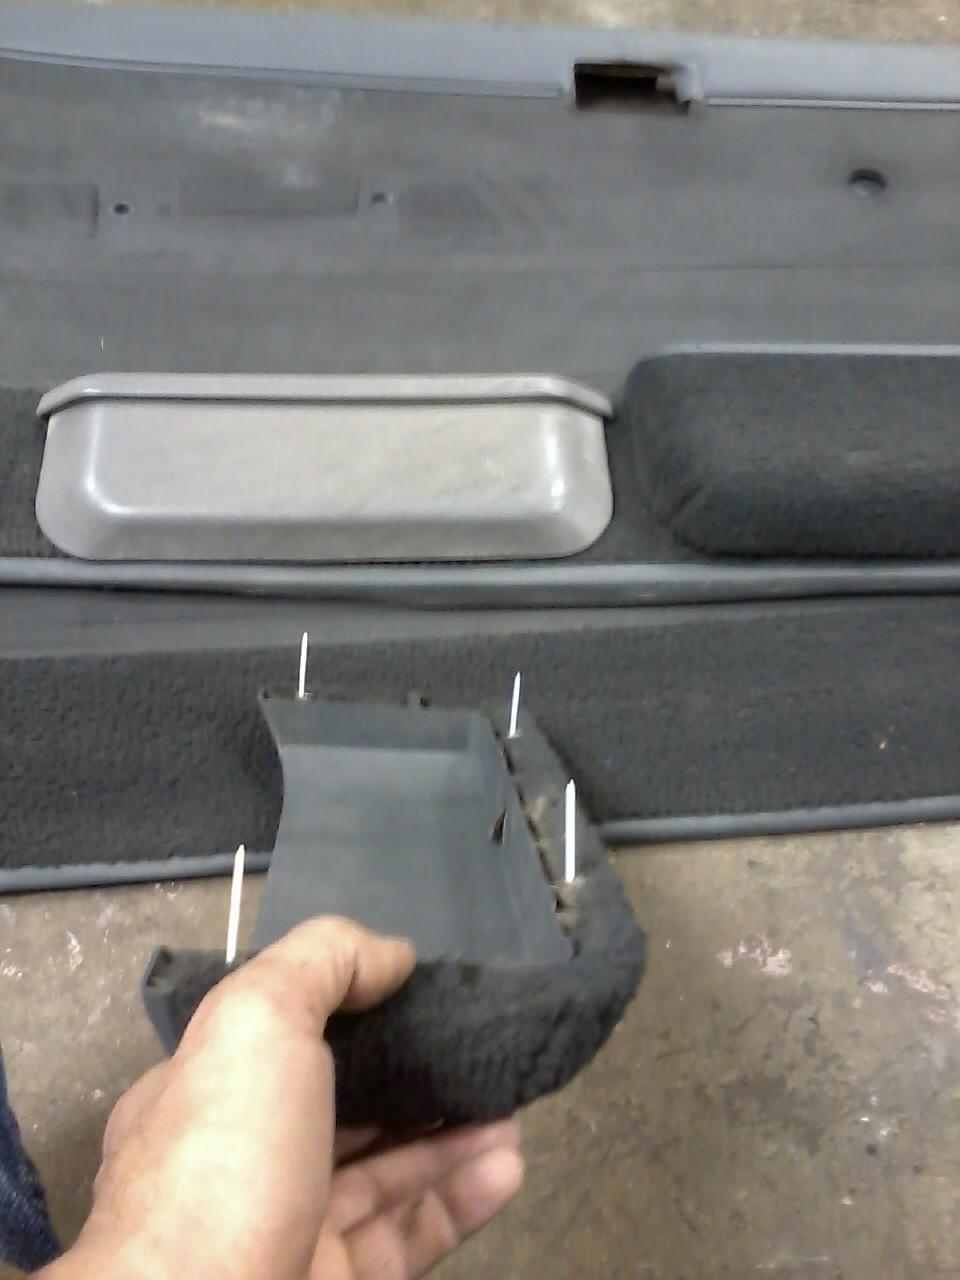
Next I pulled them thru the panel. The finishing screws heads are so small that it did very little damage to the cardboard and made it easy to screw into the backside of the panel. The bigger rip in the cardboard was previously damage and isnt where I put a screw or nail. Eventually I want to make some new panels from Gregos build thread. These will work for now though.
On vinyl, I mark the screw holes with some weather stripping glue or something similar.
One self tapping screw and one finishing nail still to pull thru.
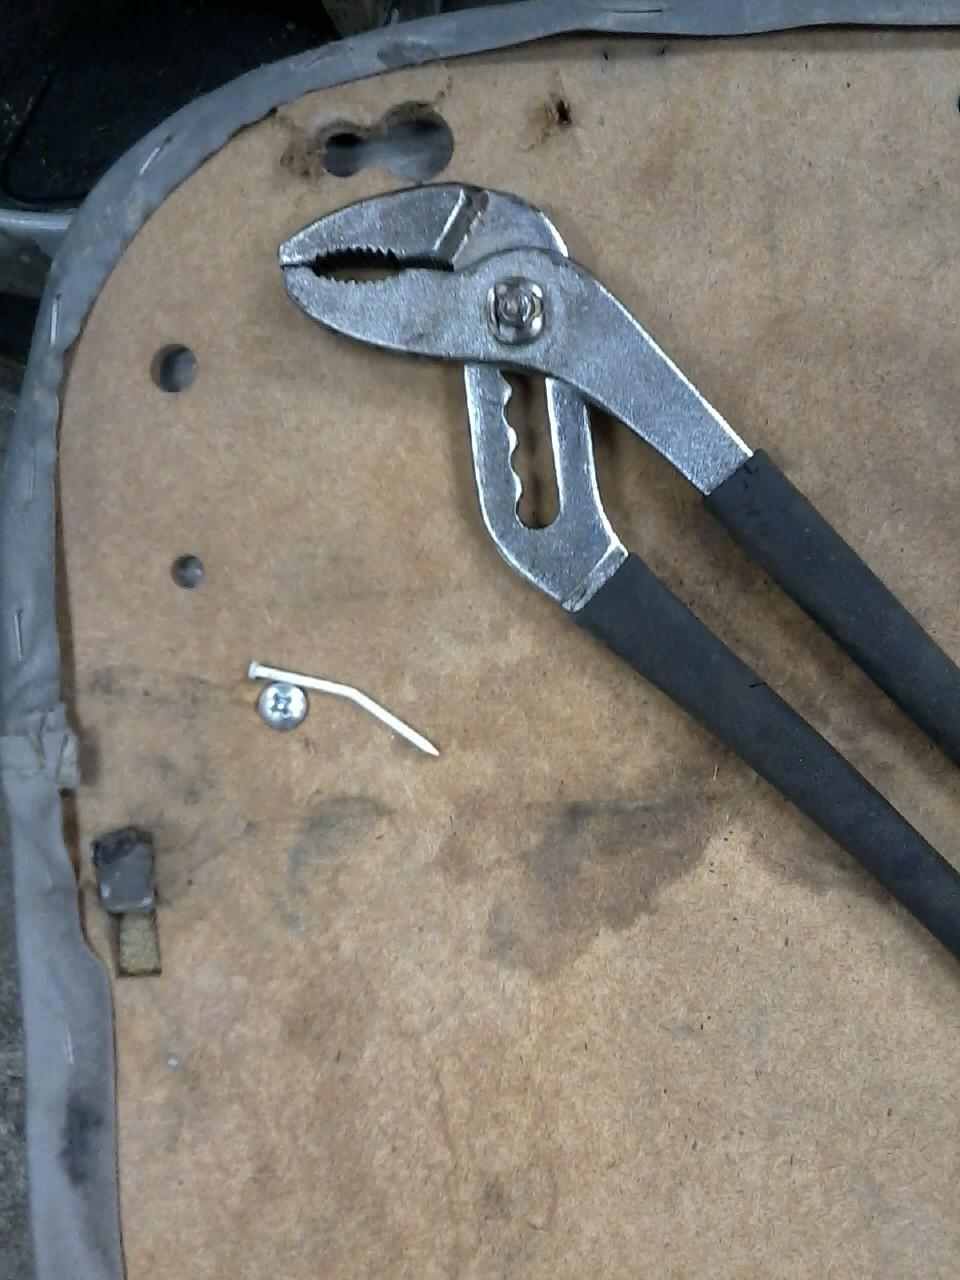
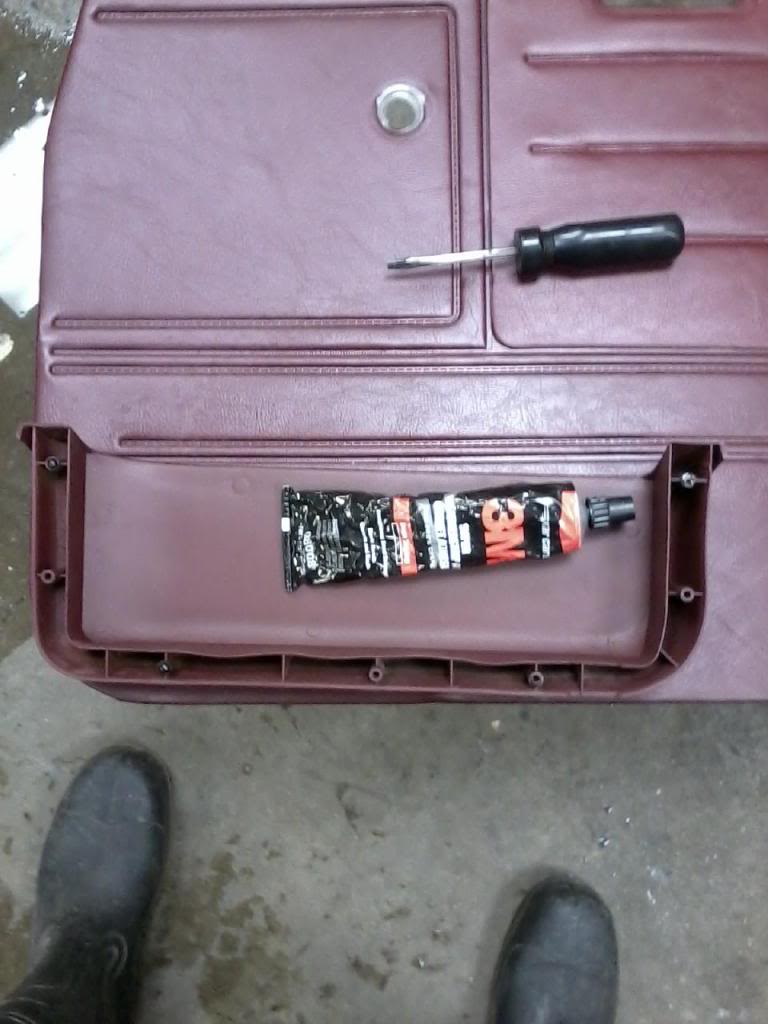
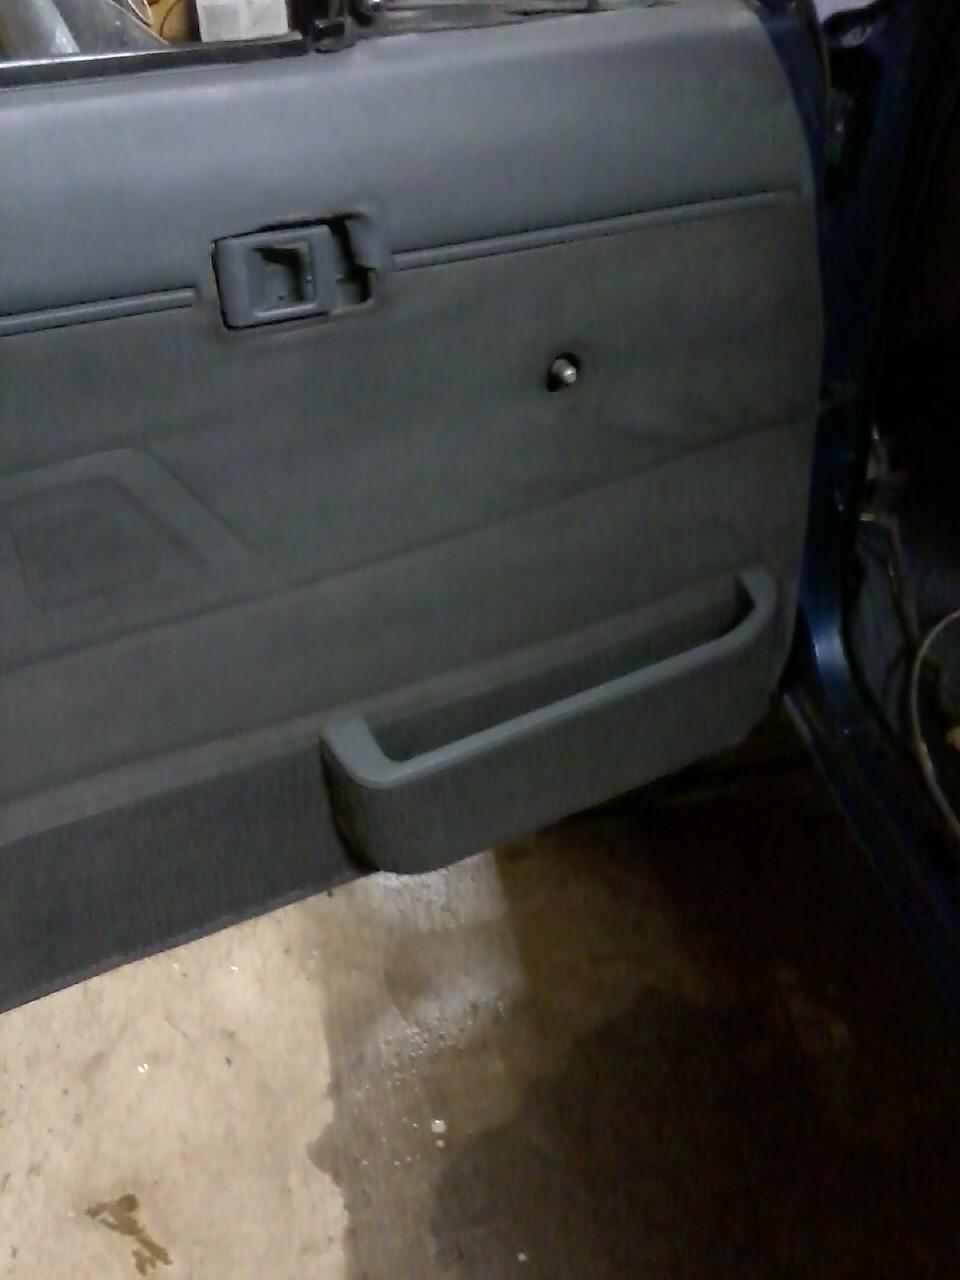
Here it is mounted. I also worked on getting more of the interior finished, getting the dash more assembled and just alot of small odd ball things.
I used the top line for a guide on mine if it is vinyl. To do carpet, I will add how I did it on my 86.
Copied...
I put some 2nd gen side pockets in. The first gens just wont hold that much due to their size.
Showing the difference.
I stuck some finishing nails where I wanted to put some self tapping sheet metal screws and then pressed them thru the panel where I wanted them to be. (yeah,... I stuck myself in the leg with one trying to get it thru,lol)
Next I pulled them thru the panel. The finishing screws heads are so small that it did very little damage to the cardboard and made it easy to screw into the backside of the panel. The bigger rip in the cardboard was previously damage and isnt where I put a screw or nail. Eventually I want to make some new panels from Gregos build thread. These will work for now though.
On vinyl, I mark the screw holes with some weather stripping glue or something similar.
One self tapping screw and one finishing nail still to pull thru.
Here it is mounted. I also worked on getting more of the interior finished, getting the dash more assembled and just alot of small odd ball things.
Last edited by Terrys87; Jul 31, 2013 at 12:40 PM.
Jul 31, 2013 | 02:46 PM
#858
Thanks guys...Both of mine are 2nd gen one. Some have carpet and some dont. I just looked for non carpeted ones for the red 88s interior and carpeted ones for my 86. My 86 actually had the first gen holders on it but I needed more room for junk.lol
Aug 3, 2013 | 01:40 PM
#859
Thread Starter
Registered User
Joined: Jul 2012
Posts: 2,365
Likes: 4
From: Idaho
well i WAS going to change out my w56 shifter boot today as martin crawler had it set that it'd arrive an the package did arrive! but not my w56 boot its a white shifter seat an ball along with 2 martin stickers...paperwork says w56 boot it aint!
guess ill be calling them monday
guess ill be calling them monday
Aug 3, 2013 | 06:22 PM
#860
Thread Starter
Registered User
Joined: Jul 2012
Posts: 2,365
Likes: 4
From: Idaho
got a burr up the tail pipe couldnt do my trans shifter seal... foot hurting leg hurting i cant sit when they act up like this so i went out an started working on my rear bumper we knew with the junky welds there would be issues yep! found um
cleaning the rust off no i dont have a face shield but do have scratched an dusty polycarbonate glasses :-)
beeeefore:

after:

ok now this is where we get into the issues first up the very shallow hitch socket i had to use a slide hammer to get the hitch out as it rusted in

we removed the back plate on it so now it will clean itself out no rust to jam things i can now yank any hitch that has the right size ball an not have to take it off the hitch an put it on the one that "only" fits my truck, have to do some extra welding to beef it back up of course i got it ready for kris

then the driver side the welds were gobbs of metal all over and as expected no penitration of the two metals (bumper is offa something else an grafted onto the toyota towing hitch) see the lines... thats a no go the other side looks ok i cleaned up the goober welds an no cracks or voids like this side

welds cut open for rewelding removed most of the right side one as it was fulla voids didnt picture that part

finished cleaning it up primered most of it save the areas where kris needs to weld will cover it in rustolium black

then have to decide do i want to bust out the big sand blaster an lay under the truck on 4 ramps an blast the rear belly area? or wait till i eventually pull the rear end for the backing plates shocks zuk's an the rear end getting a clean up as well as paint (new polyura spring bushings as well gota get those)
cleaning the rust off no i dont have a face shield but do have scratched an dusty polycarbonate glasses :-)
beeeefore:
after:
ok now this is where we get into the issues first up the very shallow hitch socket i had to use a slide hammer to get the hitch out as it rusted in
we removed the back plate on it so now it will clean itself out no rust to jam things i can now yank any hitch that has the right size ball an not have to take it off the hitch an put it on the one that "only" fits my truck, have to do some extra welding to beef it back up of course i got it ready for kris
then the driver side the welds were gobbs of metal all over and as expected no penitration of the two metals (bumper is offa something else an grafted onto the toyota towing hitch) see the lines... thats a no go the other side looks ok i cleaned up the goober welds an no cracks or voids like this side
welds cut open for rewelding removed most of the right side one as it was fulla voids didnt picture that part
finished cleaning it up primered most of it save the areas where kris needs to weld will cover it in rustolium black
then have to decide do i want to bust out the big sand blaster an lay under the truck on 4 ramps an blast the rear belly area? or wait till i eventually pull the rear end for the backing plates shocks zuk's an the rear end getting a clean up as well as paint (new polyura spring bushings as well gota get those)


