
dark_fairytales 1986 Pickup Build-Up Thread
 Apr 20, 2016 | 10:33 AM
#401


What bad press are you reading about the Rock Assault housings? I have read a few quality control issues, likely has to do with the volume and where they're being manufactured, but for the price and features they look like a great option to me as long as you know about those potential issues. I like how they integrated extra ground clearance in them, in both the center pumpkin and how the axles sit higher inside the tubes. The Ruff Stuff is a pretty nice housing too, but price man price
Apr 20, 2016 | 03:33 PM
#402
Thread Starter
Registered User
Joined: Oct 2008
Posts: 1,621
Likes: 7
From: Sacramento, Crawlifonia
You just stated the bad press I have read about Brian. I can not say that I should trust the housing If TG does not really seem to care what they are shipping out to customers. The other options my be twice the price or more, but worth supporting when the business care what is being shipped. I do understand that RuffStuff and Diamond are pricey, but remember I have no children currently, so money is not really a scarcity for me.
Apr 20, 2016 | 07:52 PM
#403
Thread Starter
Registered User
Joined: Oct 2008
Posts: 1,621
Likes: 7
From: Sacramento, Crawlifonia
And then I find info like this that would not make anyone confident with Trail Gear.
http://www.pirate4x4.com/forum/toyota-truck-4runner/1492562-makin-changes-toyota-buggy-5.html#post28571322
http://www.pirate4x4.com/forum/toyota-truck-4runner/1492562-makin-changes-toyota-buggy-5.html#post28571322
Apr 23, 2016 | 07:39 PM
#405
ive been thinking, keith. maybe we can build a turbo manifold for that GT25. i mean, we can make a log style manifold from some schedule 40 pipe. since manifold designs have really no bearing on a turbo system, we can have it mounted with any position that you want it to be mounted. shouldnt be too hard. and i have the shop that we can set everything up in. might even give my dad a reason to get a chop saw and sanding belt.
Apr 24, 2016 | 11:18 AM
#406
Thread Starter
Registered User
Joined: Oct 2008
Posts: 1,621
Likes: 7
From: Sacramento, Crawlifonia
The issue there, it would not be CARB legal, and would be a bigger pain-in-the-A too remove then a remote mount. By the way I have been looking further into turbonormalizing systems, which may bypass CARB regulations. I would need to talk to a TECH and a REF to verify how doable a normalizing system is.
Last edited by dark_fairytales; Apr 27, 2016 at 04:38 AM.
 May 4, 2016 | 04:15 PM
#408
Thread Starter
Registered User
Joined: Oct 2008
Posts: 1,621
Likes: 7
From: Sacramento, Crawlifonia
I looked into that as one of the options. I do not think I need anything like that on the rear currently. The shackles on the front axle is the larger of the two problems.
Here is where I stand with it at the moment. I already know that the spring rate is way to high for my liking. I can choose from two options regarding the spring rate, add weight to the rig to match the spring rate or pull some leafs. I prefer the "pull some leafs" method as that option will also lower the rig some along with changing the spring rate.
After changing the spring rate, I can look at the shackle angles again. I know the rear axle shackles will have an improved angle as the rear springs are quite long and vary arched. I am also thinking maybe some really short shackles up front might make that situation better (By the way Troy, you wouldn't happen to have a drill press at the shop?). I will have to do it with baby steps as baby steps seem to be the best way to configure how our rigs are setup. I will certainly write about what I discover with each change I make to the suspension.
I predict I will be pulling lots of bits apart too then reassemble, test, and pull it all apart again until I get it how I want it.
Last edited by dark_fairytales; May 4, 2016 at 04:42 PM.
May 28, 2016 | 12:05 PM
#409
Thread Starter
Registered User
Joined: Oct 2008
Posts: 1,621
Likes: 7
From: Sacramento, Crawlifonia
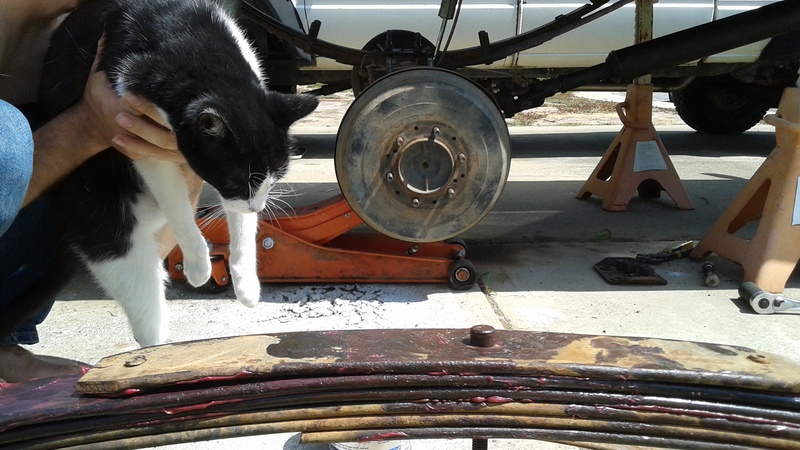
Today I started the process of pulling leaves from the rear spring packs. I am writing while I am taking a break from the sun of mid day, but here is what I have achieved thus far.
I took a measurement from the top of the tire to the top of the fender well, and it reads (10 1/4" )
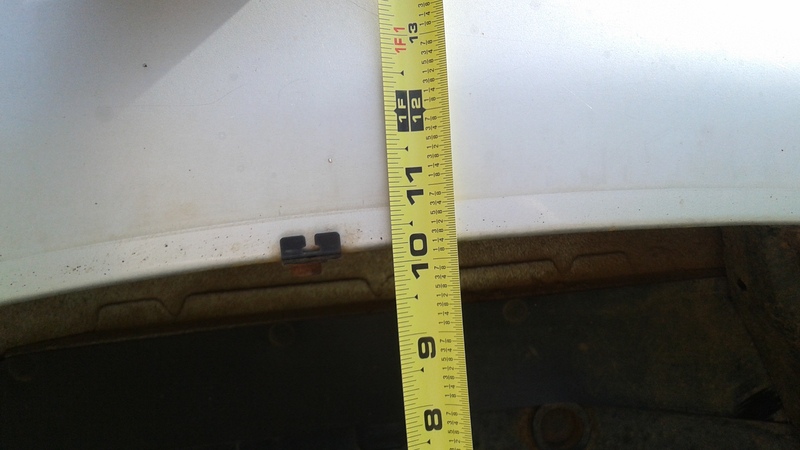
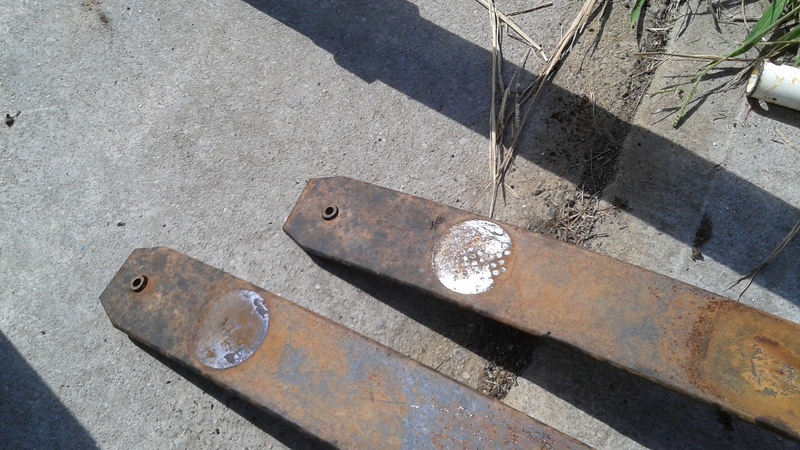
I took pictures of where the friction pads contact the leaf, and as can be seen the contact patch is nearly perfectly round, not oval. The circular contact patch indicates that the leaves are not sliding against each other, because the leaf packs are not compressing giving a very harsh ride.
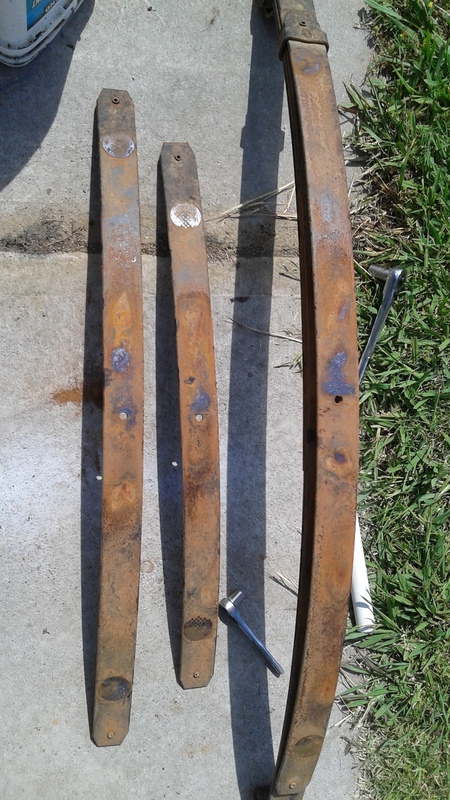
I proceeded to grease every leaf in the pack and reassembled the pack minus leaves 4 and 5.
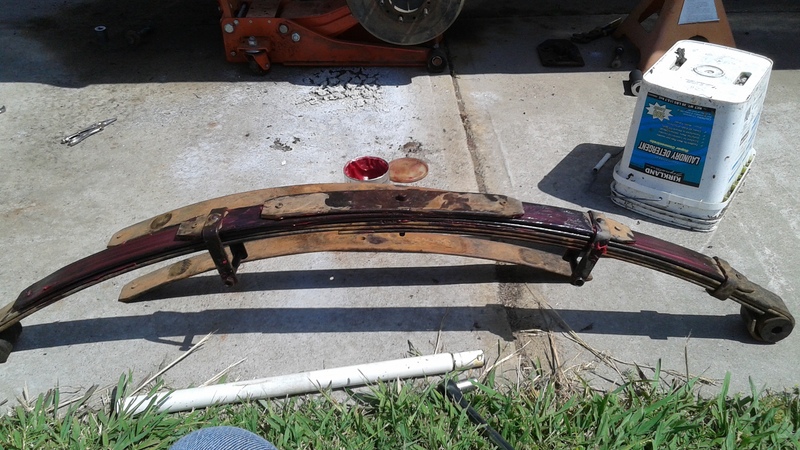
I reinstalled the leaf pack, just bolted not torqed to spec, just to see how it sits, and I measured again. The space between the tire and the fender is now (8 15/16") that is a drop of (1 5/16")
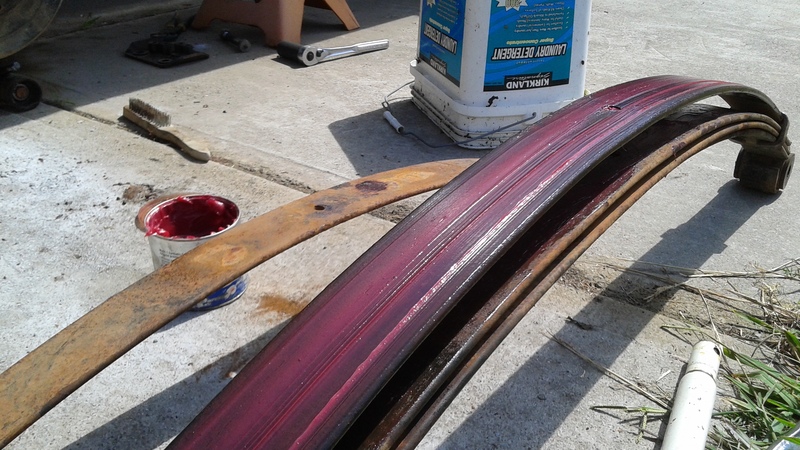
This picture show the difference between the before and after. The truck is really leaning to the passengers side.
When the sun goes down I will do the driver side leaf pack the same way and see how she drives.
I took a measurement from the top of the tire to the top of the fender well, and it reads (10 1/4" )
I took pictures of where the friction pads contact the leaf, and as can be seen the contact patch is nearly perfectly round, not oval. The circular contact patch indicates that the leaves are not sliding against each other, because the leaf packs are not compressing giving a very harsh ride.
I proceeded to grease every leaf in the pack and reassembled the pack minus leaves 4 and 5.
I reinstalled the leaf pack, just bolted not torqed to spec, just to see how it sits, and I measured again. The space between the tire and the fender is now (8 15/16") that is a drop of (1 5/16")
This picture show the difference between the before and after. The truck is really leaning to the passengers side.
When the sun goes down I will do the driver side leaf pack the same way and see how she drives.
Last edited by dark_fairytales; Jun 2, 2016 at 12:24 PM.
May 29, 2016 | 08:15 PM
#412
Thread Starter
Registered User
Joined: Oct 2008
Posts: 1,621
Likes: 7
From: Sacramento, Crawlifonia
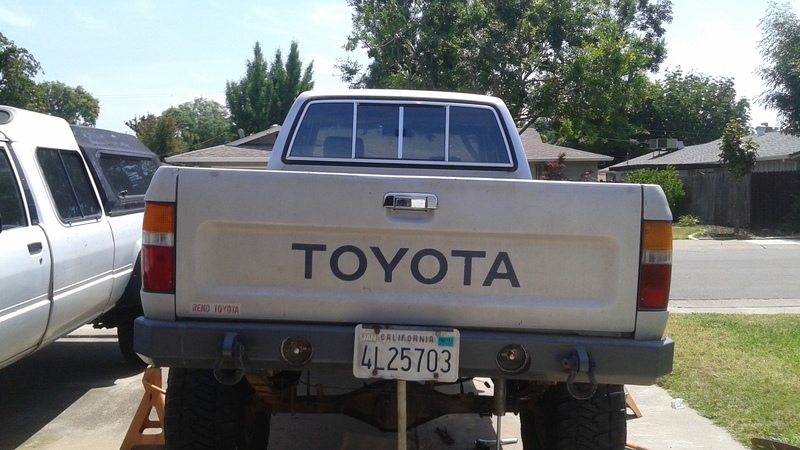
Well I got the driver side rear all buttoned up and drove the rig today. Pulling the leaves were a huge improvement to the rear suspension. It is not night and day, but it is at least soft enough to get body roll now. I will try to do the same to the front suspension next weekend.
Jun 2, 2016 | 09:41 AM
#415
he want's to see your "bro ass sag" lol
i think he means you've got a bro-truck reverse rake and you need some Monster stickers, hahahaha
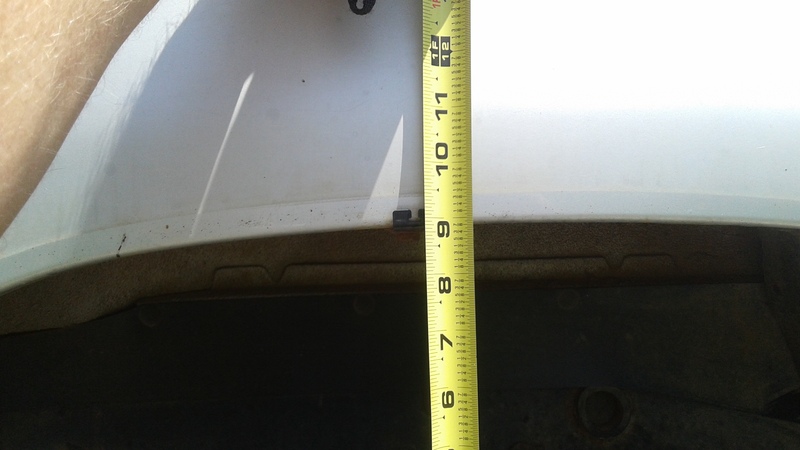
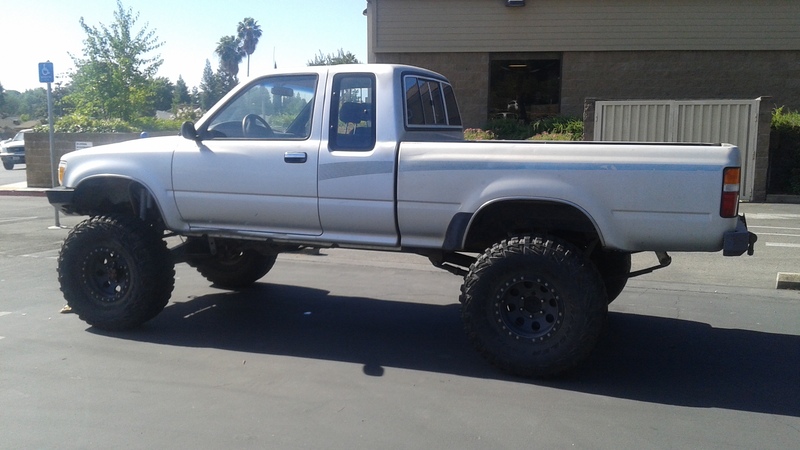
what is the height of your truck now? center axle to fender
i think he means you've got a bro-truck reverse rake and you need some Monster stickers, hahahaha
what is the height of your truck now? center axle to fender
 Aug 14, 2016 | 10:13 AM
#419
Thread Starter
Registered User
Joined: Oct 2008
Posts: 1,621
Likes: 7
From: Sacramento, Crawlifonia
Thread Hijack:
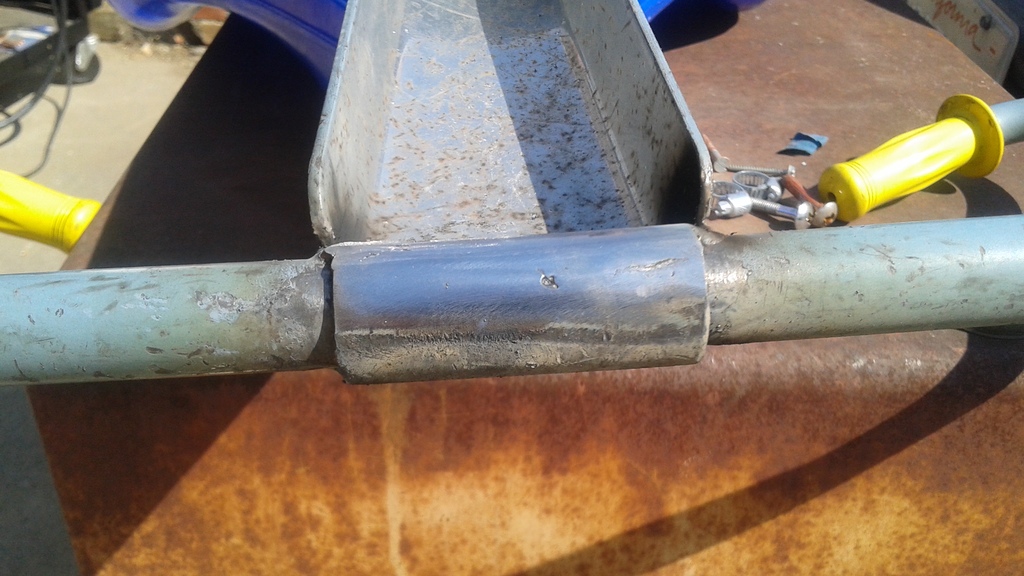
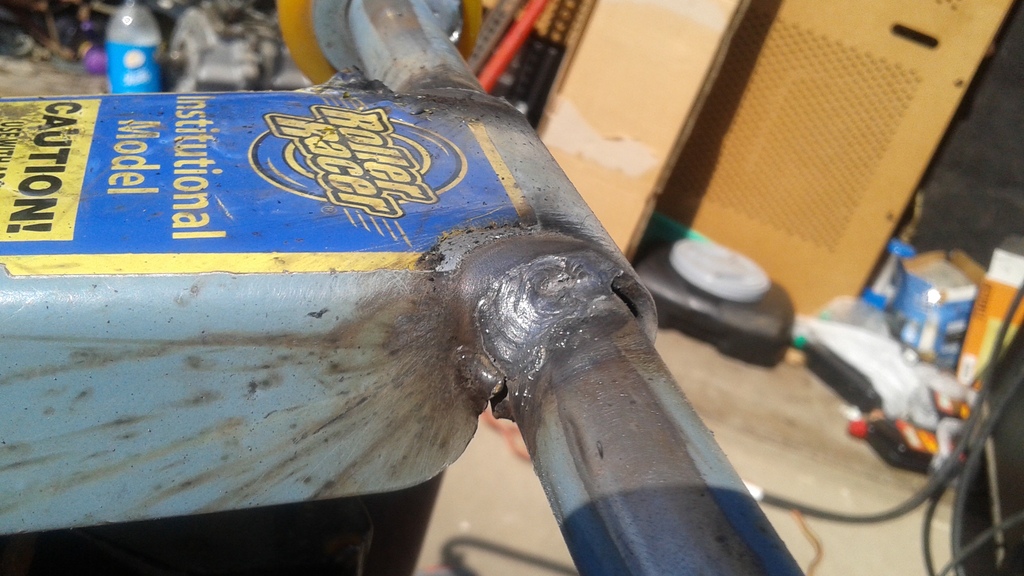
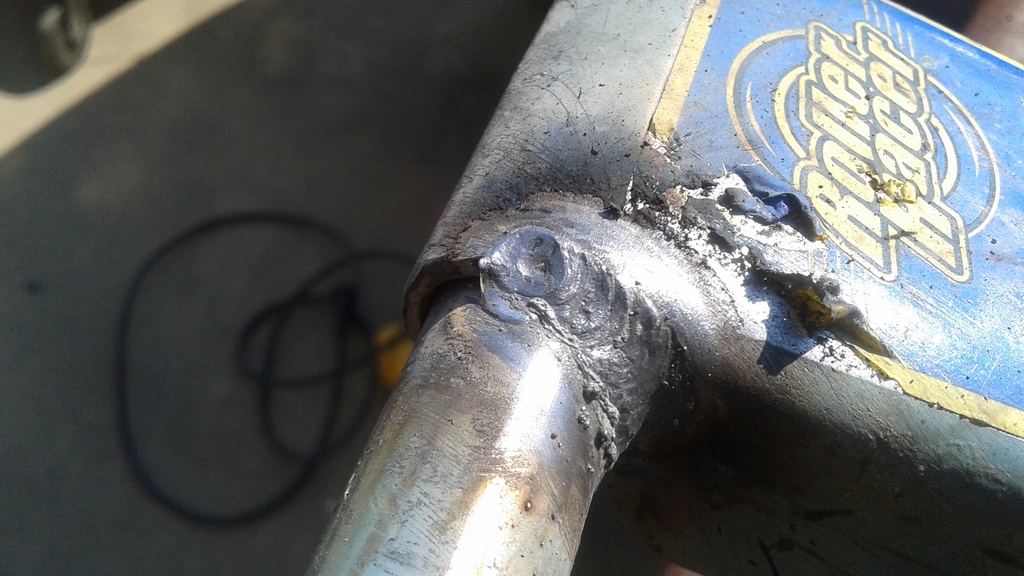
Do any of you remember one of these?
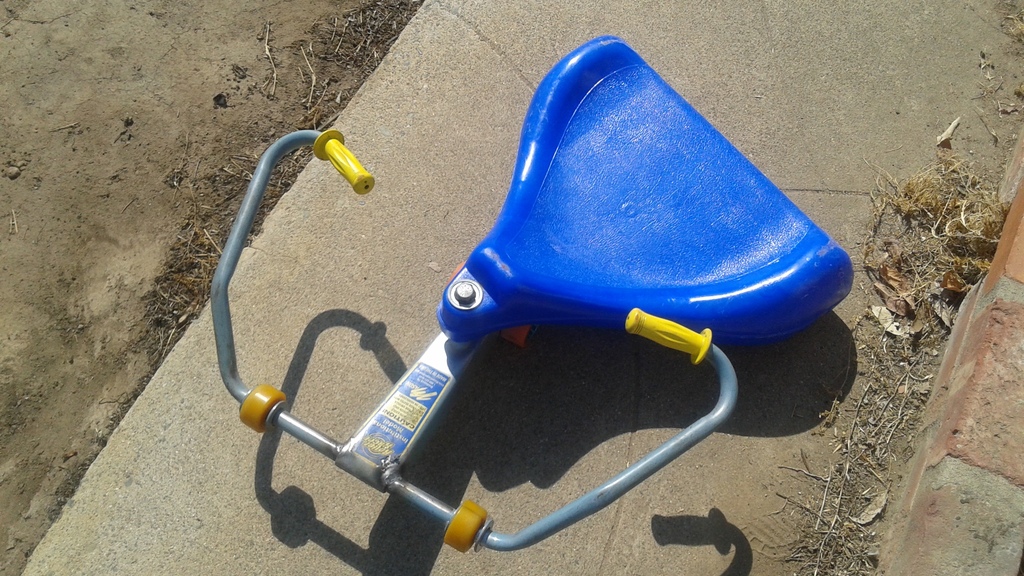
This one is two decades old and has gotten loads of use and abuse over these twenty years. The handle mount was broken, so I took it home too fix it for the school. What you think of my welds; keep in mind that I have not run a bead in quite a few years.
Do any of you remember one of these?
This one is two decades old and has gotten loads of use and abuse over these twenty years. The handle mount was broken, so I took it home too fix it for the school. What you think of my welds; keep in mind that I have not run a bead in quite a few years.
Mar 26, 2017 | 09:29 PM
#420
Thread Starter
Registered User
Joined: Oct 2008
Posts: 1,621
Likes: 7
From: Sacramento, Crawlifonia
So, I have a big project at hand, I am rebuilding my 22re. I did not plan on doing the work myself, but circumstances has forced me to do it so I will doing it right. By right, I mean I will be using LCE's 2.6 stroker kit, and Marlin 1600lb clutch kit. Clutch showed up Friday and the stoker kit should show up this week. I am also going with a new Three row all aluminum radiator and converting over to electric fan. I will be sticking with the stock valve train and flywheel.
THE HISTORY BEHIND THE REBUILD
Back in late December, I replaced a broken timing chain guide; it was a simple job and everything went too plan as it should. However, when I was driving back home on HWY 50 the fallowing day the truck started to loose power and then die. I was able to pull over and crank the engine over, but would not really start, and the starter sounded like it was struggling. I suspected that it was seizing on me ( What bad luck). Got her towed home.
Fallowing day I tried to start the engine again and she purred as she should. The starter sounded good, so I was kind of excited. I knew it was wise at that point to do a compression test, so that was in the works. Bad news, number Two cylinder was at 90psi, and later I learned when I hit the accelerator I could hear a very unmistakable knocking sound ( I have problems ).
I was not in the position to take on this project at this time, so I decided to farm the work out and pay a professional. Long story short with the mechanic, I had to request a refund because I waited a total of almost Three month for the work to get done and I had nothing to show for it, not even consistent steady communication. It took that time just to finish building a new long block, and I have no idea how long the swap would take, so I took it upon myself too do the work and decided too do it better then stock.
ON TOO THE WORK
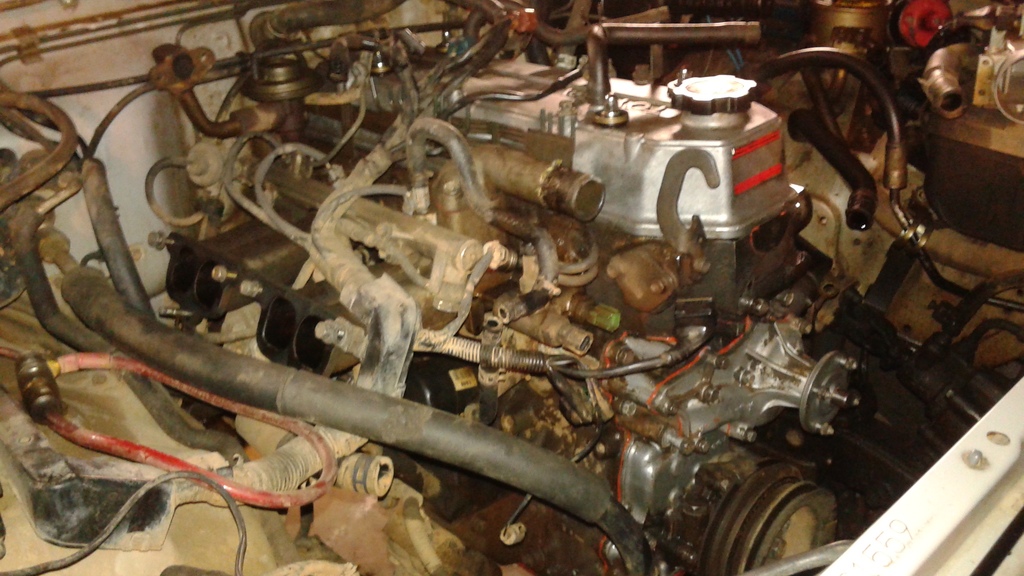
Here is what I got started with today, and I only worked on it for Three hours
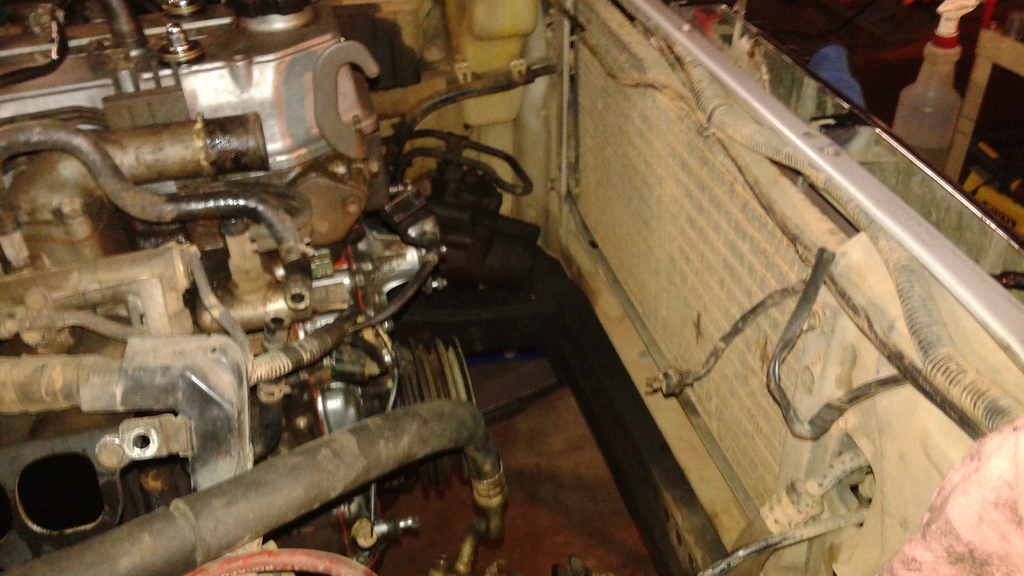
Here you can see the leak in the radiator
THE HISTORY BEHIND THE REBUILD
Back in late December, I replaced a broken timing chain guide; it was a simple job and everything went too plan as it should. However, when I was driving back home on HWY 50 the fallowing day the truck started to loose power and then die. I was able to pull over and crank the engine over, but would not really start, and the starter sounded like it was struggling. I suspected that it was seizing on me ( What bad luck). Got her towed home.
Fallowing day I tried to start the engine again and she purred as she should. The starter sounded good, so I was kind of excited. I knew it was wise at that point to do a compression test, so that was in the works. Bad news, number Two cylinder was at 90psi, and later I learned when I hit the accelerator I could hear a very unmistakable knocking sound ( I have problems ).
I was not in the position to take on this project at this time, so I decided to farm the work out and pay a professional. Long story short with the mechanic, I had to request a refund because I waited a total of almost Three month for the work to get done and I had nothing to show for it, not even consistent steady communication. It took that time just to finish building a new long block, and I have no idea how long the swap would take, so I took it upon myself too do the work and decided too do it better then stock.
ON TOO THE WORK
Here is what I got started with today, and I only worked on it for Three hours
Here you can see the leak in the radiator
Last edited by dark_fairytales; Mar 26, 2017 at 09:31 PM.


