
coryc85's 1988 4Runner Build-Up Thread
 Jul 25, 2013 | 10:18 AM
#401
Registered User


Joined: Mar 2012
Posts: 7,141
Likes: 687
Yep, same happened to mine, but just stripped the paint and had rusty spots- no hole.
BTW, I've been so busy at work so I just tool my truck to SD TRUX (independent Toyota-Lexus specialist) for the timing TPS issue. Replaced the TPS. Will take her back to smog station tomorrow.
Keep up the good work, guys!
BTW, I've been so busy at work so I just tool my truck to SD TRUX (independent Toyota-Lexus specialist) for the timing TPS issue. Replaced the TPS. Will take her back to smog station tomorrow.
Keep up the good work, guys!
Jul 27, 2013 | 10:48 AM
#403
Thread Starter
Registered User

Joined: May 2005
Posts: 1,979
Likes: 233
From: S. FL
Thank you Mark.
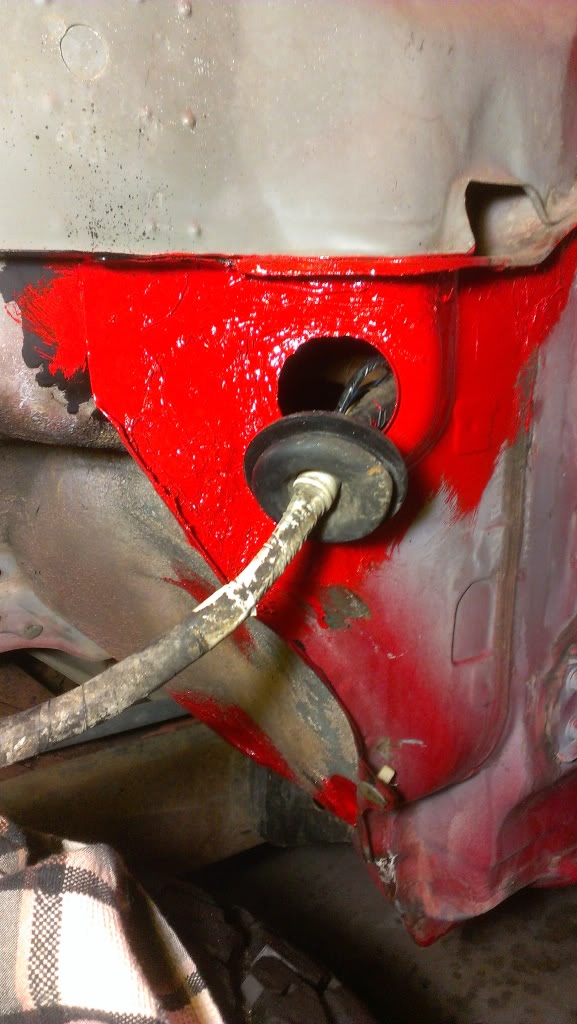
So maybe my clutch cylinder did make that hole in the floor, or maybe a mix of brake fluid and water...no idea.
Trying to Junk! Speaking of por15...
Put on a coat at 10am this morning and a second coat a little after 12. Says 2 to 6 hours on the can, I was dry to the touch in about 2.
Inside drivers floorboard
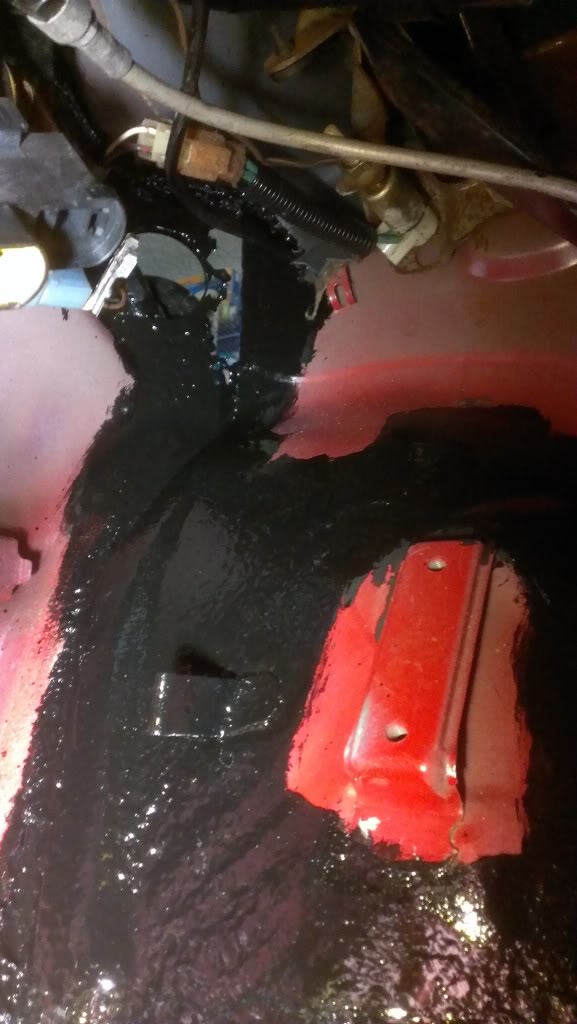
Outside of the driver side inner fender

Once that dries, I'll put the bondo hair fiberglass on it to fill the holes and then I'll probably paint everything with some Rustoleum oil based red paint that I have.
Some comments on the por15...it goes on thin so it runs, which is good to get into cracks and crevices. It seems to dry into a thick coating though. Also, the quart can was very difficult to open, took me like 20 minutes and I ruined the top in the process. I had to pour the can into a plastic container with a lid because the can lid will not go on anymore. 1 quart is definitely plenty to do the areas you see here, plus the passenger side, probably 10 times over.
Yep, same happened to mine, but just stripped the paint and had rusty spots- no hole.
BTW, I've been so busy at work so I just tool my truck to SD TRUX (independent Toyota-Lexus specialist) for the timing TPS issue. Replaced the TPS. Will take her back to smog station tomorrow.
Keep up the good work, guys!
BTW, I've been so busy at work so I just tool my truck to SD TRUX (independent Toyota-Lexus specialist) for the timing TPS issue. Replaced the TPS. Will take her back to smog station tomorrow.
Keep up the good work, guys!
Put on a coat at 10am this morning and a second coat a little after 12. Says 2 to 6 hours on the can, I was dry to the touch in about 2.
Inside drivers floorboard
Outside of the driver side inner fender
Once that dries, I'll put the bondo hair fiberglass on it to fill the holes and then I'll probably paint everything with some Rustoleum oil based red paint that I have.
Some comments on the por15...it goes on thin so it runs, which is good to get into cracks and crevices. It seems to dry into a thick coating though. Also, the quart can was very difficult to open, took me like 20 minutes and I ruined the top in the process. I had to pour the can into a plastic container with a lid because the can lid will not go on anymore. 1 quart is definitely plenty to do the areas you see here, plus the passenger side, probably 10 times over.
Last edited by coryc85; Jul 27, 2013 at 10:50 AM.
Jul 28, 2013 | 08:21 AM
#405
Thread Starter
Registered User
Joined: May 2005
Posts: 1,979
Likes: 233
From: S. FL
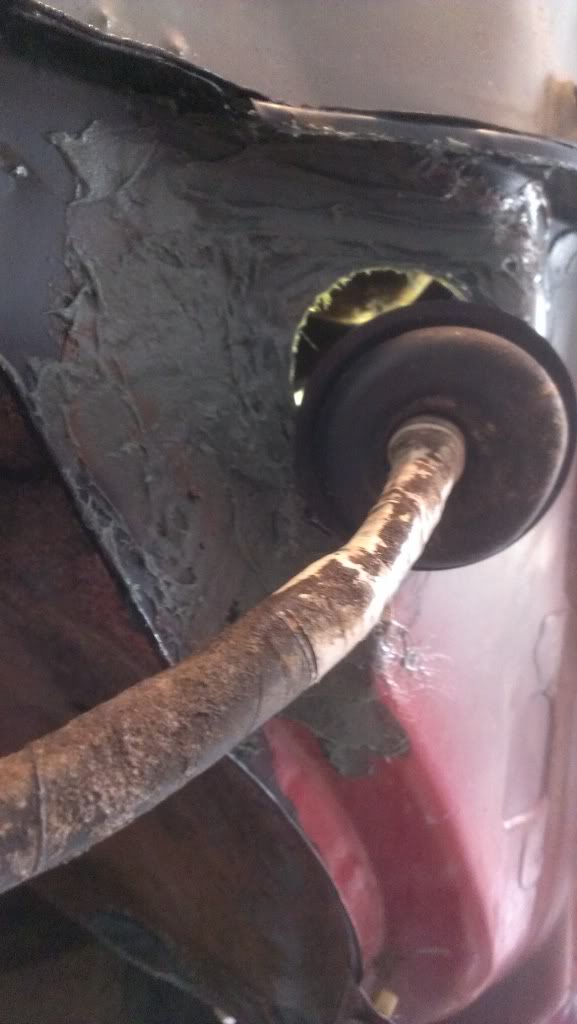
I went out there and used the Bondo Hair today...I kinda wish I used something else, the working time on this stuff is only like 3 minutes. I mixed up a golf ball sized amount first, wasted most of that because it set up before I could put it on. Then mixed up less than half of that size, and again most of it set up before I could even get it on there. Here is the area after those 2 batches put on...
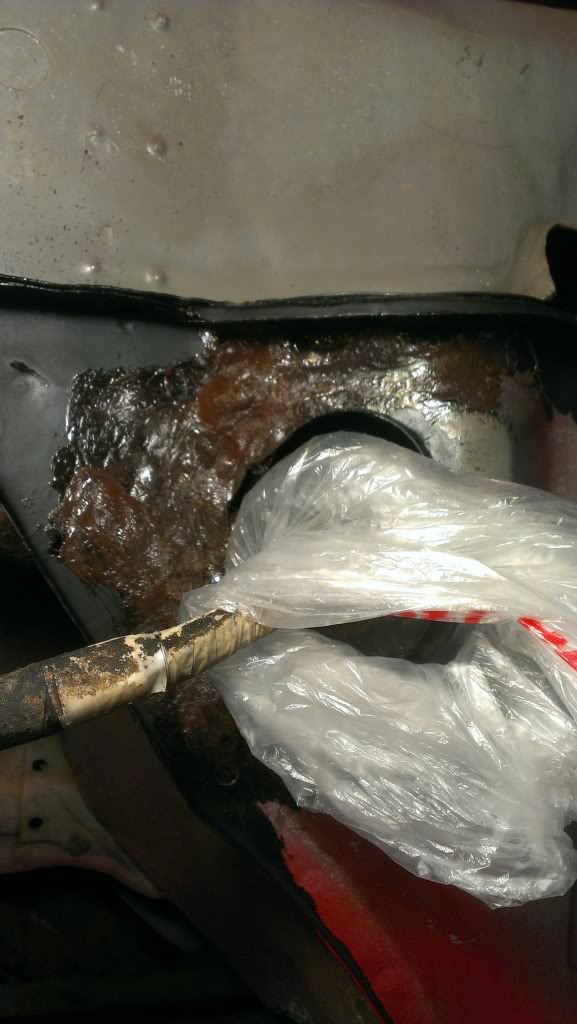
I have a few more holes to fill in, then I'll let it dry and see if I have any open spots.
Jul 28, 2013 | 09:54 AM
#406
I seen on one of the carshows to keep the POR 15 for setting up is to fill spray some form of gas like into the top of the can to displace the oxygen in the can when done using it. Also seal the can with a layer of plastic or waxed paper between the can and lid. I just cant remember which type gas/vapor it was.
When mixing up filler, I consider myself lucky to get 2 minutes out of it. Might try a little less hardner in it, but still time is very limited.
When mixing up filler, I consider myself lucky to get 2 minutes out of it. Might try a little less hardner in it, but still time is very limited.
Last edited by Terrys87; Jul 28, 2013 at 09:56 AM.
Jul 28, 2013 | 10:47 AM
#407
Registered User
Joined: Jul 2012
Posts: 2,365
Likes: 4
From: Idaho
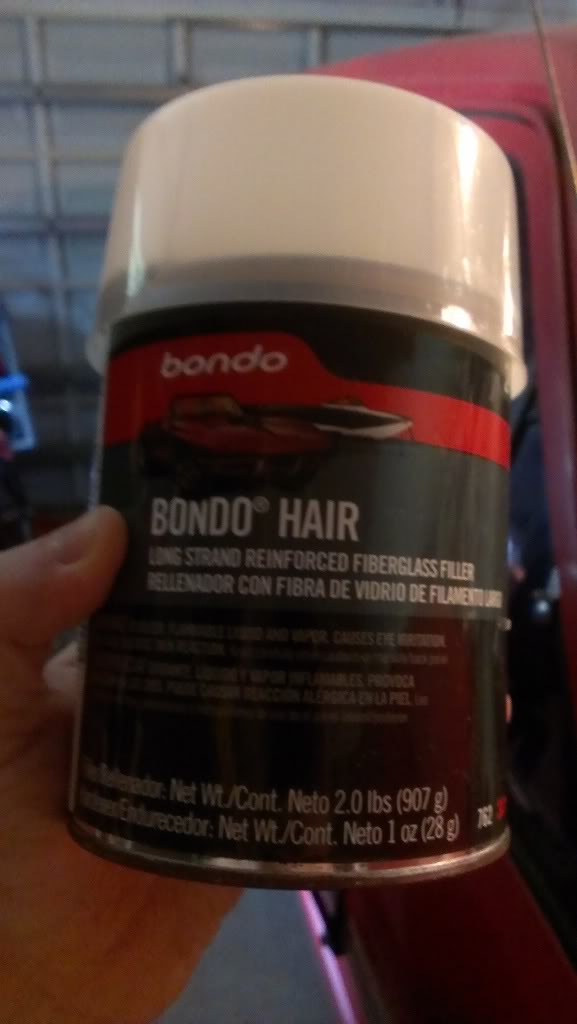
Dragon - well this is what I'm using, it has 1" fiberglass hairs in it...

I went out there and used the Bondo Hair today...I kinda wish I used something else, the working time on this stuff is only like 3 minutes. I mixed up a golf ball sized amount first, wasted most of that because it set up before I could put it on. Then mixed up less than half of that size, and again most of it set up before I could even get it on there. Here is the area after those 2 batches put on...
I have a few more holes to fill in, then I'll let it dry and see if I have any open spots.
Jul 29, 2013 | 05:24 AM
#408
Cory, that bond hair is looking good. I worked with that Metal Body filler years ago and that stuff has an activator. The more you add of the activator the hotter it gets the quicker it set, I assume its the same with bondo hair like cyberhorn said.
Jul 29, 2013 | 05:43 AM
#409
Thread Starter
Registered User
Joined: May 2005
Posts: 1,979
Likes: 233
From: S. FL
I seen on one of the carshows to keep the POR 15 for setting up is to fill spray some form of gas like into the top of the can to displace the oxygen in the can when done using it. Also seal the can with a layer of plastic or waxed paper between the can and lid. I just cant remember which type gas/vapor it was.
When mixing up filler, I consider myself lucky to get 2 minutes out of it. Might try a little less hardner in it, but still time is very limited.
When mixing up filler, I consider myself lucky to get 2 minutes out of it. Might try a little less hardner in it, but still time is very limited.
Thanks for the tip guys, I'm new to this "body work". I'll try less hardener on my next batch and see if I can get more than a couple mins out of it.
Aug 4, 2013 | 04:40 PM
#410
Thread Starter
Registered User
Joined: May 2005
Posts: 1,979
Likes: 233
From: S. FL
Whew...made some progress this weekend.
First up, I liked the Bondo Hair for filling holes, but it seemed a bit porous for filling the small holes that were like swiss cheese in the repaired area. So I bought some Bondo Fiberglass Jelly to serve as my topcoat....did I mention I hate body work?

So I used a smaller amount of hardener than I otherwise would have thanks to the advice here.
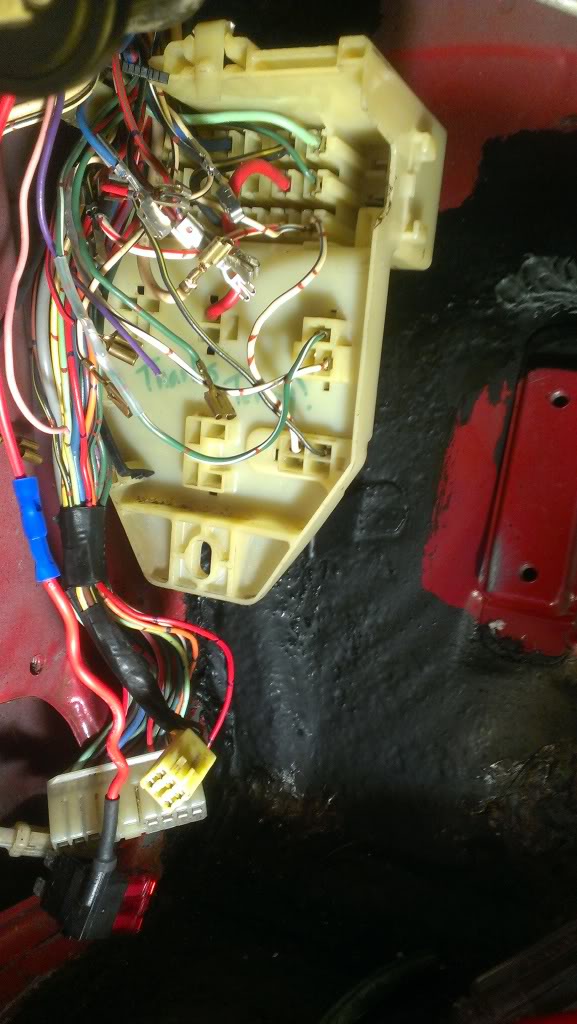
While that fiberglass was hardening I moved inside and put each and every terminal back into the donor fuse block from Terry. That was an awful job, it just took forever to route each wire and shove it in where it goes all while leaning over the floor of the truck and sweating and cussing. Anyway, it's done! I FINALLY got to use the EFI Relay I got from Chef instead of a jumper wire, and the good news is the truck started right up like a champ.
I let the fiberglass dry overnight and then I put some Rustoleum red on it...
Once that dries, I'll put the fender back on, and the drivers side is done. I'll get to the passenger side in the coming weeks.
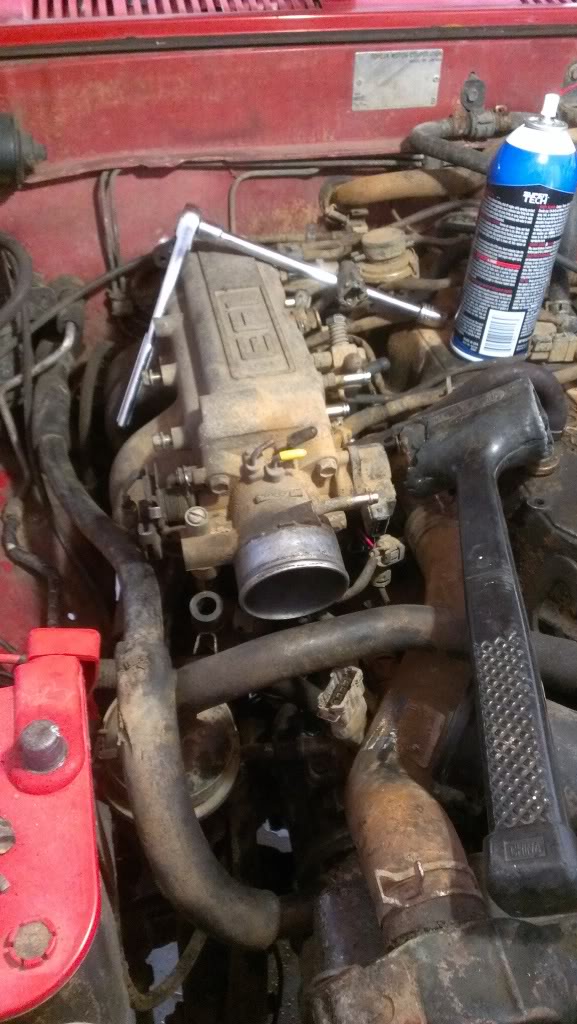
Next up, I threw in the Flamethrower injectors that I got. Wasn't a bad job, I forgot to put back a coolant line and coolant was shooting all over the floor, at first I thought it was a major fuel leak. My cold start banjo had only 1 crush washer..but somehow never leaked. I put it back and it seeped fuel. Luckily I had an extra fuel rail that had 2 crush washers in it, so I sanded them and used them.
Here's a shot of my intake just about put back together
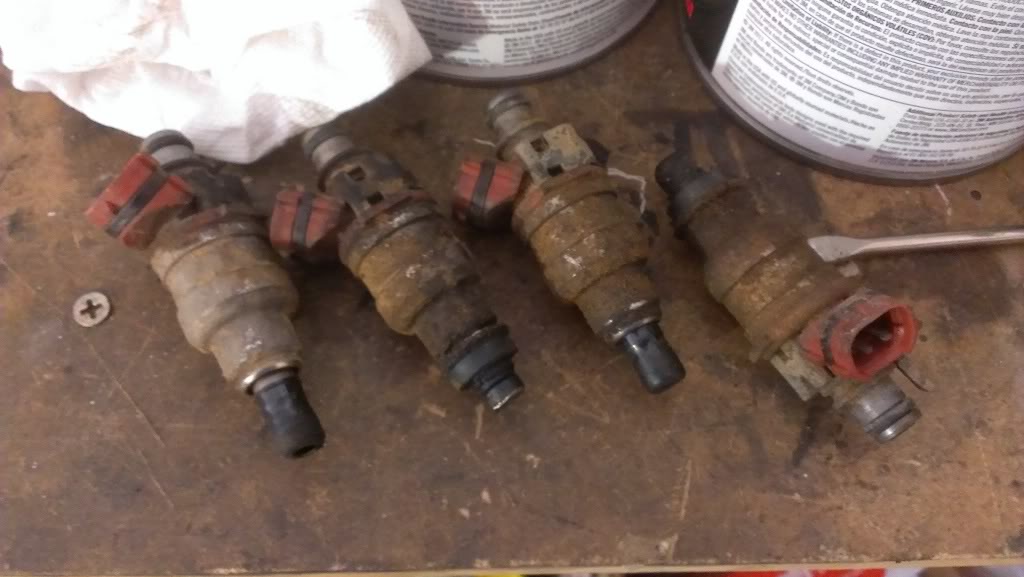
And here are my old injectors
I posted my review of the injectors so far here: https://www.yotatech.com/forums/f116...review-271766/
After that red paint dries tomorrow, I'll throw the fender back on and drive the truck to work. Really excited to see what kind of a difference these injectors make.
First up, I liked the Bondo Hair for filling holes, but it seemed a bit porous for filling the small holes that were like swiss cheese in the repaired area. So I bought some Bondo Fiberglass Jelly to serve as my topcoat....did I mention I hate body work?
So I used a smaller amount of hardener than I otherwise would have thanks to the advice here.
While that fiberglass was hardening I moved inside and put each and every terminal back into the donor fuse block from Terry. That was an awful job, it just took forever to route each wire and shove it in where it goes all while leaning over the floor of the truck and sweating and cussing. Anyway, it's done! I FINALLY got to use the EFI Relay I got from Chef instead of a jumper wire, and the good news is the truck started right up like a champ.
I let the fiberglass dry overnight and then I put some Rustoleum red on it...
Once that dries, I'll put the fender back on, and the drivers side is done. I'll get to the passenger side in the coming weeks.
Next up, I threw in the Flamethrower injectors that I got. Wasn't a bad job, I forgot to put back a coolant line and coolant was shooting all over the floor, at first I thought it was a major fuel leak. My cold start banjo had only 1 crush washer..but somehow never leaked. I put it back and it seeped fuel. Luckily I had an extra fuel rail that had 2 crush washers in it, so I sanded them and used them.
Here's a shot of my intake just about put back together
And here are my old injectors
I posted my review of the injectors so far here: https://www.yotatech.com/forums/f116...review-271766/
After that red paint dries tomorrow, I'll throw the fender back on and drive the truck to work. Really excited to see what kind of a difference these injectors make.
Aug 4, 2013 | 05:35 PM
#411
Registered User
Joined: Jul 2012
Posts: 2,365
Likes: 4
From: Idaho
you could just put it back on tonight let it dry inside the fender wont hurt the rustolium
i had to reuse one of my crush washers when i rebuilt my intake system as it didnt come with the rebuild kit the odd ball round one with a square hole in it for the CSI ive had no issues with leakage
i had to reuse one of my crush washers when i rebuilt my intake system as it didnt come with the rebuild kit the odd ball round one with a square hole in it for the CSI ive had no issues with leakage
Last edited by Cyberhorn The Dragon; Aug 4, 2013 at 05:38 PM.
Aug 5, 2013 | 10:23 AM
#412
Thread Starter
Registered User
Joined: May 2005
Posts: 1,979
Likes: 233
From: S. FL
Thought this would be a good time to update my work list with some new items and mark off the finished ones. These are in no particular order...
Stuff remaining to be done...
1. Install bj spacers and rear longer shackles - I have both items, just have not installed them.
2. Install 4.7 geared transfer case. I have the case with gears, need to assemble it and install it.
3. Buy a budbuilt tcase crossmember
4. Fix the water leak on driver & passenger side. Driver's side done, need to fix passenger side next.
5. Replace rubber window gaskset on driver side, the one in the window track, it's torn in the upper rear corner.
6. New CVs. Actually put in 1 new one, need 1 more.
7. Install some peel & seal to make it quieter.
8. Put LED lights from Superbright into dome, deck, and backup lights.
9. Upgraded headlight wiring harness.
10. New grounds. I still need to upgrade the 2 smaller engine grounds and the alternator wire. May as well do the alternator too.
11. Install electric fan. Already purchased Villager Fan and DCC Controller. Need new radiator as well.
12. Vinyl floor kit from ACC.
13. Sliders. Thinking of the 4xInnovations ones.
14. Have swingout tire carrier built. Local fab shop.
Finished work...
- New dash speakers. DONE
- Install IFS frame brace that has been sitting for a year. DONE
- Fix AC. AC Working, but still need more airflow on condenser...new efan should take care of that.
- I'd like to have my injectors cleaned at WitchHunter. Replaced with Flamethrower injectors.
- Brake upgrades: V6 front calipers, 1" bore master cylinder, extended brake lines. Upgraded calipers, rear wheel cylinders, master cylinder, and tied LSPV up.
Last edited by coryc85; Aug 6, 2013 at 05:15 AM.
Aug 5, 2013 | 11:30 AM
#414
Registered User
Joined: Mar 2012
Posts: 7,141
Likes: 687

Turns out to be just a junction point. I do not think anybody in this forum has ever used this in the past 28 or so years. Just one weak point/potential place to rust or have poor connection.
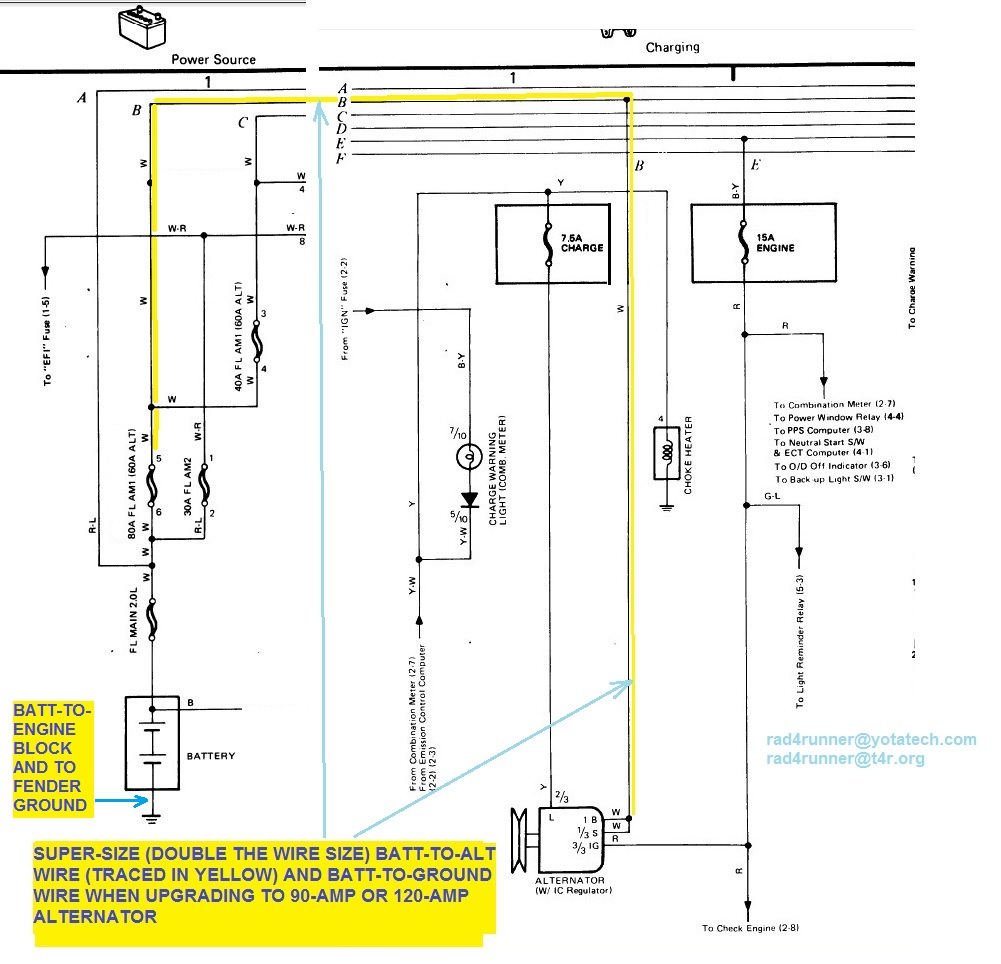
Just run a thicker wire from alt to where the wire joins the Fuse/FS network in fuse block. See yellow wire in schematic.
 Aug 5, 2013 | 01:11 PM
#416
Registered User
Joined: Jul 2012
Posts: 2,365
Likes: 4
From: Idaho
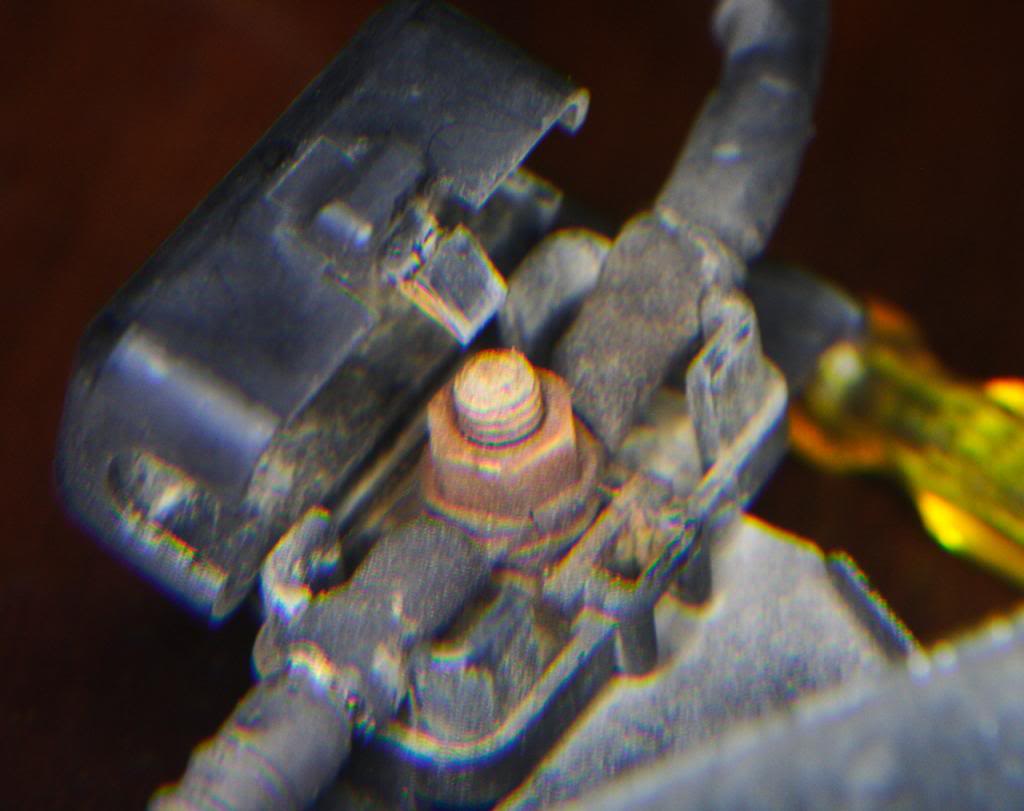
Cory, when upgrading alternator wire, I suggest you get rid of this block which I thought was a ferrite noise-supressor core.
Turns out to be just a junction point. I do not think anybody in this forum has ever used this in the past 28 or so years. Just one weak point/potential place to rust or have poor connection.
Just run a thicker wire from alt to where the wire joins the Fuse/FS network in fuse block. See yellow wire in schematic.
RAD4 since your up on wiring an alternators
i was looking at this one as an eventual upgade it LOOKS like it would nearly just bolt in change out the harness plug, up grade the primary wire done! terry was trying to get a parts dept friend to look into it but got busy thought if this is legit cory might be interested as well
http://www.ebay.com/itm/380444917072...84.m1423.l2649
Aug 5, 2013 | 02:20 PM
#417
Just now looking into this!... Saw a few threads and really not wanting to do the GM, I thought about this guy who is not far from me at all...
http://item.mobileweb.ebay.com/viewi...id=23738842920
http://item.mobileweb.ebay.com/viewi...id=23738842920
Aug 5, 2013 | 02:45 PM
#418
Registered User
Joined: Mar 2012
Posts: 7,141
Likes: 687
LOL i .. put mine back on but eventually will have to remove it to upgrade the wire
RAD4 since your up on wiring an alternators
i was looking at this one as an eventual upgade it LOOKS like it would nearly just bolt in change out the harness plug, up grade the primary wire done! terry was trying to get a parts dept friend to look into it but got busy thought if this is legit cory might be interested as well
http://www.ebay.com/itm/380444917072...84.m1423.l2649
Need to check with seller.
For the the thick alt wire itself, just disconnect from alt here, trace it back to fuse block, and replace it. Don't forget to re-connect thinner white wires that tap off from stock alt wire.
Aug 5, 2013 | 02:47 PM
#419
Registered User
Joined: Jul 2012
Posts: 2,365
Likes: 4
From: Idaho
Just now looking into this!... Saw a few threads and really not wanting to do the GM, I thought about this guy who is not far from me at all...
http://item.mobileweb.ebay.com/viewi...id=23738842920
http://item.mobileweb.ebay.com/viewi...id=23738842920
Aug 6, 2013 | 05:19 AM
#420
Thread Starter
Registered User
Joined: May 2005
Posts: 1,979
Likes: 233
From: S. FL
Whoa...thanks for the alternator tips Rad, Dragon, and Chef. I added upgrading the alternator to my list up there. I'm betting when I put in that electric villager fan I'll need the extra amps anyway.
I put the fender back on and set the idle last night...you have to double the 8cyl scale, so just under 800 rpms. That's really good for me because this truck would never idle smoothly under 1k, so the new injectors are helping that.

Drove the truck this morning to work, and man I have missed driving it.
I put the fender back on and set the idle last night...you have to double the 8cyl scale, so just under 800 rpms. That's really good for me because this truck would never idle smoothly under 1k, so the new injectors are helping that.
Drove the truck this morning to work, and man I have missed driving it.


