
ChildrenOfBodom's 1987 4Runner Build Up Thread
 Apr 1, 2013 | 05:19 PM
#62
Thread Starter
Registered User
Joined: Jul 2009
Posts: 245
Likes: 0
From: Mission Viejo, CA
Thanks dude. Can't wait to get my rig up next to yours someday, those are gonna be some sweet pics.
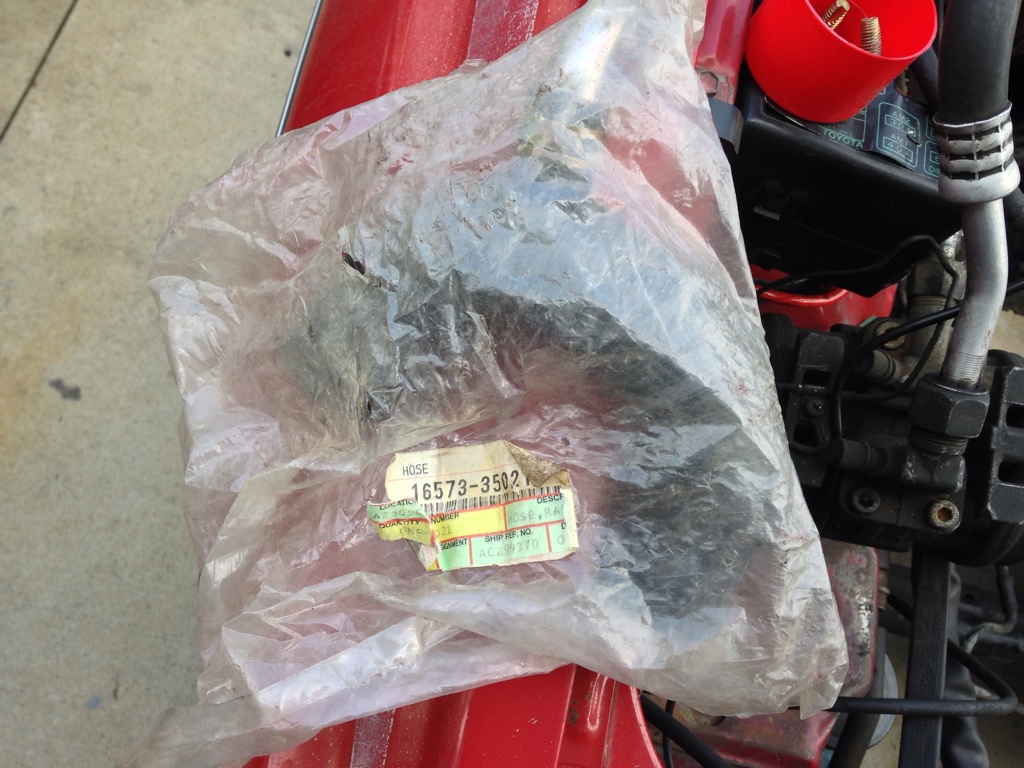
Today was pretty funny. I didn't get the oil lines figured out yet, but I think I'm going to look into some Supra forums for upgrades. Would rather go stainless braided than mess with welding the OEM stuff together. Depends on what I can find.
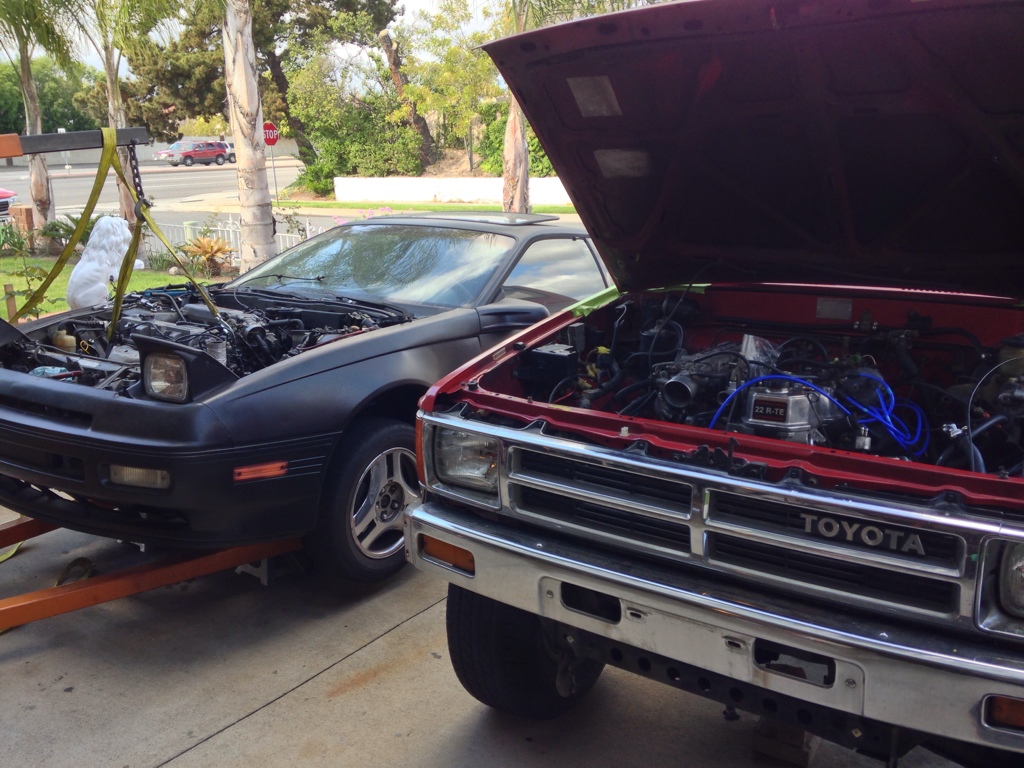
My Probe has been sitting for a few months, today my friend Lee and I got cracking on that. The 22R-TE was in the way of the garage space, so we stuck the engine in real quick before pulling the probe engine.
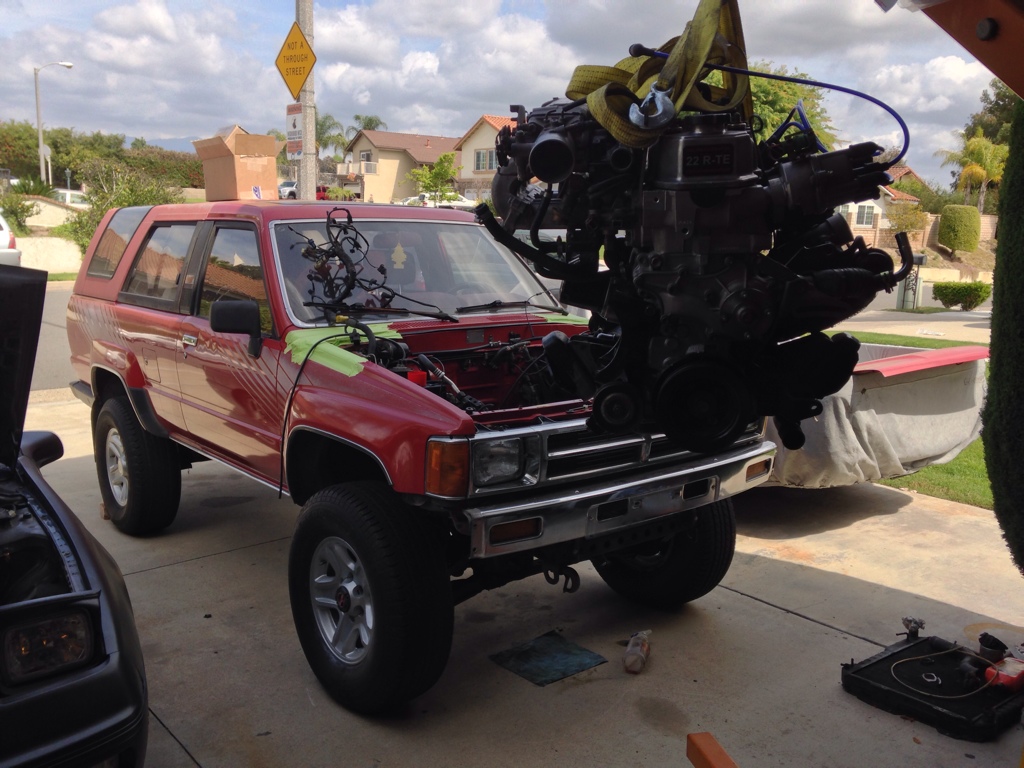
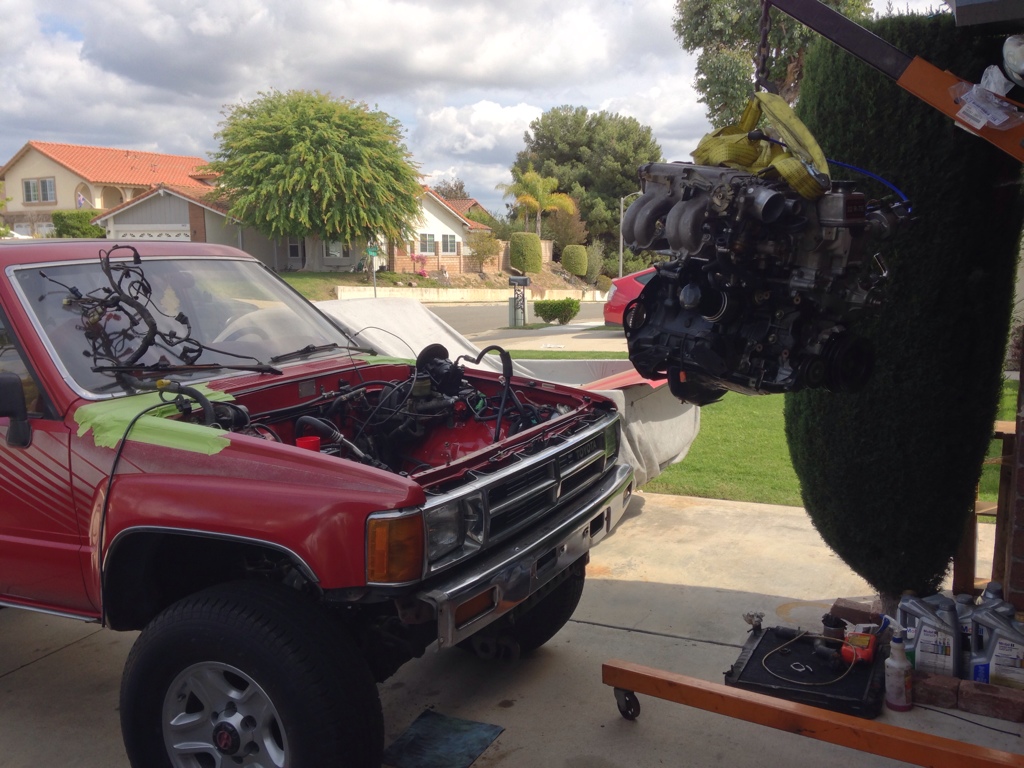
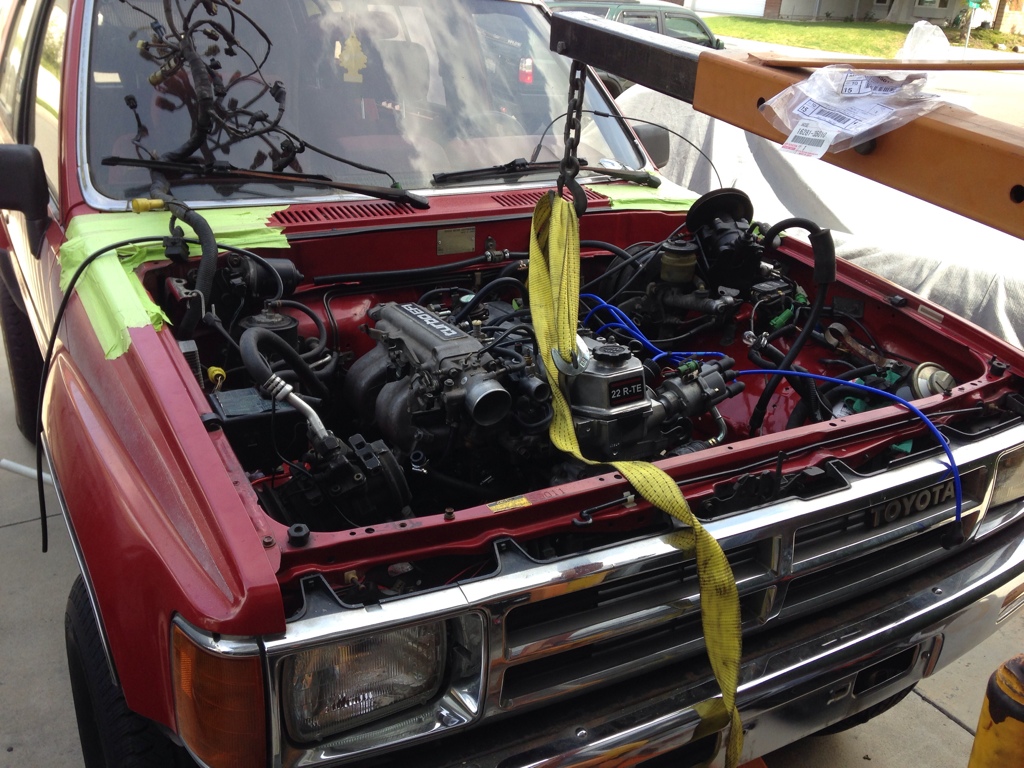
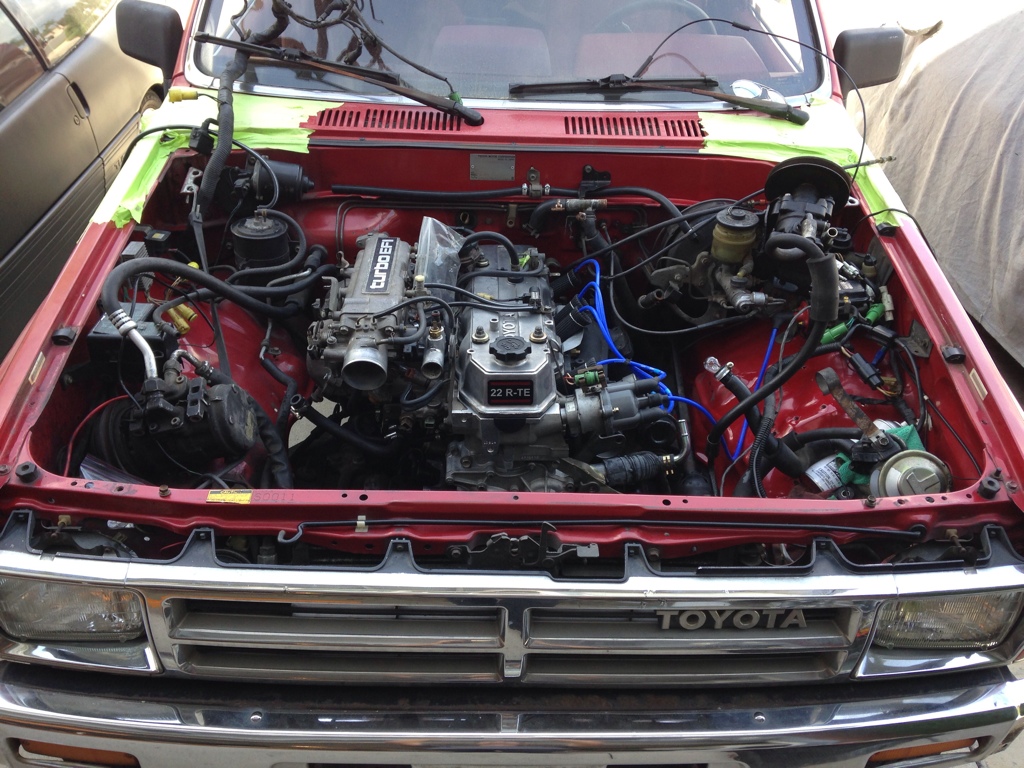
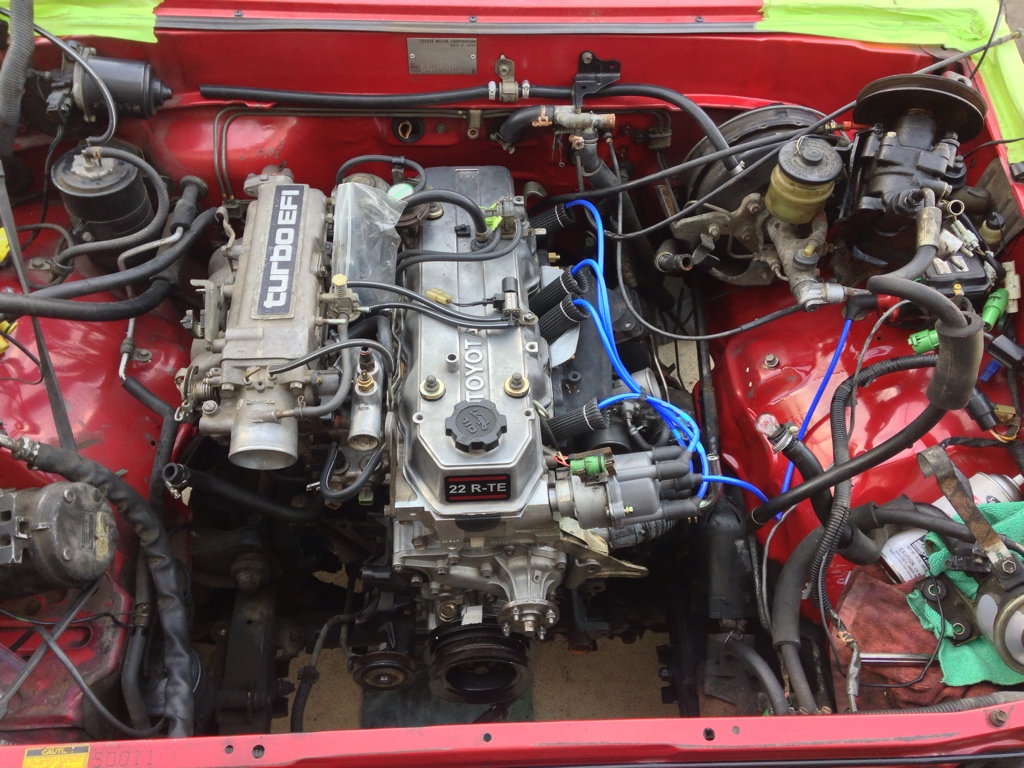
Once that was in, Probe motor came out. It's now in the garage for it's own rebuild:
 Apr 1, 2013 | 09:54 PM
#63
Yep, that's gonna be a polaroid moment! Nice progress!
Gonna go nuts on the Probe motor? Hehe. ... seen those lay rubber for yards when tricked out, lol... 400-500hp...?? O.o
Gonna go nuts on the Probe motor? Hehe. ... seen those lay rubber for yards when tricked out, lol... 400-500hp...?? O.o
Last edited by ChefYota4x4; Apr 1, 2013 at 09:56 PM.
Apr 3, 2013 | 05:13 PM
#64
Thread Starter
Registered User
Joined: Jul 2009
Posts: 245
Likes: 0
From: Mission Viejo, CA
Probe's going through some leaking issues. Replacing a ton of gaskets, main seals, head gasket, etc. Going to put it back in with a new clutch, then get it smogged.
Haha weird as hell seeing a Mazda engine where the Toyota one was just the same day!
Todays progress. Got an Innovate MTX-L wideband. Going to order a 7M-GTE Ct-26 stainless braided oil line kit and work it onto the 22R-TE
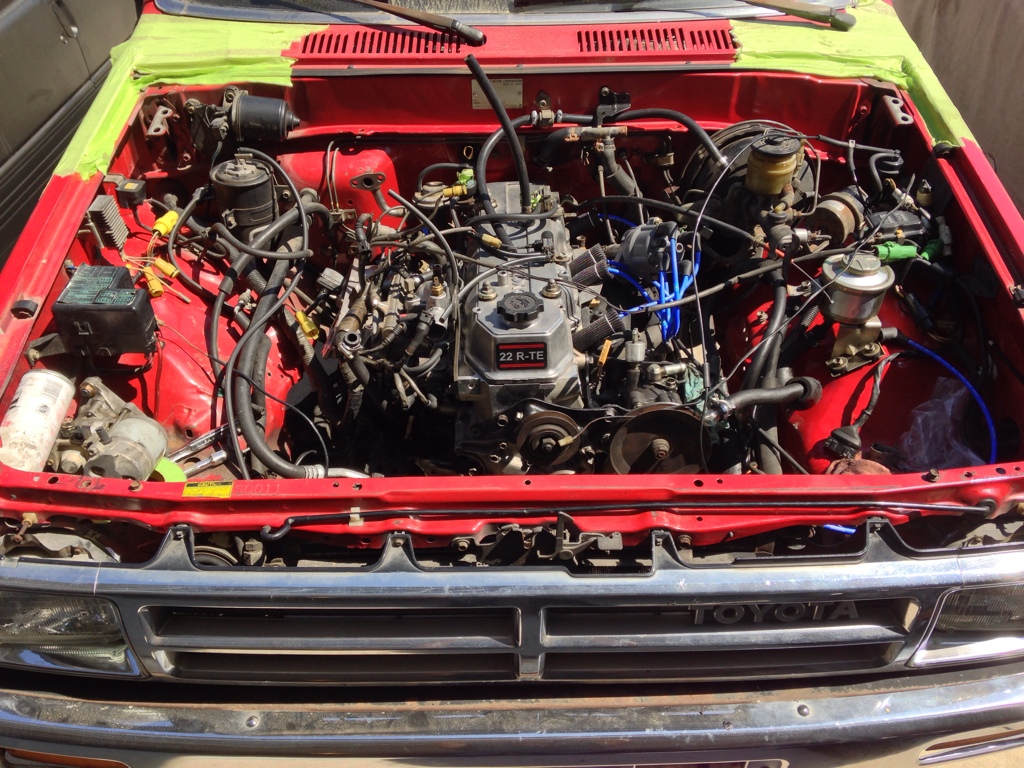
Intake manifold, wiring, starter, torque converter bolts, etc, etc, etc

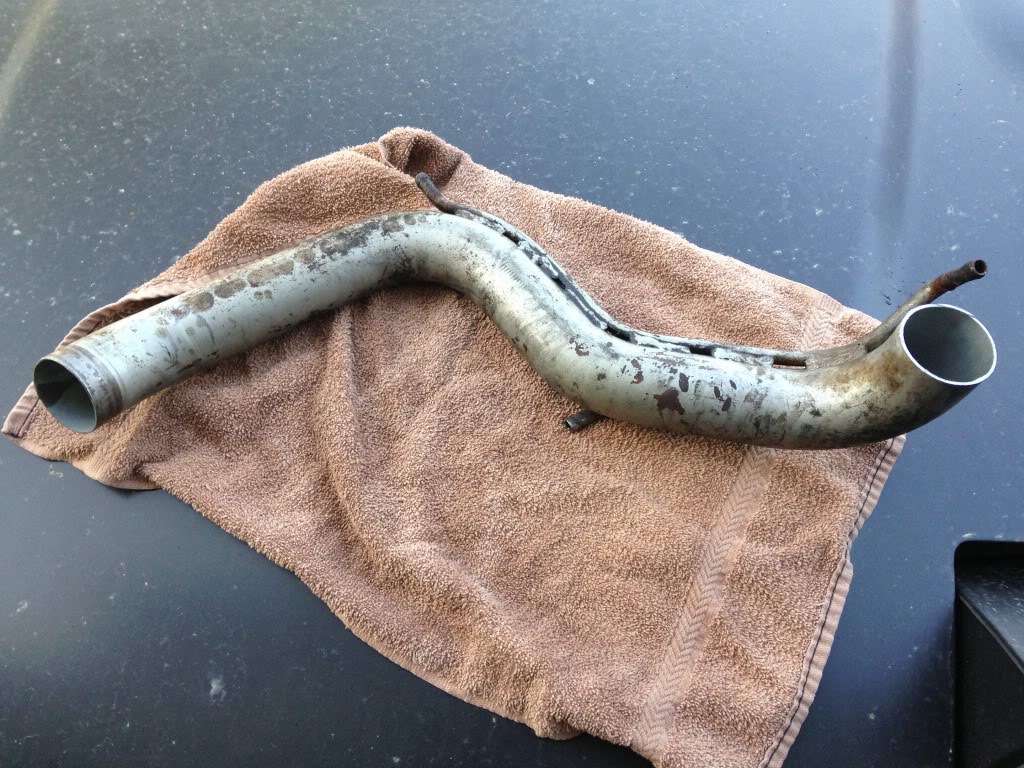
Got rid of the coolant pipe that runs behind the turbo. Going to reroute a new one.
Haha weird as hell seeing a Mazda engine where the Toyota one was just the same day!
Todays progress. Got an Innovate MTX-L wideband. Going to order a 7M-GTE Ct-26 stainless braided oil line kit and work it onto the 22R-TE
Intake manifold, wiring, starter, torque converter bolts, etc, etc, etc
Got rid of the coolant pipe that runs behind the turbo. Going to reroute a new one.

 Apr 6, 2013 | 12:11 AM
#67
Thread Starter
Registered User
Joined: Jul 2009
Posts: 245
Likes: 0
From: Mission Viejo, CA
Your first post was in my thread, what an honor! Thank you.
Thanks!!!
The rig is coming along great. I replaced the IAC hose with 12mm silicone hose yesterday. I also had a bent 22RE aluminum radiator on the side of my house. It's a little bit damaged but I'm going to fix it up and see if I can run it. Would be a nice addition!
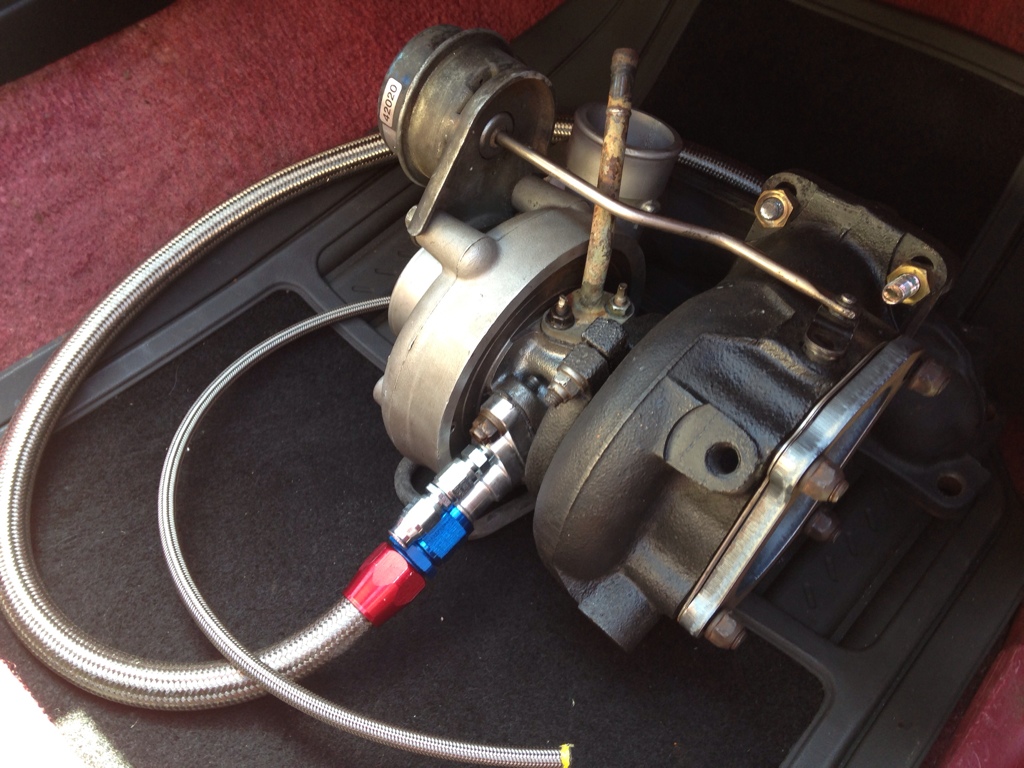
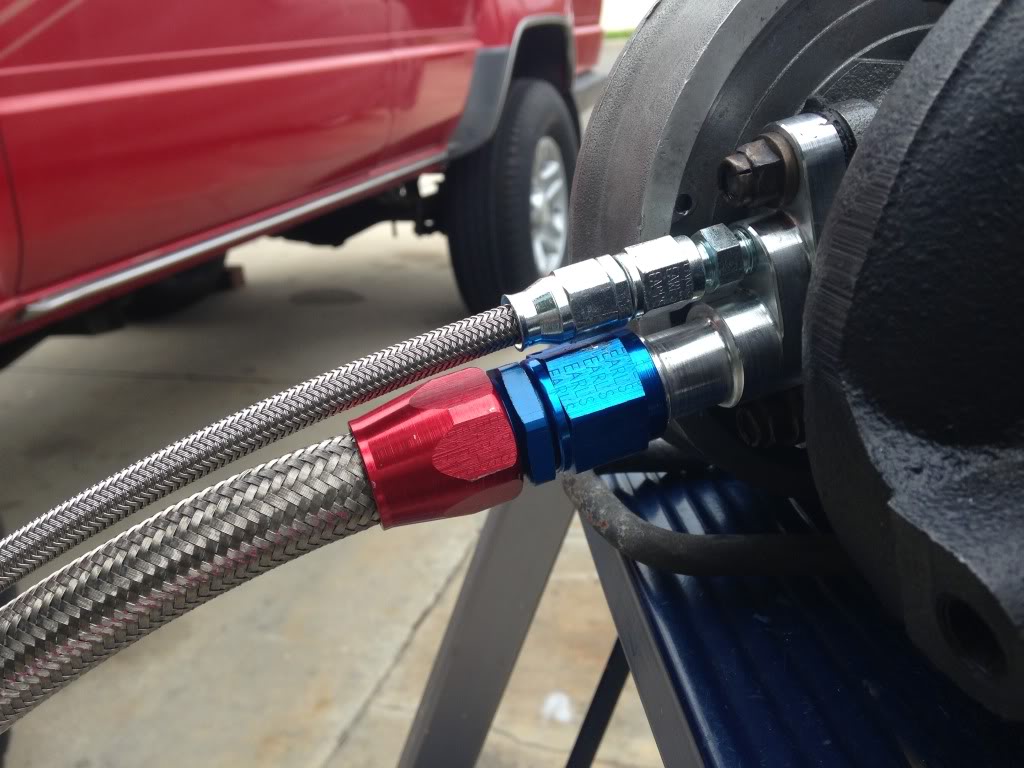
Also got my stainless steel lines figured out for the CT26. I didn't want to use the OEM lines, nor did I want to buy a 7M-GTE stainless line kit and risk fitment troubles.
1x CT26 Oil Drain/Feed Flange, -4 AN feed and -10AN drain
1x 22R-TE Oil Return Flange 1/2" NPT Boss
1x Earl's Performance -4 AN to 12mm x 1.25 Male adapter for feed line (EAR-9919BFFERL)
1x Earl's Performance Swivel-Seal hose end, -10 AN to 1/2" NPT, Oil drain hose to block flange (EAR-829010ERL)
1x Earl's Performance Swivel-Seal hose end, -10 AN to -10 AN Female, Oil drain to oil drain hose
2x Earl's Performance Speed-Seal hose end, -4 AN to Female, feed line ends
-4 AN Earl's Performance Stainless Steel braided hose
-10 AN Summit Racing Stainless Steel braided hose
Thanks!!!
The rig is coming along great. I replaced the IAC hose with 12mm silicone hose yesterday. I also had a bent 22RE aluminum radiator on the side of my house. It's a little bit damaged but I'm going to fix it up and see if I can run it. Would be a nice addition!
Also got my stainless steel lines figured out for the CT26. I didn't want to use the OEM lines, nor did I want to buy a 7M-GTE stainless line kit and risk fitment troubles.
1x CT26 Oil Drain/Feed Flange, -4 AN feed and -10AN drain
1x 22R-TE Oil Return Flange 1/2" NPT Boss
1x Earl's Performance -4 AN to 12mm x 1.25 Male adapter for feed line (EAR-9919BFFERL)
1x Earl's Performance Swivel-Seal hose end, -10 AN to 1/2" NPT, Oil drain hose to block flange (EAR-829010ERL)
1x Earl's Performance Swivel-Seal hose end, -10 AN to -10 AN Female, Oil drain to oil drain hose
2x Earl's Performance Speed-Seal hose end, -4 AN to Female, feed line ends
-4 AN Earl's Performance Stainless Steel braided hose
-10 AN Summit Racing Stainless Steel braided hose
Last edited by ChildrenOfBodom; Apr 6, 2013 at 10:42 AM.
 Apr 9, 2013 | 07:49 PM
#71
Thread Starter
Registered User
Joined: Jul 2009
Posts: 245
Likes: 0
From: Mission Viejo, CA
At first, no. I want to buy some silicone couplers, 2" intake piping, and see if I can rig up an intercooler from a 1988-92 Mazda MX6/626/Ford Probe GT. There isn't much room to work with, unfortunately... may have to go aftermarket.
Still waiting for a the drain flange for the block plus the -4 AN feed line. Also arrived, but not pictured, -10 AN drain line.
 Apr 12, 2013 | 09:44 PM
#72
Thread Starter
Registered User
Joined: Jul 2009
Posts: 245
Likes: 0
From: Mission Viejo, CA
Got my block flange for the oil drain. Just waiting on the feed line now.
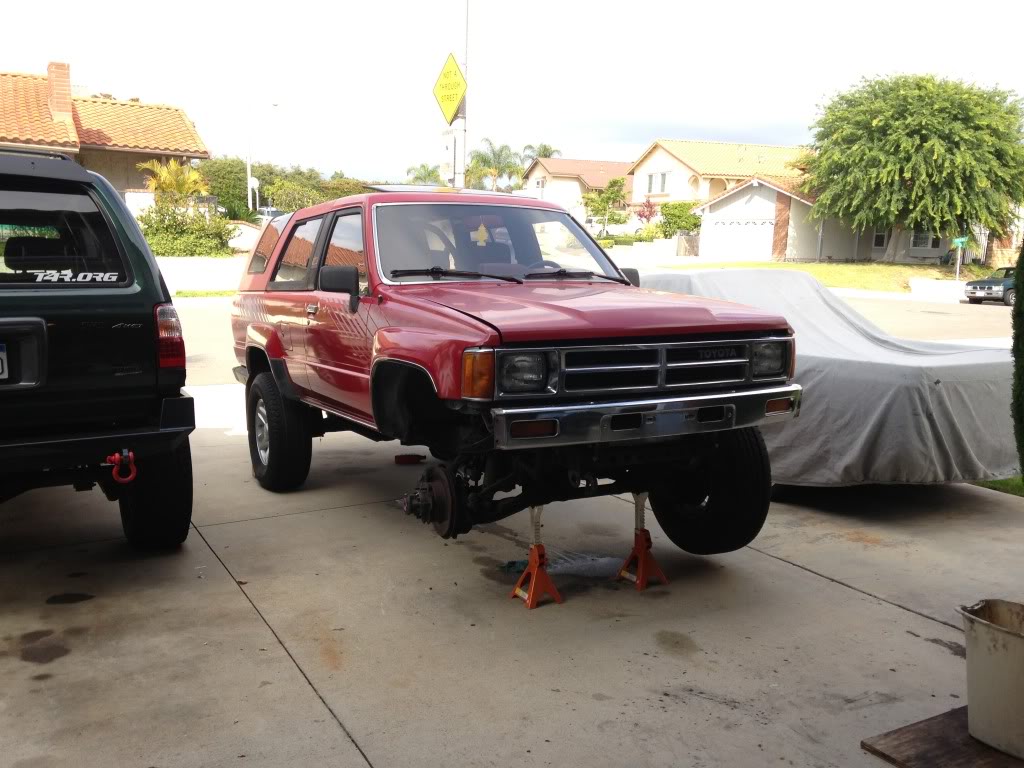
Made a video of the truck in it's current state. Wanted to have something to compare to when it finally starts.
[YOUTUBE]VPs4DReZ4fE[/YOUTUBE]
Made a video of the truck in it's current state. Wanted to have something to compare to when it finally starts.
[YOUTUBE]VPs4DReZ4fE[/YOUTUBE]


 Apr 20, 2013 | 07:20 PM
#74
Thread Starter
Registered User
Joined: Jul 2009
Posts: 245
Likes: 0
From: Mission Viejo, CA
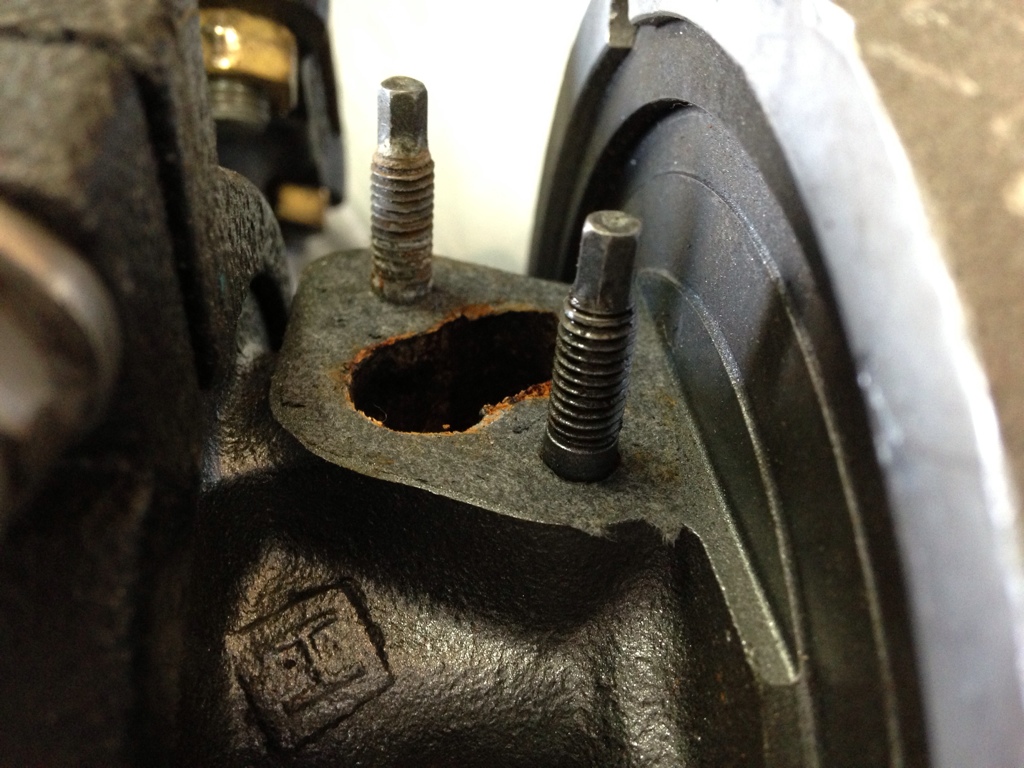
Took the turbo back out to set up the coolant lines.
Removed a block off plate from the water pump line side of the turbo and going to use the CT20 lines.
I have my oil lines ready to go.
Block feed line
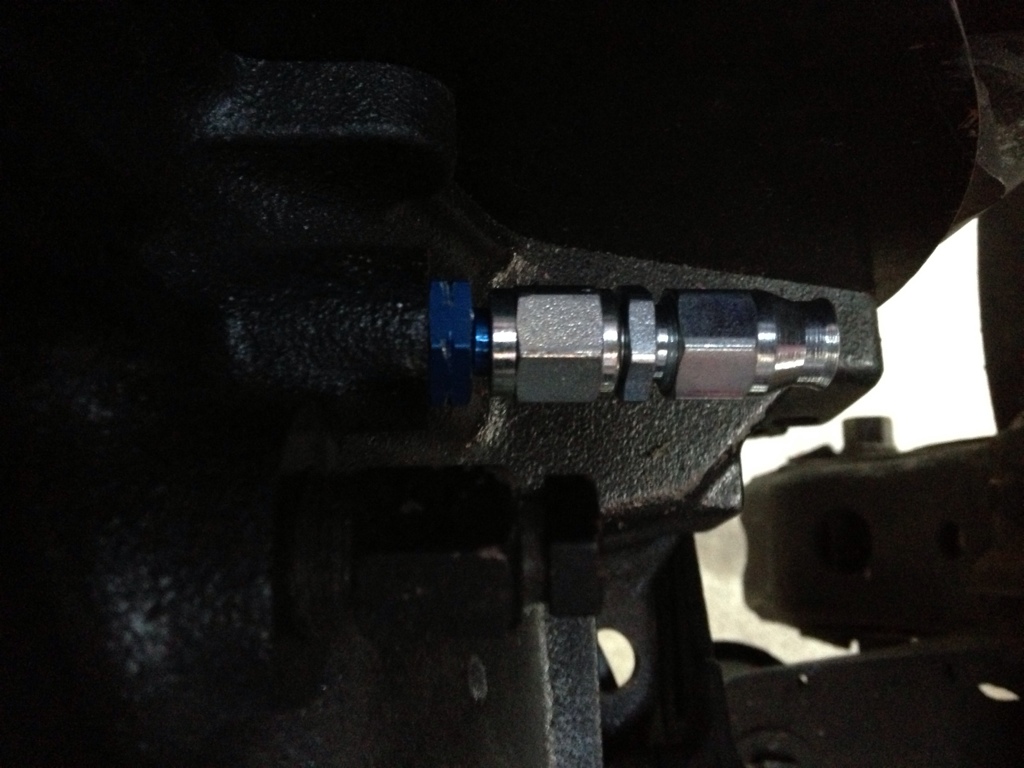
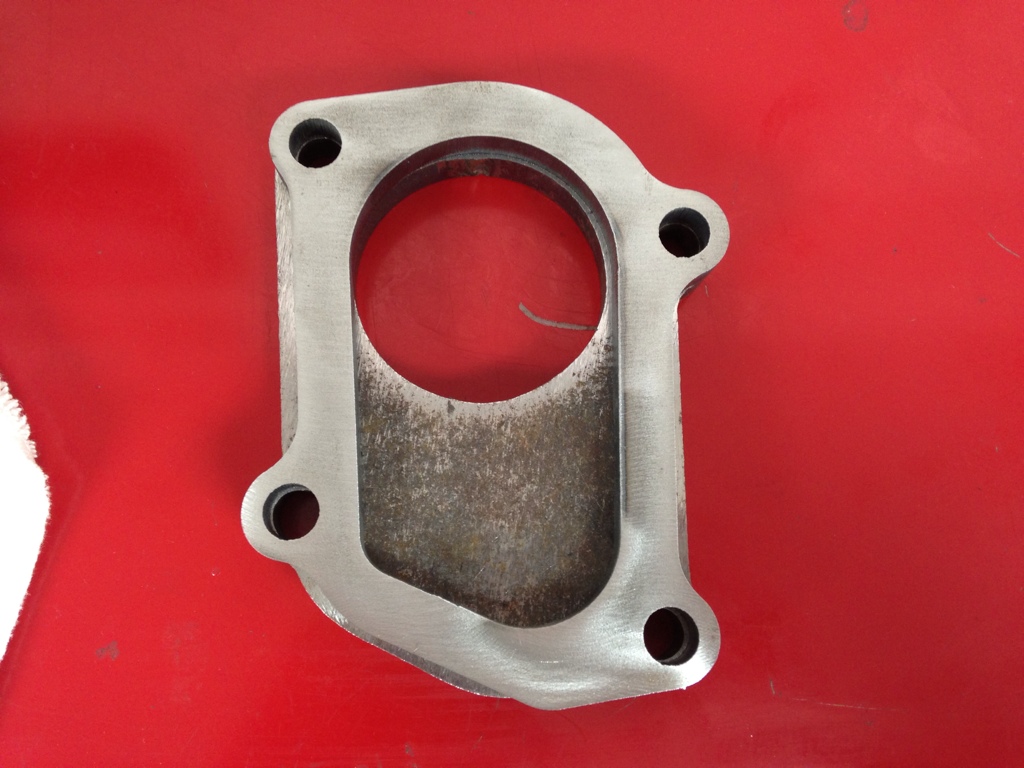
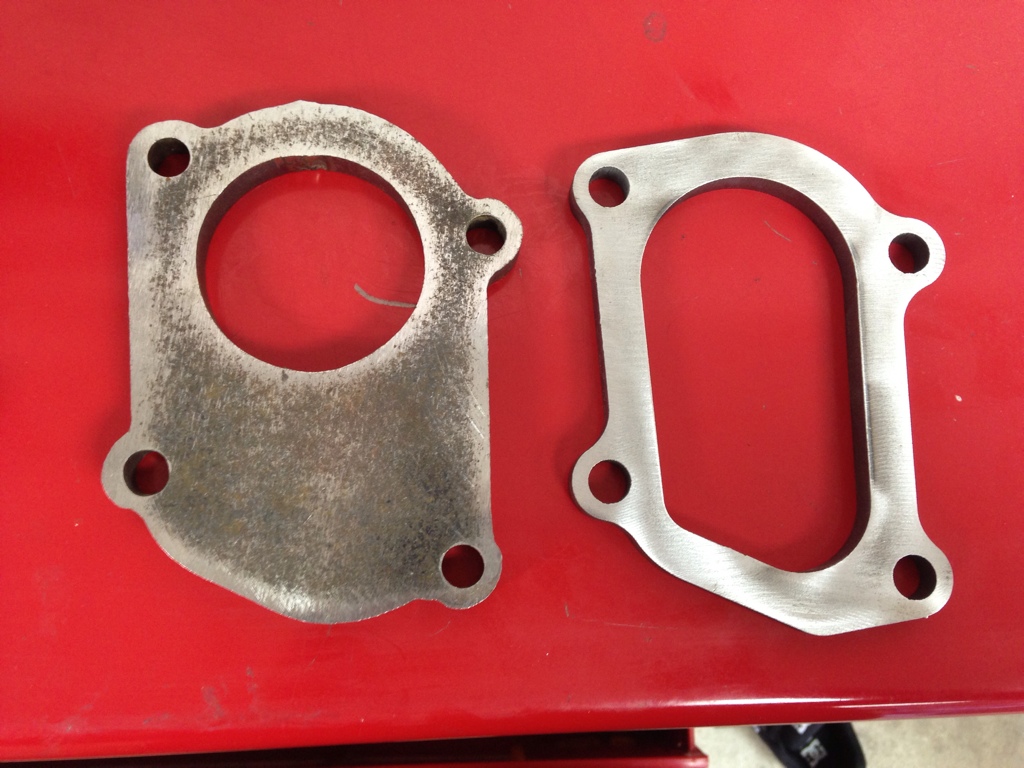
Oil return with LC engineering 22R-TE block flange
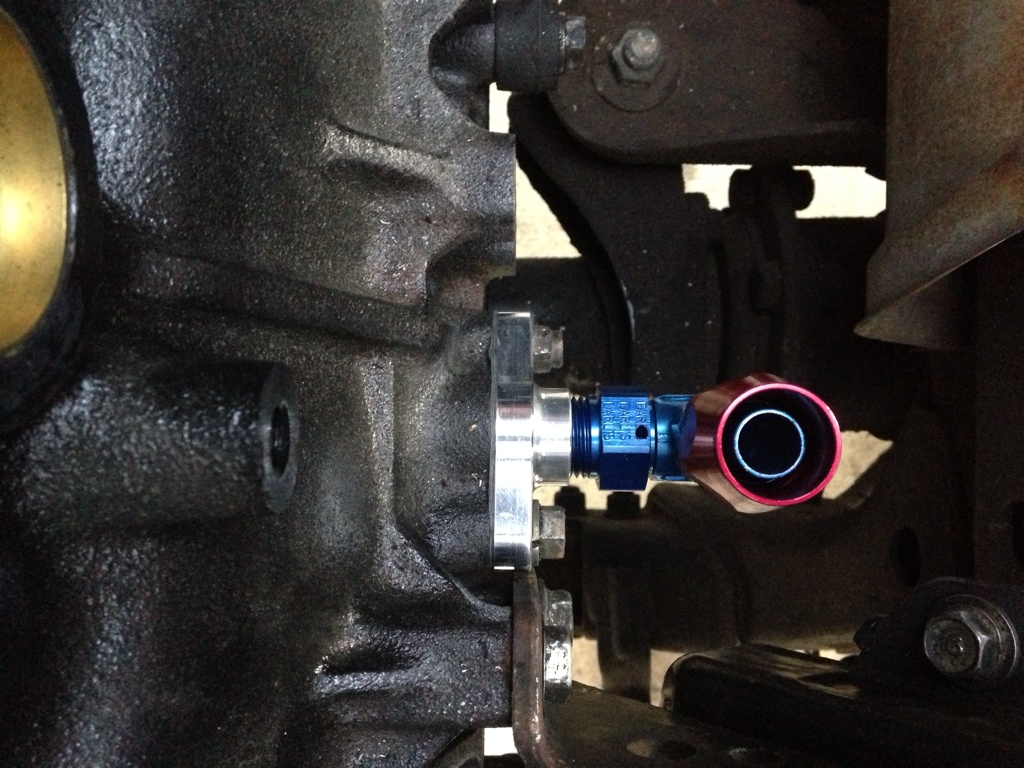
Also got this outlet flange from Suprasport. Don't like how the waste gate is blocked with the other flange
Going to try to install a coolant return on the aluminum rad.
Removed a block off plate from the water pump line side of the turbo and going to use the CT20 lines.
I have my oil lines ready to go.
Block feed line
Oil return with LC engineering 22R-TE block flange
Also got this outlet flange from Suprasport. Don't like how the waste gate is blocked with the other flange
Going to try to install a coolant return on the aluminum rad.
Apr 26, 2013 | 12:45 AM
#76
Thread Starter
Registered User
Joined: Jul 2009
Posts: 245
Likes: 0
From: Mission Viejo, CA
Thanks dude
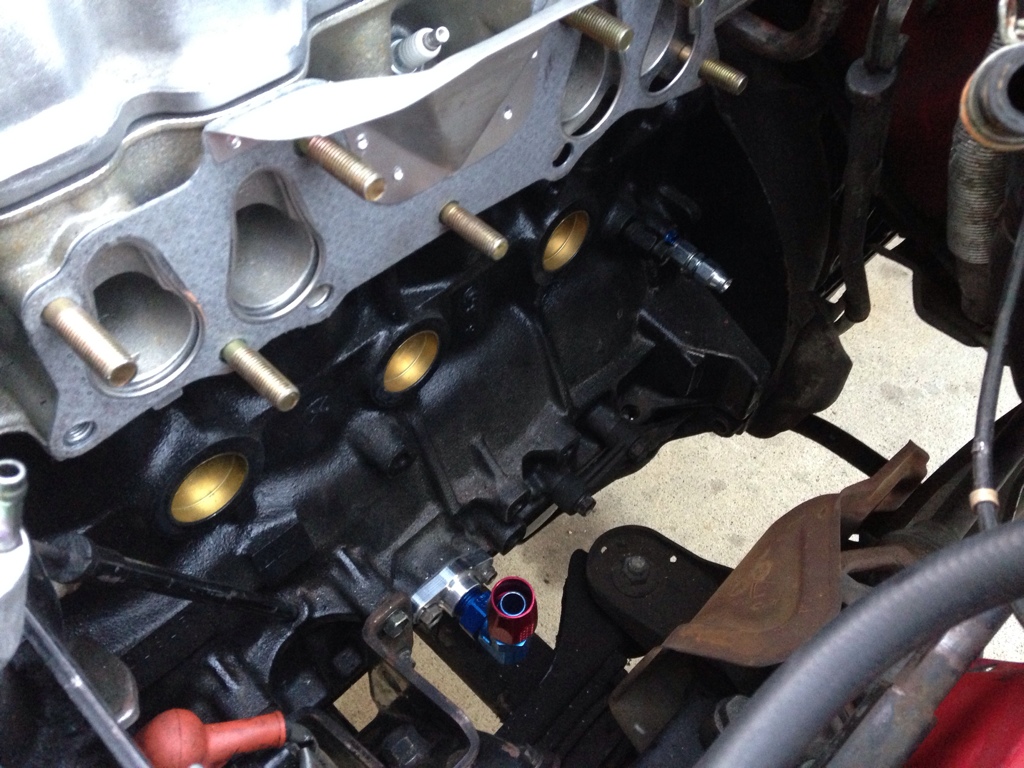
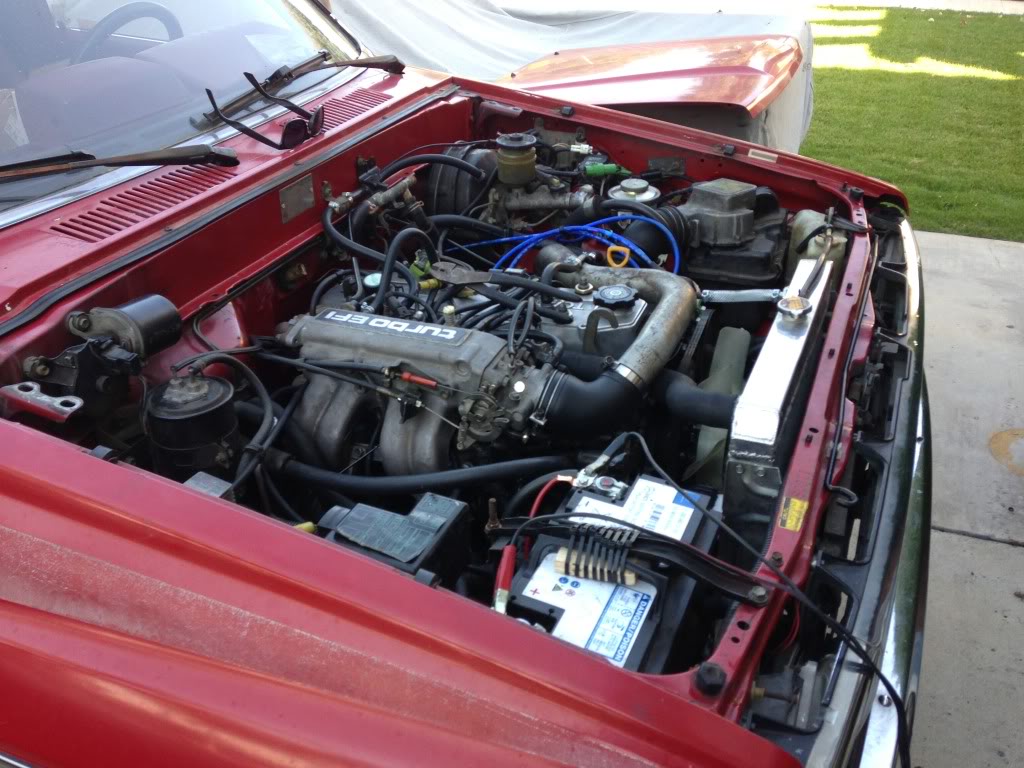
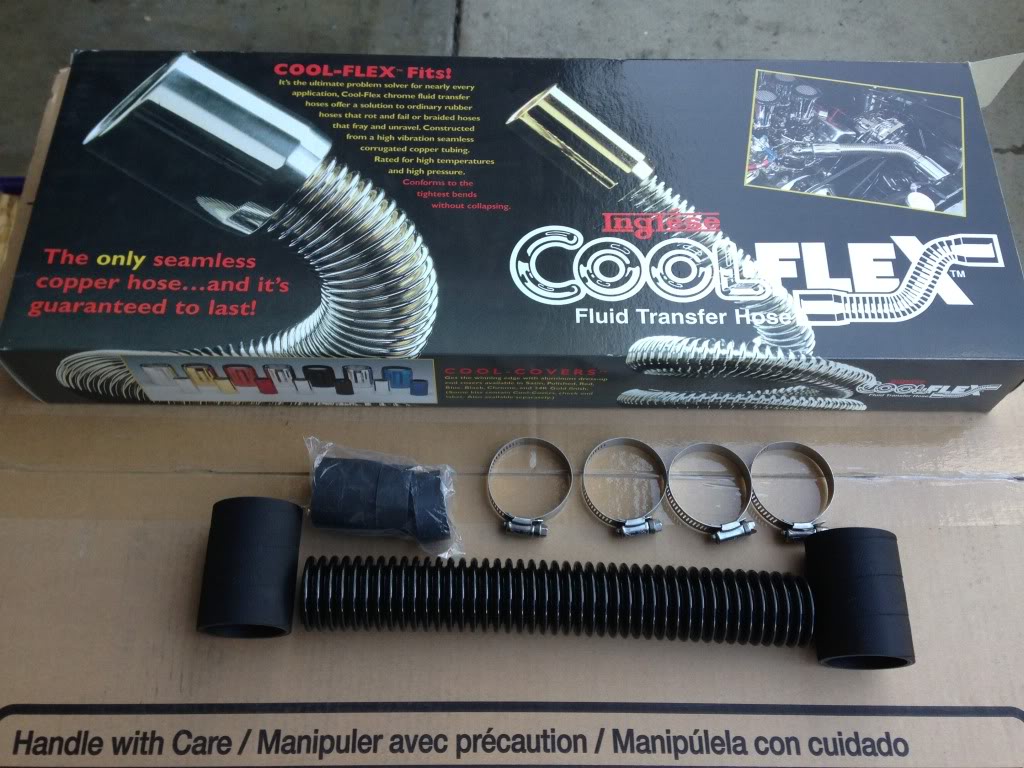
Today I had some time to work on the truck. Started by figuring out the cooling situation. First, the heater core was bypassed for replacement at a later date. 5/8" hose from back of block to the middle coolant hose. The middle coolant hose was also cut in half to soon accommodate a flexible lower radiator hose (coolflex).
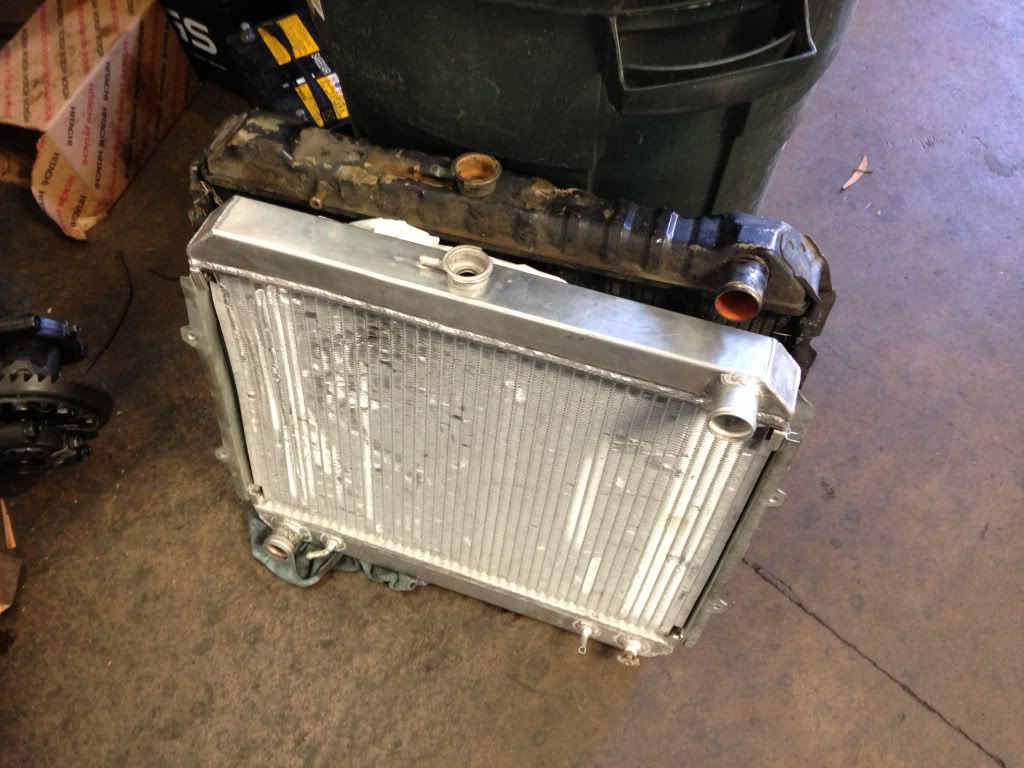
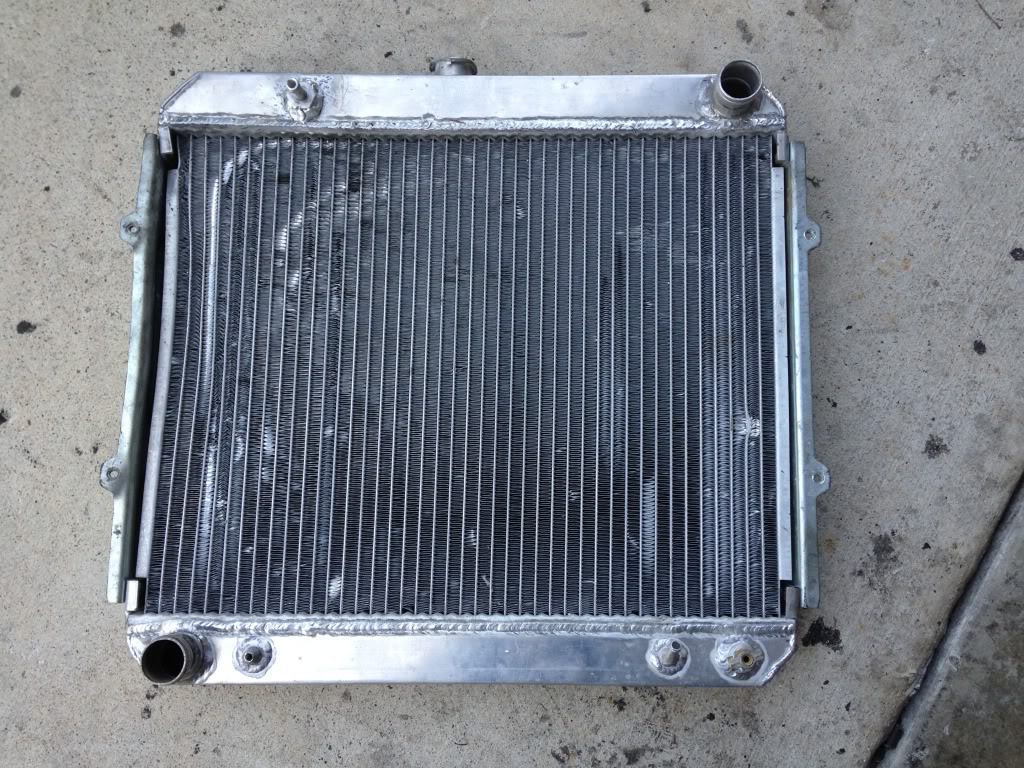
Stock radiator versus free aluminum radiator. Only difference is the coolant line for the turbo.
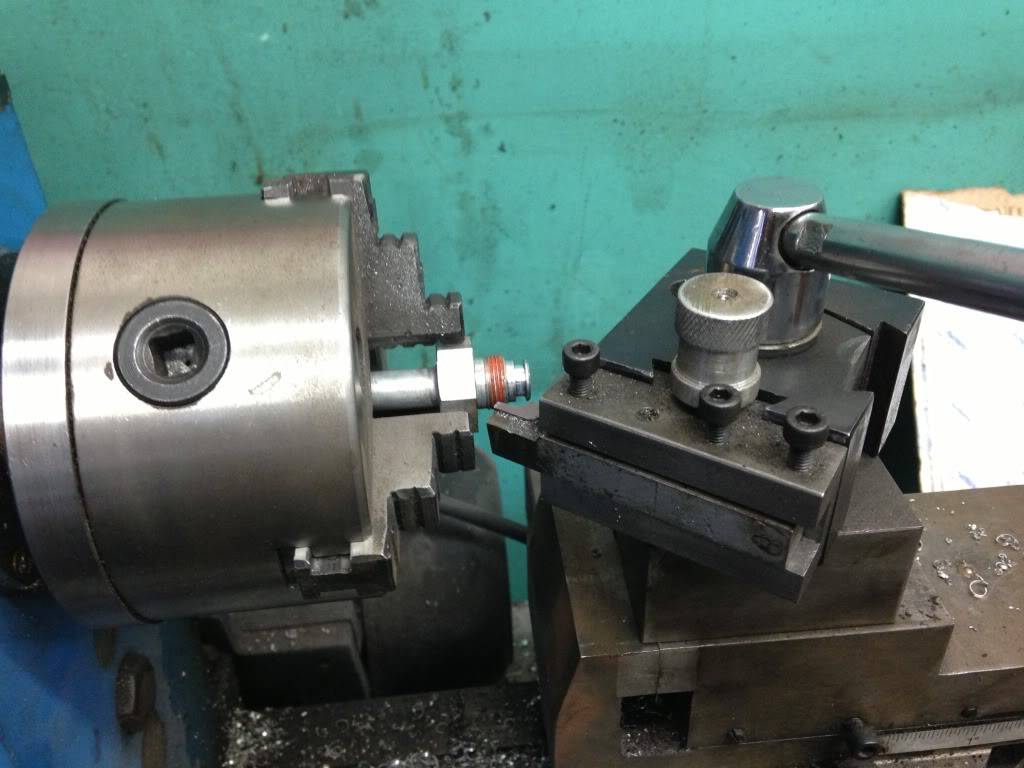
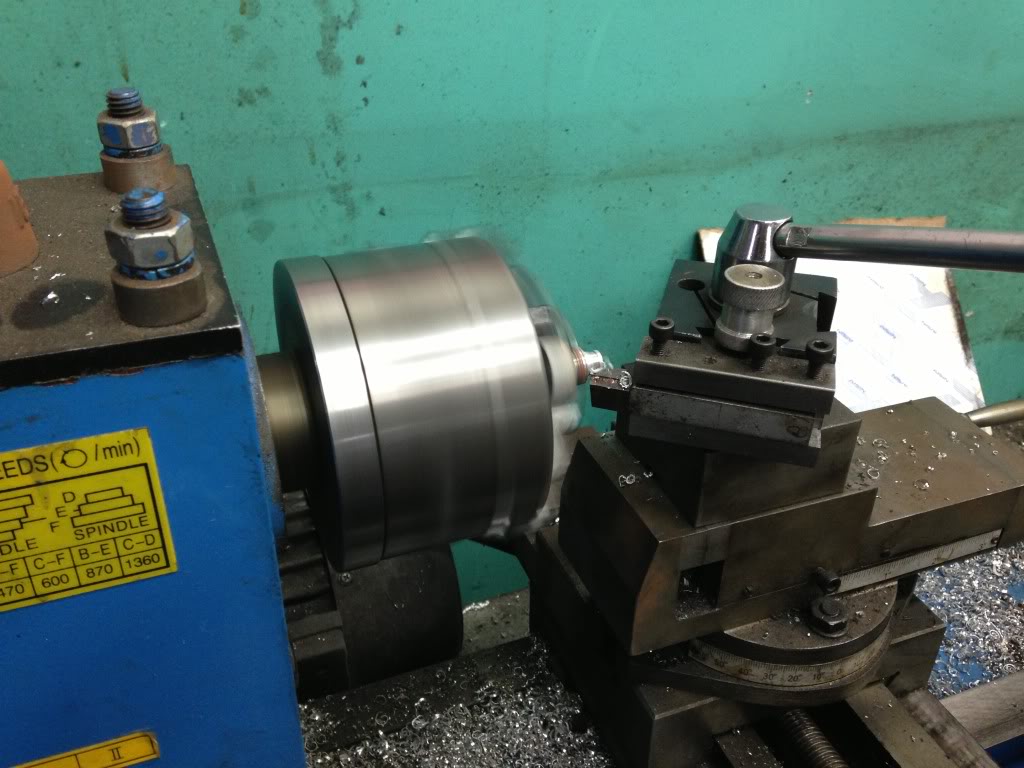
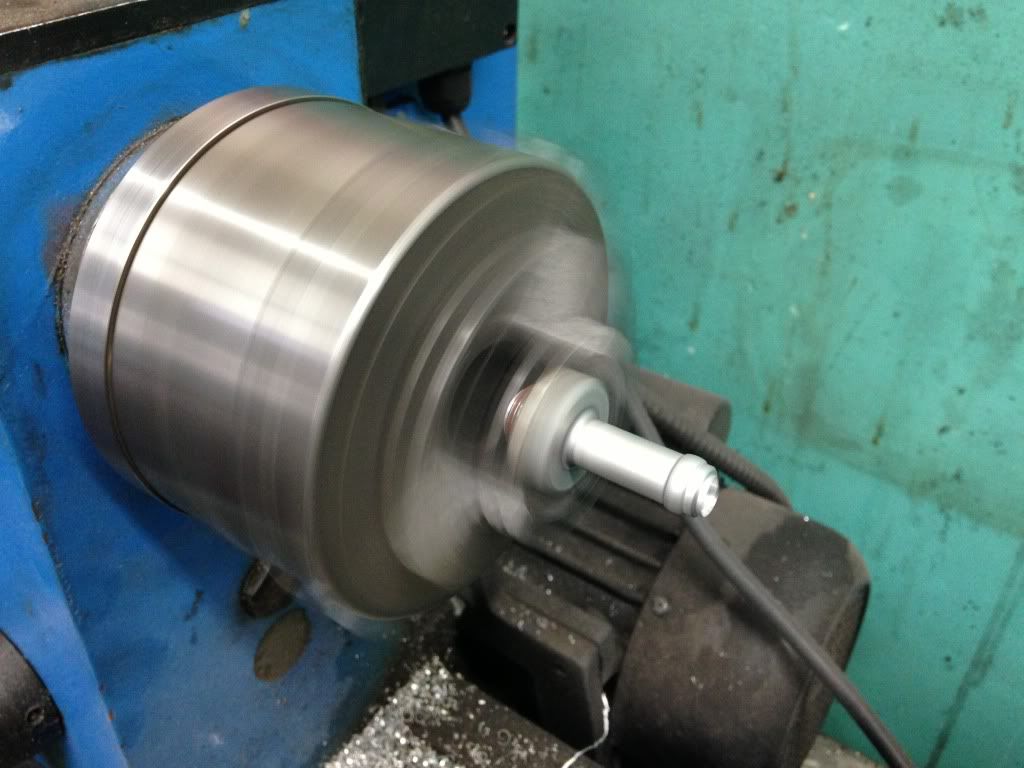
My friend John gave me an aluminum radiator fitting. He has a lathe that was able to trim the threads off the back and drill out the center to a larger size.
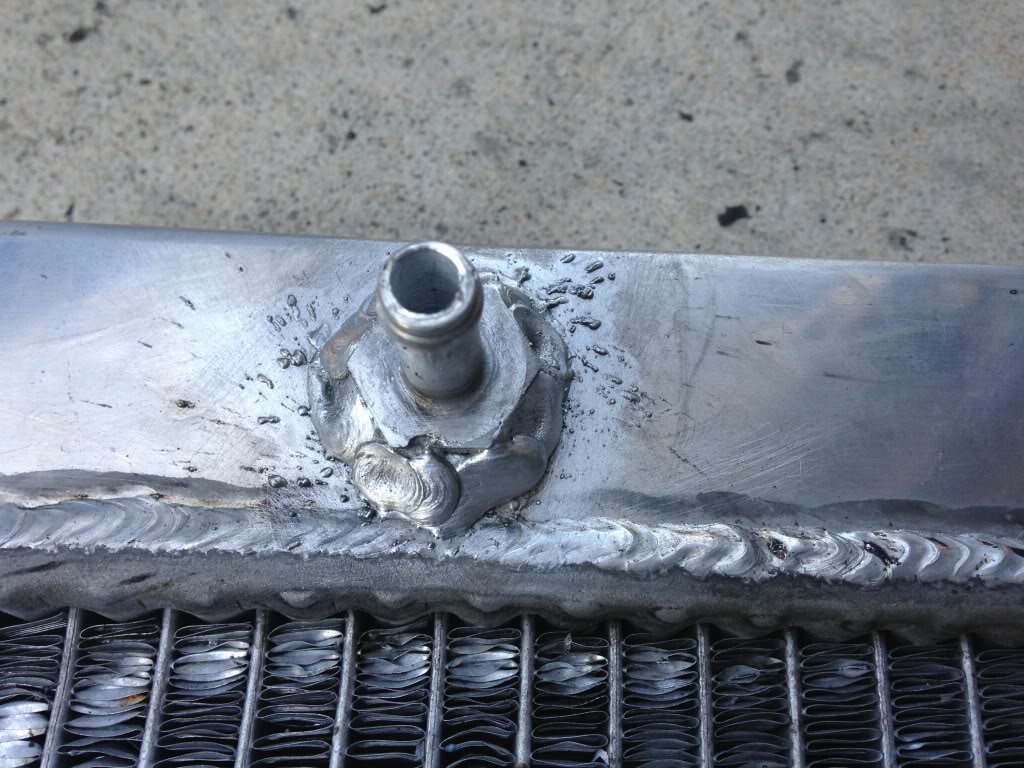
I found a welder named Jaime through a radiator shop. I have a feeling I'll be visiting him again soon.
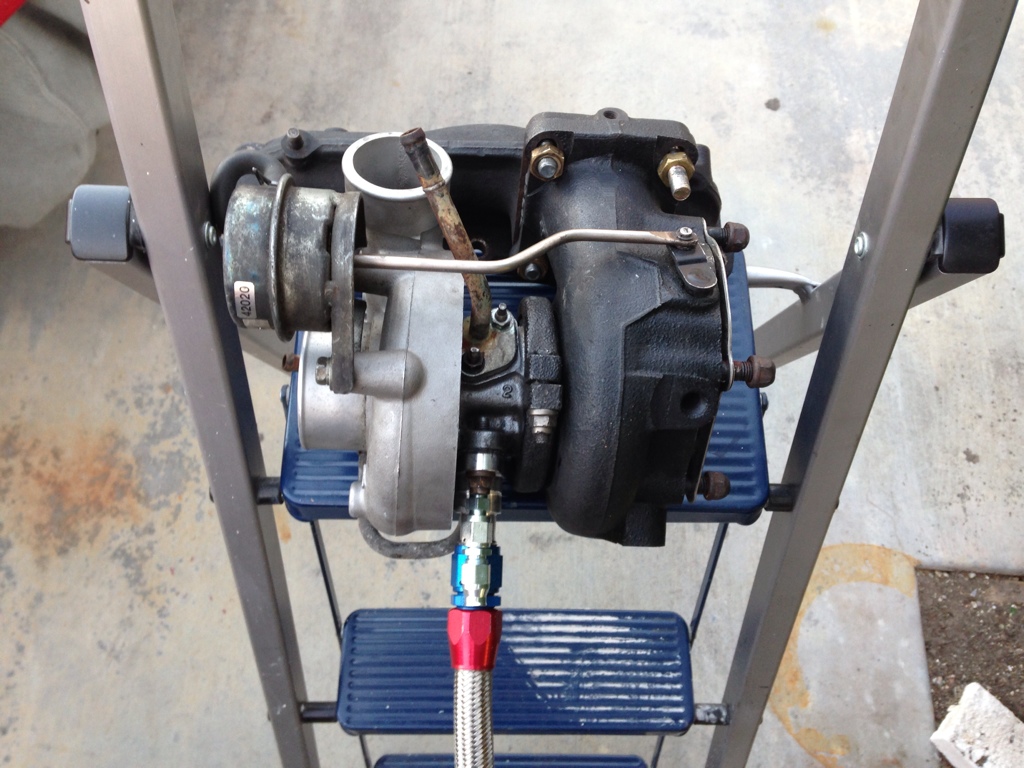
Stainless lines are done. Turbo coolant lines are done also.
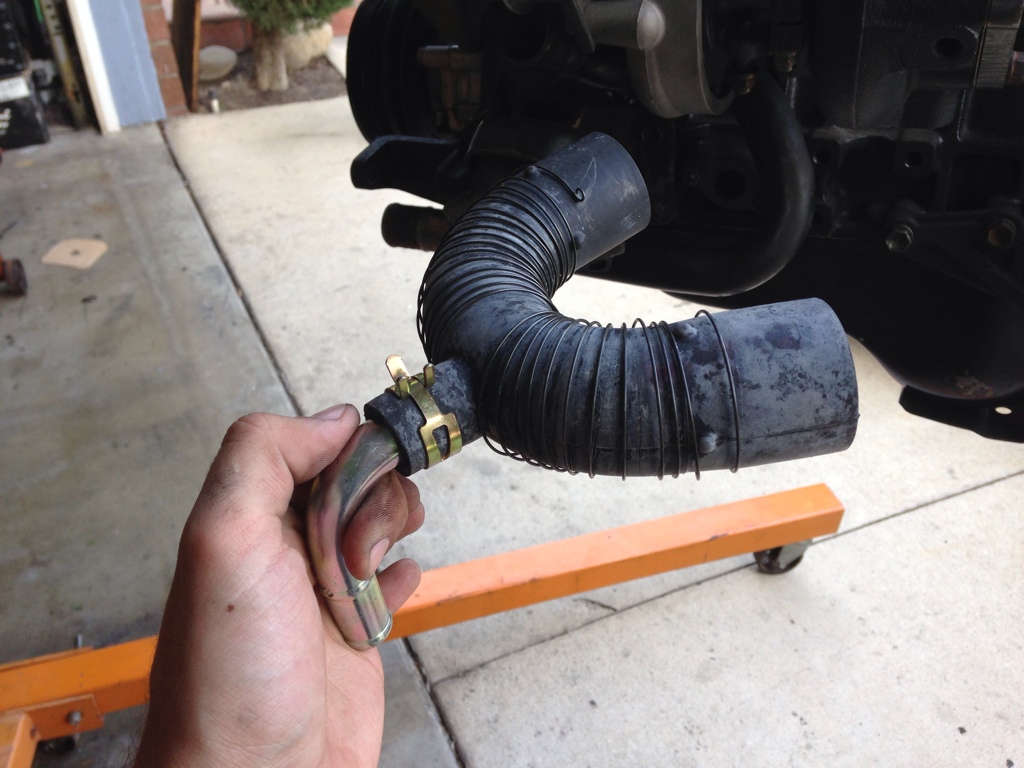
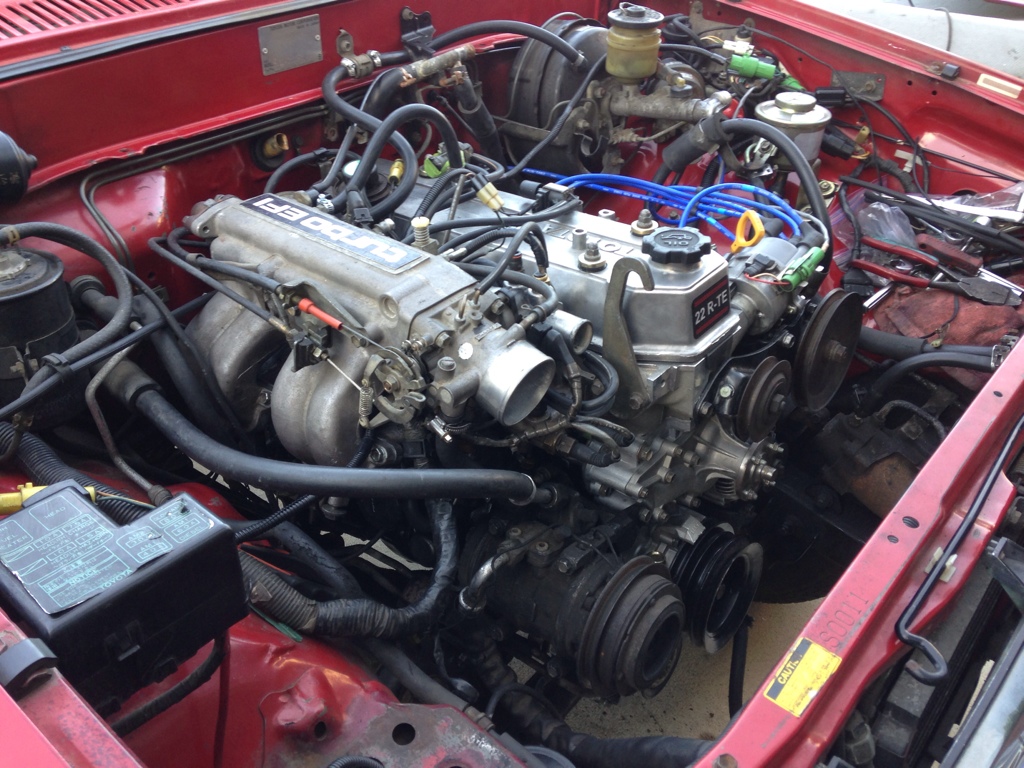
Intake pipe had to be modified to work with the CT26. The CT20 had a 2 bolt flange instead of a clamped coupler. I cut off the end flange. I'm going to refinish this pipe after fitment is perfected. Installed on CT26 using a silicone coupler (2", 45 degrees)
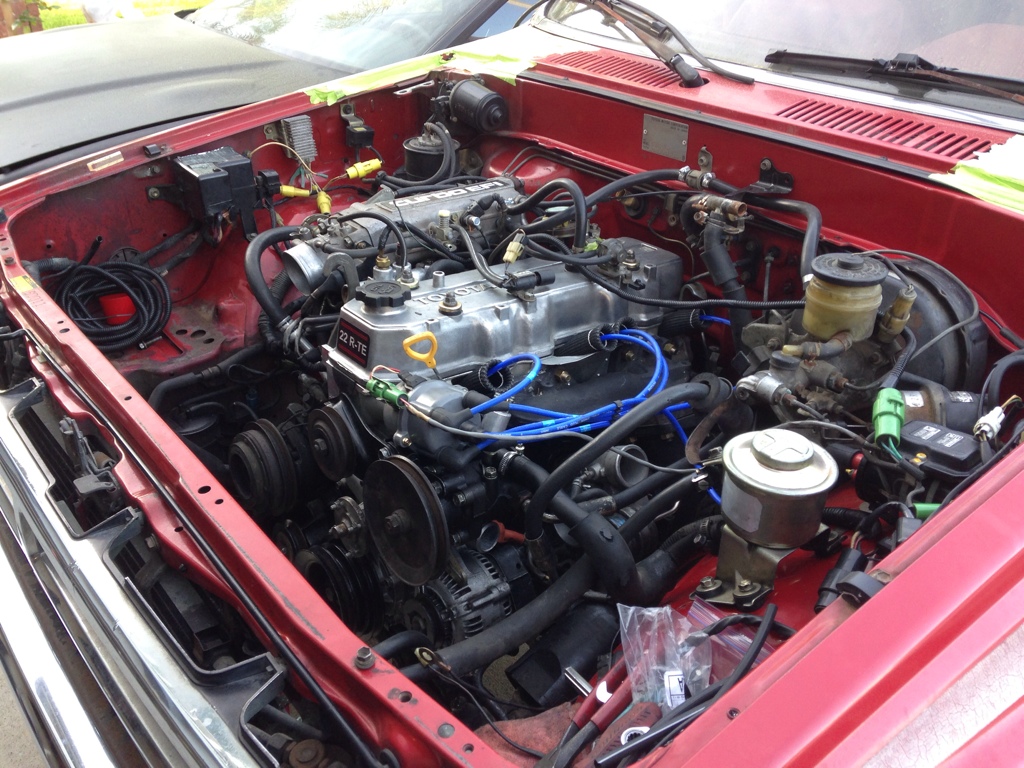
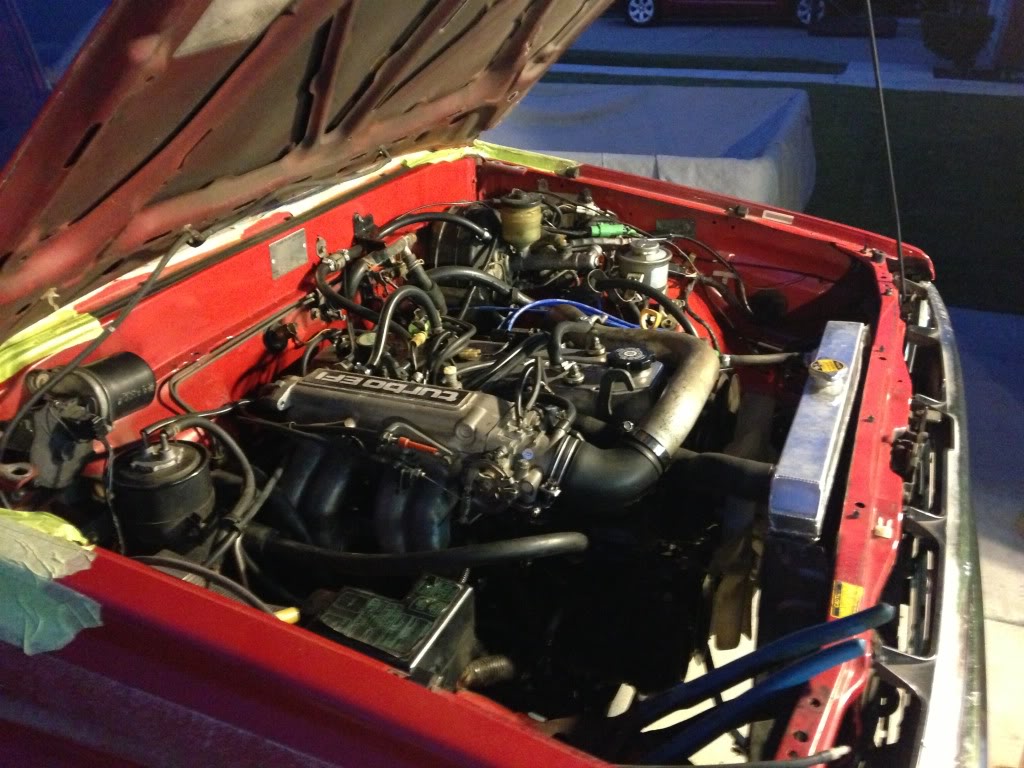
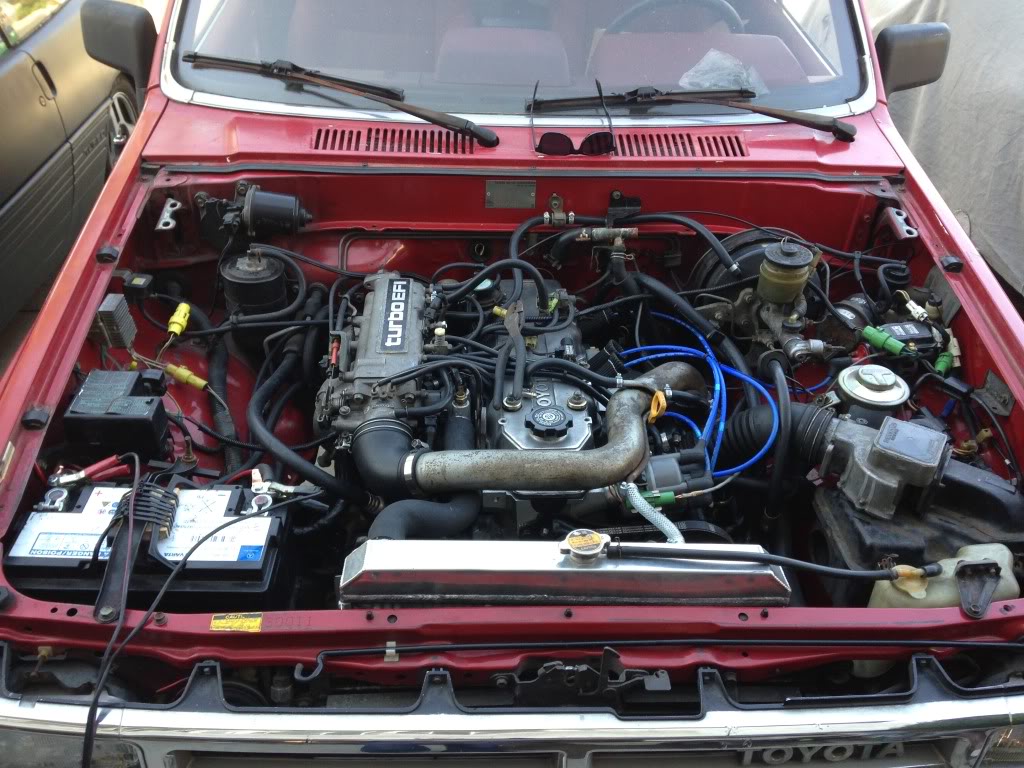
The battery is back in, the truck has power. Engine filled with Mobil 1 synthetic oil. There isn't much left before starting.
To do list:
Figure out where some plugs go, 3 danglers
2 upper bell housing bolts
drop and clean fuel tank
lower radiator hose
trim turbo inlet boot to fit CT26
install airbox
Mazda transmission cooler (radiator bypass)
And then, after it's running:
TruckPillars gauge pillar pod
install innovate mtx-l
custom downpipe using CT26 outlet flange, LC weld on O2 sensor flange, and Bosch wideband O2 bung.
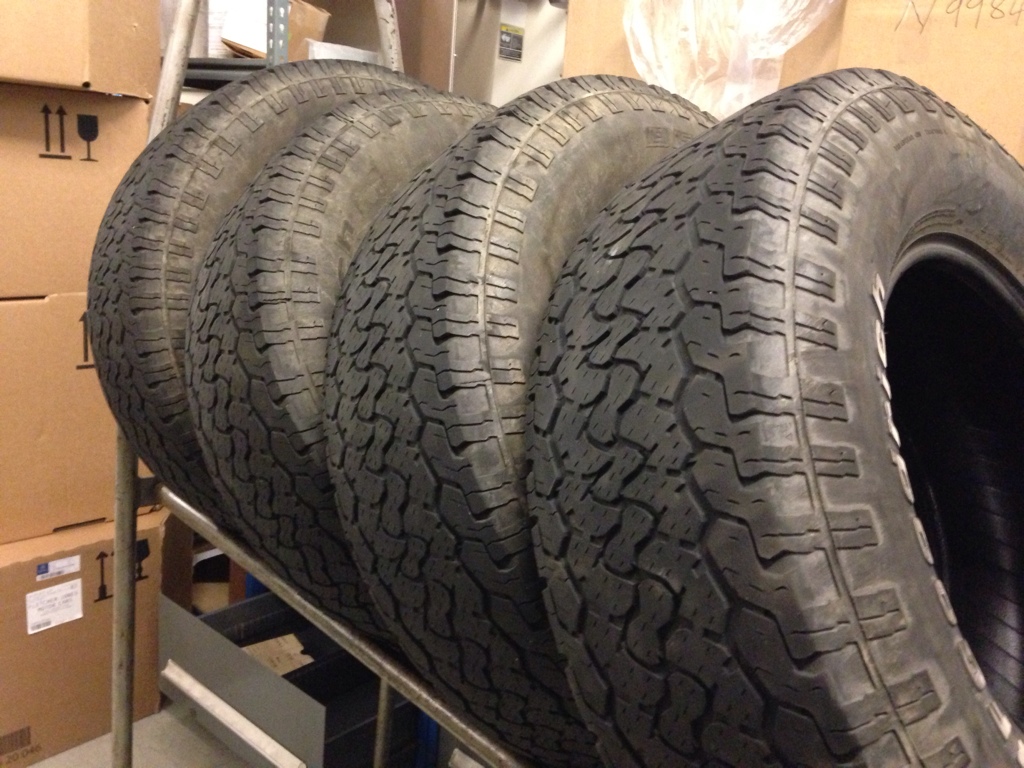
And then hopefully SMOG (and brakes... and install the tires)
Today I had some time to work on the truck. Started by figuring out the cooling situation. First, the heater core was bypassed for replacement at a later date. 5/8" hose from back of block to the middle coolant hose. The middle coolant hose was also cut in half to soon accommodate a flexible lower radiator hose (coolflex).
Stock radiator versus free aluminum radiator. Only difference is the coolant line for the turbo.
My friend John gave me an aluminum radiator fitting. He has a lathe that was able to trim the threads off the back and drill out the center to a larger size.
I found a welder named Jaime through a radiator shop. I have a feeling I'll be visiting him again soon.
Stainless lines are done. Turbo coolant lines are done also.
Intake pipe had to be modified to work with the CT26. The CT20 had a 2 bolt flange instead of a clamped coupler. I cut off the end flange. I'm going to refinish this pipe after fitment is perfected. Installed on CT26 using a silicone coupler (2", 45 degrees)
The battery is back in, the truck has power. Engine filled with Mobil 1 synthetic oil. There isn't much left before starting.
To do list:
Figure out where some plugs go, 3 danglers
2 upper bell housing bolts
drop and clean fuel tank
lower radiator hose
trim turbo inlet boot to fit CT26
install airbox
Mazda transmission cooler (radiator bypass)
And then, after it's running:
TruckPillars gauge pillar pod
install innovate mtx-l
custom downpipe using CT26 outlet flange, LC weld on O2 sensor flange, and Bosch wideband O2 bung.
And then hopefully SMOG (and brakes... and install the tires)
May 9, 2013 | 01:13 PM
#79
Thread Starter
Registered User
Joined: Jul 2009
Posts: 245
Likes: 0
From: Mission Viejo, CA
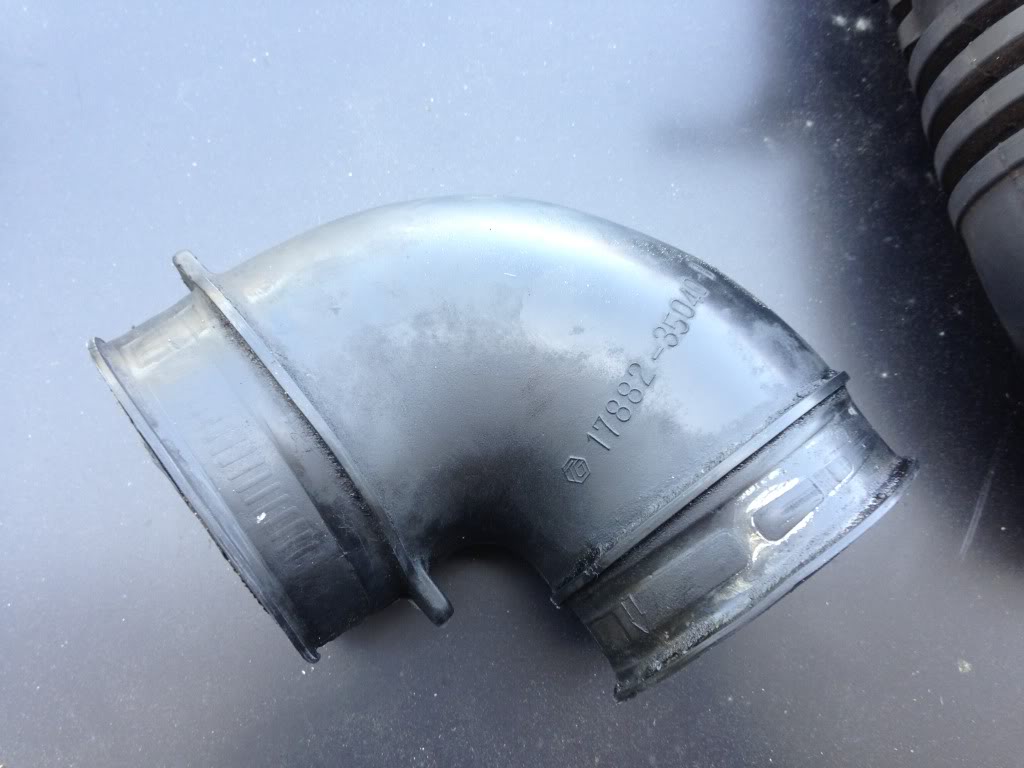
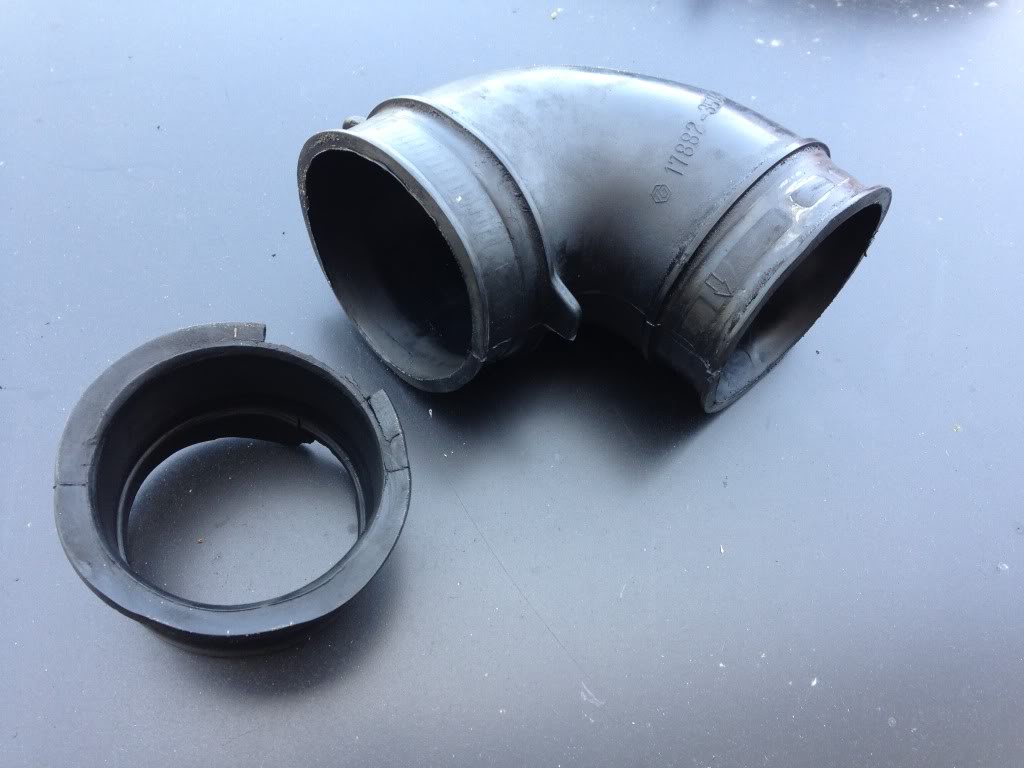
Trimmed the inside of this intake boot. It was originally two pieces of hose stuck together, but I removed the inner hose and trimmed it back. The diameter of the outer hose fits the CT-26 like a glove. I glued the trimmed piece in using Permatex Ultra Black RTV.
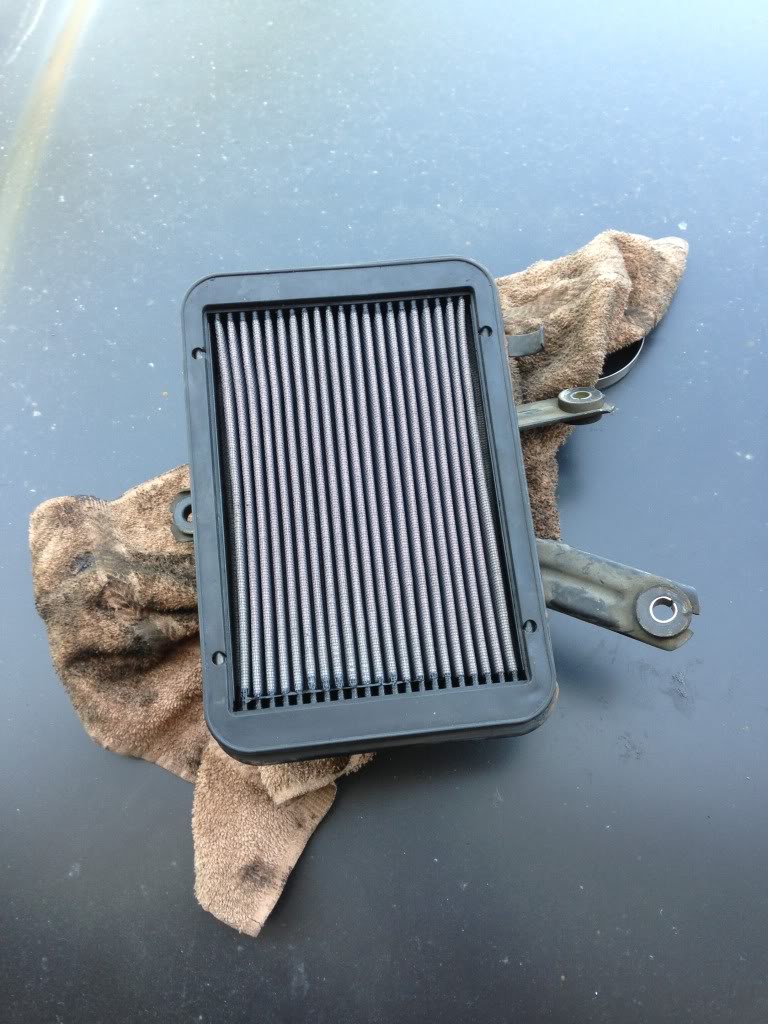
Got a K&N drop filter off of Yotatech.
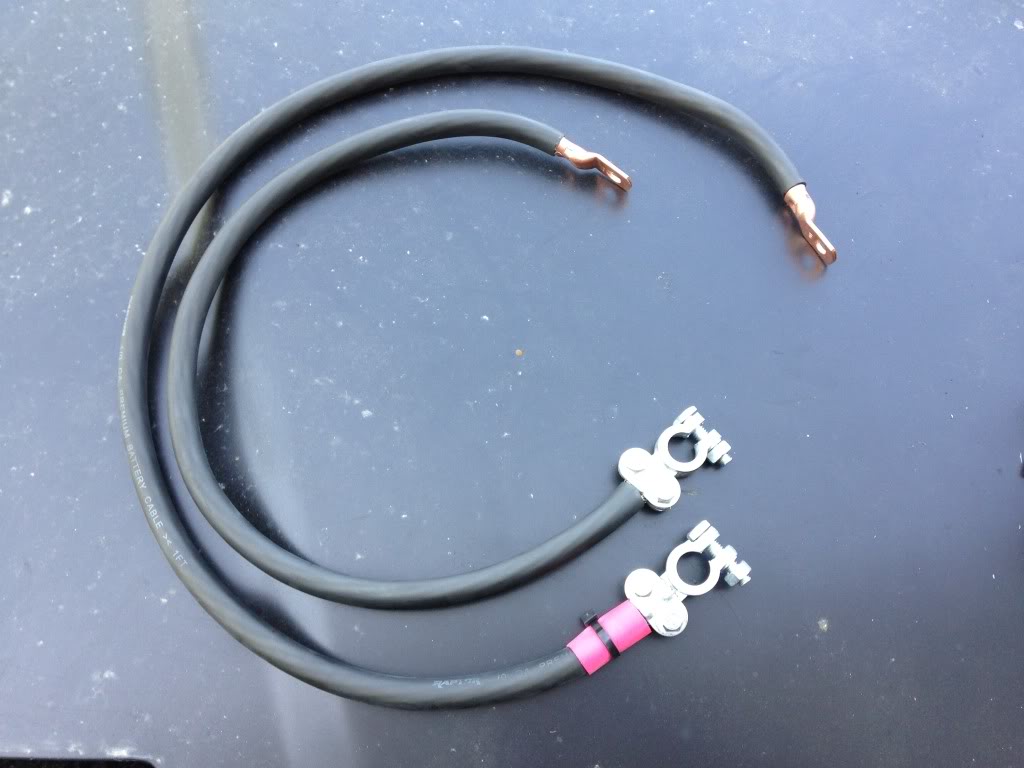
Made some 1/0 gauge battery cables with new terminals.
Good ol ziptie-wood battery mount, 3rd gen style. The intake is all done with the exception of refinishing the hardpipe from the turbo to throttle body.
Got a K&N drop filter off of Yotatech.
Made some 1/0 gauge battery cables with new terminals.
Good ol ziptie-wood battery mount, 3rd gen style. The intake is all done with the exception of refinishing the hardpipe from the turbo to throttle body.
May 9, 2013 | 01:14 PM
#80
Thread Starter
Registered User
Joined: Jul 2009
Posts: 245
Likes: 0
From: Mission Viejo, CA
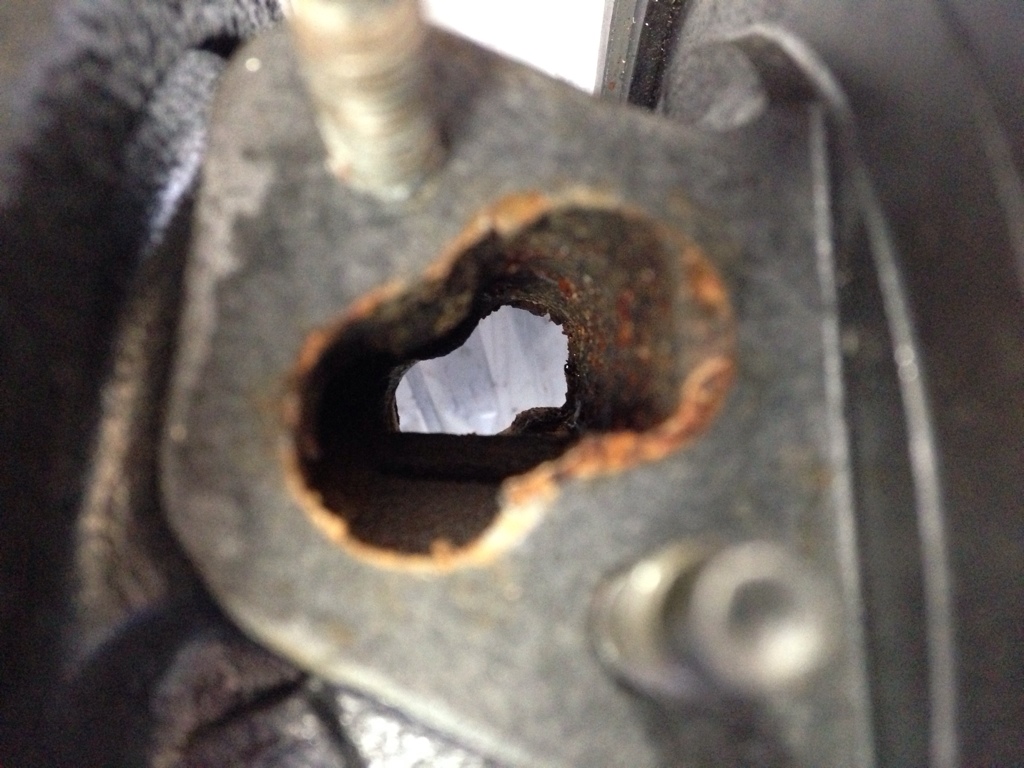
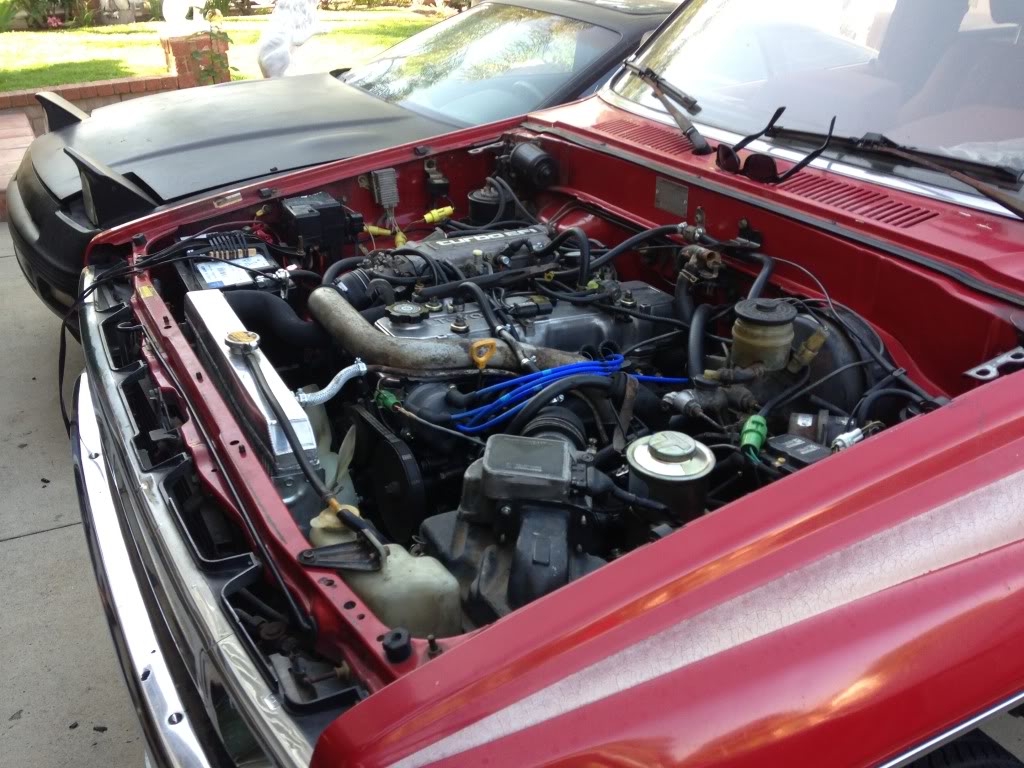
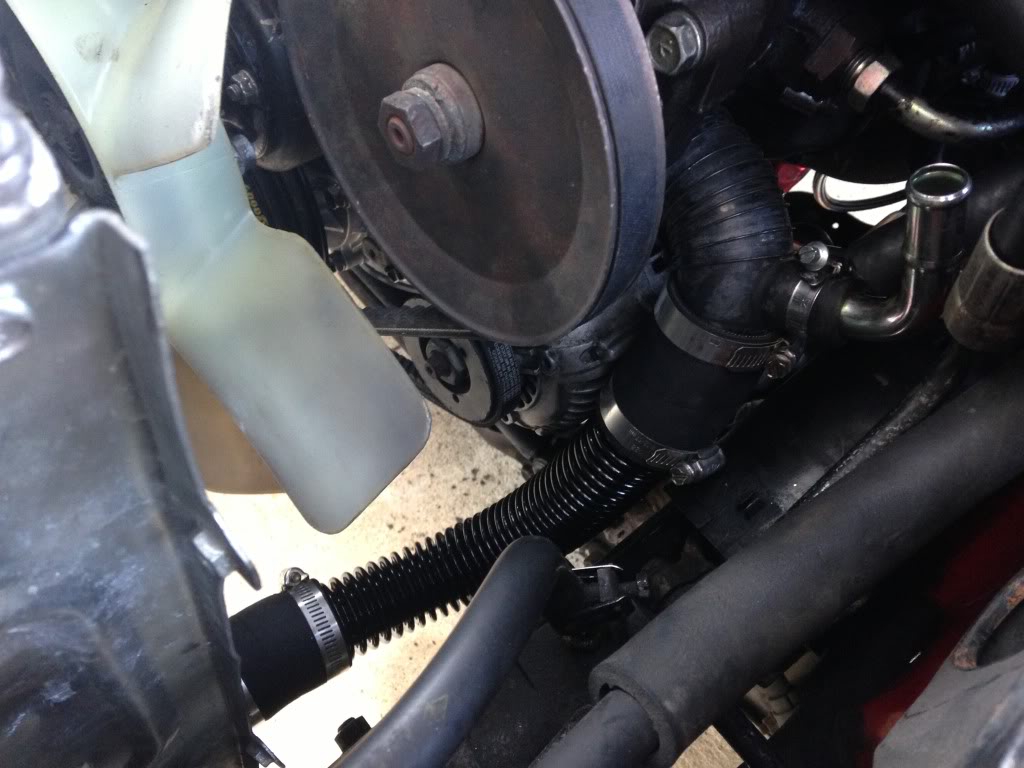
Replaced a few water lines with 3/8 hose that I'd been waiting for. Also got a lead on some 95 4Runner V6 S13WB calipers and a 1 1/16 brake master. Gonna redo the whole brake system before registration time.
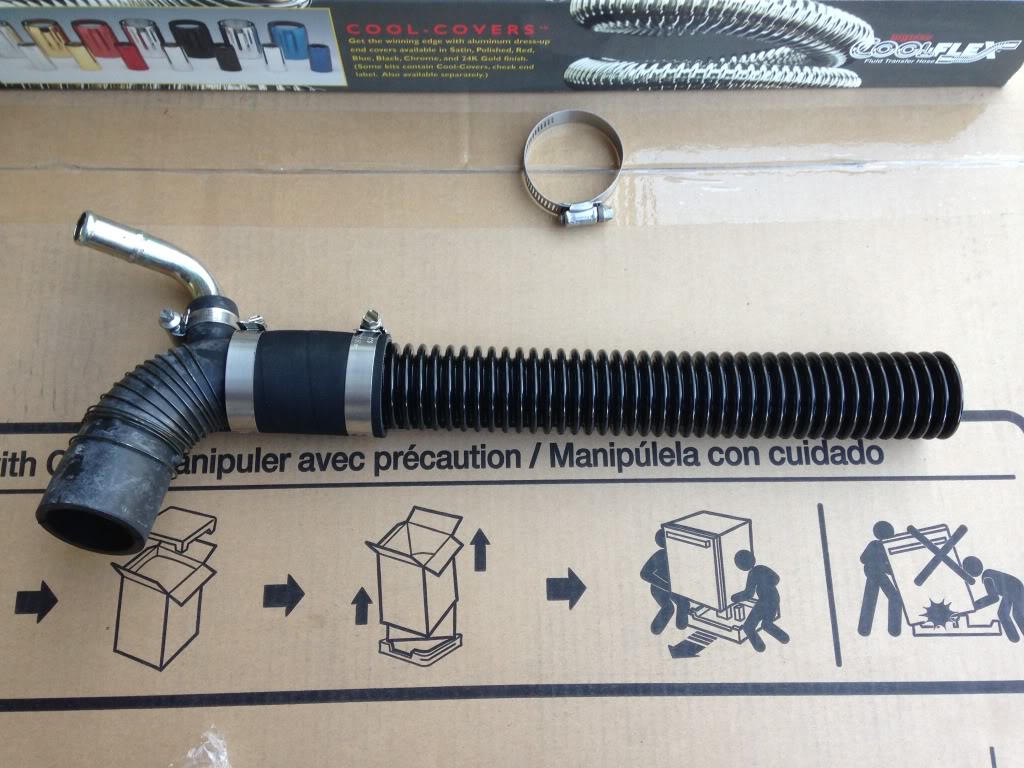
Got my lower radiator hose installed.
It may not hold where it connects to the half hose on the left, so I may have to cut a small piece of the old hardpipe to slip between them for a better solid connection.
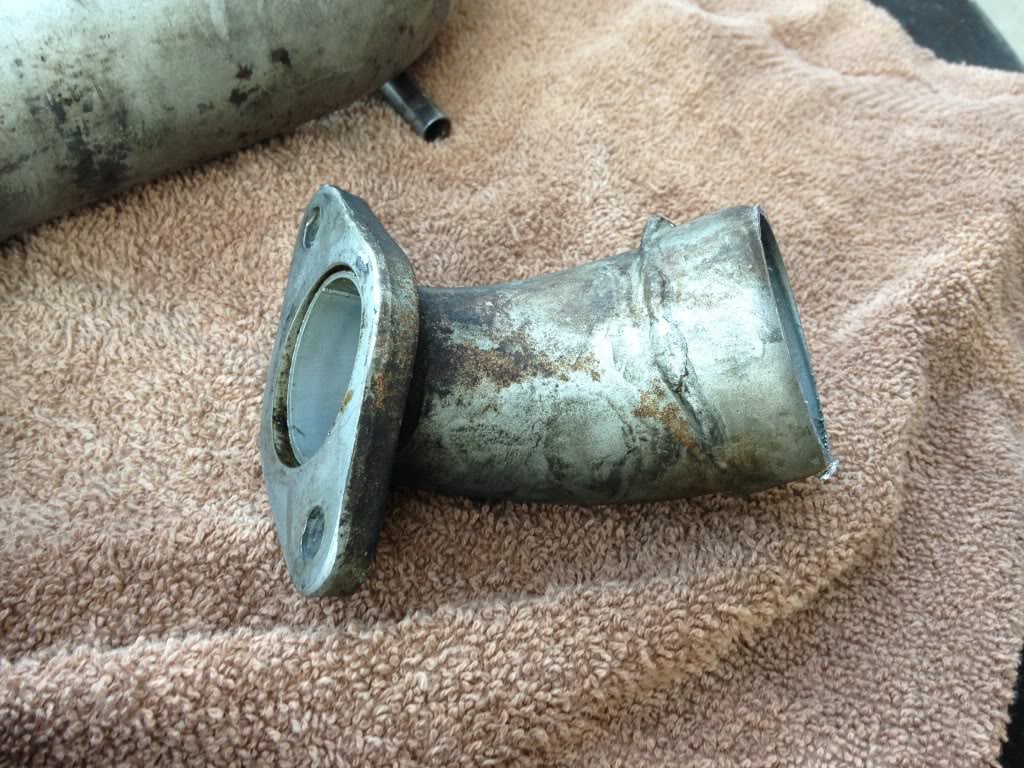
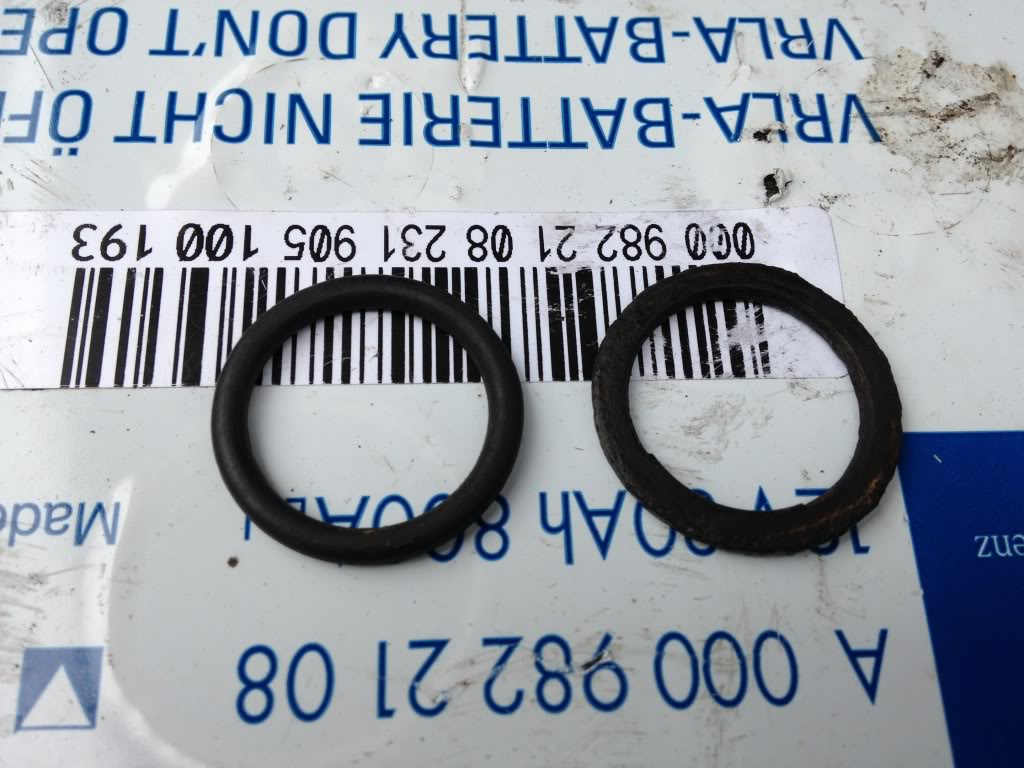
Put coolant in the truck and this little ****er started leaking. This is the coolant pipe that runs under the manifold from the thermostat towards the rear heater (back of the block)
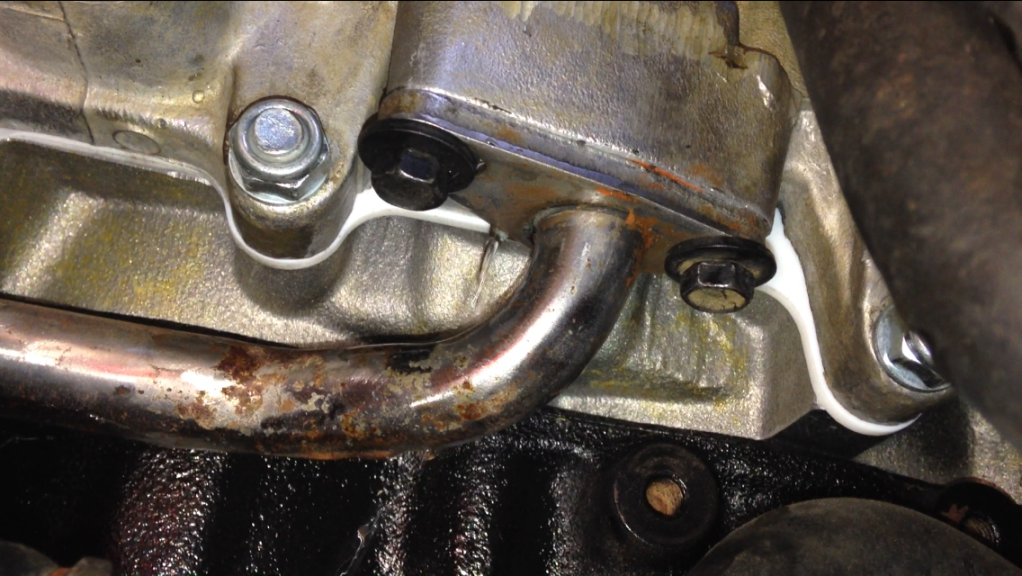
There was no o ring, instead, silicone. I had to remove the front right wheel, reach up in there and scrape the old stuff off with a flathead screwdriver and a razor blade. It was not fun. I went down to my buddy John's shop, pulled another coolant hardpipe from a 22RE manifold, and took the O-ring.
I was able to use that o-ring to find a suitable replacement.
Got my lower radiator hose installed.
It may not hold where it connects to the half hose on the left, so I may have to cut a small piece of the old hardpipe to slip between them for a better solid connection.
Put coolant in the truck and this little ****er started leaking. This is the coolant pipe that runs under the manifold from the thermostat towards the rear heater (back of the block)
There was no o ring, instead, silicone. I had to remove the front right wheel, reach up in there and scrape the old stuff off with a flathead screwdriver and a razor blade. It was not fun. I went down to my buddy John's shop, pulled another coolant hardpipe from a 22RE manifold, and took the O-ring.
I was able to use that o-ring to find a suitable replacement.


