
CBO's 87 4runner build
 Apr 12, 2016 | 03:57 AM
#121
Thread Starter
Registered User
Joined: Dec 2012
Posts: 613
Likes: 33
From: Lincoln, NE
 Apr 12, 2016 | 05:35 AM
#122
Thread Starter
Registered User
Joined: Dec 2012
Posts: 613
Likes: 33
From: Lincoln, NE
Disc brake conversion cost
Keeping track of my expenses for this mod here:
Junkyard 01 montero sport calipers: $45
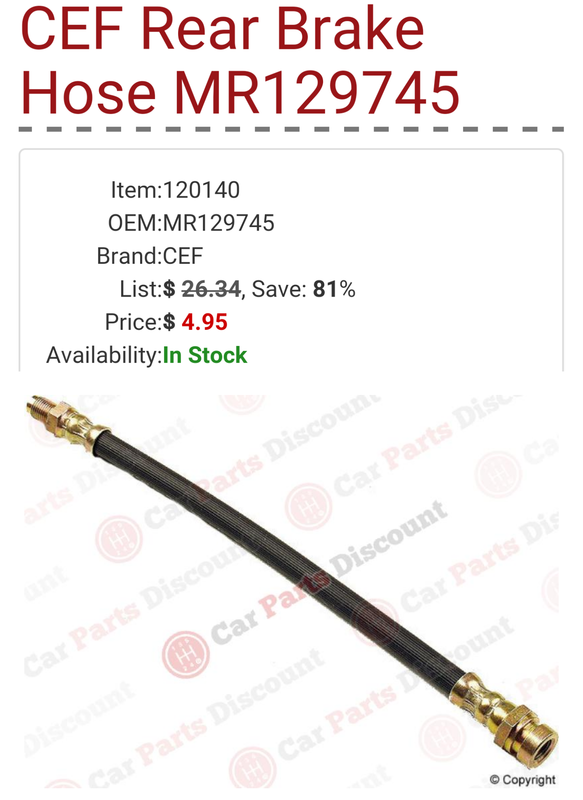
2x rear brake hose. These connect the caliper to the toyota hardline.
$22 after shipping.
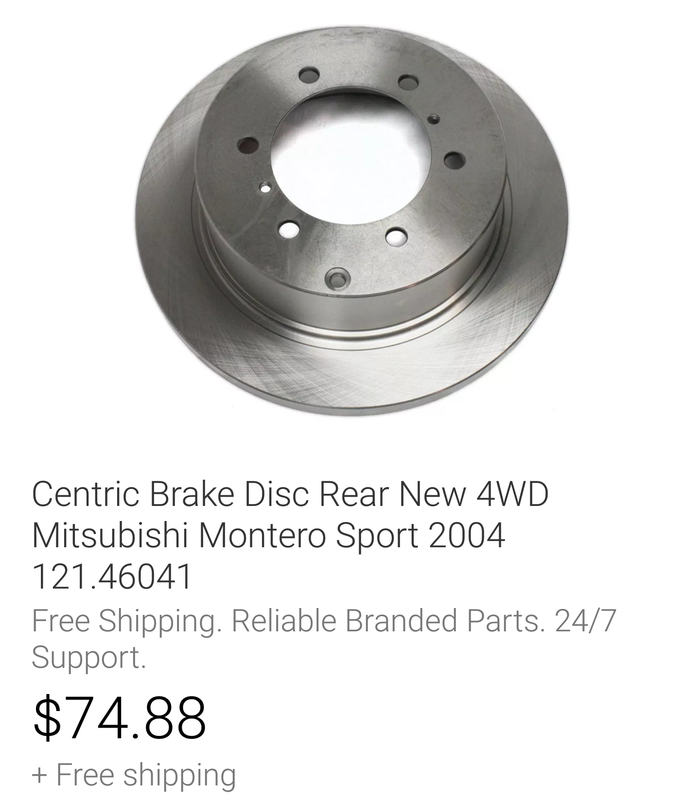
Brake rotors: $75 ebay
Caliper bushings & sleeves: $17 ebay
Ceramic brake pads: $15 jcwhitney
Current Total: $174
Junkyard 01 montero sport calipers: $45
2x rear brake hose. These connect the caliper to the toyota hardline.
$22 after shipping.
Brake rotors: $75 ebay
Caliper bushings & sleeves: $17 ebay
Ceramic brake pads: $15 jcwhitney
Current Total: $174
Last edited by crashburnoveride; Apr 26, 2016 at 08:22 AM.
Apr 12, 2016 | 03:14 PM
#123
Cool, glad you're doing a writeup, with cost of parts and links included!
Along time ago I seen a mod where they didn't have all the emergency brake cables, but they still had the pull handle in the cab. So they just ran a short cable through the firewall and back into the cab (just a big loop) and ran the cable to the brake pedal. That way when they were out wheeling they still had an emergency brake (as long as the rig was still running)......Then again, when you got dual cases you park that sucker in gear and it ain't going anywhere, lol.
Along time ago I seen a mod where they didn't have all the emergency brake cables, but they still had the pull handle in the cab. So they just ran a short cable through the firewall and back into the cab (just a big loop) and ran the cable to the brake pedal. That way when they were out wheeling they still had an emergency brake (as long as the rig was still running)......Then again, when you got dual cases you park that sucker in gear and it ain't going anywhere, lol.
Apr 15, 2016 | 07:14 AM
#124
Thread Starter
Registered User
Joined: Dec 2012
Posts: 613
Likes: 33
From: Lincoln, NE
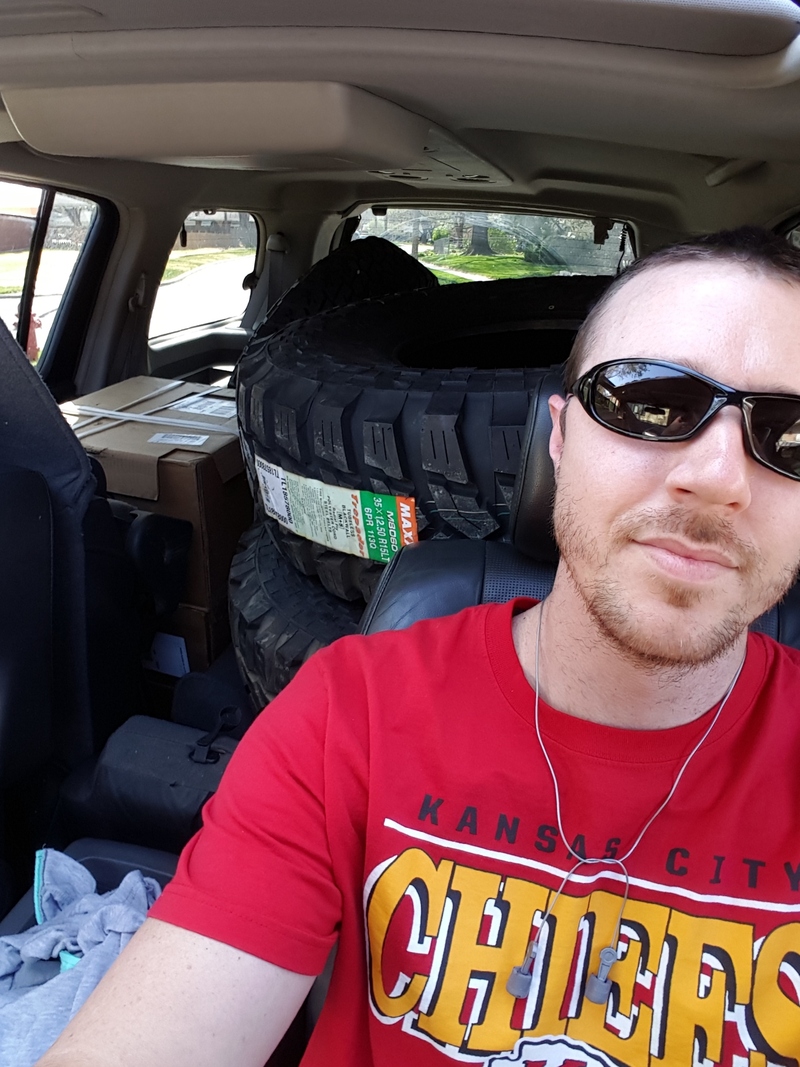
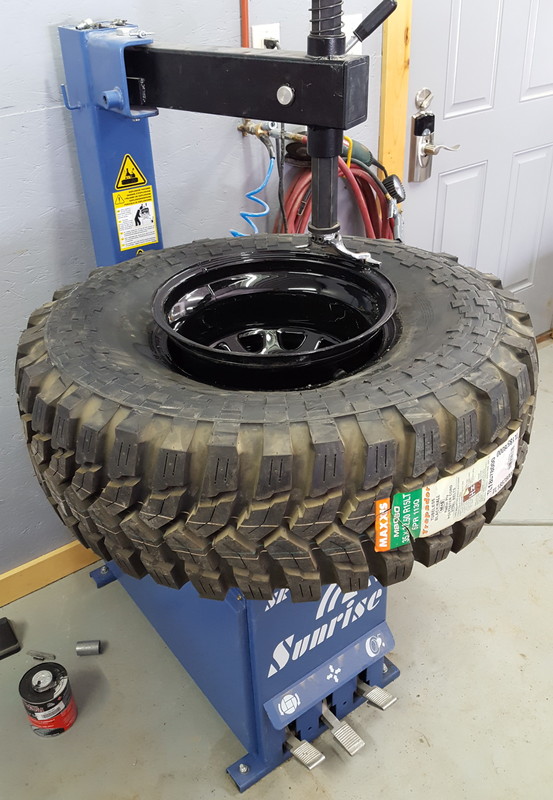
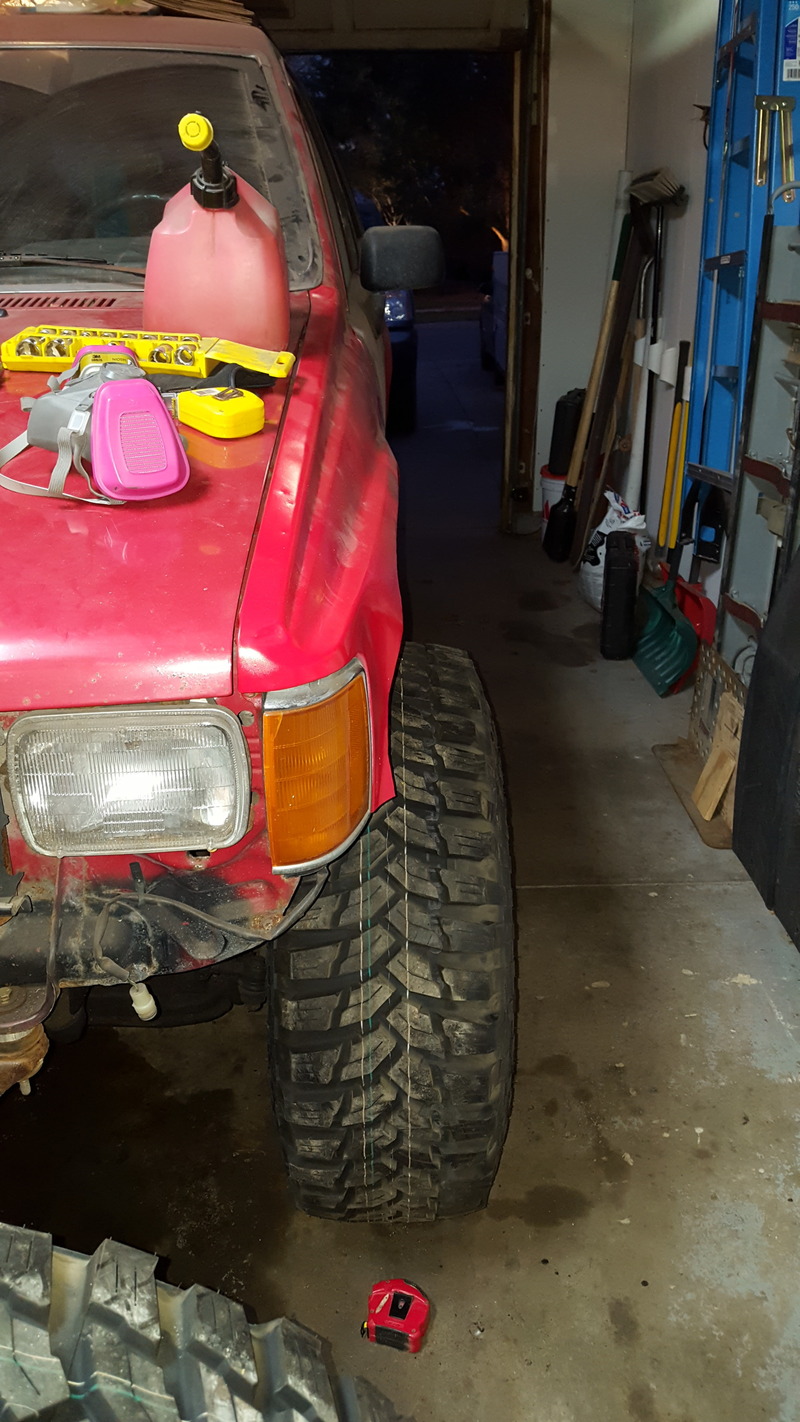
Loaded up the 4 new tires, 4 new rims, and one of my MTR's into the armada.
Went to my buddies to mount these bad boys. Used the 500 balancing beads from inside the MTR combined with 3000 other beads I had left over in the bottle in the new trepadors. I can now work a tire machine.
Got home threw one on. Heres a pic of the stance. Love it!
All my disc brake parts should come in on monday. So next week I'll begin that project!


 I got home to a surprise.
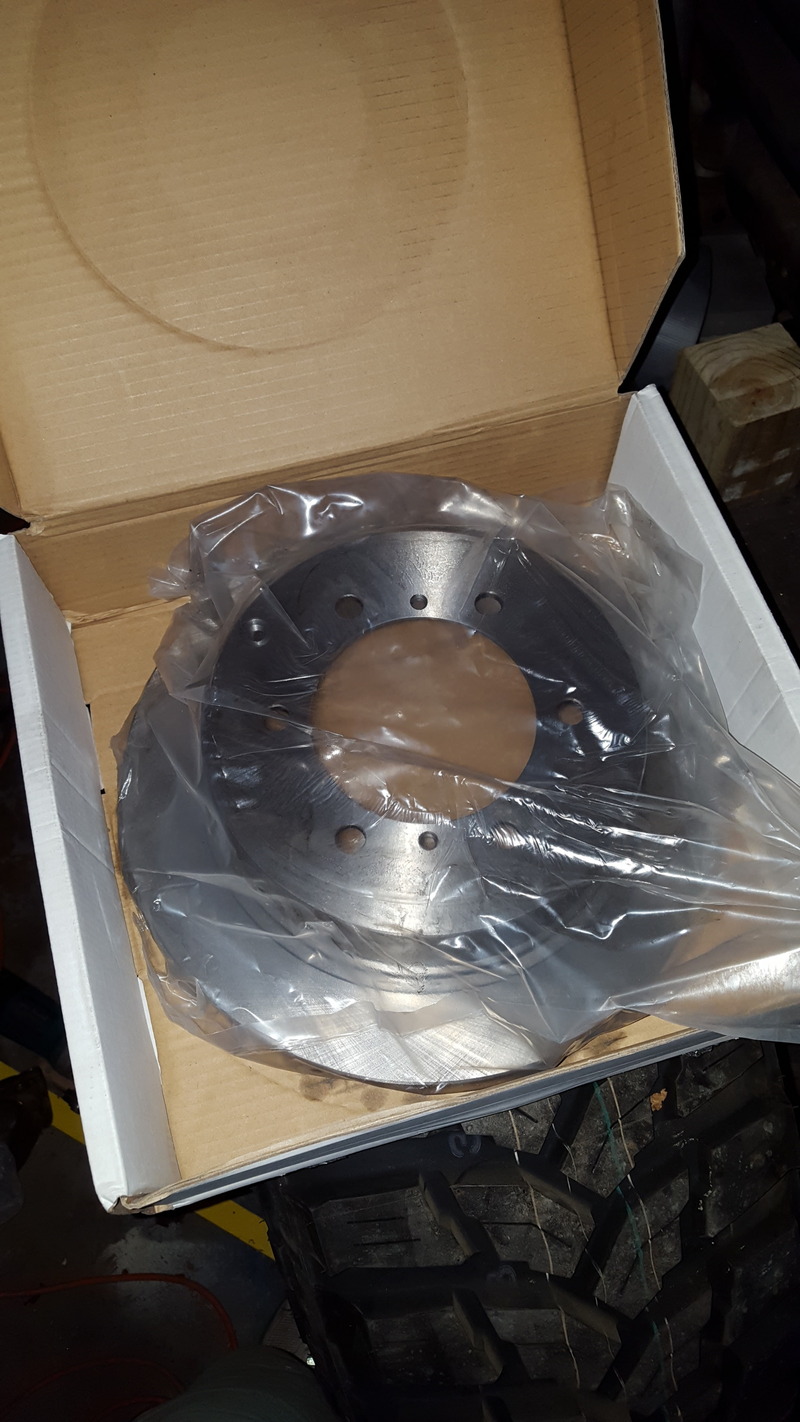
 Apr 15, 2016 | 04:22 PM
#127


 Apr 15, 2016 | 04:40 PM
#128
Thread Starter
Registered User
Joined: Dec 2012
Posts: 613
Likes: 33
From: Lincoln, NE
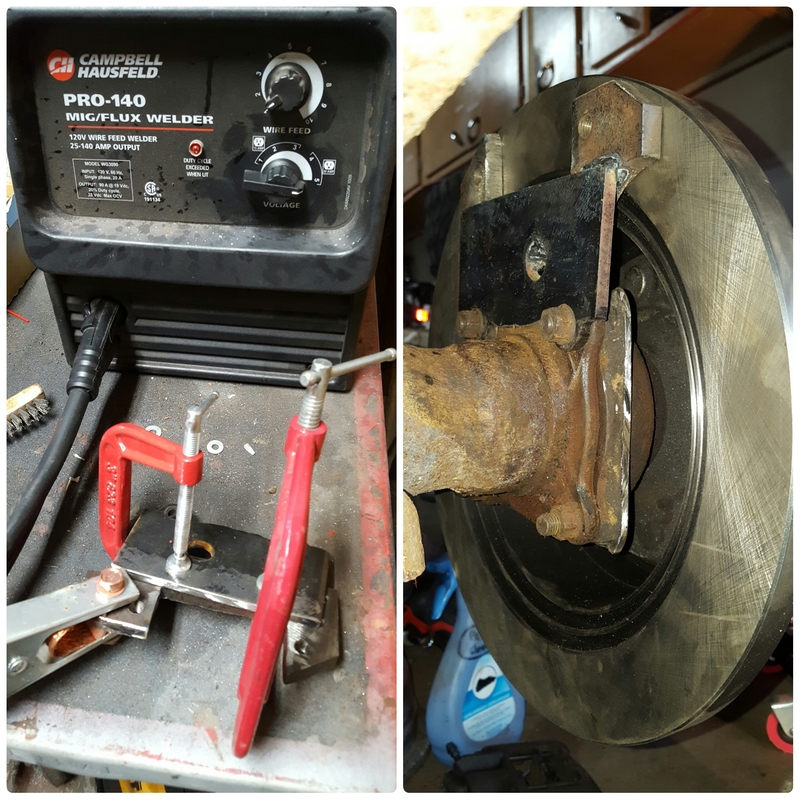
This is the bracket I have to make.
Two pieces welded together and I'll hafta thread the outer holes for the caliper to fasten into. Not the easiest design but its cool cuz it also looks like it will help clean off mud from the rotor on the back side. I wish I could find a file for it cuz I suck at making such precision stuff. But I doubt theres a file out there.

Last edited by crashburnoveride; Apr 16, 2016 at 01:52 PM.
 Apr 17, 2016 | 03:52 PM
#133
Thread Starter
Registered User
Joined: Dec 2012
Posts: 613
Likes: 33
From: Lincoln, NE
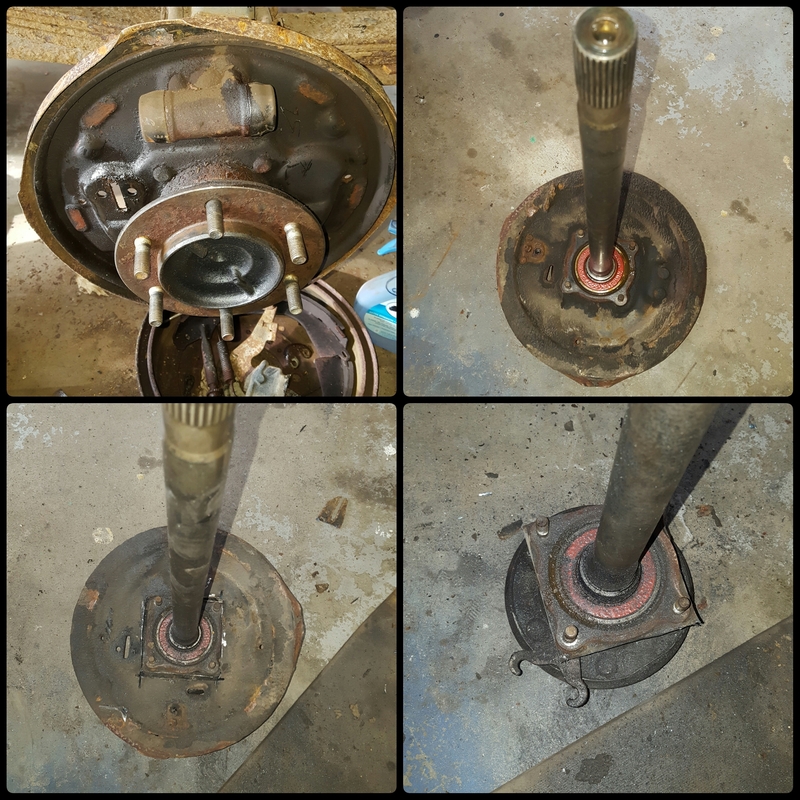
I turned the rotor around and mounted it backwards so you can see the gap. And that's after hitting it with the impact.
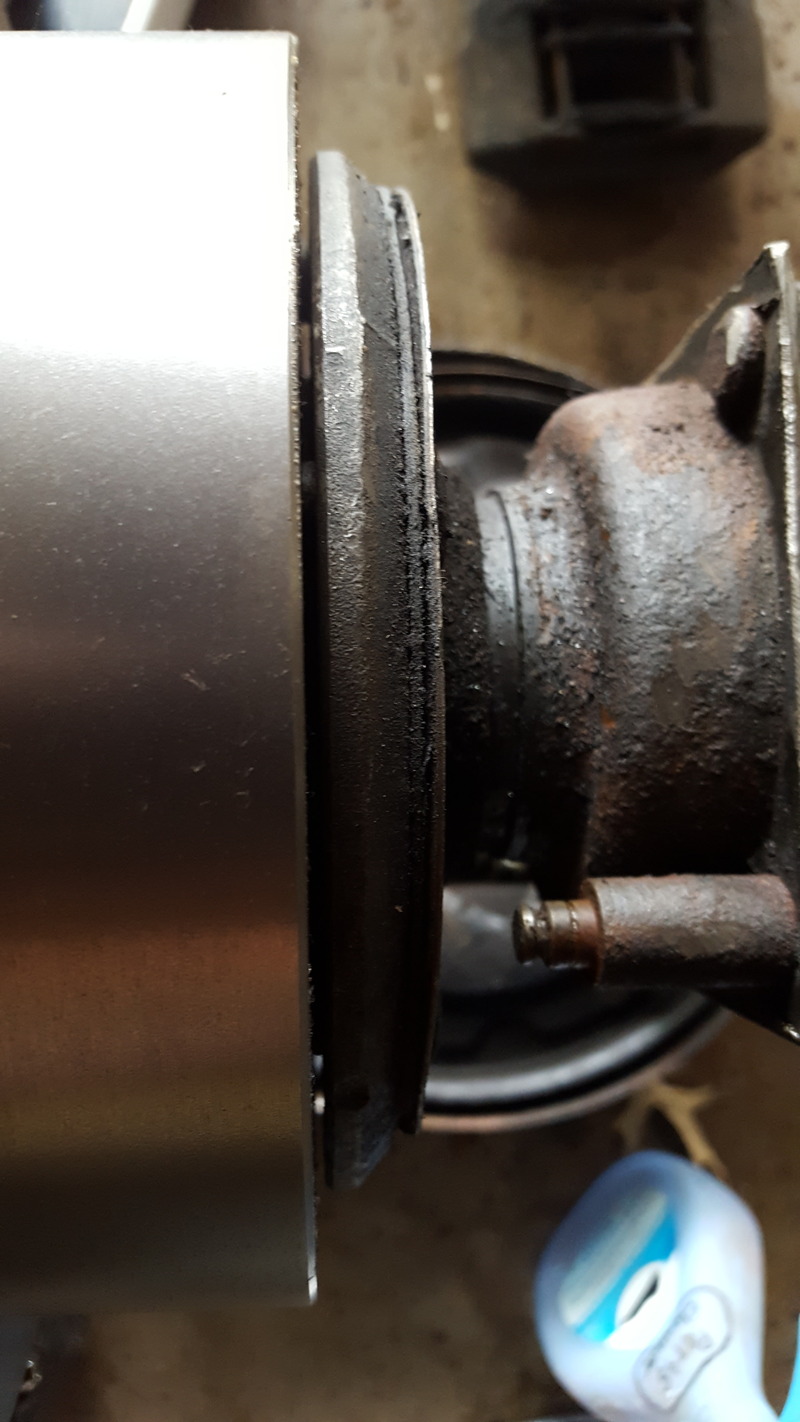
When I spun the rotor it was clearly wobbly and not on straight. I was gonna buy a 9/16 drill bit but at $25 I'll just borrow one from work. Then once its on straight I can move forward on the mounts.
Apr 19, 2016 | 11:56 AM
#134
Registered User
Joined: Apr 2013
Posts: 478
Likes: 4
From: Louisiana
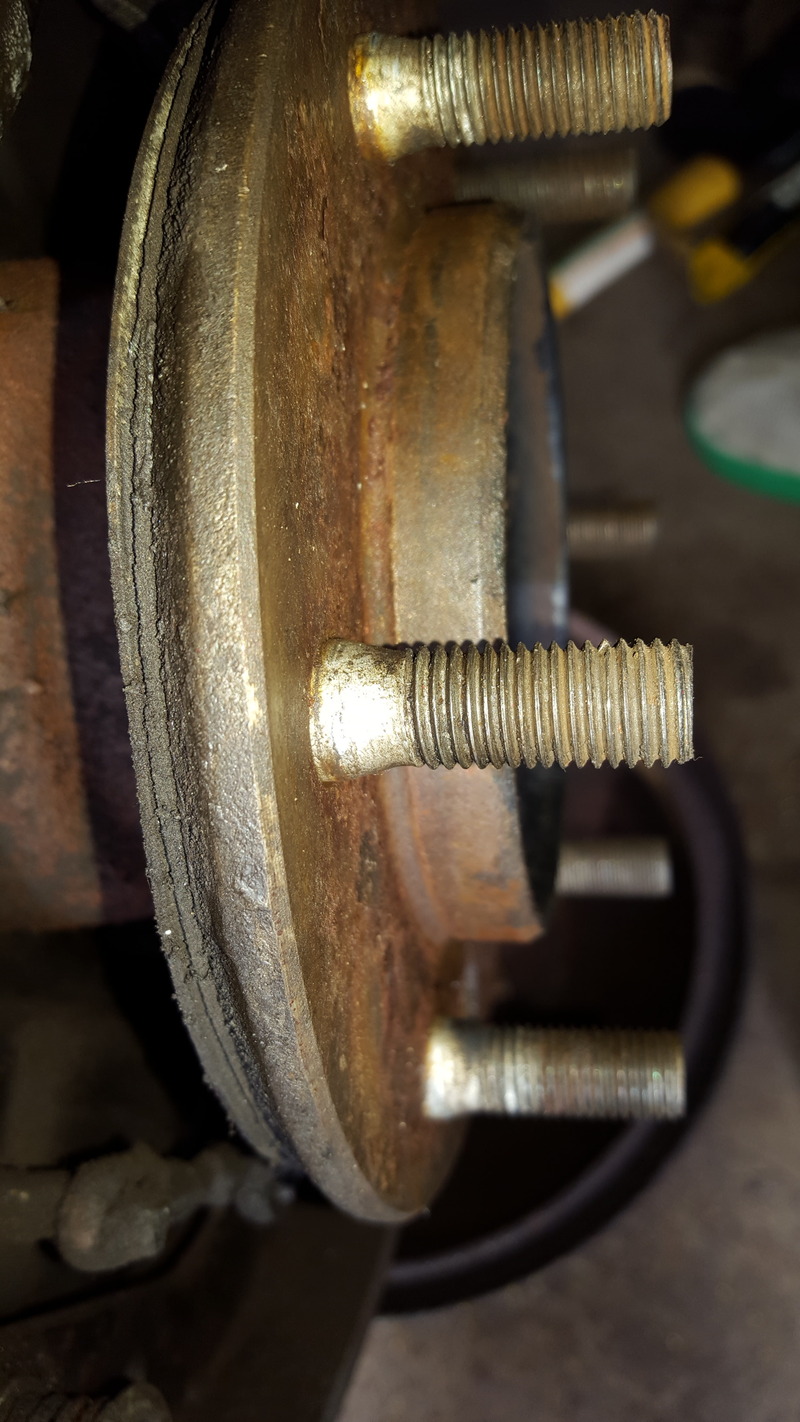
No I haven't yet Kelvin. I was tinkering around with some cardboard today when I noticed that I need to drill out the rotor stud holes. The wheel studs cone out at the bottom so the rotor won't bolt down flush.

I turned the rotor around and mounted it backwards so you can see the gap. And that's after hitting it with the impact.

When I spun the rotor it was clearly wobbly and not on straight. I was gonna buy a 9/16 drill bit but at $25 I'll just borrow one from work. Then once its on straight I can move forward on the mounts.
I turned the rotor around and mounted it backwards so you can see the gap. And that's after hitting it with the impact.
When I spun the rotor it was clearly wobbly and not on straight. I was gonna buy a 9/16 drill bit but at $25 I'll just borrow one from work. Then once its on straight I can move forward on the mounts.
Apr 19, 2016 | 05:13 PM
#135
Thread Starter
Registered User
Joined: Dec 2012
Posts: 613
Likes: 33
From: Lincoln, NE
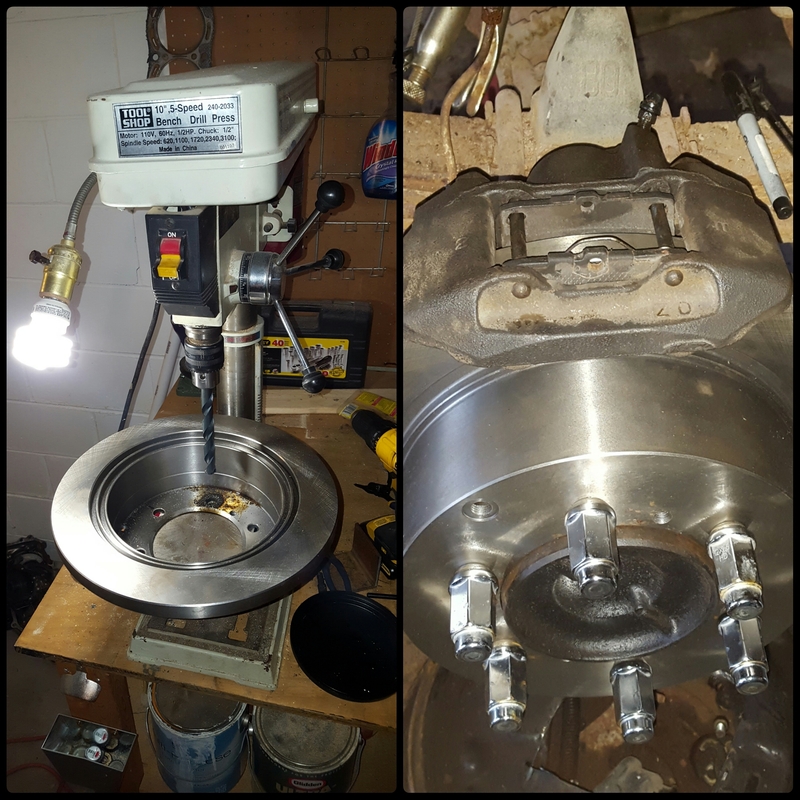
The 9/16 bit worked perfectly. Fits nice and snug now. I actually only drilled out 5 of 6 stud holes. One of the studs doesn't cone out. Then I tore into the brake calipers. The bolt sleeves hadn't been greased regularly and were rusted bad. Took me a long time, pb blaster, and many hammer wacks to get them all out. I wire wheeled them, greased them, and put one caliper back together. Some boots got destroyed and a sleeve too.
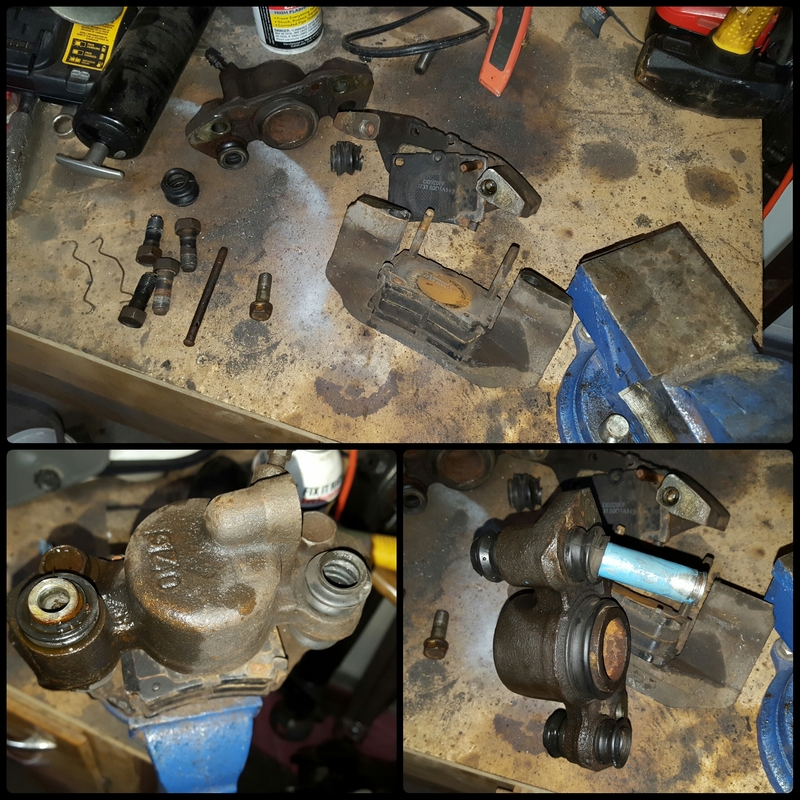
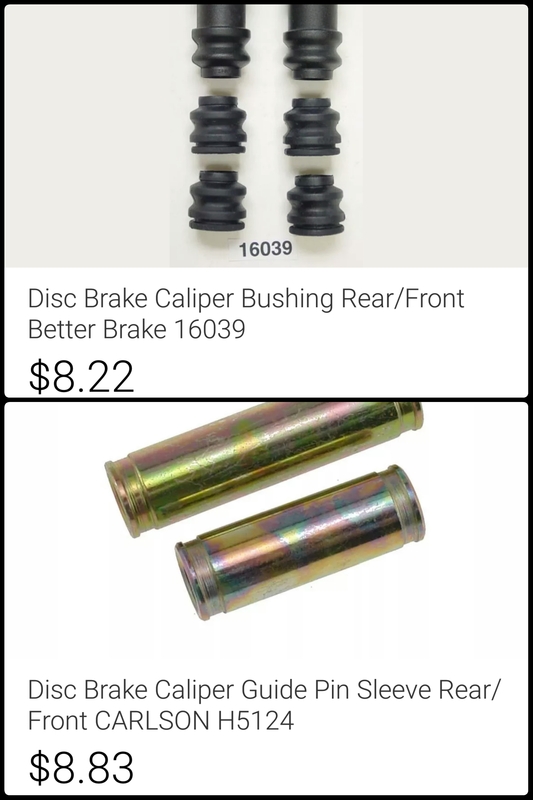
I'm hoping to find new boots and sleeves to put the other one back together. But one is good so I can make a bracket now!
Last edited by crashburnoveride; Apr 20, 2016 at 04:26 AM.
 Apr 20, 2016 | 11:17 AM
#139
Thread Starter
Registered User
Joined: Dec 2012
Posts: 613
Likes: 33
From: Lincoln, NE
 Apr 26, 2016 | 06:05 AM
#140
Thread Starter
Registered User
Joined: Dec 2012
Posts: 613
Likes: 33
From: Lincoln, NE
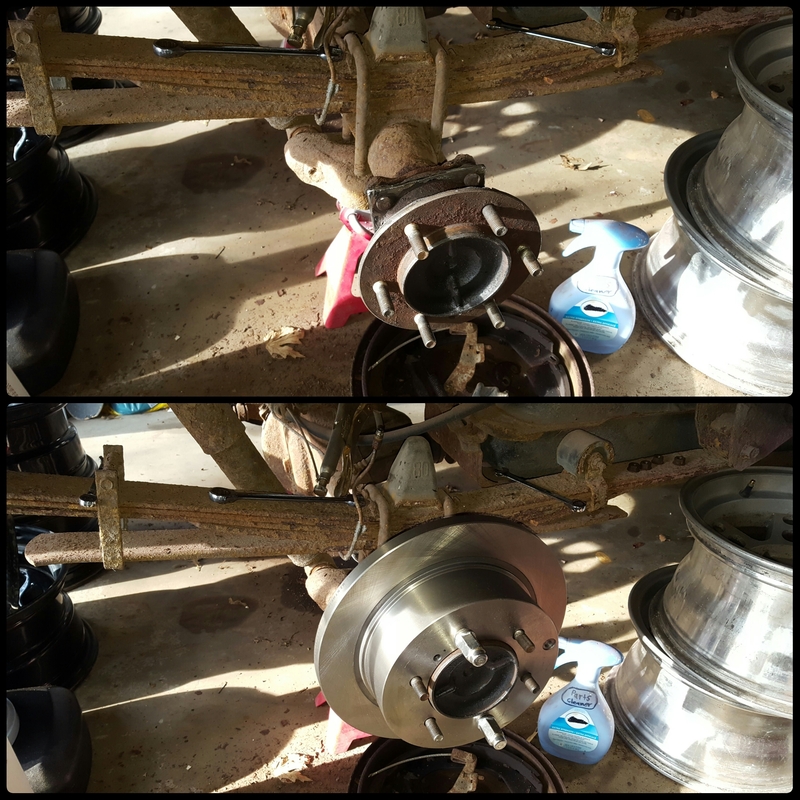
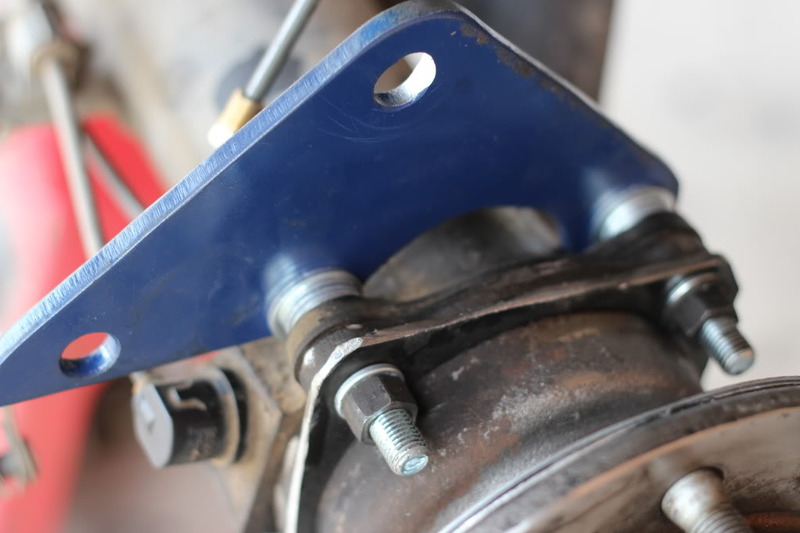
Spent hours yesterday with a goal of finishing the caliper mount. I had to remake the bottom bracket piece but 2nd time around it didn't take me long. The other day I bought a 40 piece metric tap and die set from harbor freight for $13! And I got some free batteries haha.
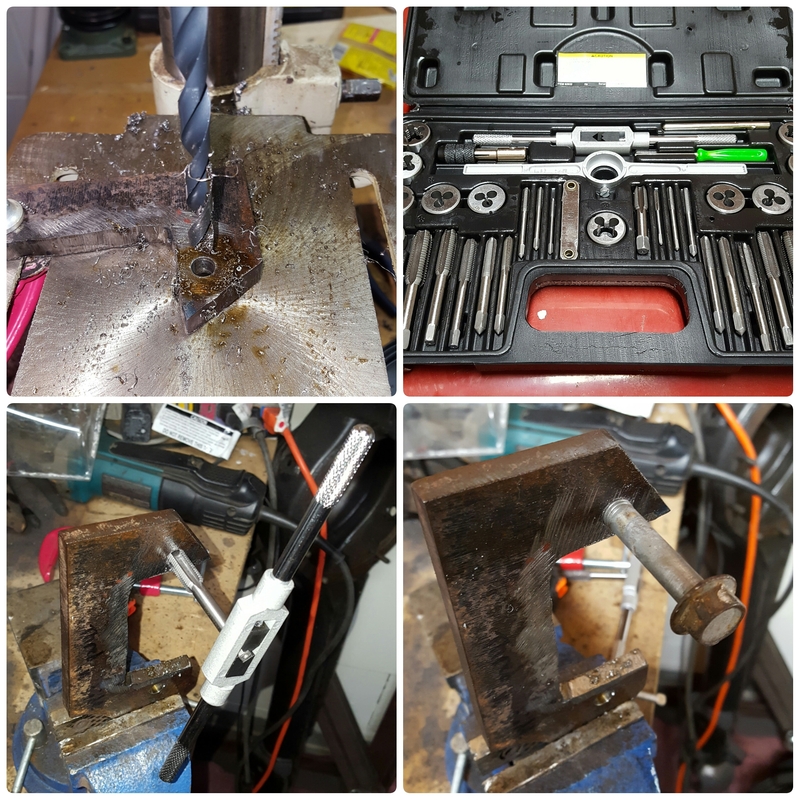
So glad I have my drill press! The caliper bolts were m10x1.25. This was my first time using a tap. It was pretty fun actually. Welded the pieces together after a fit test on the rotor.
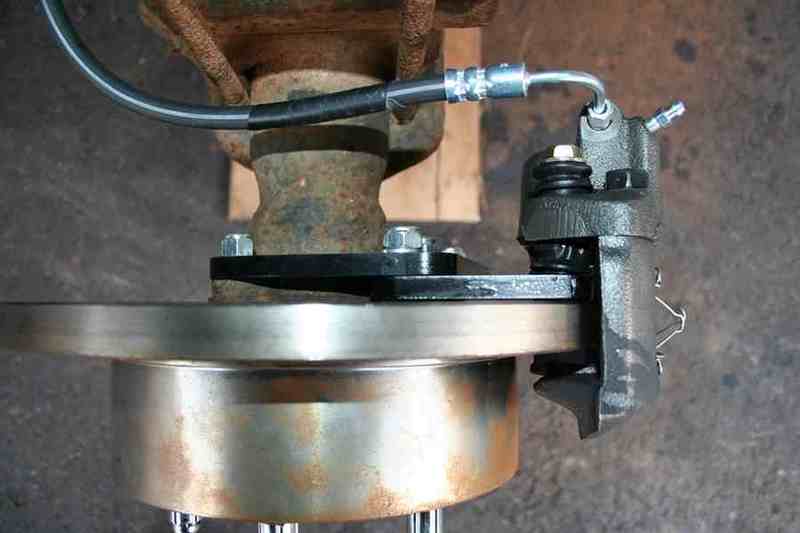
Then I bolted it all on to make sure everything fit.
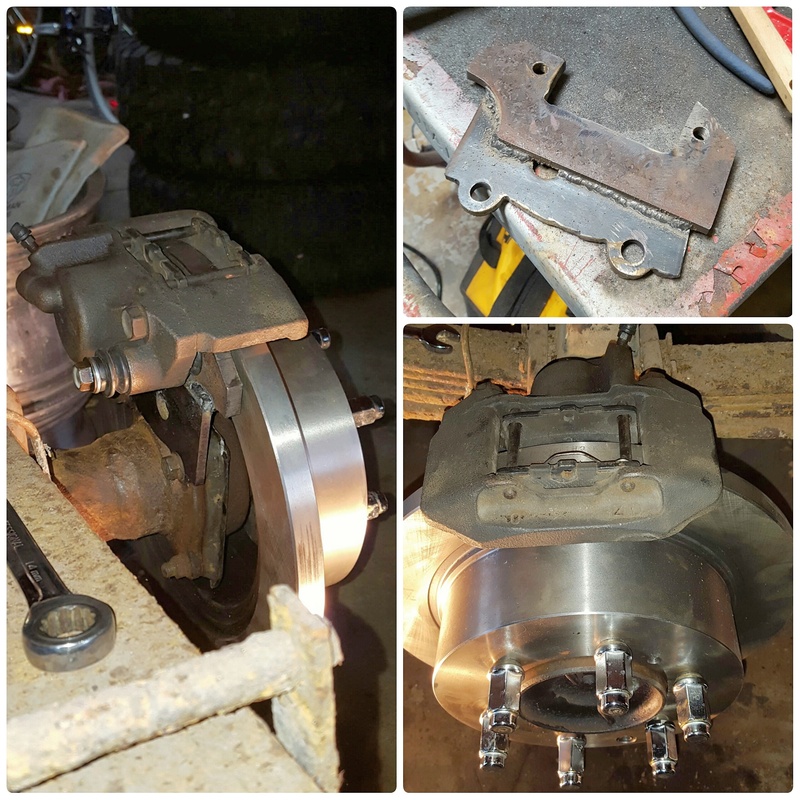
I just need to play around with some washers to shim it to perfection, spray some paint on it, and its done! The next one should be way easier. There's a poker run at tuttle creek orv next month I'd love to enter so I gotta button this thing up!!
So glad I have my drill press! The caliper bolts were m10x1.25. This was my first time using a tap. It was pretty fun actually. Welded the pieces together after a fit test on the rotor.
Then I bolted it all on to make sure everything fit.
I just need to play around with some washers to shim it to perfection, spray some paint on it, and its done! The next one should be way easier. There's a poker run at tuttle creek orv next month I'd love to enter so I gotta button this thing up!!


