
CBO's 87 4runner build


 Jun 12, 2015 | 07:05 PM
#46
Thread Starter
Registered User
Joined: Dec 2012
Posts: 613
Likes: 33
From: Lincoln, NE
Jun 15, 2015 | 01:46 PM
#47
Thread Starter
Registered User
Joined: Dec 2012
Posts: 613
Likes: 33
From: Lincoln, NE

JB Weld is on.

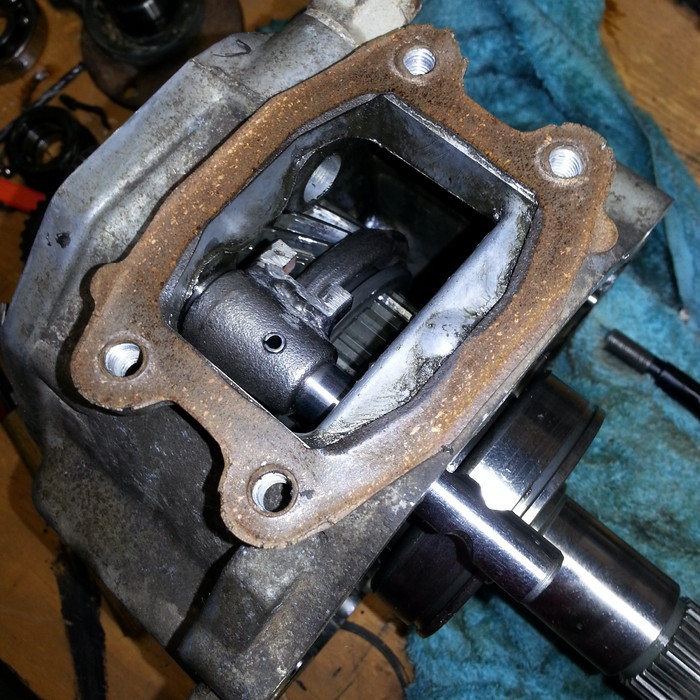
And this doesn't look too good... anybody know if this wear is ok? Each side top and bottom has some shiny low spots but this side has some slices in it as well.

I hope this is not a problem...
Jul 5, 2015 | 03:00 PM
#49
Thread Starter
Registered User
Joined: Dec 2012
Posts: 613
Likes: 33
From: Lincoln, NE
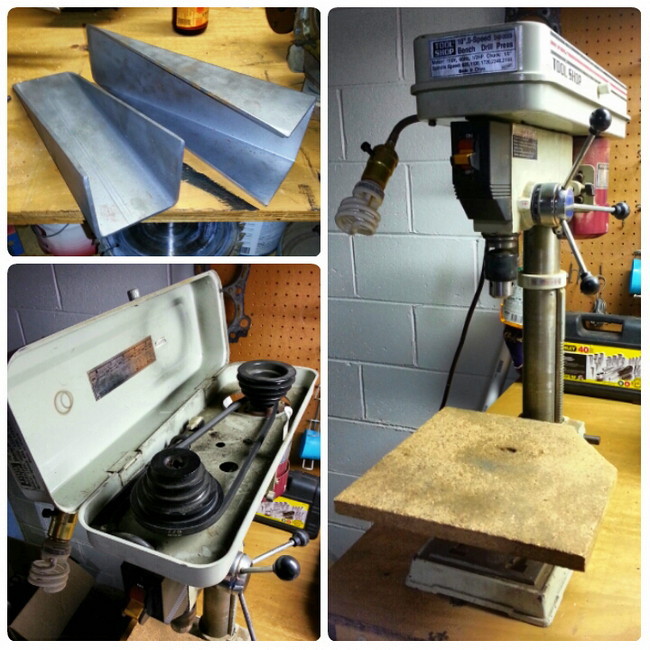
Got a $30 drill press off CL and will be modifying it to turn slower for drilling steel. My chevy 63 spring hangers are cut and just need drilled.
I sold my bfg a/t's for $480 and instead of putting that towards some 35's I might get my transfer case doubler. Tore down the case.
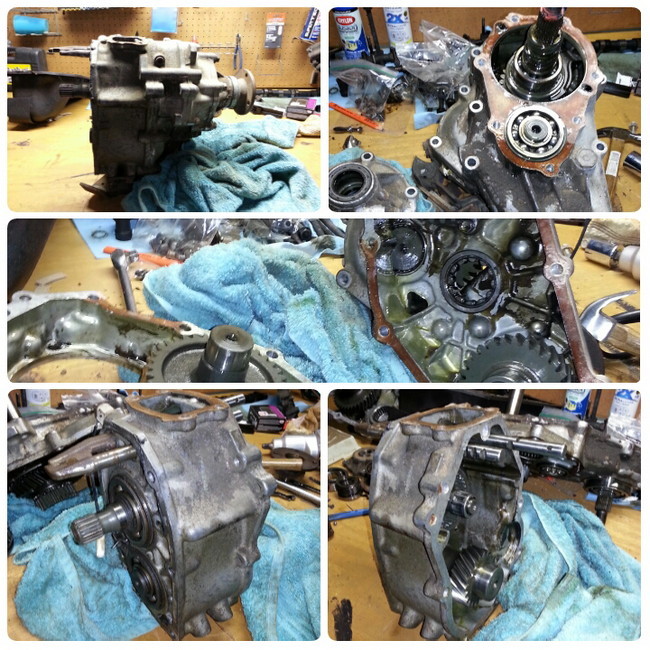
Its a front shift but I got it for free from a buddy so I'm gonna try and convert it to top shift myself.

I sold my bfg a/t's for $480 and instead of putting that towards some 35's I might get my transfer case doubler. Tore down the case.

Its a front shift but I got it for free from a buddy so I'm gonna try and convert it to top shift myself.
Jul 7, 2015 | 10:39 AM
#50
Nice work on the sas! If you haven't already bought a complete axel rebuild kit, I'd recommend TG's Trail Safe knuckle ball wiper seals. They replace the old style felt wiper seals, a big improvement IMHO. I've been running them for over 3yrs with no leaks. Look forward to seeing some more progress on the SAS!
Jul 8, 2015 | 04:41 PM
#51
Thread Starter
Registered User
Joined: Dec 2012
Posts: 613
Likes: 33
From: Lincoln, NE
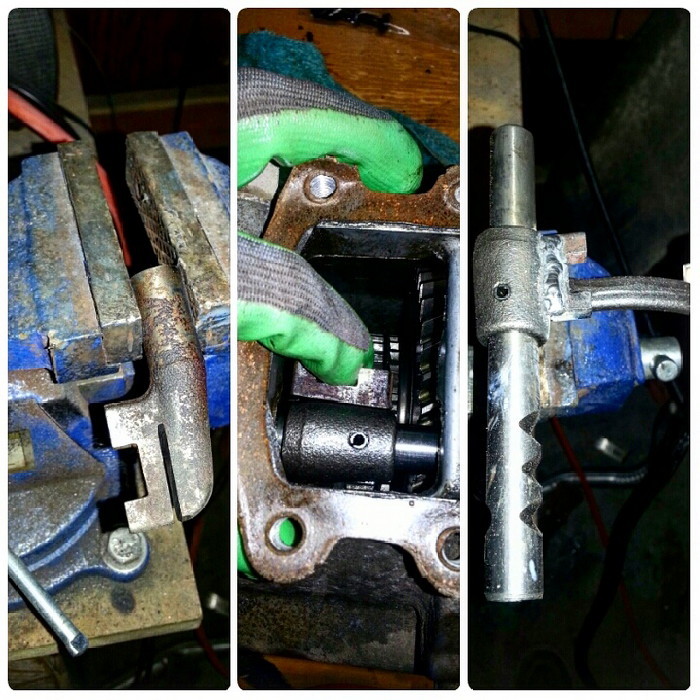
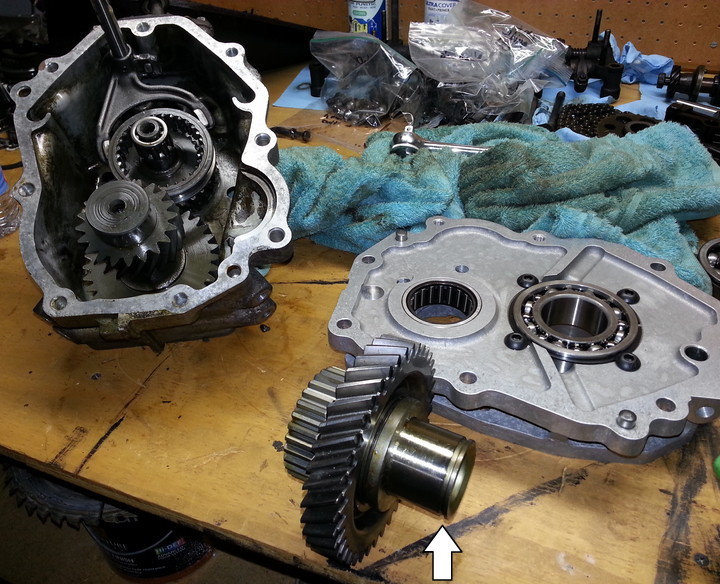
Modifying the forward shift to top shift.
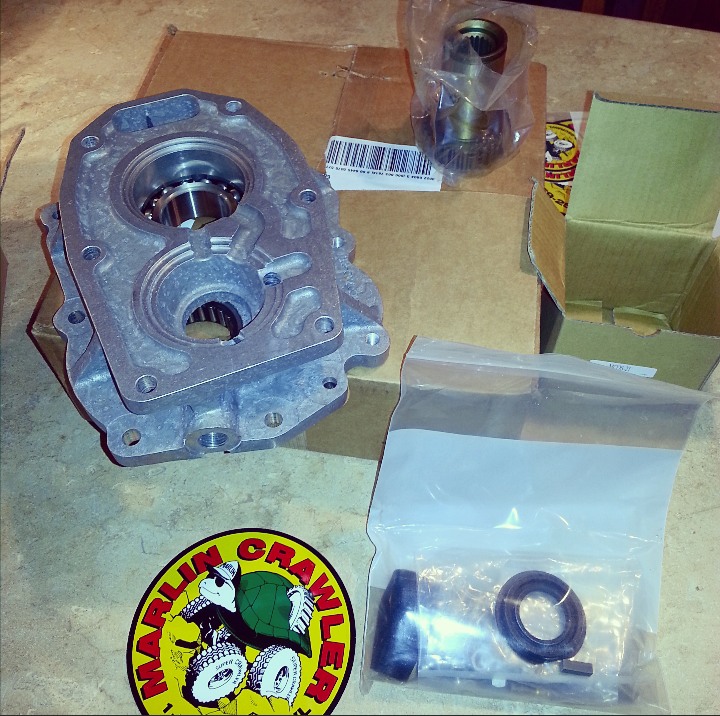
My marlin crawler 10* clocked dual adapter is on its way! Gonna take the crawl box casing into work to clean and blast it. Might as well.
Ed, I got a kit already but if I replace em I'd definitely go with TG's.


My marlin crawler 10* clocked dual adapter is on its way!
Gonna take the crawl box casing into work to clean and blast it. Might as well.Ed, I got a kit already but if I replace em I'd definitely go with TG's.
Jul 10, 2015 | 04:43 AM
#52
Great work Pat!!! I really like that you put up those pictures. It really now explains how to do this procedure. I think that spending the money on the double would be well worth it over the tire purchase ATM.
As far as the grooves on the inside of the axle.... I think those are reliefs that are cut out to accommodate the joint on the Birfield that rides in there. I could be wrong, but thats what it looks like to me.
Keep up the good work buddy.
As far as the grooves on the inside of the axle.... I think those are reliefs that are cut out to accommodate the joint on the Birfield that rides in there. I could be wrong, but thats what it looks like to me.
Keep up the good work buddy.
Jul 14, 2015 | 06:53 PM
#53
Thread Starter
Registered User
Joined: Dec 2012
Posts: 613
Likes: 33
From: Lincoln, NE
Thanks man. Well, got this a few days ago.
It took me a few days to put it all together because I dont have a shop press, and when you get to the part where you insert Marlins "heavy duty" snap ring... yah I broke two heads on my brand new snap ring pliers.
Ended up taking it to work where all the tools are super duty. So if you're reading this yes you really do need giant snap ring pliers. but...

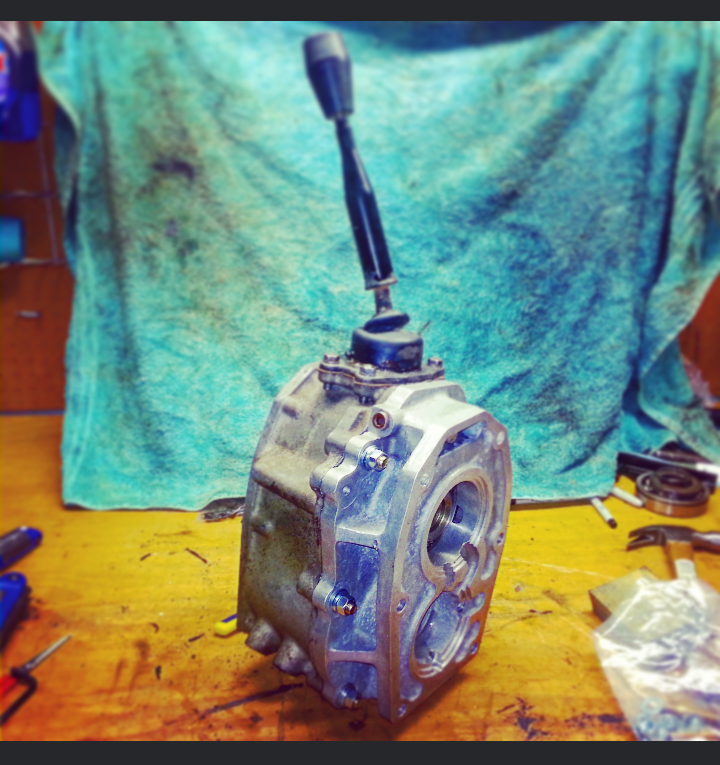

It took me a few days to put it all together because I dont have a shop press, and when you get to the part where you insert Marlins "heavy duty" snap ring... yah I broke two heads on my brand new snap ring pliers.

Ended up taking it to work where all the tools are super duty. So if you're reading this yes you really do need giant snap ring pliers. but...

 Jul 17, 2015 | 07:57 AM
#55
Thread Starter
Registered User
Joined: Dec 2012
Posts: 613
Likes: 33
From: Lincoln, NE
Jul 20, 2015 | 05:12 PM
#56
Registered User
Joined: Jun 2014
Posts: 229
Likes: 0


That thing was fubared!!! But my ecoseals fit right in there and no issues with my trunnion bearings yet so I bet yours will be fine.
 Sep 29, 2015 | 04:29 PM
#59
Thread Starter
Registered User
Joined: Dec 2012
Posts: 613
Likes: 33
From: Lincoln, NE
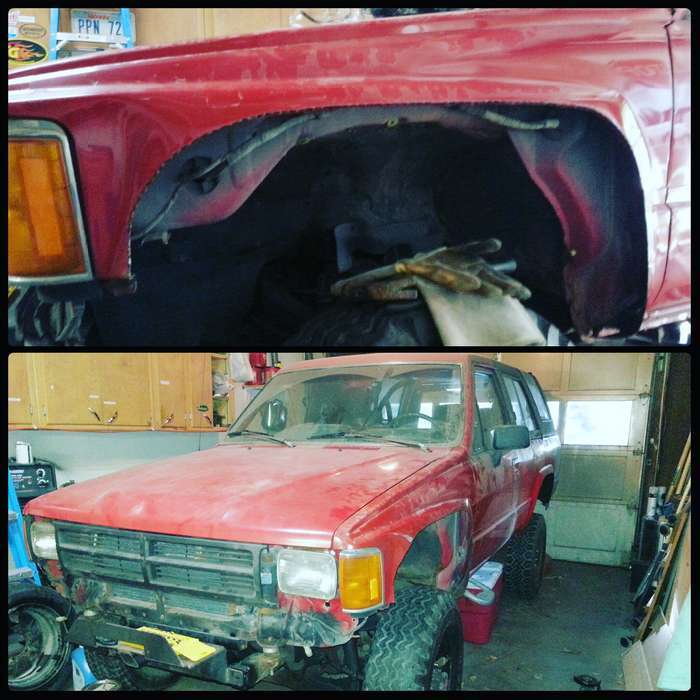
Been quite a while or at least it seems that way, since I've worked on the runner. I had a son. He is cool.

But yesterday and today I spent some time in the garage. Worked on the front drivers fender and sprayed the passenger rear wheel well with rubber coating.
It'd run if I threw an air flow meter in it. I kinda wanna throw my Spartan locker third in the rear and go wheeling in October or November.

But yesterday and today I spent some time in the garage. Worked on the front drivers fender and sprayed the passenger rear wheel well with rubber coating.

It'd run if I threw an air flow meter in it. I kinda wanna throw my Spartan locker third in the rear and go wheeling in October or November.


