
CBO's 87 4runner build
 Jan 20, 2015 | 05:59 AM
#21
Thread Starter
Registered User
Joined: Dec 2012
Posts: 613
Likes: 33
From: Lincoln, NE
Thanks guys. I might finish the rear passenger side after work today. Here's another shot after I just sprayed some red over the primer. No body filler even on it yet. This is gonna turn out just fine me thinks!
Dropzone, I used photogrid (app) to put em together then sometimes instagram to give it effects, and picsayPro to scale it down to upload.
Mark I hear yuh. Everyone's busy. I got an electrician in my house right now hookin up a 30amp outlet in my garage for my welder, and washer dryer power in our master bath. Got multiple projects goin on!
Last edited by crashburnoveride; Jan 20, 2015 at 06:01 AM.
Jan 22, 2015 | 06:43 AM
#23
Thread Starter
Registered User
Joined: Dec 2012
Posts: 613
Likes: 33
From: Lincoln, NE
So I had an electrician install a new 20amp 120v outlet in my garage because that's the max my new welder can use. It says it welds up to 1/4 inch. I was playin around and this is what I got with 1/4".
Still flux core, but I think it burned nice. Would definitely be adequate with welds on both sides.

Still flux core, but I think it burned nice. Would definitely be adequate with welds on both sides.
Jan 24, 2015 | 06:15 PM
#24
Thread Starter
Registered User
Joined: Dec 2012
Posts: 613
Likes: 33
From: Lincoln, NE
More progress today. Still working on the passenger rear fender. I had to cut out even more rusted metal and replace it.
Just have a lil more body filler to do and its done! Since the welding is done I threw the tire back on for a visual. Its a 30" tire.
Taking a long time, but its gonna look sick!! Back hurts. Movie time.

Just have a lil more body filler to do and its done! Since the welding is done I threw the tire back on for a visual. Its a 30" tire.

Taking a long time, but its gonna look sick!! Back hurts. Movie time.
Jan 24, 2015 | 06:28 PM
#25

Registered User
Joined: Dec 2014
Posts: 21
Likes: 0
Never let go of a dream ...you can make anything happen if you believe you can...I raised three boys in really tight times but always had a project vehicle happening ...usually Toyotas ...just had to scrounge a bit a bit more ....now I'm retired and ....have to scrounge a bit more....but starting another frame up build ...!....life goes on....and we keep building Toys...
Jan 25, 2015 | 05:46 PM
#26
Thread Starter
Registered User
Joined: Dec 2012
Posts: 613
Likes: 33
From: Lincoln, NE
Pickle I like the positive vibes. That's definitely one thing I've learned from working on my yotas. I feel like I can do anything I set my mind to. Love the empowerment.
On that note, I'm feeling pretty proud of this:
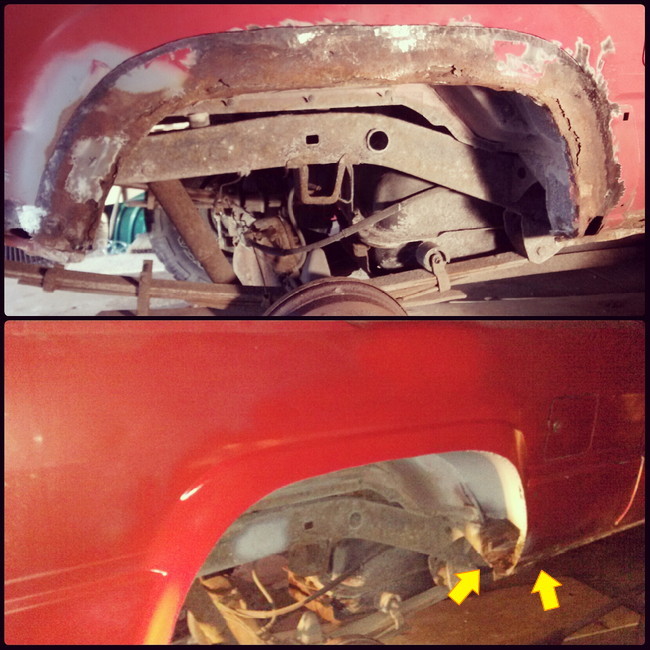
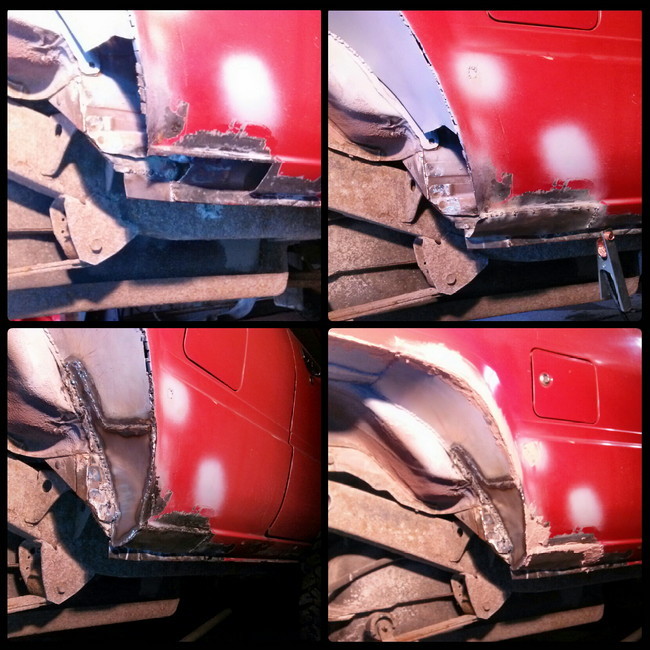
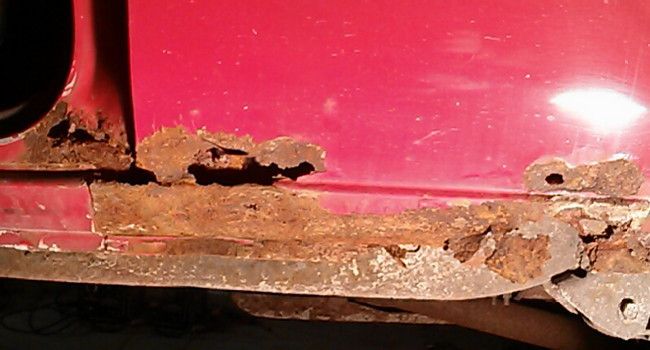
Finally done! Just needs the durabak slapped on but that's down the road. It's on to the next side now. I thought the passenger side was the worse of the two. I was wrong.
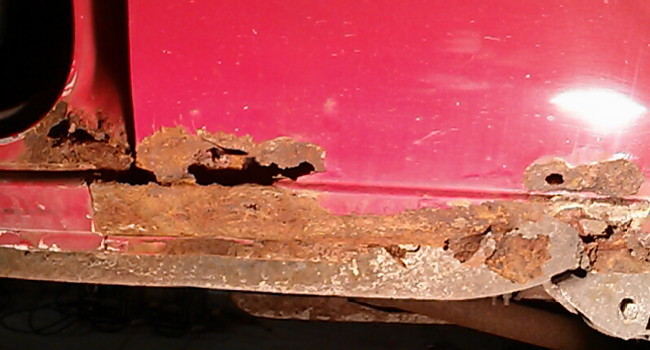
I scraped at all the bubbled up paint and kept going right through the body. Under the sr5 chrome strip were some holes. It spreads into the door frame. So I def got a lot to do. I know I can tackle it, but I don't enjoy body repair. Just the finished product! At least its a relatively cheap process tho.
On that note, I'm feeling pretty proud of this:

Finally done! Just needs the durabak slapped on but that's down the road. It's on to the next side now. I thought the passenger side was the worse of the two. I was wrong.

I scraped at all the bubbled up paint and kept going right through the body. Under the sr5 chrome strip were some holes. It spreads into the door frame. So I def got a lot to do. I know I can tackle it, but I don't enjoy body repair. Just the finished product! At least its a relatively cheap process tho.
 Jan 27, 2015 | 07:18 PM
#29
Registered User
Joined: Dec 2014
Posts: 21
Likes: 0
Balance its all about balance

Pickle I like the positive vibes. That's definitely one thing I've learned from working on my yotas. I feel like I can do anything I set my mind to. Love the empowerment.
On that note, I'm feeling pretty proud of this:

Finally done! Just needs the durabak slapped on but that's down the road. It's on to the next side now. I thought the passenger side was the worse of the two. I was wrong.
I scraped at all the bubbled up paint and kept going right through the body. Under the sr5 chrome strip were some holes. It spreads into the door frame. So I def got a lot to do. I know I can tackle it, but I don't enjoy body repair. Just the finished product! At least its a relatively cheap process tho.
On that note, I'm feeling pretty proud of this:
Finally done! Just needs the durabak slapped on but that's down the road. It's on to the next side now. I thought the passenger side was the worse of the two. I was wrong.
I scraped at all the bubbled up paint and kept going right through the body. Under the sr5 chrome strip were some holes. It spreads into the door frame. So I def got a lot to do. I know I can tackle it, but I don't enjoy body repair. Just the finished product! At least its a relatively cheap process tho.
Jan 27, 2015 | 07:29 PM
#30
Registered User
Joined: Dec 2014
Posts: 21
Likes: 0
Good for you guy ...totally rewarding ...make it happen ...my wife said sorry but we don't have anything in the budget for a project truck ....sooooooo.....make it happen right ....!...so I picked up a Cruiser ..flipped it and made enough to build this truck on a tight budget ...but hey I'm into a Toyota project and.... brides happy ...old mans...happy.......make it happen ...Big bucks and Toyota trucks ...that's all I need.


 Mar 31, 2015 | 06:14 AM
#32
Thread Starter
Registered User
Joined: Dec 2012
Posts: 613
Likes: 33
From: Lincoln, NE
What up gang? Haven't done much runner work lately, but my block and crank are ready. And I got these the other day.
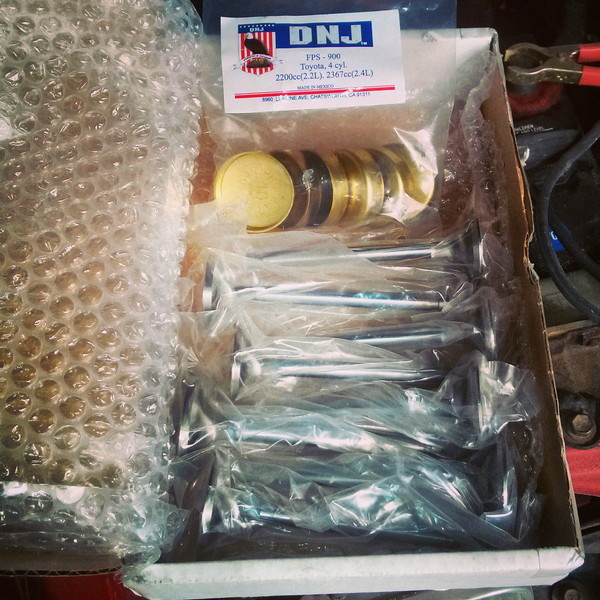
Oversized valves and my block plugs. Gonna drop my head off soon to be worked. Then its assembly time.

Oversized valves and my block plugs. Gonna drop my head off soon to be worked. Then its assembly time.
Mar 31, 2015 | 07:19 PM
#33
 May 26, 2015 | 06:43 PM
#35
Thread Starter
Registered User
Joined: Dec 2012
Posts: 613
Likes: 33
From: Lincoln, NE
Allow me to introduce you to the 4runners future tow rig.
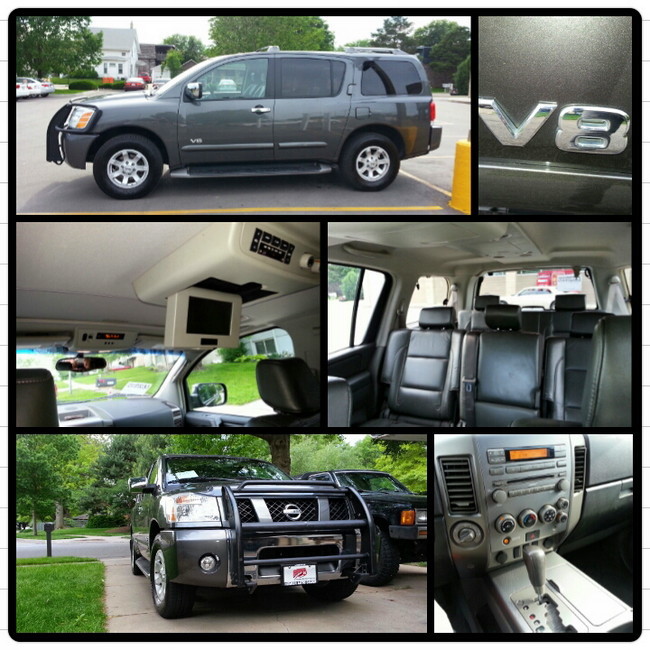
2005 Nissan Armada. Traded our Mitsubishi in because we needed 3rd row seats for all the kids my wife will be watching this summer, plus our own. I love this thing! 5.6L V8, 4wd, rear dvd, towing capacity is great, and I don't feel like a nerd driving it.
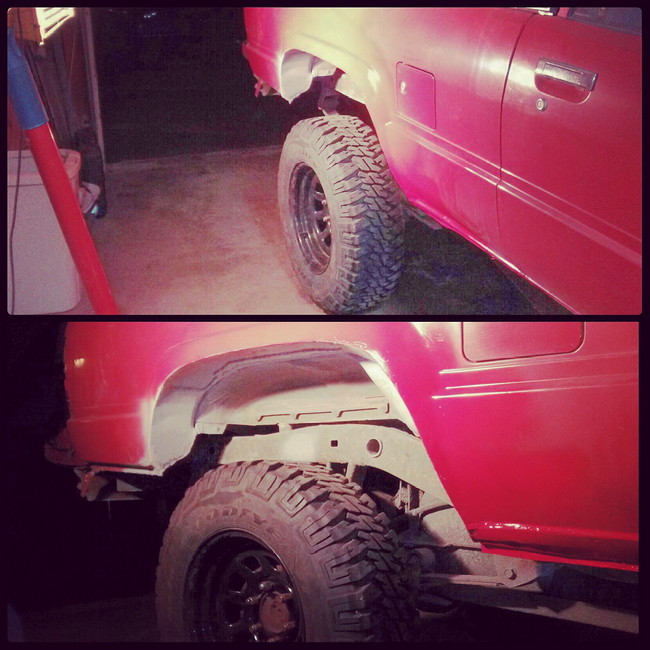
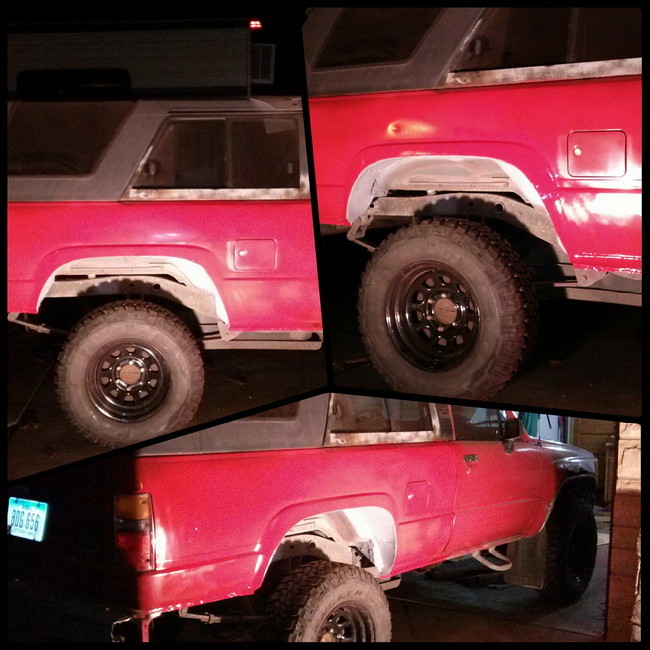
And another pic update of the drivers rear fender. Getting so close! Top right u can see just how little Bondo is needed for this method of fender trimming.
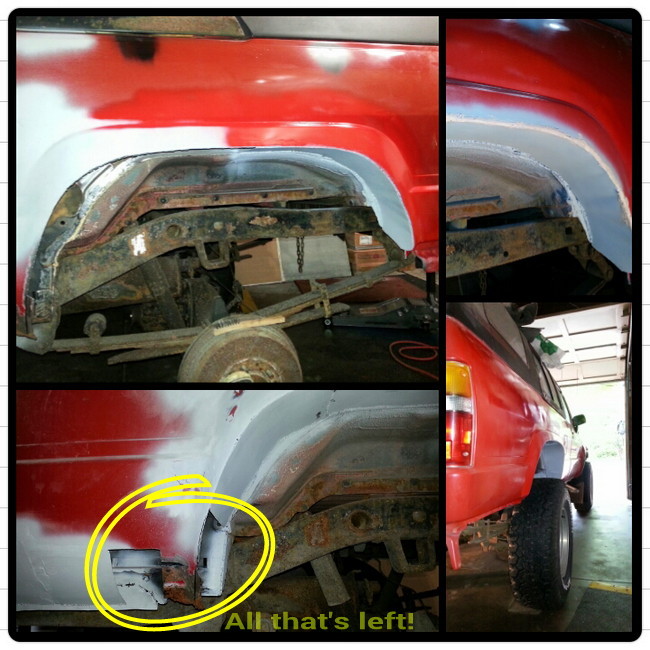
Bottom right is of the pass side. With 31's I have 9.25" from tire to fender.
Didn't I say this was gonna be a slow build? I think I did....

2005 Nissan Armada. Traded our Mitsubishi in because we needed 3rd row seats for all the kids my wife will be watching this summer, plus our own. I love this thing! 5.6L V8, 4wd, rear dvd, towing capacity is great, and I don't feel like a nerd driving it.
And another pic update of the drivers rear fender. Getting so close! Top right u can see just how little Bondo is needed for this method of fender trimming.

Bottom right is of the pass side. With 31's I have 9.25" from tire to fender.
Didn't I say this was gonna be a slow build? I think I did....
Last edited by crashburnoveride; May 26, 2015 at 06:48 PM.
Jun 3, 2015 | 08:18 AM
#36
Thread Starter
Registered User
Joined: Dec 2012
Posts: 613
Likes: 33
From: Lincoln, NE
So I'm thinking of reorganizing my priorities for this build. I'm almost done with the rear body work, and was then going to assemble the motor. But the one in it still runs. Slow, but it runs. Now I'm thinking of spending my money on getting the sas done, then gears, then tires, dual case... etc, and only getting to the motor when the current one dies. What do u guys think? What would you do?

 Jun 3, 2015 | 11:09 PM
#37
I think it's a good plan. Especially since you can still drive it right now.
Keep building it at your leisure like i did, while addressing other aspects of your build.
Then when you are ready, drop the engine in.
Keep building it at your leisure like i did, while addressing other aspects of your build.
Then when you are ready, drop the engine in.
So I'm thinking of reorganizing my priorities for this build. I'm almost done with the rear body work, and was then going to assemble the motor. But the one in it still runs. Slow, but it runs. Now I'm thinking of spending my money on getting the sas done, then gears, then tires, dual case... etc, and only getting to the motor when the current one dies. What do u guys think? What would you do?

Jun 7, 2015 | 04:00 AM
#38
Thread Starter
Registered User
Joined: Dec 2012
Posts: 613
Likes: 33
From: Lincoln, NE
 Jun 7, 2015 | 07:08 PM
#39
Thread Starter
Registered User
Joined: Dec 2012
Posts: 613
Likes: 33
From: Lincoln, NE
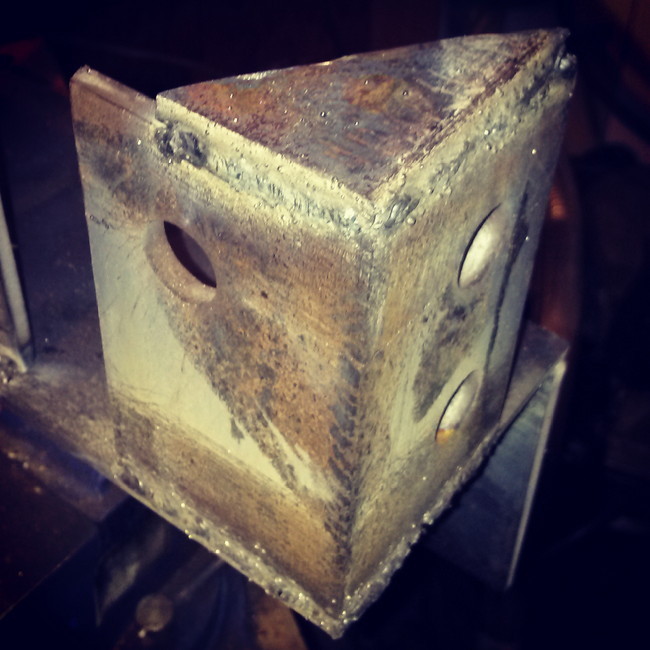
I knew there was a hole in the floorboard on the drivers side, but damn.
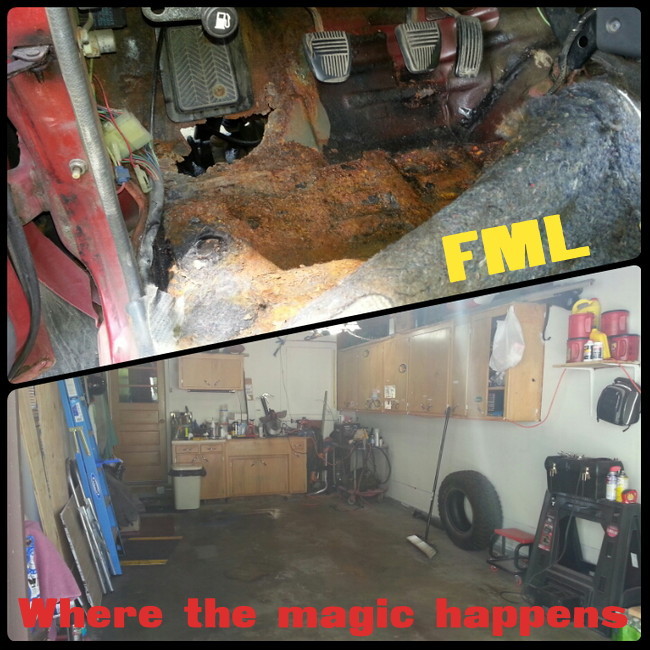
Lotsa rust as well. And my tiny one stall garage Im working in. This next pic is a bumper that is similar to the one I'm building. The 2 outer hitches weld onto the frame rails. My bumper will have angled corners not just square at the edges.
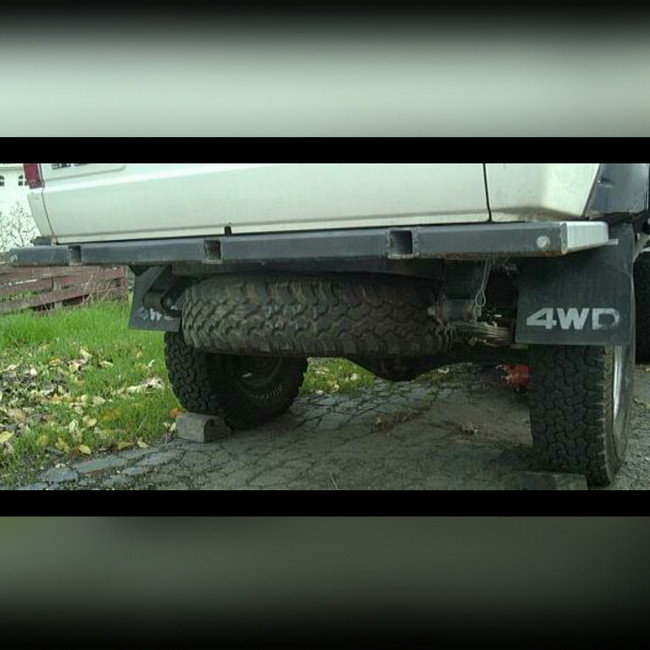
Took a long time but got the 1" body lift installed today. It perfectly allows the side hitches to weld to the bottom of the frame and the door still opens.

I'll probably cut on the green line and box it in to allow for the shackle to move. I'm kind of sick of body work so I'm excited to fab this bumper up. Hope y'all had a good weekend.
Jun 11, 2015 | 07:48 AM
#40
Thread Starter
Registered User
Joined: Dec 2012
Posts: 613
Likes: 33
From: Lincoln, NE
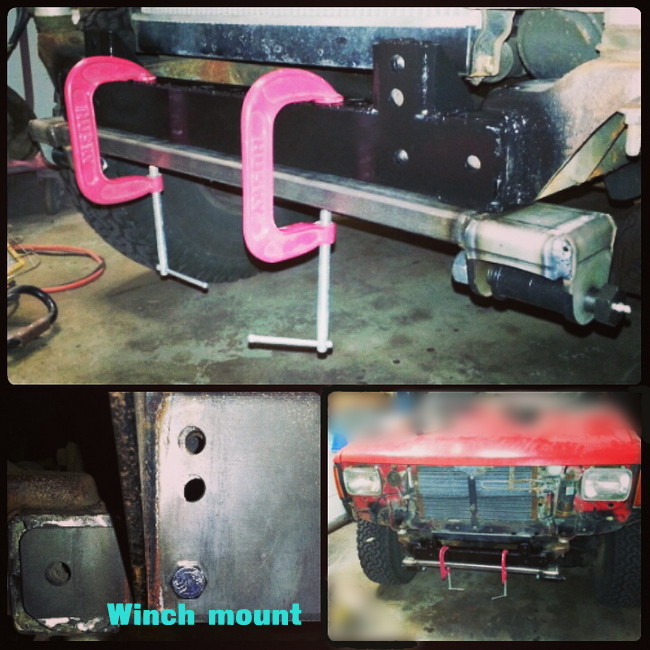
Yesterday I had some fun. Welded on the front frame brace.
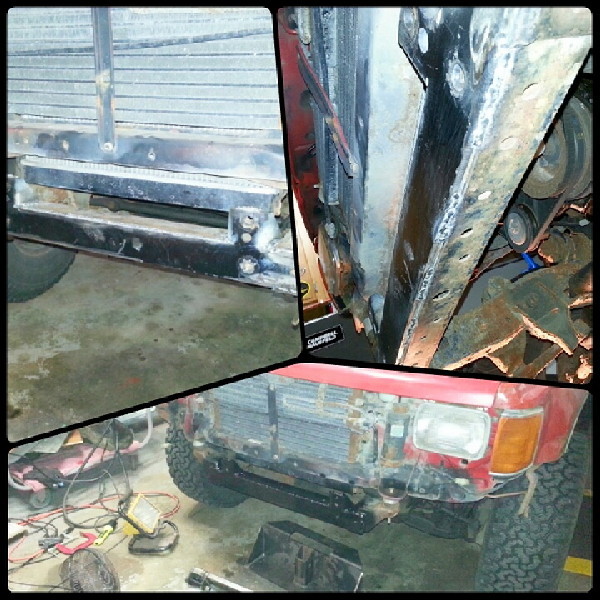
I think my wire speed was too high. Still getting a feel for it. I was mocking things up and the winch mount doesn't line up on the upper passenger side frame holes. (Pictured) So that's lame. Lines up fine everywhere else. So I guess I'll just weld the whole bumper to the Frame.
I read using RUF in a sas moves the axle forward 2 inches from stock. And if I wanna go further forward I can achieve that with spring perches so I will probably weld my hanger either flush with the front crossmember or 1/4" forward. Getting away from the body work fealt great!!
Also wanna say I got my front hanger and knuckle rebuild kit from Allpro Offroad and was very pleased with their service! I spent 170 bucks on parts and shipping was going to be seperate for each item and 30 extra dollars, but I emailed them to ask if they'd waive shipping since I'm spending a good amount. And they did! So yah. Happy.

I think my wire speed was too high. Still getting a feel for it. I was mocking things up and the winch mount doesn't line up on the upper passenger side frame holes. (Pictured) So that's lame. Lines up fine everywhere else. So I guess I'll just weld the whole bumper to the Frame.

I read using RUF in a sas moves the axle forward 2 inches from stock. And if I wanna go further forward I can achieve that with spring perches so I will probably weld my hanger either flush with the front crossmember or 1/4" forward. Getting away from the body work fealt great!!
Also wanna say I got my front hanger and knuckle rebuild kit from Allpro Offroad and was very pleased with their service! I spent 170 bucks on parts and shipping was going to be seperate for each item and 30 extra dollars, but I emailed them to ask if they'd waive shipping since I'm spending a good amount. And they did! So yah. Happy.
Last edited by crashburnoveride; Jun 11, 2015 at 07:53 AM.


