
Bump's '90 4Runner Build-Up
 May 19, 2015 | 05:30 PM
#261
Thread Starter
Registered User
Joined: Apr 2013
Posts: 478
Likes: 4
From: Louisiana
Thanks
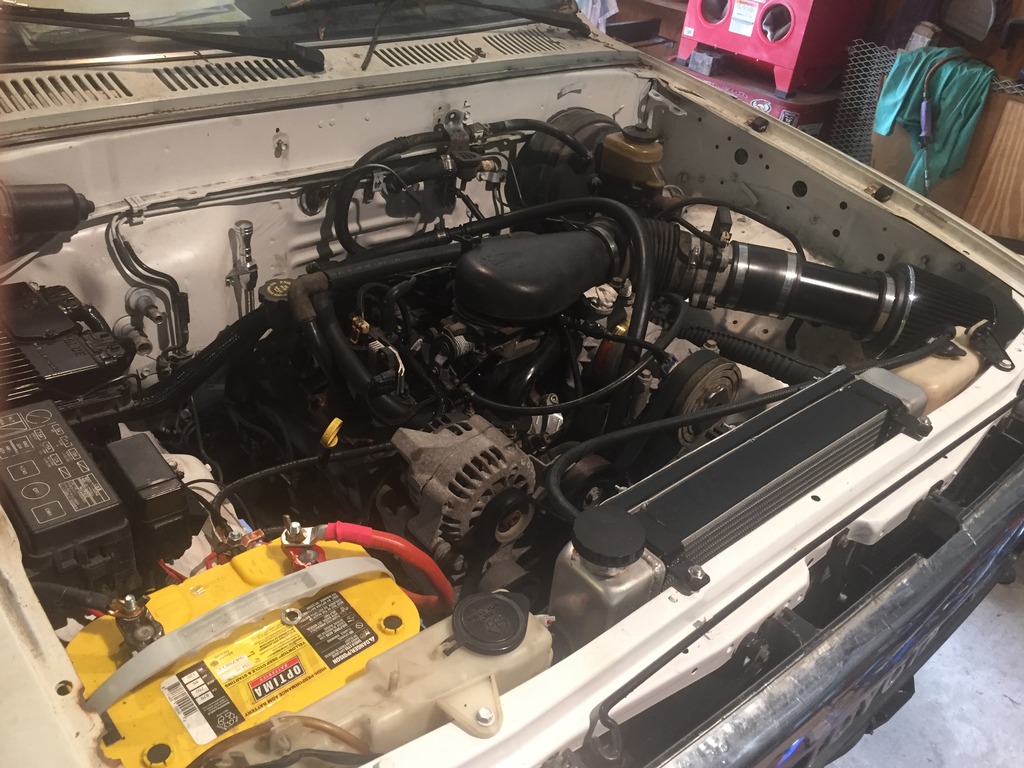
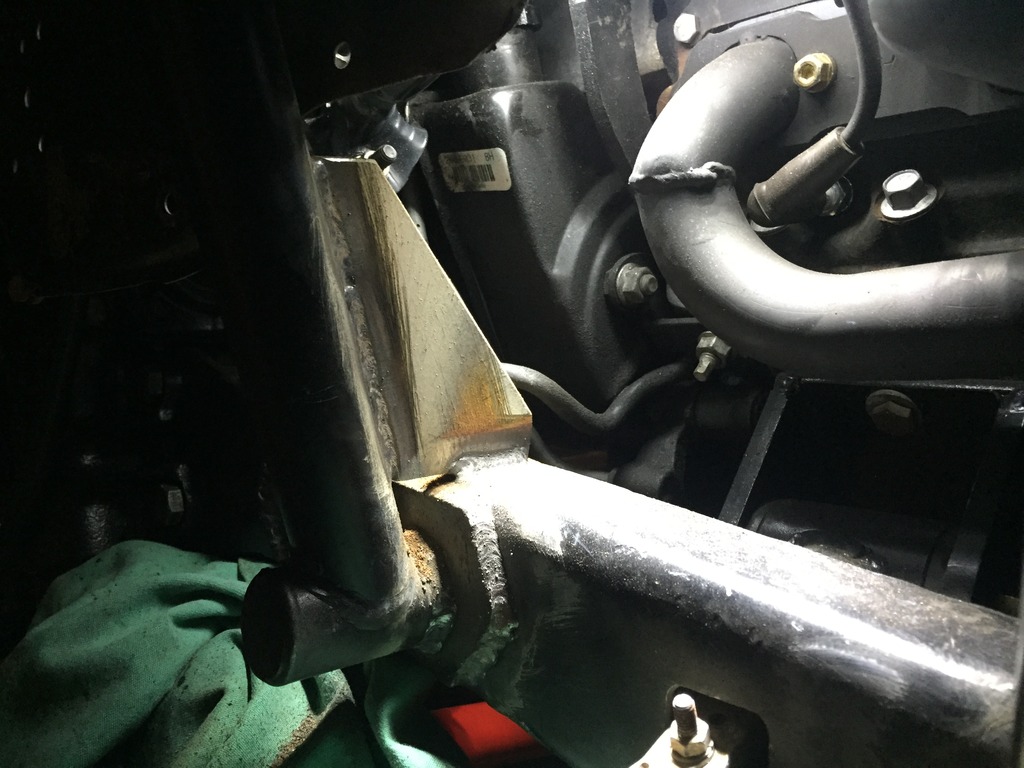
Got a little bit more done. I installed the painted intake and built a support for it. I also installed the Spartan locker and new bearings on the carrier. Just need to pull the bearing off the pinion and I can start putting it back together.
I was supposed to build the driveshaft today but the guy helping me had something else come up. So we are going to try again tomorrow.
Got a little bit more done. I installed the painted intake and built a support for it. I also installed the Spartan locker and new bearings on the carrier. Just need to pull the bearing off the pinion and I can start putting it back together.


I was supposed to build the driveshaft today but the guy helping me had something else come up. So we are going to try again tomorrow.
May 22, 2015 | 05:23 AM
#262
Thread Starter
Registered User
Joined: Apr 2013
Posts: 478
Likes: 4
From: Louisiana
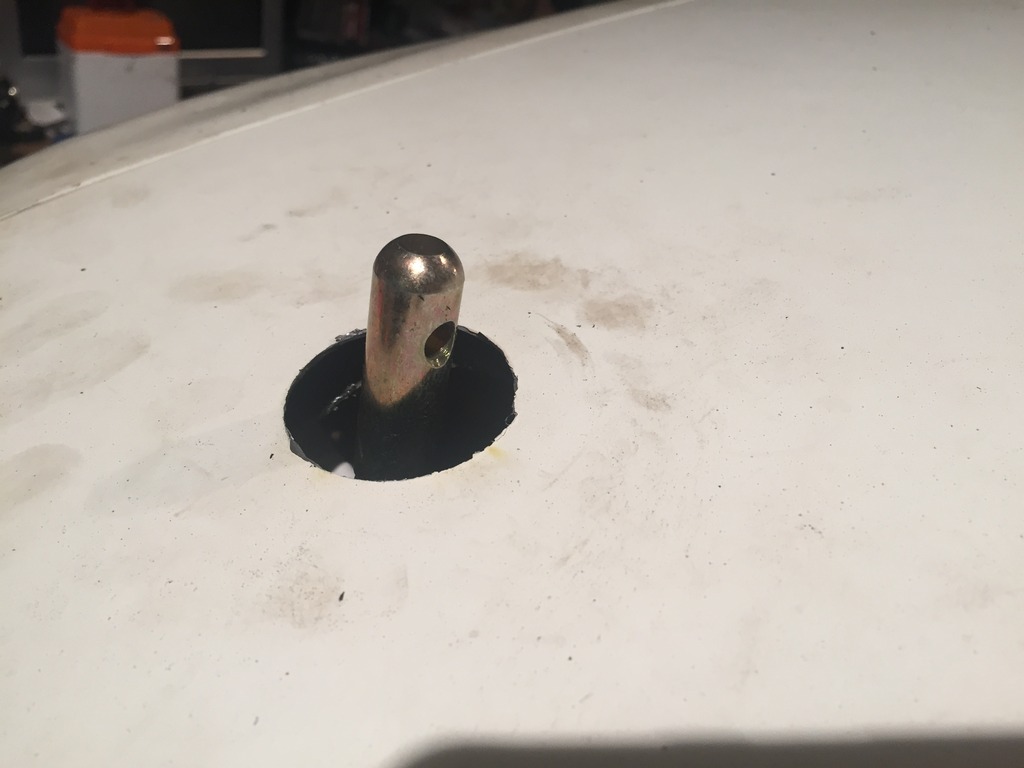
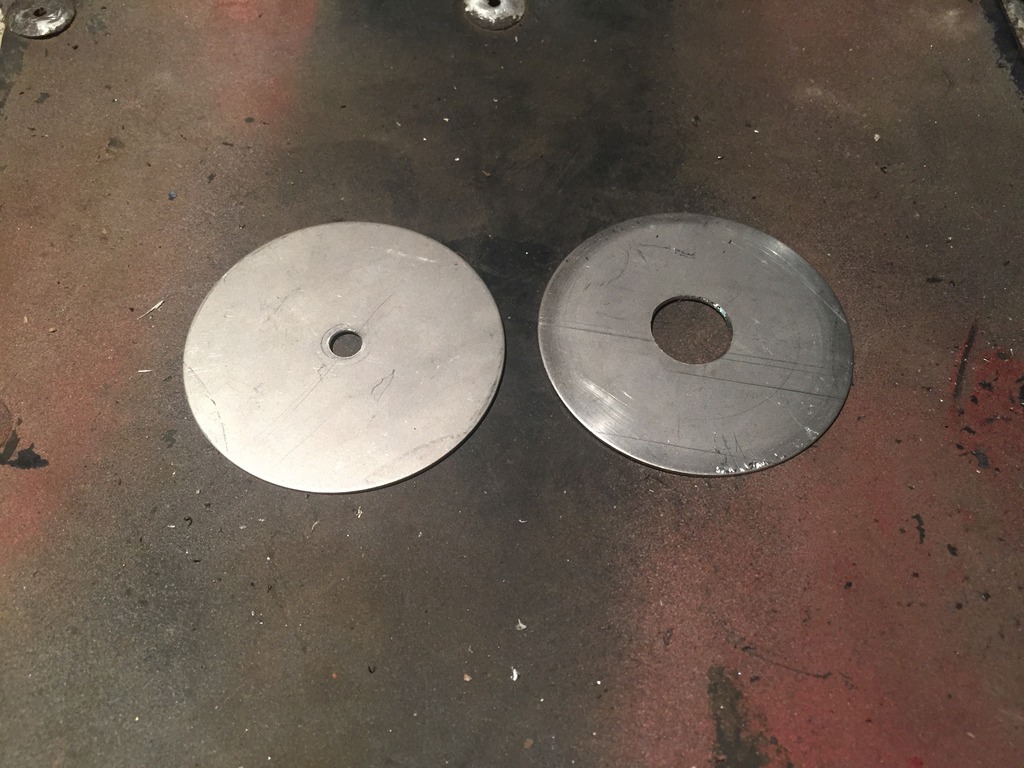
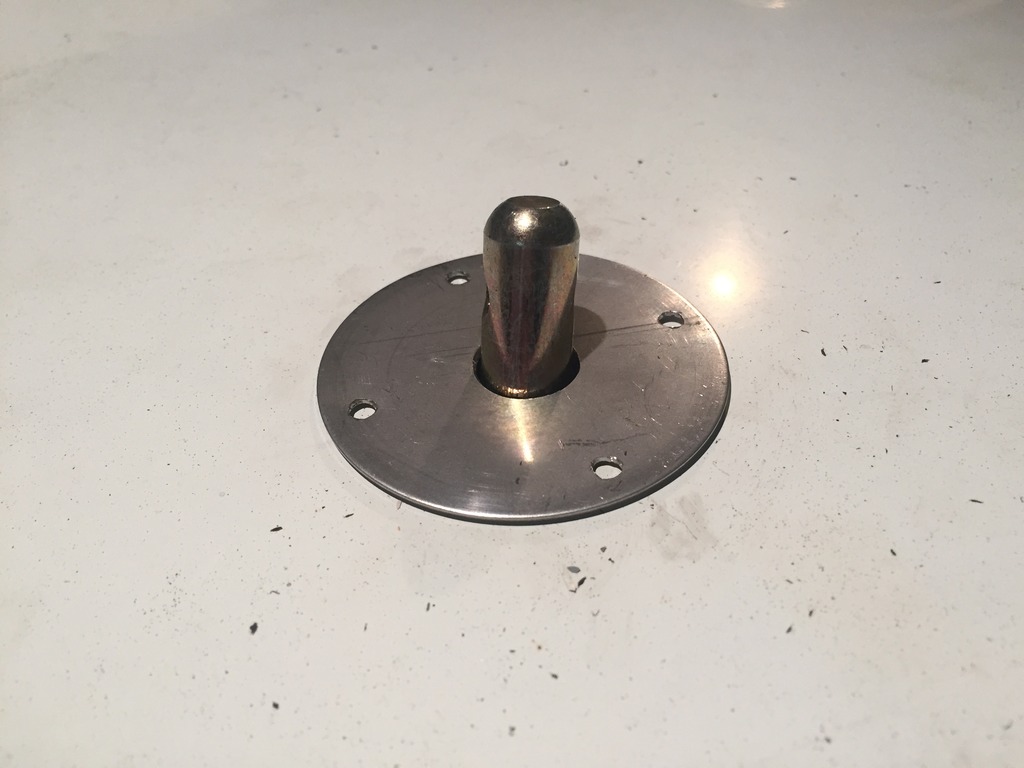
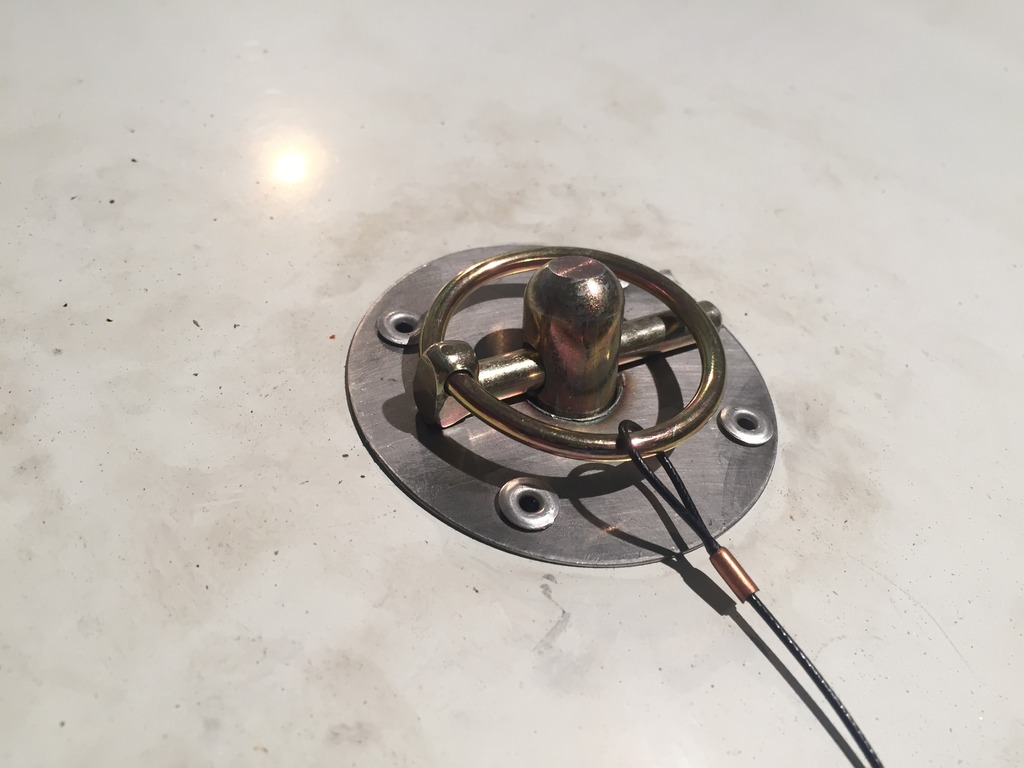
Still no driveshaft, but I did get the hood installed yesterday. I had an issue with my "fancy" hood pins tho. When installing the pins on top of the core support, the pin is straight up and down. BUT...the hood is at an angle. The way the poly bushing is built, that wont work. I was aware that might be an issue before I even bought the hood pins, but I figured I could work thru it. For now, I just found some stainless "washers" of some kind we had laying around the shop and made plates to cover the big holes in my hood and be able to use the pins. Anyways...on to the pics
First I had to clearance the hood some my radiator mounts. So I put some grease on the areas I thought might hit and checked where it was hitting.
The cap wasn't hitting, but the stud sticking up was. So I drilled a hole for clearance (No pic of the hole though).
Then I installed the hood pins in the top of the core support and used the same grease trick to drill holes in the hood for the pins
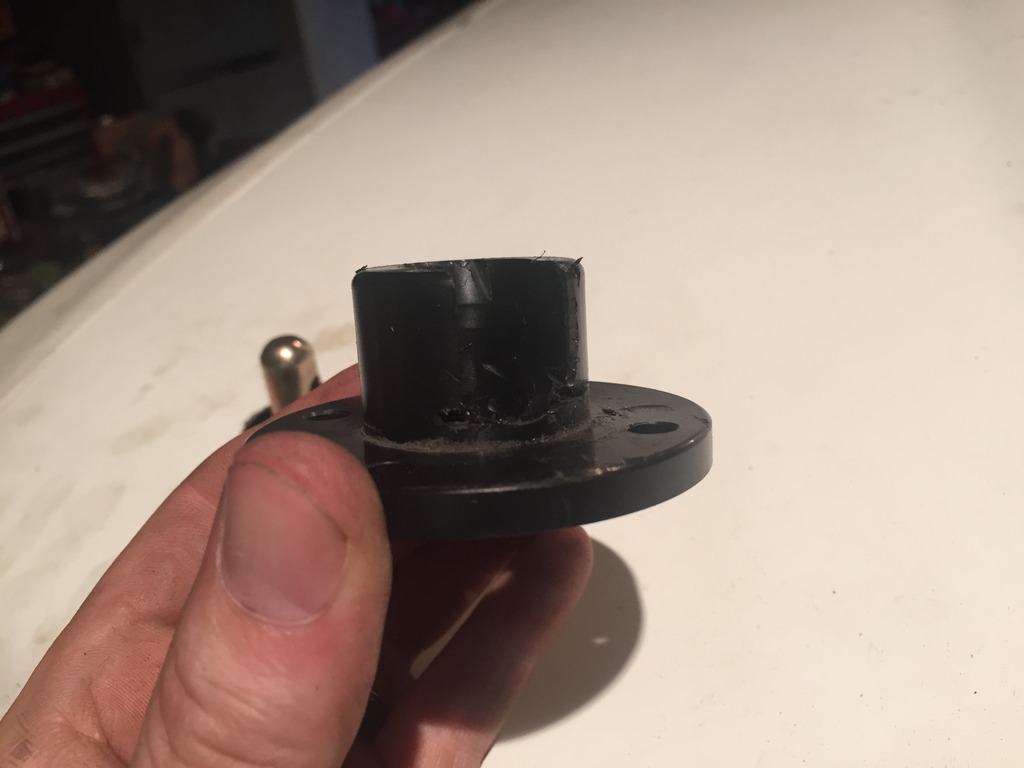
When I tried fitting the bushing, my fears where confirmed...they don't fit.

I even tried notching the bottom side of the bushing, still no fit
So I found some stainless washers laying around and drilled out the holes to fit the pins
Now I just need to drill the small holes in the hood for the rivets and rivet it down.
Before I do that tho, Im gonna try one more idea to try to angle the pin so its perpendicular to the hood so I can use those poly bushings. Maybe it will work lol.
First I had to clearance the hood some my radiator mounts. So I put some grease on the areas I thought might hit and checked where it was hitting.

The cap wasn't hitting, but the stud sticking up was. So I drilled a hole for clearance (No pic of the hole though).

Then I installed the hood pins in the top of the core support and used the same grease trick to drill holes in the hood for the pins

When I tried fitting the bushing, my fears where confirmed...they don't fit.

I even tried notching the bottom side of the bushing, still no fit

So I found some stainless washers laying around and drilled out the holes to fit the pins

Now I just need to drill the small holes in the hood for the rivets and rivet it down.

Before I do that tho, Im gonna try one more idea to try to angle the pin so its perpendicular to the hood so I can use those poly bushings. Maybe it will work lol.
May 26, 2015 | 05:59 AM
#264
Thread Starter
Registered User
Joined: Apr 2013
Posts: 478
Likes: 4
From: Louisiana
I finished the hood pin install.
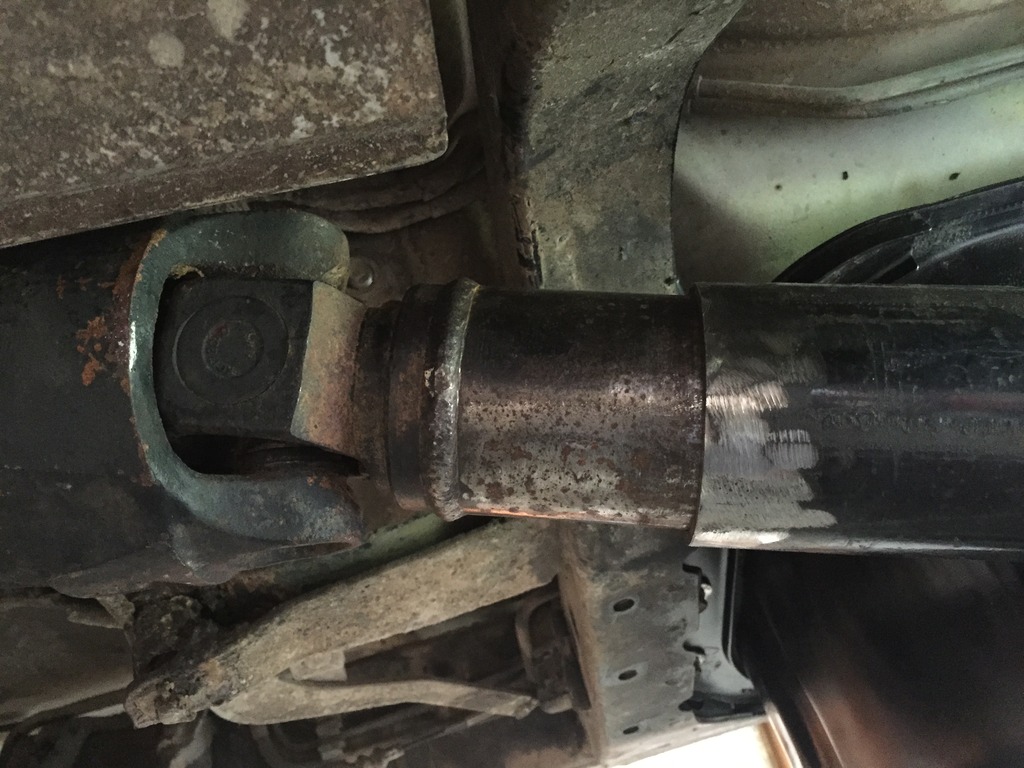
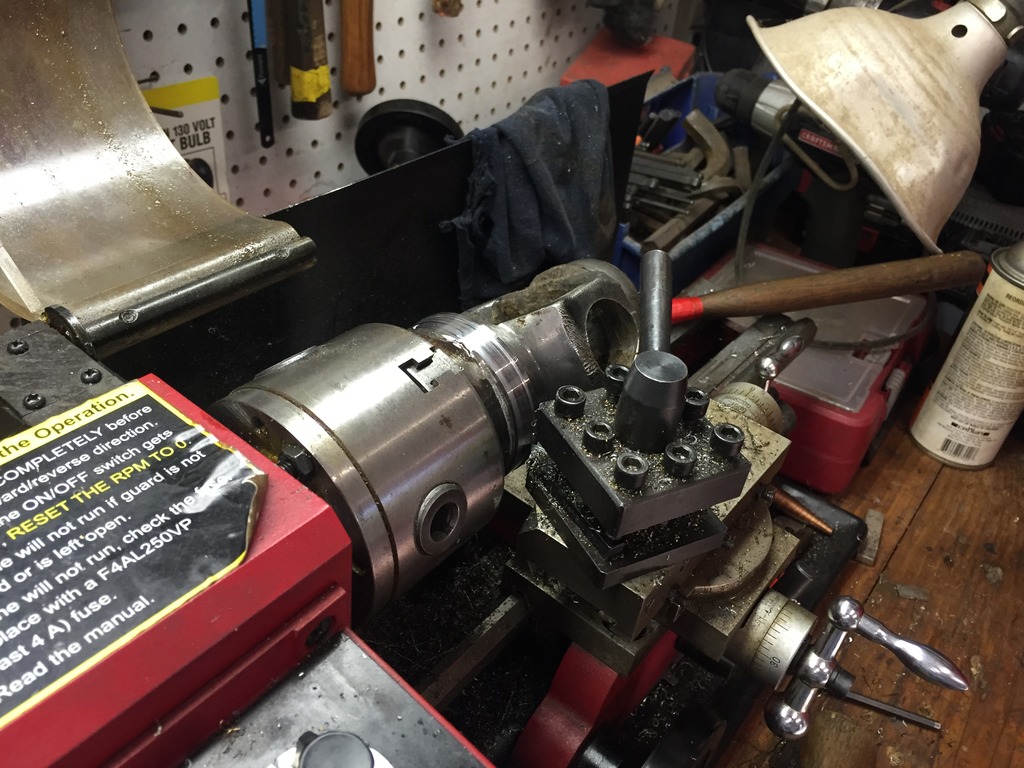
I also got the 2.5 pipe machined for my rear driveshaft, however, he didn't do a very good job and he also cut the pipe way too short. This is how much of the original tube would be sticking out, with only about 0.5" inside of the pipe.
So I decided to try to build a real driveshaft. I cut down the factory rear driveshaft and also cut off the factory CV off the front driveshaft. Im going to take it over to a guys house to get it squared up and welded up. If it vibrates, Ill take it to have it balanced.


I also got the 2.5 pipe machined for my rear driveshaft, however, he didn't do a very good job and he also cut the pipe way too short. This is how much of the original tube would be sticking out, with only about 0.5" inside of the pipe.

So I decided to try to build a real driveshaft. I cut down the factory rear driveshaft and also cut off the factory CV off the front driveshaft. Im going to take it over to a guys house to get it squared up and welded up. If it vibrates, Ill take it to have it balanced.
 May 27, 2015 | 06:10 AM
#265
Thread Starter
Registered User
Joined: Apr 2013
Posts: 478
Likes: 4
From: Louisiana
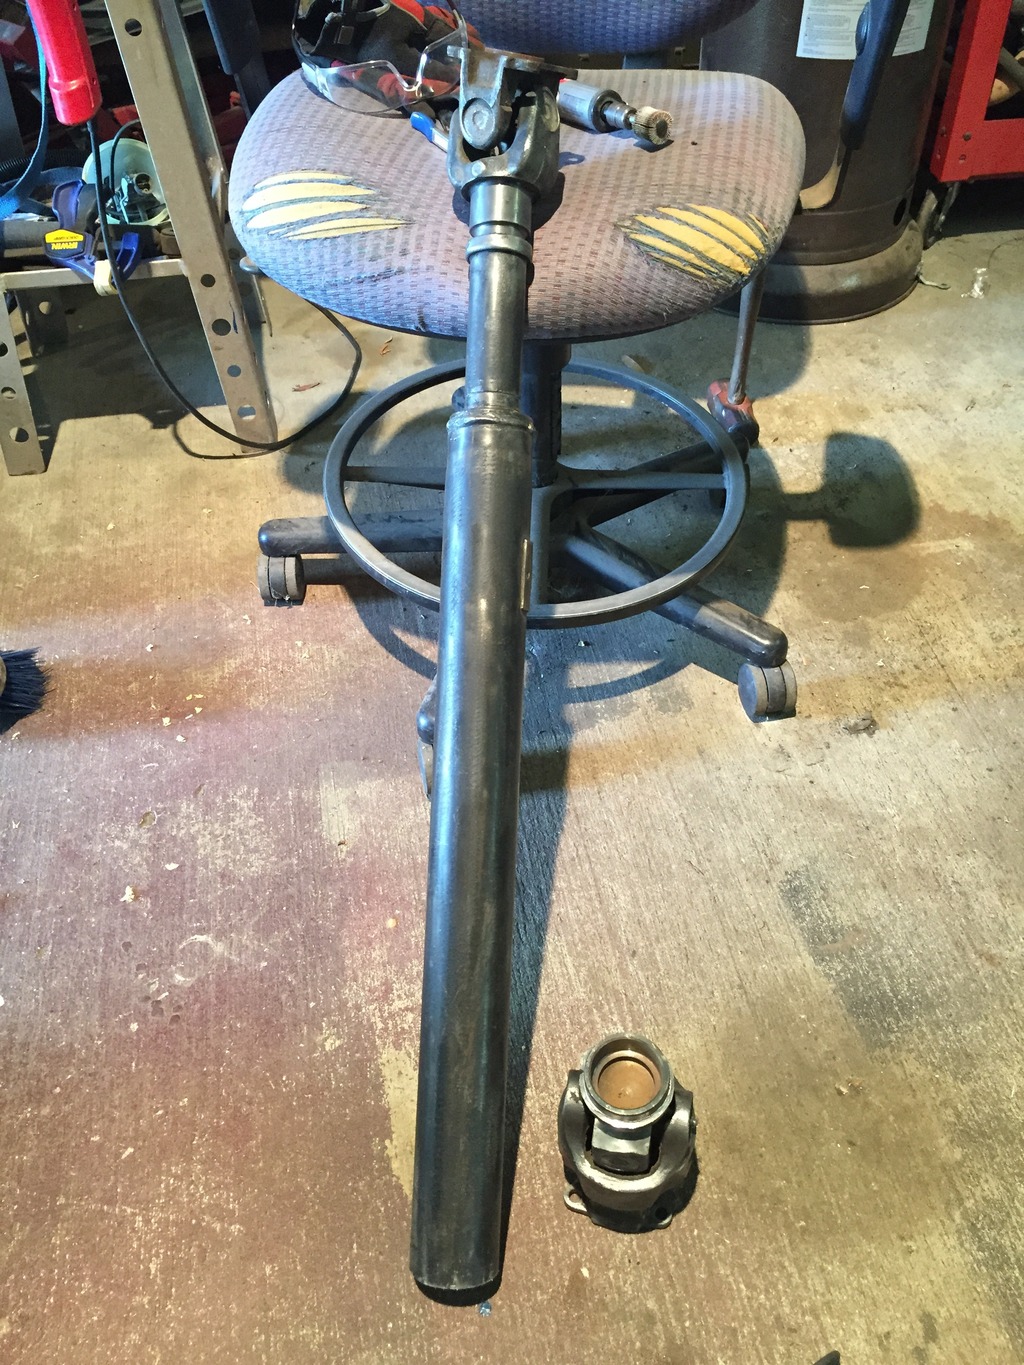
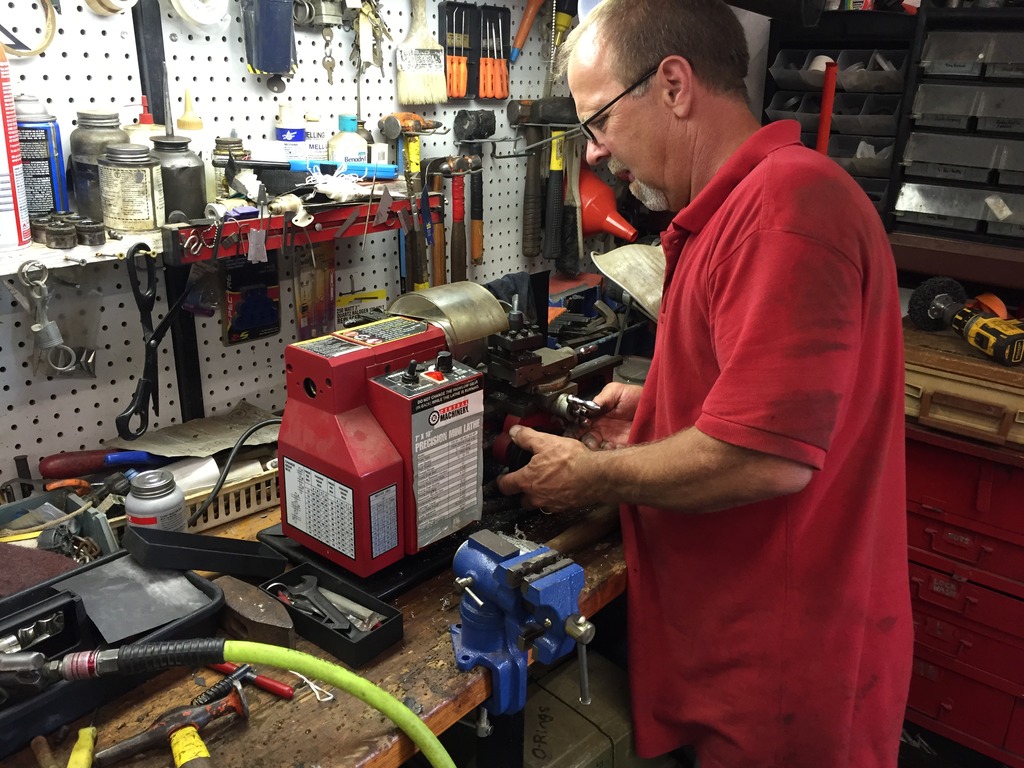
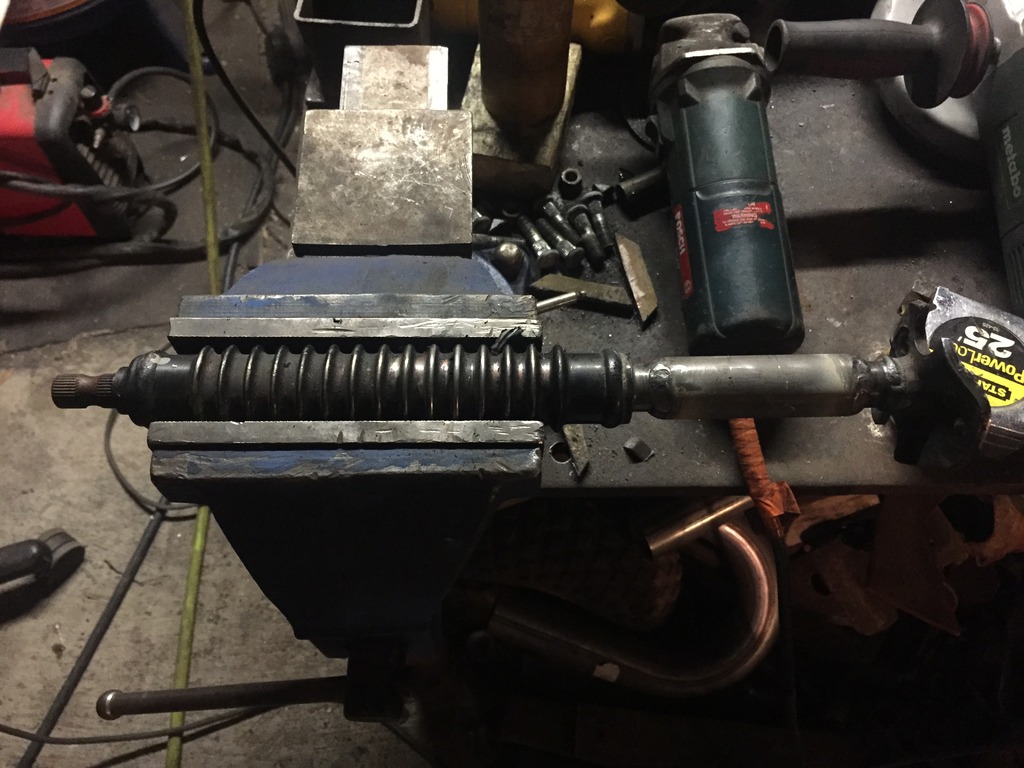
Well I finally made some progress on my rear driveshaft. We ended up taking the CV joint apart and putting it in a lathe to cut the shoulder down to fit inside the driveshaft tube.
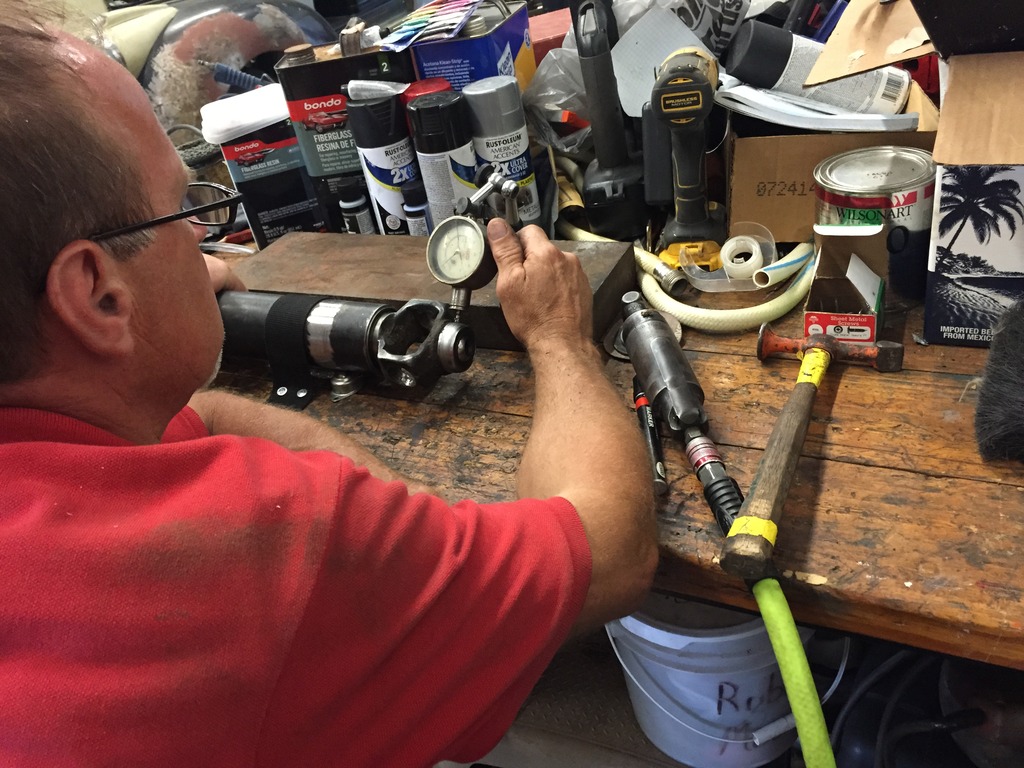
We then set it up so we could put a dial indicator on it to get it as square as possible. Ended up getting it with about .005.
After that we welded it up. I still need to put the CV back together. Im thinking I may clearance it to give me some more angle too. I plan on doing that this evening.


We then set it up so we could put a dial indicator on it to get it as square as possible. Ended up getting it with about .005.

After that we welded it up. I still need to put the CV back together. Im thinking I may clearance it to give me some more angle too. I plan on doing that this evening.
May 29, 2015 | 04:15 AM
#267
Thread Starter
Registered User
Joined: Apr 2013
Posts: 478
Likes: 4
From: Louisiana
May 29, 2015 | 04:23 AM
#268
Thread Starter
Registered User
Joined: Apr 2013
Posts: 478
Likes: 4
From: Louisiana
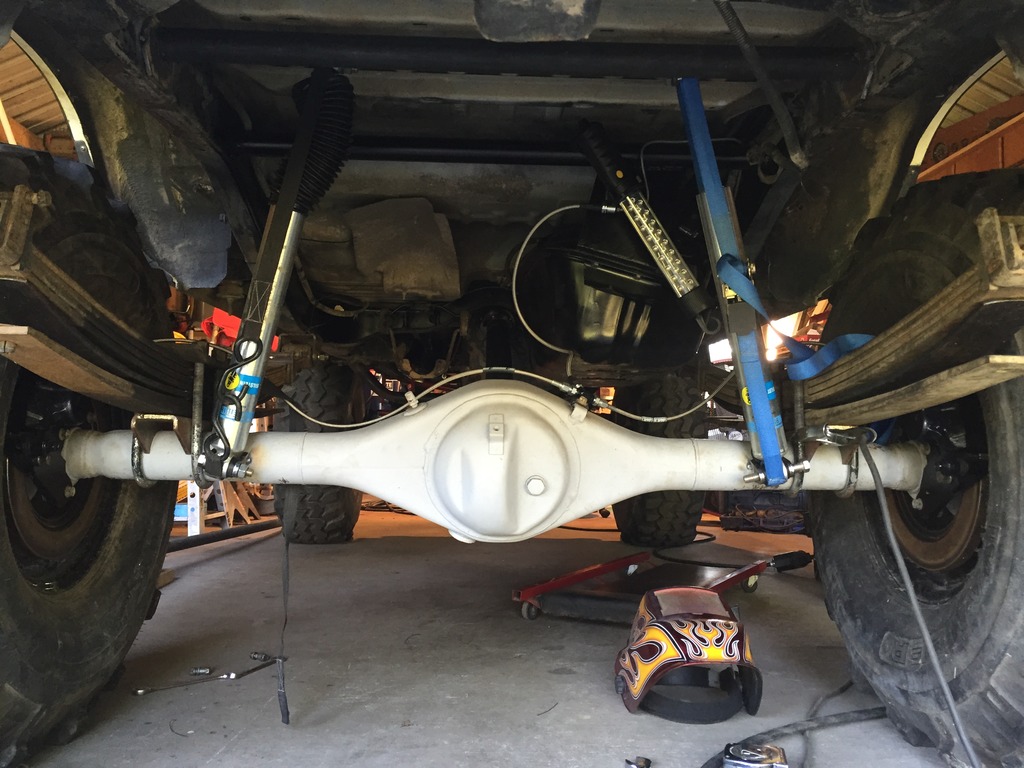
Well here is a couple pics of my driveshaft.
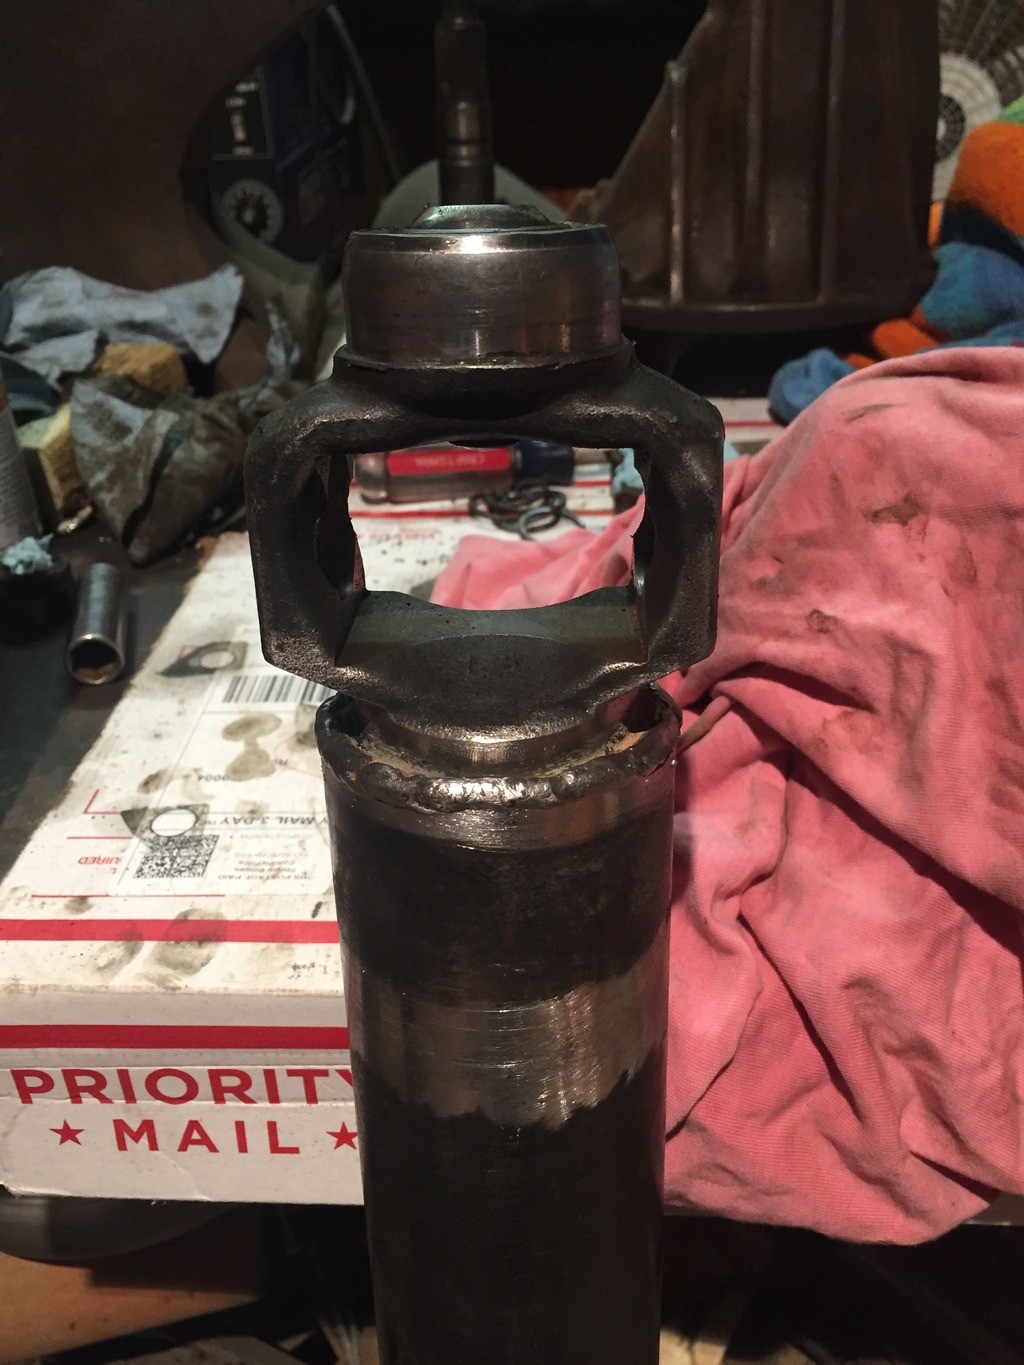

It just needs some paint now. Ill do that when I pull the rear end back out to weld it up and paint it. After I got the driveshaft installed, I set my pinion angle and put some pretty good tack welds on the spring perches. Then I did this (don't pay attention to my dad's commentary lol)...

I also made a lap around the yard just to do it. Now its time to get the streetable. First up will be getting the rear 3rd member back together and getting rear shock mounts built. Im hoping to start knocking this stuff out quickly.


It just needs some paint now. Ill do that when I pull the rear end back out to weld it up and paint it. After I got the driveshaft installed, I set my pinion angle and put some pretty good tack welds on the spring perches. Then I did this (don't pay attention to my dad's commentary lol)...
I also made a lap around the yard just to do it. Now its time to get the streetable. First up will be getting the rear 3rd member back together and getting rear shock mounts built. Im hoping to start knocking this stuff out quickly.
Jun 7, 2015 | 02:11 PM
#269
Thread Starter
Registered User
Joined: Apr 2013
Posts: 478
Likes: 4
From: Louisiana
Well some more progress has been made.
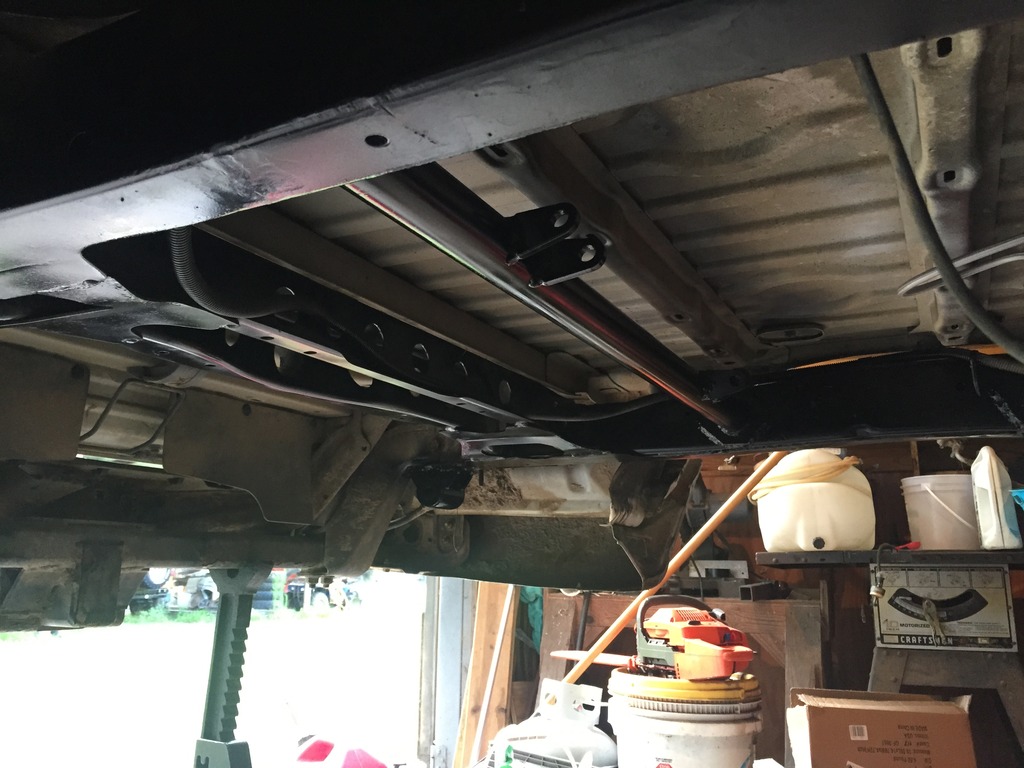
Read shock mounts are done. Just need paint
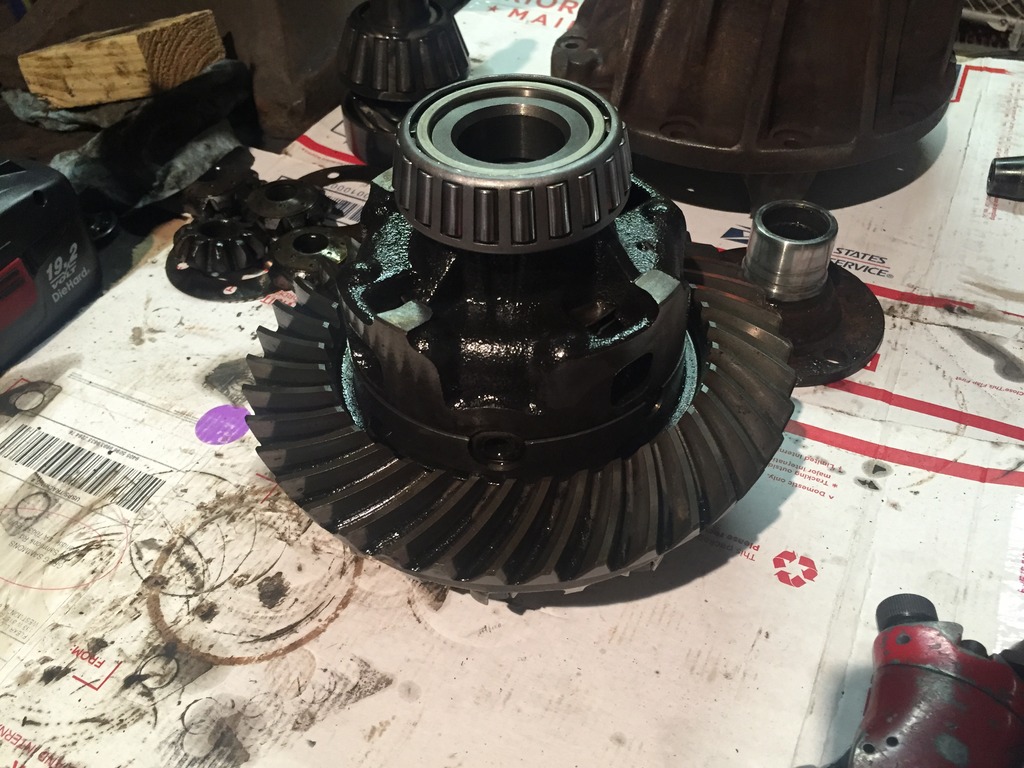
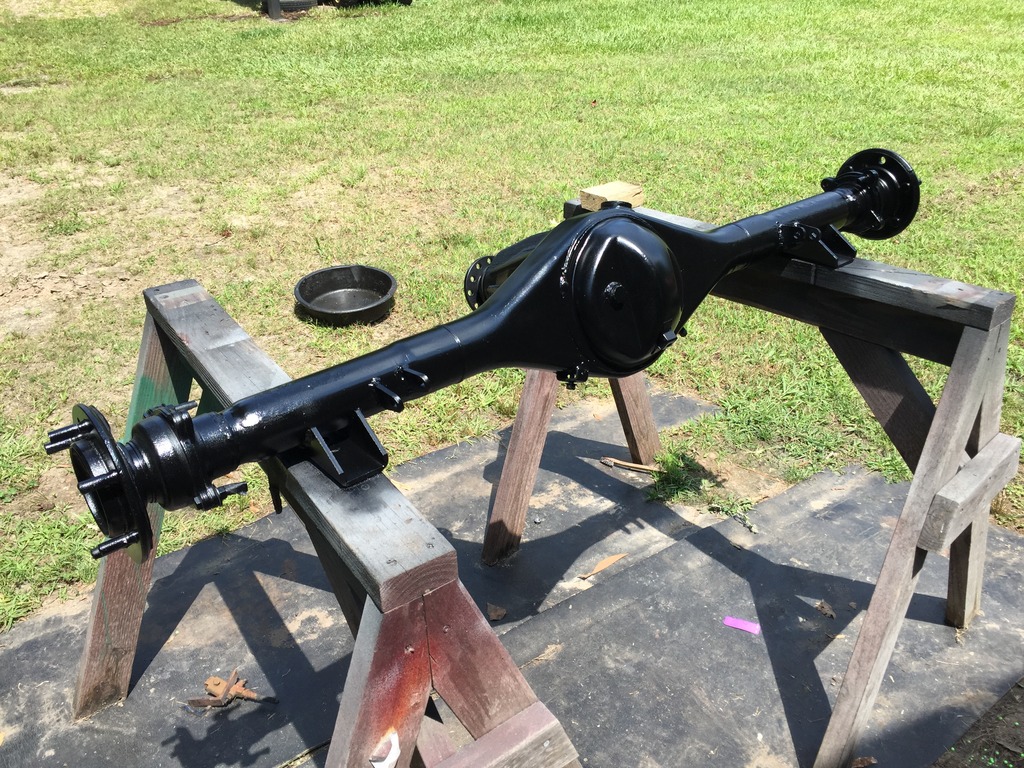
Rear third member is rebuilt, installed and the axle is painted
I didn't get as much done as I would have liked this weekend. That's mainly due to rear wheel bearings. When I pulled the axles out to install the third member I found out both rear bearings were bad. I spent better part of Saturday chasing parts and learnings the tricks of replacing the bearings lol
I'm about to order some parts. I'm getting closer to getting it road worthy
Read shock mounts are done. Just need paint


Rear third member is rebuilt, installed and the axle is painted

I didn't get as much done as I would have liked this weekend. That's mainly due to rear wheel bearings. When I pulled the axles out to install the third member I found out both rear bearings were bad. I spent better part of Saturday chasing parts and learnings the tricks of replacing the bearings lol
I'm about to order some parts. I'm getting closer to getting it road worthy
Jun 8, 2015 | 07:27 AM
#271
Thread Starter
Registered User
Joined: Apr 2013
Posts: 478
Likes: 4
From: Louisiana
Well I just placed an order for some rear pro comp shocks, TG battery box, u-bolts, and tcase ouput flange. Hopefully all that will be here by the end of the week so Ill have some more parts to throw at it next weekend lol.
I also forgot to mention earlier that I didn't clearance the CV joint when I had it apart. I thought since it was going on the rear it wouldn't need to be but I was wrong lol. So now I have to take it back apart to clearance it.
Jun 18, 2015 | 10:03 AM
#272
Thread Starter
Registered User
Joined: Apr 2013
Posts: 478
Likes: 4
From: Louisiana
So Im still making progress, slowly but surely...
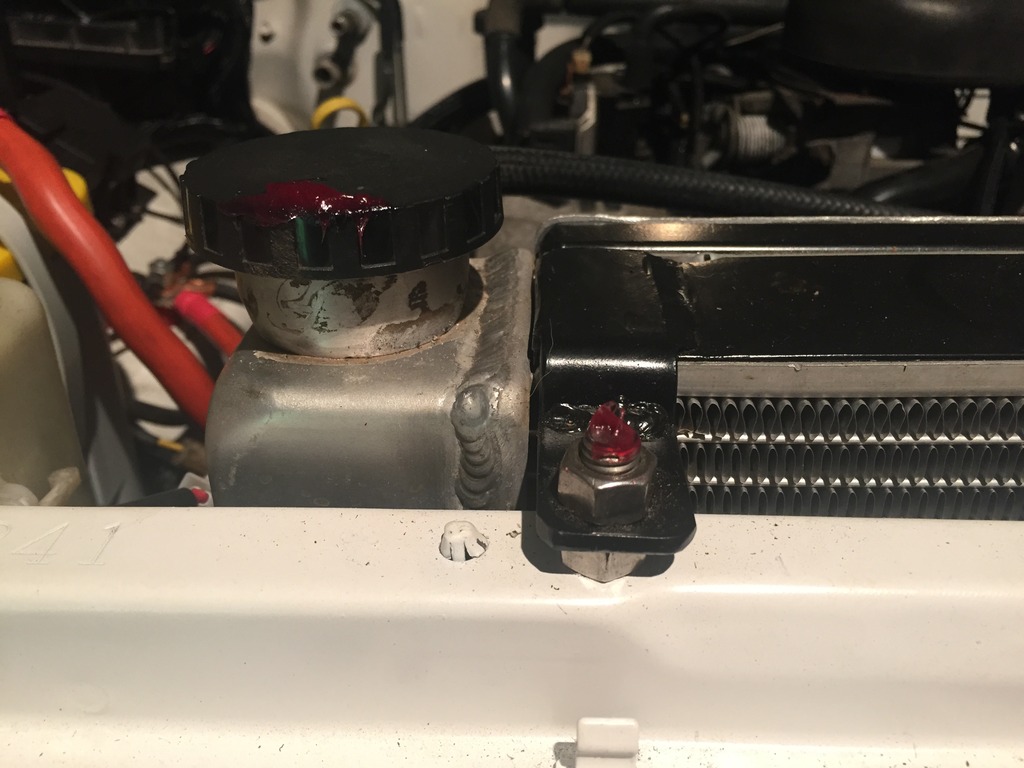
Did some painting and got the rear end installed with new shocks. The shocks are 12" travel pro comps. They measure about the same as the 12" bilsteins from TG. I did have to pushing the bolt sleeve out of them and use a piece of 3/4"x.120 DOM tho.
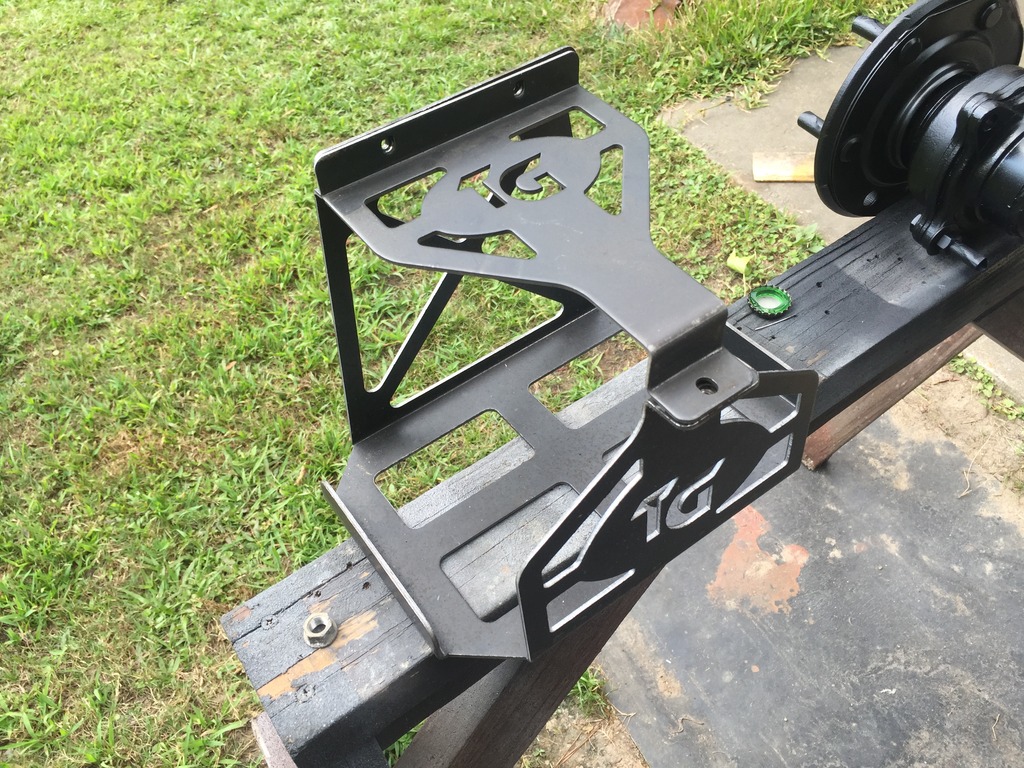
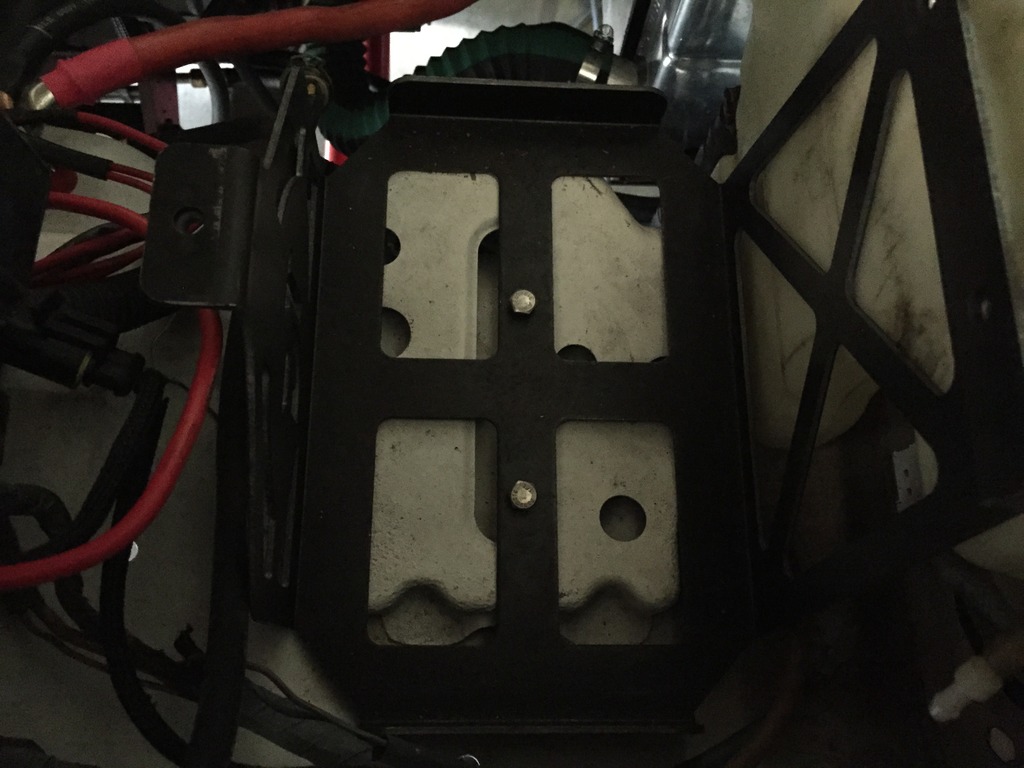
I decided to bolt the TG battery box in (not painted in the pics)
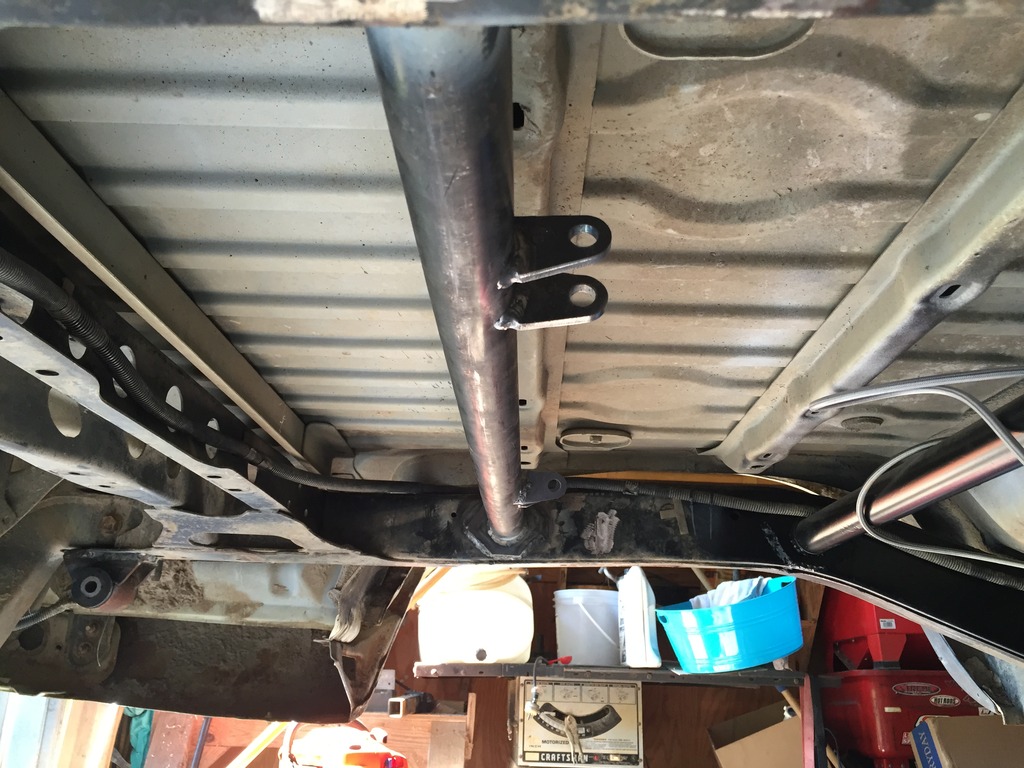
I also extended my steering shaft with a piece of 1"x.120 DOM
Weather permitting (the 4runner is parked outside right now), Ill install the drive shaft, steering shaft, and battery box this evening and flex the front end to see where to set my bump stops at. Hoping by the end of the weekend, the only major thing Ill have left before I can drive it down the road is exhaust. My goal is to drive this thing to work on my bday (july 1) so Im trying to get this stuff knocked out lol.
Did some painting and got the rear end installed with new shocks. The shocks are 12" travel pro comps. They measure about the same as the 12" bilsteins from TG. I did have to pushing the bolt sleeve out of them and use a piece of 3/4"x.120 DOM tho.


I decided to bolt the TG battery box in (not painted in the pics)


I also extended my steering shaft with a piece of 1"x.120 DOM

Weather permitting (the 4runner is parked outside right now), Ill install the drive shaft, steering shaft, and battery box this evening and flex the front end to see where to set my bump stops at. Hoping by the end of the weekend, the only major thing Ill have left before I can drive it down the road is exhaust. My goal is to drive this thing to work on my bday (july 1) so Im trying to get this stuff knocked out lol.
Jun 19, 2015 | 10:56 AM
#273
Thread Starter
Registered User
Joined: Apr 2013
Posts: 478
Likes: 4
From: Louisiana
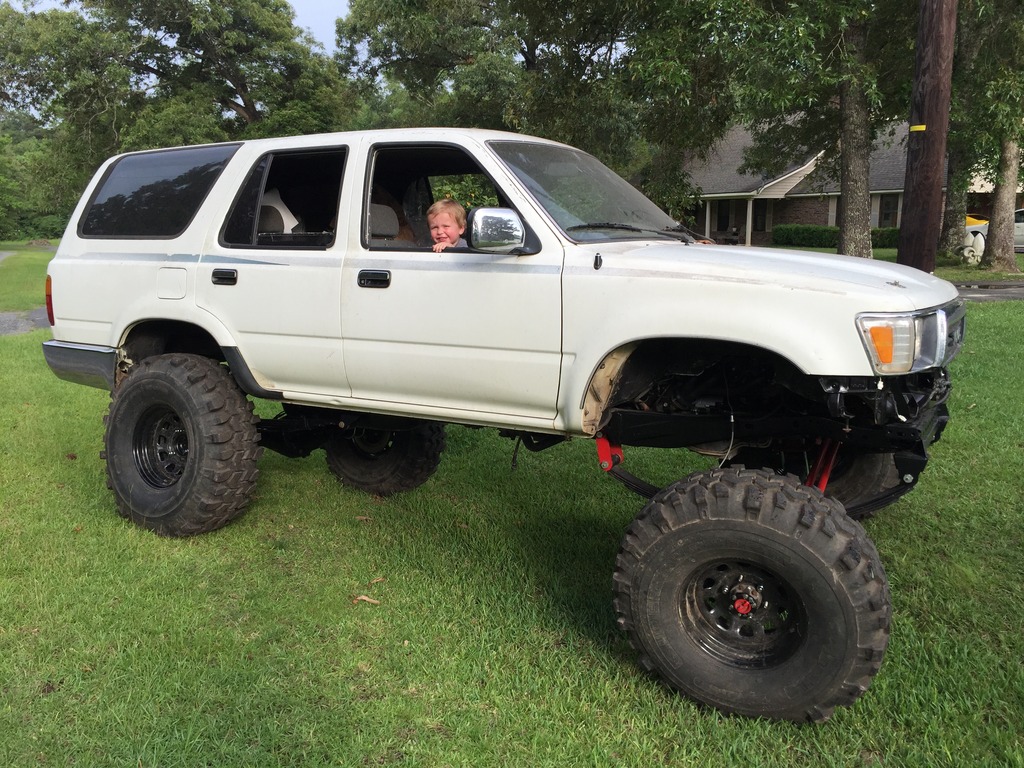
Did a little flex testing in the biggest ditch around my house lol. Not quite big enough to fully flex out the suspension, but my 2 year old had a blast lol
Ive got a pretty good leak on one of my hydro-assist plugs on the steering box, just needs a little Teflon tape and itll be good to go. Front shock hoops and bump stop pads go on this weekend between everything else I have going on lol


Ive got a pretty good leak on one of my hydro-assist plugs on the steering box, just needs a little Teflon tape and itll be good to go. Front shock hoops and bump stop pads go on this weekend between everything else I have going on lol
Jun 20, 2015 | 05:31 AM
#276
Thread Starter
Registered User
Joined: Apr 2013
Posts: 478
Likes: 4
From: Louisiana
Jun 21, 2015 | 12:00 PM
#278
Thread Starter
Registered User
Joined: Apr 2013
Posts: 478
Likes: 4
From: Louisiana
Jun 22, 2015 | 07:19 PM
#279
Thread Starter
Registered User
Joined: Apr 2013
Posts: 478
Likes: 4
From: Louisiana
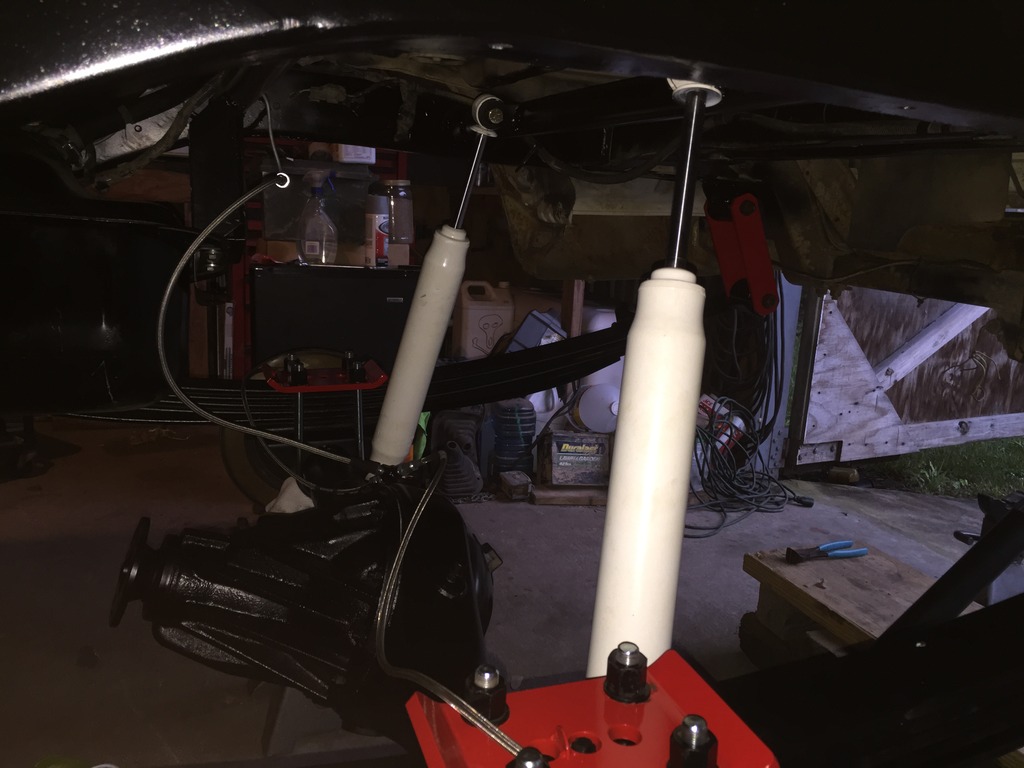
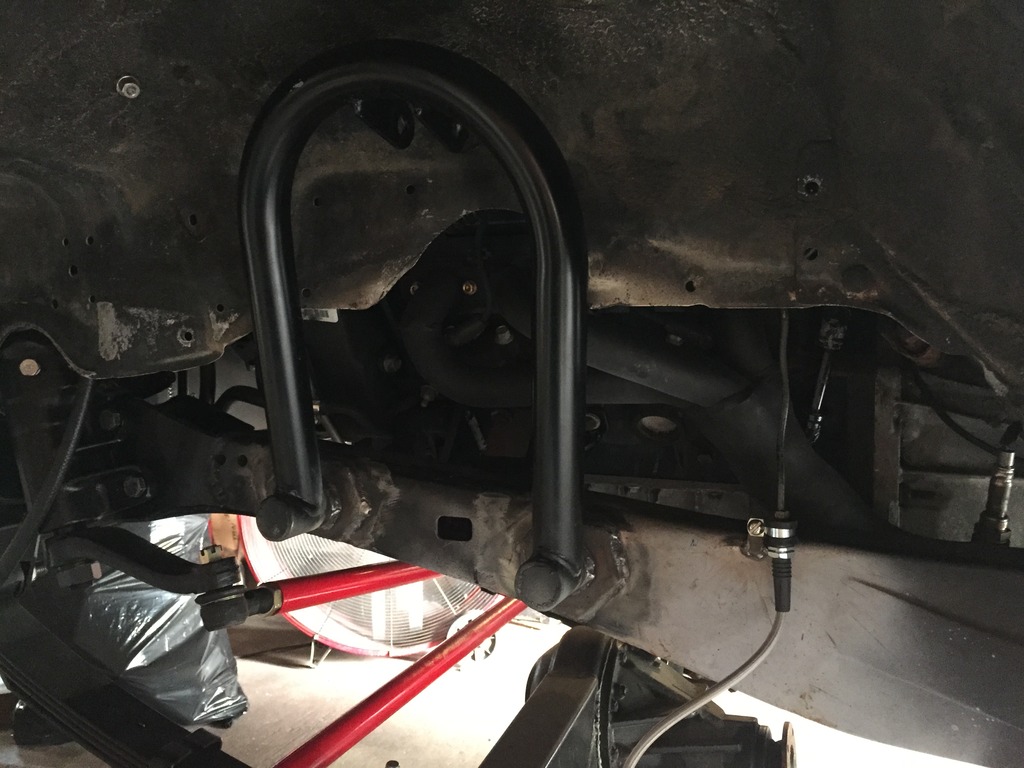
Finally made some progress on the front shock mounts tonight. I got the driver side welded up. I plated the frame with 1/4" plate and used the same stuff to build gussets for the hoops. I felt this were easier to get a better weld than the tubes supplied with the TG kit. I also welded a small tab to the frame to use a cushion clamp to secure the brake line. Tomorrow I'll knock out the passenger side.
The light in my shop sucks right now. The light over the front of the 4Runner blew out and I can't get up there to change it until I move the 4Runner lol.


The light in my shop sucks right now. The light over the front of the 4Runner blew out and I can't get up there to change it until I move the 4Runner lol.
Jul 1, 2015 | 06:09 AM
#280
Thread Starter
Registered User
Joined: Apr 2013
Posts: 478
Likes: 4
From: Louisiana
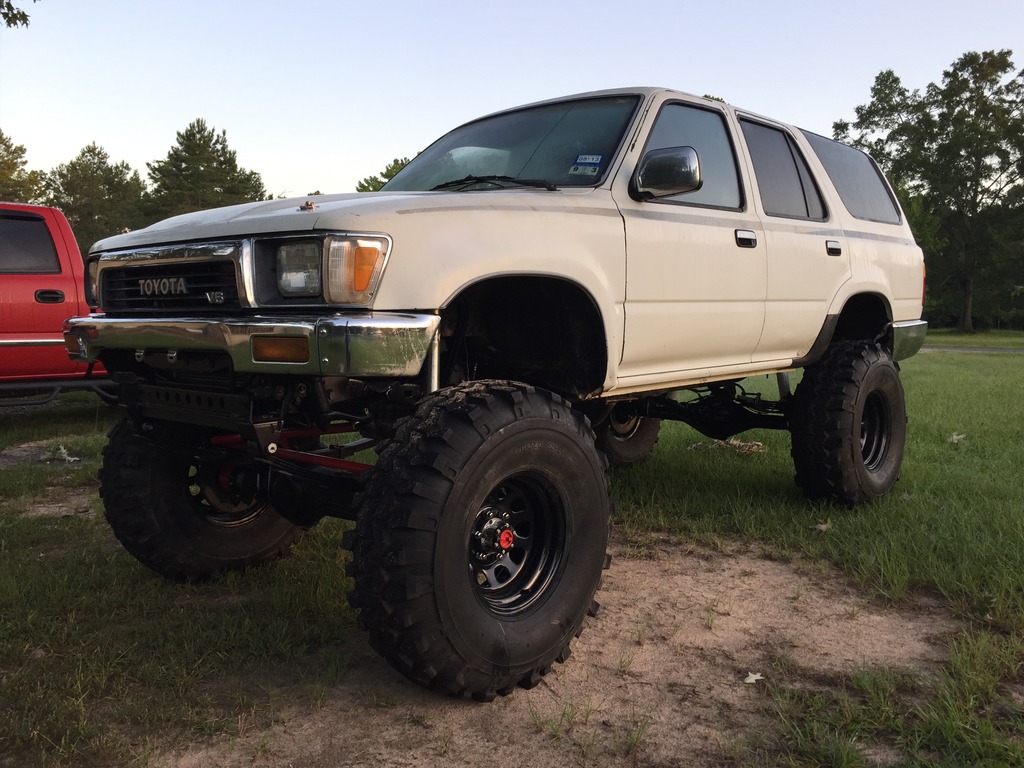
Well my plan was to have it driveable for today and I almost made it. Made my first real test drive yesterday and discovered that the trans doesn't seem to have 2nd or 4th gear. Not real sure what Im going to do about that yet. Im tempted to just pull it and have a shop go thru it.
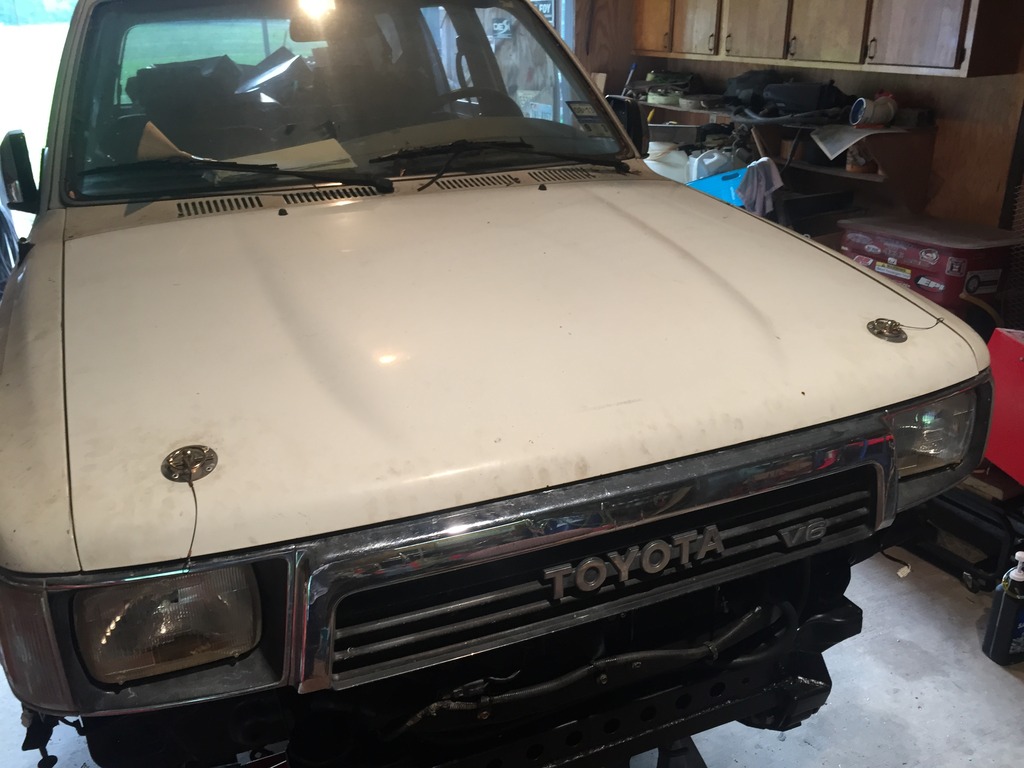
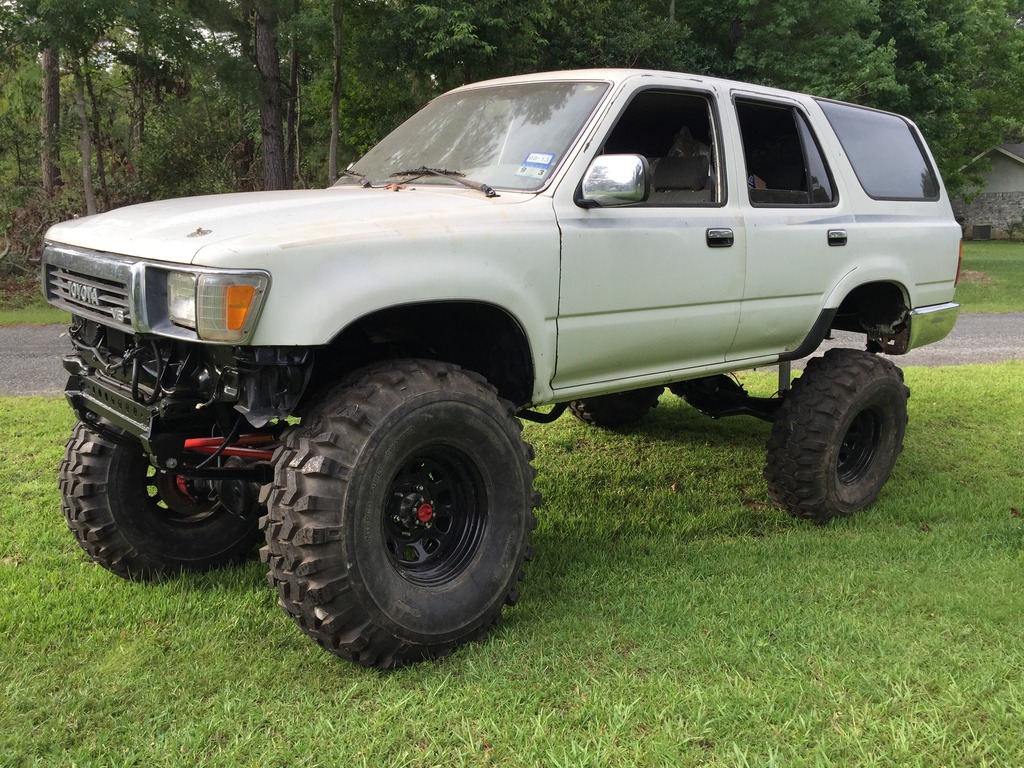
I took a pic of it this morning. I had planned to drive it to work today for my 30th bday lol.
I took a pic of it this morning. I had planned to drive it to work today for my 30th bday lol.


