
Bump's '90 4Runner Build-Up
 Dec 1, 2014 | 06:35 PM
#182
Thread Starter
Registered User
Joined: Apr 2013
Posts: 478
Likes: 4
From: Louisiana
Yea I had the old toyota fuel pump and some tools wrapped in a old tshirt. Apparently when I was doing some very small tack welds on the bench on the gas tank crossmember, a small peice of slag burnt the shirt and caught the pump on fire.
I was mocking the crossmember up under the 4runner and I heard the sound of a fire taking off lol. A little water took care of it.
I was mocking the crossmember up under the 4runner and I heard the sound of a fire taking off lol. A little water took care of it.
Dec 2, 2014 | 11:28 AM
#183
Thread Starter
Registered User
Joined: Apr 2013
Posts: 478
Likes: 4
From: Louisiana
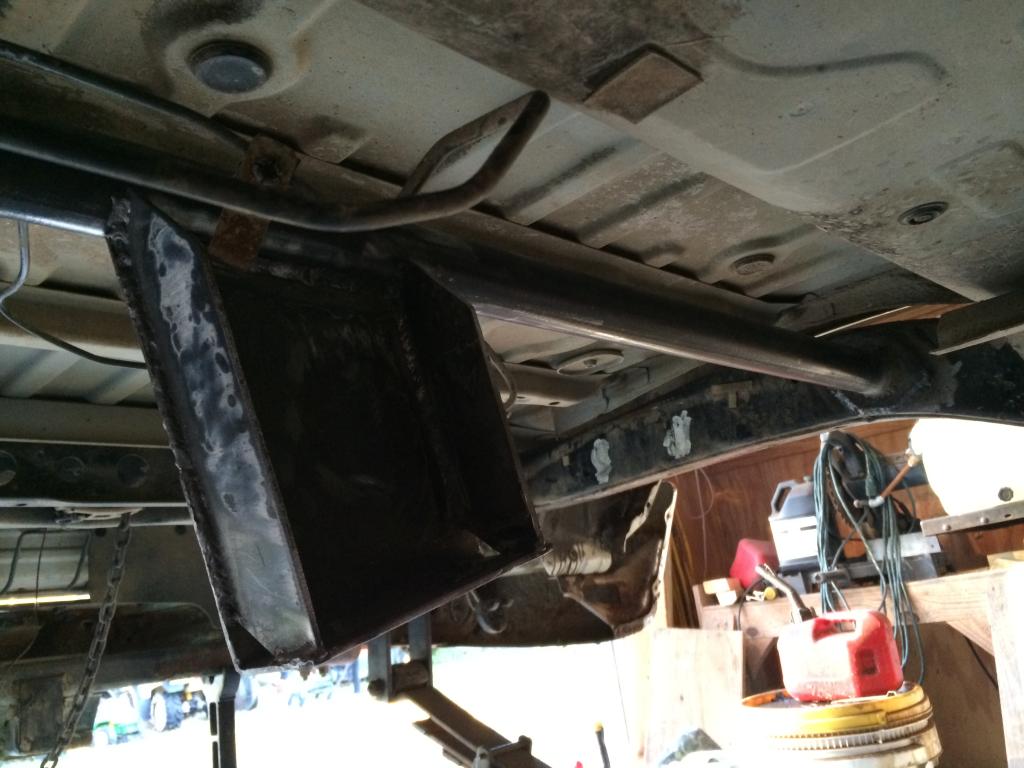
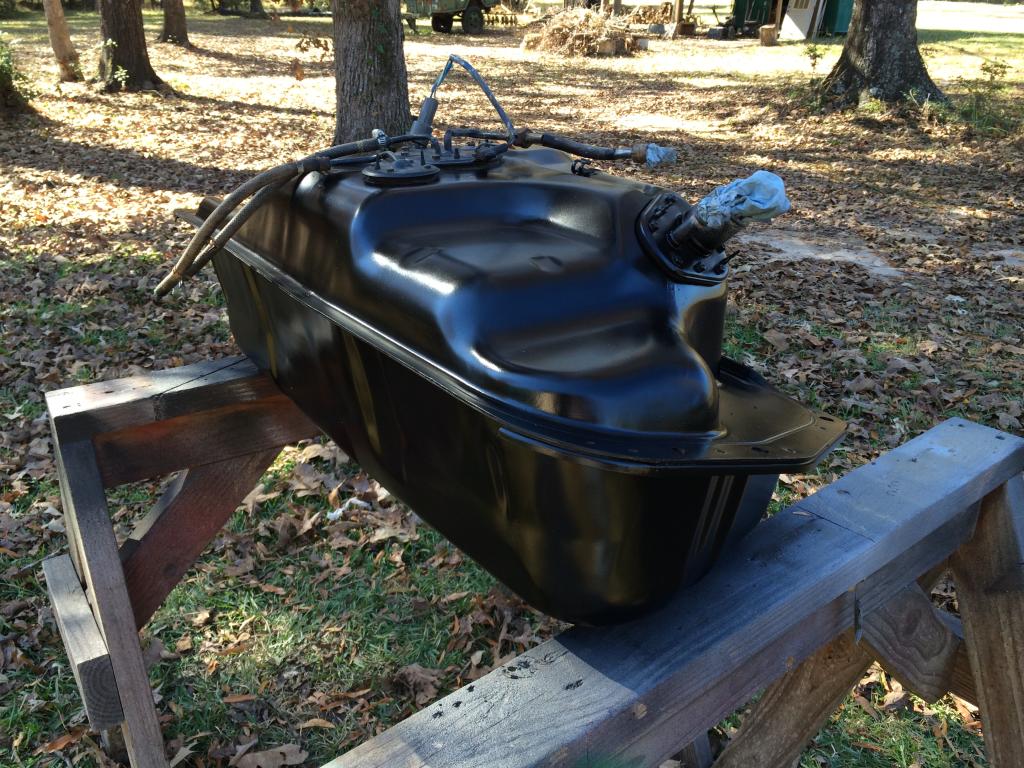
I did manage to get some done over thanksgiving. I built the crossmember/gas tank mount, painted the gas tank, and got it bolted back up. I also moved my rear springs hangers back an inch and fully welded them up.
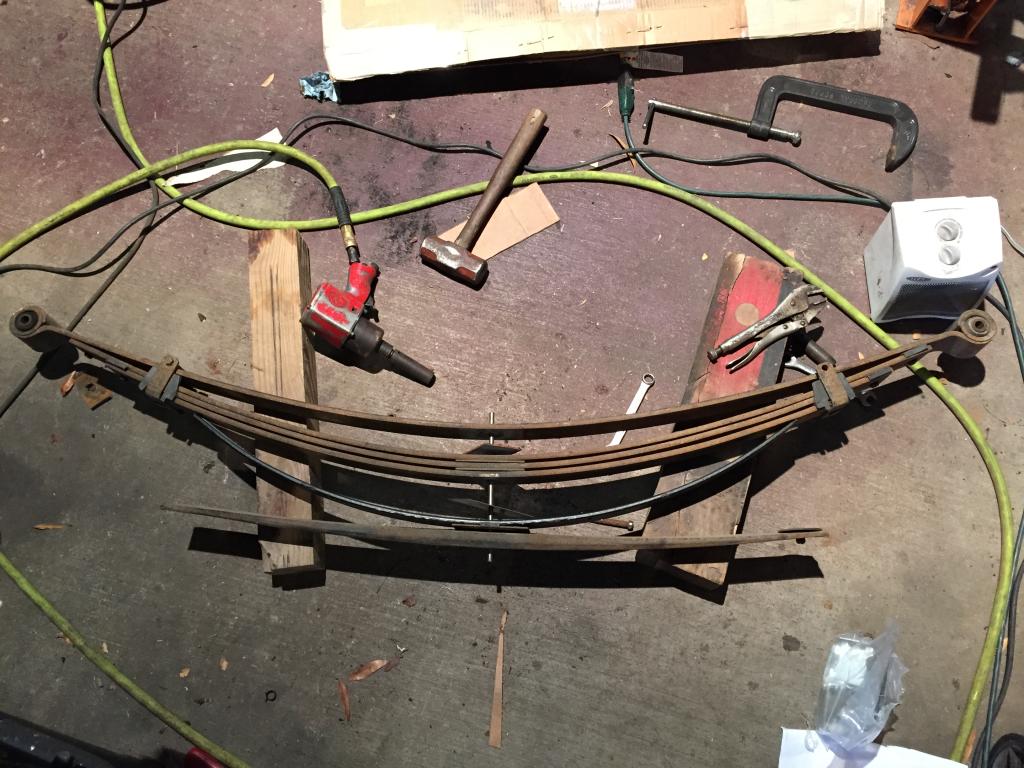
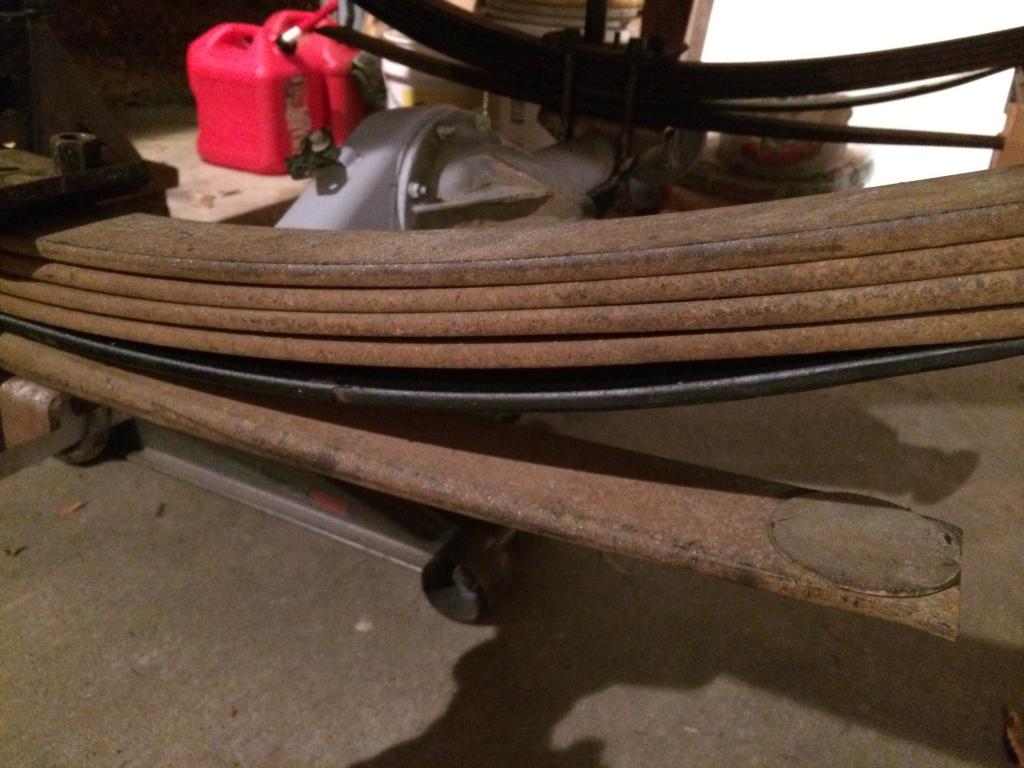
While I had the back on jack stands sitting pretty level with the front, I noticed I had about a 10 degree shackle angle on the front. So I went ahead and installed the AAL for 63s in the back. I still need to paint the springs, but that will come when I paint the axle. I still don't think its tall enough in the back, but I wont really know until I put the tires back on it.
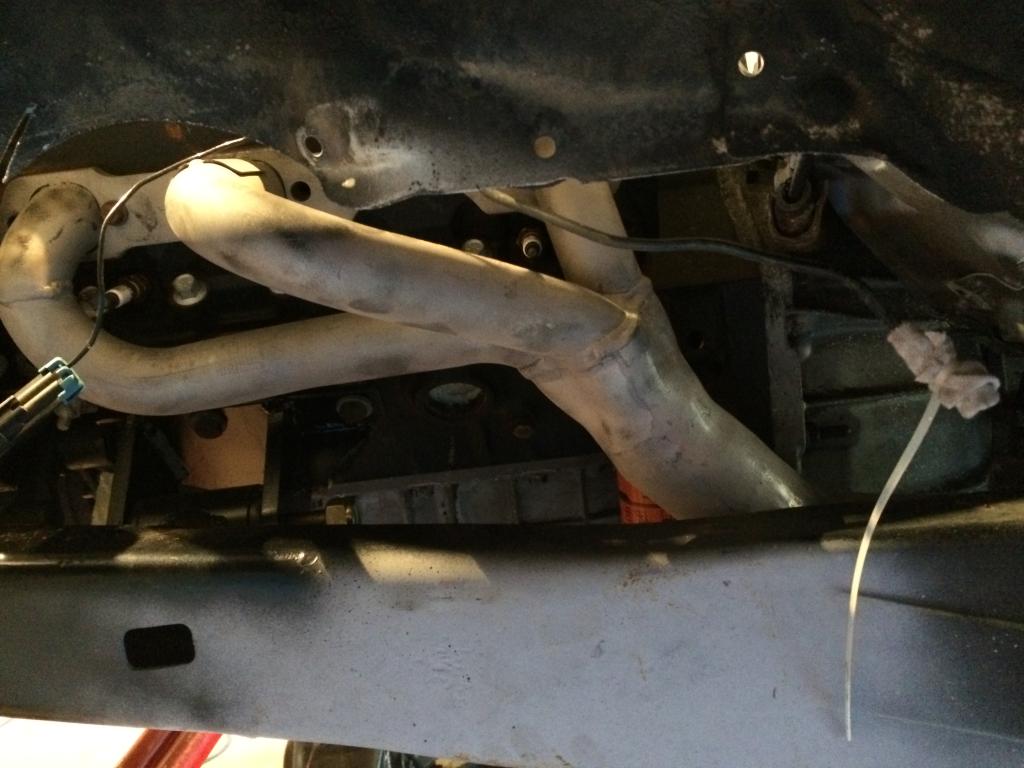
I also did some work to the exhaust. I made the driver side header fit in the frame rail, but I think Im too close to my gear selection switch and shift cable is on the transmission. So I might cut some tack welds on the header and rotate it a little. Ill get pics of the header when I pull it back off, but here is a pic of the clearance issue
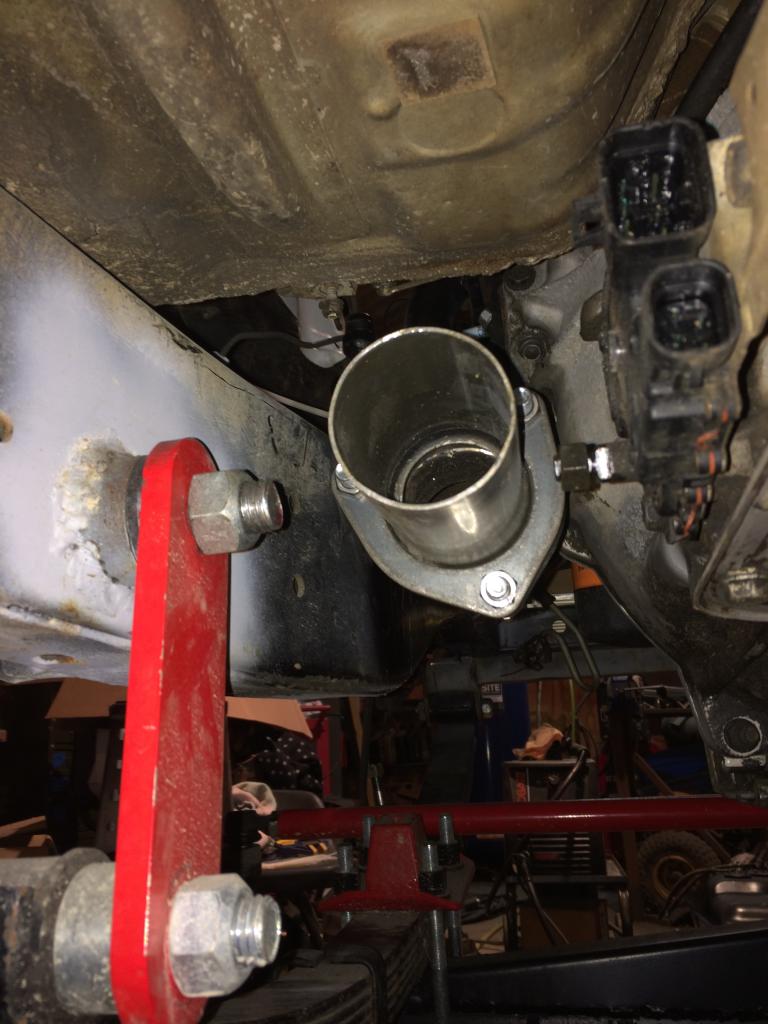
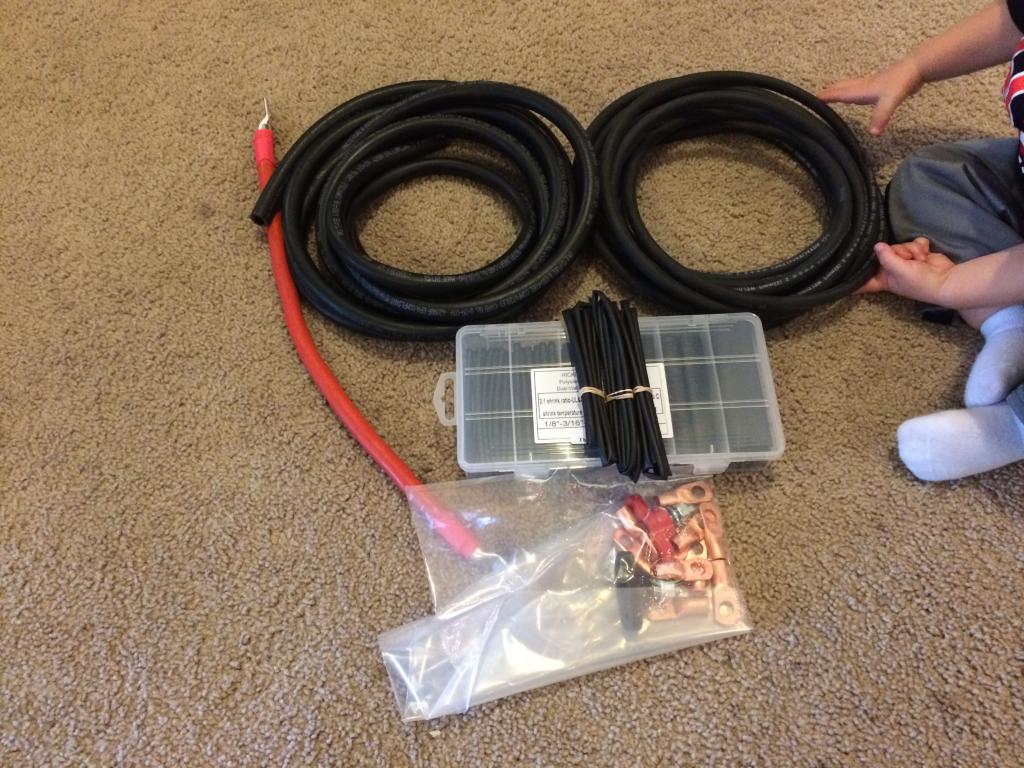
I also got in some more wiring goods and the 3/8 FI rubber line. Now I should have just about everything I need to wire this thing up, minus wiring loom. Im going to wait to order that until I get the harness done. That way I can order what I need. Ive already got the fuse blocks and relay plugs in.
I need to start working make an aluminum fan shroud. Im not too happy with how the shroud will sit on the Taurus fan shroud. I also got a 4.88 3rd member in the mail from cman1 here on the forum. I need to install a new seal and the Spartan locker so I can throw it in the housing.


While I had the back on jack stands sitting pretty level with the front, I noticed I had about a 10 degree shackle angle on the front. So I went ahead and installed the AAL for 63s in the back. I still need to paint the springs, but that will come when I paint the axle. I still don't think its tall enough in the back, but I wont really know until I put the tires back on it.


I also did some work to the exhaust. I made the driver side header fit in the frame rail, but I think Im too close to my gear selection switch and shift cable is on the transmission. So I might cut some tack welds on the header and rotate it a little. Ill get pics of the header when I pull it back off, but here is a pic of the clearance issue

I also got in some more wiring goods and the 3/8 FI rubber line. Now I should have just about everything I need to wire this thing up, minus wiring loom. Im going to wait to order that until I get the harness done. That way I can order what I need. Ive already got the fuse blocks and relay plugs in.

I need to start working make an aluminum fan shroud. Im not too happy with how the shroud will sit on the Taurus fan shroud. I also got a 4.88 3rd member in the mail from cman1 here on the forum. I need to install a new seal and the Spartan locker so I can throw it in the housing.
Last edited by bump530; Dec 2, 2014 at 11:45 AM.
Dec 2, 2014 | 12:54 PM
#185
Thread Starter
Registered User
Joined: Apr 2013
Posts: 478
Likes: 4
From: Louisiana
Dec 2, 2014 | 06:57 PM
#187
Thread Starter
Registered User
Joined: Apr 2013
Posts: 478
Likes: 4
From: Louisiana
I did make it out to the shop for a little bit. I got my fuel lines figured out. I just need some fuel injection clamps and I'll be in business. I also bolted up the rad overflow bottle, window washer bottle, ac lines and condensor fan so I can make sure nothing I'm doing interfers. I didn't take any pics, but I'll get some next time.
Last edited by bump530; Dec 2, 2014 at 07:00 PM.
Dec 4, 2014 | 06:41 PM
#189
Thread Starter
Registered User
Joined: Apr 2013
Posts: 478
Likes: 4
From: Louisiana
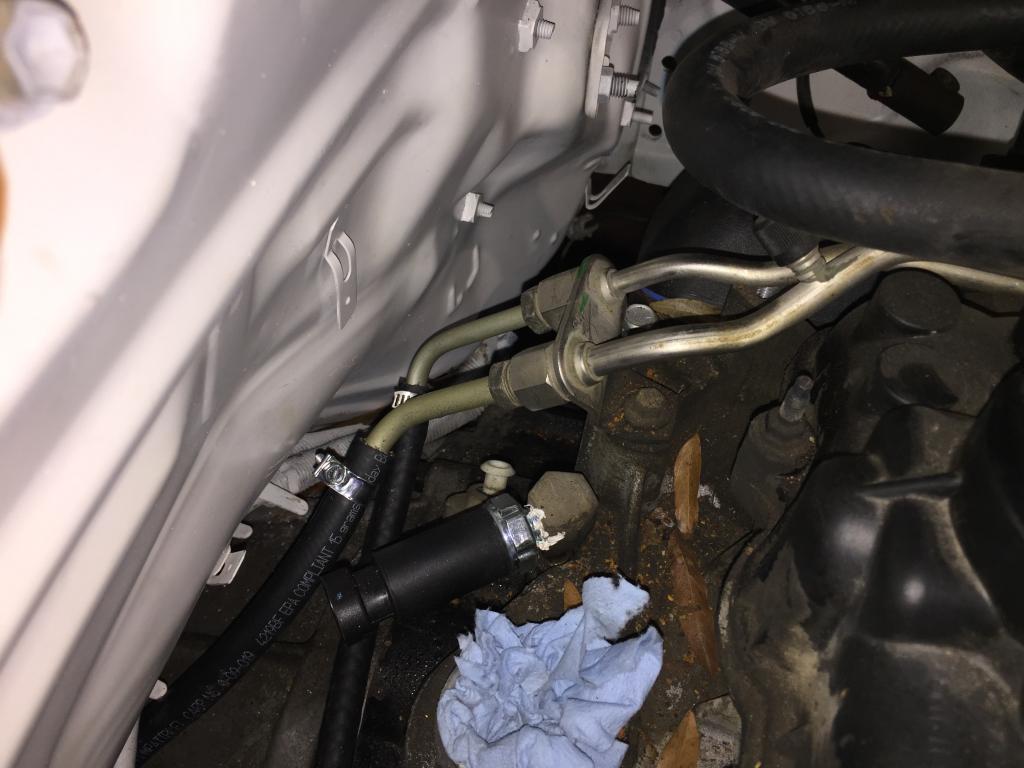
No. They make fuel injection hose clamps. They are smooth so they don't cut into the hose. You can somewhat see it in this pic. I have a few more but having trouble uploading tonight from my phone.

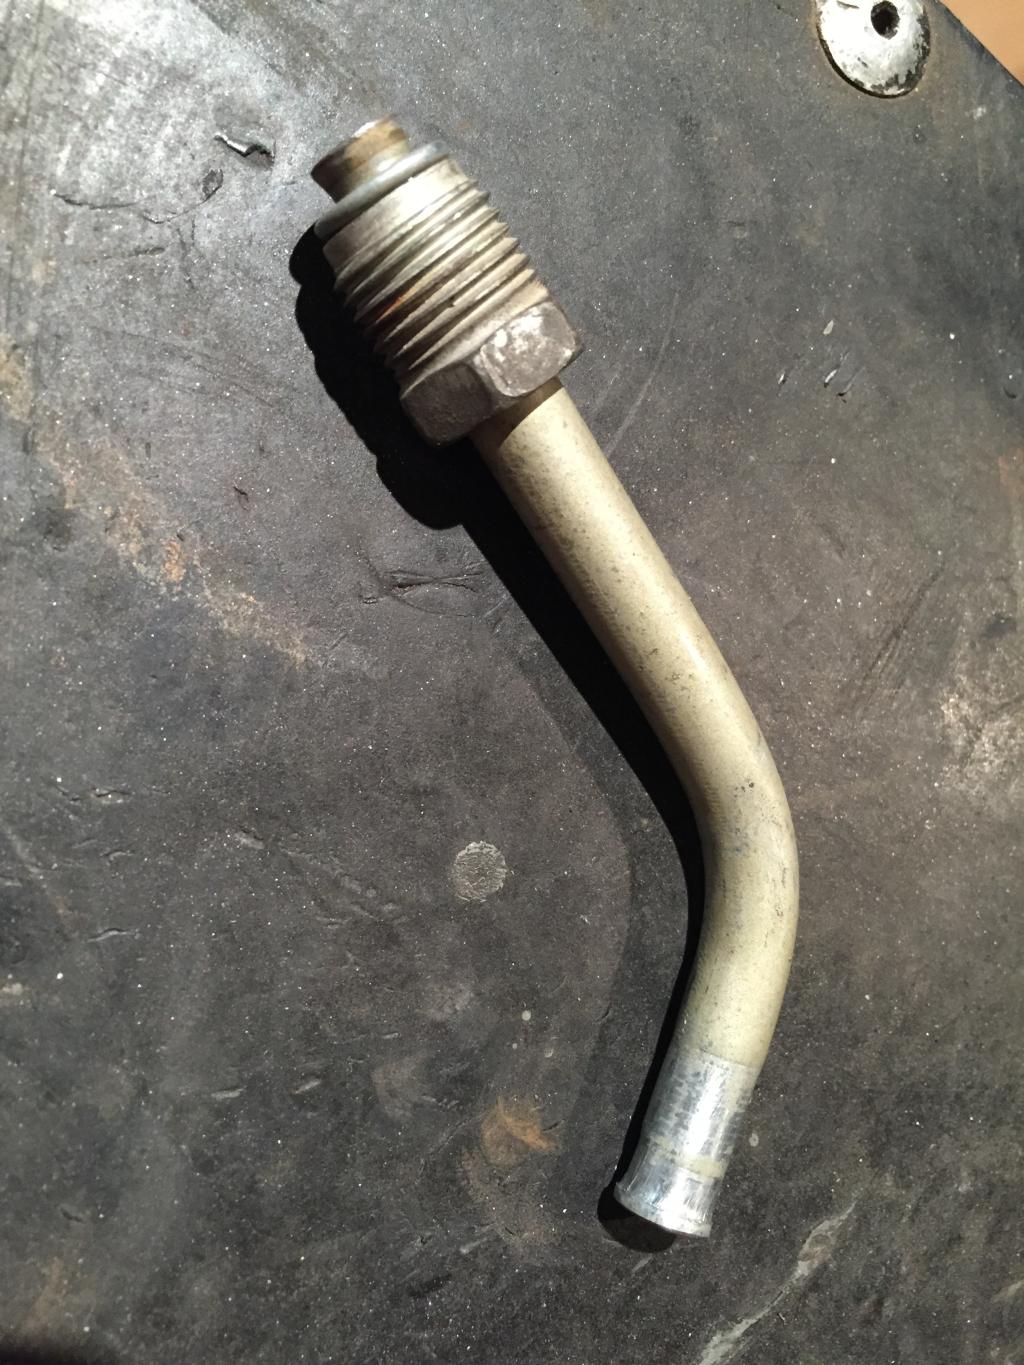
That is the feed line. I used the factory toyota line that feeds the motor and move it down to the fuel filter. I used a barbed fitting to connect the rubber line to some new rubber line. Then used a hose clamp on the factory gm hard line. I did flare the end a little bit to help hold it. I've heard that ppl have done this without flaring the end with the FI clamps with success. You can see the gm part below.
I'll get some more pics uploaded tomorrow of it all. I also started making a template for a new radiator fan shroud.

That is the feed line. I used the factory toyota line that feeds the motor and move it down to the fuel filter. I used a barbed fitting to connect the rubber line to some new rubber line. Then used a hose clamp on the factory gm hard line. I did flare the end a little bit to help hold it. I've heard that ppl have done this without flaring the end with the FI clamps with success. You can see the gm part below.

I'll get some more pics uploaded tomorrow of it all. I also started making a template for a new radiator fan shroud.
Dec 5, 2014 | 04:18 AM
#190
Thread Starter
Registered User
Joined: Apr 2013
Posts: 478
Likes: 4
From: Louisiana
Here is a pic of both the feed and return lines hooked up behind the motor. I also replaced the oil pressure sending unit as I somehow broke it, I guess during one of the motor installs. I removed the distributor to make the sending unit replacement easier.
Heres the feed line hooked up to the fuel pump.
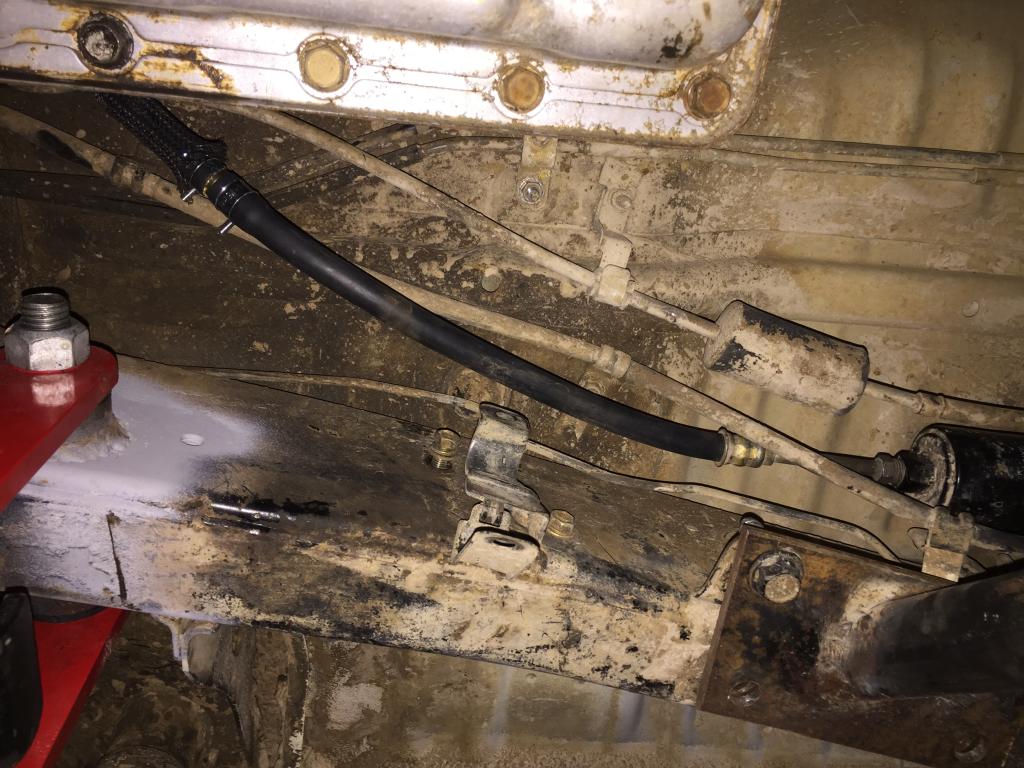
Heres a pic of the feed line running over the trans to the back of the motor.

This is where I tied my return in. I just cut the original vent line (the original return was routed cleaner into the engine bay IMO, so I will just swap the two and use the old return as the new vent) where it comes up the fire wire.
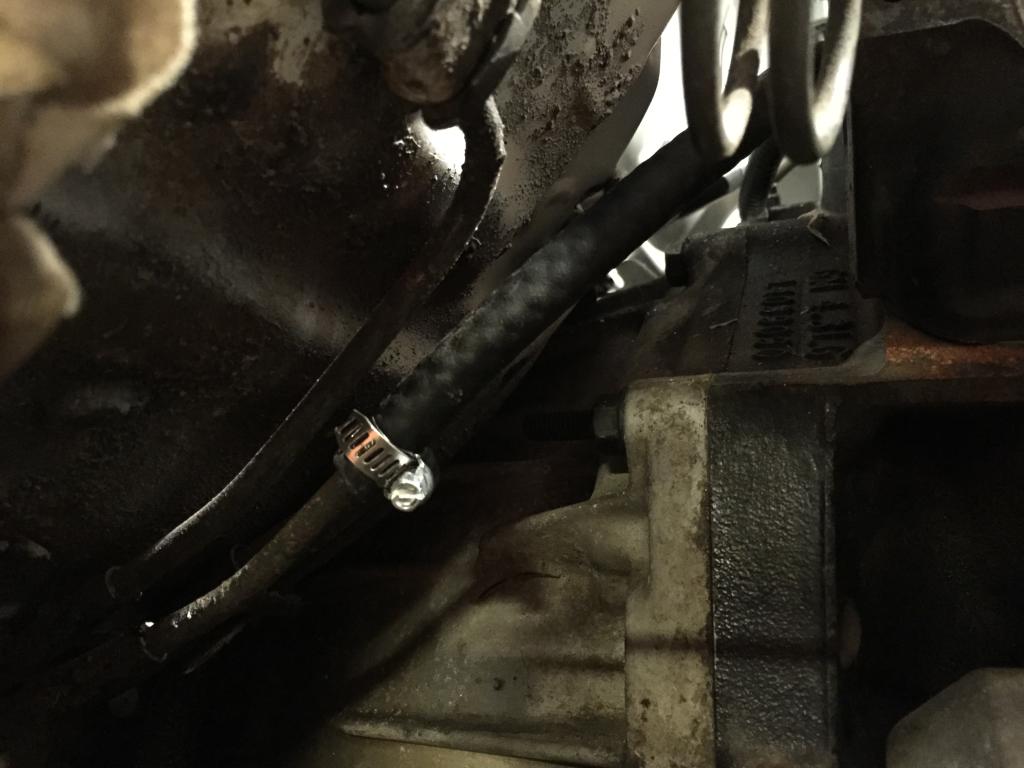

Last edited by bump530; Dec 5, 2014 at 04:20 AM.
Dec 8, 2014 | 04:14 AM
#192
Thread Starter
Registered User
Joined: Apr 2013
Posts: 478
Likes: 4
From: Louisiana
Yea I will definitely be keeping a close eye on them. The only one Im worried about is the where I clamped the rubber hose to the GM hard line on the feed side. The rest of the connections should be good to go.
Dec 12, 2014 | 10:43 AM
#193
Thread Starter
Registered User
Joined: Apr 2013
Posts: 478
Likes: 4
From: Louisiana
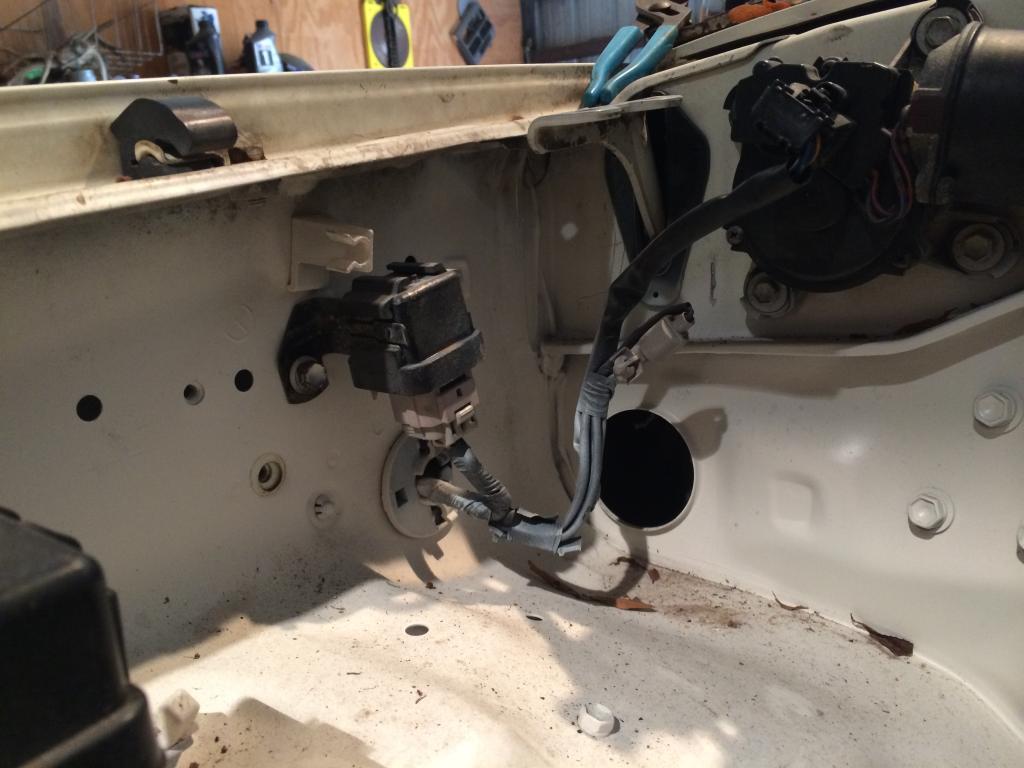
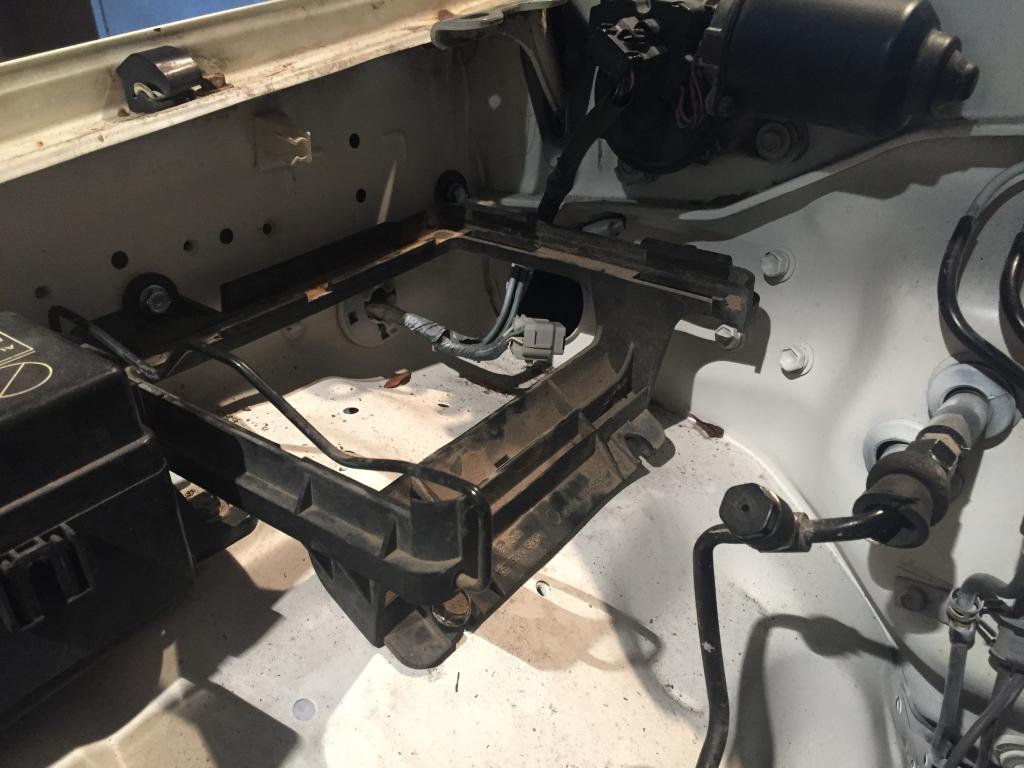
Does anybody know what this relay (what I assume it is) is for? It's in my way of how I want to mount my computer. I have a feeling I don't need it but I need to make sure and I can't find it in my wiring diagram
 Dec 15, 2014 | 06:24 AM
#199
Thread Starter
Registered User
Joined: Apr 2013
Posts: 478
Likes: 4
From: Louisiana
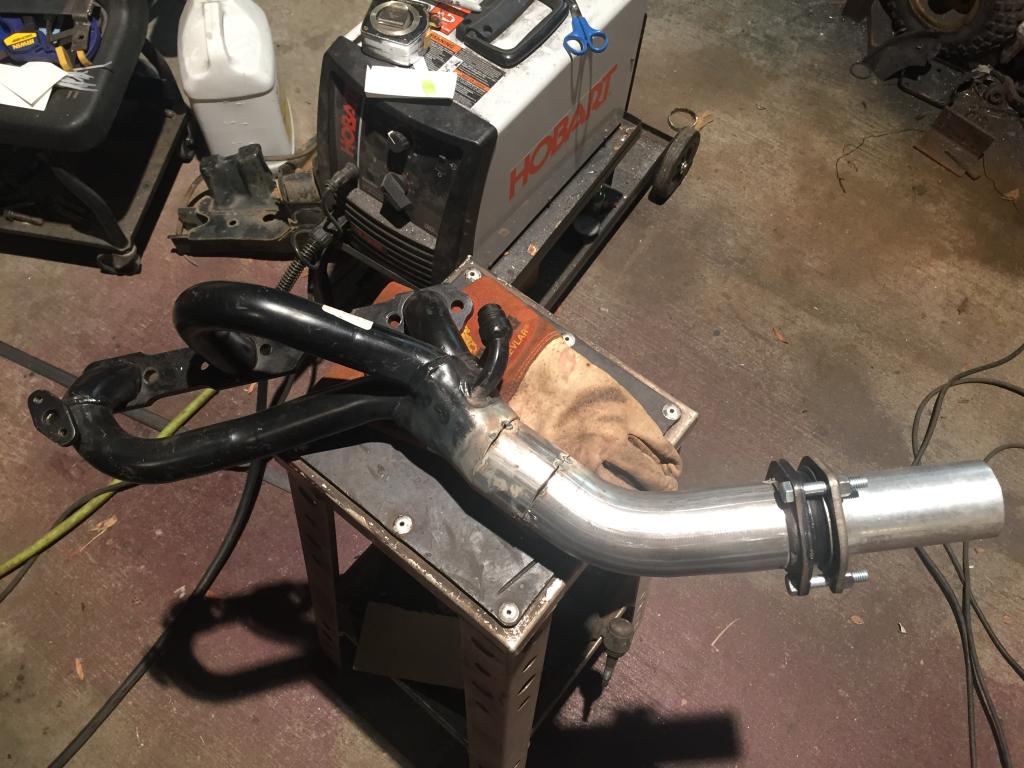
I did some work on the driver side header. All I have left to do is weld an o2 bung and paint it. I had to extend it down below the frame rail. I also cut the emission connections off of it.
Here it is tacked up
Here's how I filled in the emission holes
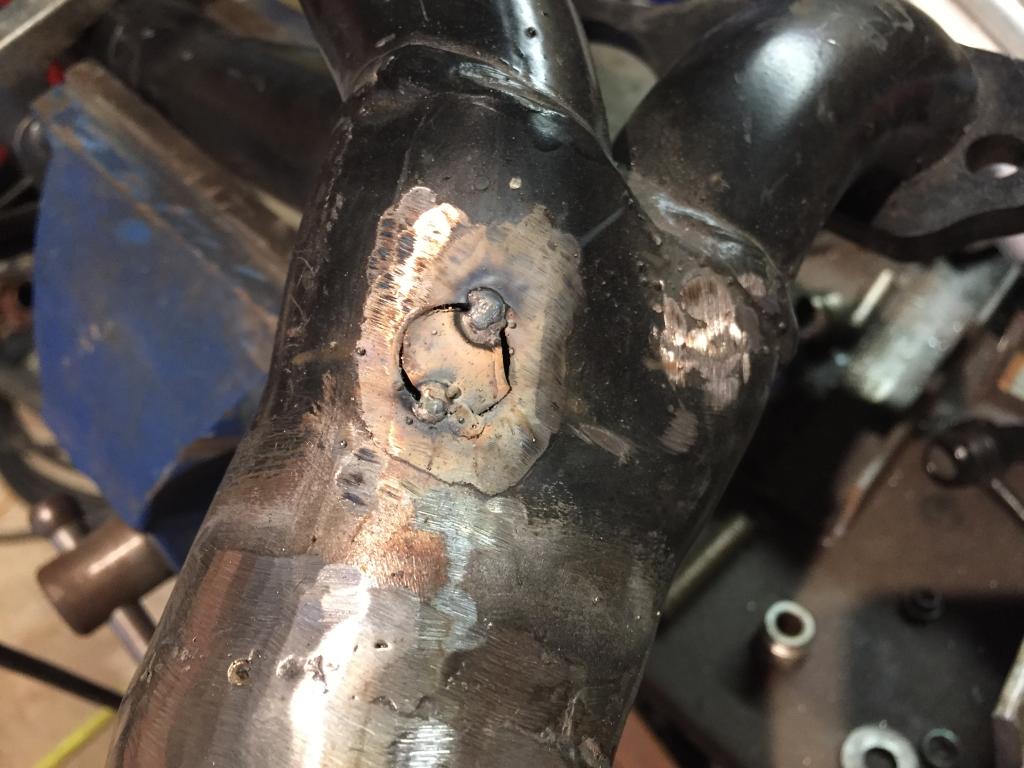
Blasted and mounted. Marking the location for the o2 bung.
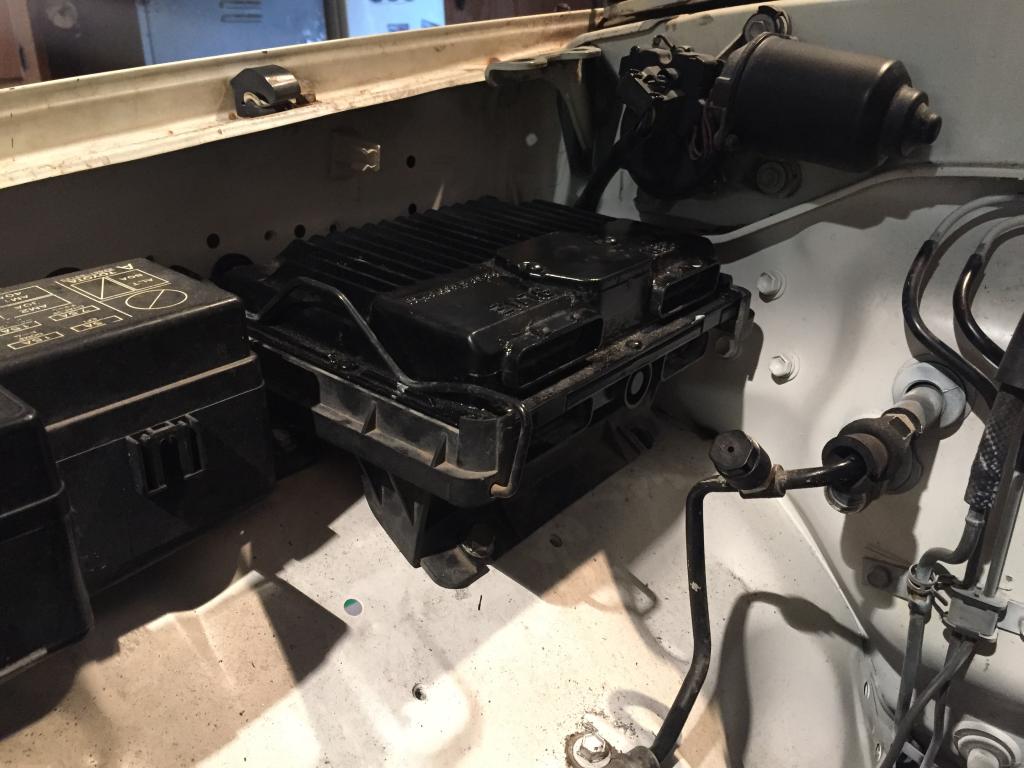
I went by a junkyard on Friday and picked up a new water neck and computer mount.
Here's the computer mount.
I started working on the passenger side exhaust so I could figure out where I am going to mount the o2 sensor but didn't get any pictures. I also figured out why my speedo had quit working before I parked it. The cable is froze up and the part that screws on to the tcase broke off. Looks like Ill be using an app on my phone to see how fast Im going for a while. My plan is to do an electric speedo swap eventually. Since this isn't a DD, Im not too worried about having a speedo right away.
Here it is tacked up

Here's how I filled in the emission holes

Blasted and mounted. Marking the location for the o2 bung.

I went by a junkyard on Friday and picked up a new water neck and computer mount.
Here's the computer mount.


I started working on the passenger side exhaust so I could figure out where I am going to mount the o2 sensor but didn't get any pictures. I also figured out why my speedo had quit working before I parked it. The cable is froze up and the part that screws on to the tcase broke off. Looks like Ill be using an app on my phone to see how fast Im going for a while. My plan is to do an electric speedo swap eventually. Since this isn't a DD, Im not too worried about having a speedo right away.
Last edited by bump530; Dec 15, 2014 at 06:29 AM.


