
Bump's '90 4Runner Build-Up
 Dec 15, 2014 | 07:43 AM
#201
Thread Starter
Registered User
Joined: Apr 2013
Posts: 478
Likes: 4
From: Louisiana
Dec 15, 2014 | 08:55 AM
#202
What are you going to use for paint? I've tried some VHT paint on my exhaust manifold, and it cooked & peeled the first time I drove it, I had good luck with some cheap wood stove paint tho, still holding up!
Dec 15, 2014 | 09:14 AM
#203
Thread Starter
Registered User
Joined: Apr 2013
Posts: 478
Likes: 4
From: Louisiana
EDIT...I just looked at the rustoleum brand header paint. It gives instructions for curing it on the vehicle. I may try that.
Last edited by bump530; Dec 15, 2014 at 09:19 AM.
Dec 15, 2014 | 09:49 AM
#204
Im still researching that, but I was thinking about using the VHT. I seen where you had those results with the VHT, but I think it needs to be "baked" on for best results (not sure if you did that or not). Not that I have a good way to bake it either lol.
EDIT...I just looked at the rustoleum brand header paint. It gives instructions for curing it on the vehicle. I may try that.
EDIT...I just looked at the rustoleum brand header paint. It gives instructions for curing it on the vehicle. I may try that.
Ya my wife wouldn't let me use her oven, lol, so I didn't bake it, but as you mentioned the instructions said that the heat of engine would also accomplish curing. The VHT has held up pretty well on my intake manifold and water pump, just not the exhaust manifold. Look forward to seeing what you come up with, hopefully you have better results than me!
Dec 16, 2014 | 05:04 PM
#205
Thread Starter
Registered User
Joined: Apr 2013
Posts: 478
Likes: 4
From: Louisiana
Well I figured out that the 1990 4Runner EWD book I bought isn't correct for mine. It shows the "correct" IH1 plug (although my plug has a couple extra wires where the EWD says they shouldnt be) but not the right IH2 plug. The book doesn't have any ABS info tho. So I found another EWD book online supposedly for the 1990-1995 4Runner. It has the "correct" IH2 plug but not the IH1 (although just like the other book, my plug has a couple extra wires where the EWD says they shouldnt be) but has the wrong IH1 plug lol. So apparently I have a weird model lol. I thinned the plugs down by which book matches that plug. That leaves me with this
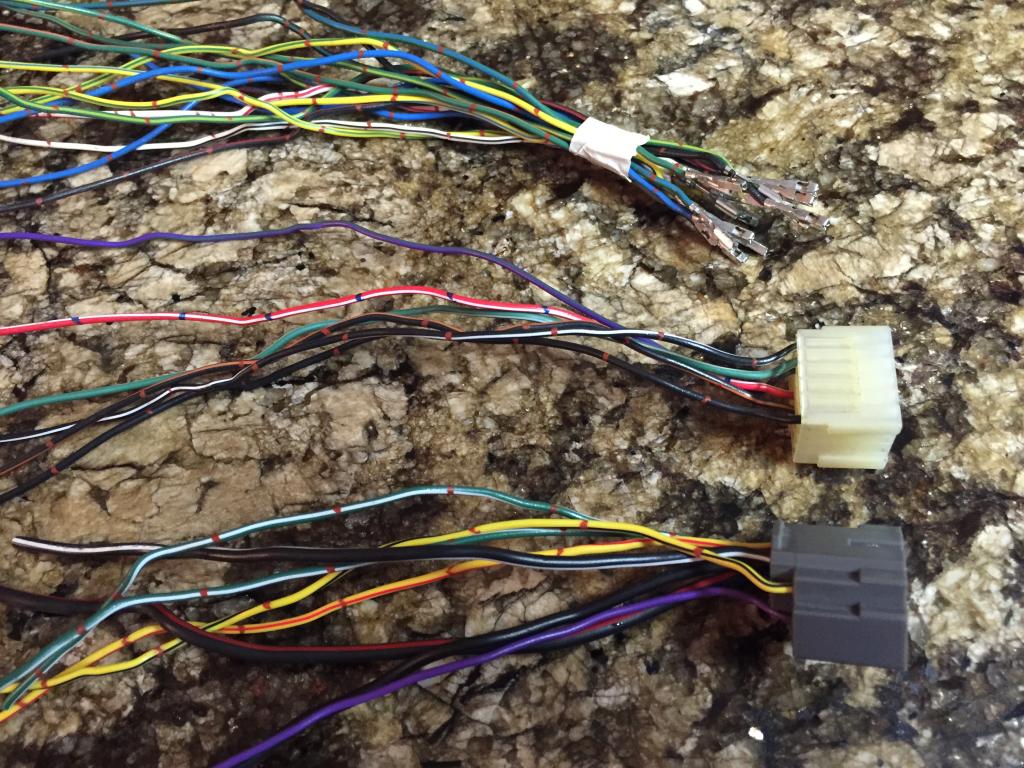
There is only a couple left I'm not sure of. That's the ones the EWDs say shouldn't be there and some I can't seem to find in the EWDs. I'm pretty sure I have all the important ones covered tho lol.
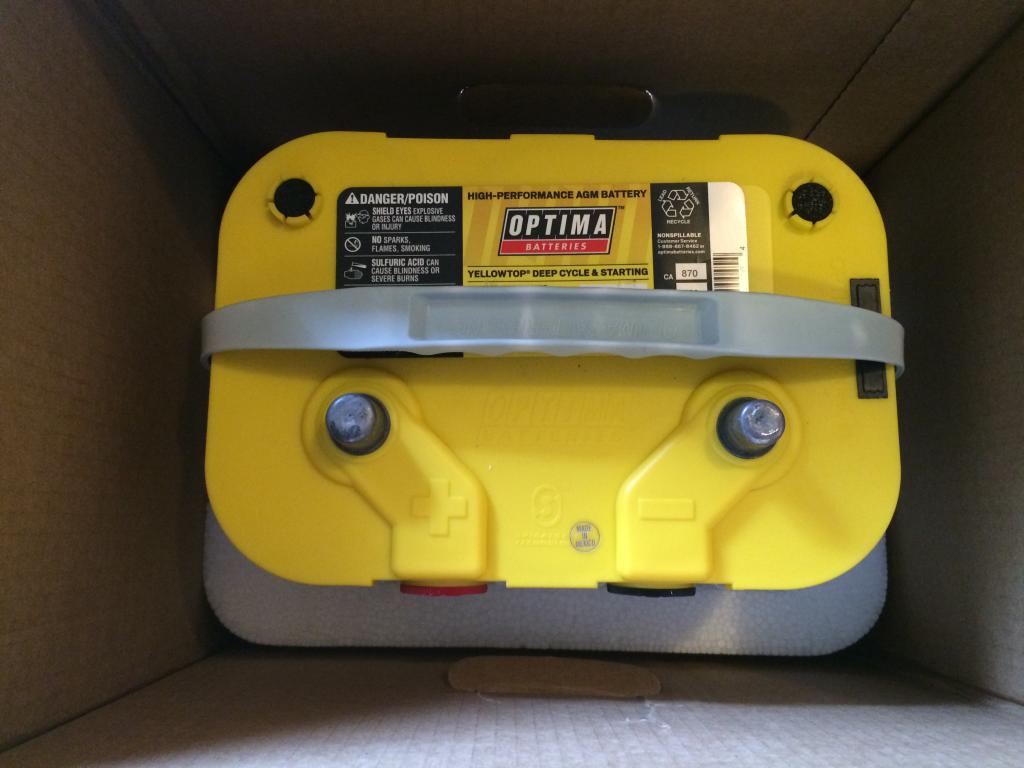
I also ordered a yellow top optima today on autozones website. It was 20% off with free shipping. I'll just have to go get my core charge refund in store. It will come out to $45 cheaper.

There is only a couple left I'm not sure of. That's the ones the EWDs say shouldn't be there and some I can't seem to find in the EWDs. I'm pretty sure I have all the important ones covered tho lol.
I also ordered a yellow top optima today on autozones website. It was 20% off with free shipping. I'll just have to go get my core charge refund in store. It will come out to $45 cheaper.
Last edited by bump530; Dec 17, 2014 at 04:48 AM.
Dec 23, 2014 | 04:35 PM
#207
Thread Starter
Registered User
Joined: Apr 2013
Posts: 478
Likes: 4
From: Louisiana
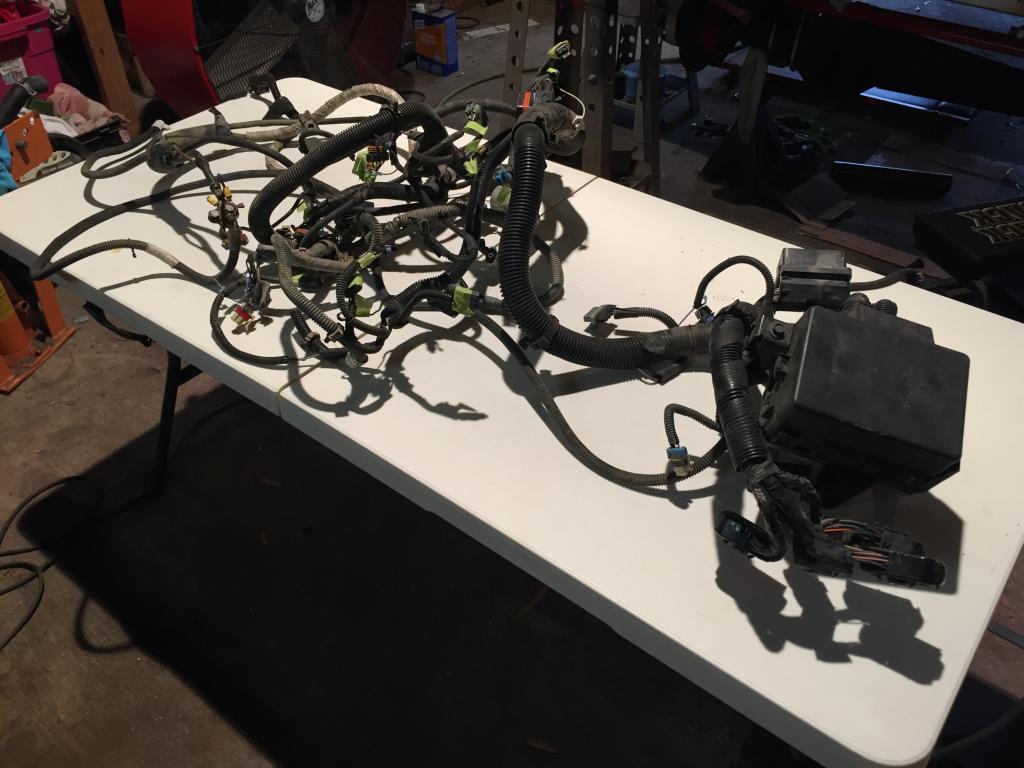
I started working on the 4.3 wiring yesterday. Here's the harness when I first laid it on the table
First thing I did was strip the loom and tape off it.
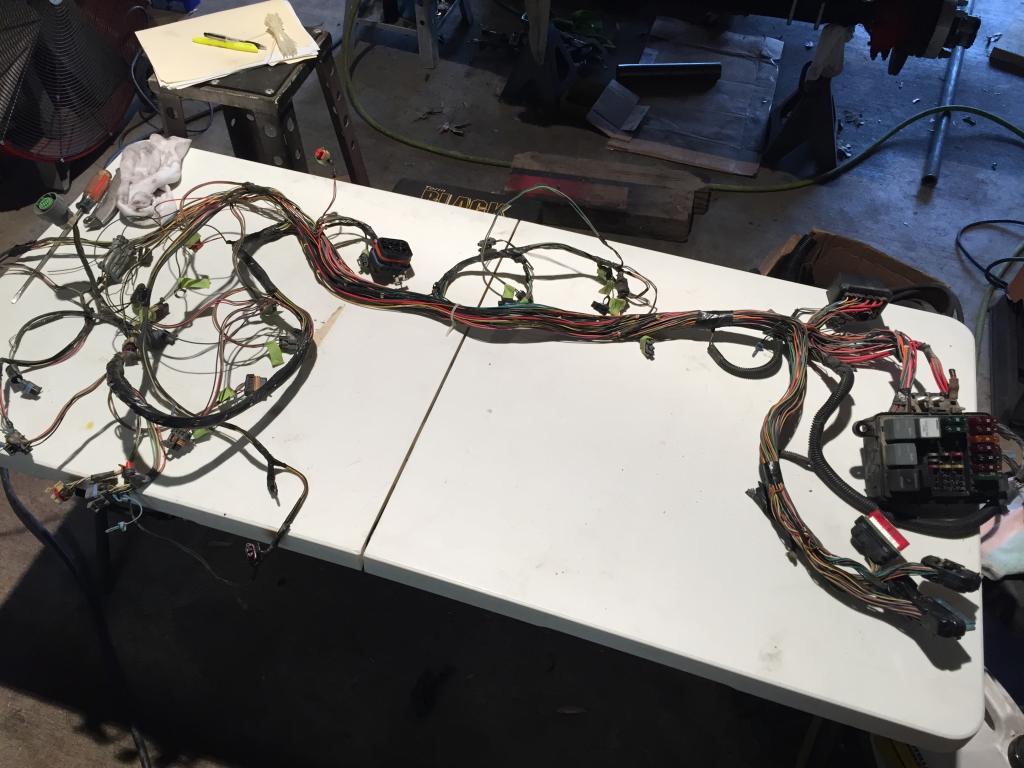
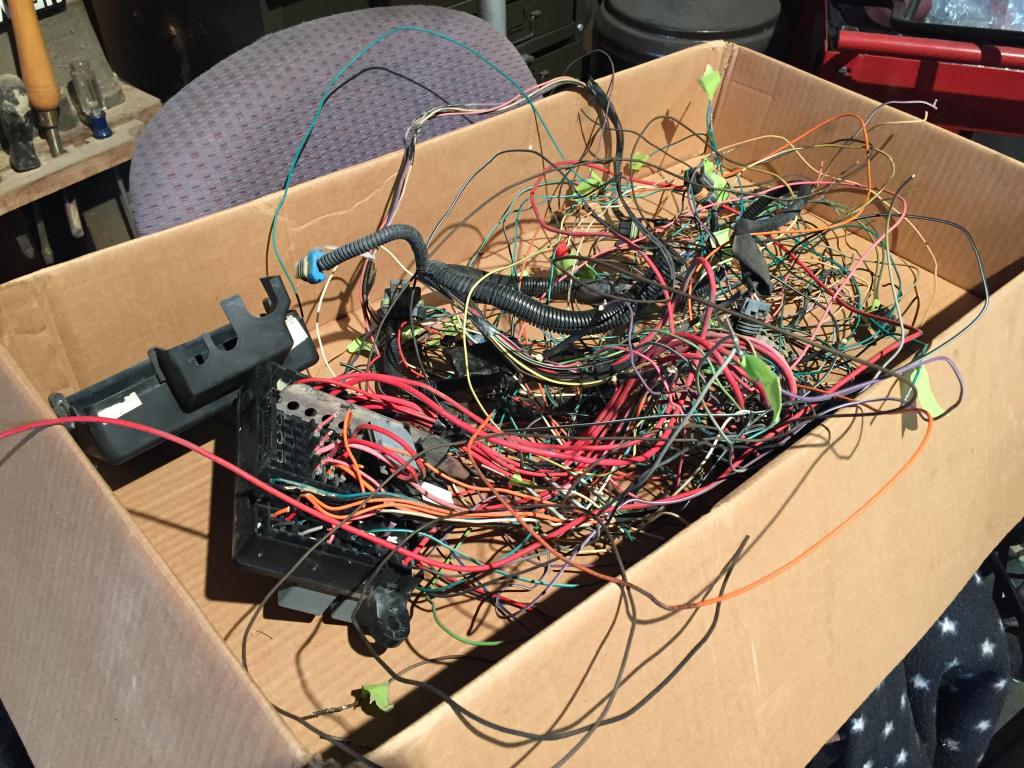
Then I stripped all the unnecessary wires out and was left with this
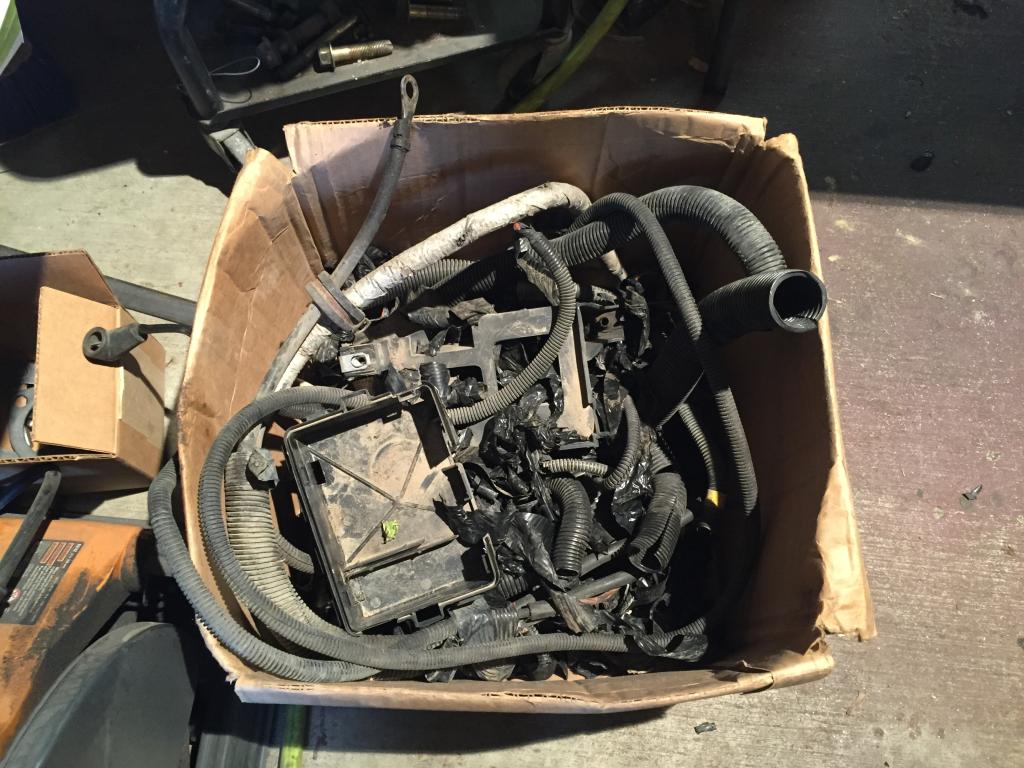
Here's the loom and wires I had pulled out to that point
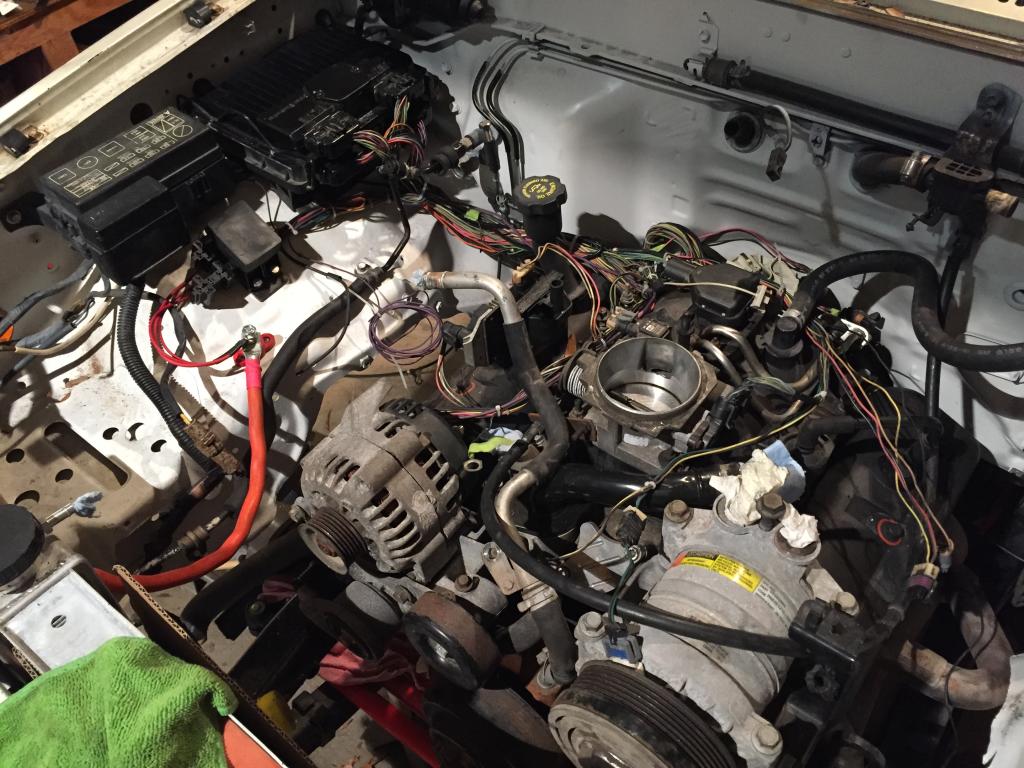
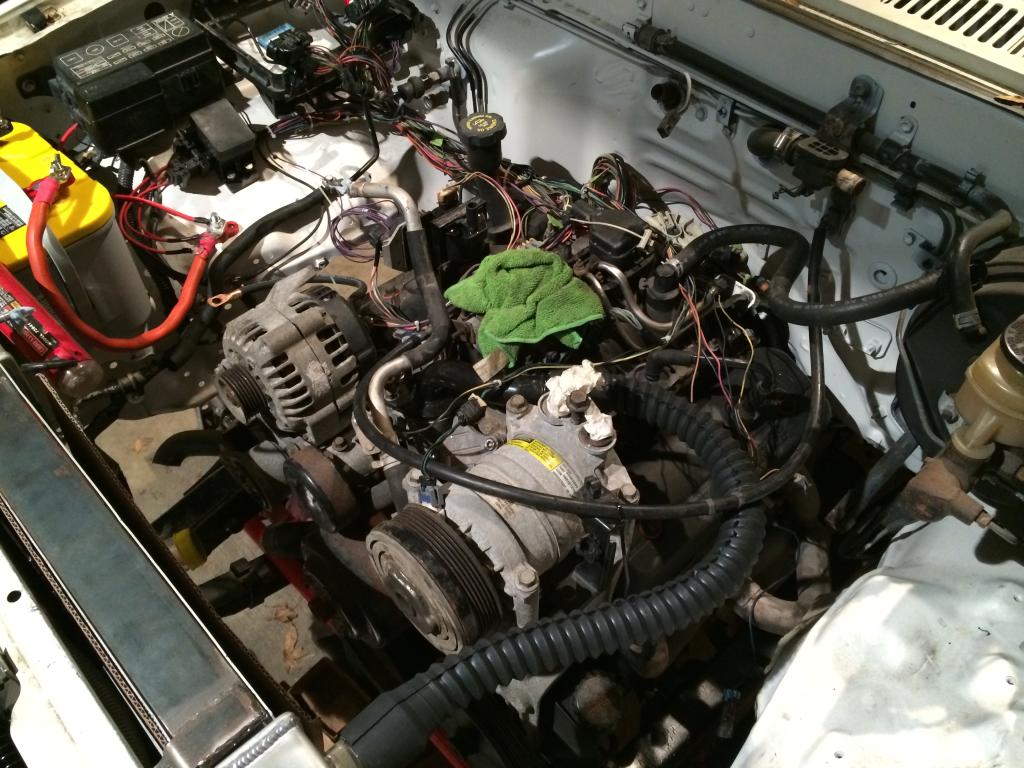
I threw the harness in the engine bay... What a mess
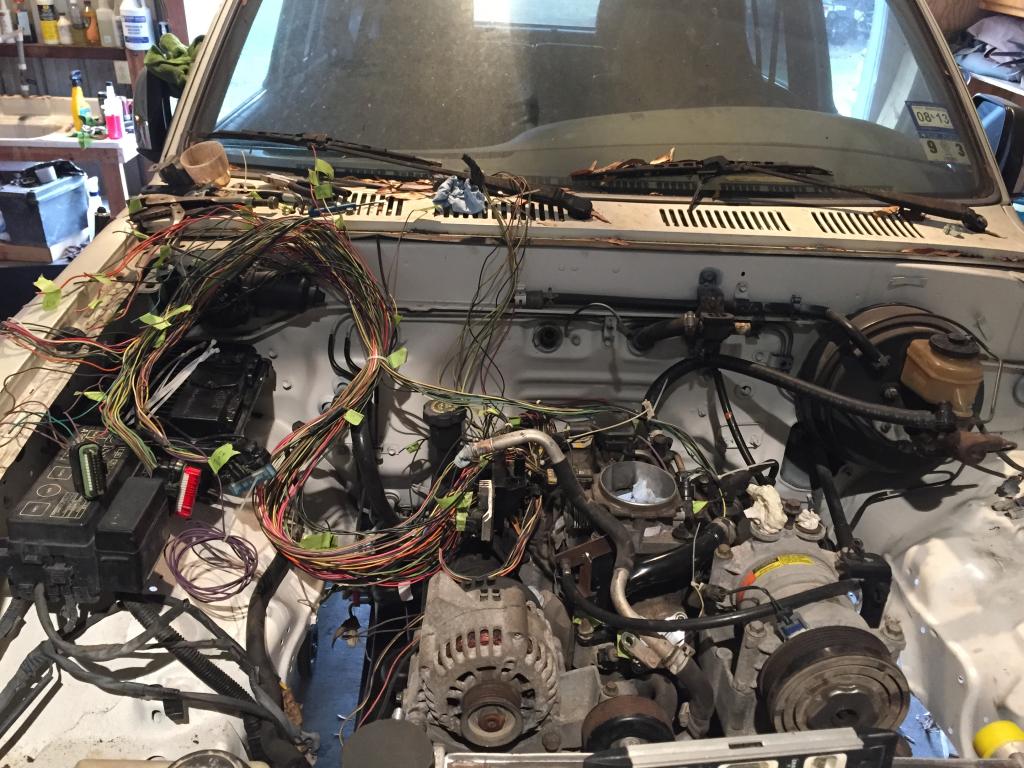
This is after routing and zip tieing the wires where I want them to route. Now I just have the rats nest at the computer.
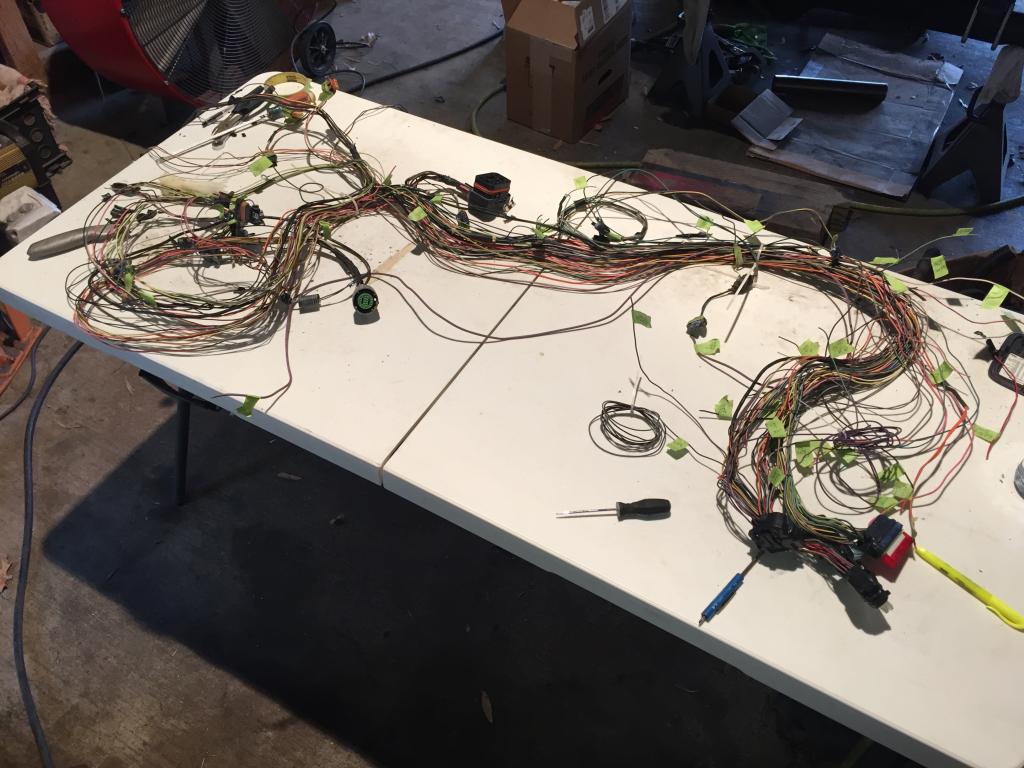
So I figured out what length of wires I needed to the pcm connectors and pulled the harness out. This is what I stared at today.
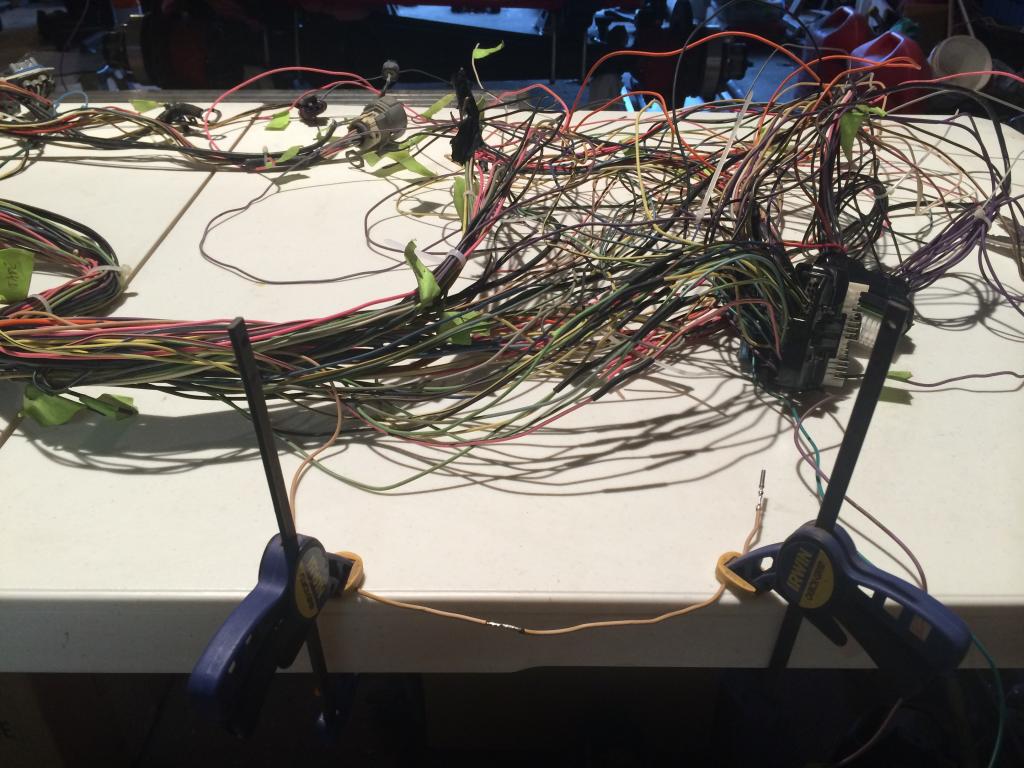
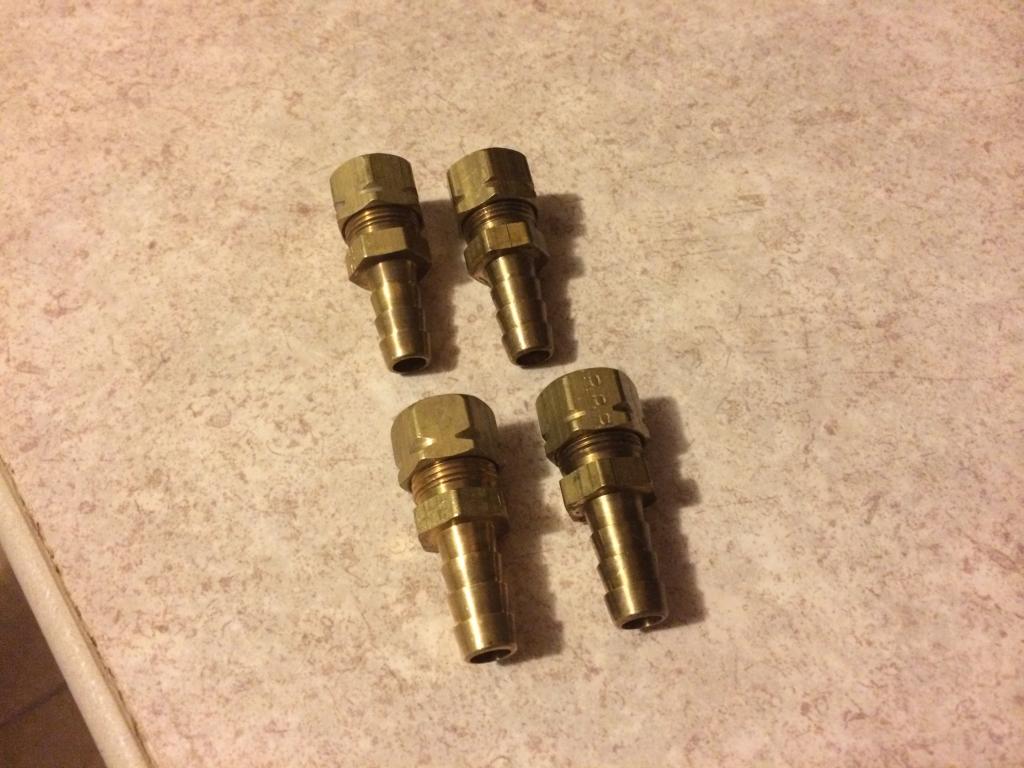
I've got most of them done before I had to leave. Only about 5 wires left going to the PCM connectors then it's on to wiring the new fuse block and relays. I also got my new yellow top optima and 3/8 compression to 3/8 barbed fittings for the trans cooler lines and fuel line

First thing I did was strip the loom and tape off it.

Then I stripped all the unnecessary wires out and was left with this

Here's the loom and wires I had pulled out to that point


I threw the harness in the engine bay... What a mess

This is after routing and zip tieing the wires where I want them to route. Now I just have the rats nest at the computer.

So I figured out what length of wires I needed to the pcm connectors and pulled the harness out. This is what I stared at today.

I've got most of them done before I had to leave. Only about 5 wires left going to the PCM connectors then it's on to wiring the new fuse block and relays. I also got my new yellow top optima and 3/8 compression to 3/8 barbed fittings for the trans cooler lines and fuel line

 Dec 24, 2014 | 10:57 AM
#208
Nice work on the wiring, that would be my worst nightmare, lol, I could barely handle hooking up 2 wires to get my carb'd 302 running, LMAO!!! Looks like you got a good handle on it though, can't wait to see this thing up and running!
Dec 24, 2014 | 12:55 PM
#209
Thread Starter
Registered User
Joined: Apr 2013
Posts: 478
Likes: 4
From: Louisiana
Me and you both. I've been building this way too long lol. The wiring really isn't too bad, just tedious. Hopefully it works when I hook it up lol
Dec 26, 2014 | 08:41 PM
#210
Registered User
Joined: Dec 2008
Posts: 2,391
Likes: 1
From: tecumseh nebraska

 Dec 29, 2014 | 11:08 AM
#212
Thread Starter
Registered User
Joined: Apr 2013
Posts: 478
Likes: 4
From: Louisiana
Its really not that bad. Just have to take it one wire at a time. I get a headache when I look at all the wires at once lol.
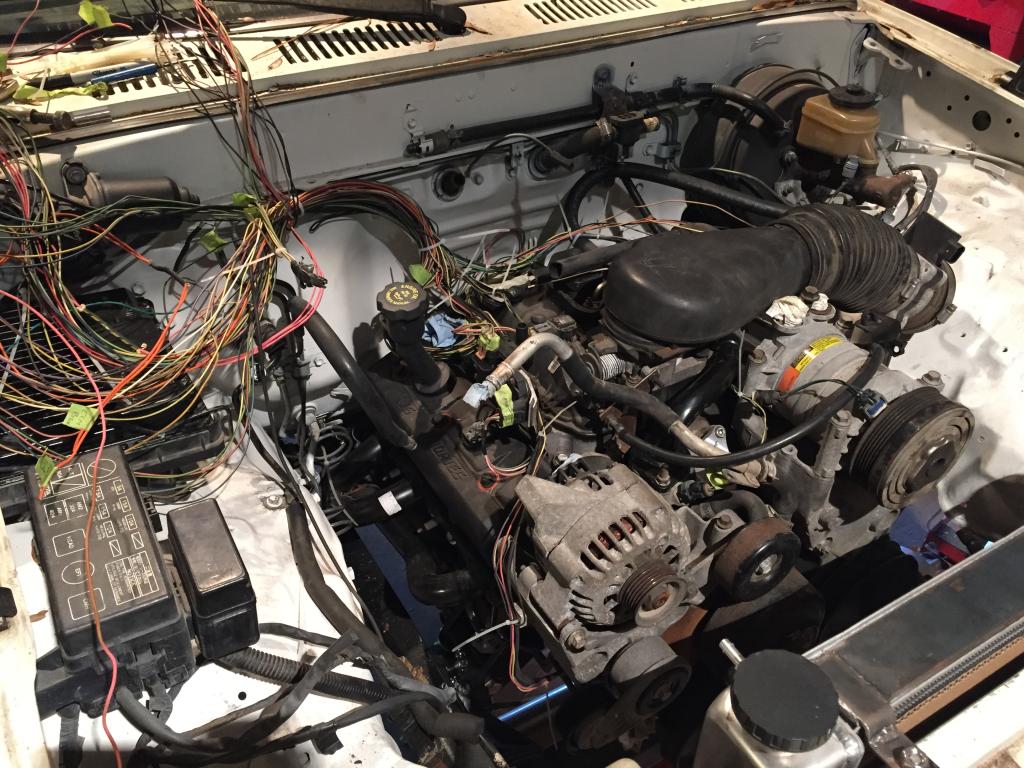
I made a little more progress. I got all the wires going to the PCM shortened and I started working on the fuse/relay box and tying the Toyota wiring into it.
Here's a pic after I finished up shortening the wires. Ill get a pic of the fuse box and Toyota stuff next time I go back out to the shop.

Hopefully before long I will be fire this thing up for a few seconds to check all my wiring lol.
Jan 3, 2015 | 07:55 PM
#213
Thread Starter
Registered User
Joined: Apr 2013
Posts: 478
Likes: 4
From: Louisiana
Well the wiring harness is back in. Most of it is done and ready to test. I need to buy a few more ends for my battery cables so I can finish them.
I've also been working on my trans cooler mounts... They are almost done. Where it's mounted, I had to do away with the hood latch so I will have to pick up some hood pins. I ordered some gates flexible radiator hoses after I figured out the stock ones wouldn't work. I have also decided to order a spal fan and not use the Taurus fan. I didn't like how it was going to fit up. Im going to build my own shroud.

I've also been working on my trans cooler mounts... They are almost done. Where it's mounted, I had to do away with the hood latch so I will have to pick up some hood pins. I ordered some gates flexible radiator hoses after I figured out the stock ones wouldn't work. I have also decided to order a spal fan and not use the Taurus fan. I didn't like how it was going to fit up. Im going to build my own shroud.
Jan 3, 2015 | 08:58 PM
#214
Lookin good! What brand of hood pins are you going to use? I need to get some hood pins for when i finally put in my new radiator, I need to move it forward, so I'll lose my hood latch. I also need to get some new radiator hoses, I'll probably go with flexible ones too.
Jan 4, 2015 | 05:30 AM
#215
Thread Starter
Registered User
Joined: Apr 2013
Posts: 478
Likes: 4
From: Louisiana
I'm probably going to order some like the ones from poly performance. They are about twice the cost as the generic hood pins, but I think they will be worth it
Jan 4, 2015 | 01:06 PM
#216
I like the looks of those, I've been tring to find some that weren't chrome or stainless, since I don't have any other parts on the exterior that blings, lol.
Jan 5, 2015 | 07:38 AM
#217
Thread Starter
Registered User
Joined: Apr 2013
Posts: 478
Likes: 4
From: Louisiana
I managed to finish up all the power/ground cables yesterday. I even hooked the battery up for a minute to get power inside the cab. That's the first time Ive heard that annoying buzzer since April lol. The mounts for the trans cooler are mostly done, just need to trimmed up and painted. I also worked on the factory gm trans cooler hard lines. I cut them down and reshaped them. Now I just have to run the rubber lines from them to the cooler. Ill have to get pictures of all that later tho. Im getting closer to being able to test fire the engine.
Jan 7, 2015 | 04:13 AM
#218
Thread Starter
Registered User
Joined: Apr 2013
Posts: 478
Likes: 4
From: Louisiana
My new radiator hoses and oil pressure gauge came in yesterday, so I went out to the shop to start installing.
Top radiator hose fits perfectly.
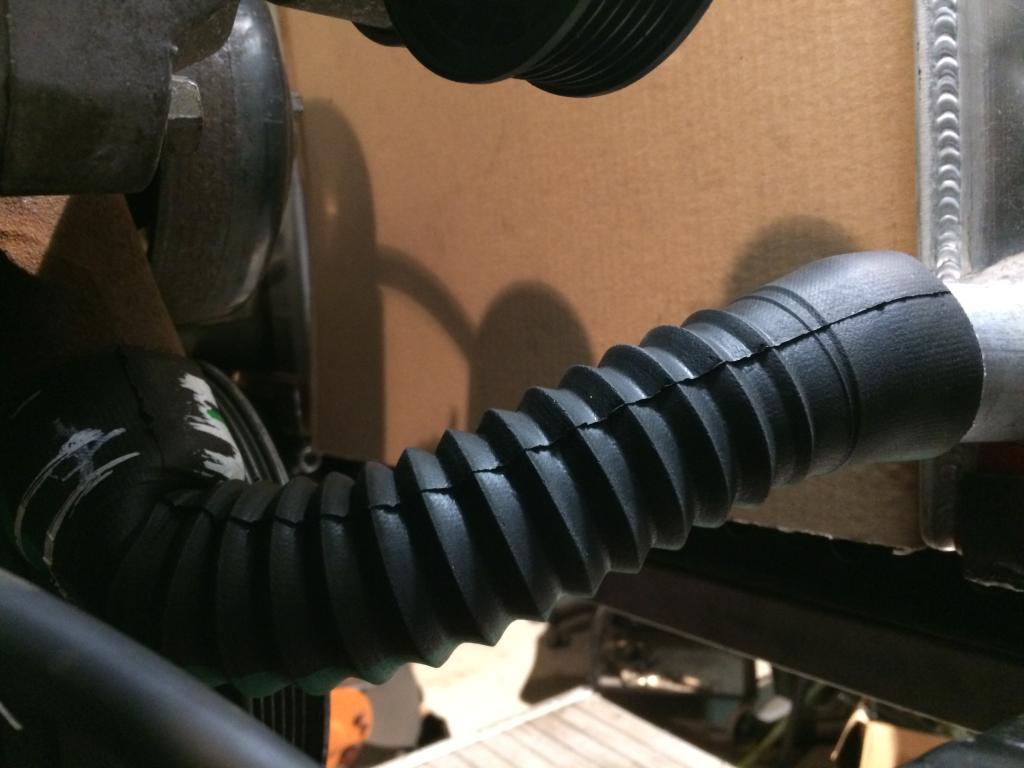
The lower...not so much. Its to short and its trying to kink at the water pump. I think Im going to see if one of the local auto parts stores has a little longer one. That MAY fix my issues. If not, I plan to have a radiator shop reposition the outlet on the radiator. Its actually point up and towards the center a little. If it was rotated to point straight back and down a little, I think it would work out. You can see the kink at the WP in this pic
Im going to have to get some pipe fittings to install the oil pressure sending unit. It comes out close to the exhaust. I also had planned on putting the gauges in the lower part of the radio hole, but it doesn't seem like they will fit too good. So I may have to build a panel to mount them below the ash try area.
Top radiator hose fits perfectly.

The lower...not so much. Its to short and its trying to kink at the water pump. I think Im going to see if one of the local auto parts stores has a little longer one. That MAY fix my issues. If not, I plan to have a radiator shop reposition the outlet on the radiator. Its actually point up and towards the center a little. If it was rotated to point straight back and down a little, I think it would work out. You can see the kink at the WP in this pic

Im going to have to get some pipe fittings to install the oil pressure sending unit. It comes out close to the exhaust. I also had planned on putting the gauges in the lower part of the radio hole, but it doesn't seem like they will fit too good. So I may have to build a panel to mount them below the ash try area.
Jan 10, 2015 | 08:13 PM
#220
Thread Starter
Registered User
Joined: Apr 2013
Posts: 478
Likes: 4
From: Louisiana
Thanks. I hope so. I should be able to crank it soon.
I've also decided to do away with a stereo head unit. That will give me more room for gauges and switches. I'm just going to use an amp to power my phone or iPod. Also, my water temp gauge and new Bosch relays came in yesterday. I'm hoping to get some more work done tomorrow.
I've also decided to do away with a stereo head unit. That will give me more room for gauges and switches. I'm just going to use an amp to power my phone or iPod. Also, my water temp gauge and new Bosch relays came in yesterday. I'm hoping to get some more work done tomorrow.


