
93Xtra-Cab's 1993 Pickup
 Jun 20, 2012 | 09:29 AM
#81
Thread Starter
Registered User
Joined: Apr 2011
Posts: 1,947
Likes: 1
From: Monkton, MD
 When I do the swap, I'll let you know.
In other news, I have two days off in a row next week, so that's when I'll be doing the lift...hopefully.
Jun 21, 2012 | 05:15 PM
#82
Registered User
Joined: Oct 2011
Posts: 24
Likes: 0
Well I have heard mixed feelings on the Bj spacers. Some cases show it wears your front end faster and tears cv boots. That's what has steered me away from even considering them. But I'm sure you have done your own research. What did you find?
Jun 23, 2012 | 03:20 AM
#83
Thread Starter
Registered User
Joined: Apr 2011
Posts: 1,947
Likes: 1
From: Monkton, MD
Overall, the positives drastically outweigh the few negatives. Ask almost anyone on here that has BJ spacers and they will tell you that it is one of the best mods they have done.
Jun 23, 2012 | 03:34 AM
#84
Thread Starter
Registered User
Joined: Apr 2011
Posts: 1,947
Likes: 1
From: Monkton, MD
I had a gift card to Advanced Auto Parts so I bought a new Spectre air filter. The one that came with my eBay CAI is junk, has been on there for over 10,000 miles, and is poop brown. It was originally red. So yeah, it is time for a change.

It didn't fit because it is a hair longer. I was planning to take out that plastic piece and make a sheetmetal cover that fits snuggly against the radiator support. Here is the old filter shown.

Here is a last picture of it before it goes under the knife.

It didn't fit because it is a hair longer. I was planning to take out that plastic piece and make a sheetmetal cover that fits snuggly against the radiator support. Here is the old filter shown.
Here is a last picture of it before it goes under the knife.
Jun 24, 2012 | 05:55 AM
#85
Thread Starter
Registered User
Joined: Apr 2011
Posts: 1,947
Likes: 1
From: Monkton, MD
Well, I'm an idiot. I never thought to just remove the plastic piece and put on the new filter. So that's what I did yesterday. I can definitely feel a difference between my clogged junky one and the Spectre one.
 Jun 27, 2012 | 10:55 AM
#88
Thread Starter
Registered User
Joined: Apr 2011
Posts: 1,947
Likes: 1
From: Monkton, MD
Pictures are coming when EVERYTHING is complete.
Today I got it aligned at a local shop. I have to say the Hydro 7000s are a definite improvement over what was on it. It's like a Caddilac now I'm thinking the old shocks were some kind of nitro shock because when you pushed them down, they came back up after you let go. There was no brand or anything stamped on them so I have no clue what they are. I know they're blue...and that's about it. I'm guessing they are factory Toyota shocks.
As for the amount of lift I achieved, I measured a total of 1 5/8" in the front. That's not bad considering the spacers were only 1.5" thick. I purchased a drill bit from work so I can finish the shackles for the rear and when they're done, I can install them and the rear shocks. As of now, it's riding like a 60's gasser!
Today I got it aligned at a local shop. I have to say the Hydro 7000s are a definite improvement over what was on it. It's like a Caddilac now
I'm thinking the old shocks were some kind of nitro shock because when you pushed them down, they came back up after you let go. There was no brand or anything stamped on them so I have no clue what they are. I know they're blue...and that's about it. I'm guessing they are factory Toyota shocks. As for the amount of lift I achieved, I measured a total of 1 5/8" in the front. That's not bad considering the spacers were only 1.5" thick. I purchased a drill bit from work so I can finish the shackles for the rear and when they're done, I can install them and the rear shocks. As of now, it's riding like a 60's gasser!
Last edited by 93Xtra-Cab; Jun 27, 2012 at 10:56 AM.
Jun 29, 2012 | 04:46 PM
#90
Thread Starter
Registered User
Joined: Apr 2011
Posts: 1,947
Likes: 1
From: Monkton, MD
RMP, I'm afraid you're going to have to wait at least another day.
I installed the rear lift today after work and I have to say that it was sort of a PITA. I had this notion that I would just jack up the truck remove the nuts on the shackles and then pull the plate with the studs and then the bushings. Boy was I wrong...I got the nuts off, then my dad cut the other shackle plate in half and then heated up the eyes to soften the bushings. He cut the others in half so he could twist the studs out. Then we figured out that we had to remove the sleeve inside the spring eye to put the new bushing in, which was another fiasco. Overall, putting the new shocks on was the simplest part, taking a total of 3 minutes to install both shocks...literally.
So now it is all done and now I can finally wash it. Bikini car wash pics and truck glamor shots tomorrow after work, maybe.
Ok, maybe not the bikini car wash pics, but definitely pics of the truck and the entire process at some point
 Jul 1, 2012 | 04:30 PM
#93
Thread Starter
Registered User
Joined: Apr 2011
Posts: 1,947
Likes: 1
From: Monkton, MD
Jul 2, 2012 | 09:06 AM
#94
Thread Starter
Registered User
Joined: Apr 2011
Posts: 1,947
Likes: 1
From: Monkton, MD
Here some pics! I'll start with the front. I started on a monday after work.
This is a before shot of the front suspension.
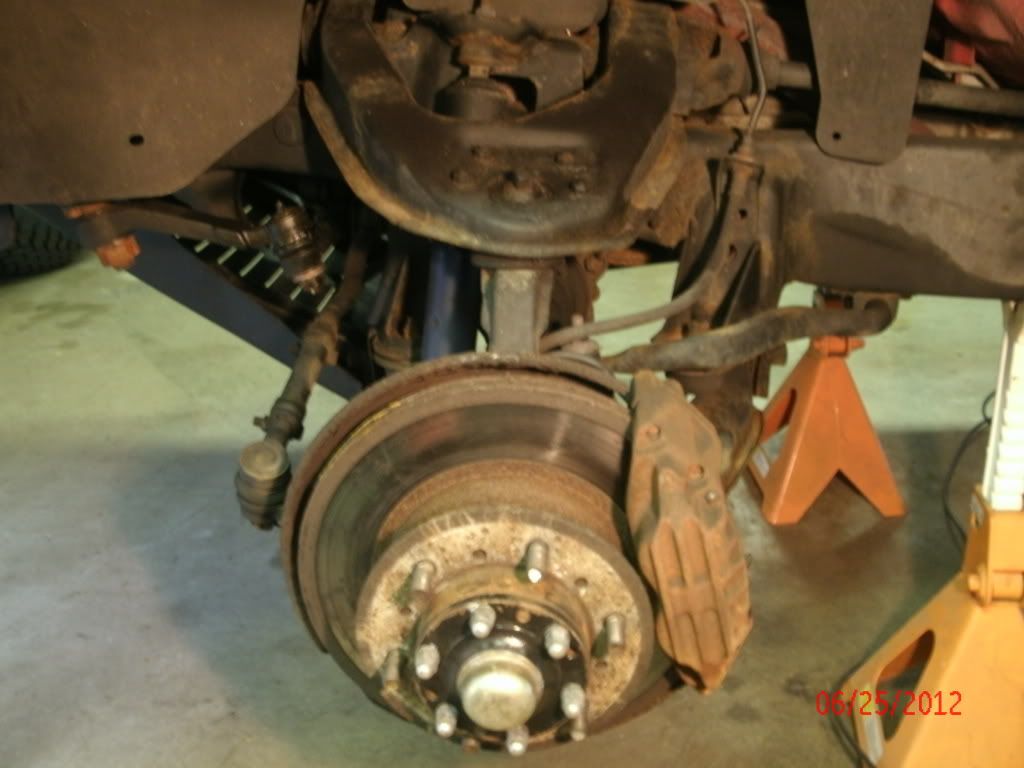
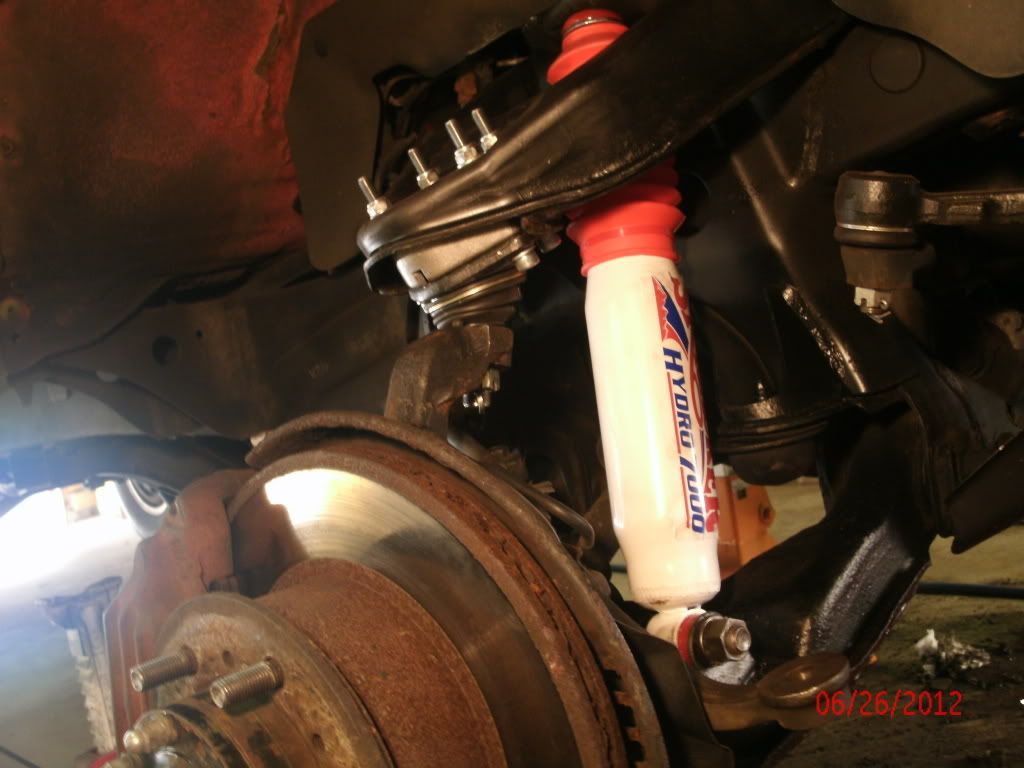
I cleaned up the control arms and shock mounts and then sprayed them with a coat of Rustoleum Rust Reformer and then a couple coats of Ace Rust Stop Satin Black. I let that sit over night and then I put the everything on the next day. I took this after I installed the shocks.
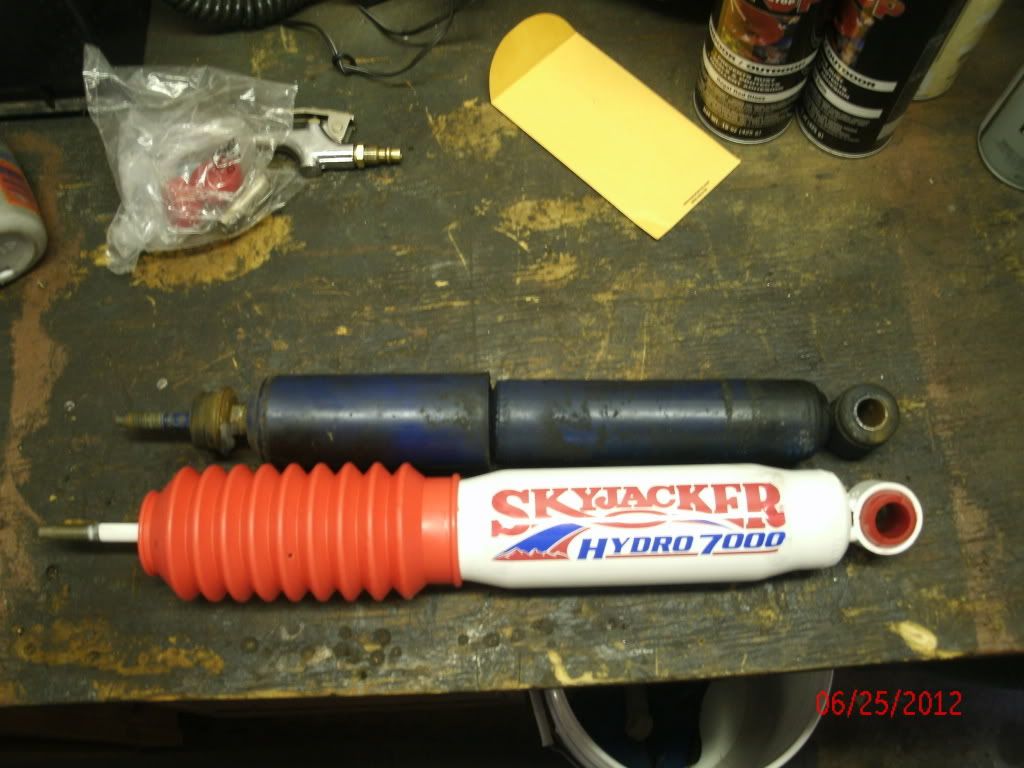
Here is a comparison shot of the shocks. Both were at fully extended lengths.
Sway Bar Mount before
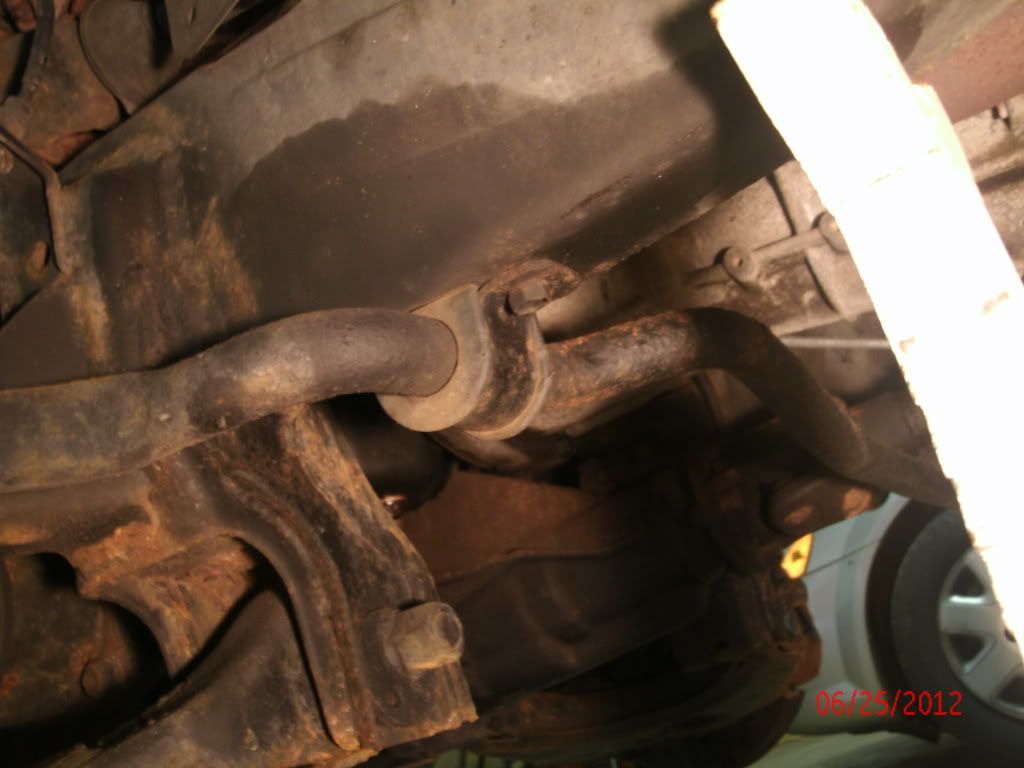
With the sway bar drop brackets installed
I never got any pictures of the differential drop. It was about 10 PM and both me and my Dad were tired from all of the cussing and wrenching. I was mainly focused on getting it done so I could get it aligned the next morning.
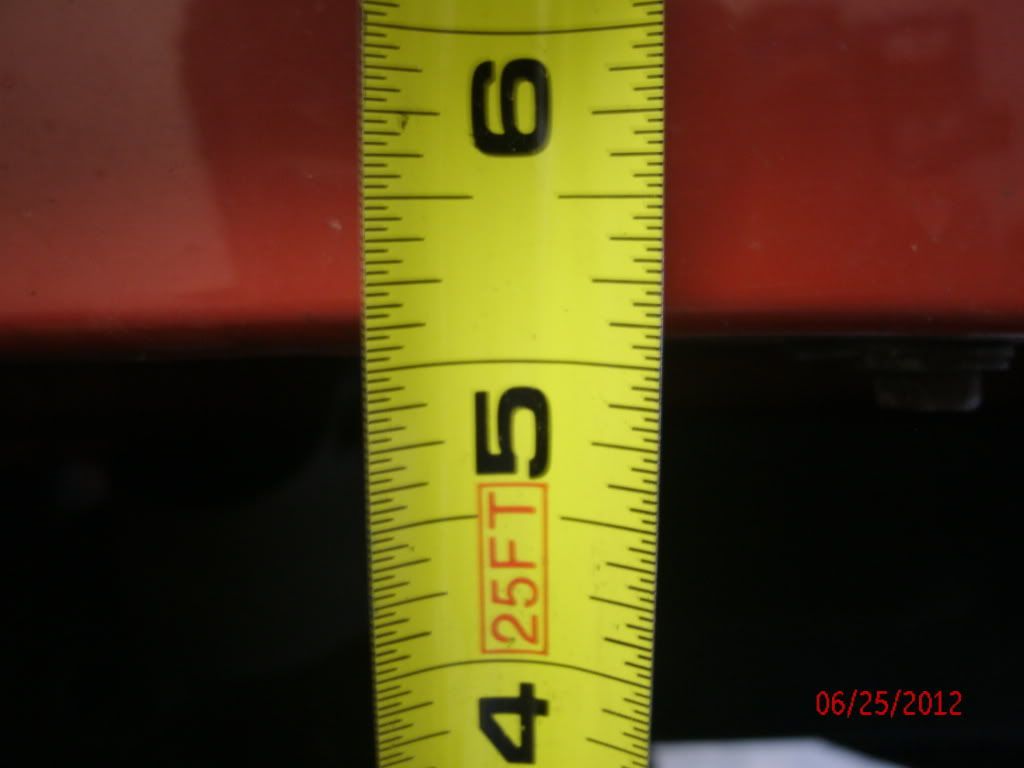
Before tearing it all apart, I measured from the top of the tire to the fender well.
After finishing the lift in the front, I measured only a 1" increase. However, after returning from getting it aligned, I got this measurement. I calculated a total of 1 5/8" total lift in the front. How I gained that extra 5/8", I don't know.
After this, I drove it for two days until I finished the rear.
This is a before shot of the front suspension.
I cleaned up the control arms and shock mounts and then sprayed them with a coat of Rustoleum Rust Reformer and then a couple coats of Ace Rust Stop Satin Black. I let that sit over night and then I put the everything on the next day. I took this after I installed the shocks.
Here is a comparison shot of the shocks. Both were at fully extended lengths.
Sway Bar Mount before
With the sway bar drop brackets installed
I never got any pictures of the differential drop. It was about 10 PM and both me and my Dad were tired from all of the cussing and wrenching. I was mainly focused on getting it done so I could get it aligned the next morning.
Before tearing it all apart, I measured from the top of the tire to the fender well.
After finishing the lift in the front, I measured only a 1" increase. However, after returning from getting it aligned, I got this measurement. I calculated a total of 1 5/8" total lift in the front. How I gained that extra 5/8", I don't know.
After this, I drove it for two days until I finished the rear.
Jul 2, 2012 | 09:58 AM
#95
Thread Starter
Registered User
Joined: Apr 2011
Posts: 1,947
Likes: 1
From: Monkton, MD
Now for the rear. Really simple, just shackles and shocks.
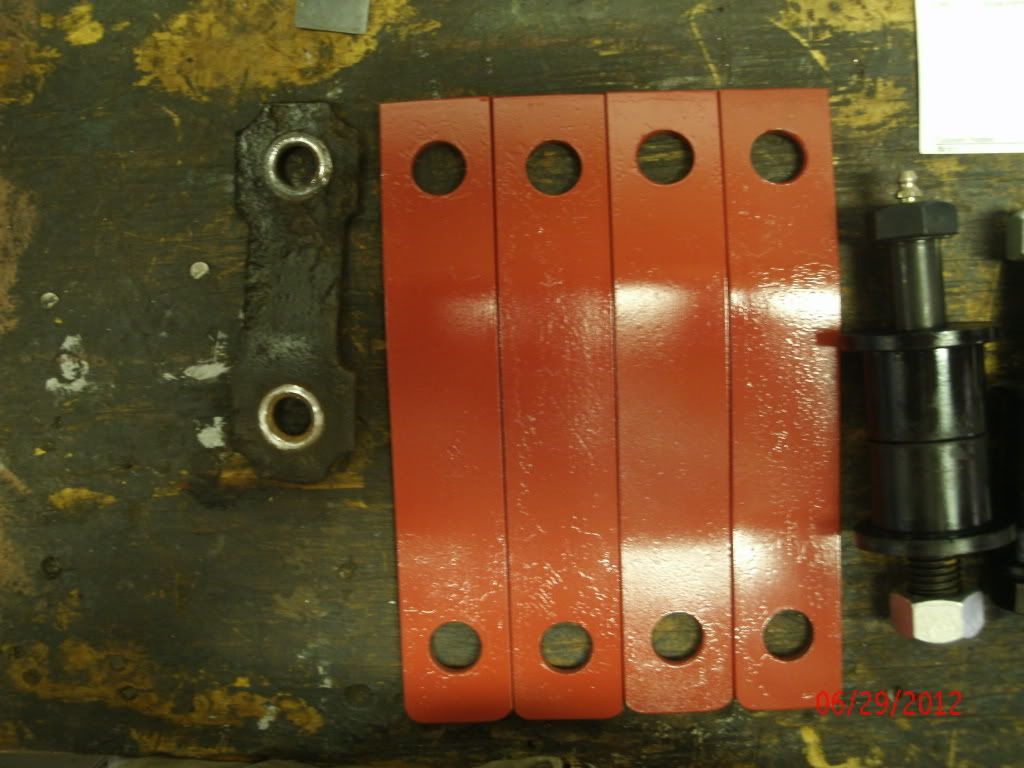
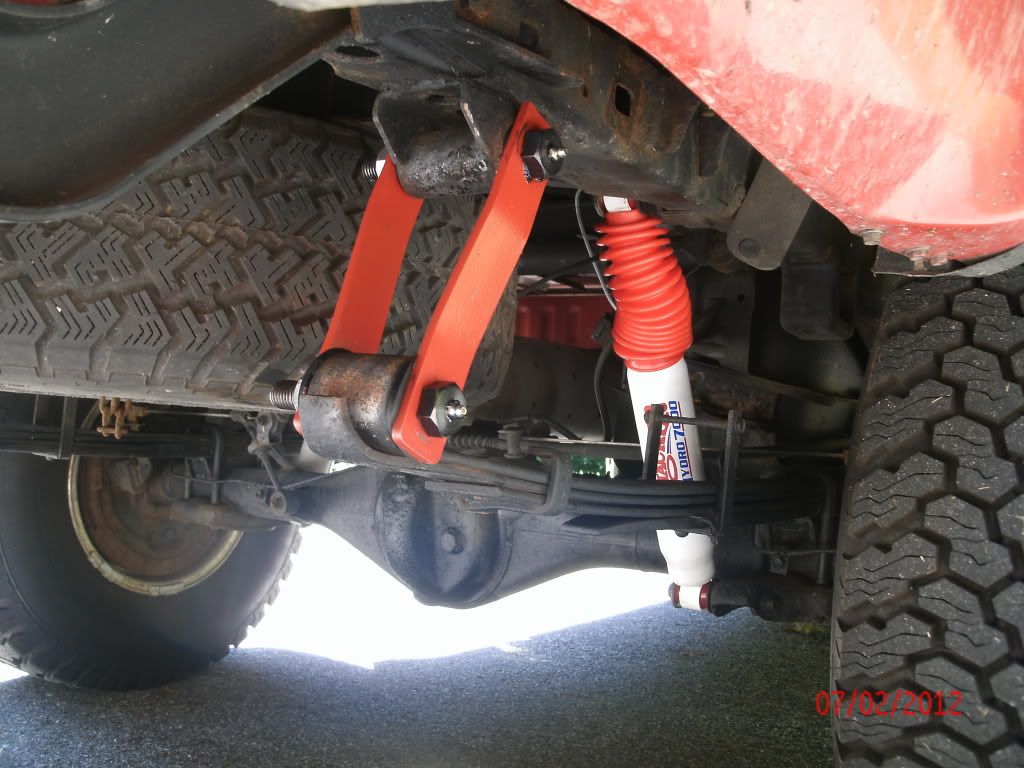
On my way back from getting it aligned (wednesday), I stopped into work to get a drill bit. I couldn't find an 18mm bit anywhere so I got a 23/32". The holes turned out perfect. We then heated the pieces up in a vise so we could bend them into shape. I roughed them up on the bench grinder wire wheel and sprayed a coat of Ace Rust Stop Red Primer. After that, I sprayed 2 generous coats of Ace Rust Stop Regal Red Gloss and let them dry overnight.
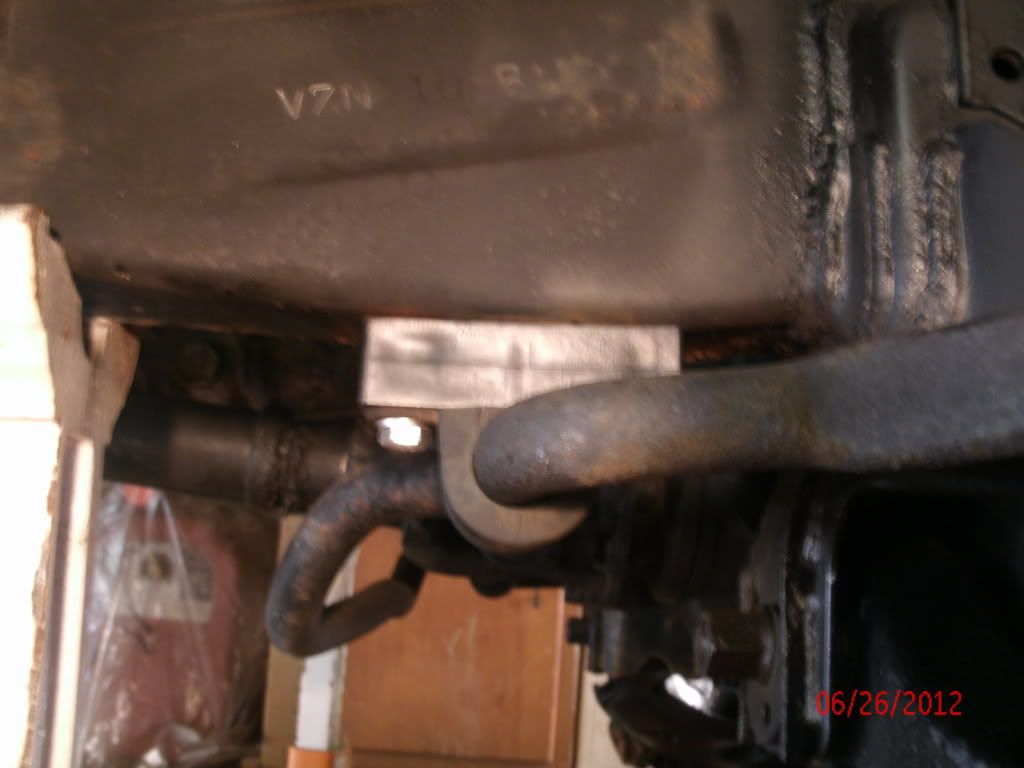
Jump to friday night, after work. I removed the nuts on the factory shackles and removed the one side plate. Here it is compared to the new ones.
By this time, I thought it would be simple. You know, just pull the whole shackle and stud assembly out though the spring eye and frame mount, remove the bushings and put the new stuff in. Me and my dad had to cut the other shackle plate in half with a torch, heat up the spring eyes and frame mounts to melt the bushings and then remove the bolts. After all that, we had to remove the sleeve in the spring eye.
For future reference, if you ever decide to heat up the spring eye to melt the rubber bushings so you can remove your factory shackles, do not lay directly underneath it. Rubber will start spraying everywhere. A giant molten chunk landed on my dads arm and took the skin right off.
So we got them all mounted up and then installed the shocks, which took a total of 5 minutes (literally) for both sides. Some pictures I took today:

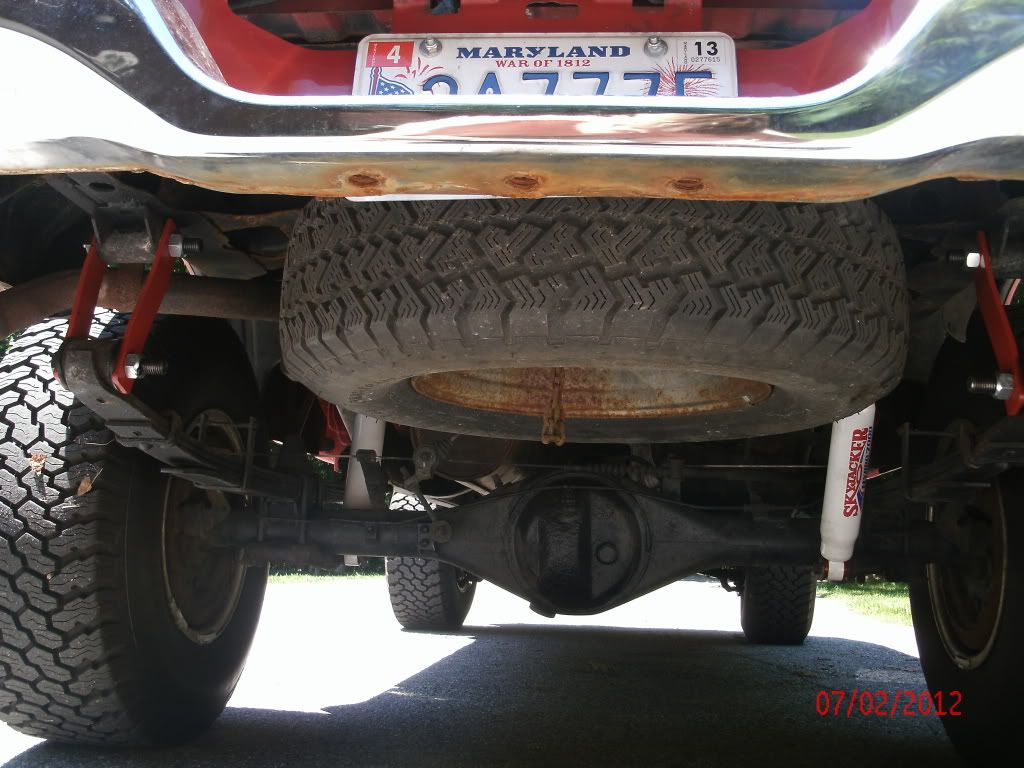
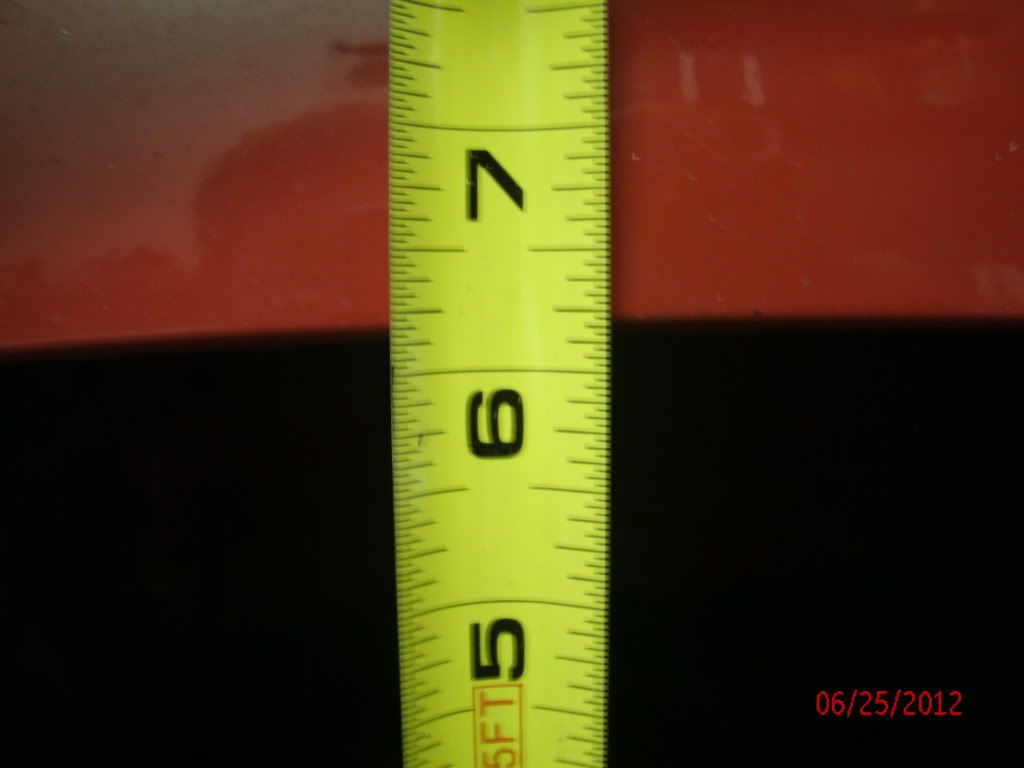
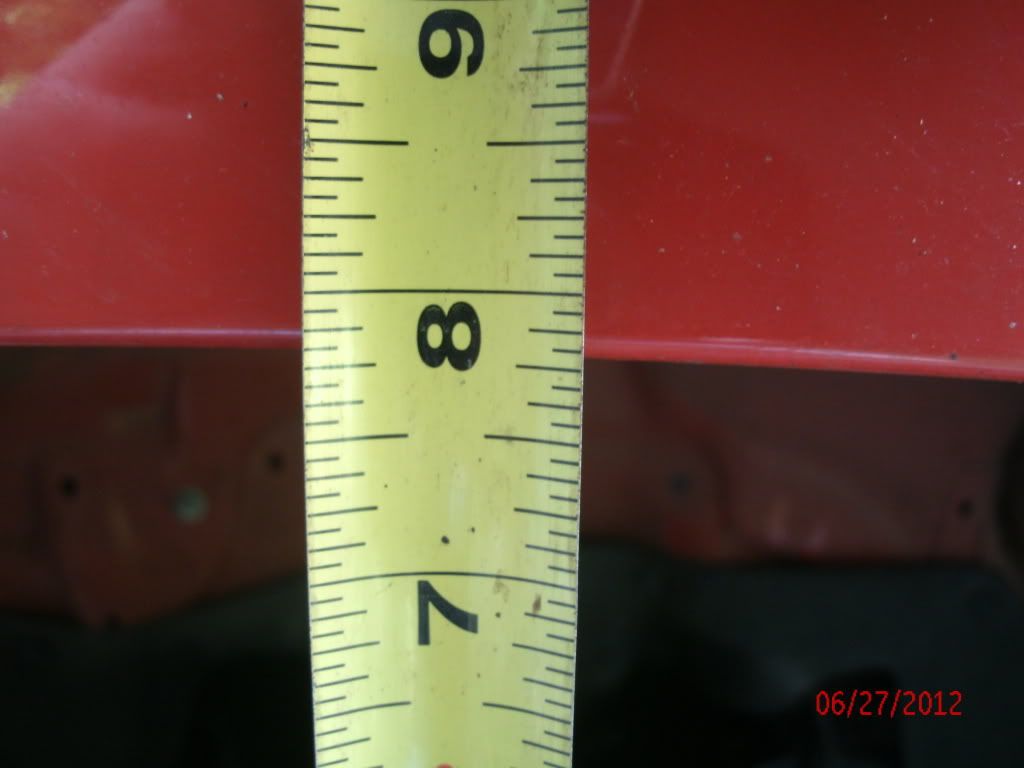
Top of tire to fender before:
After:
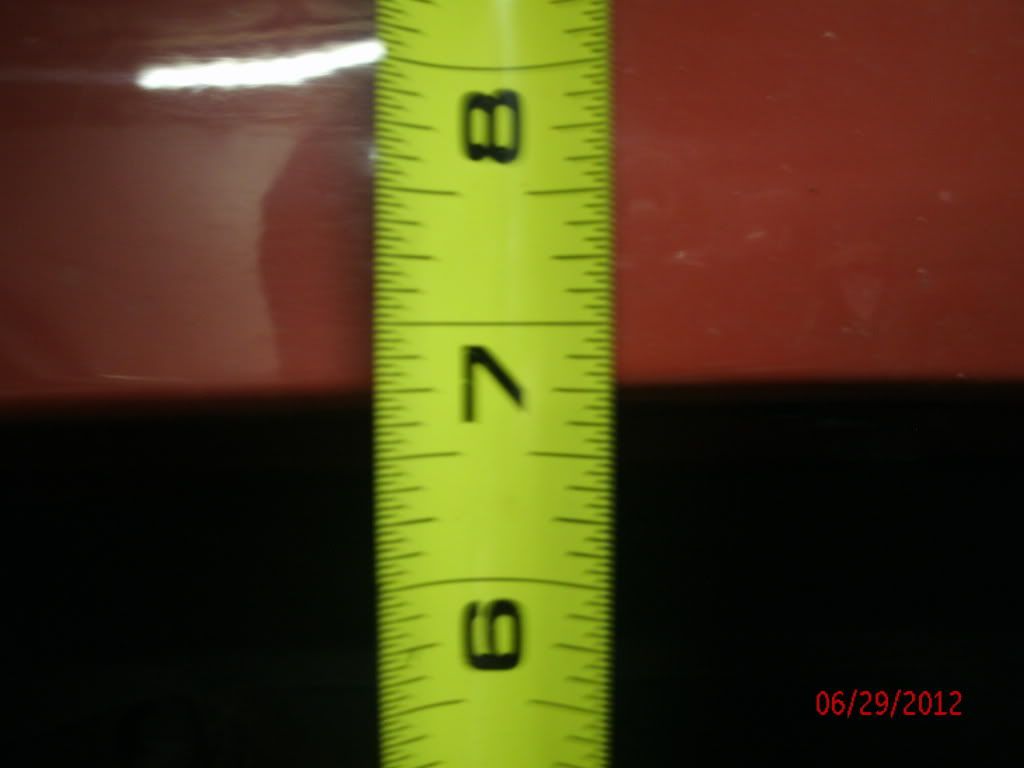
I calculated a total of 1 5/8" lift in the rear with shackles that are 6.5" center to center.
On my way back from getting it aligned (wednesday), I stopped into work to get a drill bit. I couldn't find an 18mm bit anywhere so I got a 23/32". The holes turned out perfect. We then heated the pieces up in a vise so we could bend them into shape. I roughed them up on the bench grinder wire wheel and sprayed a coat of Ace Rust Stop Red Primer. After that, I sprayed 2 generous coats of Ace Rust Stop Regal Red Gloss and let them dry overnight.
Jump to friday night, after work. I removed the nuts on the factory shackles and removed the one side plate. Here it is compared to the new ones.
By this time, I thought it would be simple. You know, just pull the whole shackle and stud assembly out though the spring eye and frame mount, remove the bushings and put the new stuff in. Me and my dad had to cut the other shackle plate in half with a torch, heat up the spring eyes and frame mounts to melt the bushings and then remove the bolts. After all that, we had to remove the sleeve in the spring eye.
For future reference, if you ever decide to heat up the spring eye to melt the rubber bushings so you can remove your factory shackles, do not lay directly underneath it. Rubber will start spraying everywhere. A giant molten chunk landed on my dads arm and took the skin right off.
So we got them all mounted up and then installed the shocks, which took a total of 5 minutes (literally) for both sides. Some pictures I took today:
Top of tire to fender before:
After:
I calculated a total of 1 5/8" lift in the rear with shackles that are 6.5" center to center.
 Jul 2, 2012 | 05:05 PM
#97
Thread Starter
Registered User
Joined: Apr 2011
Posts: 1,947
Likes: 1
From: Monkton, MD
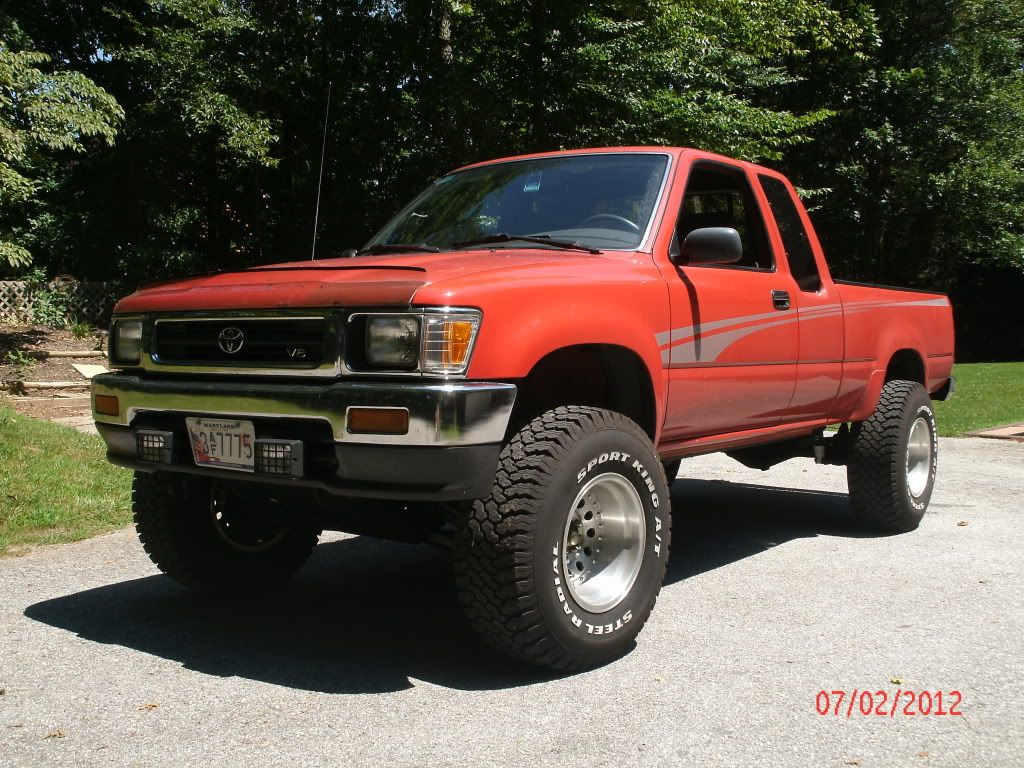
Glamour shots are here. I cleaned the rims, vacuumed the interior, cleaned the glass, put armor all on the dash and other interior plastics, and threw on some tire shine. It no longer has that streaky faded pink look to it!
Enjoy


My favorite one

Enjoy
My favorite one
Jul 2, 2012 | 05:43 PM
#98
Registered User
Joined: Dec 2010
Posts: 592
Likes: 0
From: merritt island, FL
Hey i love the truck, i wish mine was that clean! Ive got a question about your shackles? I might have missed this in your build somewhere but where did you get them, and the grease fittings?


