93 4Runner build
 Jan 18, 2014 | 04:37 PM
#1
Thread Starter
Registered User
Joined: Jul 2013
Posts: 29
Likes: 0
From: Ottawa
93 4Runner build
Hi everyone,
I have been silently following this forums for a few years now and decided it was finally time to post the progression of my 93 4Runner. I bought my 4Runner about 3 years ago on a whim and being my first 4x4 Yota I instantly fell in love (my first Yota love was my family's 86 Supra) and have been progressively learning, planning and developing my first build ever since.
Just to give everyone a better appreciation and understanding of my mechanical and fabrication capacities (or lack thereof) I would like to mention that while I'm an enthusiast my abilities are limited and it has been a learning experience as I approach every issue or upgrade. Since I bought my first car I have always attempted to service my vehicles myself both to learn and save $'s but I can recognize when I'm over my head and need help. This forum has been a great wealth of knowledge for my build and really has helped me to understand the potential and limitations of my platform and to devise an outlook for my build.
My build has been a slow progression over about 3 years and like most it is ongoing. Unfortunately I have not documented much of my build thus far but will try to do so going forward.
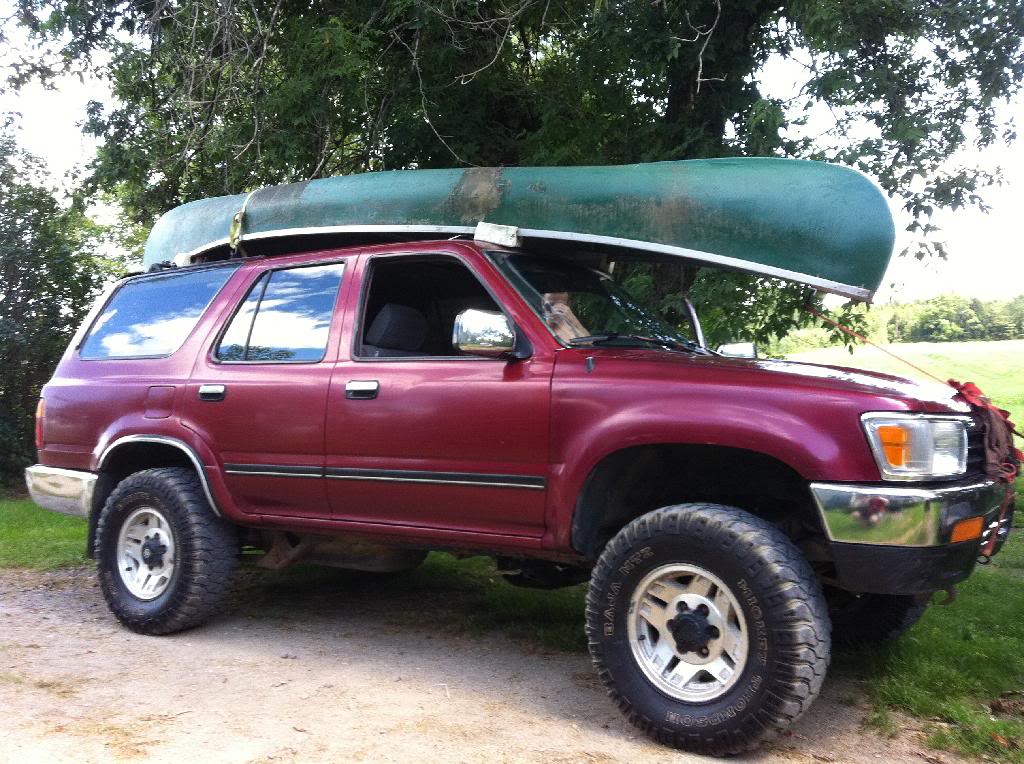
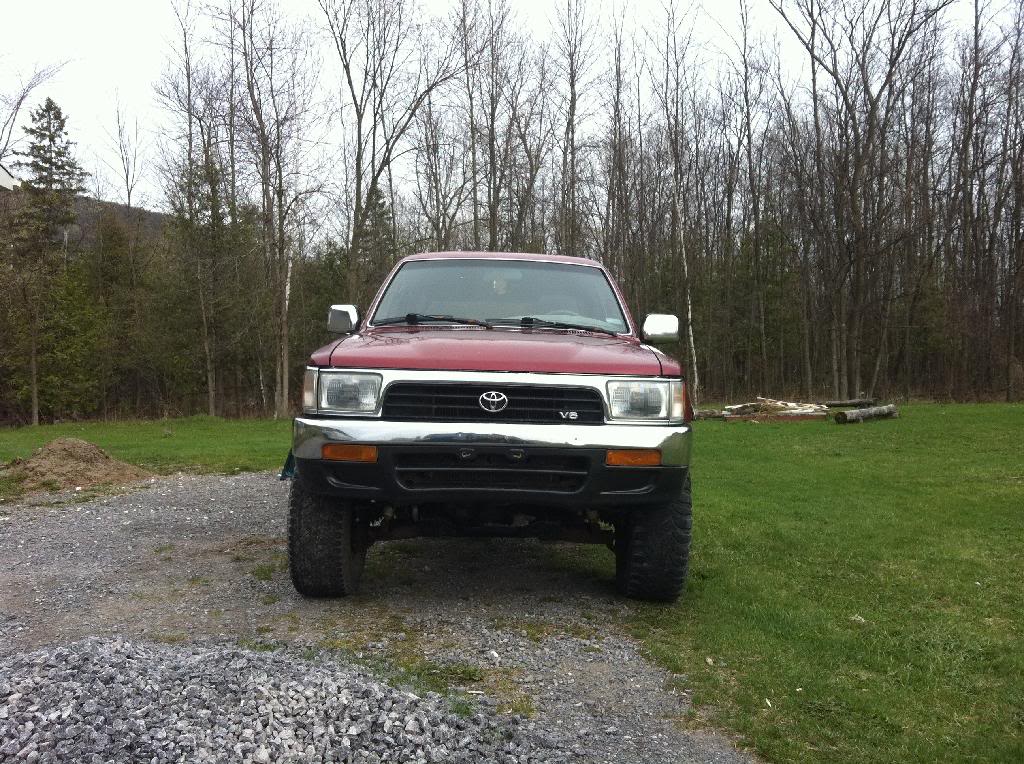
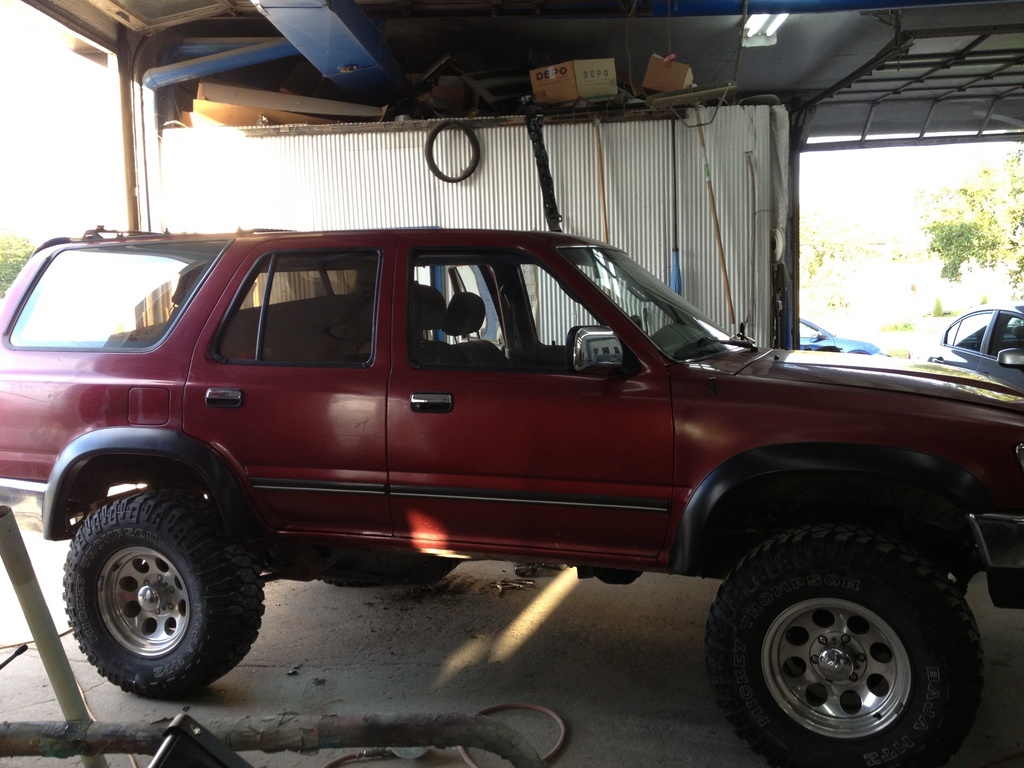
Here is a picture of my starting point. I will post some more pictures of my progression and thoughts on my approach.
I have been silently following this forums for a few years now and decided it was finally time to post the progression of my 93 4Runner. I bought my 4Runner about 3 years ago on a whim and being my first 4x4 Yota I instantly fell in love (my first Yota love was my family's 86 Supra) and have been progressively learning, planning and developing my first build ever since.
Just to give everyone a better appreciation and understanding of my mechanical and fabrication capacities (or lack thereof) I would like to mention that while I'm an enthusiast my abilities are limited and it has been a learning experience as I approach every issue or upgrade. Since I bought my first car I have always attempted to service my vehicles myself both to learn and save $'s but I can recognize when I'm over my head and need help. This forum has been a great wealth of knowledge for my build and really has helped me to understand the potential and limitations of my platform and to devise an outlook for my build.
My build has been a slow progression over about 3 years and like most it is ongoing. Unfortunately I have not documented much of my build thus far but will try to do so going forward.
Here is a picture of my starting point. I will post some more pictures of my progression and thoughts on my approach.
Last edited by T4RYota93; Jan 19, 2014 at 11:33 AM.
Jan 18, 2014 | 05:50 PM
#2
Thread Starter
Registered User
Joined: Jul 2013
Posts: 29
Likes: 0
From: Ottawa
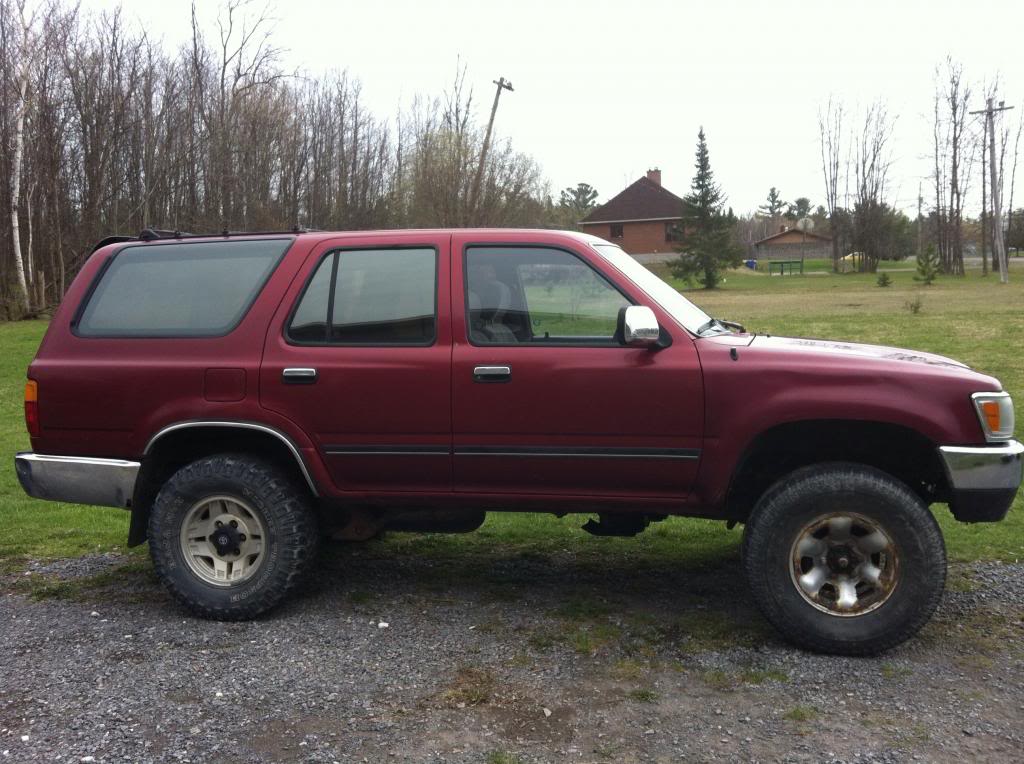
Here are some more pictures of her before her first surgery. During the first year of ownership I tried to go though most of the issues for general maintenance before doing any upgrades (i.e plugs & wires, cap & rotor, cv joints, tie-rods, clutch, etc, etc..)
Last edited by T4RYota93; Jan 19, 2014 at 11:54 AM.

Trending Topics
Jan 19, 2014 | 09:08 AM
#9
Thread Starter
Registered User
Joined: Jul 2013
Posts: 29
Likes: 0
From: Ottawa
While the 4Runner is not my daily driver (and I wouldn't want it to be with the 3.0 under the hood  ) I wanted to ensure that throughout my build the on-road drivability was not severely compromised. I mostly use the 4Runner as my work horse, for camping excursions, and for off-road trail running.
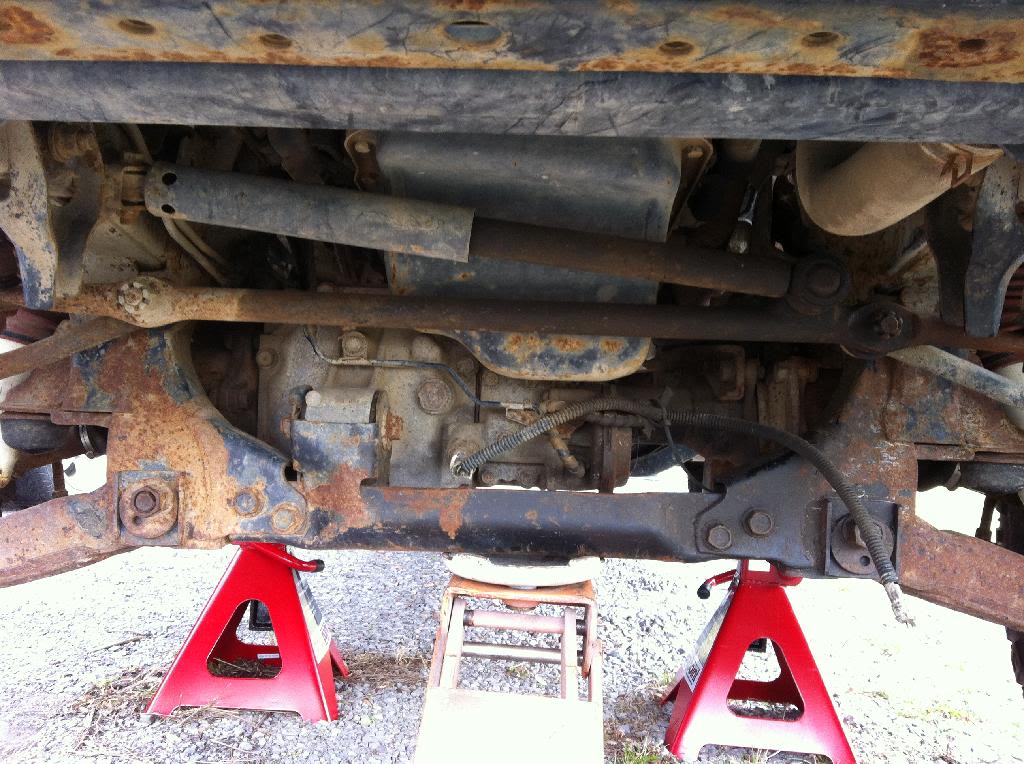
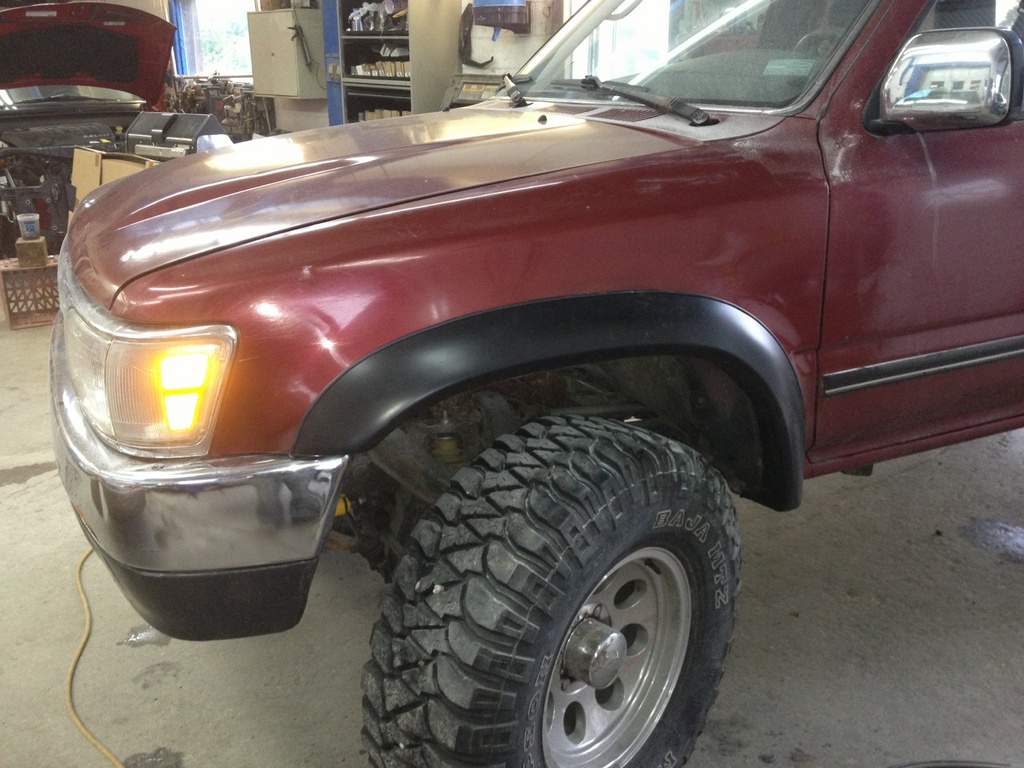
My first upgrade came when one of the old stock size (31") Mickey Thompsons finally blew out. I had been searching the forums trying to figure out what the largest size tire is that I could fit under the truck, knowing that I was ultimately interested in installing a suspension lift. Unfortunately I couldn't get a straight answer with some claiming a certain tire size is fine while others claiming that it rubs. A new set of rubber is not an insignificant investment and I didn't want to buy a slightly larger size tire to fit the stock setup only to want to upgrade as soon as I installed a lift. Sooooo... I just bit the bullet and ordered the OME 2" lift along with 16" MT wheels and 33" MT Baja MTZ's.
I ordered everything through one of the local 4x4 shops (National 4WD) after some price haggling. Thanks to the internet I was able to locate significantly lower quotes which National 4WD ultimately was willing to match if I would give them the labour for the install. Initially I had wanted to do the install myself (I have changed out the suspension on other vehicle before) but I was not familiar with the tortion bar setup and decided to take them up on the deal. In the end I was happy that I did because the panhard bar bushings in the rear were worn out and the end was actually broken. They were able to fab me up a stronger end piece with urethane bushings for about a 1/4 the price quote for a replacement. I have never used a welder so there was no way I could have done this myself.
) I wanted to ensure that throughout my build the on-road drivability was not severely compromised. I mostly use the 4Runner as my work horse, for camping excursions, and for off-road trail running.My first upgrade came when one of the old stock size (31") Mickey Thompsons finally blew out. I had been searching the forums trying to figure out what the largest size tire is that I could fit under the truck, knowing that I was ultimately interested in installing a suspension lift. Unfortunately I couldn't get a straight answer with some claiming a certain tire size is fine while others claiming that it rubs. A new set of rubber is not an insignificant investment and I didn't want to buy a slightly larger size tire to fit the stock setup only to want to upgrade as soon as I installed a lift. Sooooo... I just bit the bullet and ordered the OME 2" lift along with 16" MT wheels and 33" MT Baja MTZ's.
I ordered everything through one of the local 4x4 shops (National 4WD) after some price haggling. Thanks to the internet I was able to locate significantly lower quotes which National 4WD ultimately was willing to match if I would give them the labour for the install. Initially I had wanted to do the install myself (I have changed out the suspension on other vehicle before) but I was not familiar with the tortion bar setup and decided to take them up on the deal. In the end I was happy that I did because the panhard bar bushings in the rear were worn out and the end was actually broken. They were able to fab me up a stronger end piece with urethane bushings for about a 1/4 the price quote for a replacement. I have never used a welder so there was no way I could have done this myself.
 Jan 19, 2014 | 09:17 AM
#11
Thread Starter
Registered User
Joined: Jul 2013
Posts: 29
Likes: 0
From: Ottawa
Here is a shot from the back. You will notice the tailgate was changed. Someone decided to back into my truck in a parking lot and the glass eventually fell out of the track and would no longer go up. Painting the tailgate is on my list of things to do.
Jan 19, 2014 | 11:49 AM
#13
Thread Starter
Registered User
Joined: Jul 2013
Posts: 29
Likes: 0
From: Ottawa
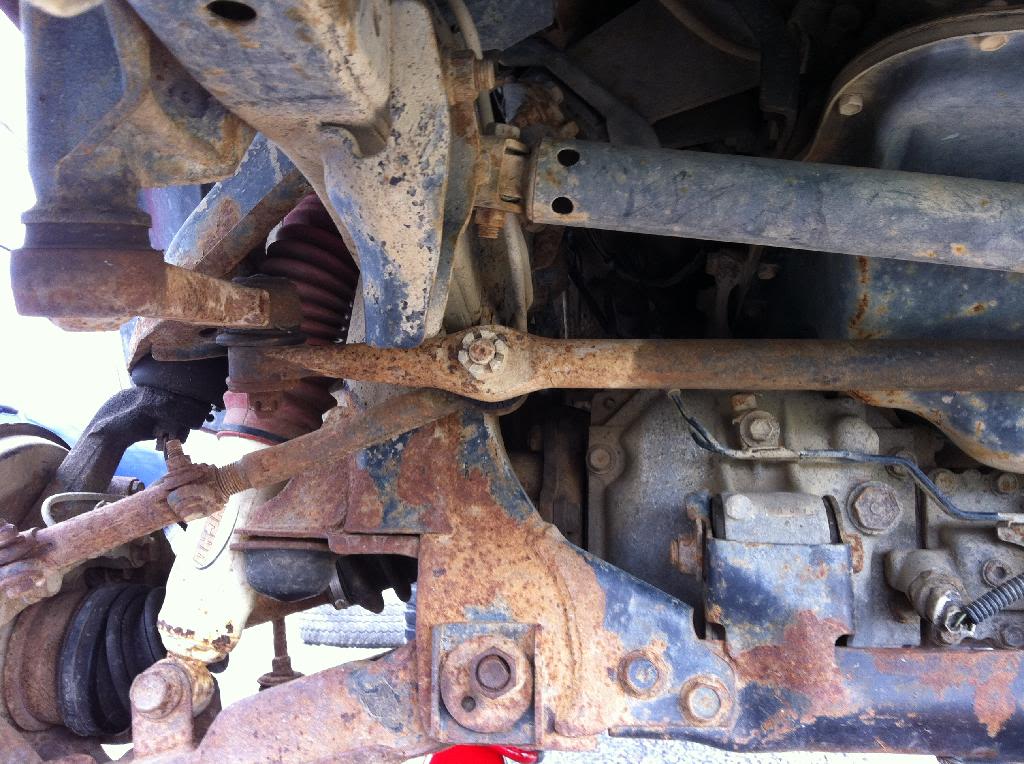
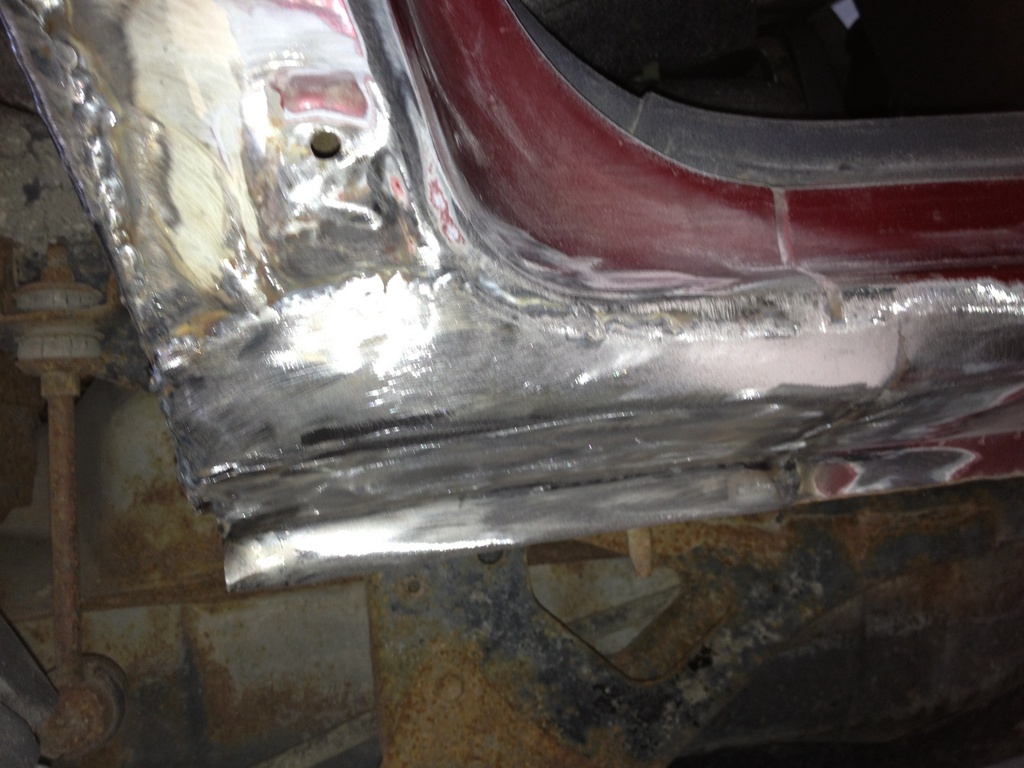
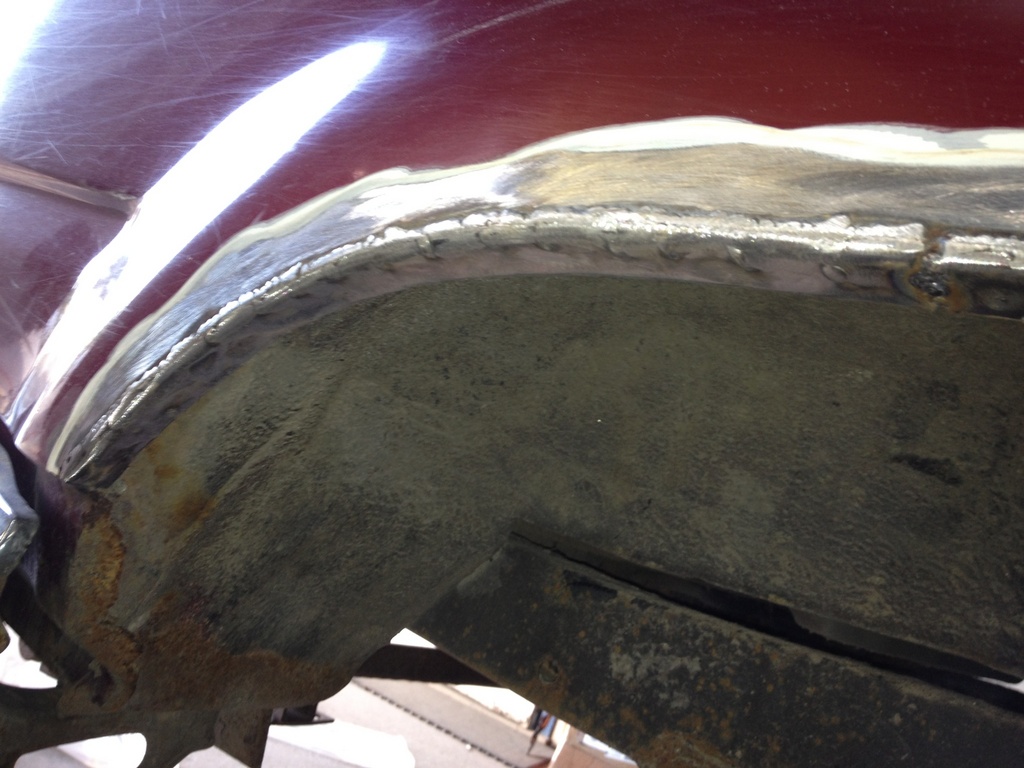
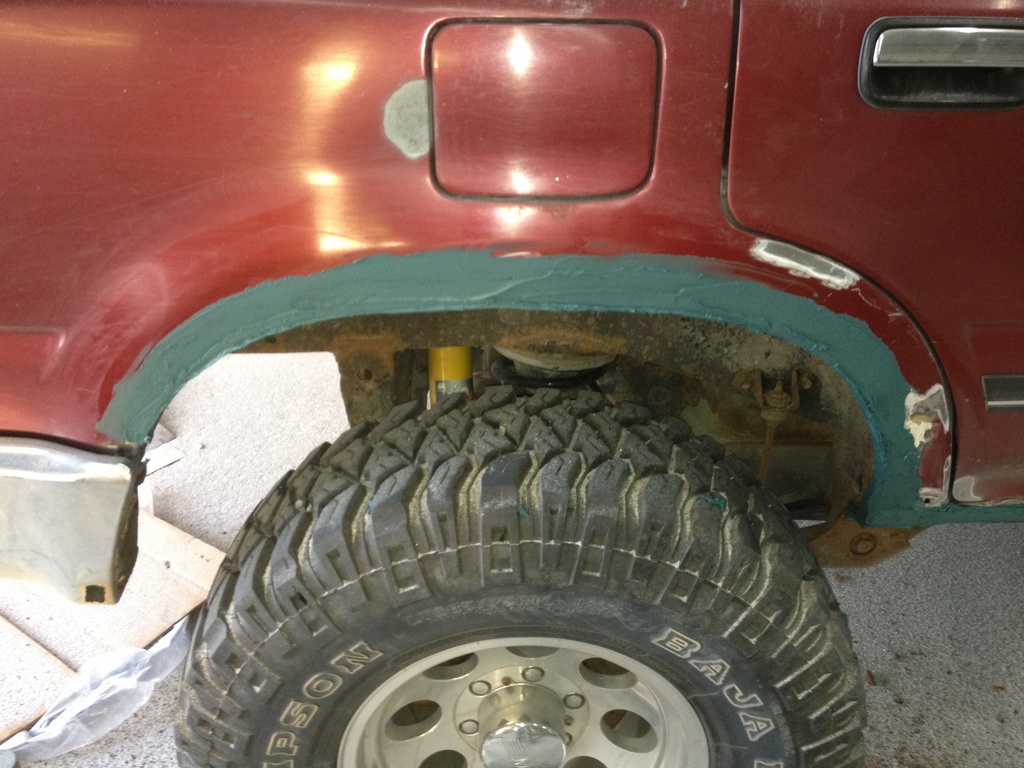
My next upgrade was to install Bushwaker fender flares to better cover the tires and provide some protection to the fenders against debris kicked up by the tires. Before covering the fenders I addressed some of the rust issues on the rockers and replaced the fender lip. Otherwise there wouldn't have been much to screw the flares to. Luckily I have a friend that is very capable and gave me a hand.
 Mar 30, 2014 | 06:21 AM
#18
Thread Starter
Registered User
Joined: Jul 2013
Posts: 29
Likes: 0
From: Ottawa
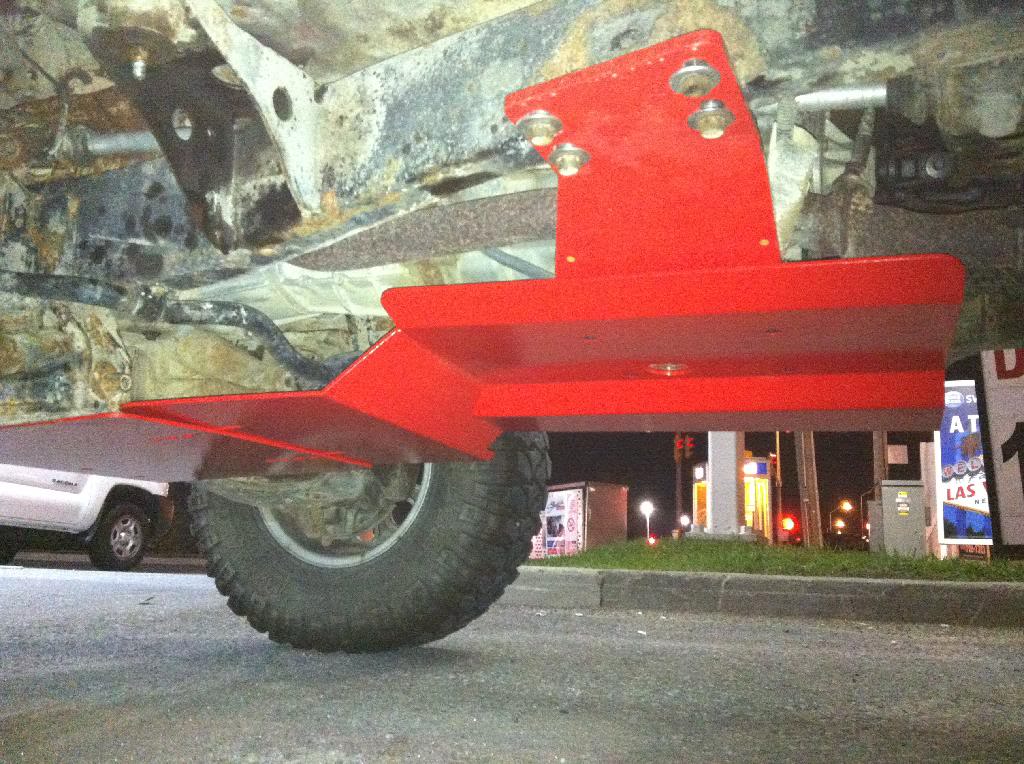
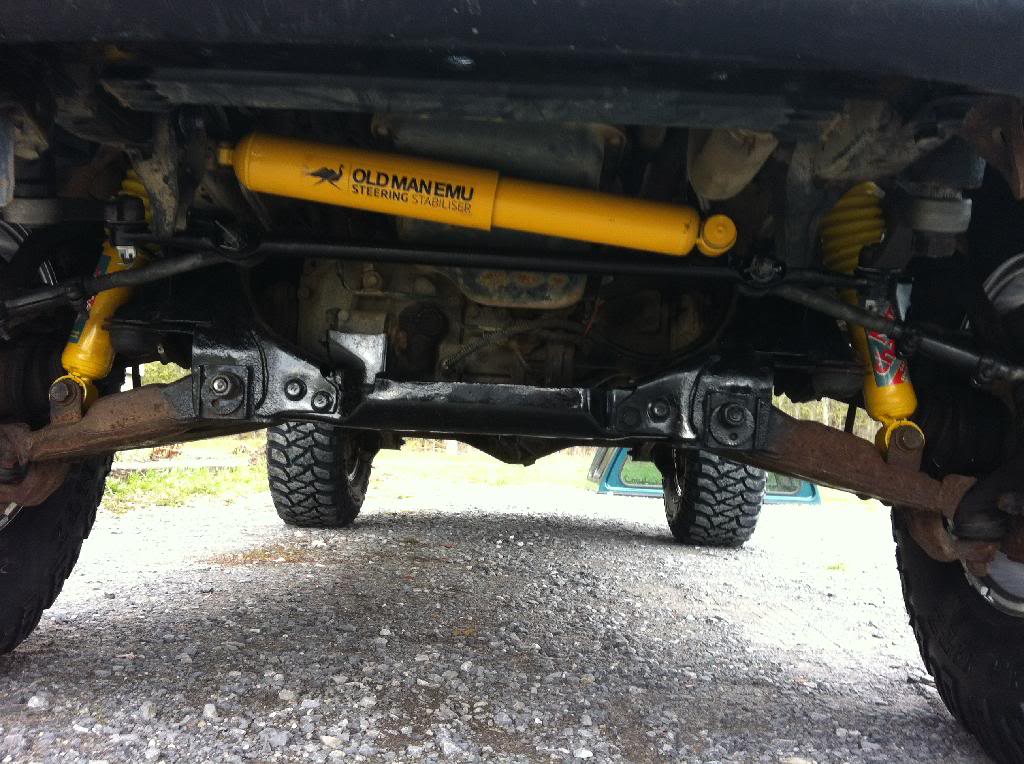
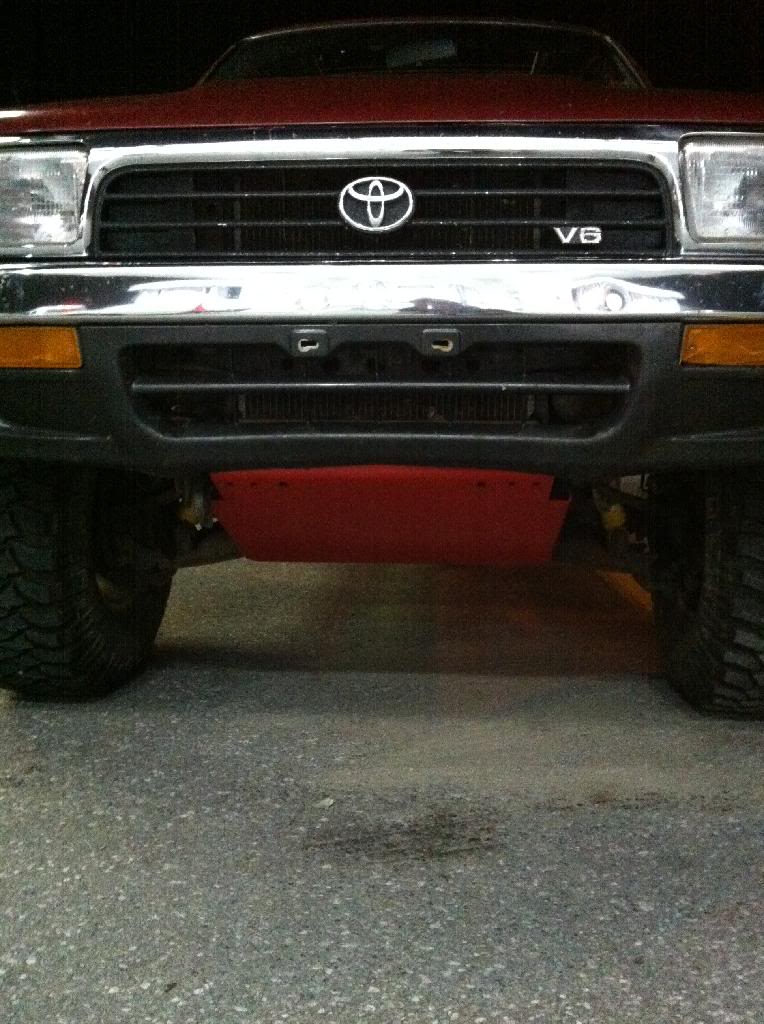
Next up I installed the Budbuilt 3 piece combo ( Front skid, cross member, and belly pan). I ran into a bit of a problem when installing the skids. It turned out that I was sent a cross member with a 1" driveline lift. I discovered this when trying to bolt up the cross member- the transmission was bottoming out on the floor before I would get it flush with the frame.
Mar 30, 2014 | 06:42 AM
#19
Thread Starter
Registered User
Joined: Jul 2013
Posts: 29
Likes: 0
From: Ottawa
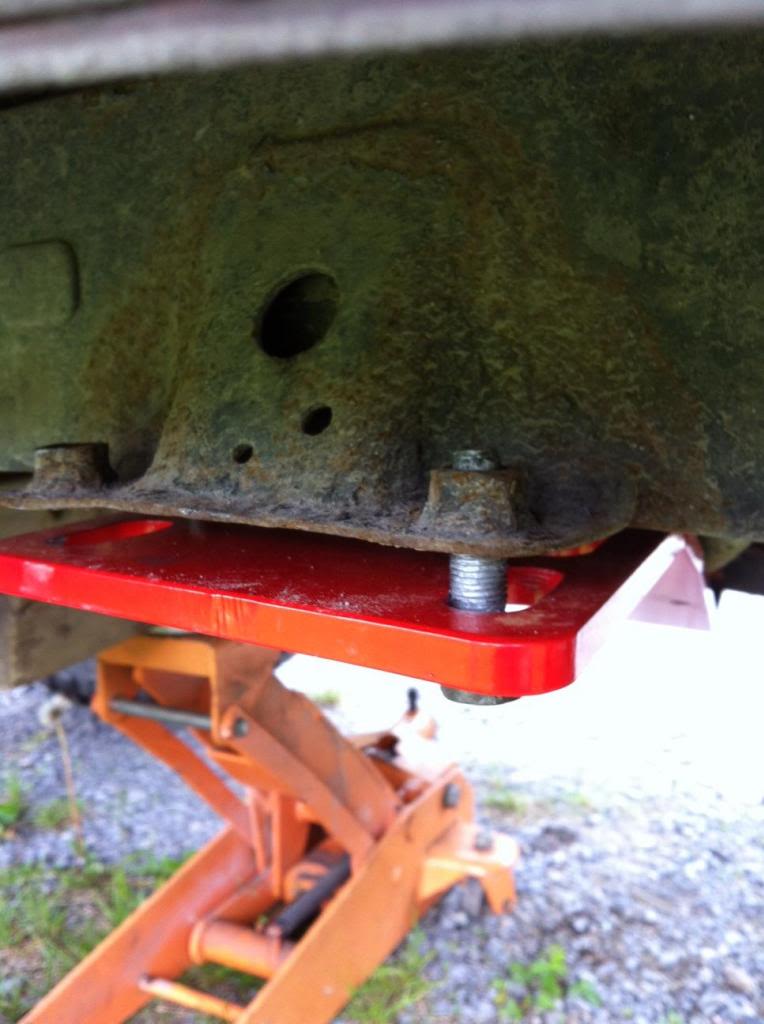
I spoke with Bud himself and he is a great guy!! He took the time to point me in the right direction and even gave me his cell number so I could give him a call anytime I had a question. He advised that I could either manipulate the floor where it was contacting to make some more space or install a body lift to make it fit. I had thought of installing a small spacer to make the difference but of course it's a better idea to create clearance. So opted to install a body lift.
So came my next decision- what size of body lift? I really don't like tall body lift and I wanted to keep the center of gravity as low as possible while avoiding things like steering shaft extensions, etc... I read through the forums to see what other guys were installing and in the end decided just to go with a 1" body lift from 4Crawler Offroad. So far I'm really happy with that decision. The resulting gaps are not very noticeable but it does get the body up off the frame allowing for a little more room underneath for working on things and will make it easier to clean mud off the top of the frame rail. It also created some space for my next upgrade, which is to install some rock sliders. Best of all the BudBuilts bolted right up after the lift!
So came my next decision- what size of body lift? I really don't like tall body lift and I wanted to keep the center of gravity as low as possible while avoiding things like steering shaft extensions, etc... I read through the forums to see what other guys were installing and in the end decided just to go with a 1" body lift from 4Crawler Offroad. So far I'm really happy with that decision. The resulting gaps are not very noticeable but it does get the body up off the frame allowing for a little more room underneath for working on things and will make it easier to clean mud off the top of the frame rail. It also created some space for my next upgrade, which is to install some rock sliders. Best of all the BudBuilts bolted right up after the lift!