When you click on links to various merchants on this site and make a purchase, this can result in this site earning a commission. Affiliate programs and affiliations include, but are not limited to, the eBay Partner Network.
There are a few runners around here. One guy has a nice 86 with shiny paint and perfect straight bumpers.
Didnt see that one.
The boy I got my stuff from is in Bat Cave
How are you liking your new paint guns?
I bought 2 from Harbor freight, the purple ones.
Had to order larger nozzles from customer service I'm using one for rust incapsulator and the other for primer
I used the non hvlp on my engine and boy was it quick. 3 passes two times and covered with no runs.
I need a larger cap too as all i have are two 1.4
I don't know anyone in bat cave with a runner. I know of two red ones, one red and black v6 and a silver v6 but i see them in hendersonville and flat rock all the time
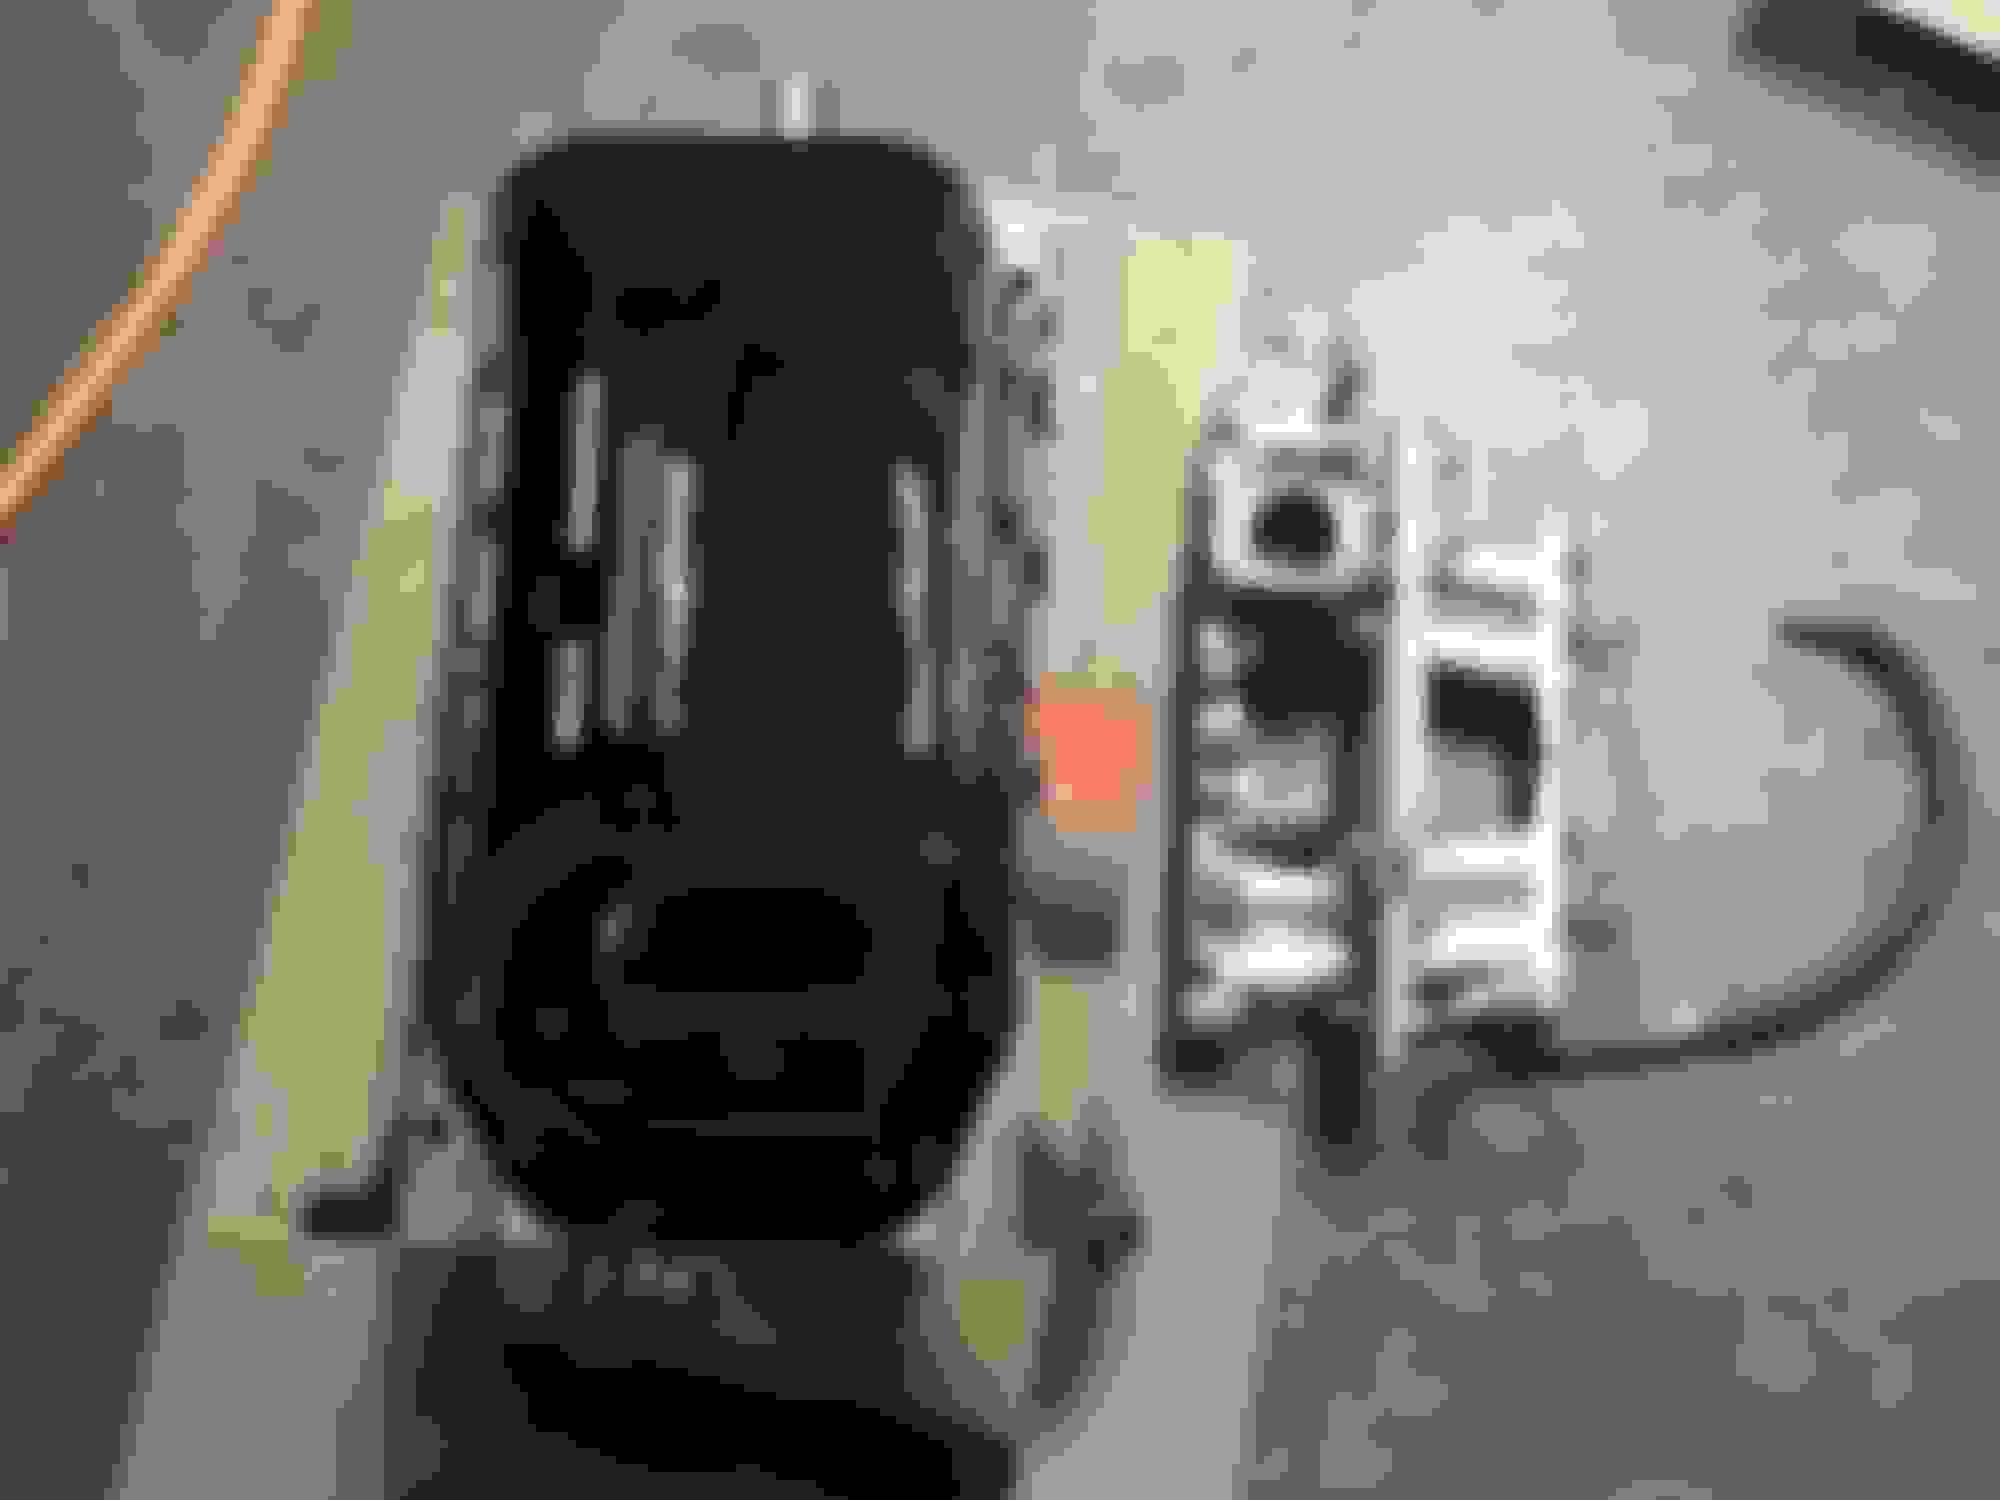
Went to assemble the engine and realized that there is no good way to do this without an engine stand. I have a buddy who will let me borrow his so i will wait for that.
I did get my oil pan painted and the plate that goes between the Trans and block.
I also got the intake manifold ready to go and installed my new injectors.
Side note on the injector install. These were dual o ring injectors but while trying to install then the second o ring wouldn't go in without coming out of its ring land. There just wasn't enough room to compress two o rings in that space.
I opted to take one of the o rings out, but am concerned that now they won't seal properly as the single o ring is now in a spot that is too large.
Thinking i may take them out and find a thinner width o ring to put back in its place.
Also, the injector o rings work as a replacement for the idle adjustment screw in the throttle body
Picked up an engine stand off Craigslist today for 40. 25 bucks cheaper than harbor freight anyways.
I started reassembly as well after digging up things i lost, like my oil pump drive gear.
I also noticed the dowels i found were oil pump dowels, but i was only missing one chain cover dowel and since the new cover came with oil pump dowels i used an old one as my missing chain cover dowel.
This is all for tonight, tomorrow I'll get everything together for the timing cover and install the head and oil pan.
Getting out of work at 8 sucks. Only a coupe of hours to work and tired as well.
I did not get the head on, i barely got the timing cover loosely bolted up.
One of the studs went missing for the water pump so i had to get a bolt to fit, then the water pump bolt that goes through the water pump and timing cover wasn't the correct one. It was too long and bottoming out so i had to cut the threads shorter so it would do its job.
I also stopped because when tourqing the water pump to 7 ftlb i had trouble getting them there, they seemed to tighten forever and even once the wrench clicked seemed less definitive than normal. Seeing as its a new timing cover and i only hand tightened before using my torque wrench they should be ok, but I'm still concerned.
I might take it back off and inspect the threads and put honda bond on it for security
Well i was right about the water pump threads. 5 of the holes are no good. They didn't strip per say but the threads that were cut are to wide so the bolts won't bite.
I will have to drill/tap them slightly larger i guess. I think a 1/4 sae is 6.3 mm and would be the best bet. This cover was machined to the block, and i already torqued the head down.
So i drilled and tapped the water pump holes for 1/4 28 and they stripped as well. Then i had one of the factory bolts snap because i forgot to reset my torque wrench.
So i went and bought a helicoil kit and drilled a 1/4 hole and installed the helicoils so now we are at m6x1 again
I replaced all of the bolts but left the studs and nuts.
My 35 dollar timing cover is now a 75 dollar timing cover with helicoils, which i hate btw.
But here she is assembled and valve lash set. All i need is to paint the valve cover and get a couple of odds and ends like oil filter, o2 sensor, fuel filter etc.
Engine is looking good! Who did you get your Bosch injectors through?
I got them from eBay. I thought they were the flamethrower injectors but they are composite and not metal like the ones you see pictures of. We will see how they go. I have extra intake gaskets so if they leak at the o ring I'll take them out and find a more suitable o ring.
They also came with a resistor bypass harness and new pigtails. Although the stock ones fit them.
I primed the engine bay and sanded it. Ready to paint. Yes the welds look bad but body filler would have probably cracked under the vibration from the battery. The battery, bracket, bottle etc will hide the imperfections.
I painted the battery holder with truck bed liner.
I took off the chrome fender trim and took out most of the large dents. I decided to leave the chrome and it will help hide the imperfections at the fender where i patched it in.
I also patched the passenger fender, the drivers side is perfect and has no rust.
And why the hell did toyota put glue/seam sealer under the fenders? I thought i was going to bend the ˟˟˟˟ out of them when i took them off.
Ready to paint
Stupid glue
This wench is perfect for the antenna nut
Traced the fender cut out
Bent to imperfect perfection
Test fit, had to level out the bottom a little, remember the chrome will hide it
Ran out of 80 grit, should be the last wipe to get it ready to prime. (Left side is good, right side had a couple of low spots)
Last edited by 92ehatch; May 15, 2016 at 05:55 PM.
Looking good. Sanding sucks! I found that a bit more time working the metal paid off when it came time to use filler and smooth it all out.
My mistake was to many high spots. Had to knock a few down.
Also had a very irritating issue with my welder. Sometimes when i pull the trigger the wire will feed then stop then feed again, causing it to arc stop then arc which was causing alot of burn through and balls of metal to grind out.
I changed the tip and loosened the spool but it didn't help. I know its not the motor as i can still hear it running. My last spool of wire didn't do this so I'm assuming it's the wire.
Make sure the tension adjustment on the drive wheel isn't too loose, debris can get into the wire housing/hose and jamb it up (blow compressed air backwards when replacing filler wire spools), or the wire housing/hose can get bent and kinked.

 Apr 28, 2016 | 05:15 PM