
91 toyota ext-cab sr5 build
 Apr 14, 2014 | 06:31 PM
#81
Thread Starter
Registered User
Joined: Jan 2014
Posts: 153
Likes: 0
From: colorado
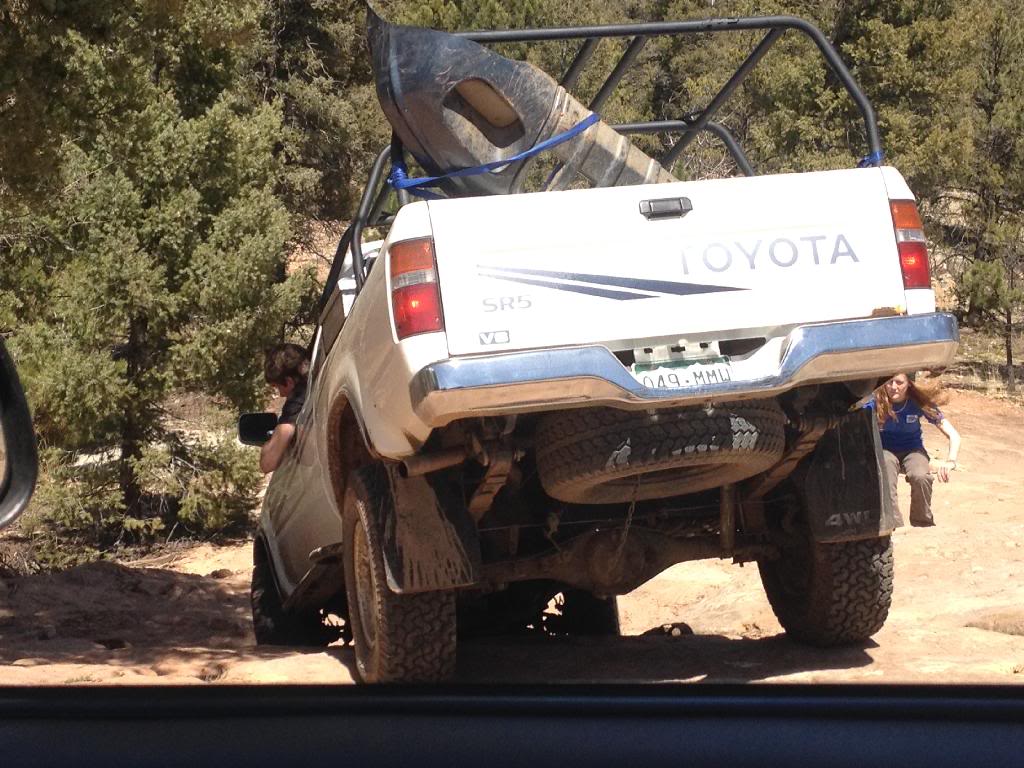
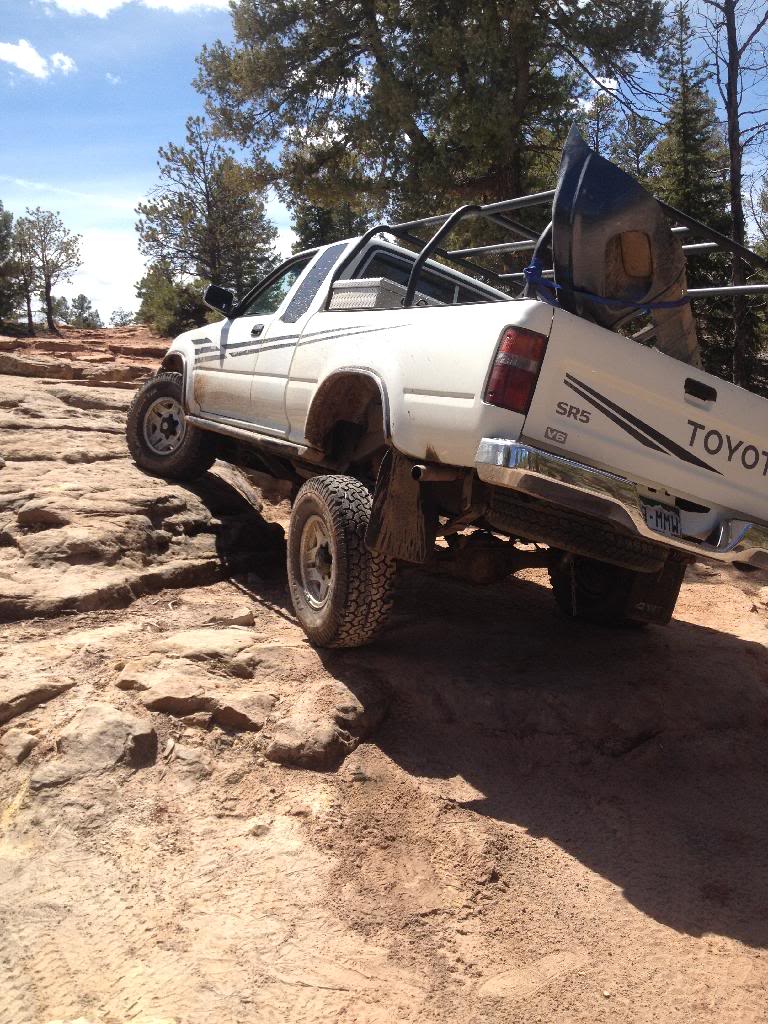
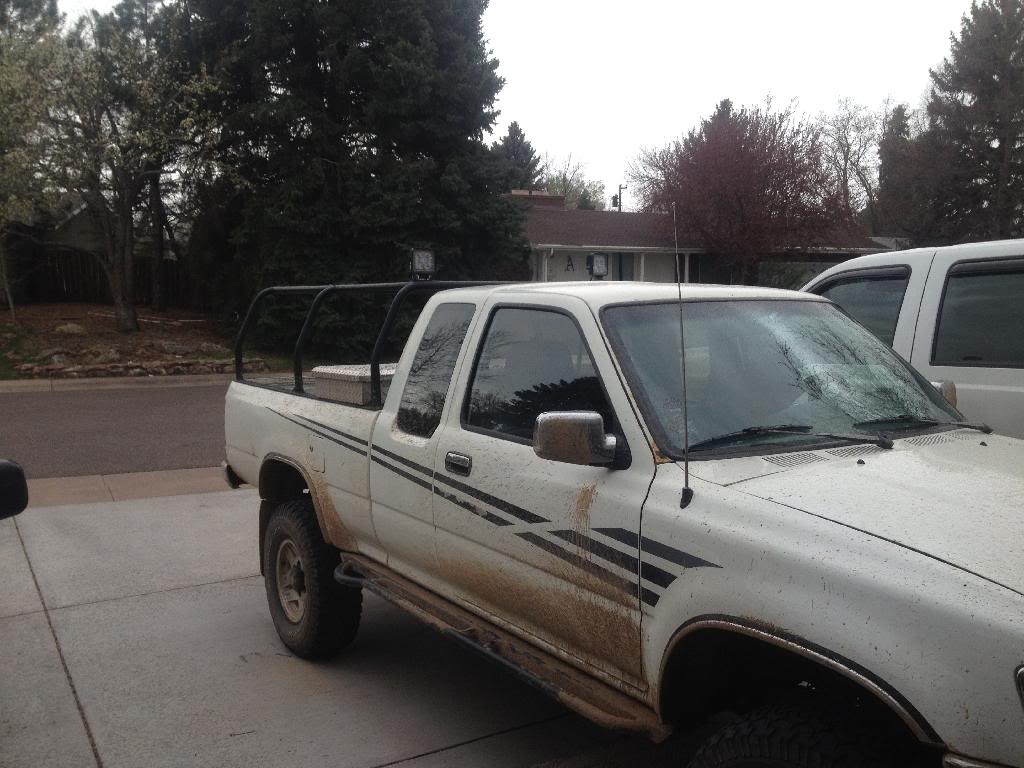
 [/IMG] you may also notice the parts truck I have in the background.

I want to get those lights so I can see what they. Are capable of, calculus is going to take forever tomorrow waiting to get home. But I did get something to drool over today.

Here is an idea of where they are going to be (not sitting like that though)

I think this is how far I want them to stick out of the bumper. What do you guys think more less?

And the bumper

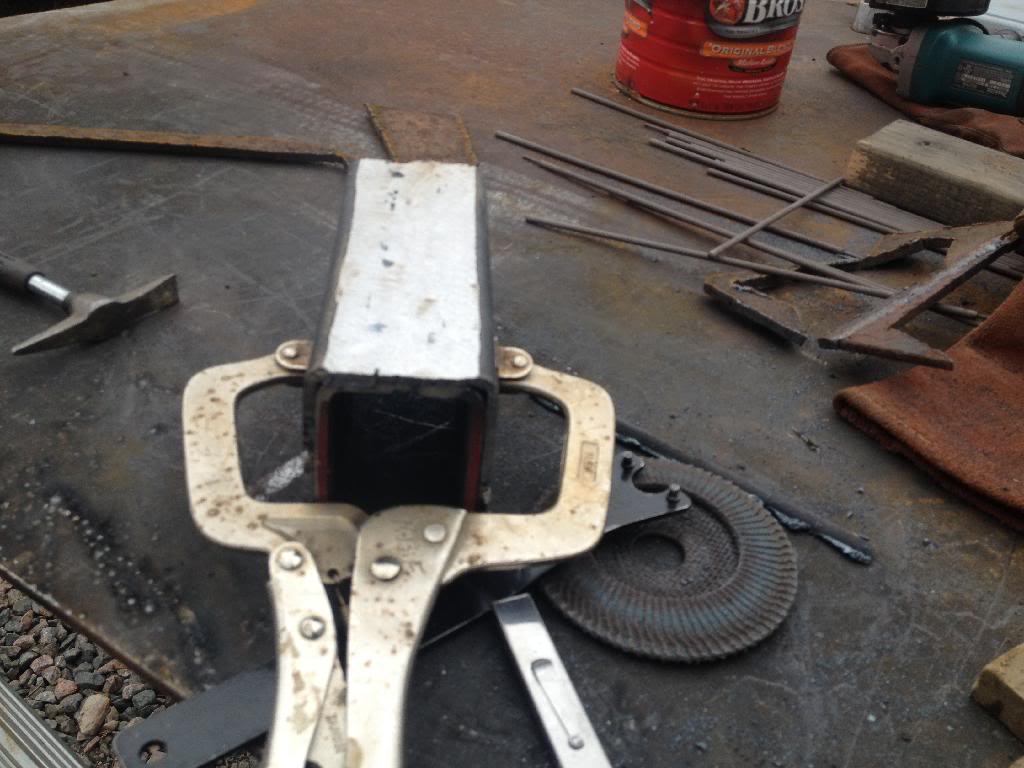
Got some grinding done on it
 I hate grinding now. and welded most of the inside
 .
. I also called up otrattw and ordered two more switches but got the rockers blank and I am going to play around with the laser engraver at school instead because I want to add a personal touch to them. And I'm not anyway a sales person for them but they are great! I love there designs for the switches and there customer service is great I ordered them today and asked if I could get them blank and that was no problem and he thew in a third rocker just incase I wanted another one or screwed one up. And if you do not have a laser to I grave things you can send in a picture and they can custom Engrave it for you. Jus an idea if you need switches.
Chuckarhunt on your thread,
Thanks for the info on the light bar and I think that is what in going to do with the. Other two lights is mount then as side pitched driving lights if they are bright enough or bed/side rock lights. Either way I think I will make a "housing" for them to hold a piece of amber acrylic for some hill bill fog lights if need be.
Thanks guys for the posts the bumper is coming along, slowly but it's coming along and I'm excited to see it done.
Jake,
Apr 15, 2014 | 08:54 AM
#82
Registered User
Joined: Mar 2014
Posts: 121
Likes: 0
From: Elkview, wv
Nobody likes a hooligan who rides a motorized bicycle for hours. I am not allowed to ride on Sundays because it's too Loud. I have had three noise violations mailed to me and I still haven't responded. But anyway, the bumper looks great, that might even keep a tree from bending it! Keep on trucking!
Apr 15, 2014 | 09:14 AM
#83
Registered User
iTrader: (1)
Joined: Nov 2012
Posts: 358
Likes: 0
From: Elko NV, at the foot of the Rubys
No problem Jake, wish I could be a little more informative though. Pretty easy to weld a tab on just about anywhere. 
Bumper is looking good. Once you have it mounted and painted, you will be able to take a step back and say "all the grinding was worth it".
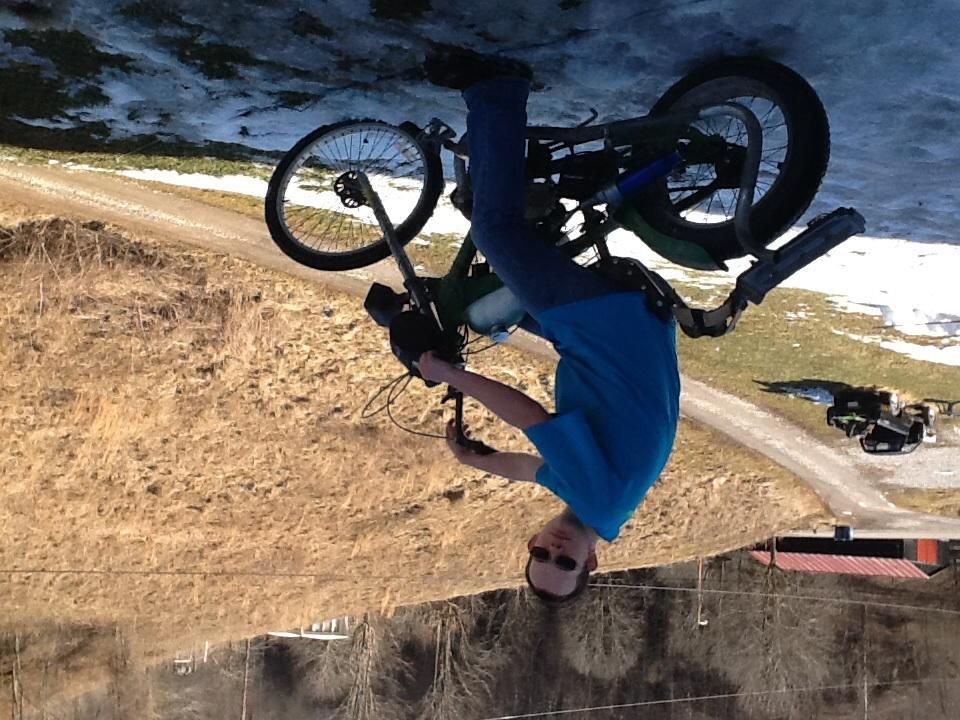
WVYOTA, It is funny you posted that bike pic, cause I hand scratch built one a couple years ago and still have it today. Thing is awesome, can do 35mph no problem with a 50cc two stroke. I would post a pic but I don't want to jack Jake's thread.
Bumper is looking good. Once you have it mounted and painted, you will be able to take a step back and say "all the grinding was worth it".
WVYOTA, It is funny you posted that bike pic, cause I hand scratch built one a couple years ago and still have it today. Thing is awesome, can do 35mph no problem with a 50cc two stroke. I would post a pic but I don't want to jack Jake's thread.
Apr 15, 2014 | 09:45 AM
#84
Registered User
Joined: Mar 2014
Posts: 121
Likes: 0
From: Elkview, wv
I didn't want too either, but the light on the front is so similar to the ones he ordered or is or ordering. The bike does an easy 41 mph top speed 66 cc not to get off topic.27 toothy sprocket on rear
Apr 15, 2014 | 11:35 AM
#85
Thread Starter
Registered User
Joined: Jan 2014
Posts: 153
Likes: 0
From: colorado
Haha no problem you two on that I'm interested now. Yah I know it will be worth it when it's done but I might have to recruits after school that I could pass the buck on grinding to  the lights are out for delivery now so maybe I can blind myself later tonight. And the bumper is so close just that end cap and grinding and welding on the mounts/ hitch reviver and then on to painting. Speaking of the inside is kinda rusty and I was thinking of putting the sray over rust primer from rustolium on it would this work ok? And yes I have thought of POR-15 but decided against it for now. Could i get a bed liner on top of the primer?
Thanks,
Jake
the lights are out for delivery now so maybe I can blind myself later tonight. And the bumper is so close just that end cap and grinding and welding on the mounts/ hitch reviver and then on to painting. Speaking of the inside is kinda rusty and I was thinking of putting the sray over rust primer from rustolium on it would this work ok? And yes I have thought of POR-15 but decided against it for now. Could i get a bed liner on top of the primer? Thanks,
Jake
Apr 15, 2014 | 01:30 PM
#86
Registered User
Joined: Mar 2014
Posts: 121
Likes: 0
From: Elkview, wv
I used the rustoeum rusty metal primer for my frame. It goes on really heavy, so be careful with it. You can overdo it really quick. The stuff covers good and seals well. Be sure to top coat within 2 hours to ensure that it gets properly sealed. My frame on my 94 sits in the rain and the weather, and so far hasn't rusted. Give it a try, but it's really your choice. For my top coat I used krylon rusty metal paint enamel black. It has held up. It would look like this[IMG]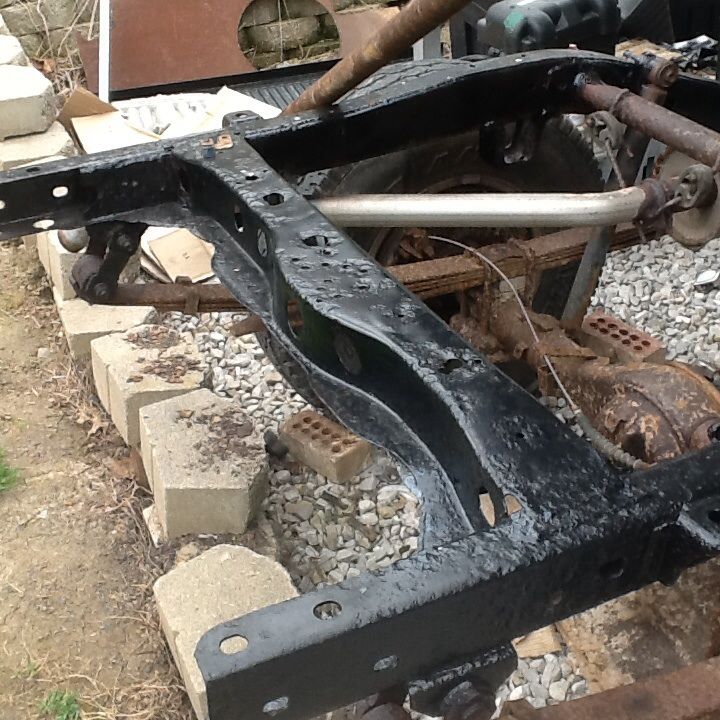 [/IMG]
It won't hut my feelings if you don't try it, but anything helps. Lol
[/IMG] It won't hut my feelings if you don't try it, but anything helps. Lol
Apr 15, 2014 | 07:04 PM
#87
Thread Starter
Registered User
Joined: Jan 2014
Posts: 153
Likes: 0
From: colorado
thanks yota boy,
yah i will try the rust primer, it should work on nice clean metal as well right? just because where i have grinded it shiny new metal.
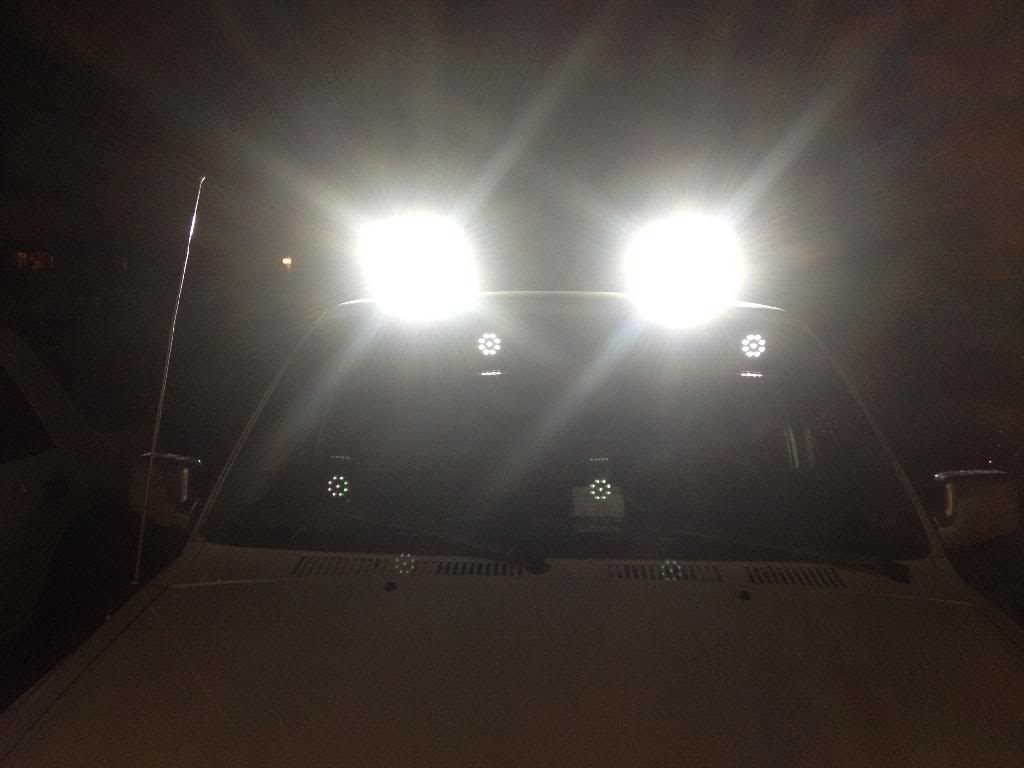
got the lights in today and they are awesome we plugged them in to my battery when i got home and they where not to bright in the middle of the day but just know when my buddy was leaving we plugged it in again and WOW its not as far as my hi beams but much more brighter AND WIDER hi beams seamed very narrow compared to this it went to both houses at the sides of my street.
oh chuckarhunt i hope you have an idea for my hi-lift mount because i found one that i have finally liked and i can lock up very securely and i will be building this one. when do we start?
jake,
yah i will try the rust primer, it should work on nice clean metal as well right? just because where i have grinded it shiny new metal.
got the lights in today and they are awesome we plugged them in to my battery when i got home and they where not to bright in the middle of the day but just know when my buddy was leaving we plugged it in again and WOW its not as far as my hi beams but much more brighter AND WIDER hi beams seamed very narrow compared to this it went to both houses at the sides of my street.
oh chuckarhunt i hope you have an idea for my hi-lift mount because i found one that i have finally liked and i can lock up very securely and i will be building this one. when do we start?
jake,
Apr 16, 2014 | 06:50 AM
#88
Registered User
Joined: Mar 2014
Posts: 121
Likes: 0
From: Elkview, wv
Most high beams aren't wide beam halogens. Those light you got are LED right? They should be bright. They will probably shine further once you get them mounted up. I know my light did on my bike. And before I forget, the primer will work on clean metal. If the metal has a little bit of rust, then it will be fine. Be sure to be careful, it goes on HEAVY!
Apr 16, 2014 | 06:39 PM
#89
Thread Starter
Registered User
Joined: Jan 2014
Posts: 153
Likes: 0
From: colorado
all right so i have been playing around today and i got the rear bumper light switch designed today and found a piece of acrylic and spray painted it back and engraved them 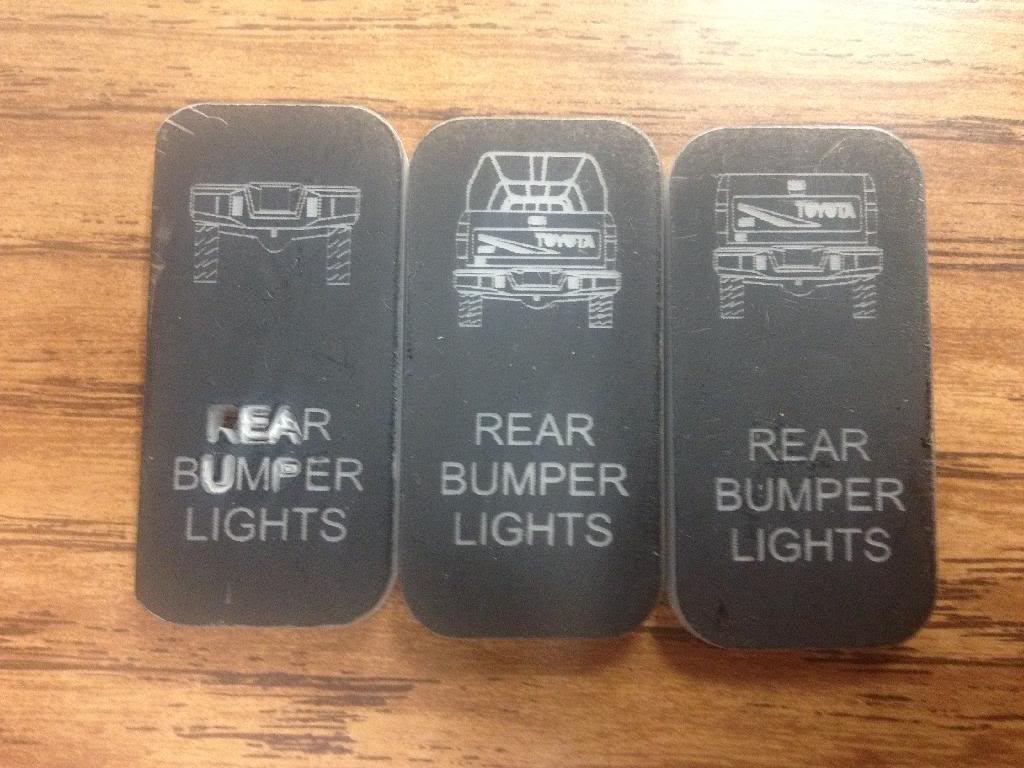
i think im going to go with the middle one. the first one got cut there at the beginning on accident had a friend help and he set it to cut
and i started on the hilift mount today so i can go wheeling Friday during senior ditch day
had some 2 by 4 box tube left from the sliders and cut two of them to seven inches but later cut them shorter. then cut one of the two inch sides of and cut the other side down the middle on one and sandwiched that to the other.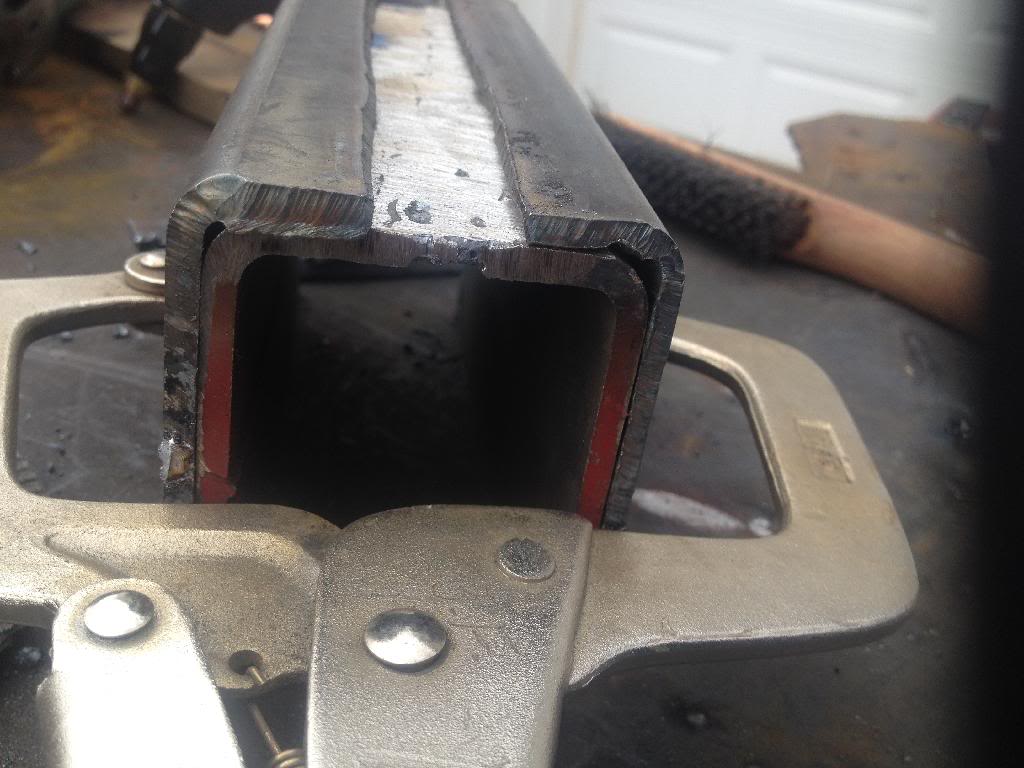
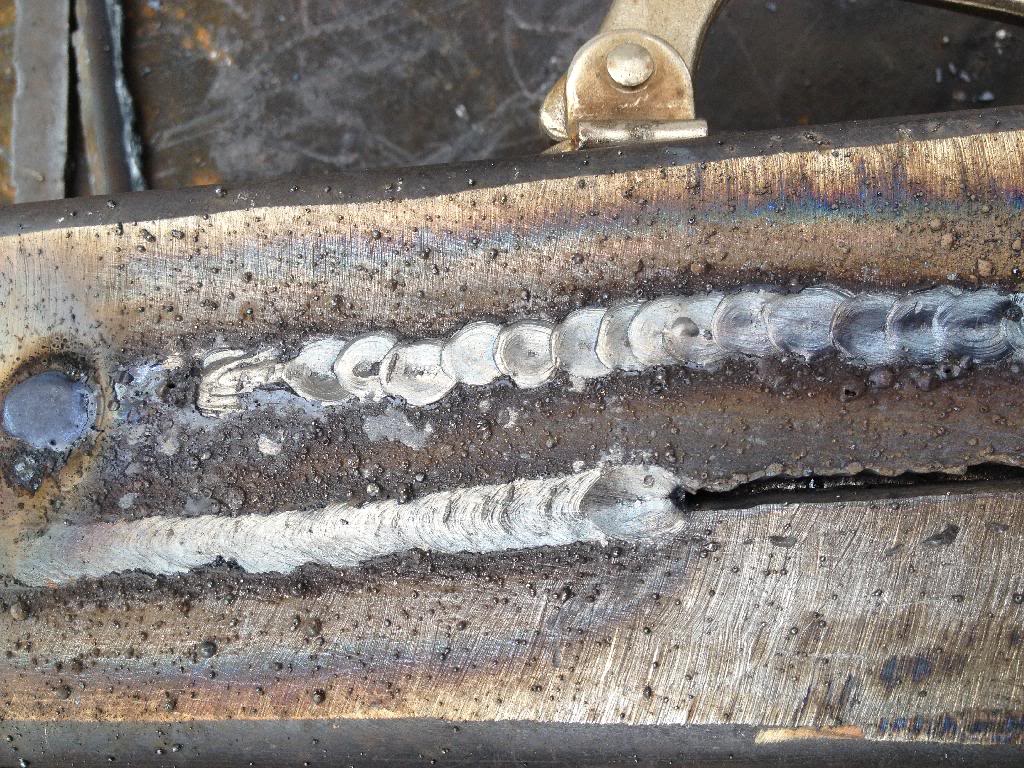
yah the sticks were to hot and just burning threw sooooo... i could either turn down the welder or i could pretend i was a tig welder.
i chose to be a tigger
i got farther bit it got dark and i forgot to get pictures so i will get some tomorrow.
jake,

i think im going to go with the middle one. the first one got cut there at the beginning on accident had a friend help and he set it to cut
and i started on the hilift mount today so i can go wheeling Friday during senior ditch day
had some 2 by 4 box tube left from the sliders and cut two of them to seven inches but later cut them shorter. then cut one of the two inch sides of and cut the other side down the middle on one and sandwiched that to the other.


yah the sticks were to hot and just burning threw sooooo... i could either turn down the welder or i could pretend i was a tig welder.
i chose to be a tigger

i got farther bit it got dark and i forgot to get pictures so i will get some tomorrow.
jake,
Last edited by Jakesr5; Apr 16, 2014 at 06:42 PM.
Apr 18, 2014 | 06:52 PM
#91
Registered User
Joined: Mar 2014
Posts: 121
Likes: 0
From: Elkview, wv
Was Good Friday senior ditch day? Did your lift go as planned? Did it do okay? Hope to see those great fabing skills at play. Get those wheeling pics up! The pics make everything better. Even a wreck. Lol.
Apr 18, 2014 | 06:58 PM
#92
Registered User
Joined: Mar 2014
Posts: 121
Likes: 0
From: Elkview, wv
By the way, your tig welds are great! Did you do that with a stick or a tig machine? Whichever, they look nice and consistent about halfway through. They'll hold! Gotta use the measure for the way most bikers categorize and want their women, strong and ugly. Lol

Apr 19, 2014 | 02:27 PM
#93
Thread Starter
Registered User
Joined: Jan 2014
Posts: 153
Likes: 0
From: colorado
i like the middle one too and i think i will go with that one.
senior ditch day was a blast we got to go wheeling duhhh
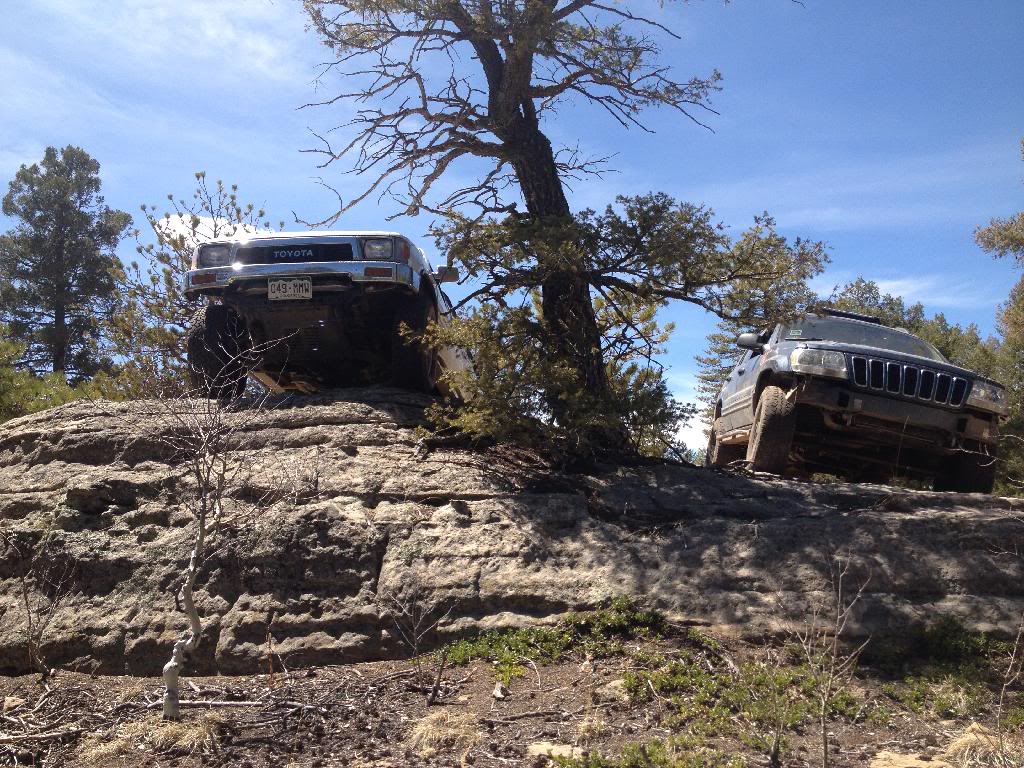
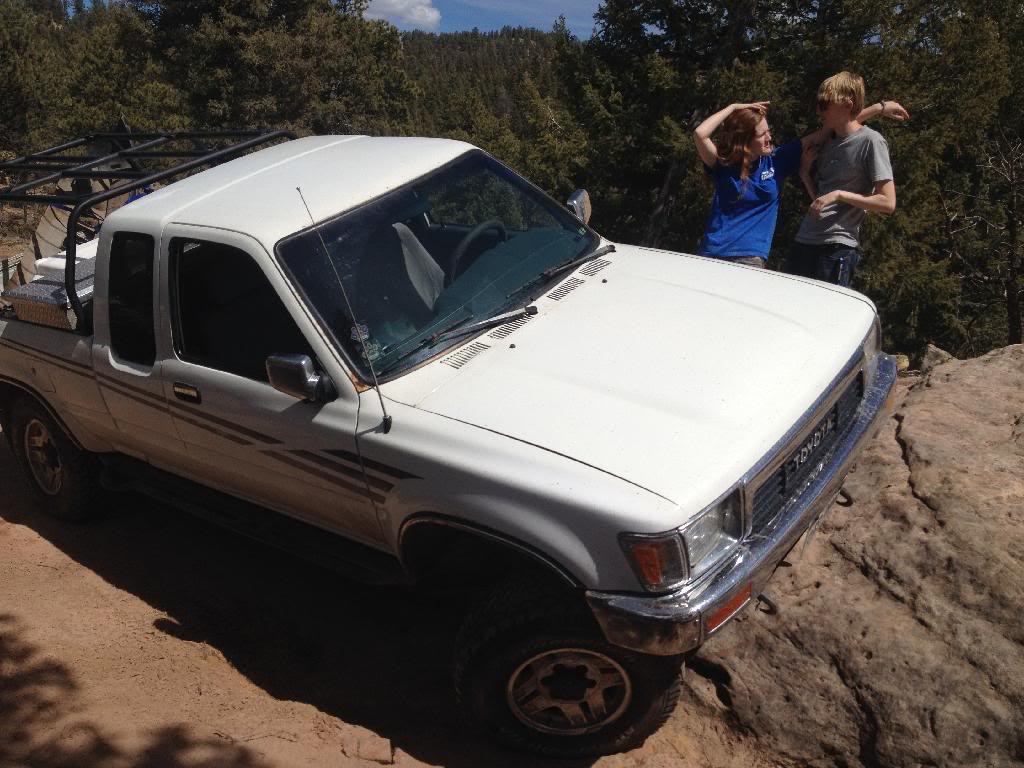
no we left at seven and got there by 9 so we had a whole day of wheeling and we used it. i dont have a ton of pics because i was driving but my friend got a lot so when she gets a moment this week i will get them from her and post them up. but we did se a lot and do a lot of trails and rock crawling. we did 153 mile in all and 40 some of that was trails so it was a trip. the rocks where tall enough to hit my friends slidders but i cleared them fine which made me happy. but on one trail i was climbing up this ledge and my front pasanger slid of it and side ways off a rock and pufffttt!!!!!! i knew what happend but it was great seeing my friends face when he was spotting me and that happened. i popped the bead compleatly and was still flexed out on this opstical so we had to back off and try and fix. this is where i wish i had finished that high lift mount because the lift was at the bottom of the tool box. Any ways the commpressor worked great it popped the bead right back on and inflated the tire just fine and we went on our way. here are the piccs i have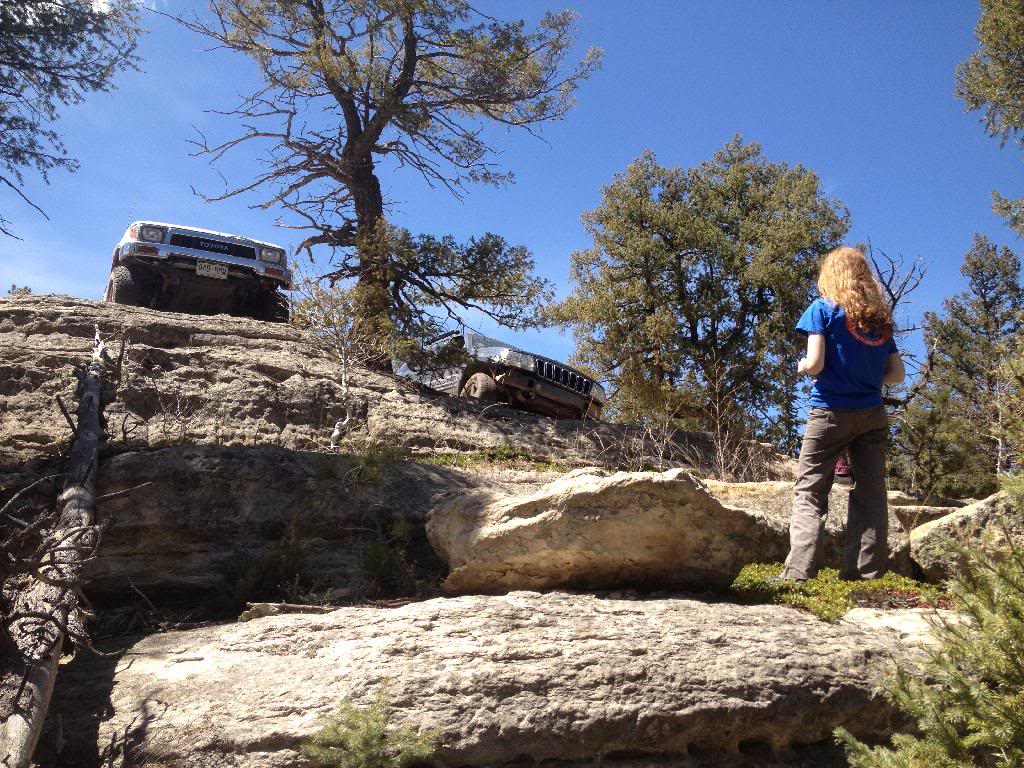
and yes that is the front bumper of the jeep in the back of my truck.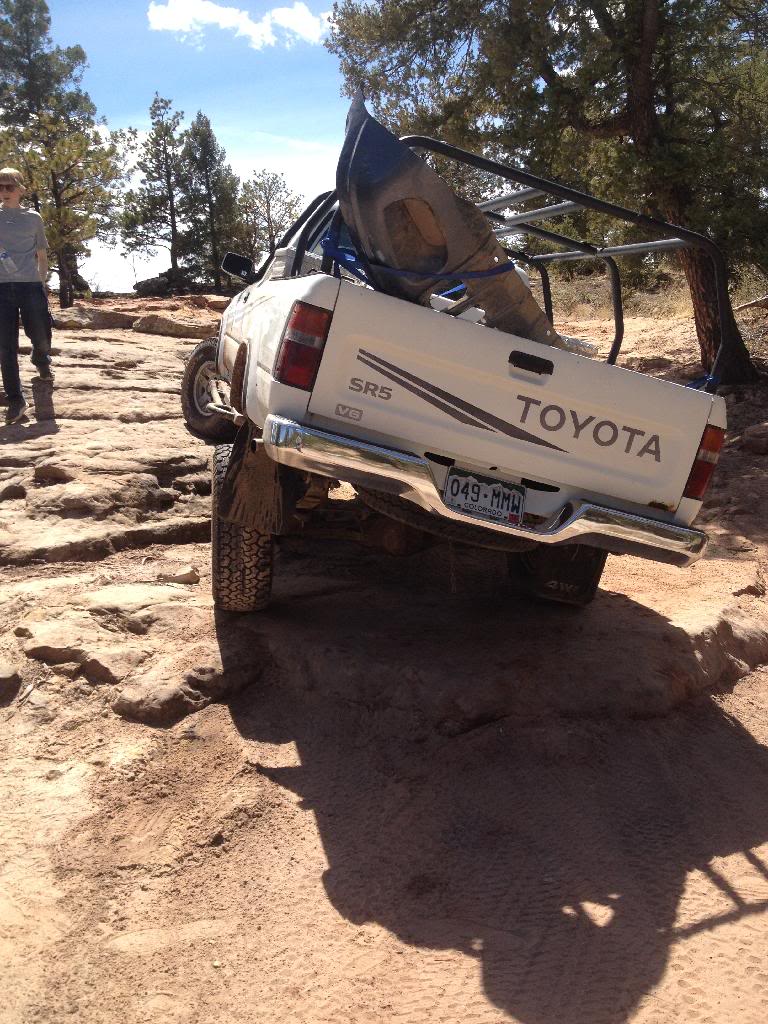
About five minutes ofter this pic is when i popped my tire
like i said i will get some more up later once i get some from my friend
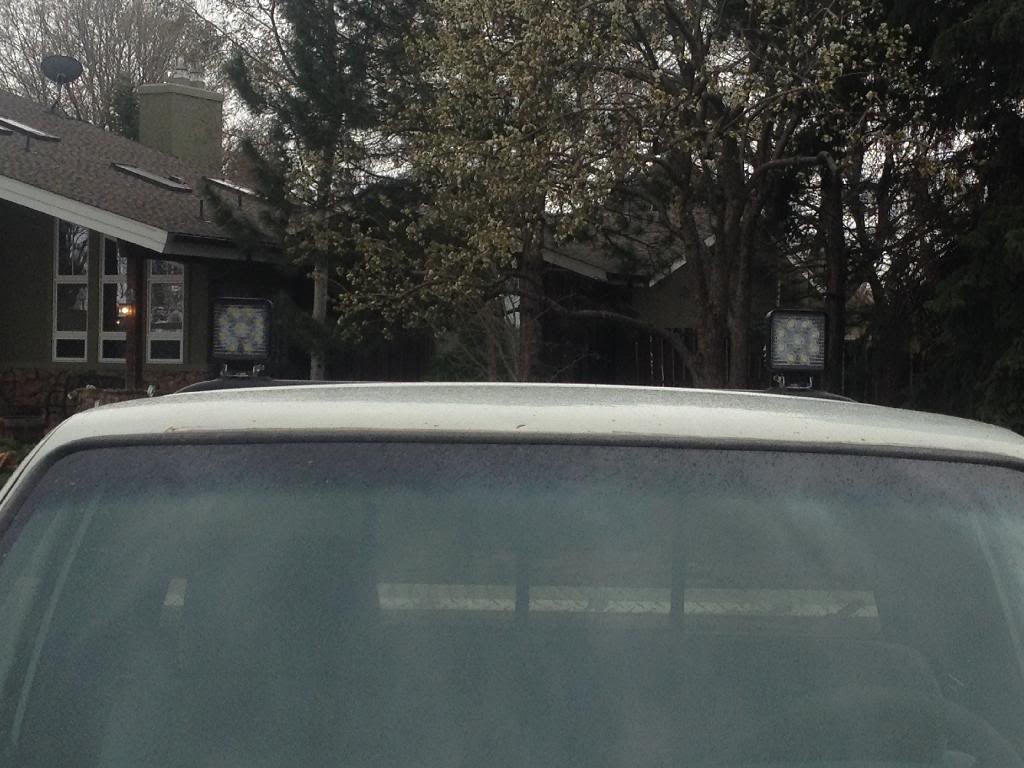
oh and i got to play with the lights on the rack today i got some holes drilled and the lights mounted but no wiring. what do you think on the look
its raining now so no progress on much right now.
jake,
senior ditch day was a blast we got to go wheeling duhhh
no we left at seven and got there by 9 so we had a whole day of wheeling and we used it. i dont have a ton of pics because i was driving but my friend got a lot so when she gets a moment this week i will get them from her and post them up. but we did se a lot and do a lot of trails and rock crawling. we did 153 mile in all and 40 some of that was trails so it was a trip. the rocks where tall enough to hit my friends slidders but i cleared them fine which made me happy. but on one trail i was climbing up this ledge and my front pasanger slid of it and side ways off a rock and pufffttt!!!!!! i knew what happend but it was great seeing my friends face when he was spotting me and that happened. i popped the bead compleatly and was still flexed out on this opstical so we had to back off and try and fix. this is where i wish i had finished that high lift mount because the lift was at the bottom of the tool box. Any ways the commpressor worked great it popped the bead right back on and inflated the tire just fine and we went on our way. here are the piccs i have


and yes that is the front bumper of the jeep in the back of my truck.


About five minutes ofter this pic is when i popped my tire


like i said i will get some more up later once i get some from my friend
oh and i got to play with the lights on the rack today i got some holes drilled and the lights mounted but no wiring. what do you think on the look


its raining now so no progress on much right now.
jake,


 Apr 21, 2014 | 04:33 PM
#95
Thread Starter
Registered User
Joined: Jan 2014
Posts: 153
Likes: 0
From: colorado
Ok so back to the lights, they are bright as hell and for 90 bucks for 4 thats well worth it in my opinion. they are finally mounted and some what wired. i had originally wired it along the side of the bed rack but did not like the look so i got to drill holes and move the wiring to inside the tubing and looking at it know it was worth it but it sucked to install and feed stupid wire through that pipe ill go out and get some pictures here in a little bit but right know im doing "homework" so i thought i would do a little update. any ways i spent 4 hours wiring then got the the switch and could not get the damn thing wired to have the lights come on right so after an hour of changing this switching that rerouting that finding where this wire and that wire go i finally looked at the compressor switch and that one and there not the same switch at all!!! it was my fault that they were not the right ones but i was able to call otrattw up and they have two new ones on the way.
here is some pics of them on in the drive way ill test them in the street tonight and get some pics.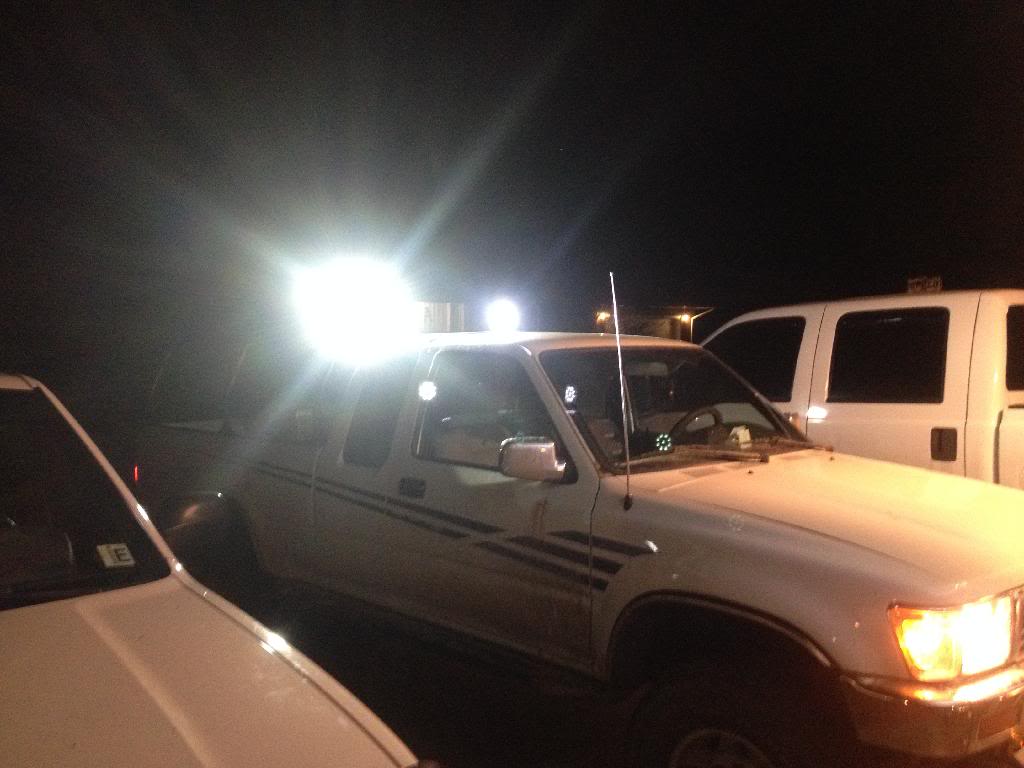
here they are from the side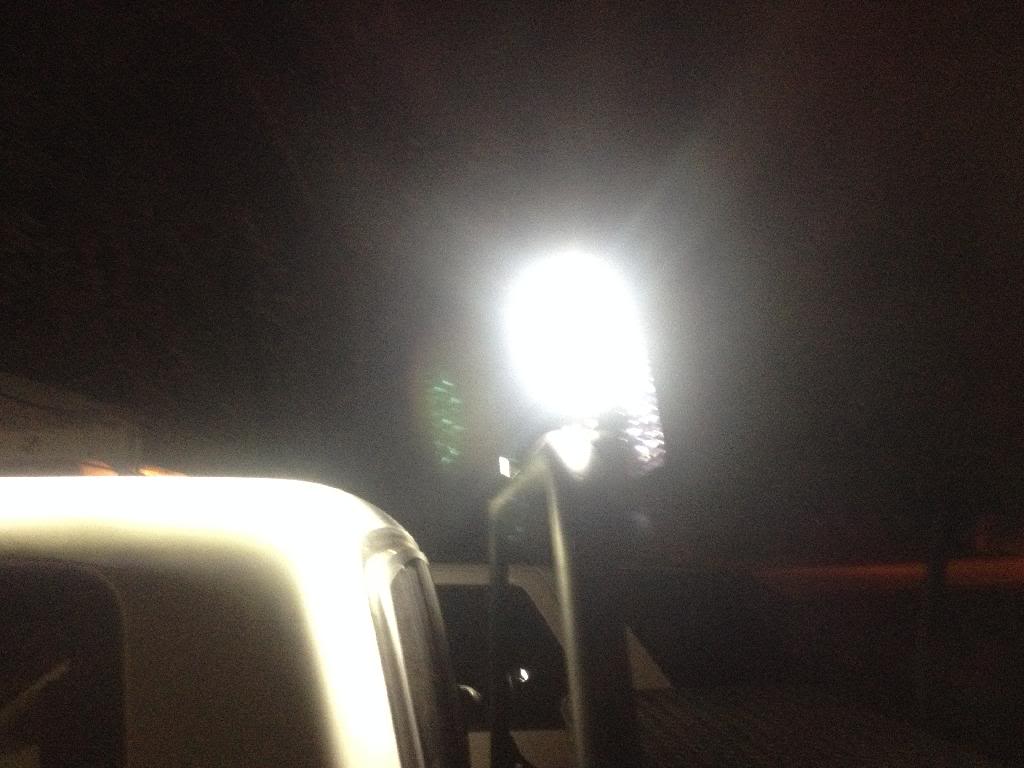
and the only thing i found wrong is that when there one the glare in my side mirrors is pretty bad so i am going to try and cross them so the right light is shining on the left and vice versa.
oh and yota boy the "tig" welds are stick. i just stopped and started the arc to not heat the metal up and i like the look even though it was pointless because i just ground them off later.
jake,
here is some pics of them on in the drive way ill test them in the street tonight and get some pics.


here they are from the side

and the only thing i found wrong is that when there one the glare in my side mirrors is pretty bad so i am going to try and cross them so the right light is shining on the left and vice versa.

oh and yota boy the "tig" welds are stick. i just stopped and started the arc to not heat the metal up and i like the look even though it was pointless because i just ground them off later.
jake,
Apr 21, 2014 | 08:08 PM
#99
Thread Starter
Registered User
Joined: Jan 2014
Posts: 153
Likes: 0
From: colorado
Yah they are really bright. Compared to my head lights where they are mounted they leave a gap in front of the truck that my low beams fill perfectly so that shows you that. And for the high beam its longer by a little but the highs are not that wide and these fill the whole street and houses on each end which is what i wanted is a wider beam. They almost shoot the same distance as high beams that you see but the light carries farther if that makes sense. I will try and get to a field and do some pictures here soon.
Jake,
Jake,
Apr 22, 2014 | 06:43 PM
#100
Registered User
Joined: Mar 2014
Posts: 121
Likes: 0
From: Elkview, wv
Were you able to blind yourself? Lol. Those lights are amazingly bright. You could see for miles! Much better for seeing at night. Remember, don't run those on the street, the law will get you for it!


