
91 toyota ext-cab sr5 build
 May 15, 2014 | 08:26 PM
#161
Thread Starter
Registered User
Joined: Jan 2014
Posts: 153
Likes: 0
From: colorado
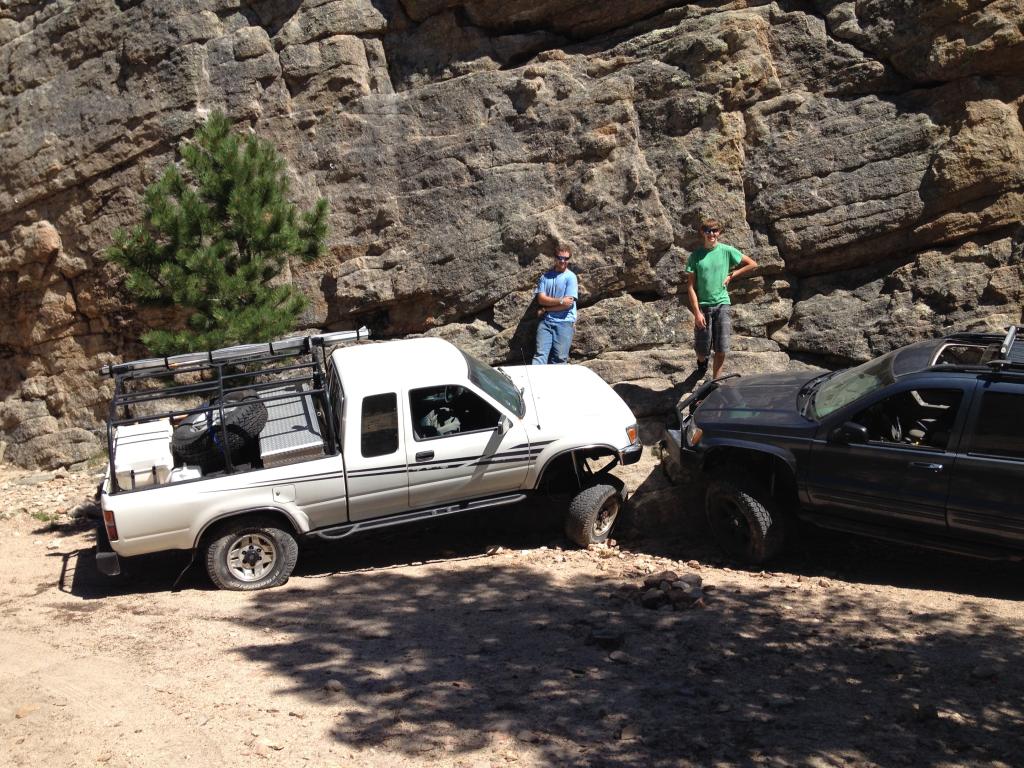
Yah tomorrow is my last day i have a test then im done. I dont know what i want to do about this locker deal. I dont have either but told both i will buy them here is the thing i could tell the guy with the spartan that i found an e locker. And the guy with the e locker has another one it would be another 300 plus having to change gears. Is it worth it i have already sank 2700 in it with sas and the lockers as i sit know is it worth going that much more. Because i think and my friends say that the front locked in 4wd in snow/will give me horible under steer. That being said las winter driving around for my dad in a f250 that has manual locking hubs NO locker in 4wd i tryed turning a corner and it went strait into a burm. I would not like to repeat that one so i am still leary having the front always locked when in 4wd. Also if i do both e lockers would i be an ass telling him i no longer want the spartan.
Jake,
Jake,
May 20, 2014 | 07:33 PM
#162
Thread Starter
Registered User
Joined: Jan 2014
Posts: 153
Likes: 0
From: colorado
alright we got the axle stripped and in the processes of cleaning it all up every thing looks good. there is some pitting on the ball of the knuckle that i think is fine, is it? any ways that was a mess the inner bearing seal was bad so the knuckle was filled with oil and was a mess. will get pics later. i also decided against getting the e locker even though it was a great price i just don't have the money and the extra to re-gear it i do have the spartan though that i will be putting in the rear and the old rear in the front. been busy with getting ready for a graduation party and work so will be slow going for a while.
jake,
jake,
May 21, 2014 | 08:08 PM
#164
Thread Starter
Registered User
Joined: Jan 2014
Posts: 153
Likes: 0
From: colorado
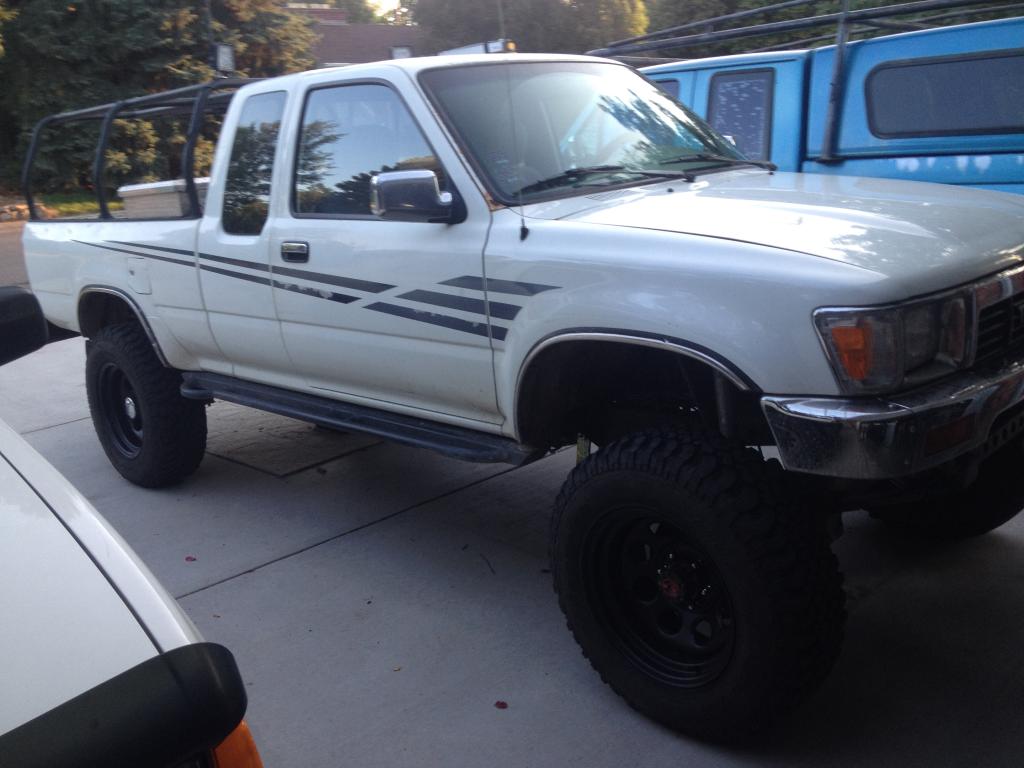
Well i cant play with the axle tell this weekend because of me making a mess before the party but i did order more things today. I got some breathers for the front and rear axle, new spindle nuts because it looks like the old ones had a bear atack them, a 54 mm socket for them, an arb tire deflator, rubber shim to keep the high lift from vibrating on the mount, and some wheel lug studs for the ifs calipered, 1982 fj-60 rotered. Brake swap 
Jake,
Jake,
May 28, 2014 | 07:45 AM
#165
Thread Starter
Registered User
Joined: Jan 2014
Posts: 153
Likes: 0
From: colorado
Well we got the spartan installed Monday and driving around I have noticed two things one when the dust cover on these are lose it Rattles and Chirps like crazy. Second, there is a lot of slip in the drive drive train meaning I can feel the gears In gauging and disingauging. I believe what I am feeling is the back lash in the third from the ring and pinion. Is that accurate if I did not feel that before this or is there something that I put on wrong?
Jake,
Jake,
May 30, 2014 | 08:50 PM
#166
Thread Starter
Registered User
Joined: Jan 2014
Posts: 153
Likes: 0
From: colorado
Well i have had no time to do any thing this week to the truck and this was supost to be the free week any ways i am still playing with the locker thinking its not that third and maybe its the clutch. the reason why is i think the throw out bearing was going out earlier this year. But i will no be able to find out any time soon because i am going on a Moab trip with my best friend in june the twelfth through the fifth tenth and we are going to rebuild his t case skid and armor and truss a new axle then instal it before the trip so there will be no time coming up here soon for any major things to the truck even though it would be nice to do the rear bumper here soon. I did get some cool presents for my birth day though, i got a cobra cb radio that is all in the hand held, a coleman stove and money (wonder where that will go) i was thinking though,i don't know where to put the antenna for the cb i could put it right behind the light on the roof rack on the pass side or i want to/will eventually make a tire carrier on the rear bumper so should i wait and mount it back there which would be more ideal? Any negatives to either if i have a folding mount on both of them?
I apologize for spelling and how bad that was, trying to type on phone sitting in car coming back from aunts house.
Jake,
I apologize for spelling and how bad that was, trying to type on phone sitting in car coming back from aunts house.
Jake,
Last edited by Jakesr5; May 30, 2014 at 09:05 PM.
Jun 3, 2014 | 08:33 AM
#167
Registered User
iTrader: (1)
Joined: Nov 2012
Posts: 358
Likes: 0
From: Elko NV, at the foot of the Rubys
I can't say on the whole locker backlash. After driving around with mine, I can feel it engage every now and then, but no serious backlash. Did you measure the gear backlash when putting it back together? The FSM has all the details on that stuff.
Nice bday presents! And I can only guess where the money will go...

Finish the bumper first, then you can attach your tire carrier to it, will save you from having to go back and redo things, IMHO.
Have fun in Moab! I should make a trip there someday, not too far from here...
Nice bday presents! And I can only guess where the money will go...
Finish the bumper first, then you can attach your tire carrier to it, will save you from having to go back and redo things, IMHO.
Have fun in Moab! I should make a trip there someday, not too far from here...
Jun 3, 2014 | 06:27 PM
#168
Thread Starter
Registered User
Joined: Jan 2014
Posts: 153
Likes: 0
From: colorado
Looking and feeling how the locker does I think it's what it is suppose to do and if there is any play Its in the clutch.
I will do the bumper and finish it andinstall then later this year I will put the tire carrier on.
My birthday money is going to parts on the truck (who could have guessed) I did order the rest of the things to wire the cb up, a air tank (finally) and a arb recovery strap as a moab gift. The only bad thing is all the stuff is coming in 4 different packages. The three without the strap are allready on the way, the one with the strap is not
Moab will be fun I'm sure it's just trying to get every thing for it. We ate taking my friends jeep and we want to make custom upper links to match the bottom and have to do that this weekend. Then to moab!!!!!!!!
Jake,
Aug 10, 2014 | 04:24 PM
#169
Thread Starter
Registered User
Joined: Jan 2014
Posts: 153
Likes: 0
From: colorado
Sorry I have not been on here in a long time it's been very busy!! There has been a lot of progress on the truck. After coming back from moab we started the SAS on the truck. It took about a day of just cutting the ifs off with the plasma cutter and grinding with the two angle grinders 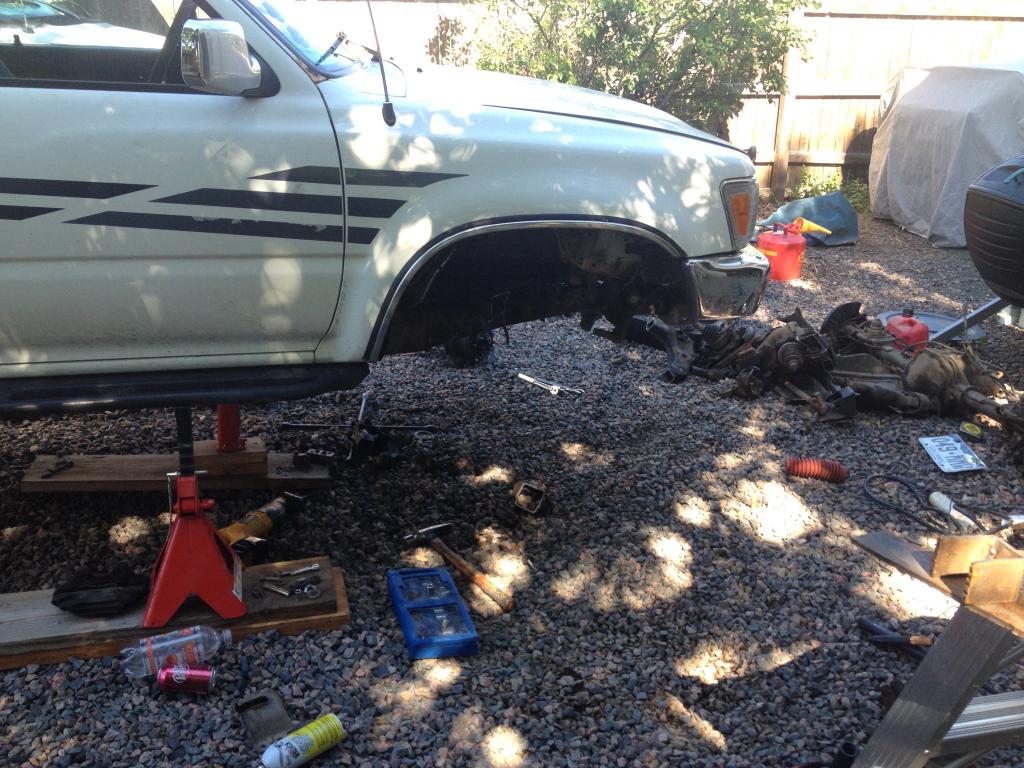
after that was all ground up and clean it was time to start putting things back on. I had frenched in the front hangers a couple days earlier and worked out really well with the plasma. My dad had needed a better welder then the stick for some work on a house and I needed it for the truck so we looked at renting a mig. The only one in town that we knew of would have charged us 150 a day and we would have needed it for 6 days so we bought a lincon dual phase welder after some persuading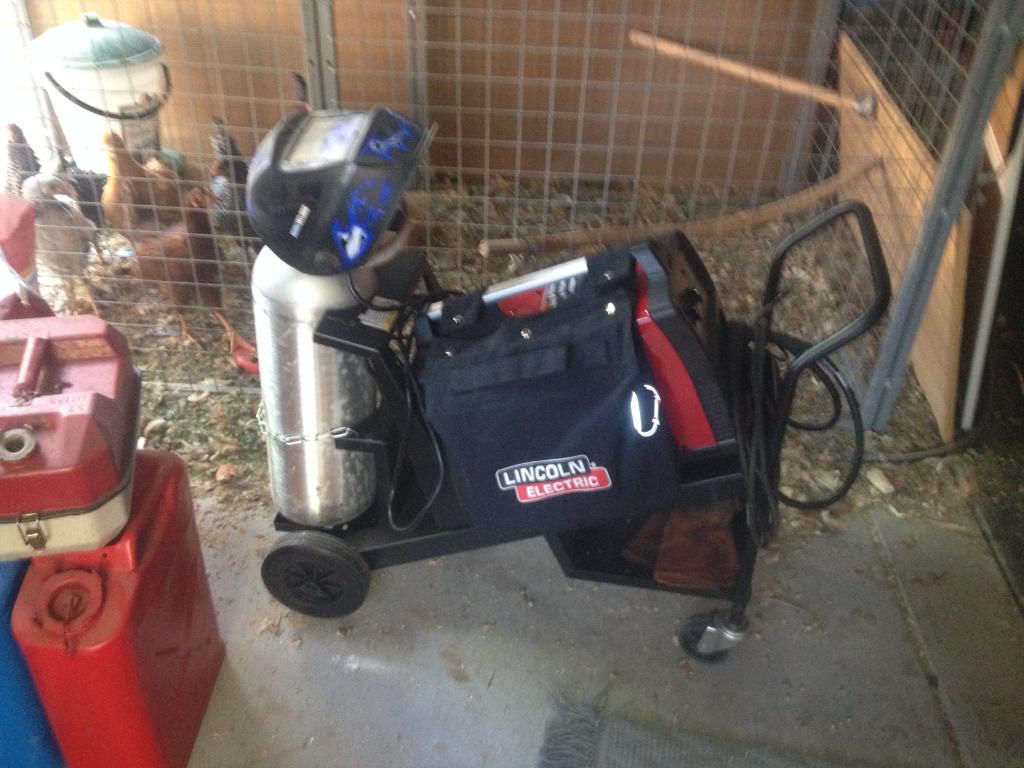
the welder works flawlessly (when I remember to turn the gas on %%%%%). Back to the SAS the front hangers and rear shackles were nice and easy to do. I did not have fun with the fact that there was layers in the frame where the rear hangers were going The leafs went on followed by a newly trussed and armored axle
  . In the end I pushed the front axle to the front 2 inches to clear things like the oil pan.
I road around without shocks and drive shaft for about 2 weeks waiting on a woody drive shaft that I got 100$ Off from a raffle in moab. When I received the drive shaft I was not happy though I had to re drill the holes for the t case because the holes there were about 1/8 in towards the center. I did get it on though eventually and was able to go flex it out to see what height I needed to put shock hoops and in the process was very happy to see the travel that the front has know. I would say the front has more then the back has with modded mounts and longer shackles.!!!! I got shocks on and guess what! They really helped with the ride quality!!
As the break in period progressed I had developed death wobble from lose upper steering studs on the driver side caused by my tie rod bashing my pitman arm so the steering box had to be moved. I ordered a flat pitman arm and moved the box forward 2.25 inches. I did cut a 3/16 plate to match my frame and move my steering box and welded it on. Then mounted the steering box and flat arm and drag link.
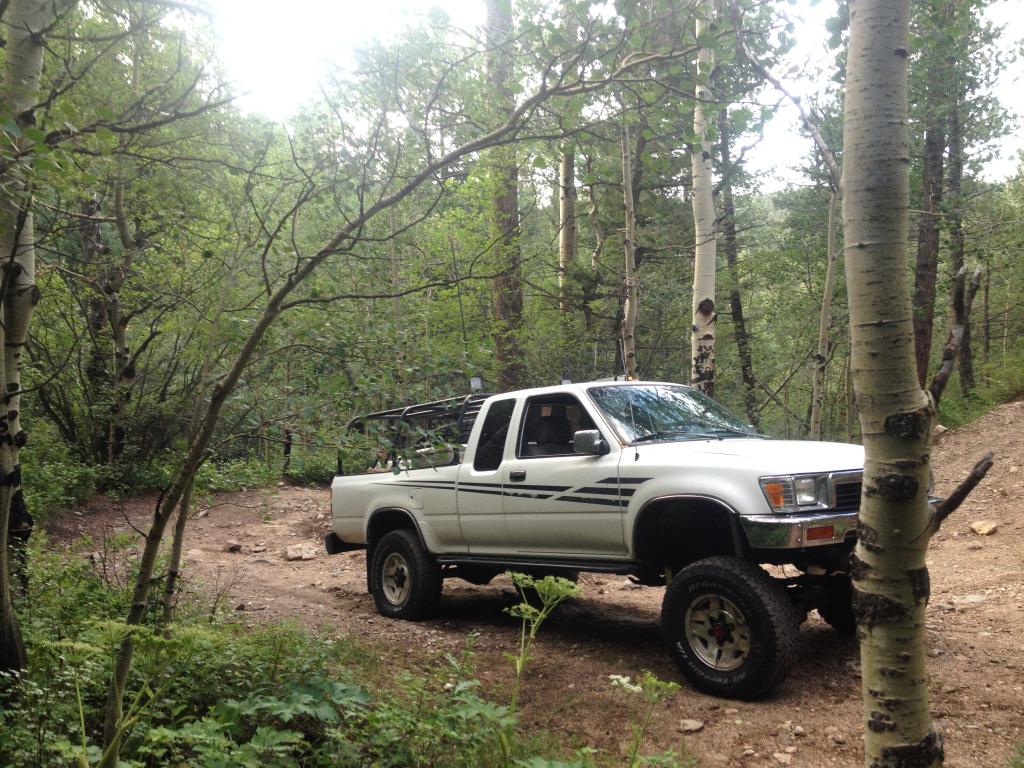
Other then the steering I have had no problem with the front after the SAS with 2000 miles and one three day trip of wheeling on miller rock, iron clad, left hand gultch, and some other Trails of equal or + difficulty that I'm spacing out on the name of right now.
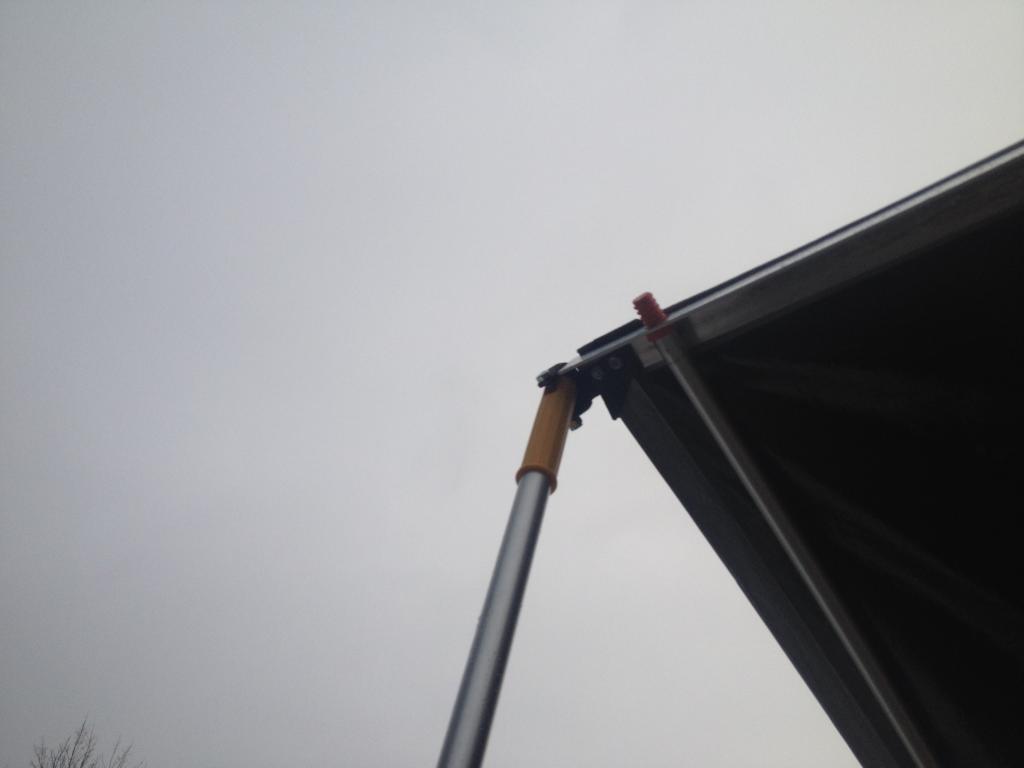
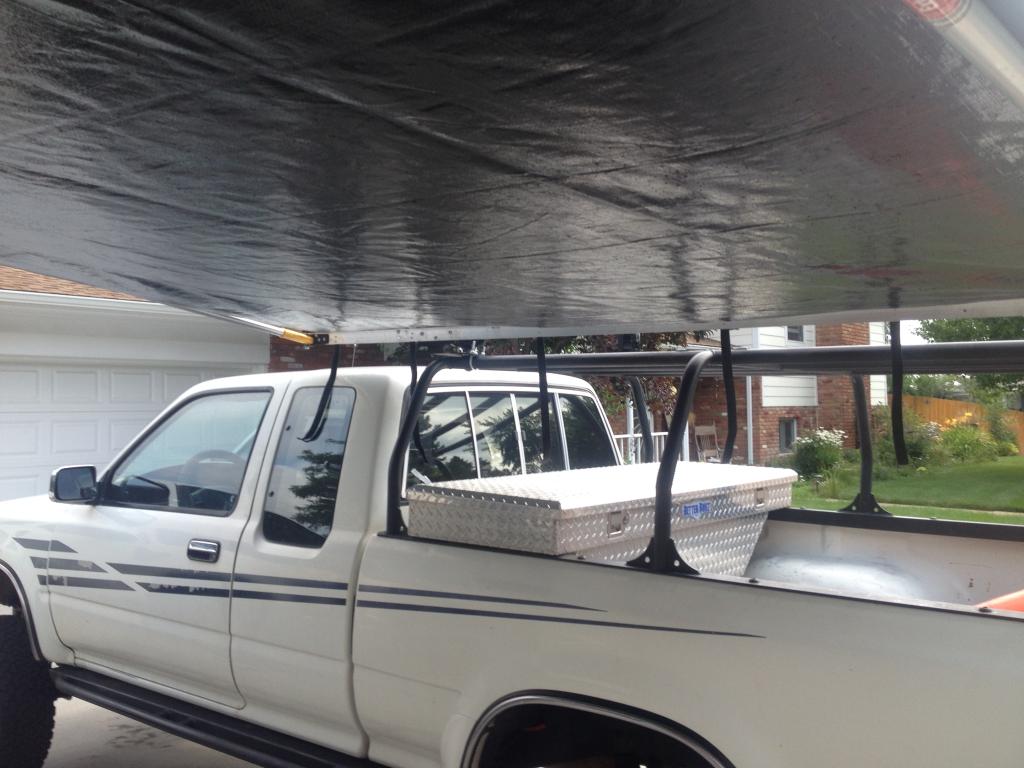
On to other things. I had been preparing for that camping/wheeling trip for about 3 weeks and got some really cool things done. First and my favorite is a awning that can be passed as an arb (in my opinion).
What I needed
4-6 foot extendable aluminum painting poles.
1-2x2x1/8 aluminum angle 8 ft long
1-1.5x1.5x1/8 aluminum angle 8 feet long
2-1inchx1/8 aluminum flat bar
1 tarp 8x10
14-1/4x 5/8 long bolts and lock nuts
8- 1/4x3/4 long bolts and lock nuts
4-5/16x2.5 long bolts and lock washers
2- things of weather striping 1/4 thick by 1/2-3/4 wide
A pack of d ring mounts for picture hangers
4-8x24 3/8 long bolts with lock nuts
Rope- any small rope of your preference I had some para coward at work that was yellow and had reflecting thread in it so it was visible day and night.
Some way of tensioning the rope. I used figure 9 clips from work
Some way of clipping the rope to the awning from the d ring picture hangers
Tent spikes
6-Velcro straps used to strap the awning down When not in use
Some way to mount the awning to your vehicle
4-brackets that are shaped as a T and bend the top tabs In like this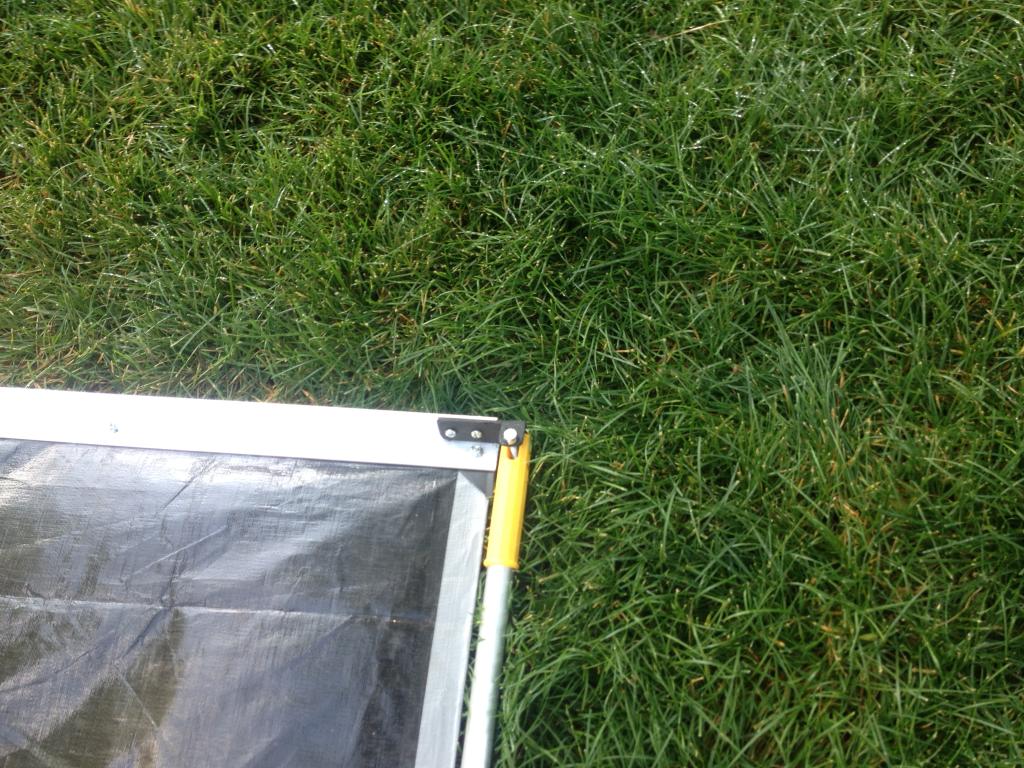
I had a welder at my disposal so made my own
You can get ALL of this from ace hardware
Start by sticking the weather stripping to one side of the flat bar on both pieces, these will be used to squish the tarp to the angles
Place the angle In a vice so you have a flat side on top and put the 8 foot side of the tarp on top with the edge to the where the aluminum makes the angle.
Set one of your flat bars with the weather stripping facing the tarp on the tarp and angle so the tarp is sandwiched in between.
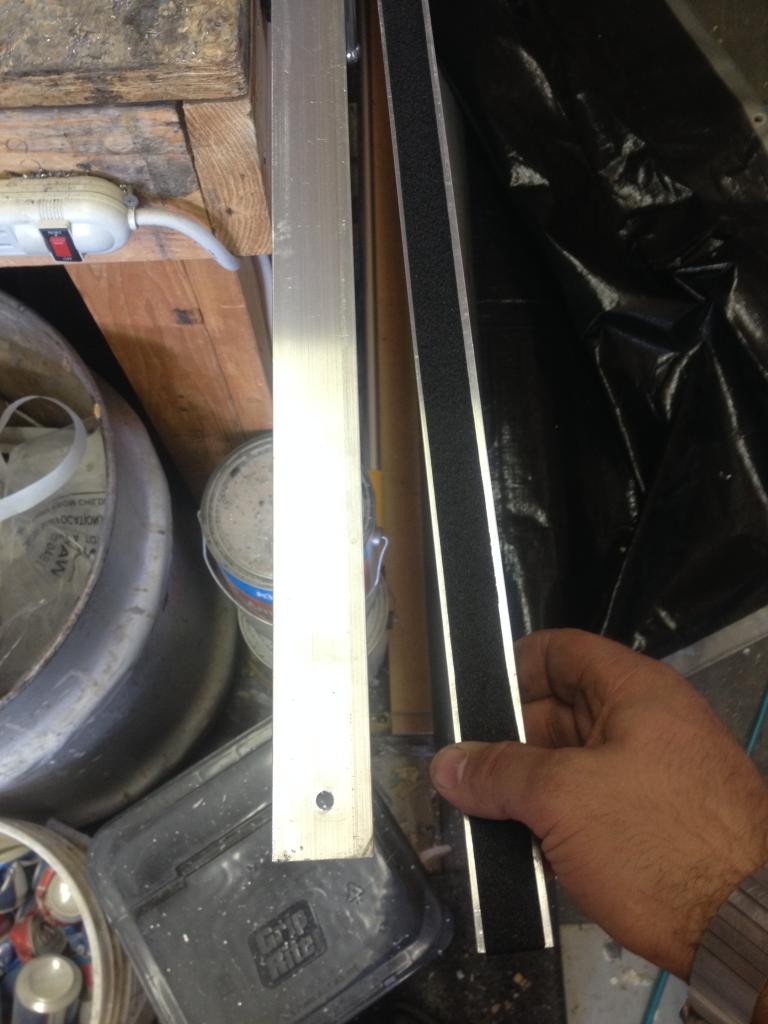
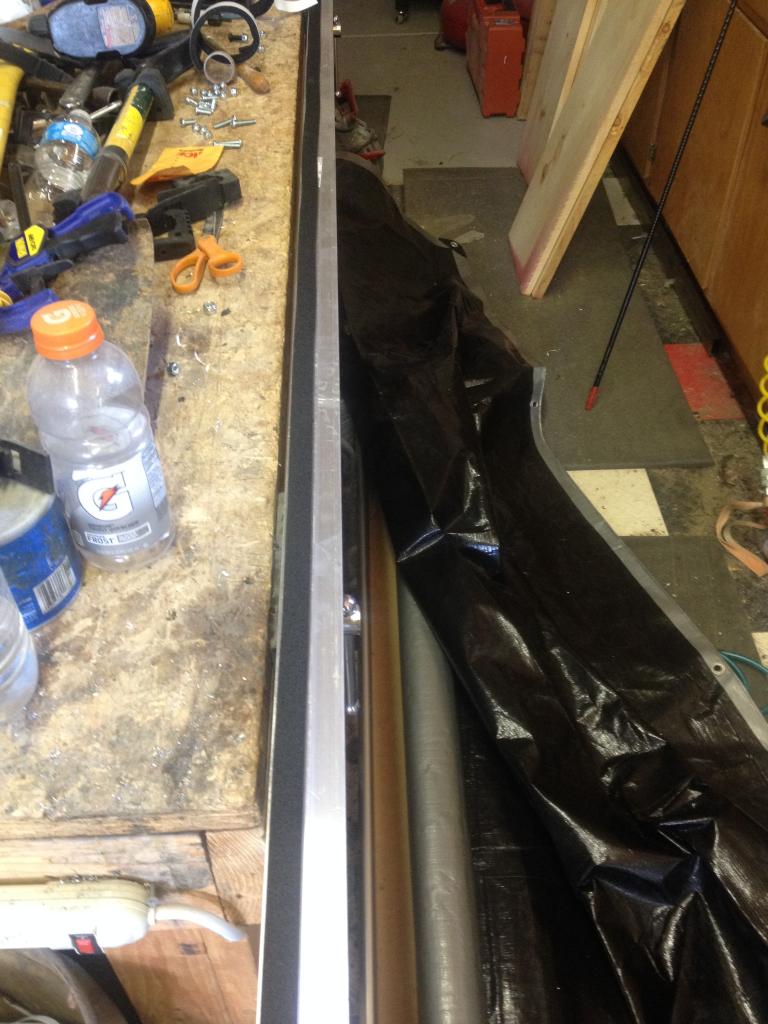
Clamp one end of the sandwich down and go to the other side of the angle sandwich and pull the tarp tout and clamp this side go to the center and drill 1/4 inch holes where the eyelits are ( through the flat bar with weather stripping then through the eye lit then the angle) repeat at the eye lits then put three more in between one eye lit to the other.
Make sense?? You should have an angle with a flat out side facing up with a tarp on top of that then weather strip then flat bar.
Your holes should be corner tarp next one should be centered from that eyelet to the next one in, then that eyelet then centered then eyelet then centered then other corner. Put the 1/4 inch by 5/8 with through these seven holes and secure with a nut.
Go to the other side of the tarp and repeat
You should have a tarp with the two 8 foot ends sandwiched with the angles and flats
[ ] your angles should be facing the center of the tarp in that fashion with the tarp on top.
The two inch angle side will be the side that goes against your truck and the 1-1/2 will be the outside
On the 1 and 1/2 angle side mark 4 inches in on each side on the side that has nothing on it and drill a 7/8 hole on each side of the bar. These will be where the paint poles coming from the 2 inch angle will go to tension the awning.
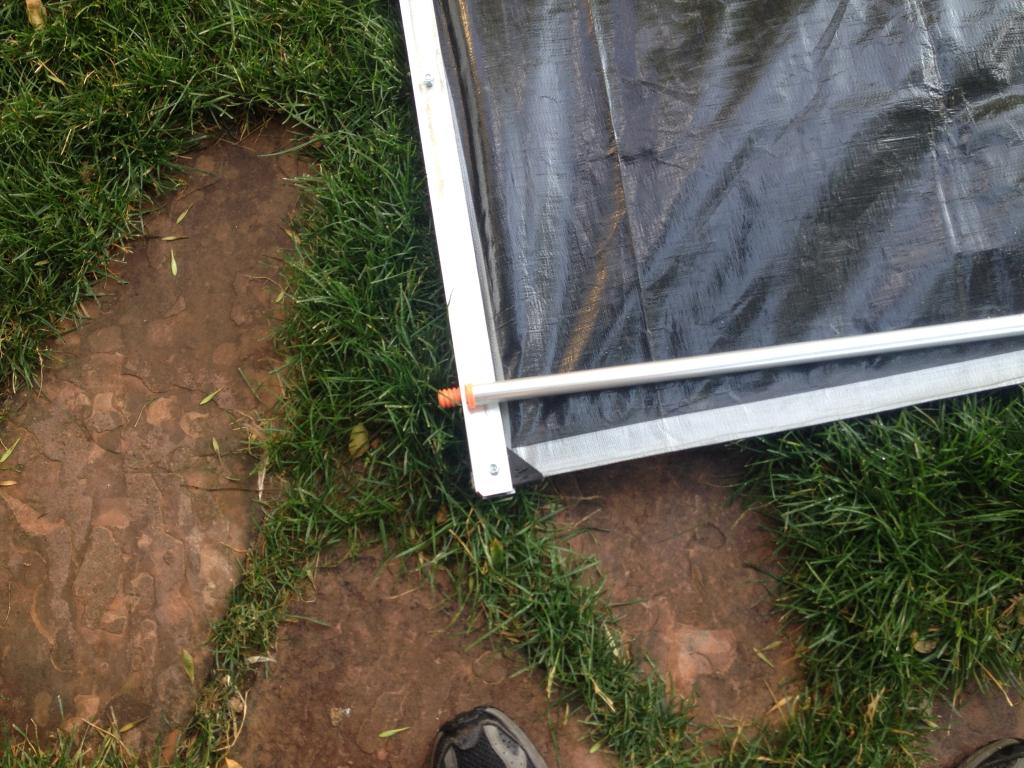
Make your T's to this size
Professional drawing I know
Mount these at the ends of the aluminum angle and drill your 5/16 holes in and mount your extension poles
Mount the "d rings about 2 inches in from the 7/8 holes that you drilled in the 1-1/2 angle and bolt on.
Mount the Velcro to the 2 inch Angle in what ever maner you want I put two rivets in each to hold them to the angle but it's only to keep them there when the awnings out...
Now you have a awning waiting for you to mount!!!!!
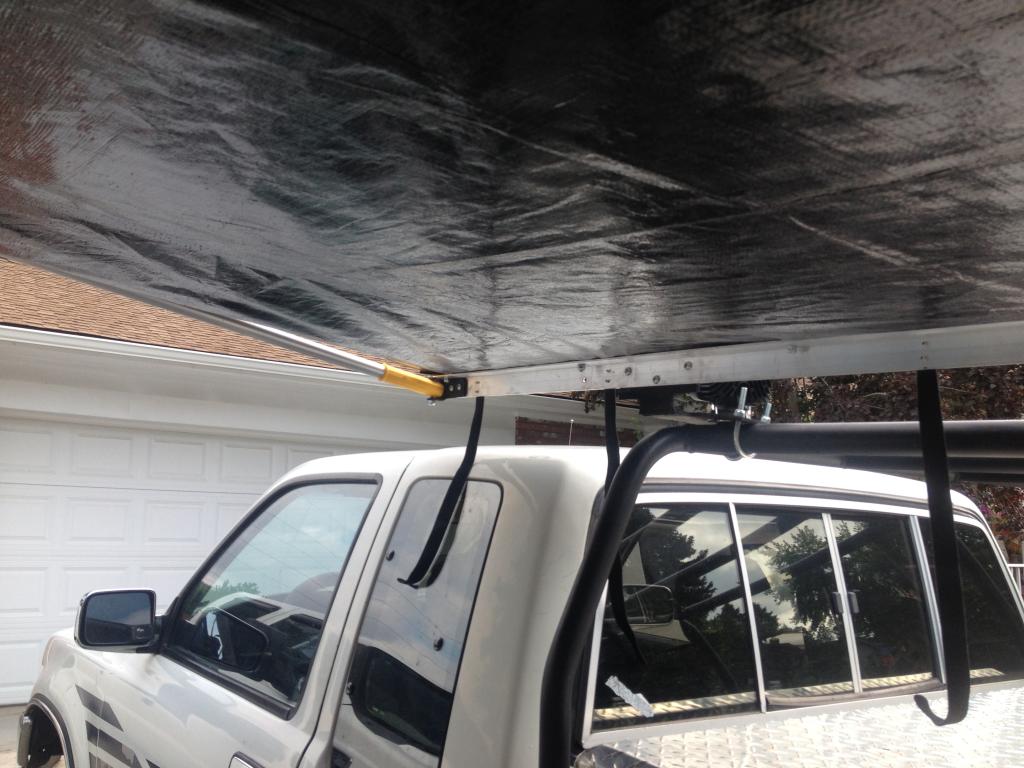
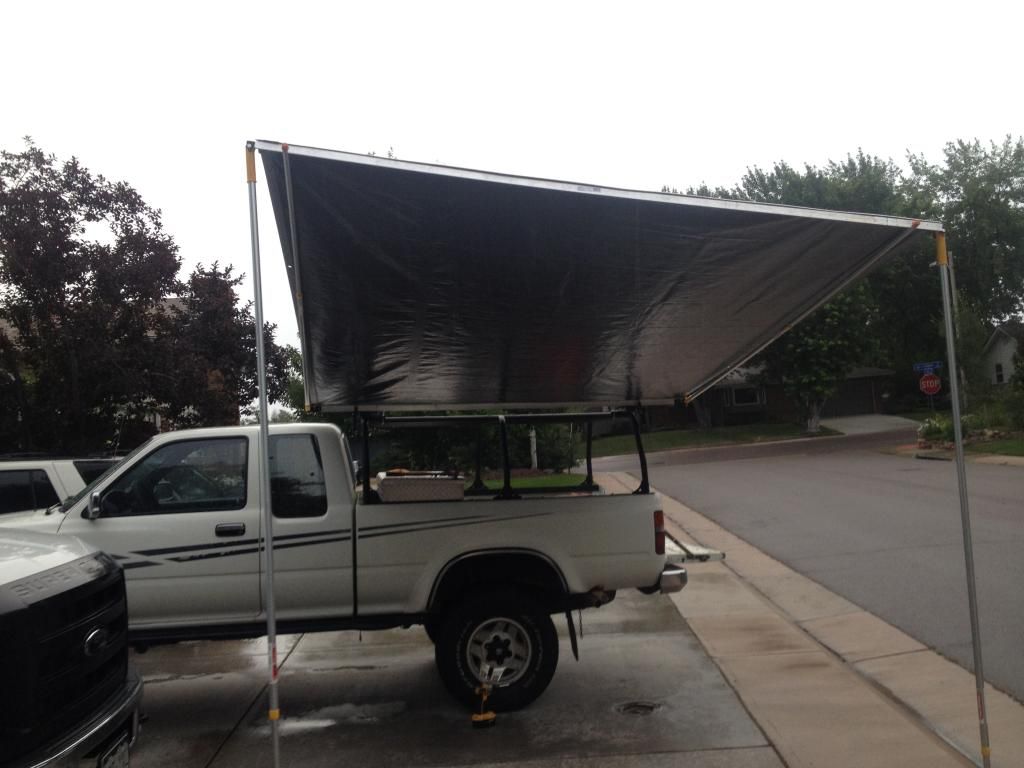
Note to self don't mount the awning to your rig in the rain like I did or you might get wet the first few minutes tell you get it up.
Other things done.
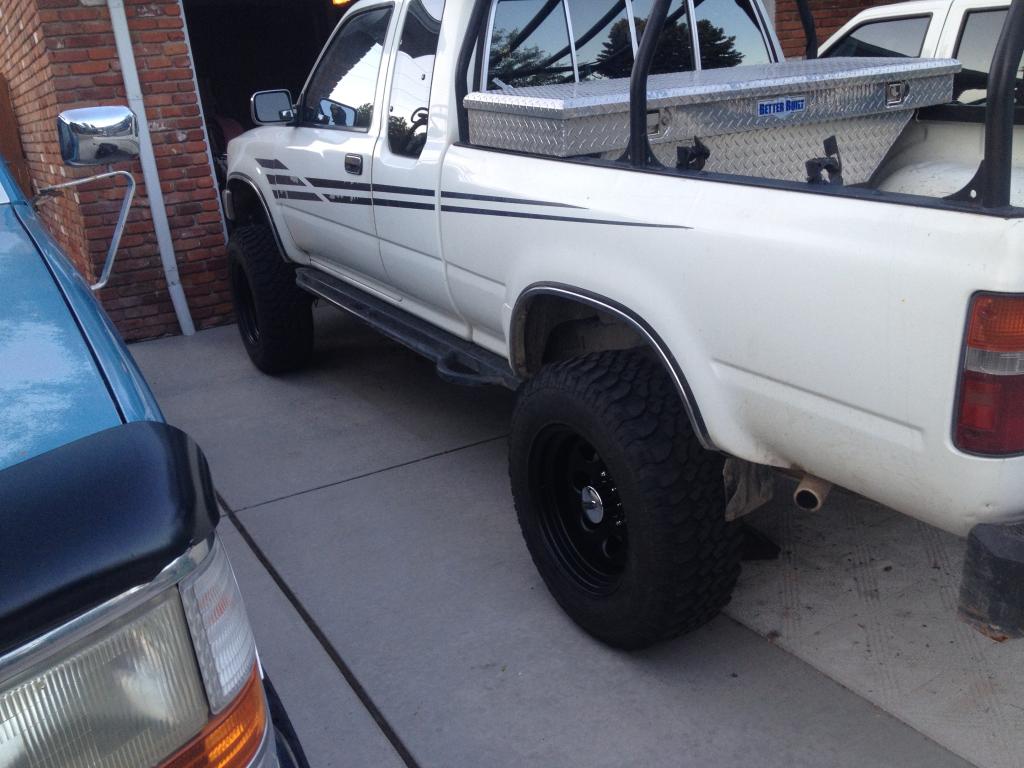
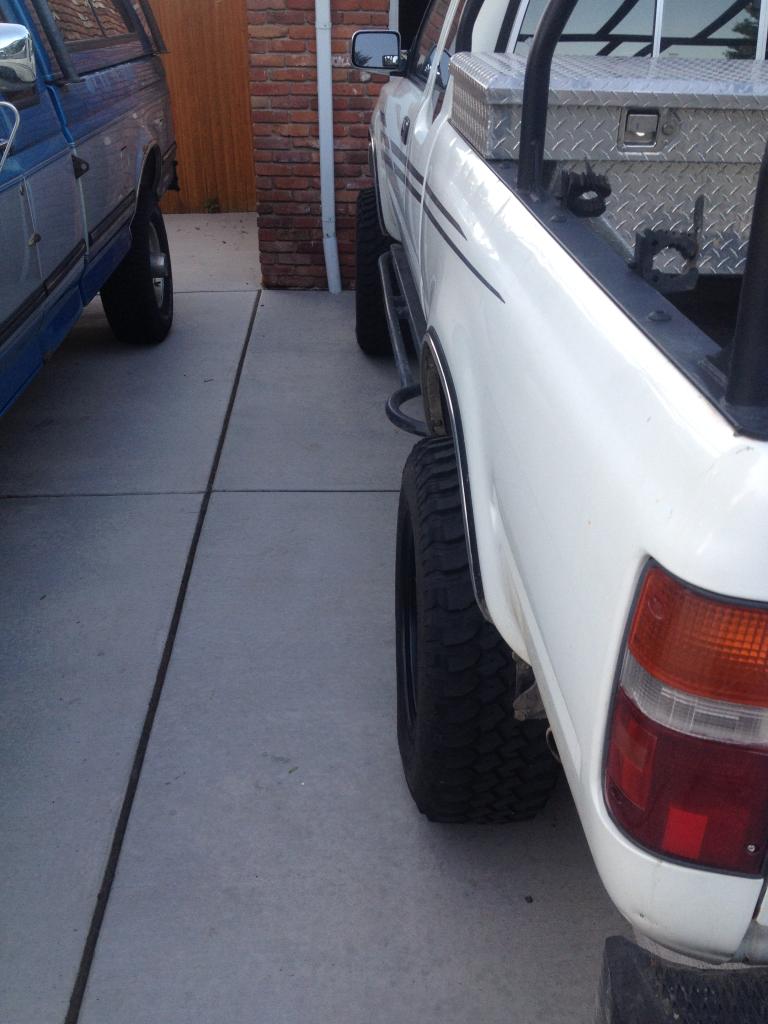
The rear bumper is finally mounted !!!!!!!!
Sorry no good pics right now I will post some when I can.
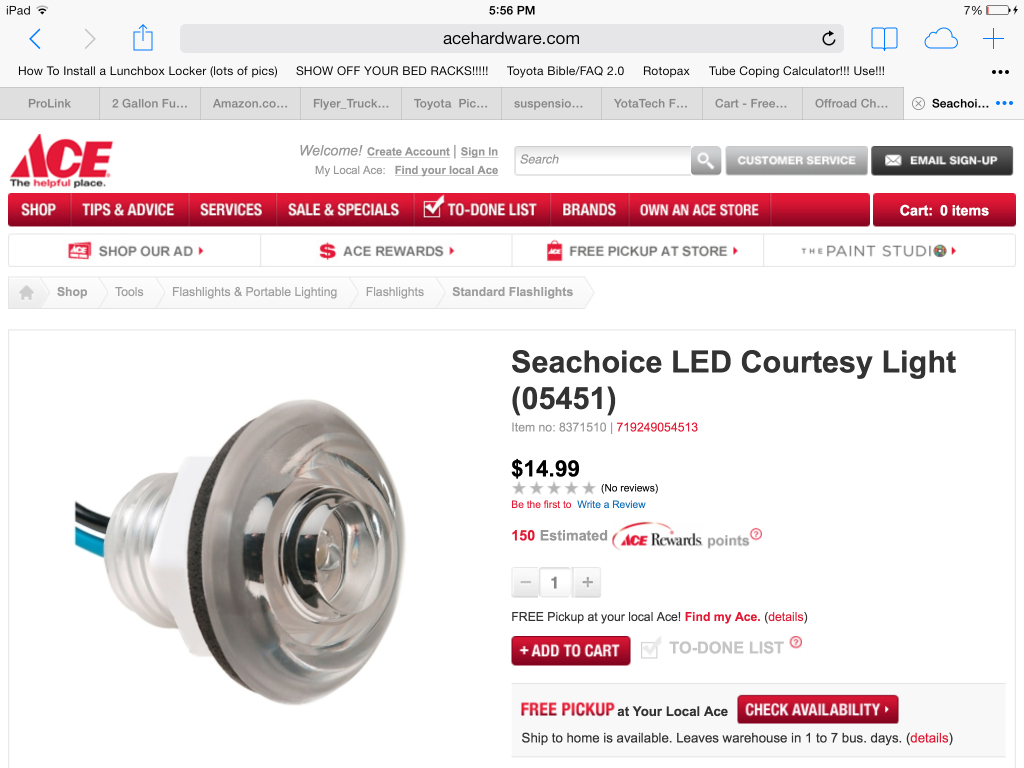
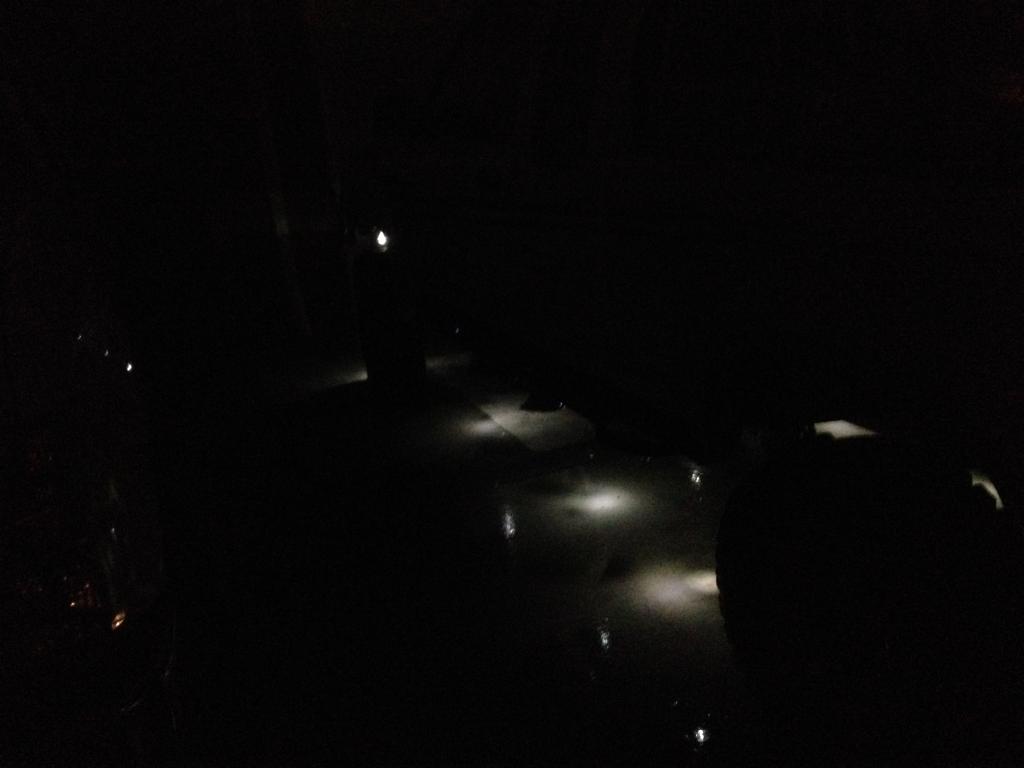
I made rock lights!!
There boat courtesy lights from ace hardware
If you want them you will have to order them they are not a in stock item unless you want the seven in my store ( where did those come from??) pm me if interested I can get better price.
I ran two lines (+ and -) down the side on the passenger side from the front of the tire and weaved the wires threw the truck and connected the ends to the front light on the driver front tire. Then used in line splices to connect the lights to the lines. There are 10 in all there is one in front and behind each tire them two more in the center of the truck.
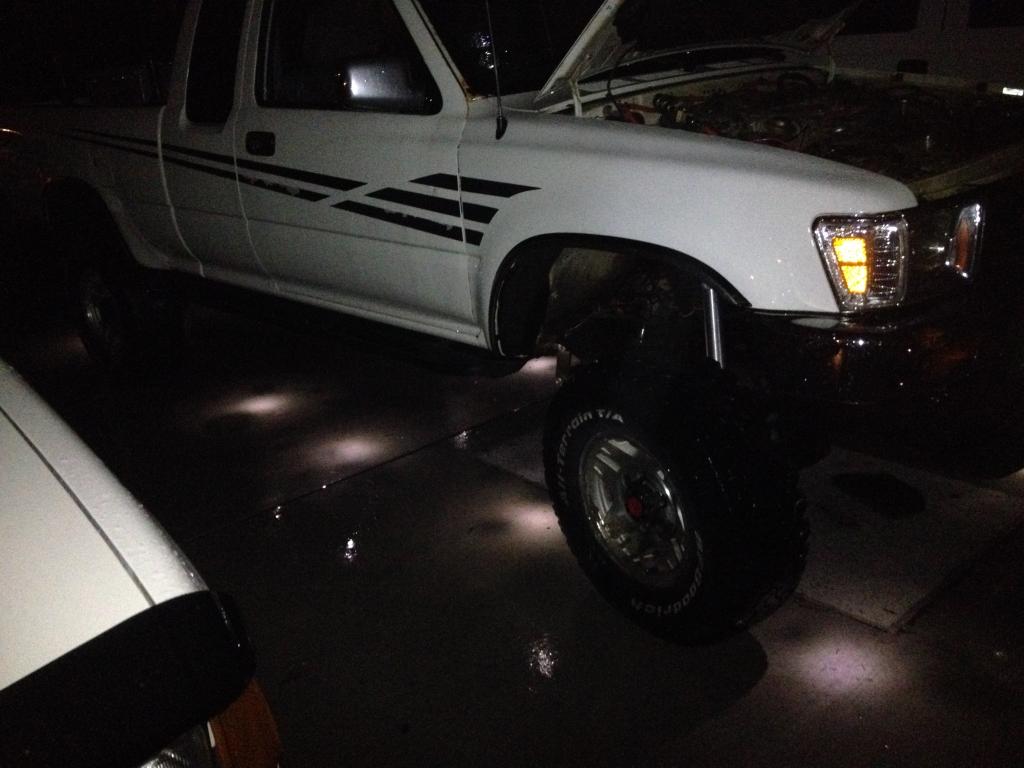
The tabs I made out of some thin gauge steel and drilled a 1-1/8 hole with a hole saw bit and welded on.
I finally got the cb radio installed and the antenna mounted on the rack and on the second day of wheeling the first 10 minutes I snapped the cb antenna base and my radio antenna
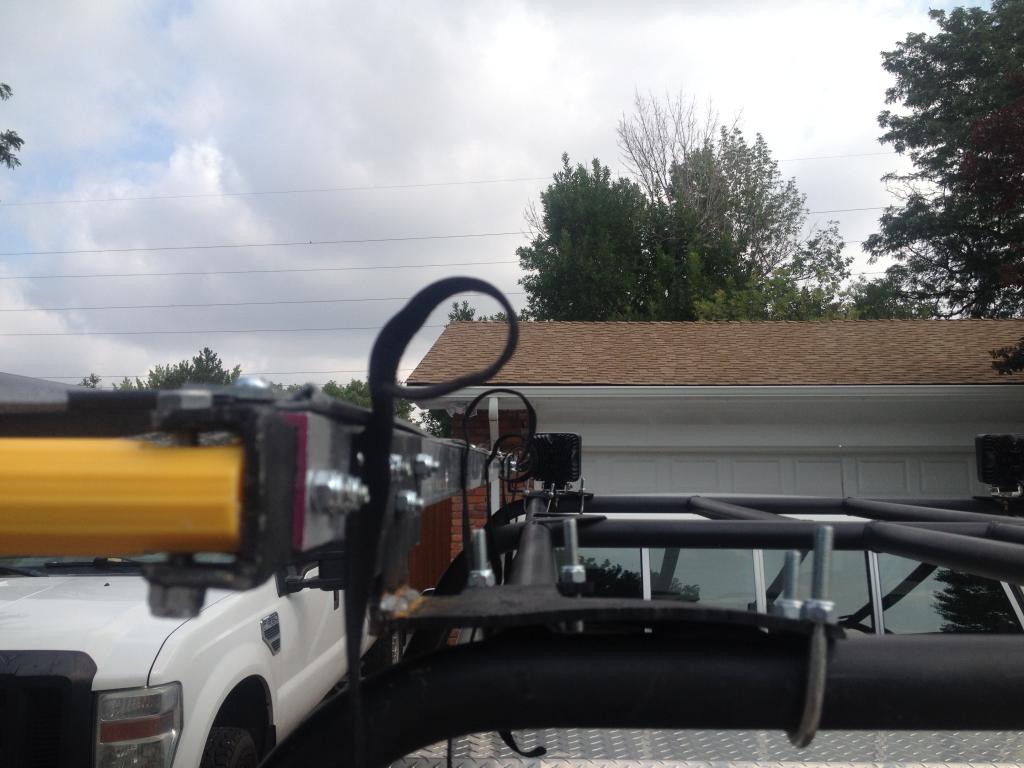
I am now working on the front bumper I have ordered and my friend picked it up for me a warn m8000-s and a pro link titanium in yellow and will be making the bumper off a trail gear winch mounting plate.
I also trashed a tire on the wheeling trip putting 2 one inch cuts in the side wall and I am very glad I had the arb tire plug kit.
So now I get to ask you a question I need new tires should I go with a 33x12.5 bfg all terrain/ mud terrain or can I fit a 35 bfg mud terrain on 3.75 back spacing? I'm not worried about the front it's the back I am worried about but might be putting chevy 63 with a 2.5 block in the back? Any ideas or pics??
I will post some other pics and things when I can get picks of them so if there is any thing you want to see let me know.
And if you have any questions let me know.
Jake,
after that was all ground up and clean it was time to start putting things back on. I had frenched in the front hangers a couple days earlier and worked out really well with the plasma. My dad had needed a better welder then the stick for some work on a house and I needed it for the truck so we looked at renting a mig. The only one in town that we knew of would have charged us 150 a day and we would have needed it for 6 days so we bought a lincon dual phase welder after some persuading
the welder works flawlessly (when I remember to turn the gas on %%%%%). Back to the SAS the front hangers and rear shackles were nice and easy to do. I did not have fun with the fact that there was layers in the frame where the rear hangers were going
The leafs went on followed by a newly trussed and armored axle . In the end I pushed the front axle to the front 2 inches to clear things like the oil pan. I road around without shocks and drive shaft for about 2 weeks waiting on a woody drive shaft that I got 100$ Off from a raffle in moab. When I received the drive shaft I was not happy though I had to re drill the holes for the t case because the holes there were about 1/8 in towards the center. I did get it on though eventually and was able to go flex it out to see what height I needed to put shock hoops and in the process was very happy to see the travel that the front has know. I would say the front has more then the back has with modded mounts and longer shackles.!!!! I got shocks on and guess what! They really helped with the ride quality!!
As the break in period progressed I had developed death wobble from lose upper steering studs on the driver side caused by my tie rod bashing my pitman arm so the steering box had to be moved. I ordered a flat pitman arm and moved the box forward 2.25 inches. I did cut a 3/16 plate to match my frame and move my steering box and welded it on. Then mounted the steering box and flat arm and drag link.
Other then the steering I have had no problem with the front after the SAS with 2000 miles and one three day trip of wheeling on miller rock, iron clad, left hand gultch, and some other Trails of equal or + difficulty that I'm spacing out on the name of right now.
On to other things. I had been preparing for that camping/wheeling trip for about 3 weeks and got some really cool things done. First and my favorite is a awning that can be passed as an arb (in my opinion).
What I needed
4-6 foot extendable aluminum painting poles.
1-2x2x1/8 aluminum angle 8 ft long
1-1.5x1.5x1/8 aluminum angle 8 feet long
2-1inchx1/8 aluminum flat bar
1 tarp 8x10
14-1/4x 5/8 long bolts and lock nuts
8- 1/4x3/4 long bolts and lock nuts
4-5/16x2.5 long bolts and lock washers
2- things of weather striping 1/4 thick by 1/2-3/4 wide
A pack of d ring mounts for picture hangers
4-8x24 3/8 long bolts with lock nuts
Rope- any small rope of your preference I had some para coward at work that was yellow and had reflecting thread in it so it was visible day and night.
Some way of tensioning the rope. I used figure 9 clips from work
Some way of clipping the rope to the awning from the d ring picture hangers
Tent spikes
6-Velcro straps used to strap the awning down When not in use
Some way to mount the awning to your vehicle
4-brackets that are shaped as a T and bend the top tabs In like this
I had a welder at my disposal so made my own
You can get ALL of this from ace hardware
Start by sticking the weather stripping to one side of the flat bar on both pieces, these will be used to squish the tarp to the angles
Place the angle In a vice so you have a flat side on top and put the 8 foot side of the tarp on top with the edge to the where the aluminum makes the angle.
Set one of your flat bars with the weather stripping facing the tarp on the tarp and angle so the tarp is sandwiched in between.
Clamp one end of the sandwich down and go to the other side of the angle sandwich and pull the tarp tout and clamp this side go to the center and drill 1/4 inch holes where the eyelits are ( through the flat bar with weather stripping then through the eye lit then the angle) repeat at the eye lits then put three more in between one eye lit to the other.
Make sense?? You should have an angle with a flat out side facing up with a tarp on top of that then weather strip then flat bar.
Your holes should be corner tarp next one should be centered from that eyelet to the next one in, then that eyelet then centered then eyelet then centered then other corner. Put the 1/4 inch by 5/8 with through these seven holes and secure with a nut.
Go to the other side of the tarp and repeat
You should have a tarp with the two 8 foot ends sandwiched with the angles and flats
[ ] your angles should be facing the center of the tarp in that fashion with the tarp on top.
The two inch angle side will be the side that goes against your truck and the 1-1/2 will be the outside
On the 1 and 1/2 angle side mark 4 inches in on each side on the side that has nothing on it and drill a 7/8 hole on each side of the bar. These will be where the paint poles coming from the 2 inch angle will go to tension the awning.
Make your T's to this size
Professional drawing I know
Mount these at the ends of the aluminum angle and drill your 5/16 holes in and mount your extension poles
Mount the "d rings about 2 inches in from the 7/8 holes that you drilled in the 1-1/2 angle and bolt on.
Mount the Velcro to the 2 inch Angle in what ever maner you want I put two rivets in each to hold them to the angle but it's only to keep them there when the awnings out...
Now you have a awning waiting for you to mount!!!!!
Note to self don't mount the awning to your rig in the rain like I did or you might get wet the first few minutes tell you get it up.
Other things done.
The rear bumper is finally mounted !!!!!!!!
Sorry no good pics right now I will post some when I can.
I made rock lights!!
There boat courtesy lights from ace hardware
If you want them you will have to order them they are not a in stock item unless you want the seven in my store ( where did those come from??) pm me if interested I can get better price.
I ran two lines (+ and -) down the side on the passenger side from the front of the tire and weaved the wires threw the truck and connected the ends to the front light on the driver front tire. Then used in line splices to connect the lights to the lines. There are 10 in all there is one in front and behind each tire them two more in the center of the truck.
The tabs I made out of some thin gauge steel and drilled a 1-1/8 hole with a hole saw bit and welded on.
I finally got the cb radio installed and the antenna mounted on the rack and on the second day of wheeling the first 10 minutes I snapped the cb antenna base and my radio antenna
I am now working on the front bumper I have ordered and my friend picked it up for me a warn m8000-s and a pro link titanium in yellow and will be making the bumper off a trail gear winch mounting plate.
I also trashed a tire on the wheeling trip putting 2 one inch cuts in the side wall and I am very glad I had the arb tire plug kit.
So now I get to ask you a question I need new tires should I go with a 33x12.5 bfg all terrain/ mud terrain or can I fit a 35 bfg mud terrain on 3.75 back spacing? I'm not worried about the front it's the back I am worried about but might be putting chevy 63 with a 2.5 block in the back? Any ideas or pics??
I will post some other pics and things when I can get picks of them so if there is any thing you want to see let me know.
And if you have any questions let me know.
Jake,
Aug 10, 2014 | 06:31 PM
#170


Great progress!!
That's a pretty nice job on the awning. And very creative. I like your use of simple parts and pieces that can be obtained at the local hardware store. Especially the painting poles.
On the tires.. I would imagine that you should be good with 35's. Depending on what size springs you went with, 33's might look small.
Aug 10, 2014 | 06:57 PM
#171
Thread Starter
Registered User
Joined: Jan 2014
Posts: 153
Likes: 0
From: colorado
Yah 33 could be small,but I know they will fit in the back with out trimming or bump stops.I guess it would not be the end of the world if I have to add bump-stops but I'm not sure if thats all i need and if so how much lift?The front is a 4 inch lift and with the 3.75 back spacing am not worried about rubbing up there but i am in the back not only front and rear of the tire but also the top.
Last edited by Jakesr5; Aug 10, 2014 at 08:19 PM.
Sep 7, 2014 | 08:46 PM
#172
Thread Starter
Registered User
Joined: Jan 2014
Posts: 153
Likes: 0
From: colorado
hey guys,
its been a while sense i have been on here with college and life, but just some up dates on the truck l had found some good bfg muds off a jeep wranger rubicon for a great price and could not pass them up so i pulled the trigger and got the pro comp steelies that i have been eye balling and got the worn tires out of here. it really looks good on the truck and added some stance.
hopefully i will get some good shots of it and not sitting in the driveway here soon.
we had started getting the front bumper rolling tonight and got the winch mount tacked in place and set the winch on there and it fits like a glove! im very excited to get going on this. sorry no pics yet.
now the bad
the stover nut on the leaf side of the back passenger shackle had came off and the shackle had came off on that side and trashed the bushings so i replaced all the rear bushings the other day. The best thing is i was going on a trip to miller rock and to see some friends up at boulder. but doing a pre check on the truck last night i found that my driver motor mount had not only broke but had popped up and wedged its self into the rubber of the mount. i know when i did this (i think) but i has stalled on a ledge on a wheeling trip and rolled back on another and smashed my passenger slider on the kick out agenst a rock and when i started it up i had heard the fan hitting the shroud but thought i had just jarred that and not popped the mount. so now i need to get some new mounts but i get to upgrade i think im going to go with trail gears bombproof motor mounts and that way i don't have to worry about it to much.
other things, laying under the truck changing split bushings i was thinking about suspension and i think a three link is in the future once i get the tires and bumper paid of and completed.
hope every one else is doing good!!!
jake,
its been a while sense i have been on here with college and life, but just some up dates on the truck l had found some good bfg muds off a jeep wranger rubicon for a great price and could not pass them up so i pulled the trigger and got the pro comp steelies that i have been eye balling and got the worn tires out of here. it really looks good on the truck and added some stance.


hopefully i will get some good shots of it and not sitting in the driveway here soon.
we had started getting the front bumper rolling tonight and got the winch mount tacked in place and set the winch on there and it fits like a glove! im very excited to get going on this. sorry no pics yet.
now the bad
the stover nut on the leaf side of the back passenger shackle had came off and the shackle had came off on that side and trashed the bushings so i replaced all the rear bushings the other day. The best thing is i was going on a trip to miller rock and to see some friends up at boulder. but doing a pre check on the truck last night i found that my driver motor mount had not only broke but had popped up and wedged its self into the rubber of the mount. i know when i did this (i think) but i has stalled on a ledge on a wheeling trip and rolled back on another and smashed my passenger slider on the kick out agenst a rock and when i started it up i had heard the fan hitting the shroud but thought i had just jarred that and not popped the mount. so now i need to get some new mounts but i get to upgrade
i think im going to go with trail gears bombproof motor mounts and that way i don't have to worry about it to much.other things, laying under the truck changing split bushings i was thinking about suspension and i think a three link is in the future once i get the tires and bumper paid of and completed.
hope every one else is doing good!!!
jake,

Thread
Thread Starter
Forum
Replies
Last Post
dirtrider0129
Buying & Selling Advice - Feeler/Gauging Interest
10
Jun 24, 2015 12:24 PM


