
Lindsay's Long Leg Seat Mod
 Jun 17, 2015 | 12:18 PM
#1
Thread Starter
Registered User
iTrader: (8)
Joined: May 2011
Posts: 1,517
Likes: 354
From: Southeast Virginia
Lindsay's Long Leg Seat Mod
I'm about 6'2" or 6'3" with most of it in my legs. The seats in my 1987 4Runner SR5 are comfy but leave me wishing I had more legroom. If you're in the same boat, here's how I fixed it.
I did this on seats out of a 1988 4Runner SR5. They are identical to the seats from a 1987 SR5. This may work on other years and perhaps the rails are the same for the DLX seats. Figure that out on your own.
This modification is super easy, free, and basically has no downsides that I can think of. Here's how I did it.
First, obviously, remove the driver's seat.
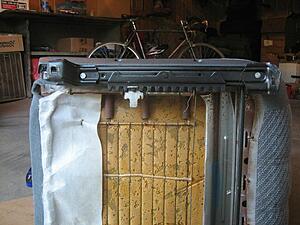
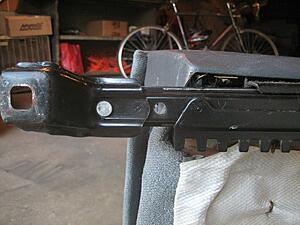
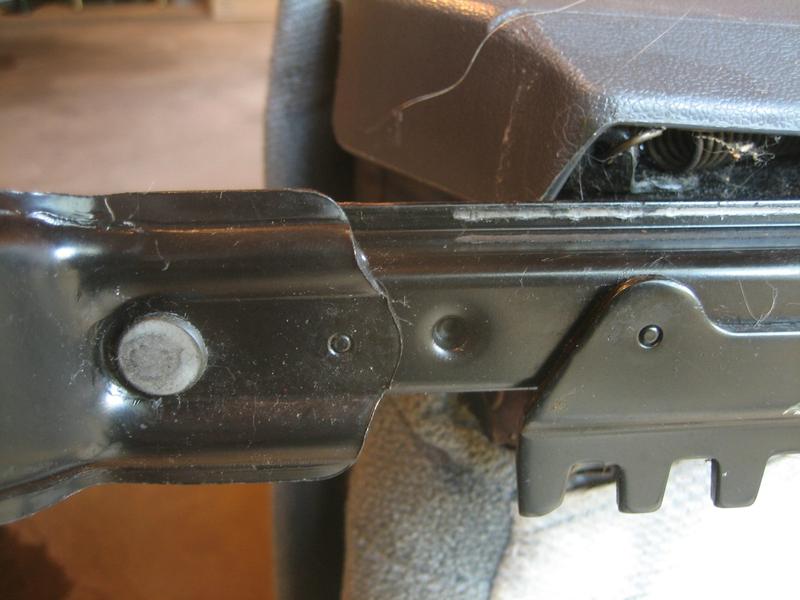
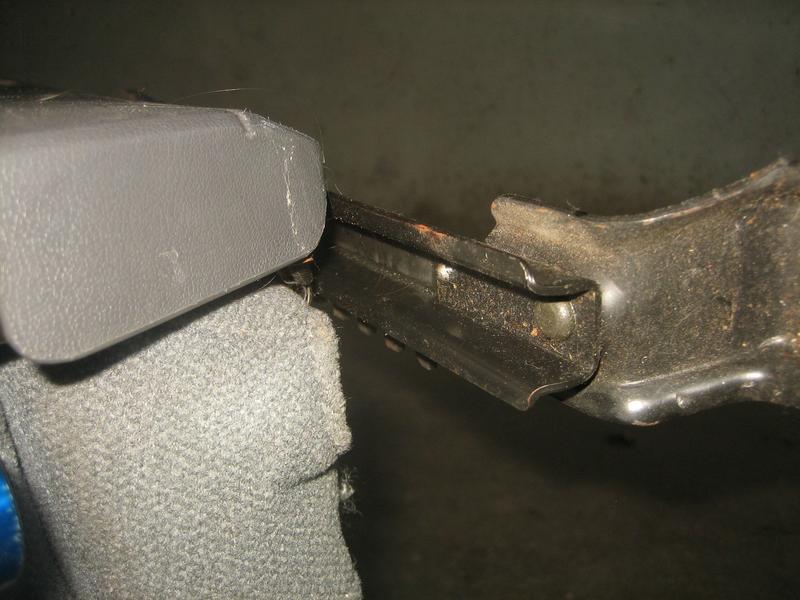
Now look at the rear most part of the seat rails. Notice the dimple that is actually going into the roller track. This is the limiting point of how far back your seat will go.

Here's a view from the top. You can see the dirt and nasty under-the-seat stuff stops at the dimple because the rollers keep the track clean where they ride. If that dimple wasn't there, the seat would be free to roll back all the way until it hit the big rivet.

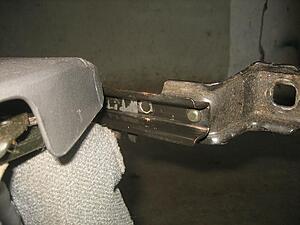
And the best part is, the locking mechanism that holds the seat at each position has room to spare. If you slide the seat back all the way back as far as it goes, you can see there are still 3 unused locking teeth. Both rails are identical in regards to the locking teeth and the placement of the dimple and rivet.
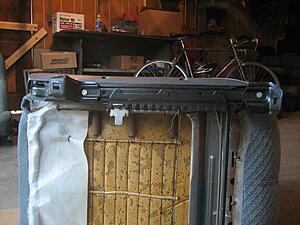
So what we need to do is remove the dimple. You could try to grind it out or smash it back down, I suppose. I chose to drill it out. It's really easy to drill from the bottom because it's already center punched. Here it is after drilling it out.
Here it is from the top after deburring the hole and cleaning up the dust and metal shavings.
Repeat on the other side. Now the seat is free to slide back two more teeth. This equals about 1.5 inches more seat travel. It may not sound like a lot but it was way more comfortable to me. Instead of my weight being concentrated on my butt, it's not spread over the bottom of my legs as I sit. This makes long drives way more comfortable.
I also made a video showing the process. Feel free to watch that too before you do this. Let me know if you like it!
I did this on seats out of a 1988 4Runner SR5. They are identical to the seats from a 1987 SR5. This may work on other years and perhaps the rails are the same for the DLX seats. Figure that out on your own.
This modification is super easy, free, and basically has no downsides that I can think of. Here's how I did it.
First, obviously, remove the driver's seat.
Now look at the rear most part of the seat rails. Notice the dimple that is actually going into the roller track. This is the limiting point of how far back your seat will go.
Here's a view from the top. You can see the dirt and nasty under-the-seat stuff stops at the dimple because the rollers keep the track clean where they ride. If that dimple wasn't there, the seat would be free to roll back all the way until it hit the big rivet.
And the best part is, the locking mechanism that holds the seat at each position has room to spare. If you slide the seat back all the way back as far as it goes, you can see there are still 3 unused locking teeth. Both rails are identical in regards to the locking teeth and the placement of the dimple and rivet.

So what we need to do is remove the dimple. You could try to grind it out or smash it back down, I suppose. I chose to drill it out. It's really easy to drill from the bottom because it's already center punched. Here it is after drilling it out.

Here it is from the top after deburring the hole and cleaning up the dust and metal shavings.

Repeat on the other side. Now the seat is free to slide back two more teeth. This equals about 1.5 inches more seat travel. It may not sound like a lot but it was way more comfortable to me. Instead of my weight being concentrated on my butt, it's not spread over the bottom of my legs as I sit. This makes long drives way more comfortable.

I also made a video showing the process. Feel free to watch that too before you do this. Let me know if you like it!
Jun 22, 2015 | 09:54 PM
#3
Registered User
Joined: May 2014
Posts: 259
Likes: 0
From: Southern Oregon
I did this today. Again, great idea! I'm 5'11", but I'm pretty crippled up and it makes it easier to get in and out. I don't hit my head now. More leg room than you would think. The first hole I drilled larger then cleaned it up with a die grinder, on the second one I drilled a smaller hole and cleaned it up. I used a hammer to get the rail to go back further, wouldn't go by hand. But, a little tap and it worked fine. Found a quarter in the outside panel!


 ^^ ^^
^^ ^^
Trending Topics


Thread
Thread Starter
Forum
Replies
Last Post
jasonty
Pre 84 Trucks (Build-Up Section)
41
Dec 23, 2018 01:00 PM
terminator
Misc Stuff (Vehicle Related)
3
Jul 27, 2015 07:13 PM
icentropy
86-95 Trucks & 4Runners
4
Jul 9, 2015 02:12 PM


