
1987 4Runner Cyber Dude
 May 31, 2013 | 05:59 AM
#262
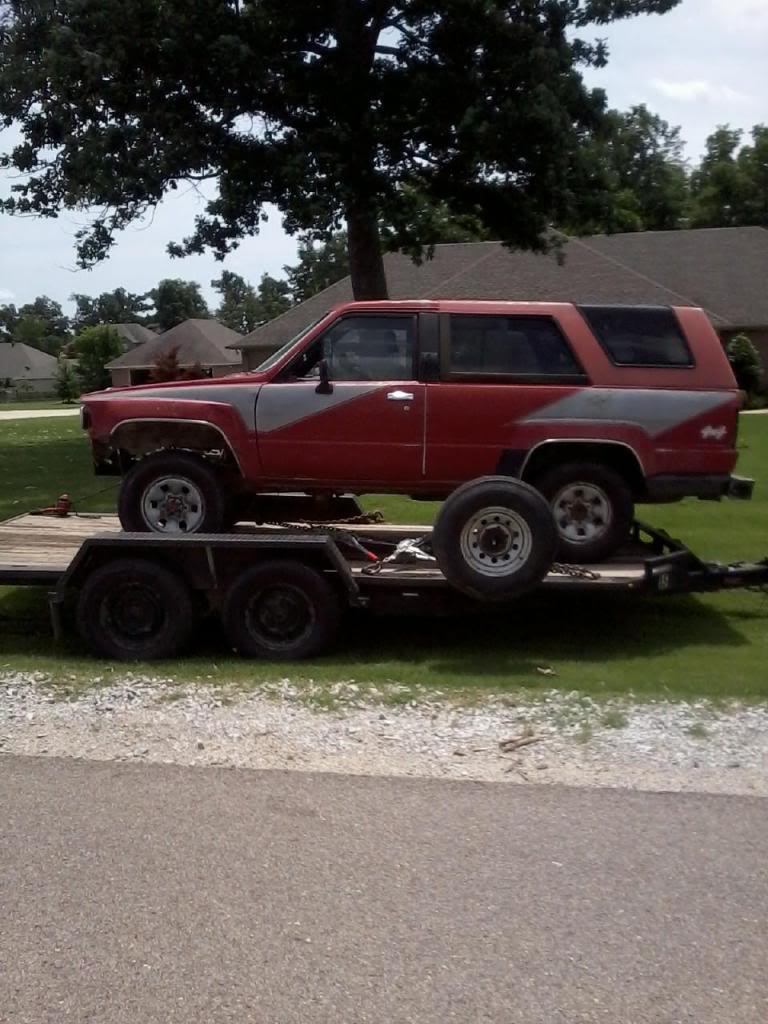
You will want a tandem (2 axle) trailer. You will notice that car trailers have the axles about 3/4th of the way toward the back of a trailer. The way I am hauling this Runner is not the correct way, but I didnt have a chioce as it was loaded with a forklift out of a junk yard, no ramps ect.. But it didnt have a motor in it it and if you notice how far I have it sitting back, I could not do a full hard turn as the back of the runner would bump the back of my 3rd Gen so it limited me on my turn radius.
You need more weight in front of the axles or you will get the trailer wig wagging ( swaying side to side) going down the highway. Something I never thought of til writing this post is having a tongue long enoug to keep the front of the vehicle being hauled from hitting the back of the vehicle doing the towing.
On my builds you will see I add a reciever hitch that mounts to the frame. Towing a truck and trailer using a regular bumper is really putting a load on a factory made bumper. On full size trucks, you can get away with it for a while but you are taking a chance, but with the reciever hitch assembly, you can buy hitch mounts that will either drop or raise the ball to a level height. I personally like mine to ride just a fuzz below level to help keep the weight on the hitch for a bit more safety to help reduce the chance of the hitch coming off of the ball.
I can find out what length this trailer was that I rented and you probably wouldnt need to go that long, but axles and where they are mounted is going to be the biggest factor in the trailer over the length.
If you are going to be doing alot of towing, and you get a car hauler, get trailer brakes added to your trailer at a later time. What a difference trailer brakes make. You can adjust them to where the trailer applies brakes to the percentage that you like. I will post a picture of the trailer brake assembly that I have on my 3rd gen later today for you.
Also I have a Load Leveling Kit and Anti Sway that I use when I pull my camper, each trailer has to be set up with brakes, anti sway and the load leveler, but when it is all hooked up and working, you really wont know the trailer is back there when stopping and going down the highway.
If you notice I only have one sport mirror on my 86. I am looking for the mirror mounts that go down an mount halfway down the door so that my mirrors set further out. I had doors that didnt have the bolt hole down the door, but I intentionally used these doors for the mirror mounts and for towing.
I will also post a kit that is Plug and Play for trailer lights as well for you that I would really suggest you getting for trailer lights. I stll dont have a car hauler myself and when I do it will take some time to get the Loads Levler, Anti Sway, and trailer brakes, but it makes towing so much safer.
You will find when pulling a trailer that people dont want to get behind you as you will drive slower and will cut in front of you and I have had some close calls. One reason I do try to show in my builds about the towing information that I have. You dont have to have all of these options at once but when you can afford and get it, it makes towing a piece of cake.
Not the correct way to haul a truck, but to show some things to look for in a trailer.
You need more weight in front of the axles or you will get the trailer wig wagging ( swaying side to side) going down the highway. Something I never thought of til writing this post is having a tongue long enoug to keep the front of the vehicle being hauled from hitting the back of the vehicle doing the towing.
On my builds you will see I add a reciever hitch that mounts to the frame. Towing a truck and trailer using a regular bumper is really putting a load on a factory made bumper. On full size trucks, you can get away with it for a while but you are taking a chance, but with the reciever hitch assembly, you can buy hitch mounts that will either drop or raise the ball to a level height. I personally like mine to ride just a fuzz below level to help keep the weight on the hitch for a bit more safety to help reduce the chance of the hitch coming off of the ball.
I can find out what length this trailer was that I rented and you probably wouldnt need to go that long, but axles and where they are mounted is going to be the biggest factor in the trailer over the length.
If you are going to be doing alot of towing, and you get a car hauler, get trailer brakes added to your trailer at a later time. What a difference trailer brakes make. You can adjust them to where the trailer applies brakes to the percentage that you like. I will post a picture of the trailer brake assembly that I have on my 3rd gen later today for you.
Also I have a Load Leveling Kit and Anti Sway that I use when I pull my camper, each trailer has to be set up with brakes, anti sway and the load leveler, but when it is all hooked up and working, you really wont know the trailer is back there when stopping and going down the highway.
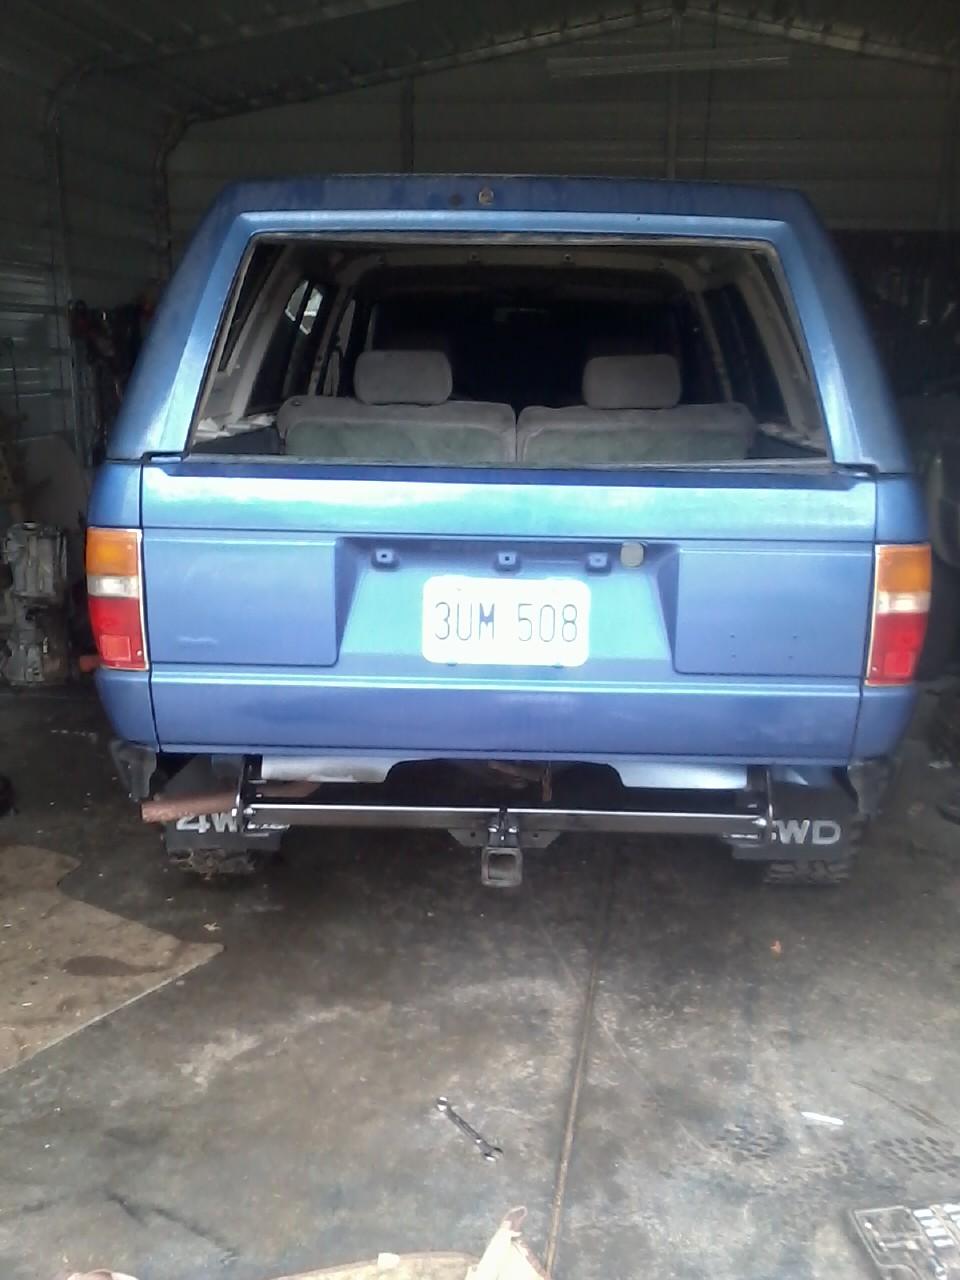
If you notice I only have one sport mirror on my 86. I am looking for the mirror mounts that go down an mount halfway down the door so that my mirrors set further out. I had doors that didnt have the bolt hole down the door, but I intentionally used these doors for the mirror mounts and for towing.
I will also post a kit that is Plug and Play for trailer lights as well for you that I would really suggest you getting for trailer lights. I stll dont have a car hauler myself and when I do it will take some time to get the Loads Levler, Anti Sway, and trailer brakes, but it makes towing so much safer.
You will find when pulling a trailer that people dont want to get behind you as you will drive slower and will cut in front of you and I have had some close calls. One reason I do try to show in my builds about the towing information that I have. You dont have to have all of these options at once but when you can afford and get it, it makes towing a piece of cake.
Not the correct way to haul a truck, but to show some things to look for in a trailer.
 May 31, 2013 | 06:02 AM
#263
If you want to email me at terryparnelll67@yahoo.com, post on one of my threads or PM me I might could see if it would work or see something that could help.
Copied...
Tail Light Conversion Kit
I got my tail light conversion kit, still need to get it installed and need a drop hitch. I do alot of pulling. Its PN# 43315.

You will eventually want a frame mounted hitch assembly. This gives you the option to adjust the height with a raised or dropped reciever to level the trailer.
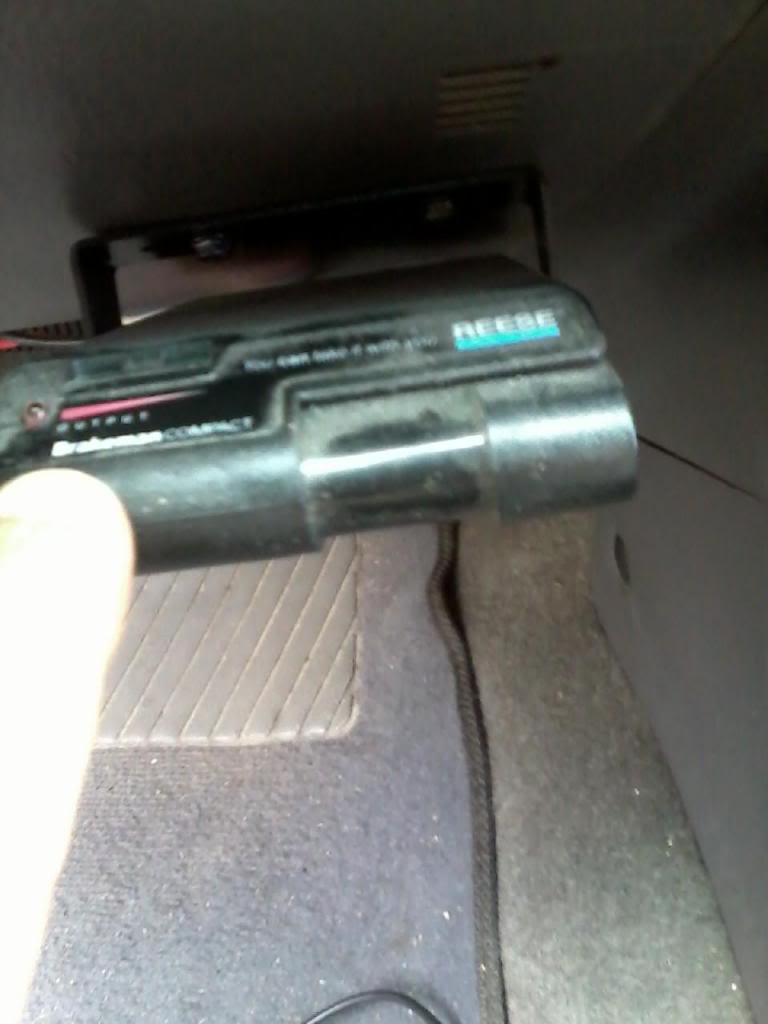
Trailer Brake installed on my 3rd Gen. Trailer will need to be set up as well. I have mine about half way adjusted. It controls how much or how little it applies the brakes.
Copied...
Tail Light Conversion Kit
I got my tail light conversion kit, still need to get it installed and need a drop hitch. I do alot of pulling. Its PN# 43315.
You will eventually want a frame mounted hitch assembly. This gives you the option to adjust the height with a raised or dropped reciever to level the trailer.
Trailer Brake installed on my 3rd Gen. Trailer will need to be set up as well. I have mine about half way adjusted. It controls how much or how little it applies the brakes.

Last edited by Terrys87; May 31, 2013 at 06:25 AM.
May 31, 2013 | 07:32 AM
#264
Thread Starter
Registered User
iTrader: (1)
Joined: May 2012
Posts: 835
Likes: 2
From: South Florida
Hey Terry,
Thanks for chiming in, I've towed plenty of times large trailers open and enclosed, but never a car or truck. All my towing experiences are with the 86 4Runner way back years ago and like I said only cargo never a vehicle.
I will email you a picture of the trailer for you to see and give a just a little information that I know so far.
May 31, 2013 | 01:18 PM
#265
Thread Starter
Registered User
iTrader: (1)
Joined: May 2012
Posts: 835
Likes: 2
From: South Florida
Terry, I emailed you, but that email you left up top isn't working, I got a return email saying not deliverable. Instead, I PM'ed you.
Okay first up I left a note about paint problems on Terry's thread, but I'll post it here I don't want to take up his thread.
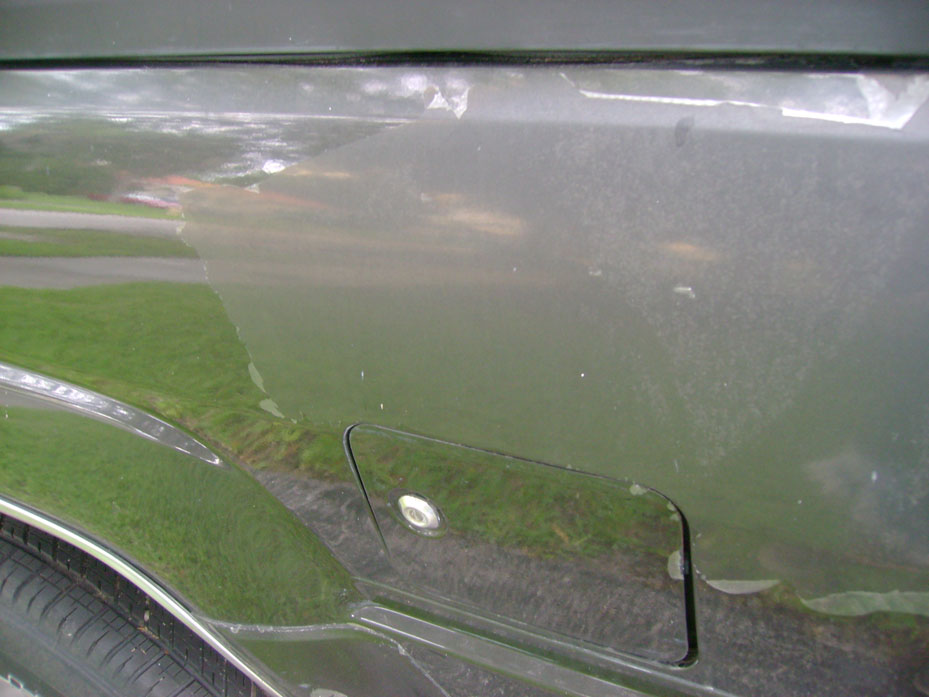
Here's a picture of the clear peeling off the truck. I think it's just a poor paint job, the truck was paint at some point by the original PO, but I don't think they did a very good job, they even painted over the original strippings, you can see some of the originals in some places. Well here's the pic of the clear peeling off.
And finally promised earlier, a picture of the crankshaft I received the other day. If the weathers right, I plan on working on this tomorrow.


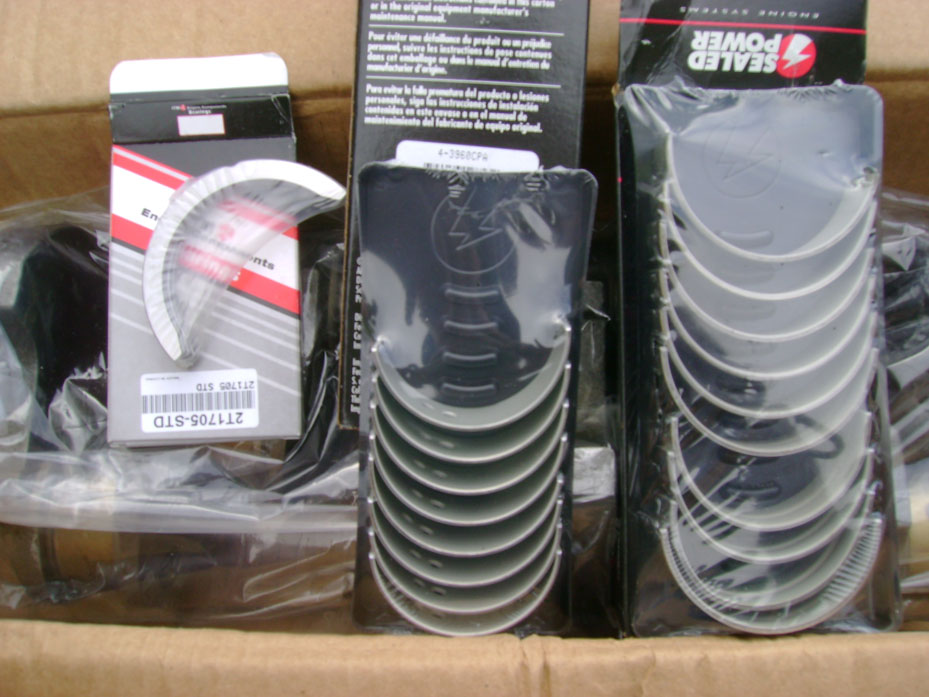
Since I haven't unwraped the plastic from the crankshaft, I can't tell you how well it was made. It seems to be a B+ grade of manufacturing (forged) a little rough compared to the original on. Once I put this one in, i going to measure the one I take out and see if It can be reused.
Okay first up I left a note about paint problems on Terry's thread, but I'll post it here I don't want to take up his thread.
Here's a picture of the clear peeling off the truck. I think it's just a poor paint job, the truck was paint at some point by the original PO, but I don't think they did a very good job, they even painted over the original strippings, you can see some of the originals in some places. Well here's the pic of the clear peeling off.
And finally promised earlier, a picture of the crankshaft I received the other day. If the weathers right, I plan on working on this tomorrow.
Since I haven't unwraped the plastic from the crankshaft, I can't tell you how well it was made. It seems to be a B+ grade of manufacturing (forged) a little rough compared to the original on. Once I put this one in, i going to measure the one I take out and see if It can be reused.
Last edited by junk4u; May 31, 2013 at 01:21 PM.
Jun 1, 2013 | 08:49 AM
#267
Thread Starter
Registered User
iTrader: (1)
Joined: May 2012
Posts: 835
Likes: 2
From: South Florida
Hey Cory, I started to head out and pulled out everything I need to get started and wham it starts to drizzle. Started putting everything away and wham it stops and a few minutes later the sun shines. Checked out weather.com and it says cloudy in my area.
Got tired of this cat and mouse waiting as its no fun getting ready then putting away so quickly.
I'm going to try again later, even though weather.com states it will rain at 6pm tonight.
Jun 2, 2013 | 06:57 AM
#268
Thread Starter
Registered User
iTrader: (1)
Joined: May 2012
Posts: 835
Likes: 2
From: South Florida
Okay here's what I did yesterday. Was to chicken to drag the motor out again and have it start raining again, so i start taking bolts off the front timing chain cover, the space i had was about a 3x3 space between the 86 4Runner and the shelving i have in the garage. Didn't get much off as it was to tight and cramped to really work on any thing, but I took a look at the a few things while I was at it. I didn't have a telescoping Bore Gauge to actually measure the connecting rod cap, I just decided to check it out anyhow with one of these cheap digital caliper measuring tools. I know the correct thing to do is measure the connecting rod and caps together and at specs torq, but I was just curious. Anyhow I measured #1 cap and got a 2.187" and then on #2 I did the same thing and got 2.204". That was strange as the #1 is the one that supposedly spun and should be larger. I check for grooves and it felt smooth. My neighbor came by the airplane mechanic and looked at it and he thought that was strange as well. He said he had a telescoping gauge at work and would bring it home. He may or may not bring it home today as he sometimes forgets as he works late hours and of course like most of use just want to get home and hit the bed.
Anyhow today looks like a great day and I've already taken out the motor from the garage and started again taking it apart to get that crankshaft out. Hopefully i can get that much done today, I'm also hoping to not remove the head off the block saving $ for a new gasket. We shall see how that turns out. Also, I would like to know actually how did the bearing spin, it looks like it really starved from lack of oil. So I', for sure going to check if the oil pump is actually good.
Anyhow today looks like a great day and I've already taken out the motor from the garage and started again taking it apart to get that crankshaft out. Hopefully i can get that much done today, I'm also hoping to not remove the head off the block saving $ for a new gasket. We shall see how that turns out. Also, I would like to know actually how did the bearing spin, it looks like it really starved from lack of oil. So I', for sure going to check if the oil pump is actually good.
Jun 3, 2013 | 11:01 AM
#269
Thread Starter
Registered User
iTrader: (1)
Joined: May 2012
Posts: 835
Likes: 2
From: South Florida
Okay Guys, I got a few things done yesterday, but weather was teasing me a bit.

I removed the front chain cover completely and checked the oil pump. As I have known, the oil pump hardly ever fails as it�s pretty much is just mechanical. The only thing that may fail is the oil seal ring over time or improperly placed. Everything checked out okay as far as the oil pump and water pump. Chain and everything look okay as well.

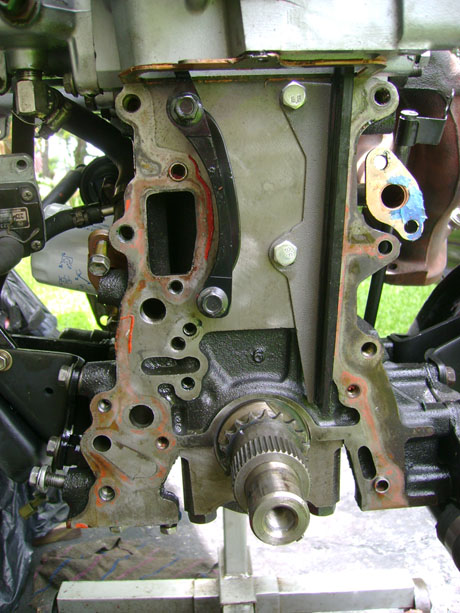
Heading to the crankshaft, started removing the connecting rod caps and noticed that #4 had no play, but the bearing was scored up a little. This thing heated up pretty bad as far as I can tell and the worst part is, I always lubricate the bearings prior to installation. Any who(AKA how) my neighbor stopped by to check out what I was doing and to tell me he forgot to bring home his gauges. Well we sat around looking at the crankshaft to try and figure out what went wrong. Of course we examined the oil pump and it seems find very little can go wrong with that and we both agree.
So you can see how much metal is in the pan.

Using a digital caliper which is not really the tool to use, but it gives me an idea. I took a few measurements from rod journal #1 and found that it was off across meaning it seemed to be tapered from outside to center being smaller. Then I took a few more readings around the #1 rod journal and found that one side was large than the other (out round). Then check # 2 and #3 which didn�t seem to have any real problems and their measurement came out pretty much the same meaning tapering higher on the outside of the journal and lower towards the center. I�m thinking those guys at the machine shop knew this and only gave me one measurement and told me all I need is polishing, then again my bad for trusting them to do it correctly and doing the right job. I�ll put this crankshaft aside for now.
I�m going to try and buy one of those cheap telescoping gauge sets from HF, I don�t want to bother my neighbor with his as he needs it at work anyhow. I�m not taking any chances this time around. I�m going to check as much as possible; I�m going to try and get the plastigage from AutoZone and make sure I have right oil gaps, etc�
I removed the front chain cover completely and checked the oil pump. As I have known, the oil pump hardly ever fails as it�s pretty much is just mechanical. The only thing that may fail is the oil seal ring over time or improperly placed. Everything checked out okay as far as the oil pump and water pump. Chain and everything look okay as well.
Heading to the crankshaft, started removing the connecting rod caps and noticed that #4 had no play, but the bearing was scored up a little. This thing heated up pretty bad as far as I can tell and the worst part is, I always lubricate the bearings prior to installation. Any who(AKA how) my neighbor stopped by to check out what I was doing and to tell me he forgot to bring home his gauges. Well we sat around looking at the crankshaft to try and figure out what went wrong. Of course we examined the oil pump and it seems find very little can go wrong with that and we both agree.
So you can see how much metal is in the pan.
Using a digital caliper which is not really the tool to use, but it gives me an idea. I took a few measurements from rod journal #1 and found that it was off across meaning it seemed to be tapered from outside to center being smaller. Then I took a few more readings around the #1 rod journal and found that one side was large than the other (out round). Then check # 2 and #3 which didn�t seem to have any real problems and their measurement came out pretty much the same meaning tapering higher on the outside of the journal and lower towards the center. I�m thinking those guys at the machine shop knew this and only gave me one measurement and told me all I need is polishing, then again my bad for trusting them to do it correctly and doing the right job. I�ll put this crankshaft aside for now.
I�m going to try and buy one of those cheap telescoping gauge sets from HF, I don�t want to bother my neighbor with his as he needs it at work anyhow. I�m not taking any chances this time around. I�m going to check as much as possible; I�m going to try and get the plastigage from AutoZone and make sure I have right oil gaps, etc�
Jun 3, 2013 | 06:00 PM
#270
Registered User


Joined: May 2005
Posts: 1,977
Likes: 231
From: S. FL
Junk - well looks like you are getting there. I never even thought about tapered crank journals. I'd be pretty upset at the machine shop, but not sure what you can do other than never use them again.
Jun 3, 2013 | 11:37 PM
#271
That is frustrating about the bearing and the machine shop. Seems like some shops just dont care about the quality of work any more.
On your clear coat, I would suggest trying to use some 1500 grit paper and featheredge the clear, to where you really cant tell where the clear and the base coat meets. When done right it looks like a smear. Just make sure you dont get thru the base coat.
You will need to reclear over the bare spot and then go alot further out from the orginal repair and gradually fade out or go to a body line. I have only done some spot repairs and it was always on new paint and clear caot. You will be adding new clear coat on top of old clear coat and there is a trick to gradually making it blend so that it isnt noticeable. I have the basic idea, but not exactly sure I could do it absolutely correct.
As far as shooting clear coat. It is the toughest for me but it is also nothing to be worried about. You can just wet sand it and it is something you are going to have to do any ways. The smoother the finish the less wetsanding you have to do. It is so nice when it goes on smoothe the first time.
Using something like 2000 grit paper is alot more safer then using a polishing compound and a buffer. I have burned thru with a buffer but never with fine grit paper. When you do get the clear done, is when you will need to go over it with 2000 grit paper.
The base coat that you are showing is what it looks like when you are painting. It gets it shine from the clear coat.
Jun 4, 2013 | 03:31 AM
#272
Thread Starter
Registered User
iTrader: (1)
Joined: May 2012
Posts: 835
Likes: 2
From: South Florida
Cory, thanks a lot I sure hope I get some where soon. I was upset at the machine shop, but I also blame myself as you well know I've been saying I'm kind of to blame for not checking myself.
Terry, thanks for the help on the paint. I plan on sanding down close to the original pain. I personally can't stand the fact that I can see the silhouette of the decal on this coat of paint. Whom ever painted it just painted over the decal, so I just may spend some time sanding sections of the truck down to the original base paint them painting over it.
I'm hoping to get to HF today to pickup that telescoping gauges and measure the connecting rods and move forward with this again today.
Jun 13, 2013 | 05:03 PM
#273
Thread Starter
Registered User
iTrader: (1)
Joined: May 2012
Posts: 835
Likes: 2
From: South Florida
Update
I've been kind of busy with a few things and on and off toying with the engine on this truck. I got a little frustrated with the measuring the other day, so I pulled out of it for a bit to calm down rather than messing things up.
I went and got some plastigage the other day to check things out using it.
Now I need a little input on this as to what you guys think what direction I should take.
Here's where I'm at so far with the plastigage:
#1 journal reads between .015 and .002
#2 journal reads roughly .002
#3 journal reads roughly .002
#4 journal reads .001
These readings are from one side of the journal, tomorrow I plan on rotating the crank to get he lowest point on it then plastigaging it to see how much of a difference there is in the readings.
I figured there would be more of a problem with #1 and #4 considering #1 spun and #4 was worn as well. I am sure there will be a difference once I rotate the crank so that when i do plastigage measure it the journals would be at the lowest or in this case since the motor is upside down the journals would be face directly 90 degrees up.
Here's a pic of #4 journal:

And one of #1 Journal

I would liek to hear from some of you all to see what you guys think.
I went and got some plastigage the other day to check things out using it.
Now I need a little input on this as to what you guys think what direction I should take.
Here's where I'm at so far with the plastigage:
#1 journal reads between .015 and .002
#2 journal reads roughly .002
#3 journal reads roughly .002
#4 journal reads .001
These readings are from one side of the journal, tomorrow I plan on rotating the crank to get he lowest point on it then plastigaging it to see how much of a difference there is in the readings.
I figured there would be more of a problem with #1 and #4 considering #1 spun and #4 was worn as well. I am sure there will be a difference once I rotate the crank so that when i do plastigage measure it the journals would be at the lowest or in this case since the motor is upside down the journals would be face directly 90 degrees up.
Here's a pic of #4 journal:
And one of #1 Journal
I would liek to hear from some of you all to see what you guys think.
Jun 13, 2013 | 05:22 PM
#274
Thread Starter
Registered User
iTrader: (1)
Joined: May 2012
Posts: 835
Likes: 2
From: South Florida
One more thing the FSM states that the widest point for the plastigage measurement standard:
Standard clearance should be .001 - .0022 in.
So far at this point I would say i am with in tolerance, but we shall see tomorrows readings with the journals at 12 O-Clock.
Standard clearance should be .001 - .0022 in.
So far at this point I would say i am with in tolerance, but we shall see tomorrows readings with the journals at 12 O-Clock.
Jun 14, 2013 | 06:17 AM
#275
Registered User
Joined: May 2005
Posts: 1,977
Likes: 231
From: S. FL
Junk - in your pic of journal 4, you are holding the mm guage up to it, not the inches, I'm hoping that was just for the pic. I really don't know what to think if all your clearances are fine. Wrong bearing maybe? You sure there was assembly lube on it? Some people pack their oil pump with vaseline to kind of prime it, I guess so they get oil pumping quicker, but I really don't know.
Jun 14, 2013 | 06:41 AM
#276
Thread Starter
Registered User
iTrader: (1)
Joined: May 2012
Posts: 835
Likes: 2
From: South Florida
Hey Cory, Yeah, that was a slight of hand trick. I just snapped the pic and later saw that I had the measurement guide backwards.
it really doesn't matter, .025mm is equal to .001 inches. Or more so .0254mm is equal to .001 inches.
everything you see there is new except the connecting rod. I'm thinking nothing is wrong with the connecting rod at this point and it should be okay to use given the measurement and actual run time on the motor after rebuild was less than 3 hours or so, but I will wait to decide that until I take the measurements as stated on my last post.
As far as what may have happened, I'm guessing the prior crank journal needed to be machined and those guys didn't bother to spend the actual time to do a good check. The oil pump was primed with a little bearing grease and 20w50 motor oil pour a little 20w50 into the pump. The bearing grease is a little thick and kind of hold like Vaseline and does eventually dissolve as well. This time I'm looking for that grease they use to lube up the bearings, kind of a pre-grease for the bearings as they say its better than using regular grease which is 20w50 that I use. I don't know if it makes a difference, but I use to love the 20w50 even though they said it wasn't the greatest for our weather conditions hot and sunny. Right now I use 10w30.
Jun 14, 2013 | 06:50 AM
#277
Registered User
Joined: May 2005
Posts: 1,977
Likes: 231
From: S. FL
Ahh ok, didn't even notice this was the new crank...makes complete sense now. So you're just checking clearances on the new crank...good idea. When I changed my bearings I did not plastigauge, mostly because I had 175k on the motor and I was not gonna do any work to at that time. I used that green assembly lube, got it from Discount Auto. It's like a green syrup, I guess it worked, I'm now around 184k and things seem to be fine.
Jun 25, 2013 | 02:30 PM
#279
Thread Starter
Registered User
iTrader: (1)
Joined: May 2012
Posts: 835
Likes: 2
From: South Florida
Hey Cory,
Haven't gotten that far at all. Been under the weather for the past couple of days.
I picked up the woodruff keys from Toyota for the new crankshaft. Was kind of difficult trying to remove the old one. I was going to heat it up and then try to tap it out, but changed my mind. Picked up the new Woodruffs for $1.65 each as they seem to price match TPZ online.
Anyhow, didn't get around to messing with the engine again till this afternoon. I am so nervous about the new crank now that I took the cap of #1 and rechecked it again with the pastigage. I'm going to speculate that the cap is tight this time around as it hits right on .001mm and maybe a smudge more. Could be a slight movement in the crank to cause this, but I just closed it up and torq to specs. got the woodruff in and set the timing chain. Started to cleanup the chain cover when it was time to come in since it started to rain down here. Will start again tomorrow cleaning up the chain cover, but I don't seem to find my wire brushes. Must of put them up somewhere I can't find them. I may stop by on the way home and pick a few tomorrow.
I was also going to pick up those first gen SR5 rims I told you about. I got the set of 4 for $75.00 I have to look around for center caps now since he was short hopefully they aren't damaged. I may pick up those third gen rims he has as well at some point as well, they looked nice in the picture he had.
So hopefully I will have a better update tomorrow.
Jun 27, 2013 | 04:06 PM
#280
Thread Starter
Registered User
iTrader: (1)
Joined: May 2012
Posts: 835
Likes: 2
From: South Florida
Update 6-27-2013
Yesterday, I picked up those SR5 Rims 15x7JJ 8Offset  . These are the from a second generation 4runner as the center caps have the logo instead of Toyota. I am happy with them, but they do need cleaning and scrubbing.
The guy had rims from a 97-98 4runner as well, 16x7JJ 8Offset. I may get those in the future as I would like to change my 86 to something better than the white stock wheels it came with back then. I am very excited to meet this guy as he himself loves the 1st gen 4runners, but diesel. He brings them in from overseas and drives them around. Some what of a downside since he gets them from over seas is they are right hand steering. Upside they are diesel 2L engines. He plans of getting one at the beginning of next years and invited me to see when he gets it since he himself lives about 20minutes from me. Can't wait to see it when he does get it.
I got a few done today on my motor. Everything is bolted back up on it. Lucas Assembly grease was put on the bearings and filled the oil pump with it as well. Kind of like honey slimy and sticky. Next up is putting the flywheel and clutch on and them dropping that bad boy in again which I should be able to do tomorrow. Once that's done, I should be able to crank it up on Saturday if the wife doesn't have any honeydew thing she needs.
I'm going to order a gasket kit for the original motor I pulled out of this truck. I don't plan to do more than just that at this time since it was running, just leaking oil everywhere. Also it needs a timing chain and new guides as the guides in it now are toast. I'll probably end up putting this in the 86 4Runner.
I'm hoping to get this 87 4Runner up and running before the 4th of July.
. These are the from a second generation 4runner as the center caps have the logo instead of Toyota. I am happy with them, but they do need cleaning and scrubbing.The guy had rims from a 97-98 4runner as well, 16x7JJ 8Offset. I may get those in the future as I would like to change my 86 to something better than the white stock wheels it came with back then. I am very excited to meet this guy as he himself loves the 1st gen 4runners, but diesel. He brings them in from overseas and drives them around. Some what of a downside since he gets them from over seas is they are right hand steering. Upside they are diesel 2L engines. He plans of getting one at the beginning of next years and invited me to see when he gets it since he himself lives about 20minutes from me. Can't wait to see it when he does get it.
I got a few done today on my motor. Everything is bolted back up on it. Lucas Assembly grease was put on the bearings and filled the oil pump with it as well. Kind of like honey slimy and sticky. Next up is putting the flywheel and clutch on and them dropping that bad boy in again which I should be able to do tomorrow. Once that's done, I should be able to crank it up on Saturday if the wife doesn't have any honeydew thing she needs.
I'm going to order a gasket kit for the original motor I pulled out of this truck. I don't plan to do more than just that at this time since it was running, just leaking oil everywhere. Also it needs a timing chain and new guides as the guides in it now are toast. I'll probably end up putting this in the 86 4Runner.
I'm hoping to get this 87 4Runner up and running before the 4th of July.


