
Liveoffroad's '84 4runner build
 Feb 27, 2015 | 06:22 AM
#441
Thread Starter
Registered User
Joined: Mar 2008
Posts: 705
Likes: 19
From: Colorado
from above:

Last edited by liveoffroad; Feb 27, 2015 at 06:26 AM.
Feb 27, 2015 | 06:46 AM
#442
Registered User


Joined: Oct 2009
Posts: 4,832
Likes: 332
From: Northfield, Vermont
But thats after the perch? If you try to line your axle up with your current springs now I think the perches will be too far out (by however much you moved the perches out). You dont move the perches for wheel spacers or an ifs hub swap....?
Did you widen your hanger or outboard your shackles to make up for the new with of the perches?
Like I said, maybe I missed something. Just trying to save you some headache down the road.
Did you widen your hanger or outboard your shackles to make up for the new with of the perches?
Like I said, maybe I missed something. Just trying to save you some headache down the road.
Feb 27, 2015 | 07:43 AM
#443
Thread Starter
Registered User
Joined: Mar 2008
Posts: 705
Likes: 19
From: Colorado
But thats after the perch? If you try to line your axle up with your current springs now I think the perches will be too far out (by however much you moved the perches out). You dont move the perches for wheel spacers or an ifs hub swap....?
Did you widen your hanger or outboard your shackles to make up for the new with of the perches?
Like I said, maybe I missed something. Just trying to save you some headache down the road.
Did you widen your hanger or outboard your shackles to make up for the new with of the perches?
Like I said, maybe I missed something. Just trying to save you some headache down the road.
I'm not widening the spring perches, i'm moving both of them 1.5" towards the passenger side to account for the spacer. have to move them since i only added a spacer to one side, rather than both sides. going to have the same distance between the perches as stock when its all said and done.
Last edited by liveoffroad; Feb 27, 2015 at 07:47 AM.
Feb 27, 2015 | 07:55 AM
#444
Registered User
Joined: Oct 2009
Posts: 4,832
Likes: 332
From: Northfield, Vermont
I understand your question now..haha.
I'm not widening the spring perches, i'm moving both of them 1.5" towards the passenger side to account for the spacer. have to move them since i only added a spacer to one side, rather than both sides. going to have the same distance between the perches as stock when its all said and done.
I'm not widening the spring perches, i'm moving both of them 1.5" towards the passenger side to account for the spacer. have to move them since i only added a spacer to one side, rather than both sides. going to have the same distance between the perches as stock when its all said and done.
Feb 27, 2015 | 08:01 AM
#445
Thread Starter
Registered User
Joined: Mar 2008
Posts: 705
Likes: 19
From: Colorado
yea, I did it this way so that it's the same as the TrailGear rock-assult +3 axle so my axle shafts are off-the-shelf from trail gear, rather than custom. in retrospect, that's probably not a big deal though and i'm already starting to regret not going a little wider... oh well, maybe on my future fj60 build 
Last edited by liveoffroad; Feb 27, 2015 at 08:02 AM.
Feb 27, 2015 | 08:06 AM
#446
Registered User
Joined: Oct 2009
Posts: 4,832
Likes: 332
From: Northfield, Vermont
yea, I did it this way so that it's the same as the TrailGear rock-assult +3 axle so my axle shafts are off-the-shelf from trail gear, rather than custom. in retrospect, that's probably not a big deal though and i'm already starting to regret not going a little wider... oh well, maybe on my future fj60 build
Feb 27, 2015 | 11:18 AM
#447
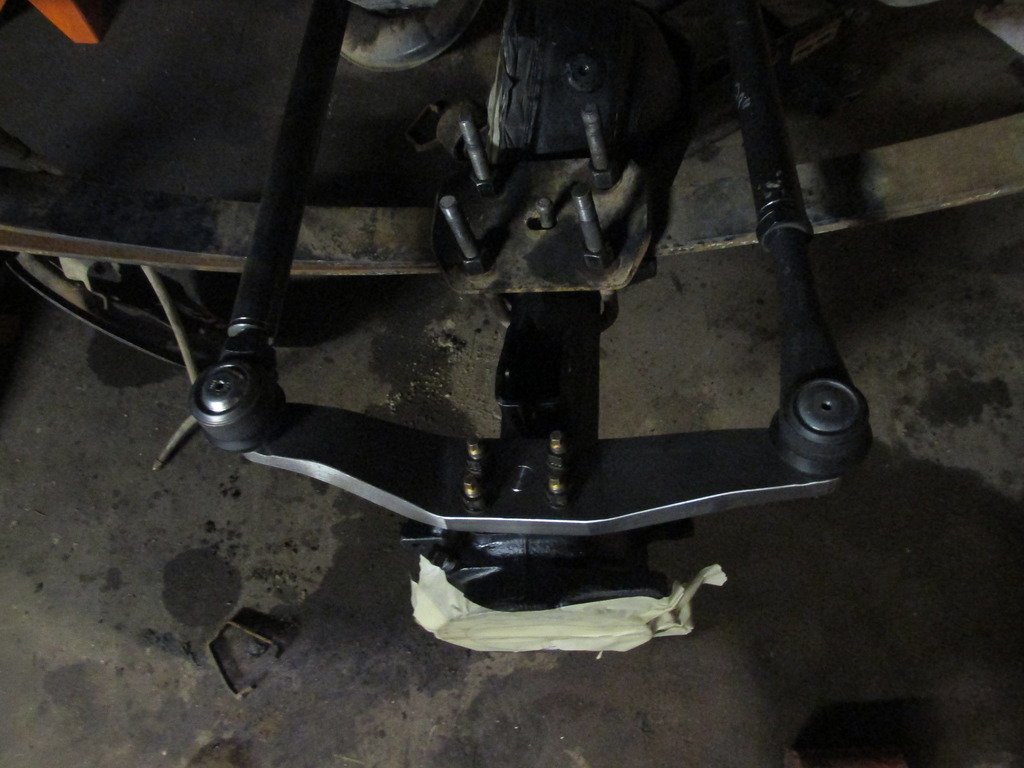
Nice work on the axel, its looking good! That's a cool highsteer setup, I've never seen that before. So your drag link runs from the steering box across the front to the passenger side steering arm like normal, but the tie rod runs across from one steering arm to other from behind and above the pinion, correct? That's what I like about your build, you think outside the box!
 Feb 27, 2015 | 01:18 PM
#448
Thread Starter
Registered User
Joined: Mar 2008
Posts: 705
Likes: 19
From: Colorado
Nice work on the axel, its looking good! That's a cool highsteer setup, I've never seen that before. So your drag link runs from the steering box across the front to the passenger side steering arm like normal, but the tie rod runs across from one steering arm to other from behind and above the pinion, correct? That's what I like about your build, you think outside the box!
side note: i'm going to look at some 37" mtrs tonight

Last edited by liveoffroad; Feb 27, 2015 at 01:21 PM.
Mar 5, 2015 | 06:42 AM
#449
Thread Starter
Registered User
Joined: Mar 2008
Posts: 705
Likes: 19
From: Colorado
axle update:
I got the DS knuckle rotated and put on the other spring perch.
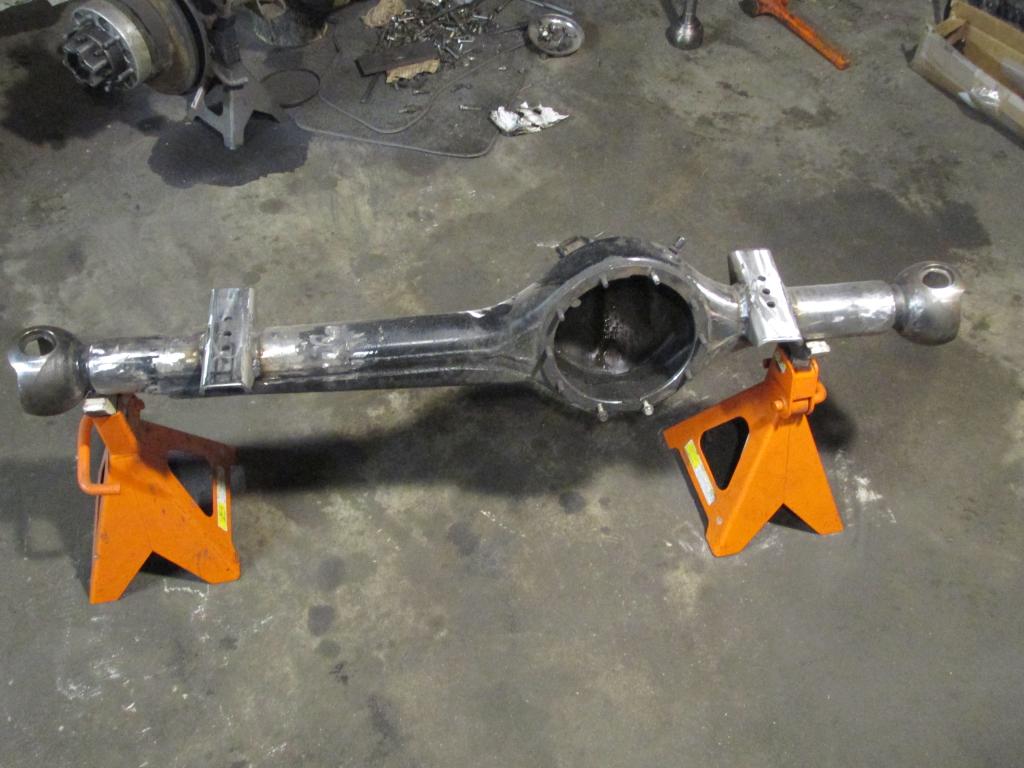
Monday i finally got my order from TG so i could finish the axle. Armor time:
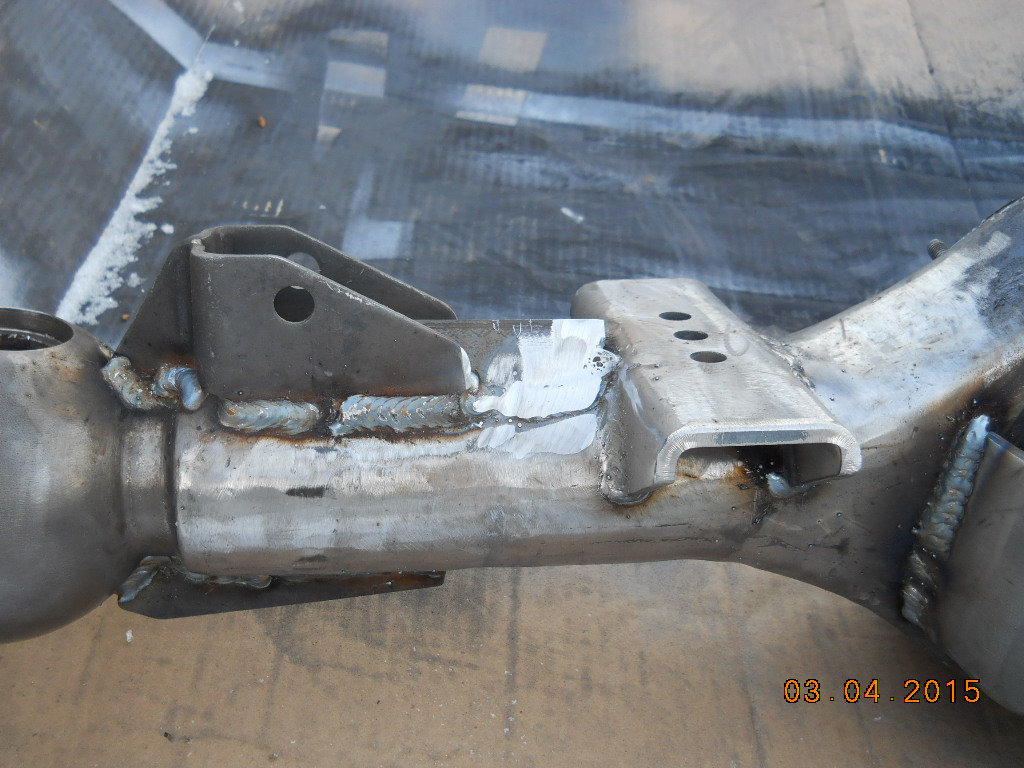
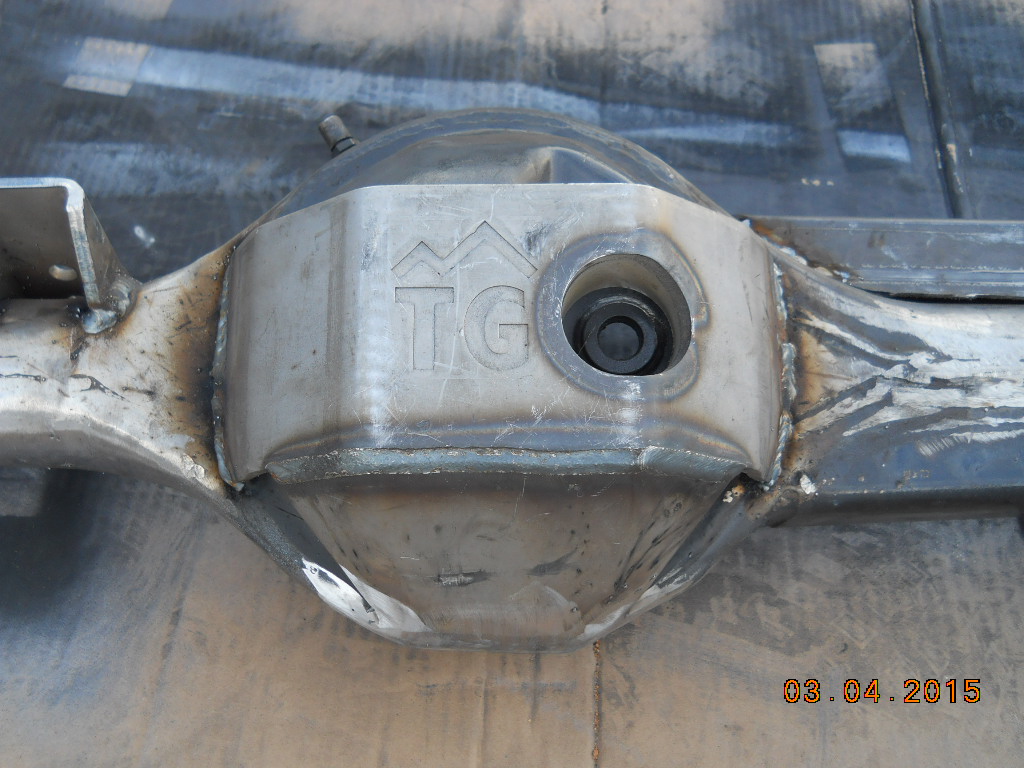
made my own long side truss from some 2x2x1/8" i had lying around. not pretty but it works. Its just tacked right now cuz i'm gonna put it on a jig and make sure its straight first

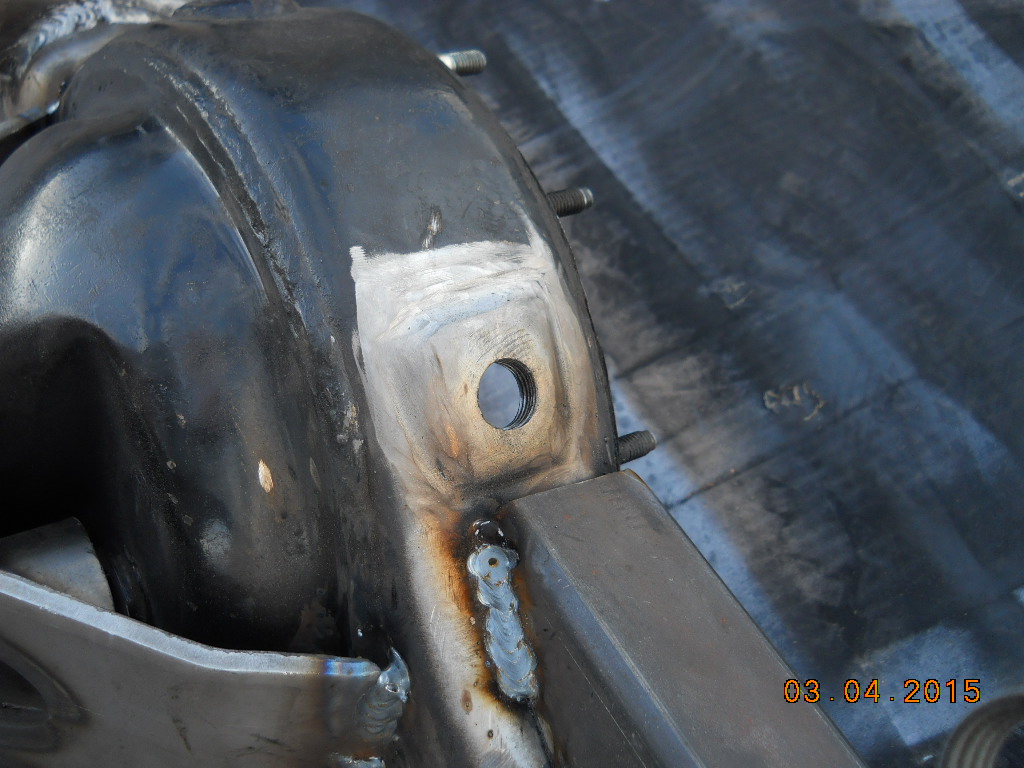
you can see in some of the pictures that i welded some short pieces of 1/8" x 2" angle to fill the gaps between the spring perch and the knuckle-gussets. It was one of those "why not" moments. every inch of this thing is trussed now haha
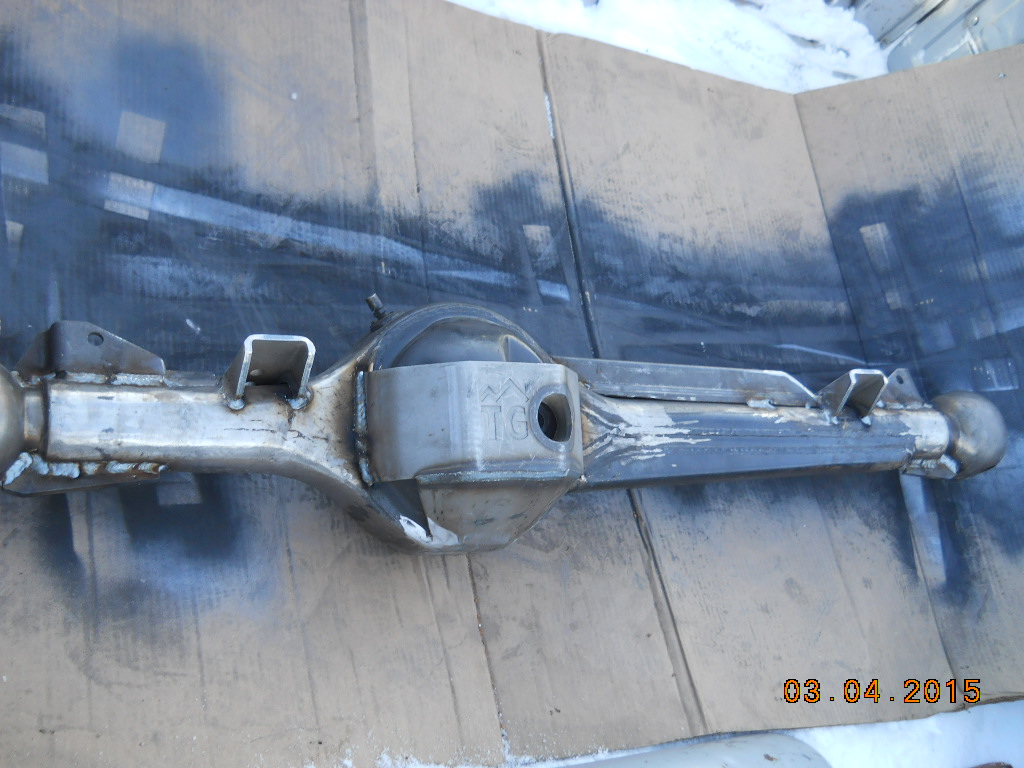
I also added a fill hole cuz i hate trying to fill these things from the front.
Takin it to a shop today to make sure the axle is nice and straight, then i'll finish burning in the truss and paint it. hopefully be pulling the truck in for the swap starting monday
I got the DS knuckle rotated and put on the other spring perch.

Monday i finally got my order from TG so i could finish the axle. Armor time:


made my own long side truss from some 2x2x1/8" i had lying around. not pretty but it works. Its just tacked right now cuz i'm gonna put it on a jig and make sure its straight first

you can see in some of the pictures that i welded some short pieces of 1/8" x 2" angle to fill the gaps between the spring perch and the knuckle-gussets. It was one of those "why not" moments. every inch of this thing is trussed now haha

I also added a fill hole cuz i hate trying to fill these things from the front.

Takin it to a shop today to make sure the axle is nice and straight, then i'll finish burning in the truss and paint it. hopefully be pulling the truck in for the swap starting monday
Last edited by liveoffroad; Mar 10, 2015 at 06:49 AM.

 Mar 12, 2015 | 06:35 AM
#453
Thread Starter
Registered User
Joined: Mar 2008
Posts: 705
Likes: 19
From: Colorado
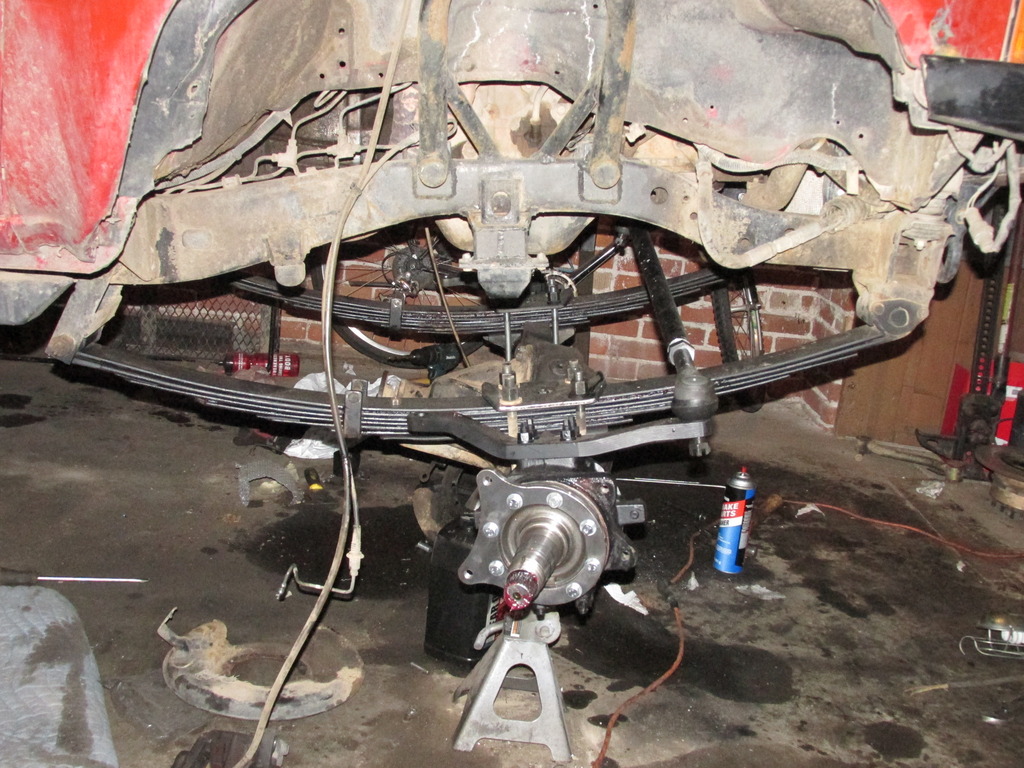
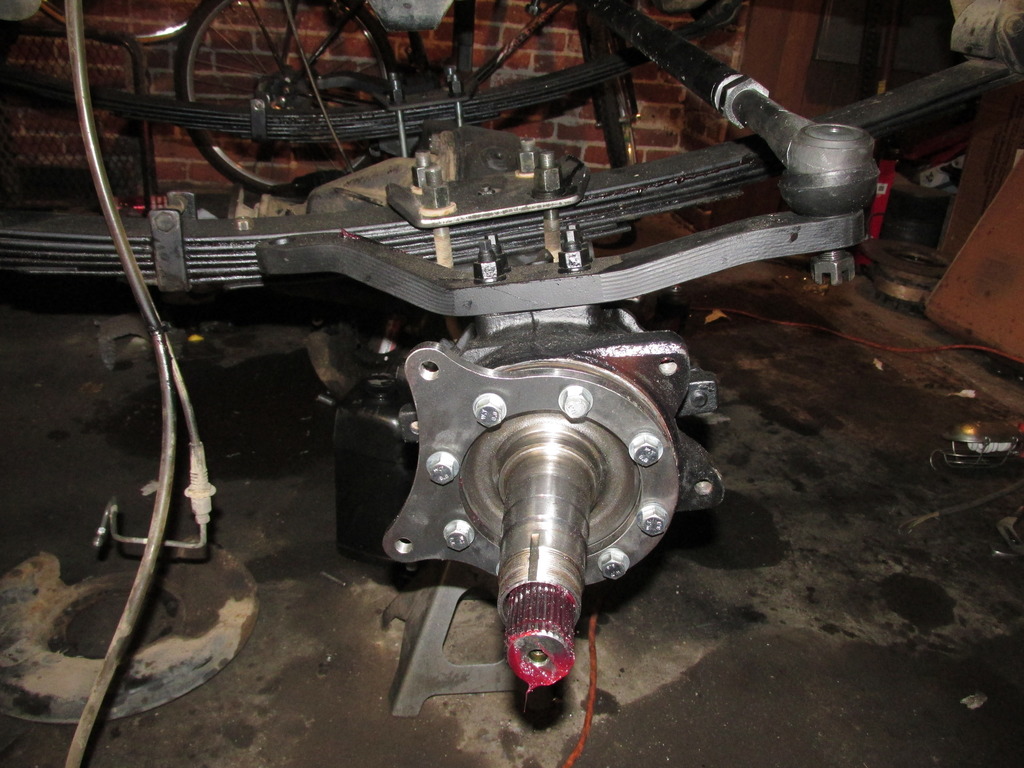
got the knuckles painted and installed and mocked up the highsteer. looks like everything will clear nicely. I really like the 4x4 labs setup.
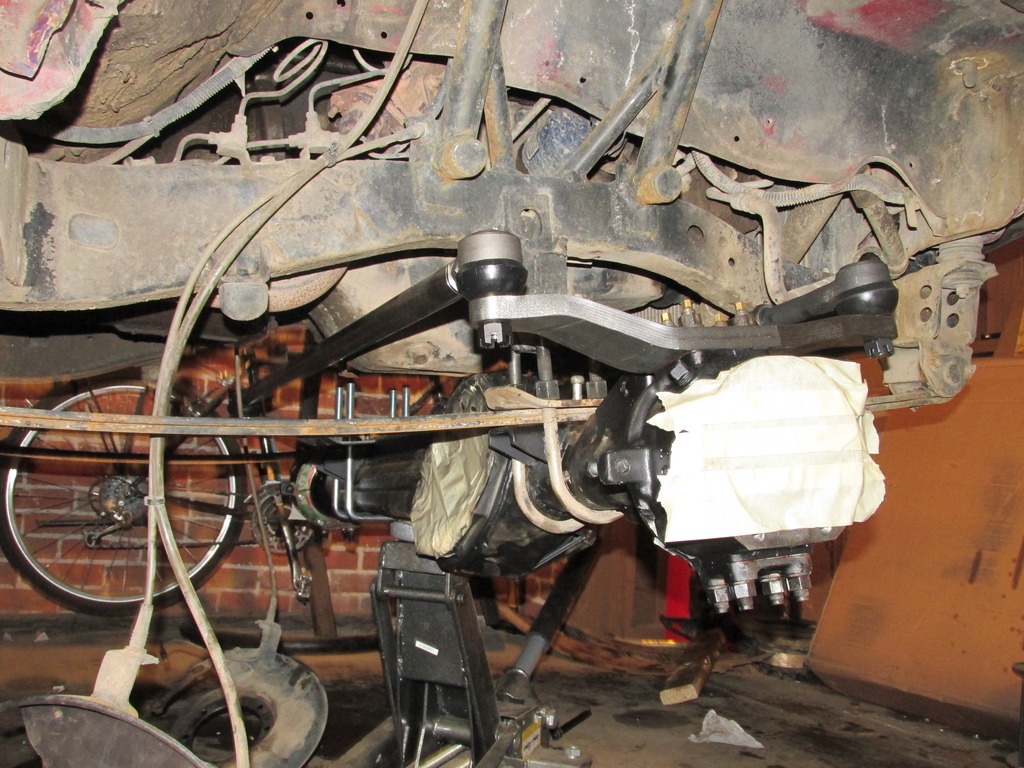
I installed on only the top 2 leaves and jacked up the axle to where i estimate it will hit bumpstop, once the other leaves are installed. lots of room, shouldn't have any clearance issues


I installed on only the top 2 leaves and jacked up the axle to where i estimate it will hit bumpstop, once the other leaves are installed. lots of room, shouldn't have any clearance issues


Last edited by liveoffroad; Mar 12, 2015 at 06:49 AM.
Mar 12, 2015 | 08:54 AM
#457
Thread Starter
Registered User
Joined: Mar 2008
Posts: 705
Likes: 19
From: Colorado
thanks
Mar 17, 2015 | 06:07 AM
#458
Thread Starter
Registered User
Joined: Mar 2008
Posts: 705
Likes: 19
From: Colorado
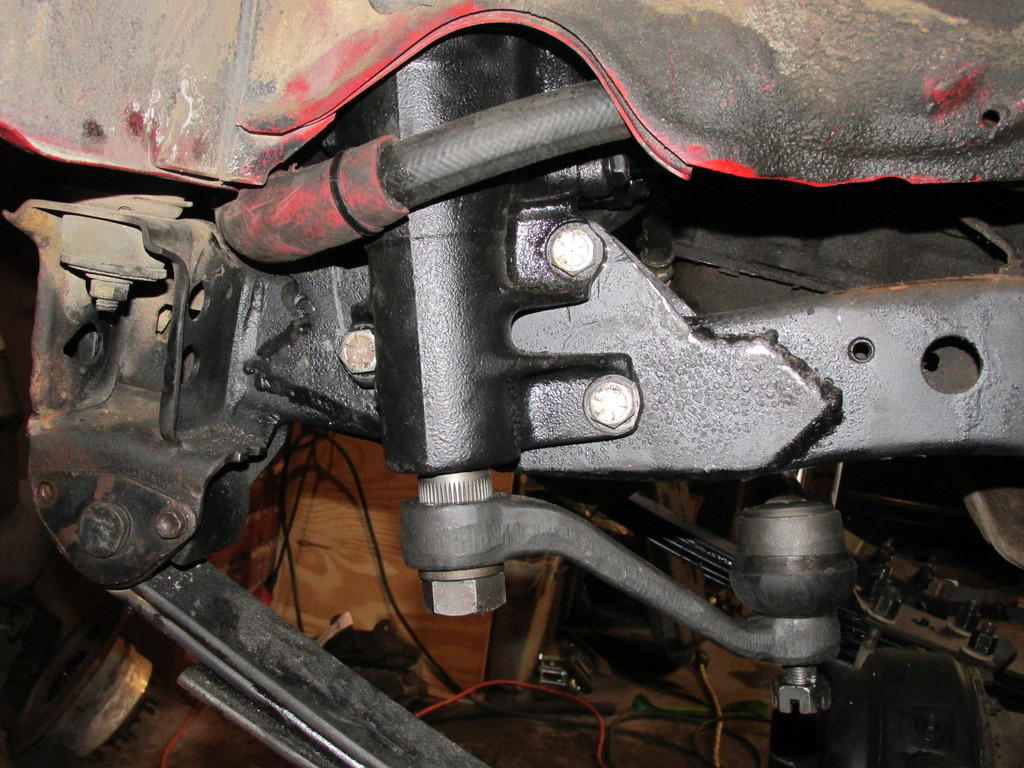
Finally got the steering box mounted, man that was a lot of work!
Had to have a special arm made (thanks 4x4labs) to put the draglink above the pitman arm to keep my current uptravel
got the diff, shafts, and spindle's installed. just waiting on wheel bearings (supposed to be in today) from marlin so i can finish bolting everything together. Hoping to get a good long test drive in before i leave for moab
Had to have a special arm made (thanks 4x4labs) to put the draglink above the pitman arm to keep my current uptravel

got the diff, shafts, and spindle's installed. just waiting on wheel bearings (supposed to be in today) from marlin so i can finish bolting everything together. Hoping to get a good long test drive in before i leave for moab


Last edited by liveoffroad; Mar 17, 2015 at 06:48 AM.
Mar 17, 2015 | 01:42 PM
#459
You bastard. I have to wait another 5 1/2 months before I leave for Moab  . Have fun brother and take lots of pics and video!
Are you doing the IFS hub mod with FROR's Tacoma brackets? Did I miss that?
. Have fun brother and take lots of pics and video! Are you doing the IFS hub mod with FROR's Tacoma brackets? Did I miss that?
Mar 17, 2015 | 01:49 PM
#460
Thread Starter
Registered User
Joined: Mar 2008
Posts: 705
Likes: 19
From: Colorado
yea i'm doing FROR's taco brake kit and running tundra brakes. i'll post up some more info when i get it put together
Last edited by liveoffroad; Mar 17, 2015 at 01:55 PM.


