
Liveoffroad's '84 4runner build

 Feb 3, 2015 | 10:53 AM
#422
Thread Starter
Registered User
Joined: Mar 2008
Posts: 705
Likes: 19
From: Colorado
Feb 4, 2015 | 09:53 AM
#423
Checked out your classified for the turbo runner, that's a nice looking, low mileage rig! I know what you were going through contemplating building a second vehicle it's tough. That's how I felt when I had my 83' even though it was a dd, it seemed like it was nickel and dimein me, take my funds and time away from my 4runner. Now even with my trailer build it's tough throwing money at 2 projects, lol.
I hope it sells quick for you, it will be nice to get some of the bigger projects knocked out on your 4runner!
I hope it sells quick for you, it will be nice to get some of the bigger projects knocked out on your 4runner!
Feb 9, 2015 | 06:11 AM
#424
Thread Starter
Registered User
Joined: Mar 2008
Posts: 705
Likes: 19
From: Colorado
Checked out your classified for the turbo runner, that's a nice looking, low mileage rig! I know what you were going through contemplating building a second vehicle it's tough. That's how I felt when I had my 83' even though it was a dd, it seemed like it was nickel and dimein me, take my funds and time away from my 4runner. Now even with my trailer build it's tough throwing money at 2 projects, lol.
I hope it sells quick for you, it will be nice to get some of the bigger projects knocked out on your 4runner!
I hope it sells quick for you, it will be nice to get some of the bigger projects knocked out on your 4runner!
Recently i've noticed that when it rains/snows i get a small pool of water on the floorboards...both drivers and passenger side. I can't figure out how its getting in so i thought I'd throw a shot out to see if this is a common issue that people have dealt with and if so how i may go about finding the leak. My next idea is to wait until dark and put a bunch of lights in the cab, then take off the fender to see if there's a crack somewhere. lot of work though
Last edited by liveoffroad; Feb 9, 2015 at 06:17 AM.
Feb 9, 2015 | 07:45 AM
#425
Registered User


Joined: May 2005
Posts: 1,977
Likes: 231
From: S. FL
Thanks ed, yea it is a nice rig I hate to sell it but one of them's got to go... but if it doesn't sell soon though i may change my mind about which one haha
Recently i've noticed that when it rains/snows i get a small pool of water on the floorboards...both drivers and passenger side. I can't figure out how its getting in so i thought I'd throw a shot out to see if this is a common issue that people have dealt with and if so how i may go about finding the leak. My next idea is to wait until dark and put a bunch of lights in the cab, then take off the fender to see if there's a crack somewhere. lot of work though
Recently i've noticed that when it rains/snows i get a small pool of water on the floorboards...both drivers and passenger side. I can't figure out how its getting in so i thought I'd throw a shot out to see if this is a common issue that people have dealt with and if so how i may go about finding the leak. My next idea is to wait until dark and put a bunch of lights in the cab, then take off the fender to see if there's a crack somewhere. lot of work though
Feb 10, 2015 | 06:40 AM
#427
Thread Starter
Registered User
Joined: Mar 2008
Posts: 705
Likes: 19
From: Colorado
Its time for an update:
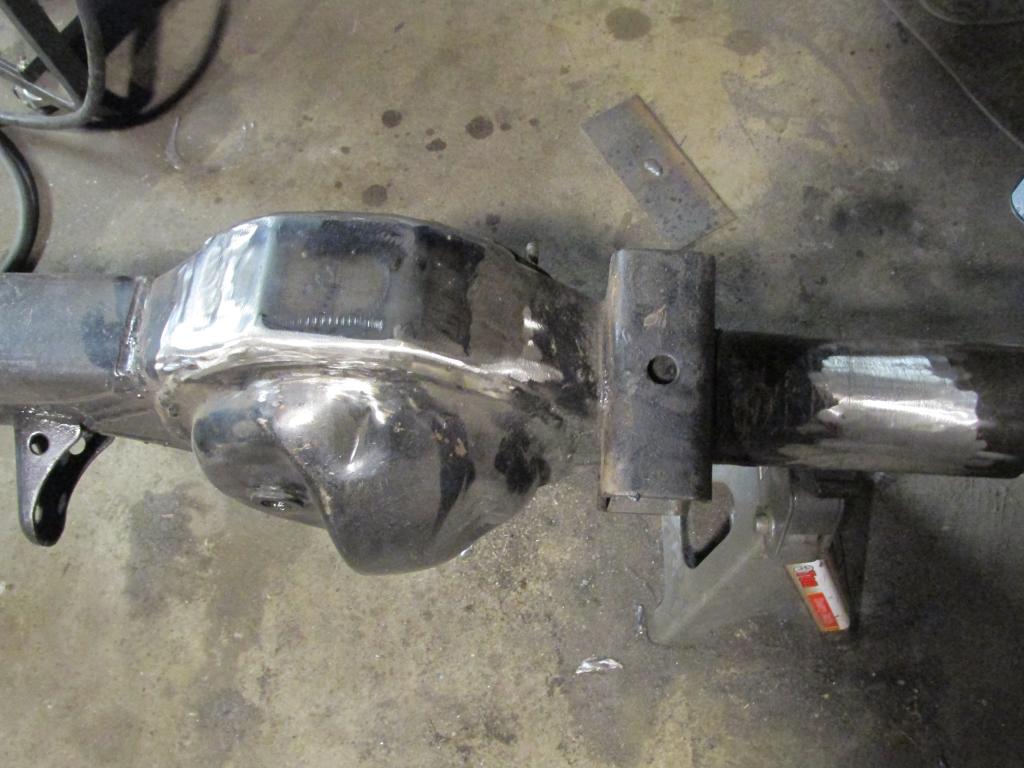
got started on my axle build last night.
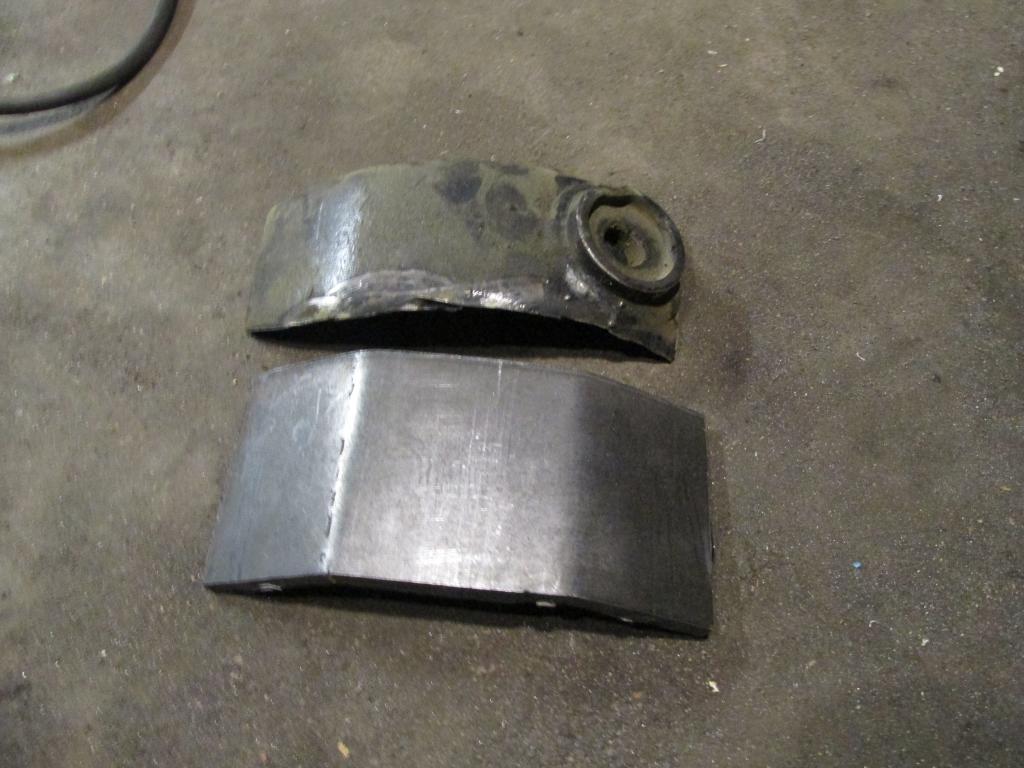
Cut off all the mounts and tabs by the knuckle and saved them for later.
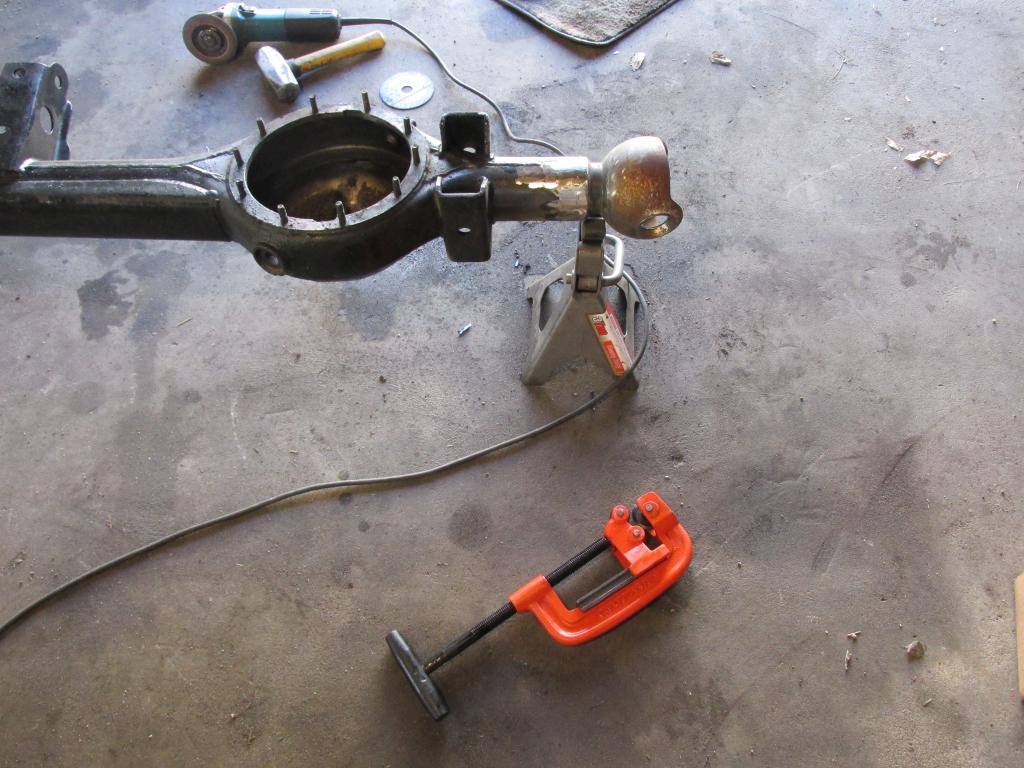
Tried the Harbor Freight pipe cutter and it broke after less than 5 minutes, so ended up using a cutoff wheel
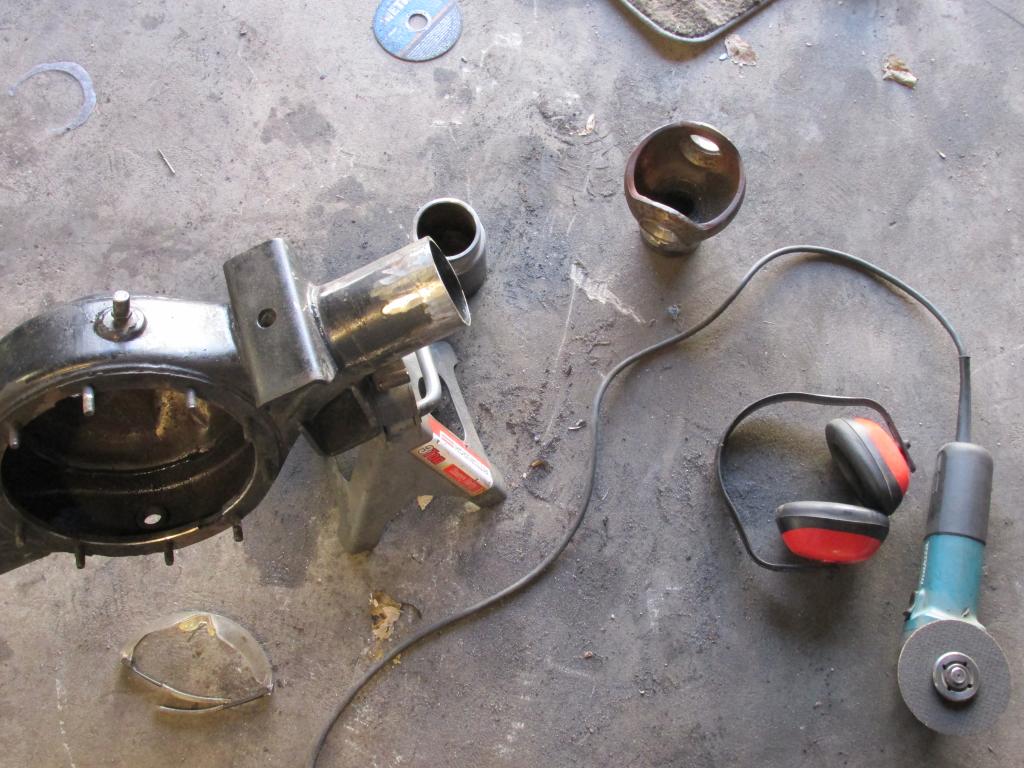
Test Fit of the Mayem Metal Works 3" spacer (http://www.pirate4x4.com/forum/toyot...right-way.html)
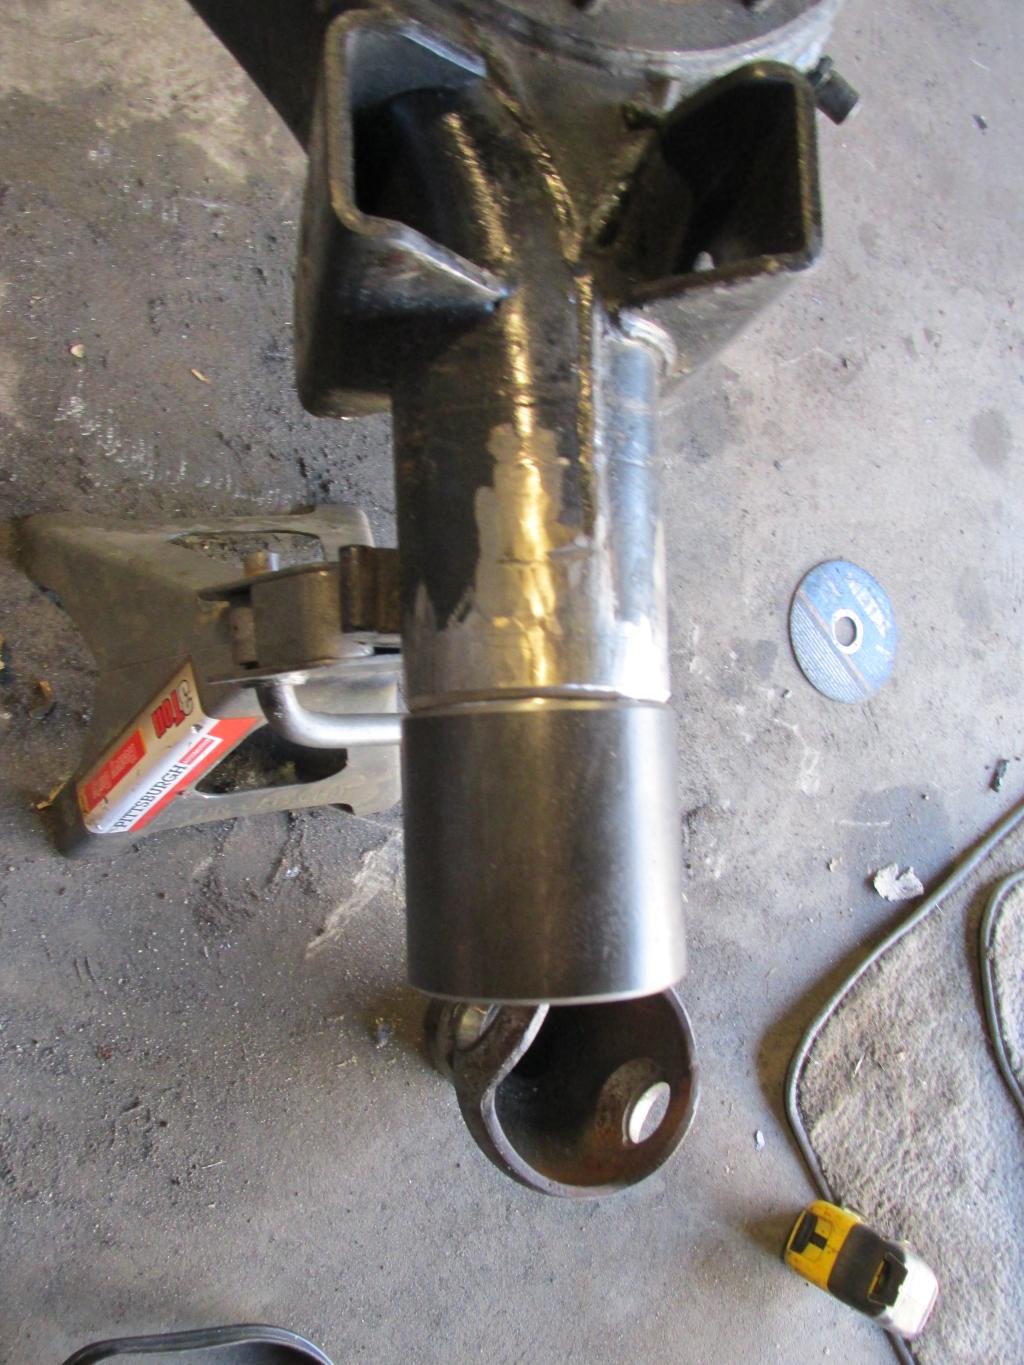
Clearanced the bottom of the axle. Stole the idea from 4Crawler (http://www.4crawler.com/4x4/ForSale/AxlePlate.shtml)

Made my own 1/4" slide plate

Before burning it in, i welded some nuts inside for the bottom stud holes, since they will be converted to bolts. This step was probably overkill, but i hate stripped threads!
then

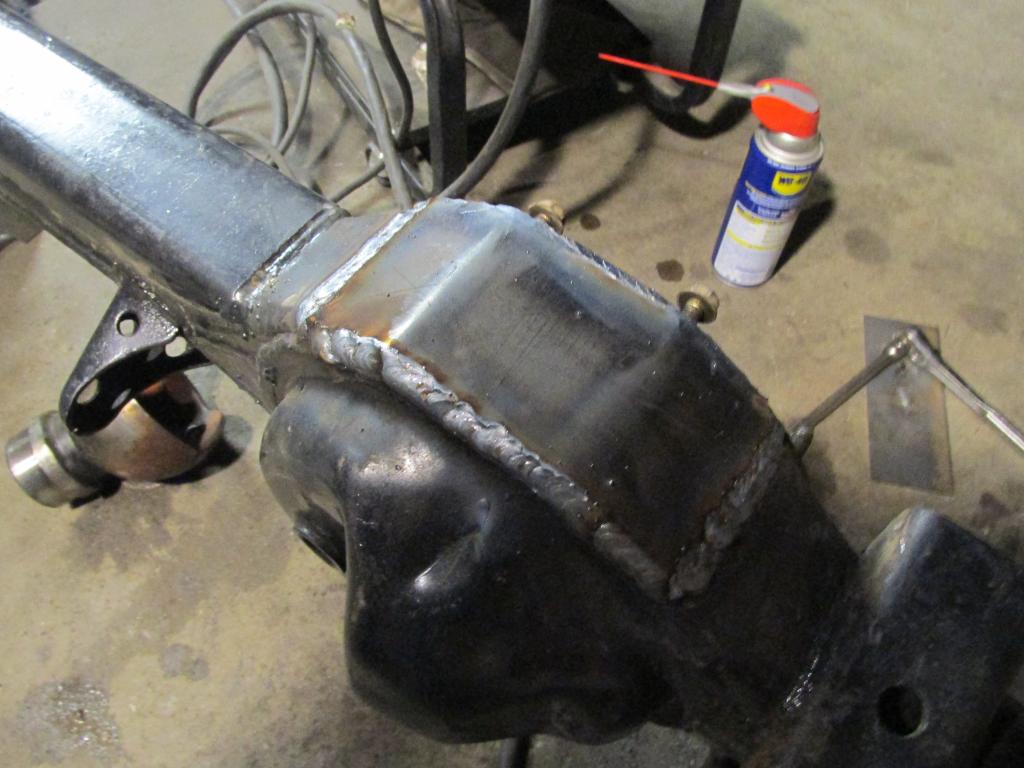
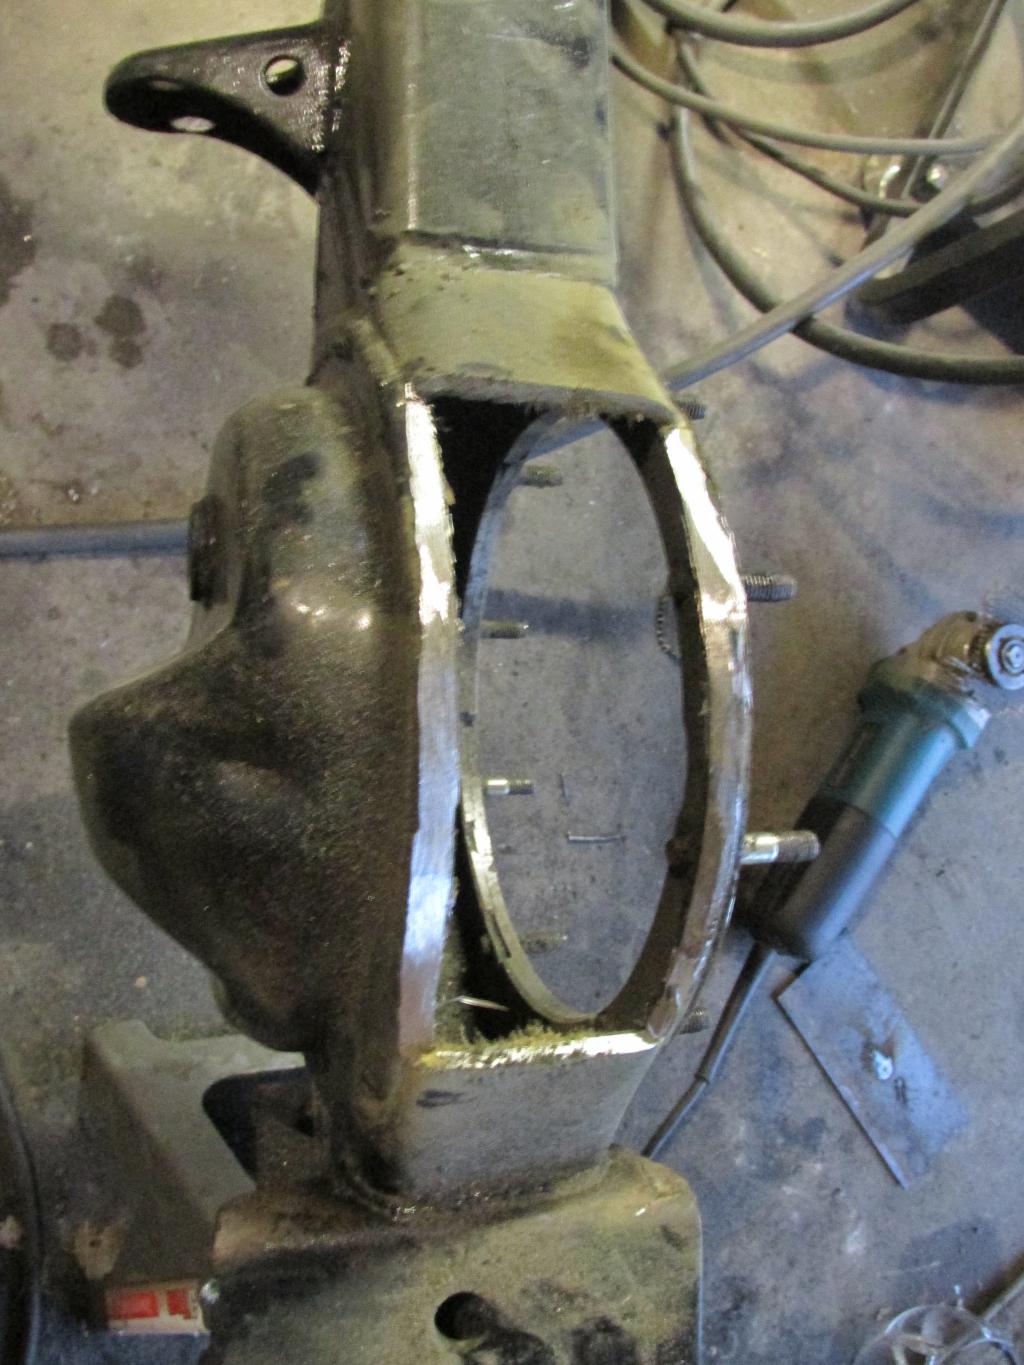
Also burned in the spacer and ground everything smooth:
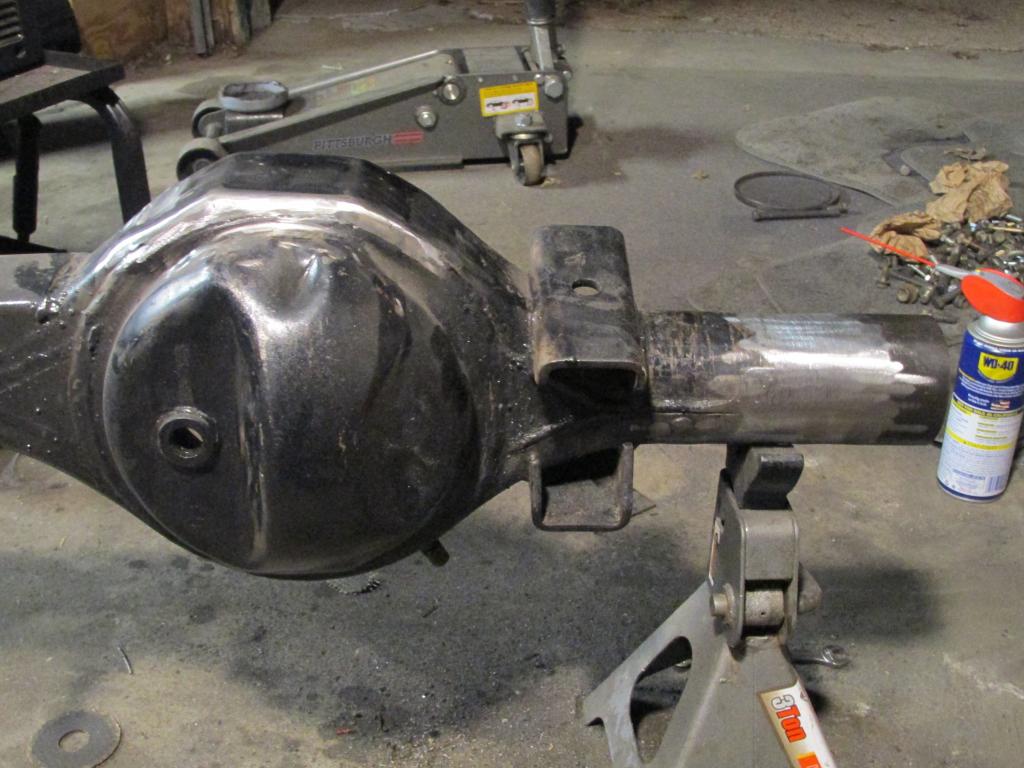
That was a decent evening! I'm ready to weld the knuckle ball back on, just waiting to hear back from 4x4labs about my caster angle.
got started on my axle build last night.
Cut off all the mounts and tabs by the knuckle and saved them for later.

Tried the Harbor Freight pipe cutter and it broke after less than 5 minutes, so ended up using a cutoff wheel

Test Fit of the Mayem Metal Works 3" spacer (http://www.pirate4x4.com/forum/toyot...right-way.html)

Clearanced the bottom of the axle. Stole the idea from 4Crawler (http://www.4crawler.com/4x4/ForSale/AxlePlate.shtml)


Made my own 1/4" slide plate


Before burning it in, i welded some nuts inside for the bottom stud holes, since they will be converted to bolts. This step was probably overkill, but i hate stripped threads!

then


Also burned in the spacer and ground everything smooth:


That was a decent evening! I'm ready to weld the knuckle ball back on, just waiting to hear back from 4x4labs about my caster angle.
Last edited by liveoffroad; Feb 10, 2015 at 06:43 AM.
Feb 10, 2015 | 06:59 AM
#428
I am a little jealous of your welding skills, it is something I am working on and not coming along as fast as I would like. Looks good at what you are doing.
On your windshield leak, I have seen 3 different trucks that had leaks. All three of mine that I worked on was on the bottom. There is always other places that they can leak but from my experience it is on bottom of the windshield.
I would suggest pulling your windshield and cleaning it down to bare metal. If you take it to the windshield shop alot of times they just add glue on top of the old glue. Then they can use a rust sealer or maybe you could apply POR to it. It will be pitted fairly bad but it can be sealed over. The windshield shop I use, they put a metal strip over where it was rotted out and sealed it up. Hasnt leaked yet.
The sides and bottom really pits up and where I have seen most issues.
Also pull the cowl infront of your windshield and make sure there is no debris stacked up in the cowl and causing some rotting in that area.
On your windshield leak, I have seen 3 different trucks that had leaks. All three of mine that I worked on was on the bottom. There is always other places that they can leak but from my experience it is on bottom of the windshield.
I would suggest pulling your windshield and cleaning it down to bare metal. If you take it to the windshield shop alot of times they just add glue on top of the old glue. Then they can use a rust sealer or maybe you could apply POR to it. It will be pitted fairly bad but it can be sealed over. The windshield shop I use, they put a metal strip over where it was rotted out and sealed it up. Hasnt leaked yet.
The sides and bottom really pits up and where I have seen most issues.

Also pull the cowl infront of your windshield and make sure there is no debris stacked up in the cowl and causing some rotting in that area.
Last edited by Terrys87; Feb 10, 2015 at 07:01 AM.
 Feb 17, 2015 | 09:29 PM
#433
You need to remove the wipers and with a very stubby screw driver you have 3 Phillips screws to remove and one each side of the cowl there are two tabs (driver/passenger sides) that a flat blade screw driver can be used to lift them up. Then the cowl just slides forward and up.
Feb 19, 2015 | 07:42 AM
#434
Thread Starter
Registered User
Joined: Mar 2008
Posts: 705
Likes: 19
From: Colorado
You need to remove the wipers and with a very stubby screw driver you have 3 Phillips screws to remove and one each side of the cowl there are two tabs (driver/passenger sides) that a flat blade screw driver can be used to lift them up. Then the cowl just slides forward and up.
Feb 23, 2015 | 08:21 AM
#436
Thread Starter
Registered User
Joined: Mar 2008
Posts: 705
Likes: 19
From: Colorado
Update:
Worked on the axle this weekend, didn't get as far as i'd hoped cuz it took a while to set up all the angles.
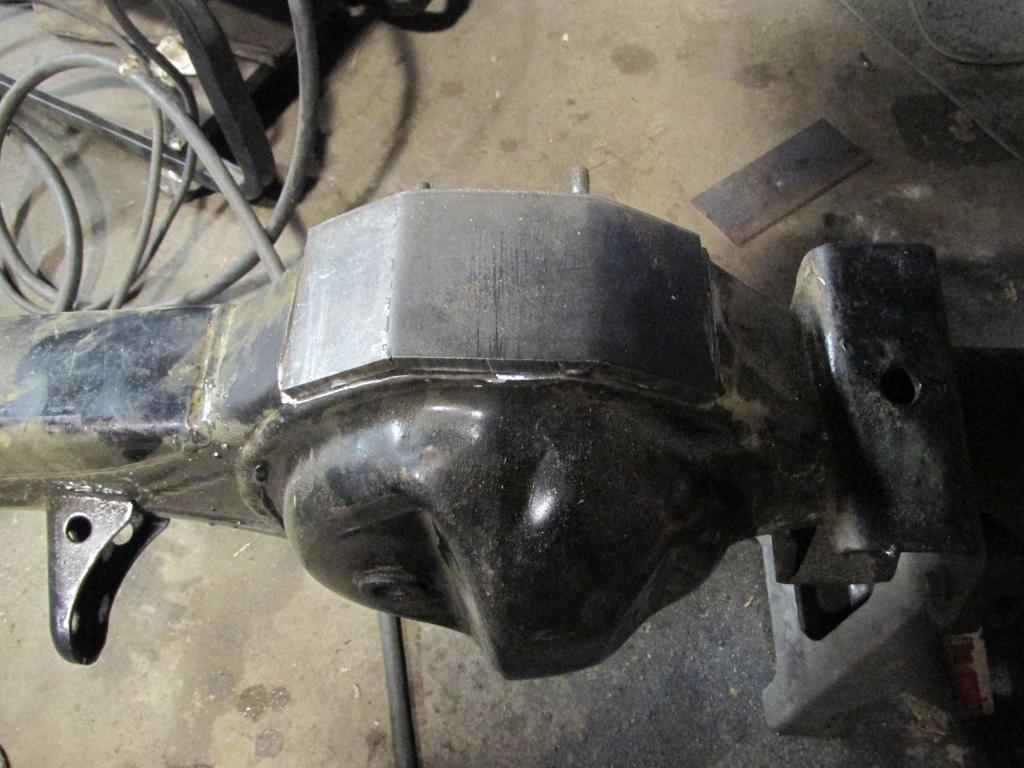
Got the Short side knuckle ball welded back on. Set it at 9* of rotation from stock. I'll explain more later.
I cut a 3/16" grove to get a deep weld, then did a 2nd pass (the first pass was prettier, i promise
 )
)
then I moved on to the spring perch. Got it cut off (short side is a real pain since it sits on the side of the diff housing)

and then ground everything smooth:

Then prepped the new spring perches. I've been disappointed with many of the popular spring perches on the market since they sit so high off the axle. I really want to keep this thing as low as possible, so I went with rock-tactics low-profile perches. (http://www.pirate4x4.com/forum/suspe...g-perches.html) They are cut very well, but require a little welding since they do a relief cut to get the low-pro design

took me a couple hours to get the short side perch in position. Even though i relocated the perch 1.5" toward the short side, I still ran into the same issue as above where the spring perch is mounted on an angle where it rides up on the diff housing. Because of this, i had to cut the perch a little to get it to set level, but all-in-all it wasn't too bad.

red line shows the stock location of the perch. Moved it 1.5" toward the knuckle to account for the spacer

I don't know how guys rotate the knuckles without relocating the spring perches, it would have been much harder if i had to put it back in the stock location since the closer you get to the diff, the housing flattens out on the front and the perch rides up on the diff housing, causing all kinds of crazy angle issues.
Here's how I set the pinion and caster angles: knuckles 9* more than stock, spring perch 6* more than stock (pinion angle). So the difference (3*) will be added to the caster angle. I only did 6* on the pinion angle so that i can run a hp someday if i stumble across one for less than a million dollars.
Side note, these spring perch's sit about 1/16" LOWER than the stock ones! (7/16" lower than the stock short-side perch since it sits 3/8" higher than the long-side one) highly recommend them.
Last edited by liveoffroad; Feb 8, 2016 at 12:46 PM.


