
Build for a buddy. 2wd SAS 84/1st gen truck
 Apr 14, 2014 | 11:50 PM
#101
No suggestions about the lift, but I do like seeing a scrap piece of steel starting to look like parts needed. I am starting to see the big picture of what is going on. The day I get to own welder and cutter is going to be a joyous day. I like seeing how your project is going from paper to reality and quick at that. Tell the kids they are doing great!!!
Apr 15, 2014 | 06:03 AM
#102
Thread Starter


Joined: Aug 2007
Posts: 3,276
Likes: 7
From: Pennsylvania

If you decided to go with hi-steer you might need that extra inch of clearance for your tie rod and drag link, I believe you need at least 3" of lift. Also to me it looks like the hanger would be stronger, you'd be able to weld more of an area than in the bottom pic. Your students are making some good progress!
I think that you guys have steered me in the right direction. We are going to go with the top pic setup. I want to be able to give him the option to do hi-steer later on.
The students are really doing a good job on this project. I am going to order the pins needed for the rear today or tomorrow and hopefully have all the suspension on and axles under permanently by next week.
Apr 15, 2014 | 06:06 AM
#103
Thread Starter
Joined: Aug 2007
Posts: 3,276
Likes: 7
From: Pennsylvania
No suggestions about the lift, but I do like seeing a scrap piece of steel starting to look like parts needed. I am starting to see the big picture of what is going on. The day I get to own welder and cutter is going to be a joyous day. I like seeing how your project is going from paper to reality and quick at that. Tell the kids they are doing great!!!
Thanks Terry!! I really try hard to use up all of our resources first before going and getting more. There is so much stuff sitting around that you forget about over time, that you can use to make what you need.
I love having a welder and metal working tools. Even the simplest/most affordable welder will get basically any job done within reason. Most of the tools that we have are at the entry level end of things. I do however, dream about the day I can buy myself a nice new Millermatic welder, and a TIG welder!!
Apr 15, 2014 | 06:23 AM
#104
Registered User


Joined: Oct 2009
Posts: 4,832
Likes: 332
From: Northfield, Vermont
A little drop in the front isnt bad, will help with pinion angle. All the kits come giving a 2" drop over stock (I think) One of those hangers looks cut a little close to the mounting hole? Look at the pic you posted to copy vs what got cut from the tube. You want to make them thick, they are prime rock anchors.
Last edited by rattlewagon; Apr 15, 2014 at 06:24 AM.
Apr 15, 2014 | 08:17 AM
#105
Registered User
Joined: Sep 2012
Posts: 618
Likes: 0
From: iowa
It's too late now but what u could've done with the hanger is notch the tube to allow the hangers to sit on the the tube and then cap the exposed ends. It would give the entire hanger more strength but nevertheless what u have should be sufficient. I really wish I had the option of taking an automotive class when I was in high school. Lots of good stuff going on in ur class.
Apr 15, 2014 | 09:05 AM
#106
Thread Starter
Joined: Aug 2007
Posts: 3,276
Likes: 7
From: Pennsylvania
A little drop in the front isnt bad, will help with pinion angle. All the kits come giving a 2" drop over stock (I think) One of those hangers looks cut a little close to the mounting hole? Look at the pic you posted to copy vs what got cut from the tube. You want to make them thick, they are prime rock anchors.
Apr 15, 2014 | 09:20 AM
#107
Thread Starter
Joined: Aug 2007
Posts: 3,276
Likes: 7
From: Pennsylvania
It's too late now but what u could've done with the hanger is notch the tube to allow the hangers to sit on the the tube and then cap the exposed ends. It would give the entire hanger more strength but nevertheless what u have should be sufficient. I really wish I had the option of taking an automotive class when I was in high school. Lots of good stuff going on in ur class.
I hear you on the automotive classes. I wish I had the opportunity to do a project like this in HS. I think of the knowledge I would have right now if that was the case. But unfortunately, we did not even have the option to take an auto class.
Most of the students realize the opportunity they are getting by doing projects like this. So it pays off pretty good.
Apr 16, 2014 | 10:22 AM
#108
Thread Starter
Joined: Aug 2007
Posts: 3,276
Likes: 7
From: Pennsylvania
Update 4-16-14
This will be the last update for a few days since we are going on Easter break after today.
We ended up tacking the front hanger together enough to clamp to the front support and hang a spring to see where it would put us in relation to where we have to drill out the tubes.
I have the front hanger flush with the front of the support. This is going to have to go back further as flush with the front puts us to far forward for the stock length springs to work.
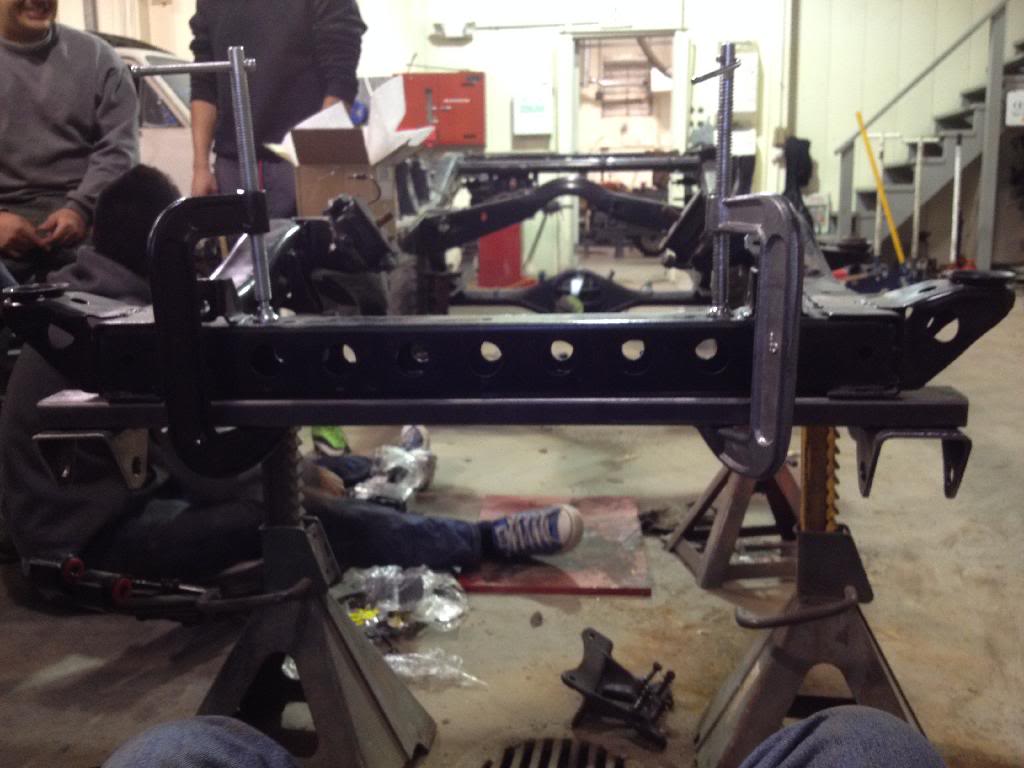
You can see in this pic what I mean about how the shackle angle would end up the wrong way for us if we went with the hanger being flush with the support.
Luckily we have a few frames here that I can use as a reference. If you look at the 84 frame, the centerline for the front bolt/pin is almost in line with the rear of the spring hanger.
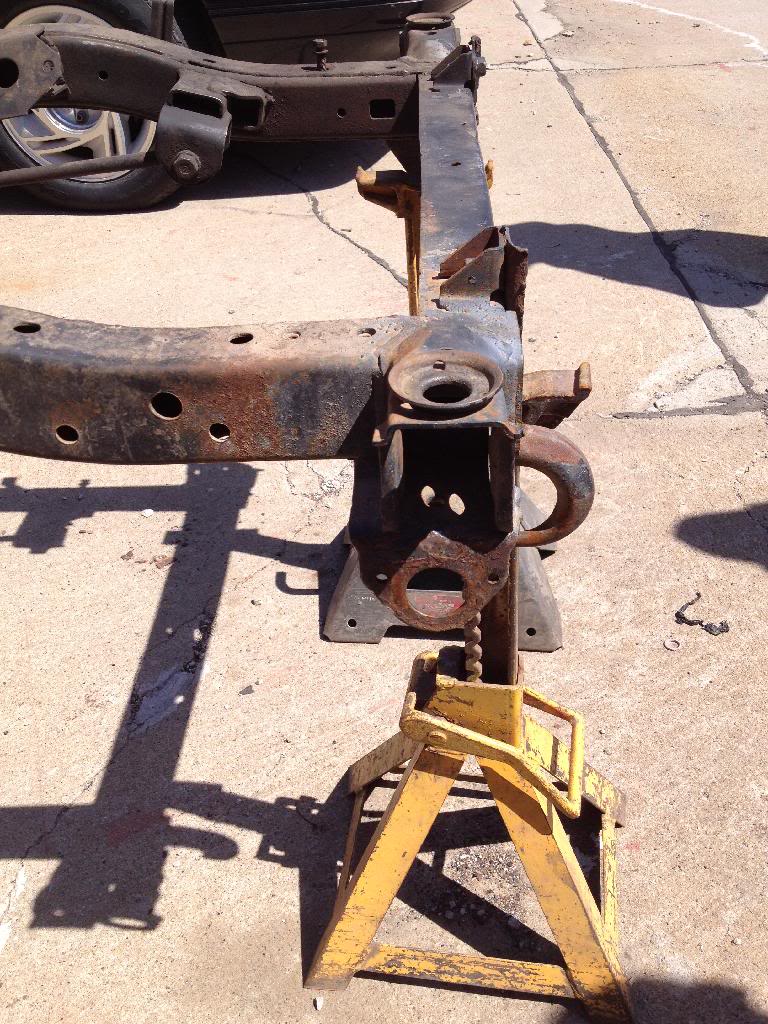
We are going to have to move this back to achieve our proper angle for the shackle.
Please keep in mind that everything is simply mocked up and no finish welds are made. We still have some work to do on the front hanger but wanted to get an idea of where this setup would put us.
I really want to get the front springs hung by next week so that we can start plumbing the frame with fuel and brake lines. Also be able to set the engine in and mock up the mounts for the 4wd cross member that we have to make and weld to the frame.
Getting closer but still feel like miles away since this suspension is taking forever it seems like.
Let me know what you guys think.
We ended up tacking the front hanger together enough to clamp to the front support and hang a spring to see where it would put us in relation to where we have to drill out the tubes.
I have the front hanger flush with the front of the support. This is going to have to go back further as flush with the front puts us to far forward for the stock length springs to work.


You can see in this pic what I mean about how the shackle angle would end up the wrong way for us if we went with the hanger being flush with the support.

Luckily we have a few frames here that I can use as a reference. If you look at the 84 frame, the centerline for the front bolt/pin is almost in line with the rear of the spring hanger.

We are going to have to move this back to achieve our proper angle for the shackle.


Please keep in mind that everything is simply mocked up and no finish welds are made. We still have some work to do on the front hanger but wanted to get an idea of where this setup would put us.
I really want to get the front springs hung by next week so that we can start plumbing the frame with fuel and brake lines. Also be able to set the engine in and mock up the mounts for the 4wd cross member that we have to make and weld to the frame.
Getting closer but still feel like miles away since this suspension is taking forever it seems like.
Let me know what you guys think.
Apr 22, 2014 | 02:34 PM
#109
Thread Starter
Joined: Aug 2007
Posts: 3,276
Likes: 7
From: Pennsylvania
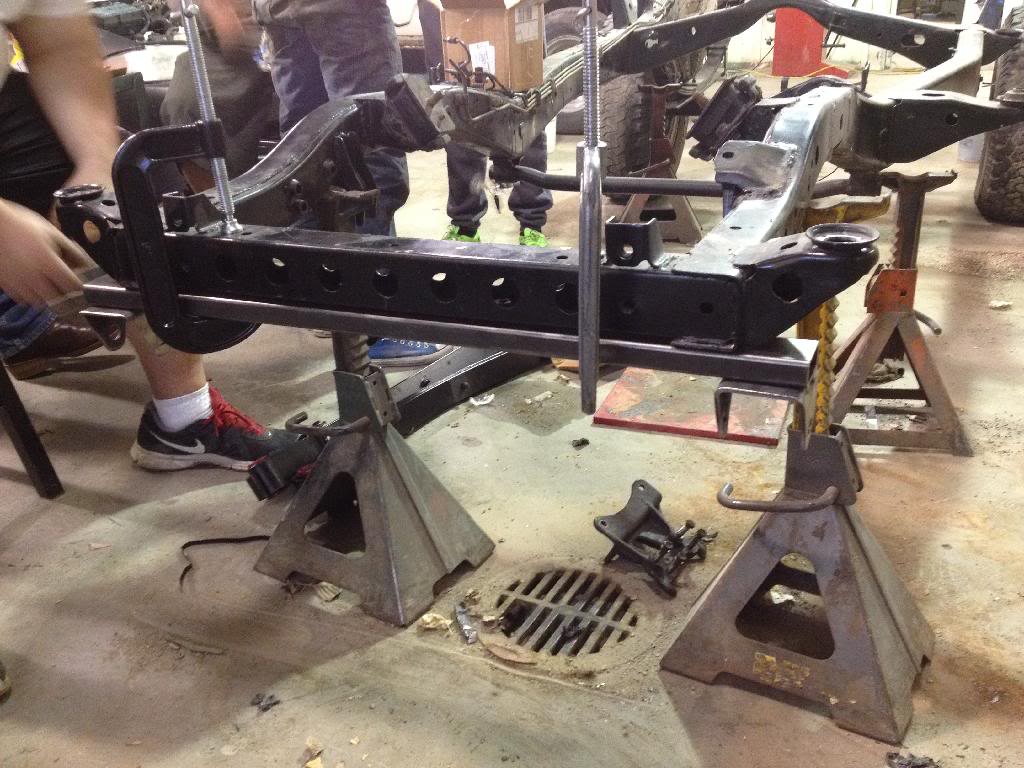
Got some more done today. I have the drivers side drilled out and the tube is slid into the frame. I am going to drill out the passenger side in the morning.
I want to do like chris( kornhuskerwizard ) said, and get some conduit to run through and make sure we are level and square before welding.
I had some trouble on the outside old. The pilot but slipped a little, causing the hole to be more to one side. So I stopped, filled the indent with weld, made a new set punch indent for drilling, and finished the hole. It is very hard to get the holes lined up perfect with the hole saw bit.
I had to do a bit of work with a file just to get the tube to slide through just right. I know that I will have to make some final adjustments to get it perfect.
 Apr 22, 2014 | 08:46 PM
#113
Thread Starter
Joined: Aug 2007
Posts: 3,276
Likes: 7
From: Pennsylvania
I have to do some more filing, check for square and level and burn them in.
Thanks for the compliments guys.
Apr 23, 2014 | 12:19 AM
#115
I took my time and drilled the pilot hole first then attached the hole saw to the drill. It was a little sketchy going through, but this 2wd frame does not have the inner ribs that some of the older 4wd frames have that people experience drilling through.
I have to do some more filing, check for square and level and burn them in.
Thanks for the compliments guys.
I have to do some more filing, check for square and level and burn them in.
Thanks for the compliments guys.
Apr 23, 2014 | 05:46 AM
#116
Thread Starter
Joined: Aug 2007
Posts: 3,276
Likes: 7
From: Pennsylvania
HAHA yeah Chris (kornhuskerwizard) said it about broke his wrists when the hole saw hit the rib in his frame!! So I was bracing for it to happen the whole time!
Apr 23, 2014 | 01:11 PM
#117
Thread Starter
Joined: Aug 2007
Posts: 3,276
Likes: 7
From: Pennsylvania
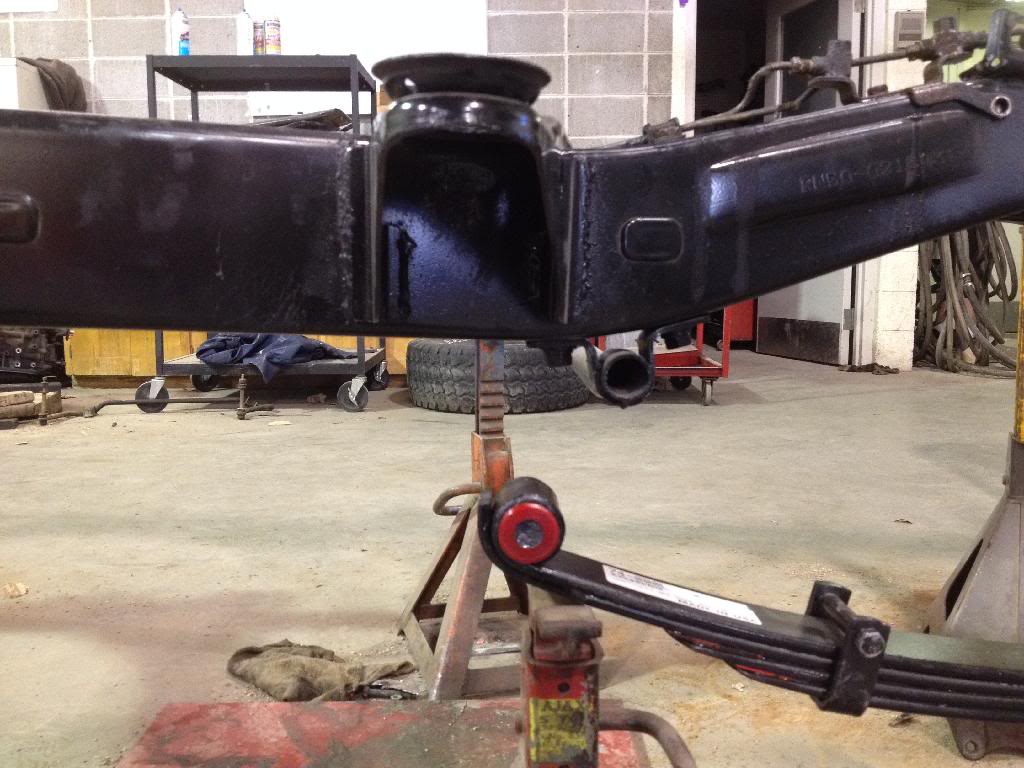
Well we successfully got the tubes through the frame. We do not have them tack welded yet, but I am planning on doing that tomorrow.
I used the advice of others that suggested getting a piece of 1 inch EMT conduit to run from tube to tube on the frame rails. I put a level on the tube, and it is almost perfect.
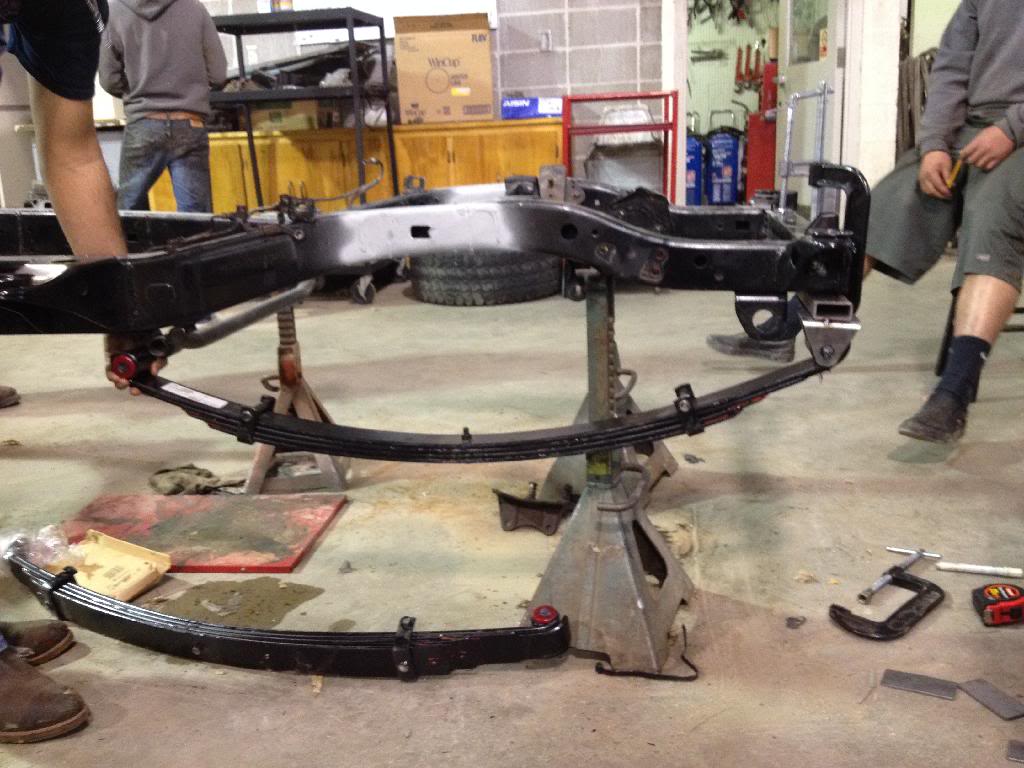
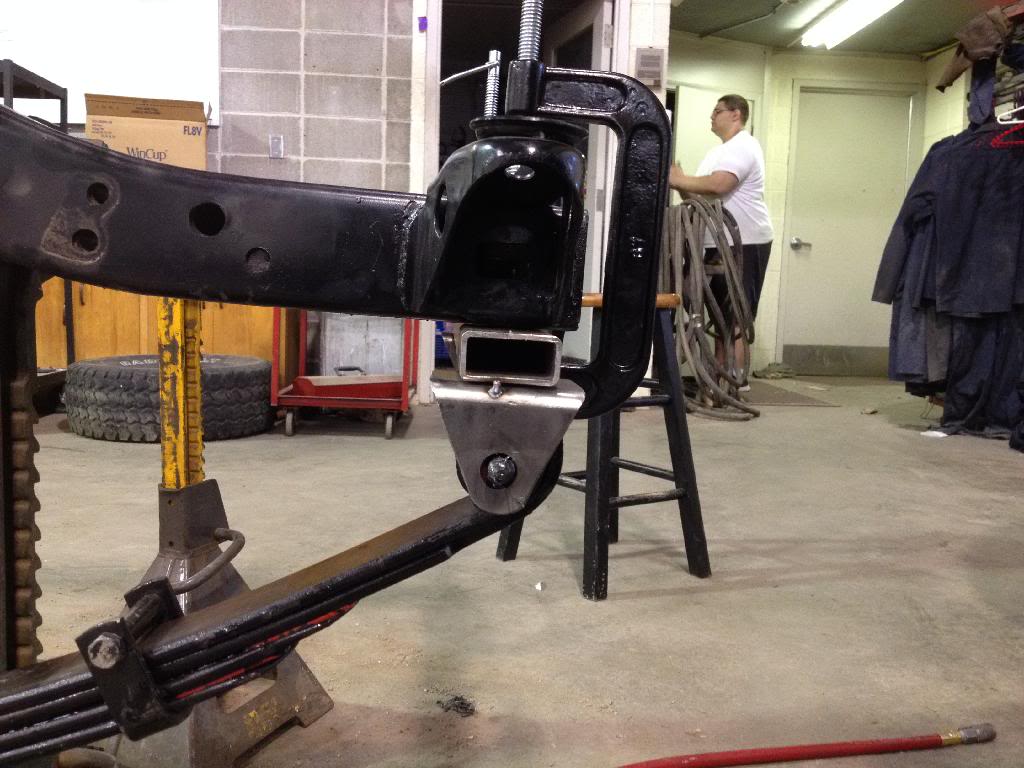
We temporarily hung the front springs to see where we are going to mount the front hanger and get everything burned in.
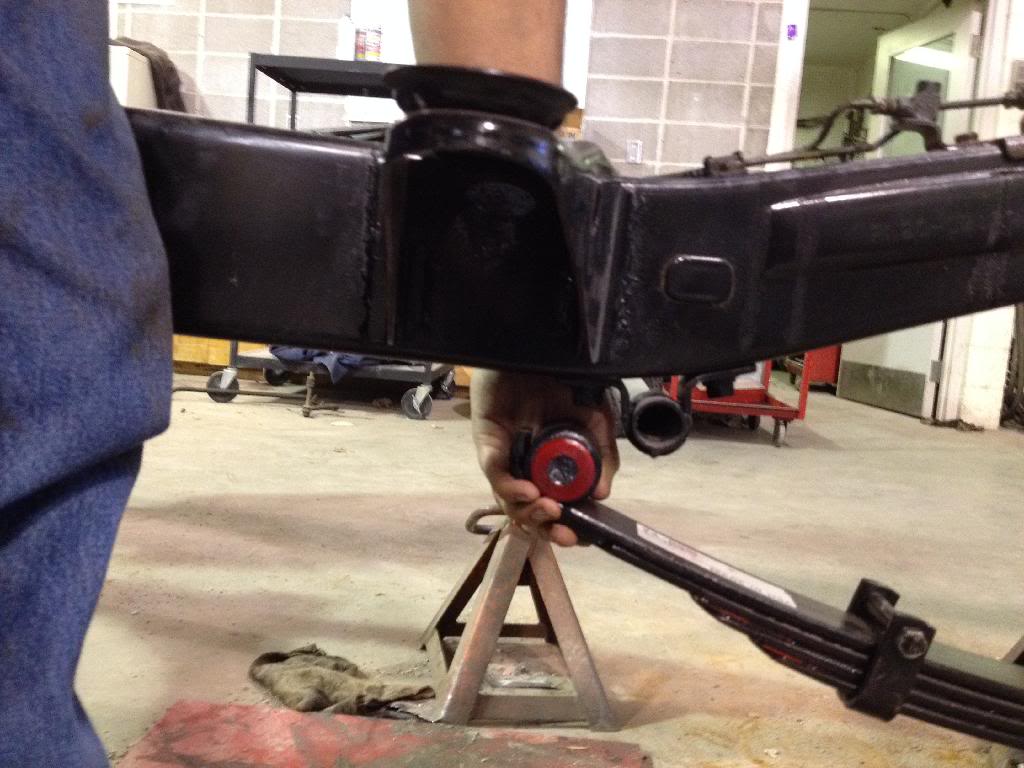
You can see right now in the one pic the difference between here the eyelet meets the front hanger.
What I need to figure out is how much shackle angle I want/need before we burn it all in. Any suggestions??? I'm open to all advice.
Thanks for looking guys
I used the advice of others that suggested getting a piece of 1 inch EMT conduit to run from tube to tube on the frame rails. I put a level on the tube, and it is almost perfect.
We temporarily hung the front springs to see where we are going to mount the front hanger and get everything burned in.
You can see right now in the one pic the difference between here the eyelet meets the front hanger.
What I need to figure out is how much shackle angle I want/need before we burn it all in. Any suggestions??? I'm open to all advice.
Thanks for looking guys
Apr 24, 2014 | 04:55 AM
#119
Thread Starter
Joined: Aug 2007
Posts: 3,276
Likes: 7
From: Pennsylvania
Thanks chris! It feels like its taking forever for us to get a little bit of work done. I am hoping today to have the front axle in place and see what we are going to do for steering. I also want to start pulling the engine from the 81 pickup and fitting it in the frame.
Apr 24, 2014 | 09:45 PM
#120
Registered User
Joined: Dec 2008
Posts: 2,391
Likes: 1
From: tecumseh nebraska
Thanks chris! It feels like its taking forever for us to get a little bit of work done. I am hoping today to have the front axle in place and see what we are going to do for steering. I also want to start pulling the engine from the 81 pickup and fitting it in the frame.


