
85 Extra Cab Saved from Crusher
 Dec 10, 2015 | 08:23 AM
#841
Thread Starter
Super Moderator
iTrader: (1)
Joined: Aug 2008
Posts: 11,787
Likes: 28
From: Anderson Missouri
My old bumper is shiny but bent and rusty (top one) and my new to me is faded but is straight and rust free.
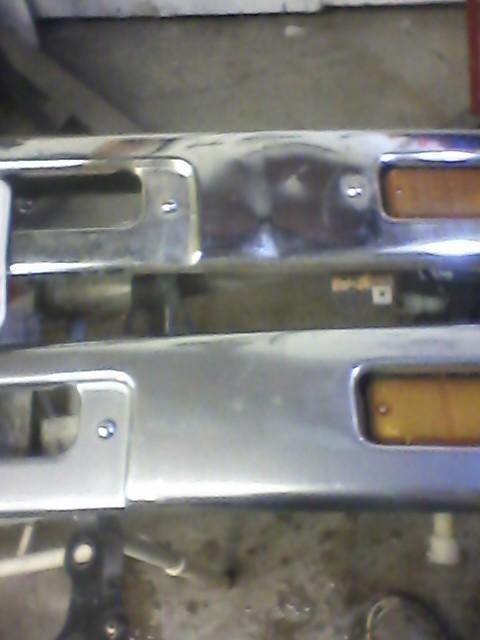
The end caps are just glued on. I have a few end caps out on the interstate somewhere so now I bolt mine on with carriage bolts which match the factory bumper bolts and looks like it came from the factory that way.

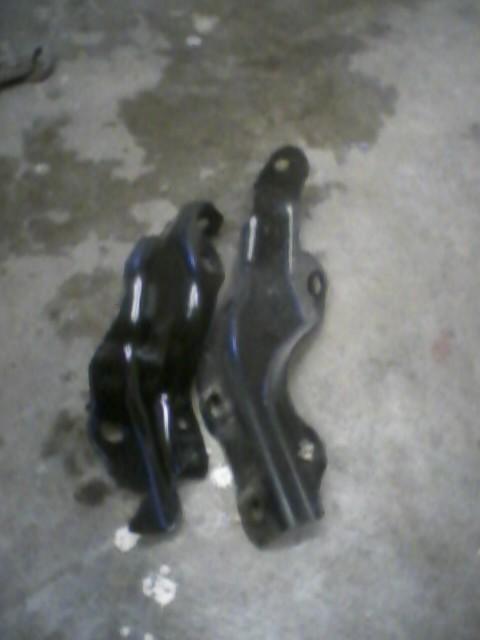
The bumper bracket on the left is for a solid axle truck. IFS trucks use a longer bracket. Someone cut up my bracket but it is working. I think the drivers side is a little bent and wont let my bumper line up like it should but I will check ebay or the salvage for a new set of brackets at a later time. I did not realize my new to me bumper was so faded. I tried to shine it up but will replace with a new bumper at a later time. My old bumper was bent and rusty but it did the job until something better came along. I will keep it and sure it will go on another project someday.
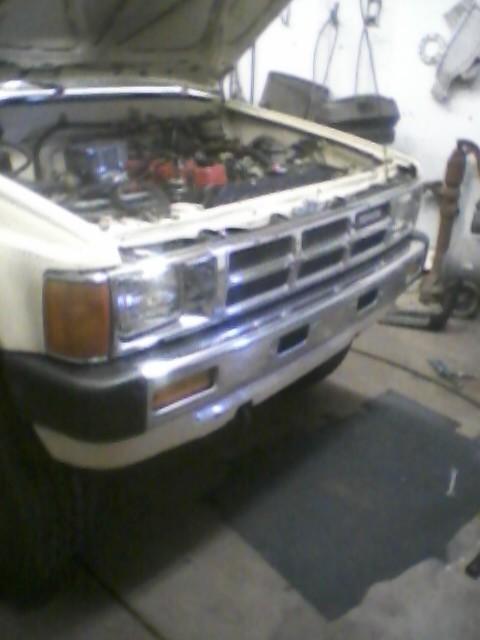
Got the bumper back on. I still need to do a little work to the drivers side end cap but it is far better then it was. A few whacks with the big hammer on the bumper bracket and things lined up quick.
New page, updated list.
Work on SR5 cluster.............done
Map light.............................done
Cargo Light....Working on.
Head liner......Working on.
Driver window track
Oil pan leak........................done
Weld up exhaust pipe
Detail Engine bay... working on.
Passenger seat belt
Drivers seat belt..................done
Interior trim...Working on.
Body Gaps
Buff
Detail rear wheel caps......... done.
Platic clips
Look at Heater
4WD Light
Extend front diff breather
Extend rear diff breather.........done
Detail hub dials......................done
Fix fire wall leak
Buff vacuum advance..............done
#4 Plug wire..........................done
Engine/firewall ground strap.....done
Burped system.......................done
Rear Diff Oil...........................done
Front Diff Oil .........................done
Fix Hood Latch........................done
Window Seals.........................done
Install Antenna
Gather up bumper pieces
Salvage yard
Rear Bumper brackets
Dome Light
Bumper Brackets
Wheel

The end caps are just glued on. I have a few end caps out on the interstate somewhere so now I bolt mine on with carriage bolts which match the factory bumper bolts and looks like it came from the factory that way.

The bumper bracket on the left is for a solid axle truck. IFS trucks use a longer bracket. Someone cut up my bracket but it is working. I think the drivers side is a little bent and wont let my bumper line up like it should but I will check ebay or the salvage for a new set of brackets at a later time. I did not realize my new to me bumper was so faded. I tried to shine it up but will replace with a new bumper at a later time. My old bumper was bent and rusty but it did the job until something better came along. I will keep it and sure it will go on another project someday.

Got the bumper back on. I still need to do a little work to the drivers side end cap but it is far better then it was. A few whacks with the big hammer on the bumper bracket and things lined up quick.

New page, updated list.
Work on SR5 cluster.............done
Map light.............................done
Cargo Light....Working on.
Head liner......Working on.
Driver window track
Oil pan leak........................done
Weld up exhaust pipe
Detail Engine bay... working on.
Passenger seat belt
Drivers seat belt..................done
Interior trim...Working on.
Body Gaps
Buff
Detail rear wheel caps......... done.
Platic clips
Look at Heater
4WD Light
Extend front diff breather
Extend rear diff breather.........done
Detail hub dials......................done
Fix fire wall leak
Buff vacuum advance..............done
#4 Plug wire..........................done
Engine/firewall ground strap.....done
Burped system.......................done
Rear Diff Oil...........................done
Front Diff Oil .........................done
Fix Hood Latch........................done
Window Seals.........................done
Install Antenna
Gather up bumper pieces
Salvage yard
Rear Bumper brackets
Dome Light
Bumper Brackets
Wheel
Last edited by Terrys87; Jan 5, 2016 at 07:19 PM.
Dec 10, 2015 | 10:48 AM
#842
Thread Starter
Super Moderator
iTrader: (1)
Joined: Aug 2008
Posts: 11,787
Likes: 28
From: Anderson Missouri
I use the larger port off of an EFI plenum to extend the diff breather.
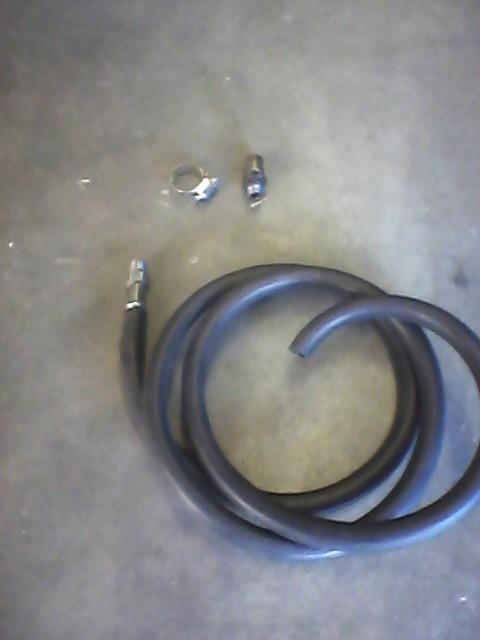
I moved it to the gas tank. I cross low water bridges and putting a boat in the water so one less worry. It gave me another 12-18 inches of height. I zip tied it to the LPV rod and it has plenty of slack. I should of waited until the truck cooled down before starting this project. Burnt my arm on the exhaust pipe. Ouch!!
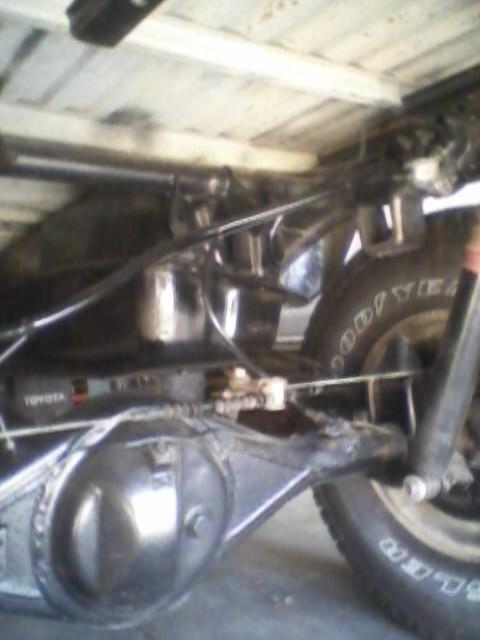

I moved it to the gas tank. I cross low water bridges and putting a boat in the water so one less worry. It gave me another 12-18 inches of height. I zip tied it to the LPV rod and it has plenty of slack. I should of waited until the truck cooled down before starting this project. Burnt my arm on the exhaust pipe. Ouch!!

Last edited by Terrys87; Dec 10, 2015 at 10:51 AM.
Dec 10, 2015 | 11:44 AM
#843
Thread Starter
Super Moderator
iTrader: (1)
Joined: Aug 2008
Posts: 11,787
Likes: 28
From: Anderson Missouri
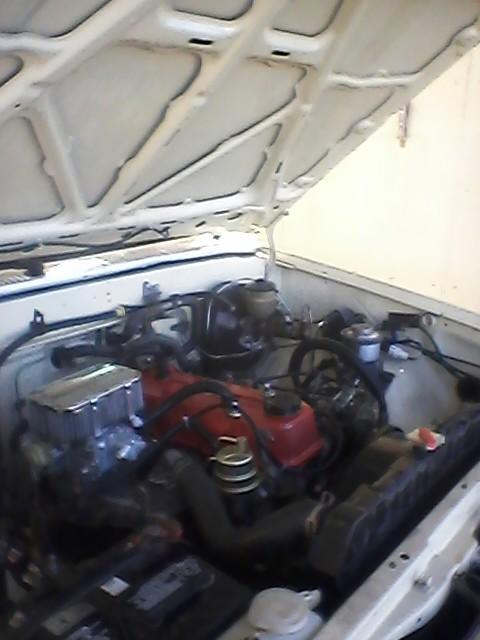
No matter how hard I try to have a great looking engine bay, it looks like a half butted attempt. It is actually a full butted attempt but doesnt look like it. When I was setting the timing a while back, I left the distributor hold down bolt out and when I fired it up, it sprayed oil everywhere.

It even got the hood. Here I started to clean it and half of it wiped down.

I took it to the carwash and it looks better. I still need to figure out to get the spark plugs wires and other things from not looking so blah. I am going to eventually repaint the valve cover. I have a temporary plug where the EFI harness went and also need a seal around the hood release cable, after the car wash, I had water on the floor boards. 2 steps forward and 1 step back. Will add that to the list to get sealed off.

Last edited by Terrys87; Dec 10, 2015 at 02:51 PM.
Dec 10, 2015 | 11:55 AM
#844
Thread Starter
Super Moderator
iTrader: (1)
Joined: Aug 2008
Posts: 11,787
Likes: 28
From: Anderson Missouri
I get emails from Rockauto for discount parts. http://www.rockauto.com/RSS/vehiclef...l=en&html=true Keep the link and it is updated usually when I click on it. Think others may want this.
Started detailing the drivers hub dial. I disassemble them in a five gallon bucket to keep from losing the ball bearing. The spring would not come out so I figured I could clean it with it in the dial. Some where it did come out and I cant find it. Luckily I had a spare hub to get the spring from.Hub is taking longer then I expected so the passenger side is going to wait for a while before I get to it. The dial assembly is drying so will finish it tomorrow. It is starting to get cold and dont feel like starting a fire as I will be getting tired in a while.
The truck I got the wiring from did not have the cab light for the exterior so I dont have a plug to put in the factory switch for it. I pulled the headliner loose enough to see if it is on its own seperate wire harness and it joins the dome light. I will cut the cab light from the dome light harness and see if I can wire it in on a seperate switch and try to use the factory deck lamp switch. I will be doing some Googling for that.
I plan on adding the rock guards to the bed. Eventually want to bed line the inside of the bed, and getting a rear bumper. A friend of mine and me still think the bed needs something, but not sure what it is. I would like to get a fiberglass shell for it someday but finding one might turn into a job. You cant use a standard cab shell as the extra cabs rear tilts forward and a standard cab is straight up and down. Still would like to find something to add to the bed but dont want it to look gawdy.
I busted my rear trying to get things done, front wheels, front bumper, engine bay cleaner, rear diff breather extended, adjusted drivers door, drivers hub is tore a part, removed some excess wiring, and some trouble shooting on the cab light. I had 12 hours into it and it does not seem like much for 12 hours.
Last edited by Terrys87; Dec 10, 2015 at 02:59 PM.
Dec 11, 2015 | 05:25 AM
#845
Thread Starter
Super Moderator
iTrader: (1)
Joined: Aug 2008
Posts: 11,787
Likes: 28
From: Anderson Missouri
When it comes to assembling the red disc from the black disc, I do it in a 5 gallon bucket to keep from losing the spring and ball bearing. Not sure where to get a spring but the ball bearing can be replaced with a 1/4 inch drive extention or ratchet ball bearing.

Hubs done and moving to a few other fixes.
Started working on my cab light. I pulled the headliner loose and got to the wire to the cablight and spliced a wire to down to the A pillar. I can enegize it with a single hot wire as it is grounded thru the cab. Side view due to glare on picture if I take a direct shot.
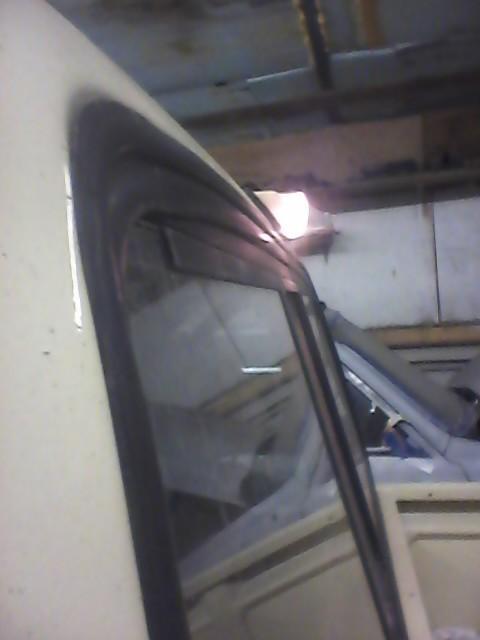
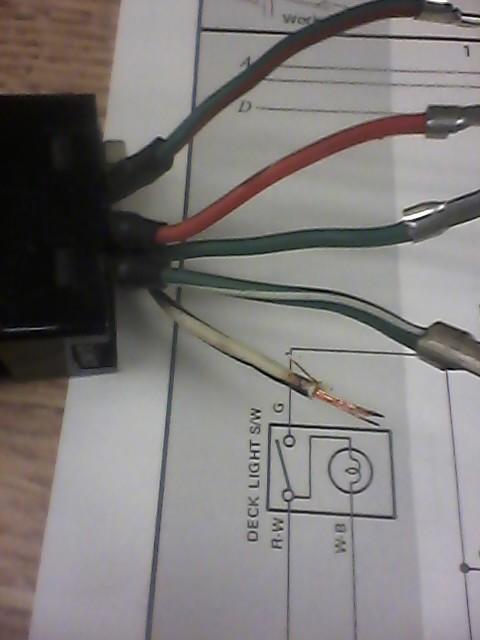
I have two switches. I want to get a male plug so to be able to seperate it when working under the dash. The truck I got the harness off of did not have the cab light. I want it to look and work like factory. I know the white wire is the ground. I will need to look at the electrical diagram to see which other one is the supply and the one that goes to the light. The single wire going to the light is red so should only need to find the supply side of the switch.


Hubs done and moving to a few other fixes.

Started working on my cab light. I pulled the headliner loose and got to the wire to the cablight and spliced a wire to down to the A pillar. I can enegize it with a single hot wire as it is grounded thru the cab. Side view due to glare on picture if I take a direct shot.

I have two switches. I want to get a male plug so to be able to seperate it when working under the dash. The truck I got the harness off of did not have the cab light. I want it to look and work like factory. I know the white wire is the ground. I will need to look at the electrical diagram to see which other one is the supply and the one that goes to the light. The single wire going to the light is red so should only need to find the supply side of the switch.

Last edited by Terrys87; Dec 11, 2015 at 08:04 AM.
Dec 12, 2015 | 12:55 AM
#846
Thread Starter
Super Moderator
iTrader: (1)
Joined: Aug 2008
Posts: 11,787
Likes: 28
From: Anderson Missouri
I will get back to the Cargo Light switch later. The more I drive this truck the better it is getting. I was surprised at really how quite it was today and I don't have carpet in it. I have a wind noise on the passenger door and will be taking care of it soon. Took care of a few more issues today. Got a seat belt in for the driver side and will need to get one in for the passenger side. The 3rd gen runner seat belts wont accept the latch assembly.
I did not have the head to firewall ground strap attached and it is now done. Been trying to detail the engine bay and get things looking better and will have to find some pictures for an example to go off of. A few other things I have done just don't remember like trying to get the interior back together.
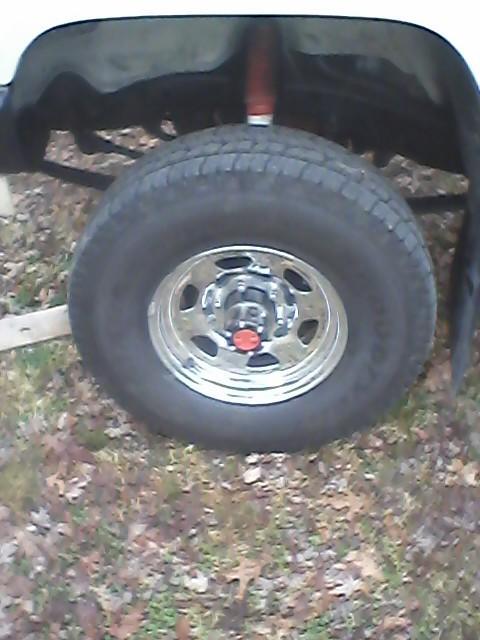
I could see some rust poking thru the cut outs on the rear drivers side rim and wanted to get the red back on the center cap. It was rusty. I used a drill and wire brush and then followed it with aluminum foil to clean it up. I am unable to get all of the rust off but you cant see it now when looking thru the cutouts.
Rear drivers side.
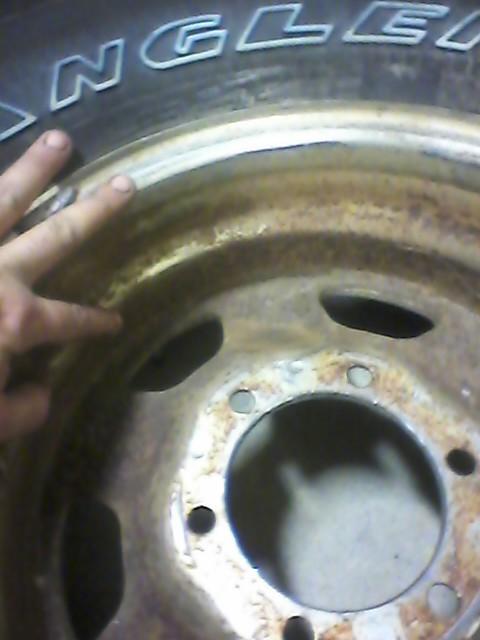
I used a small paint brush and tried to stay in the lines at first but could not get it to how I wanted it to be. So then I painted everything I wanted red and then when the paint dried, I took wet aluminum foil and basically sanded the excess off.
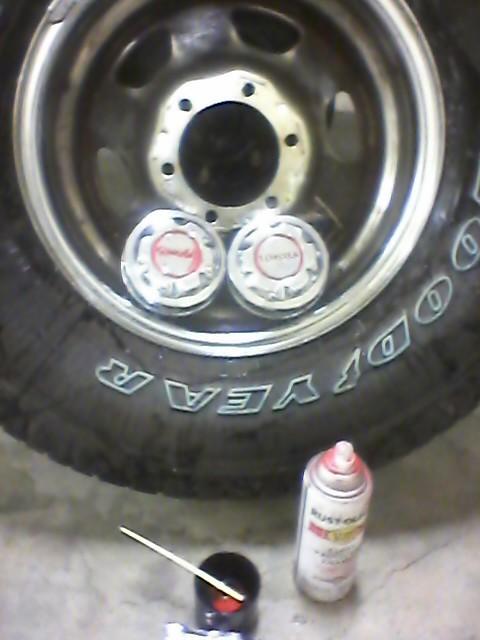
Looking better.

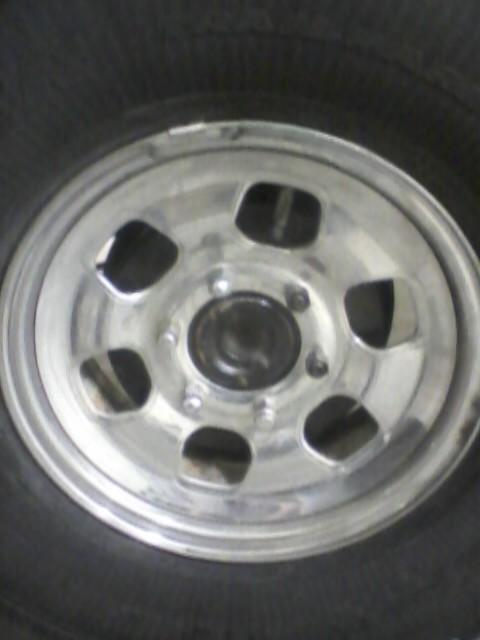
Here is my passenger rear rim. I went to the bone yard and they were able to find 7 rims at one salvage and 4 rims at another salvage about an hour so away from me so I will eventually get the one that I need for passenger rear, just got to get the time to go get it.
I did not have the head to firewall ground strap attached and it is now done. Been trying to detail the engine bay and get things looking better and will have to find some pictures for an example to go off of. A few other things I have done just don't remember like trying to get the interior back together.
I could see some rust poking thru the cut outs on the rear drivers side rim and wanted to get the red back on the center cap. It was rusty. I used a drill and wire brush and then followed it with aluminum foil to clean it up. I am unable to get all of the rust off but you cant see it now when looking thru the cutouts.
Rear drivers side.

I used a small paint brush and tried to stay in the lines at first but could not get it to how I wanted it to be. So then I painted everything I wanted red and then when the paint dried, I took wet aluminum foil and basically sanded the excess off.

Looking better.

Here is my passenger rear rim. I went to the bone yard and they were able to find 7 rims at one salvage and 4 rims at another salvage about an hour so away from me so I will eventually get the one that I need for passenger rear, just got to get the time to go get it.
 Dec 12, 2015 | 02:31 AM
#847
Registered User


Joined: Mar 2012
Posts: 7,125
Likes: 681
 1/4-20 boltS? IT has shoulder that fits exactly in the existing holes, so no need to enlarge existing.
Dec 12, 2015 | 07:22 AM
1/4-20 boltS? IT has shoulder that fits exactly in the existing holes, so no need to enlarge existing.
Dec 12, 2015 | 07:22 AM
#849
Thread Starter
Super Moderator
iTrader: (1)
Joined: Aug 2008
Posts: 11,787
Likes: 28
From: Anderson Missouri
I am going to be looking for another phone. These pictures are terrible. Hopefully it will show how high I raise my trucks to burp the cooling system. Going to be a lot of small fixes for a while. I want to get on Toms runner and get it completed.
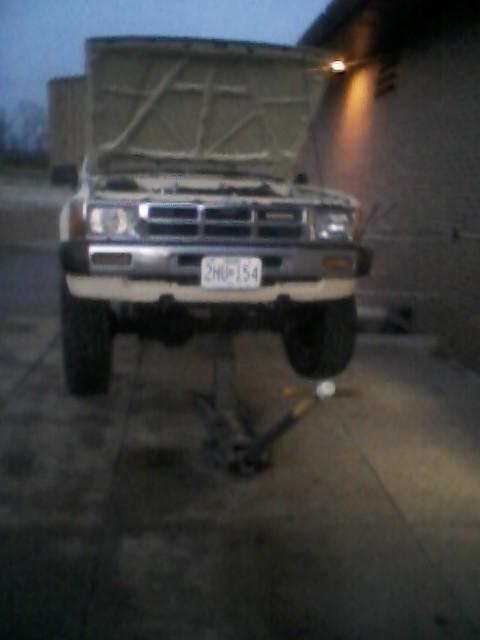
Example for me to follow
Use Mistys phone for a better pic.

Example for me to follow

Use Mistys phone for a better pic.


Last edited by Terrys87; Dec 16, 2015 at 12:45 AM.
Dec 14, 2015 | 02:28 AM
#850
Thread Starter
Super Moderator
iTrader: (1)
Joined: Aug 2008
Posts: 11,787
Likes: 28
From: Anderson Missouri
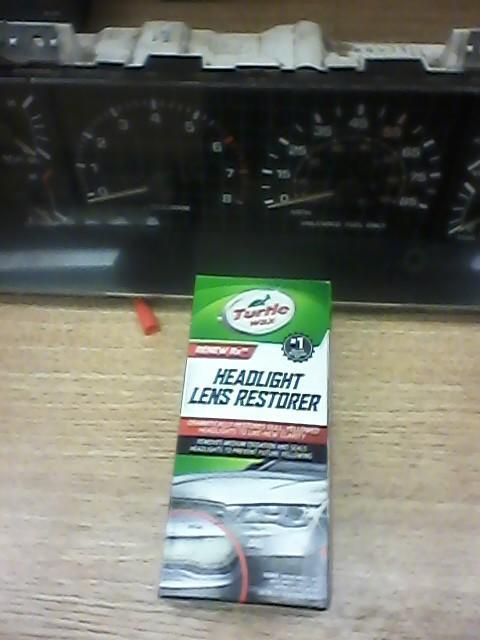
I got my speedometer set 1155 miles. Never again will I set the mileage by working the gears. I broke a piece and it took a while to get it fixed. I will use a drill on a cable even if it takes a month to get it set right. Still happy that it is correct now. I also buffed out the scratches in the lens and it looks great at night time. I might later on install some green bulbs or some other color later on but am in no hurry to pull the cluster again. I stuck a used bulb in the 4WD socket and it still wont light up. It lit up on another cluster but may still just be a bad bulb. Will look into it later on.
I did a test with the Deck Lamp switch and it will work. The FSM only shows 3 wires but the switch has five. White is ground and the Red goes to the Cargo light. That much I am sure of. In the manual it says solid Green is the source. Not sure what the other two green go to. I will get the switch wired in on the next project I do.
I am having to piece my interior together. The PO had a poor velvet style headliner in it with some ratty sun visors. I am getting all the pieces installed and will get some interior paint and paint it all at once. Also there are two styles of bezels. I like the pointed one better.


I did a test with the Deck Lamp switch and it will work. The FSM only shows 3 wires but the switch has five. White is ground and the Red goes to the Cargo light. That much I am sure of. In the manual it says solid Green is the source. Not sure what the other two green go to. I will get the switch wired in on the next project I do.

I am having to piece my interior together. The PO had a poor velvet style headliner in it with some ratty sun visors. I am getting all the pieces installed and will get some interior paint and paint it all at once. Also there are two styles of bezels. I like the pointed one better.

Last edited by Terrys87; Dec 14, 2015 at 02:33 AM.
Dec 14, 2015 | 07:46 PM
#851
Man Terry, I can't get over how sharp your truck looks, you've really accomplished alot in a short amount of time.
That's a good trick using the headlamp lens cleaner for polishing out scratches on the gauge cluster, I'll have to remember that one.
I didn't realize there were 2 different styles of bezels for the gauge clusters, where the SR5's bezels different from the deluxe models?
That's a good trick using the headlamp lens cleaner for polishing out scratches on the gauge cluster, I'll have to remember that one.
I didn't realize there were 2 different styles of bezels for the gauge clusters, where the SR5's bezels different from the deluxe models?
Last edited by rustED; Dec 15, 2015 at 05:20 AM.
Dec 14, 2015 | 11:15 PM
#852
Thread Starter
Super Moderator
iTrader: (1)
Joined: Aug 2008
Posts: 11,787
Likes: 28
From: Anderson Missouri
Thanks Ed... I appreciate it. I have gotten off of overtime and getting some time to work on it and it is starting to come along now. I am not 100% sure but from looking at some trucks in the yard and past experience, I am thinking trucks that came with blue or brown interiors got the squared bezel with a black steering column and steering wheel. I really am not thinking it is year or SR5 specific. I showed a couple of other guys the difference and once they seen the two different styles, they too preferred the peaked bezel.
One thing I am going to try when I get to the rest of the interior is paint my column and steering wheel brown instead of the black. I can imagine it will look better that way but seeing it when done will determine if Toyota had it right or not.
There is also another style of horn button that will interchange like the bezel will that I think looks better. Mistys truck has the horn button that I like better and hers was a very base model truck.
Using the head lamp polish is kind of scary when you do it as it will be blurry when you first do it and you are actually sanding the lens. Follow the instructions and the last step is when you put the sealer on, it will look brand new. I wish I could get a good picture of my cluster in the truck and especially at night. It really pops and clear as a bell. It really looks great. I have done it on my other trucks and they still look great.
Dec 14, 2015 | 11:50 PM
#853
Thread Starter
Super Moderator
iTrader: (1)
Joined: Aug 2008
Posts: 11,787
Likes: 28
From: Anderson Missouri
In Missouri, we have the option of putting EXEMPT on the title where the mileage would go. On the first page or so of this build, you can see where someone tried to install a 91 pickup dash in it and did a poor job of it. The speedometer was not the correct one for this truck and no way of knowing the mileage of this truck so I had EXEMPT put on the title. This will kill the any resale value of this truck with Exempt on it. Had I known of the true mileage I would of kept the numbers accurate but since I did not know and started from scratch I wanted it to be what I have put on it. Changing mileage is a big no-no but the way I have done it is legal. Each state is different.
There are too many changes on this truck that a little investigating thru the VIN would find the color, options, fuel system and somewhere they might could look up on previous registration to find out the mileage is not correct but EXEMPT I am legal in Missouri. I don't think anybody would fall for the "I bought it from a little old lady story" lol.
I really think one thing that can add to the driving enjoyment of a truck is a great looking dash and a hood in great shape. It can make you feel like you are driving a new truck. I really like how my bezel and cluster is looking. As long as I am looking at the hood and bezel while driving it is been great. I wish I could say the same for the rest of the trucks interior.
I have a blue hood release on the inside, black steering column/steering wheel, black pinch weld trim on passenger side, red ash tray, gray sun visors, brown interior and metal floor boards. I am gathering the missing pieces and once I have them all installed I will paint all pieces together. I will have to remove them all but will give the new look I am going for. It is looking shabby right now.
I should of already done all of my fluid changes but I am bound to forget something along the way so am now getting some of the basics caught up. I did get the rear differential change. Some yucky stuff come out. I had enough on the shelf to the rear and will get some gear oil for the front tomorrow.
Nasty stuff.
 Dec 16, 2015 | 03:56 PM
#854
Thread Starter
Super Moderator
iTrader: (1)
Joined: Aug 2008
Posts: 11,787
Likes: 28
From: Anderson Missouri
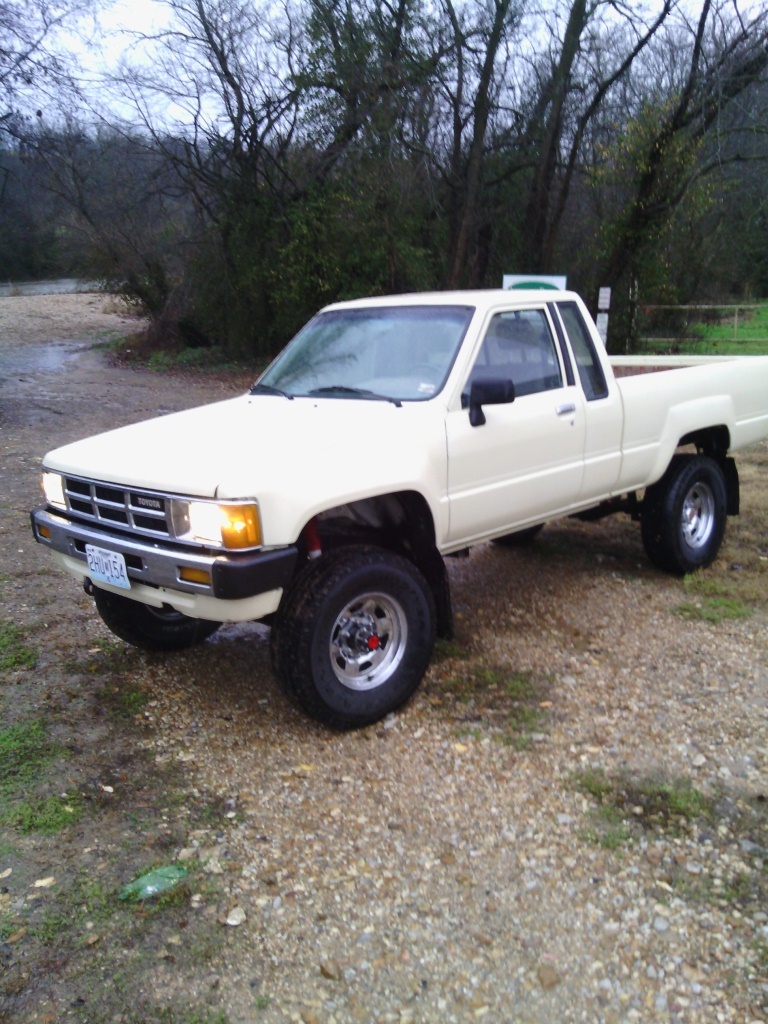
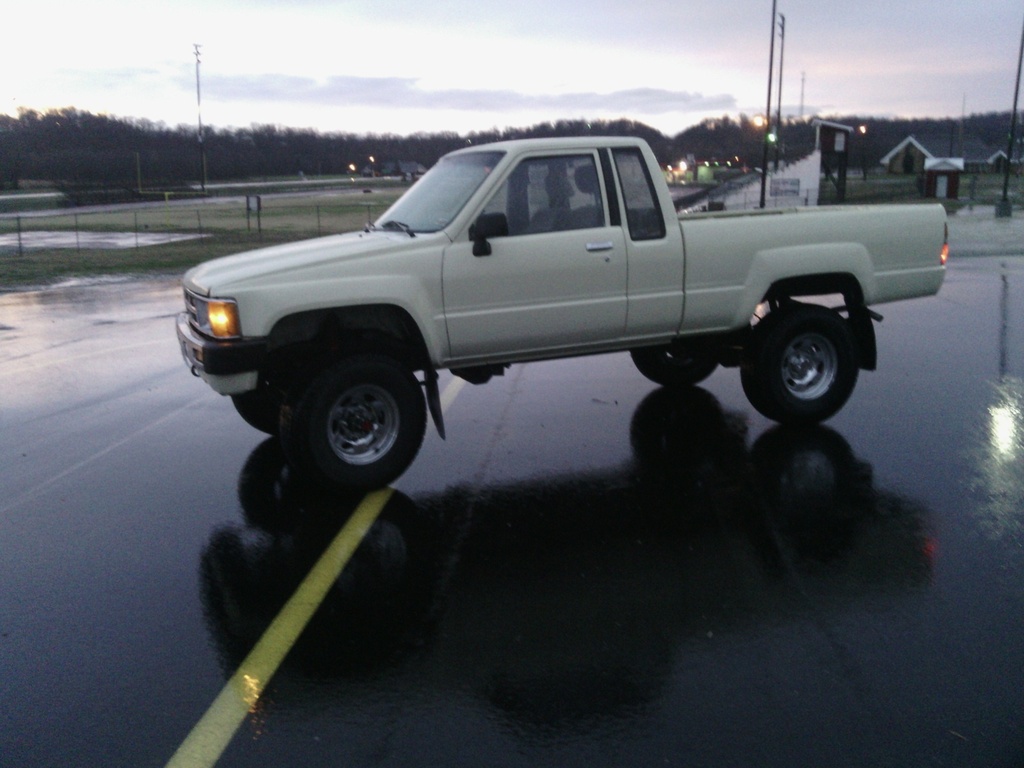
I got the maplight installed and working, got the front diff oil changed and it was not nearly as bad as the rear, and a few other small things done that I cant recall right off. I plan on trying to get some interior shots tommorrow with Mistys phone. It does not look to good right now but will a good before shot at a later time. I also updated the first post on my thread showing the before and after of my truck. When I first got this truck, it was in worse shape then what the pictures show.
While looking thru the shed for some other parts, I remembered I have an SR5 bumper from Toms truck build. After pricing some new bumpers, I am wondering if I cant get the chrome redone for about or less then the cost of a new bumper. There is a shop in Tulsa that I see when going to see my inlaws and will ask what they will charge to do the chrome. I would also like to see what they would charge to chrome my tailgate handle.
It took 3 or 4 bumpers to make one good bumper for his truck. So glad I keep most of my old or broken parts. I think I will be able to make another bumper out of the 3 junk ones I have. I will start digging those parts out for this weekend and see what I can make.
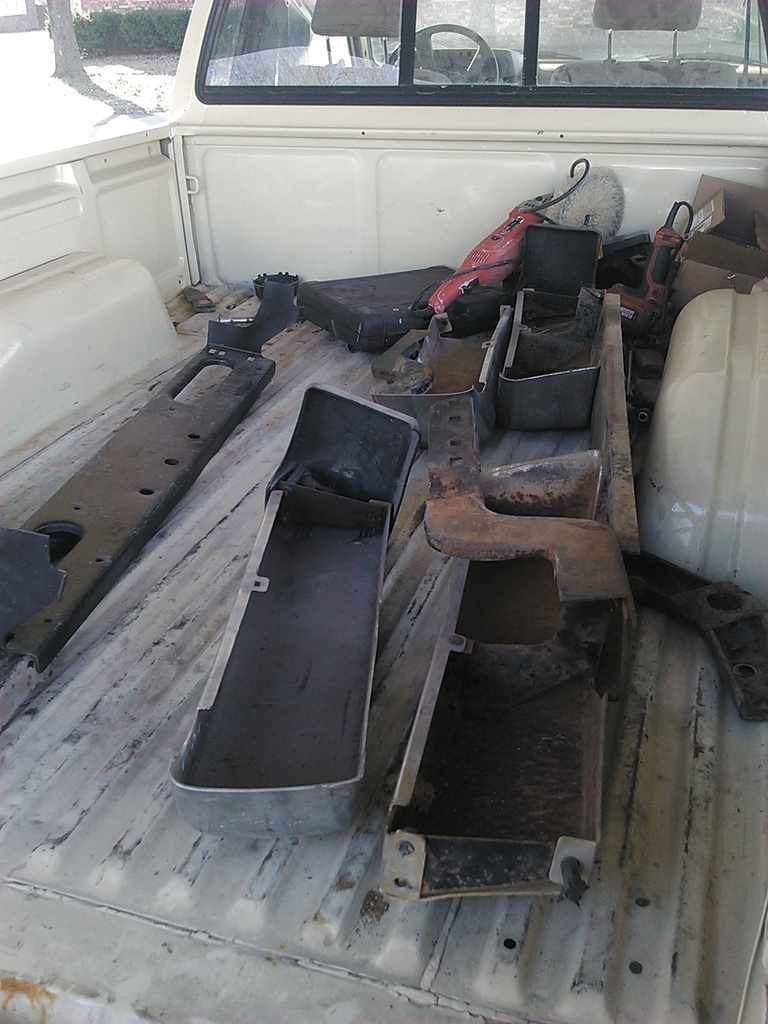
Here is the bumper I am talking about.

The pieces I have some surface rust and dings in them, I think I should be able to get one looking that good.
While looking thru the shed for some other parts, I remembered I have an SR5 bumper from Toms truck build. After pricing some new bumpers, I am wondering if I cant get the chrome redone for about or less then the cost of a new bumper. There is a shop in Tulsa that I see when going to see my inlaws and will ask what they will charge to do the chrome. I would also like to see what they would charge to chrome my tailgate handle.
It took 3 or 4 bumpers to make one good bumper for his truck. So glad I keep most of my old or broken parts. I think I will be able to make another bumper out of the 3 junk ones I have. I will start digging those parts out for this weekend and see what I can make.
Here is the bumper I am talking about.

The pieces I have some surface rust and dings in them, I think I should be able to get one looking that good.
Last edited by Terrys87; Dec 16, 2015 at 04:01 PM.
Dec 16, 2015 | 04:15 PM
#855
Thread Starter
Super Moderator
iTrader: (1)
Joined: Aug 2008
Posts: 11,787
Likes: 28
From: Anderson Missouri
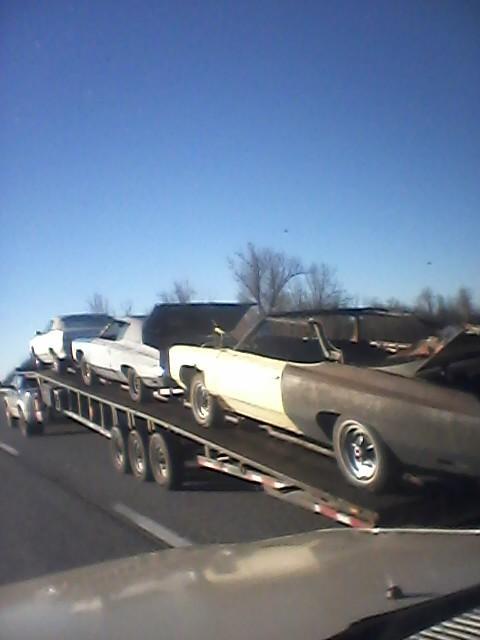
When coming home today, I passed this truck load of early to mid Chevys. I like seeing deep projects regardless of make and model. So nice seeing other things on the road besides newer cookie cutter cars. I enjoy spending time on other restoration sites and finding a good build that goes from start to finish and what all was involved. I have learned tons of things from others builds.
2 convertibles and a hard top. Probably 72-76 Chevy Bel Airs or Impalas.
2 convertibles and a hard top. Probably 72-76 Chevy Bel Airs or Impalas.
 Dec 16, 2015 | 05:07 PM
#856
Contributing Member

Joined: Sep 2005
Posts: 8,247
Likes: 497
From: mo
I see people trailering project bits up and down 44, always cool to see.
Wow, you've been a truck fiddlin' maniac! Mostly I'm just checking in to get my Terry's project pic fix and get a little drool on the keyboard. Awesome as always.
Wow, you've been a truck fiddlin' maniac! Mostly I'm just checking in to get my Terry's project pic fix and get a little drool on the keyboard.
Awesome as always.
Dec 16, 2015 | 05:31 PM
#857
Registered User
Joined: Mar 2012
Posts: 7,125
Likes: 681
Nice, Terry!
LOL! yeah those stock mounting "bolts" are molded into the plastic; not robust for workhorse trucks. I prefer simple screw-in attachments.
Nice. Like mine except for the cream sections and the SR5? seats.
If you like Android, try the Samsungs. I'm very happy with my S5, especially when in bright conditions or when using the flash.
That switch is most likely from 4Runner with two-way switching (You can control light either from driver position or from rear-deck.). Unfortunately, color codes vary from year to year.
Please check closely the striping on the green wires.
Most likely, the solid green is power source (pin5). On the MoreFunner, one position of the switch will connect it to one of the green wires. Flicking the switch will connect it to the other green wire.
The white with black stripe is probably ground for the indicator light (pin2). Please see which of the other wires have some (not zero or OL) resistance to that. That resistance will be from filament of indicator light, assuming it's there. That other wire will be the positive side (pin1) for the indicator light. Most likely, that's the red wire. You would need to connect that to the output terminal (one of the green wires) that will power the cargo lamp.
Your wiring would be this way:
PLEASE IGNORE COLORS

If you like Android, try the Samsungs. I'm very happy with my S5, especially when in bright conditions or when using the flash.
I did a test with the Deck Lamp switch and it will work. The FSM only shows 3 wires but the switch has five. White is ground and the Red goes to the Cargo light. That much I am sure of. In the manual it says solid Green is the source. Not sure what the other two green go to. I will get the switch wired in on the next project I do.

Please check closely the striping on the green wires.
Most likely, the solid green is power source (pin5). On the MoreFunner, one position of the switch will connect it to one of the green wires. Flicking the switch will connect it to the other green wire.
The white with black stripe is probably ground for the indicator light (pin2). Please see which of the other wires have some (not zero or OL) resistance to that. That resistance will be from filament of indicator light, assuming it's there. That other wire will be the positive side (pin1) for the indicator light. Most likely, that's the red wire. You would need to connect that to the output terminal (one of the green wires) that will power the cargo lamp.
Your wiring would be this way:
PLEASE IGNORE COLORS
Last edited by RAD4Runner; Dec 17, 2015 at 08:07 AM.
Dec 17, 2015 | 09:05 PM
#858
Registered User
Joined: Jul 2012
Posts: 2,365
Likes: 4
From: Idaho
hey terry shes looking great as always your the king of details
got a question how do ya get a rear seat belt to unlock? kids got the retracter on the rear seatbelt stuck it wont extend nor retract an only 10 inches of it is out not enoug to use as a belt
got a question how do ya get a rear seat belt to unlock? kids got the retracter on the rear seatbelt stuck it wont extend nor retract an only 10 inches of it is out not enoug to use as a belt
Dec 18, 2015 | 12:01 PM
#859
Thread Starter
Super Moderator
iTrader: (1)
Joined: Aug 2008
Posts: 11,787
Likes: 28
From: Anderson Missouri
Hello hab.. I just like seeing all kinds of projects out there. I should be getting all kinds of projets moving along now here shortly. Getting some time freed up should make a difference.
Thanks Ray... I was fairly sure the solid green wire was the power source. I tried to find a pickup switch but all I had was runner switches. I will try and post some pictures tonight as I want to get my cargo light working. My interior looks shabby now but I am getting it more together so when I repaint all of my interior, I think it will look as good as the above. My flip phone just broke on me and I do like how the pictures are working on it.
Hello Cyberhorn.. I will see if I can find an old seat belt and show what it looks like inside. The two I fixed in the past, there is a saw blade like device in there that a ball bearing falls in between the teeth. Once I was able to clean the dust out and lubricate it and got it working and the other one I had to replace.
Dec 18, 2015 | 12:16 PM
#860
Thread Starter
Super Moderator
iTrader: (1)
Joined: Aug 2008
Posts: 11,787
Likes: 28
From: Anderson Missouri
My old phone just broke in two pieces. Dont know what happened so the phone I got now does a better picture. Wanted to get a good before picture as I will eventually get my interior looking better.
I dug up all of the rear bumper assemblies that I have in hopes of making one good one. I will have to get an end piece for the passenger side. I have two drivers side and will try to make it work for a short term fix.
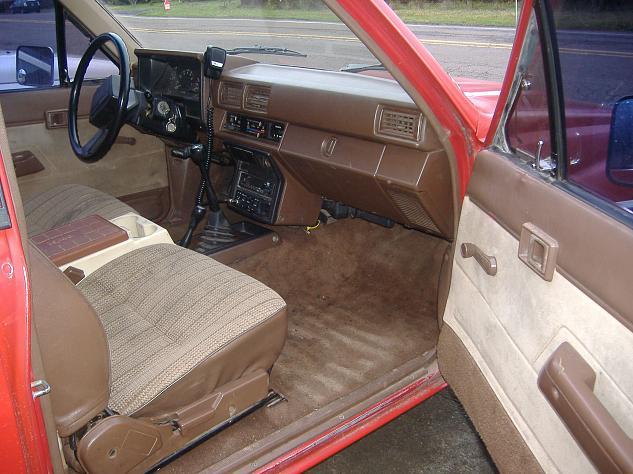
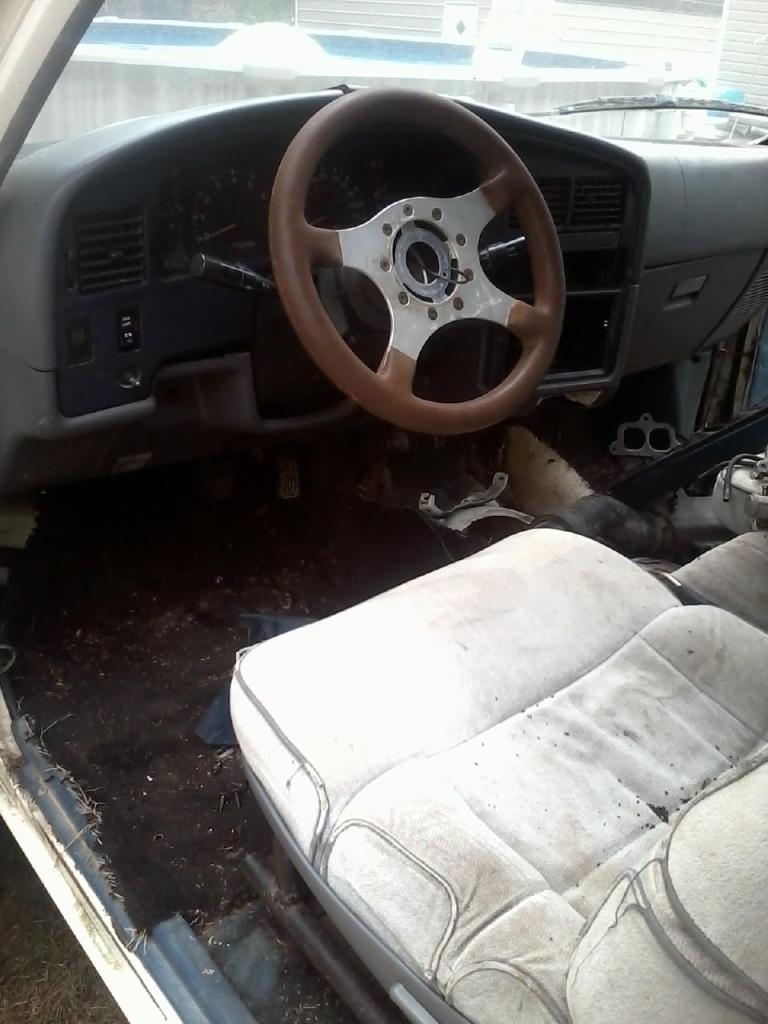
Here you can see the SR5 gauge a little and looks great. I have the vents but will install them when I completely repaint the interior. The red and gray interior trucks, the steering wheel and column are the same as the rest of the interior. Blue and brown interior trucks the steering column and wheel are black. I am going to go brown with mine.
Still some glare but gives you an idea of what it looks like. I have a better dash and will install it when I do the repaint. It is not hard to get a pickup interior to looking better once you have some good pieces and seats.

Here are the numerous pieces that I think I can clean up and will see about having a chrome shop to do the chrome on them at a later time. Looks bad, but think it will clean up or until something better comes along. Chasing down the parts is a reward in itself and when a truck is completed, it looks like it is an easy thing, but it does take time.
Here is the horn button I prefer, This is Mistys and the TOYOTA badge fell out of it which I will eventually get replaced. I like this style better then the hockey puck I have on mine.
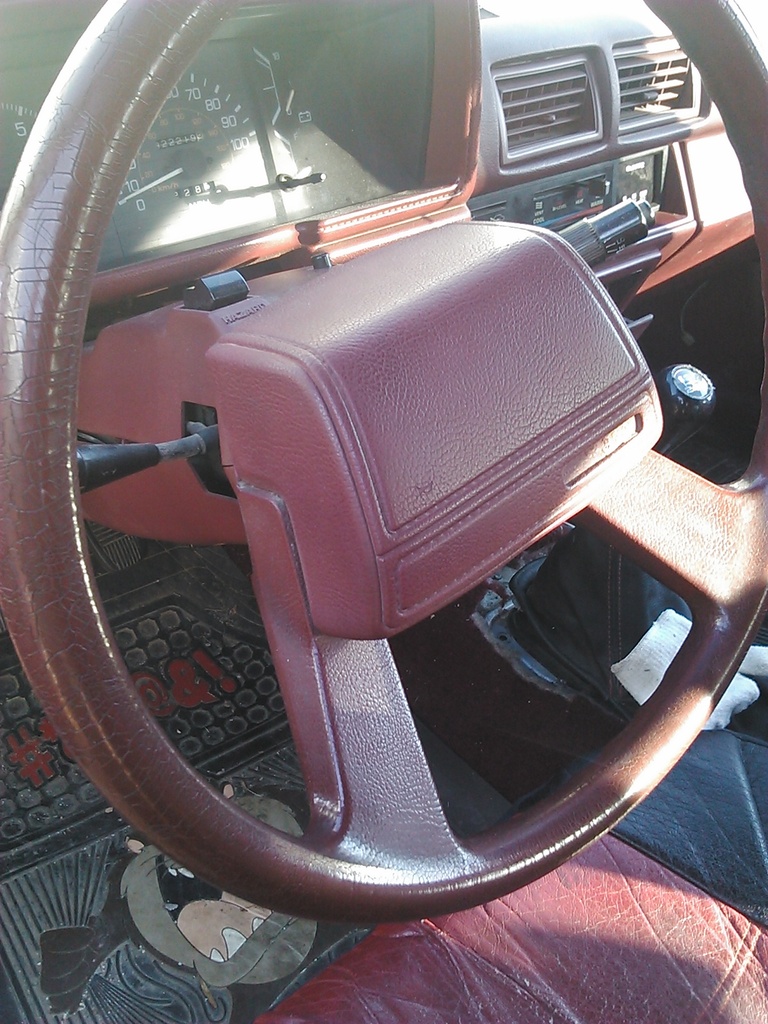
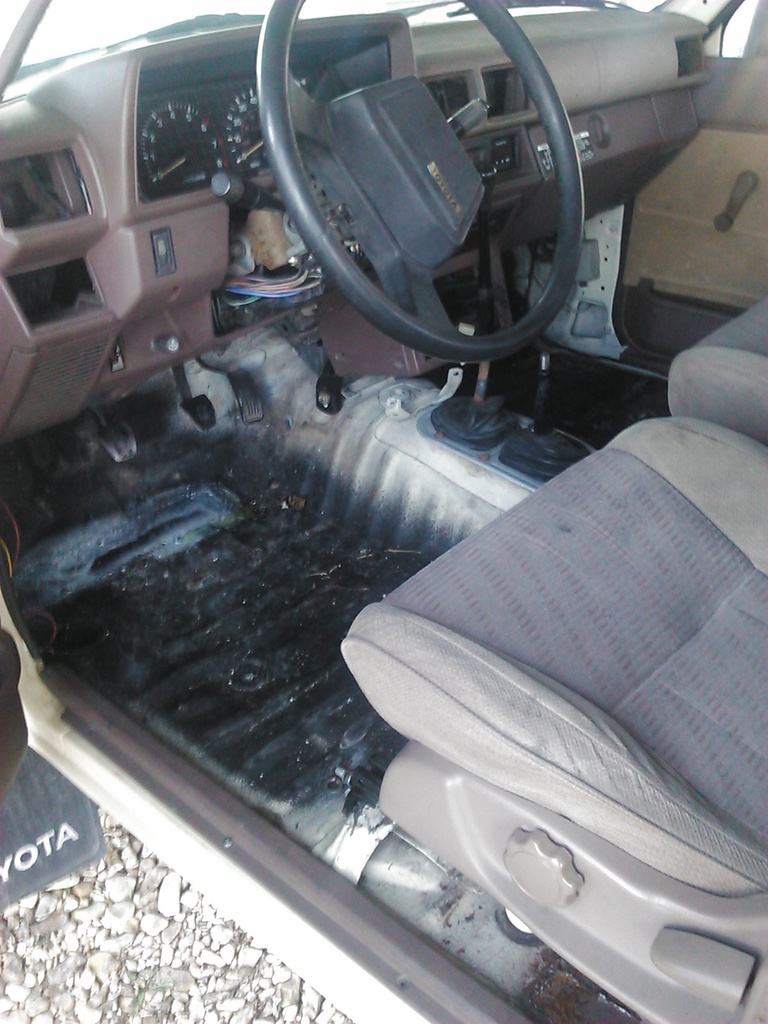
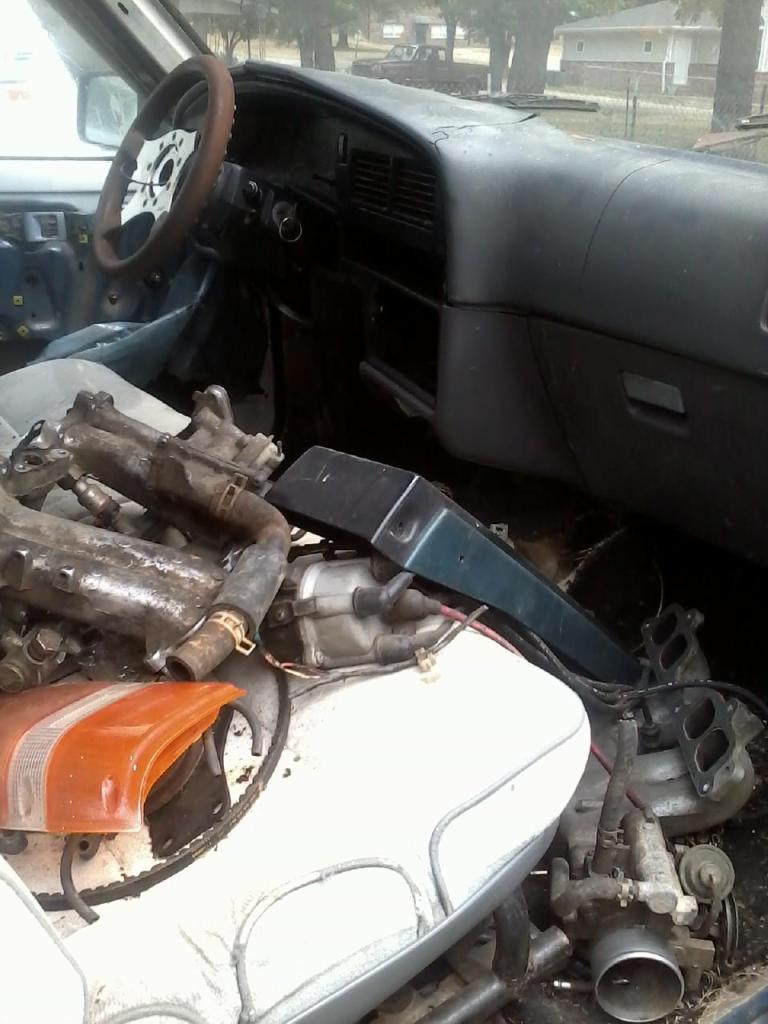
Here is what the dash was like when I first got the truck. It was from an 89-95 and was installed dangerously. It would of been a hazard to drive as it was just held in with some thin strips of metal. Dash that was just sitting on steering colmn and how bad interior was.
I dug up all of the rear bumper assemblies that I have in hopes of making one good one. I will have to get an end piece for the passenger side. I have two drivers side and will try to make it work for a short term fix.
Here you can see the SR5 gauge a little and looks great. I have the vents but will install them when I completely repaint the interior. The red and gray interior trucks, the steering wheel and column are the same as the rest of the interior. Blue and brown interior trucks the steering column and wheel are black. I am going to go brown with mine.

Still some glare but gives you an idea of what it looks like. I have a better dash and will install it when I do the repaint. It is not hard to get a pickup interior to looking better once you have some good pieces and seats.

Here are the numerous pieces that I think I can clean up and will see about having a chrome shop to do the chrome on them at a later time. Looks bad, but think it will clean up or until something better comes along. Chasing down the parts is a reward in itself and when a truck is completed, it looks like it is an easy thing, but it does take time.

Here is the horn button I prefer, This is Mistys and the TOYOTA badge fell out of it which I will eventually get replaced. I like this style better then the hockey puck I have on mine.

Here is what the dash was like when I first got the truck. It was from an 89-95 and was installed dangerously. It would of been a hazard to drive as it was just held in with some thin strips of metal. Dash that was just sitting on steering colmn and how bad interior was.
Last edited by Terrys87; Dec 18, 2015 at 12:43 PM.


