
85 Extra Cab Saved from Crusher
 Oct 9, 2014 | 08:43 AM
#521
Thread Starter
Super Moderator
iTrader: (1)
Joined: Aug 2008
Posts: 11,787
Likes: 28
From: Anderson Missouri
I got the motor in. I will finish the valve cover and plenum at a later time. Trying to get the shop organized again and getting the things on the truck will help alot.

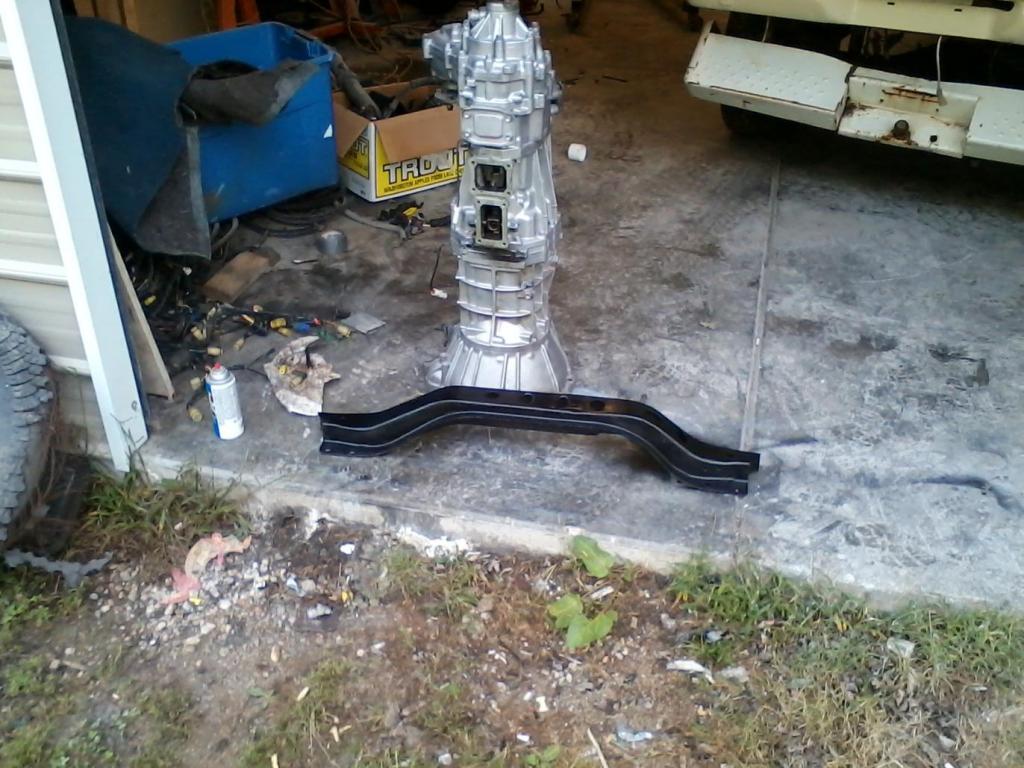
Cleaned and painted tranny and crossmember.
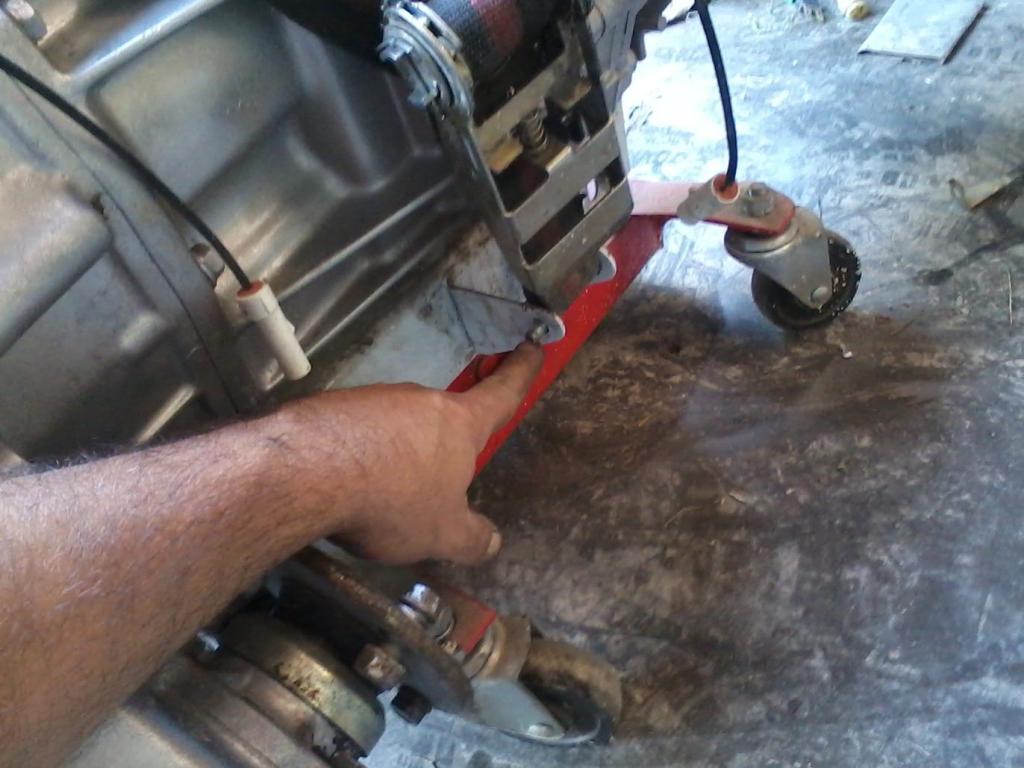
The HF tranny jack works great. One problem I run into is the buckle is up against the floor and I am unable to unlatch it. What I do is remove the nut and the pressure on the strap keeps it secured until the tranny is bolted to the engine and then I can release the pressure and just slide the bolt out to get the tranny back out.
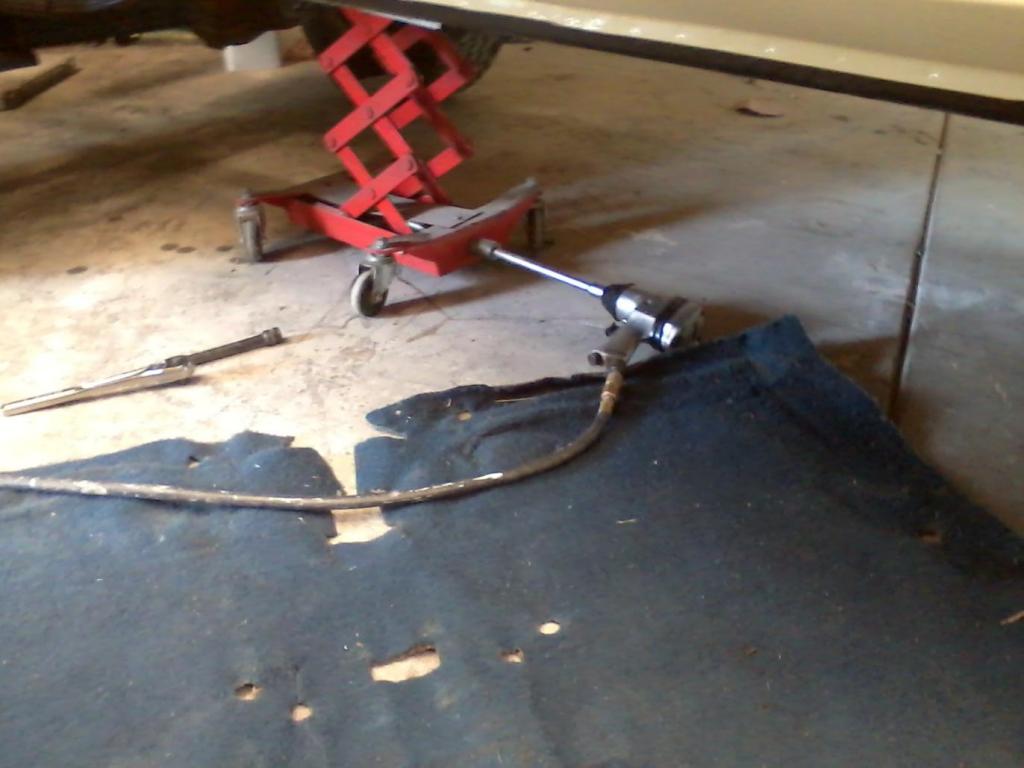
Transmission is in. Instead of ratcheting it the whole way, I took the easy way and used the impact wrench to get it most of the way, after that I did ratchet it in.
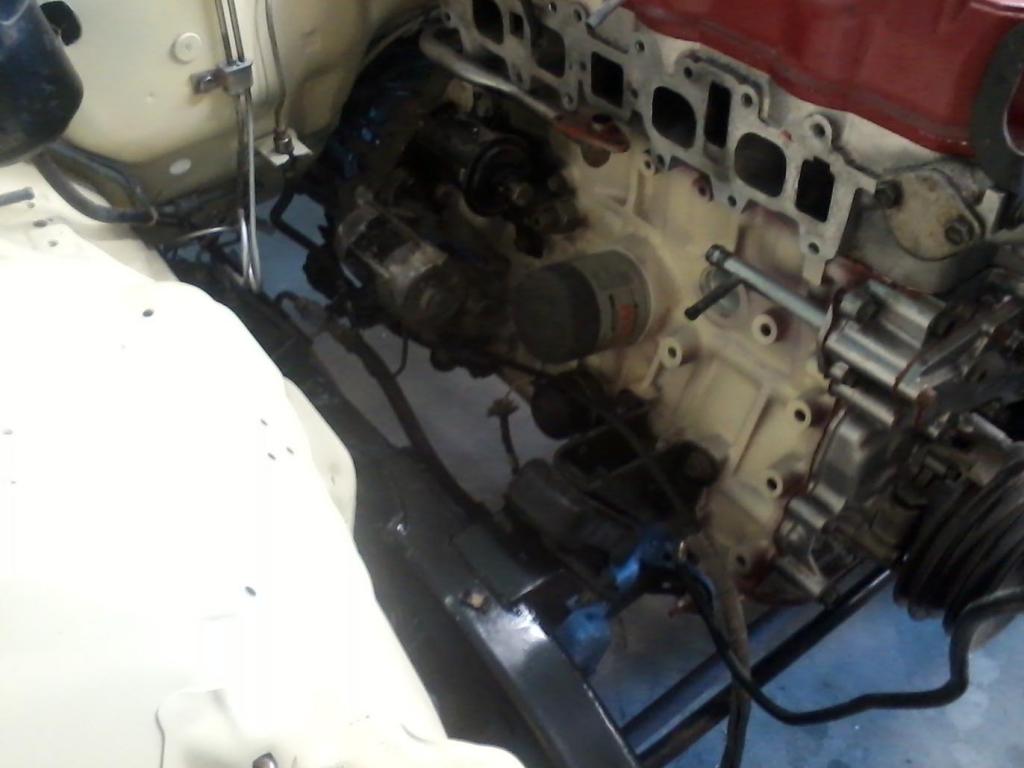
Not sure why everyone says changing the fuel filter is hard. haha, If I had the intake on I would understand. Tranny, starter, and several odds and ends.
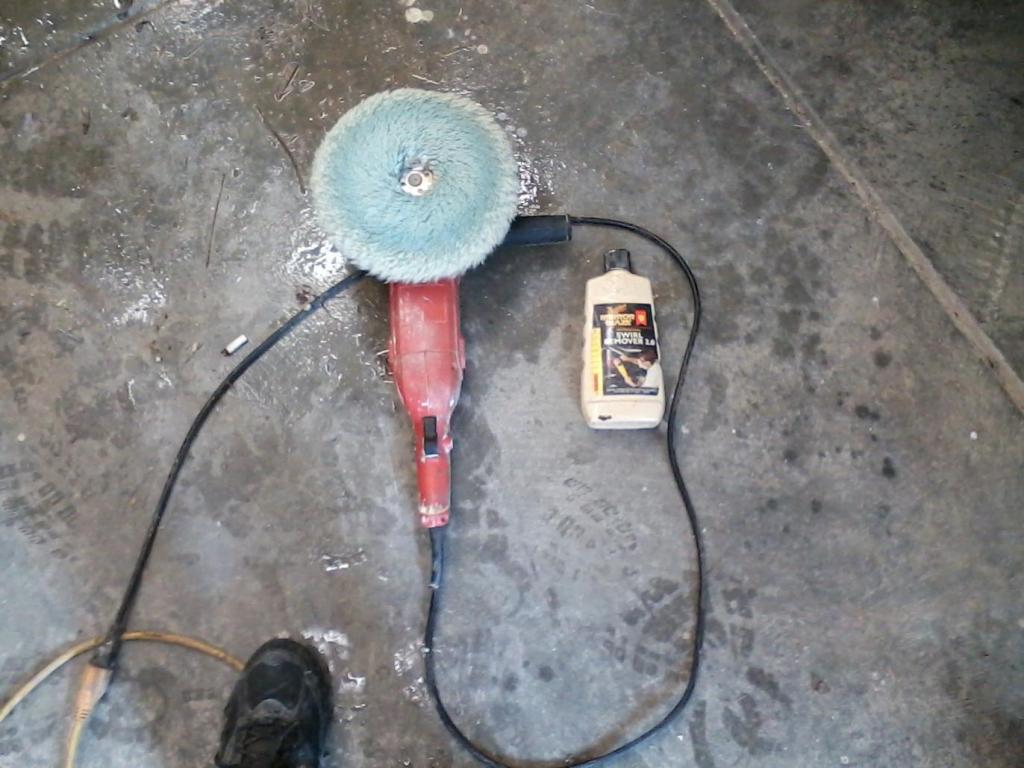
Got tired of mechaicing so wanted to get some more things added on, so I started with 1500 grit to get some orange peel out of the clear coat. So nice when it lays down right the first time but that is the way it goes for me. Here you can see some of the clear that is coming off the way that it should.
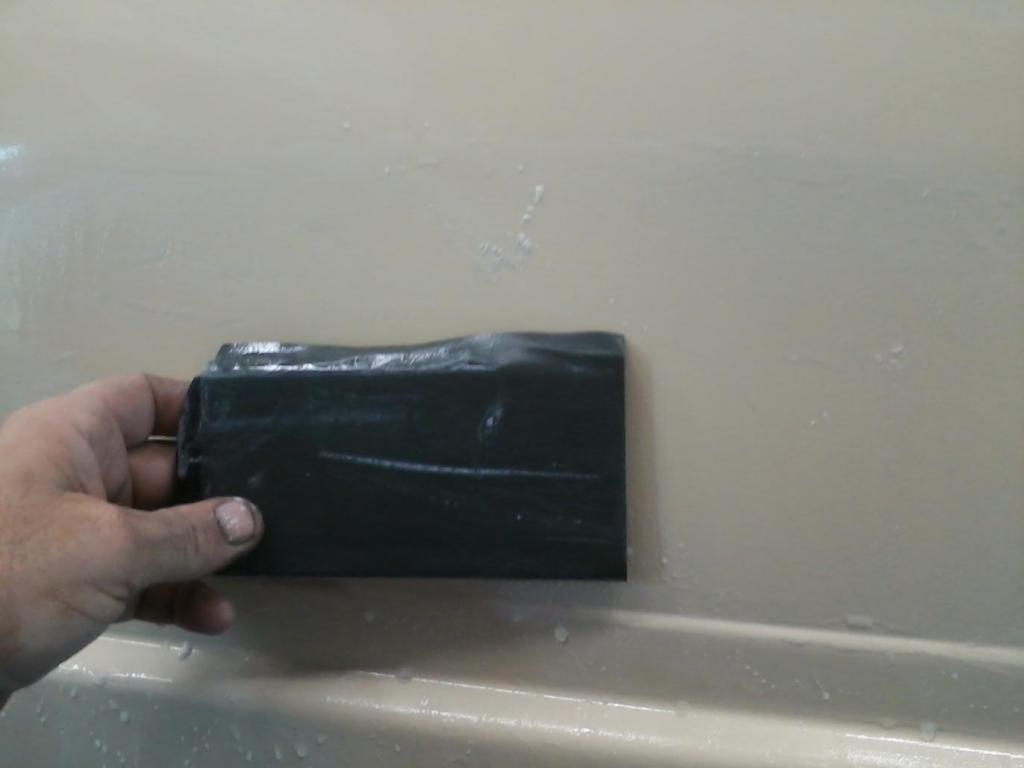
Meguiars is some great stuff. You will get in more trouble with a buffer then you will sandpaper.
I did not get around the edges very good as it is easy to burn thru. I can get it smoother but for now it looks good enough for me. I only got the door done so as I can stick on the mirror and the door lock. I left the door lock inside the door and forgot to pull them out before putting on the door panels, Doh!!! No biggie, I will get it shortly.


Cleaned and painted tranny and crossmember.

The HF tranny jack works great. One problem I run into is the buckle is up against the floor and I am unable to unlatch it. What I do is remove the nut and the pressure on the strap keeps it secured until the tranny is bolted to the engine and then I can release the pressure and just slide the bolt out to get the tranny back out.

Transmission is in. Instead of ratcheting it the whole way, I took the easy way and used the impact wrench to get it most of the way, after that I did ratchet it in.

Not sure why everyone says changing the fuel filter is hard. haha, If I had the intake on I would understand. Tranny, starter, and several odds and ends.

Got tired of mechaicing so wanted to get some more things added on, so I started with 1500 grit to get some orange peel out of the clear coat. So nice when it lays down right the first time but that is the way it goes for me. Here you can see some of the clear that is coming off the way that it should.

Meguiars is some great stuff. You will get in more trouble with a buffer then you will sandpaper.

I did not get around the edges very good as it is easy to burn thru. I can get it smoother but for now it looks good enough for me. I only got the door done so as I can stick on the mirror and the door lock. I left the door lock inside the door and forgot to pull them out before putting on the door panels, Doh!!! No biggie, I will get it shortly.

Last edited by Terrys87; Oct 9, 2014 at 12:14 PM.
Oct 9, 2014 | 11:31 PM
#524
Thread Starter
Super Moderator
iTrader: (1)
Joined: Aug 2008
Posts: 11,787
Likes: 28
From: Anderson Missouri
Thanks Ed... I have a ton of time on some small details that I am hoping will pay off in the long run. Doesnt really show on the pictures but it is coming along slowly but surely. It is starting to feel like a truck again with the bed on.
Thanks Chris... With the great weather we are having, I am trying to take advantage of it. Also been spending some time tring to get my runner buffed out from when I painted it and never got around to it. I want it looking as good as possible for Tuttle. I am hoping I can come up with the right paint scheme on the Plenum and Intake to make the motor color look right.
Thanks Chris... With the great weather we are having, I am trying to take advantage of it. Also been spending some time tring to get my runner buffed out from when I painted it and never got around to it. I want it looking as good as possible for Tuttle. I am hoping I can come up with the right paint scheme on the Plenum and Intake to make the motor color look right.
Oct 9, 2014 | 11:35 PM
#525
Thread Starter
Super Moderator
iTrader: (1)
Joined: Aug 2008
Posts: 11,787
Likes: 28
From: Anderson Missouri
I will get a picture later but I did get the drivers mirror on and the drivers side of the bed buffed out. Earlier today I had to stop as I was just sore in the neck and shoulders and I think that was from messing with the tranny or a combination of every thing.
I put on some Icey Hot and took a nap and thought I would try to work the stiffness out so went out and did that for a while. We will see if that was a good idea or not. I do like how the bed smoothed out and it has a wet glassy feel to it now. Still along ways to go on this project but it is one step closer in the mile I still have to go.
I had to remove the door panels to get to the lock. Got the lock, mirror, and B-pillar trim installed on the drivers side. Starting on passenger side now.
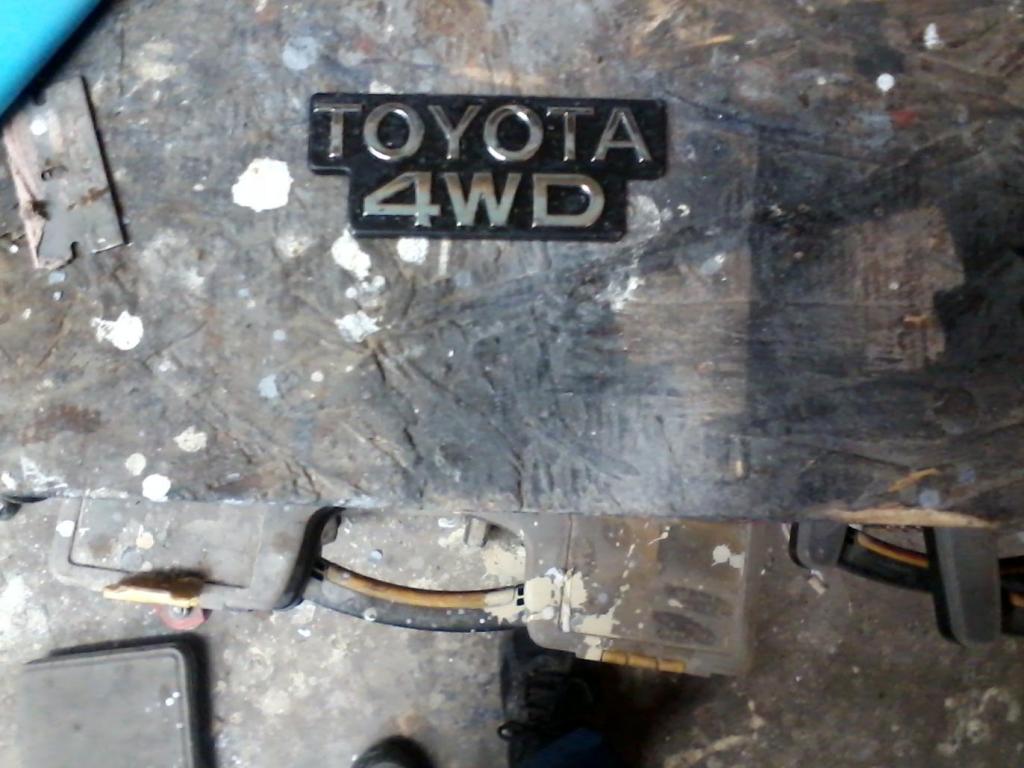
I wont be using these badges as the PO broke the tabs off and glued them on. I will replace with some unbroken badges later.

Picture did not come out but it was faded. I just spray paint the badge, let it tack up a little bit and lightly rub the surface on some sandpaper.

Last edited by Terrys87; Oct 10, 2014 at 04:52 AM.


 Oct 14, 2014 | 11:52 PM
#529
Thread Starter
Super Moderator
iTrader: (1)
Joined: Aug 2008
Posts: 11,787
Likes: 28
From: Anderson Missouri
Thanks Mark... I plan on getting some more Peel and Seal in the morning and try to start getting the headliner and back piece in. I am not going to be able to make the Tuttle trip. We are a guy short and I am having to do some overtime to cover him being gone. Been told 2 weeks but will most likely be 2 months. He will be gone for surgery.
Thank rattlewagon... Even with a tranny jack sometimes a tranny goes in easy and sometimes not. A friend of mine a lift system and that swapping trannies so much easier. He spoiled me on that. This tranny gave me a little more problems getting it installed then normal.
Hello 85sr5excab.. We are finally starting to dry out a little. Today was the last bit of rain and tomorrow is to be nice. I am going to try and make the most of it. It is getting cooler at nights and some cool days. It takes it out of you when the temps are not so great. Going to try and get something done on my next days off.
Oct 14, 2014 | 11:56 PM
#530
Thread Starter
Super Moderator
iTrader: (1)
Joined: Aug 2008
Posts: 11,787
Likes: 28
From: Anderson Missouri
I went and got some vinyl for my back piece. It was originally done with carpet and if I don't like it, I may go back with a carpet. We will see how it goes. I had previously removed the old carpet and now am getting to recover the back piece.
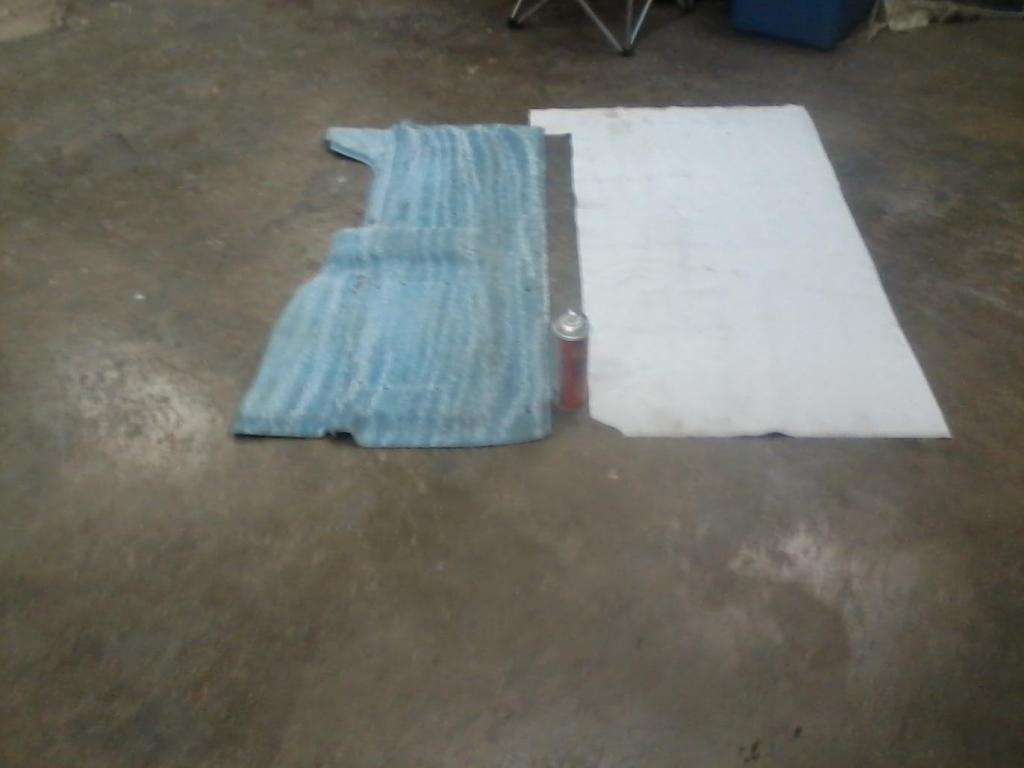
Here it is with the vinyl on. I still need to add the pockets but want to get some new bungee cord for them. The different colors of gray was a hard match to find and I will probably be using some interior paint on this to match it a little closer. I was glad that I got a piece a little bigger then I needed as when laying it down, it kept wanting to stick and I would have to lift it back up to adjust. If it was an exact fit, it would of been tough. I just trimmed the excess off.


Here it is with the vinyl on. I still need to add the pockets but want to get some new bungee cord for them. The different colors of gray was a hard match to find and I will probably be using some interior paint on this to match it a little closer. I was glad that I got a piece a little bigger then I needed as when laying it down, it kept wanting to stick and I would have to lift it back up to adjust. If it was an exact fit, it would of been tough. I just trimmed the excess off.
 Oct 16, 2014 | 11:39 AM
#534
Thread Starter
Super Moderator
iTrader: (1)
Joined: Aug 2008
Posts: 11,787
Likes: 28
From: Anderson Missouri
Thanks Cyberhorn...I am going to get up early in the morning and try to get some of that cord. I would like to start putting some of the interior back in on what I do have.
Thanks Mark..It was a fun little project. I am starting to like doing interior work when it is possible. I hope the vinyl looks great with it as it was orginally carpet.
Thanks 775Toy...I am eventually going to be spending alot of time in the bed of the truck as well. I am hoping it turns out nearly as well as the rest of the truck when done.
Oct 16, 2014 | 11:41 AM
#535
Thread Starter
Super Moderator
iTrader: (1)
Joined: Aug 2008
Posts: 11,787
Likes: 28
From: Anderson Missouri
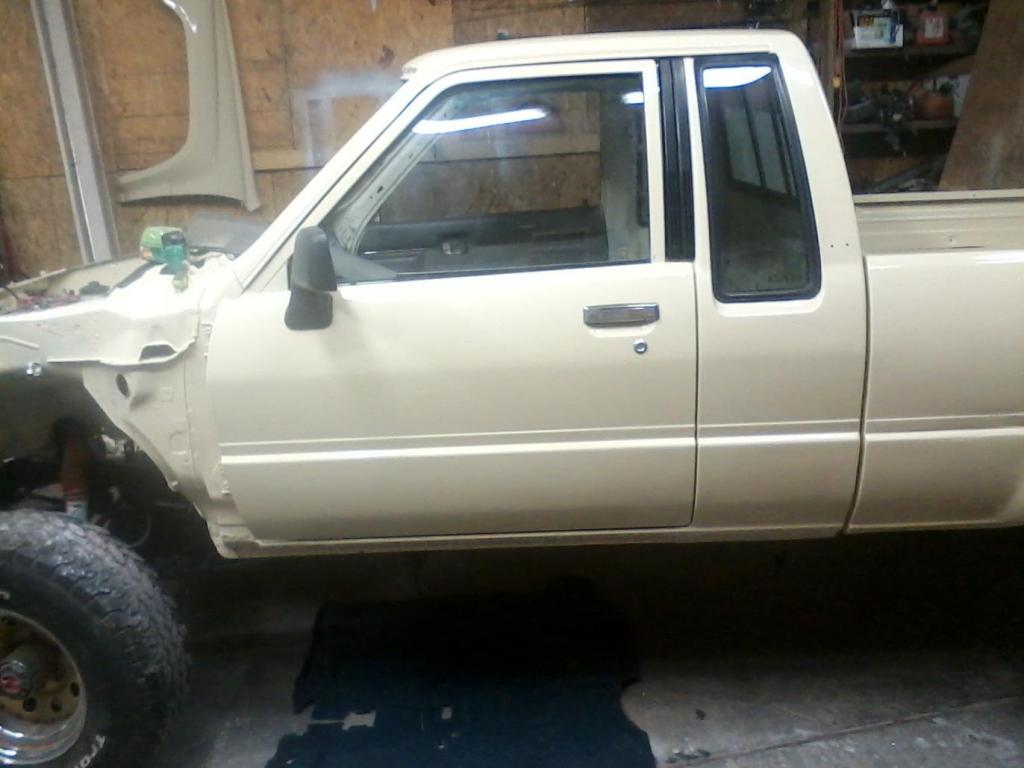
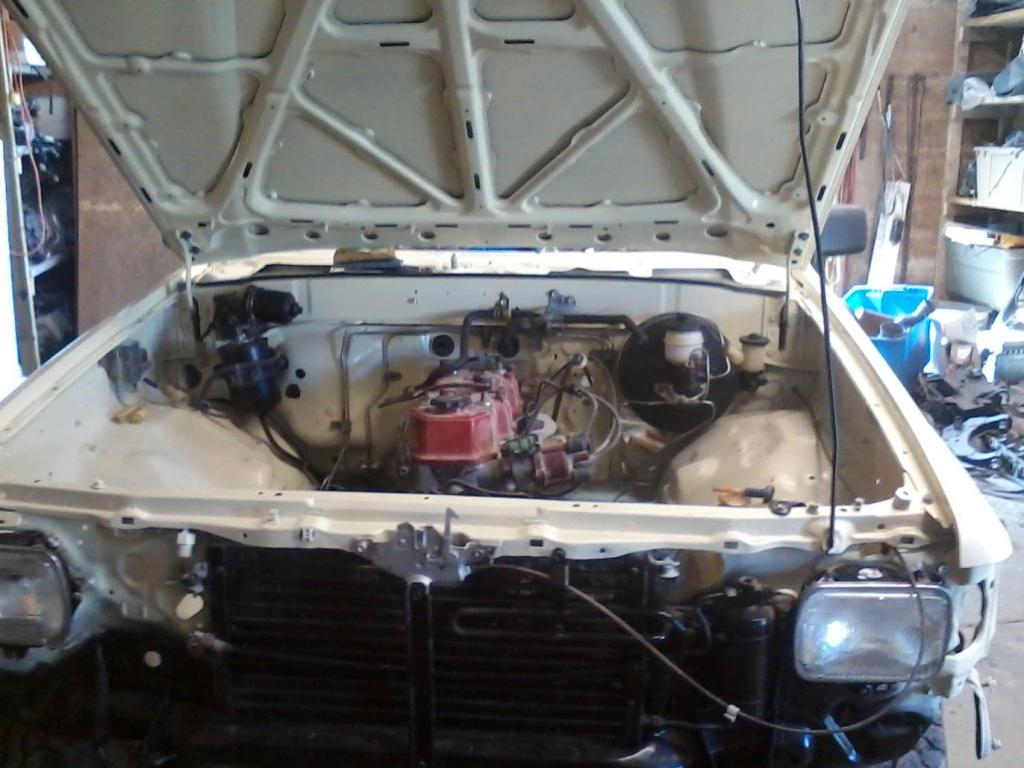
It is starting to look like a truck again. I got the hood and fenders on and started some more color sanding and polishing. Still have a ways to go.

Just something I like seeing is the engine bay maching the rest of the truck.
I got the rear wall Peel and Sealed in preparations of getting the rear panel in.


Just something I like seeing is the engine bay maching the rest of the truck.

I got the rear wall Peel and Sealed in preparations of getting the rear panel in.

Last edited by Terrys87; Dec 2, 2014 at 12:33 AM.
Oct 17, 2014 | 12:07 PM
#539
Thread Starter
Super Moderator
iTrader: (1)
Joined: Aug 2008
Posts: 11,787
Likes: 28
From: Anderson Missouri
Thanks Mark...I am really liking how it is starting to look. I am ready to get it on the road.
Thanks Ed... I have been working on it hard but it is the small things that are really slowing me down.
Hello 775Toy...I will cringe getting any body damage on it. An older guy I work with door dinged my runner and I eventually will go and fix it. It always is frustrating when one gets dinged.
Thanks Ed... I have been working on it hard but it is the small things that are really slowing me down.
Hello 775Toy...I will cringe getting any body damage on it. An older guy I work with door dinged my runner and I eventually will go and fix it. It always is frustrating when one gets dinged.
Oct 17, 2014 | 12:17 PM
#540
Thread Starter
Super Moderator
iTrader: (1)
Joined: Aug 2008
Posts: 11,787
Likes: 28
From: Anderson Missouri
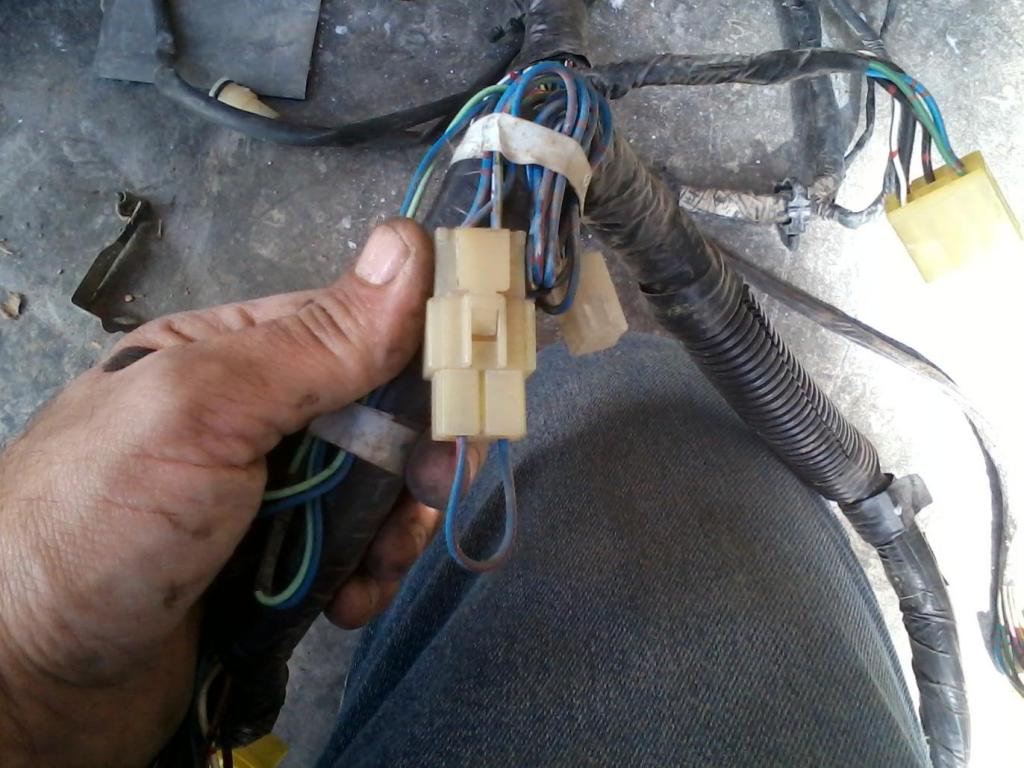
I went and got me a two wheel drive harness. I can live without the 4x4 light working until I find the right harness. I had the truck running in the past but wanted to have all features working as they should be. For some reason the harness I got off of the extra cab in the salvage, the wiper wires are different. Toyota changes something in every harness and this one I just am not able to figure out. I dont want to booty fab my wiper with a toggle switch so will find the correct harness I need.
If your truck does not have wiper delay, you can swap out the combo switch and get a jumper with the green box and have wiper delay. If you dont have that, here is what you will have beside the blower box assembly. It is just a jumper plug that by passes what would go to the wiper control.
Jumper Plug.
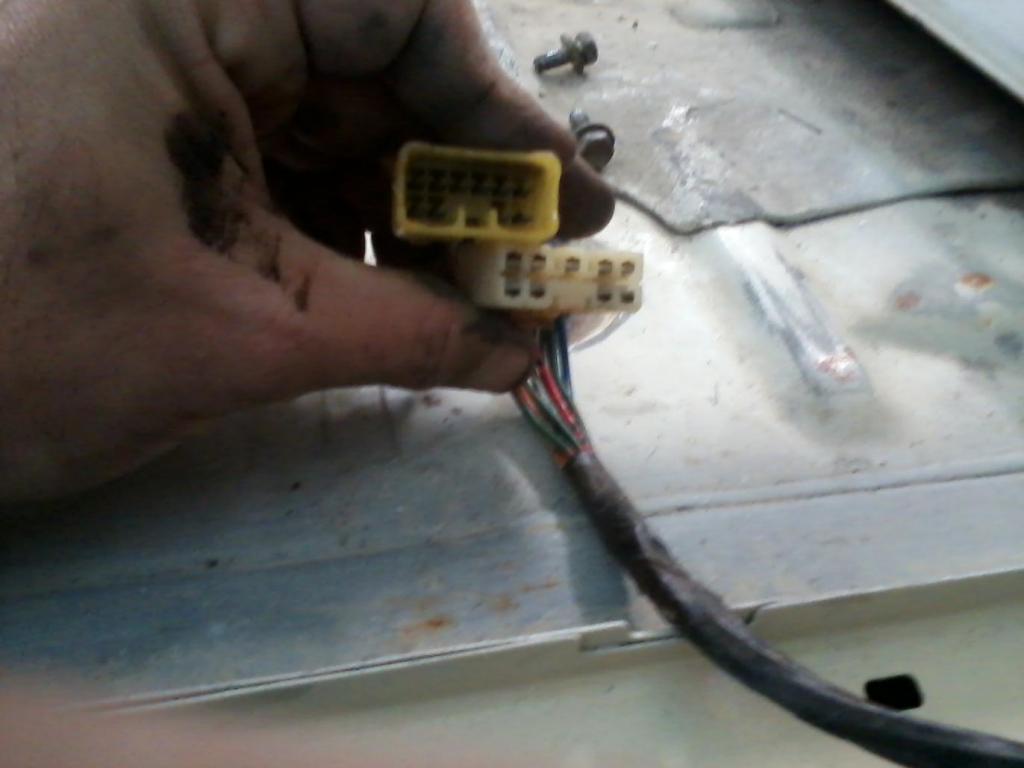
This harness will not work for me. I might could make it work with cutting and soldering but I am not going to do that. Toyota uses two different plugs for the fule/tail light connections. I have yet to figure out which is which as I have seen it on 2 and 4 wheel drives and a couple of different years.
One thing I did learn and probably should of figured it out is that the main harness is all the same length. The difference betweeen extra cab length and standard cab length is in the fuel/tail light harness. Something I should of known but did not. So my options are going to be expanded. Next Friday, a friend and me will be going to the boneyard in Springfield and I am sure he has a harness. I know I need the mini pin connector and the wiper plug by the blower box.
Mini pin and spade type connector.


