
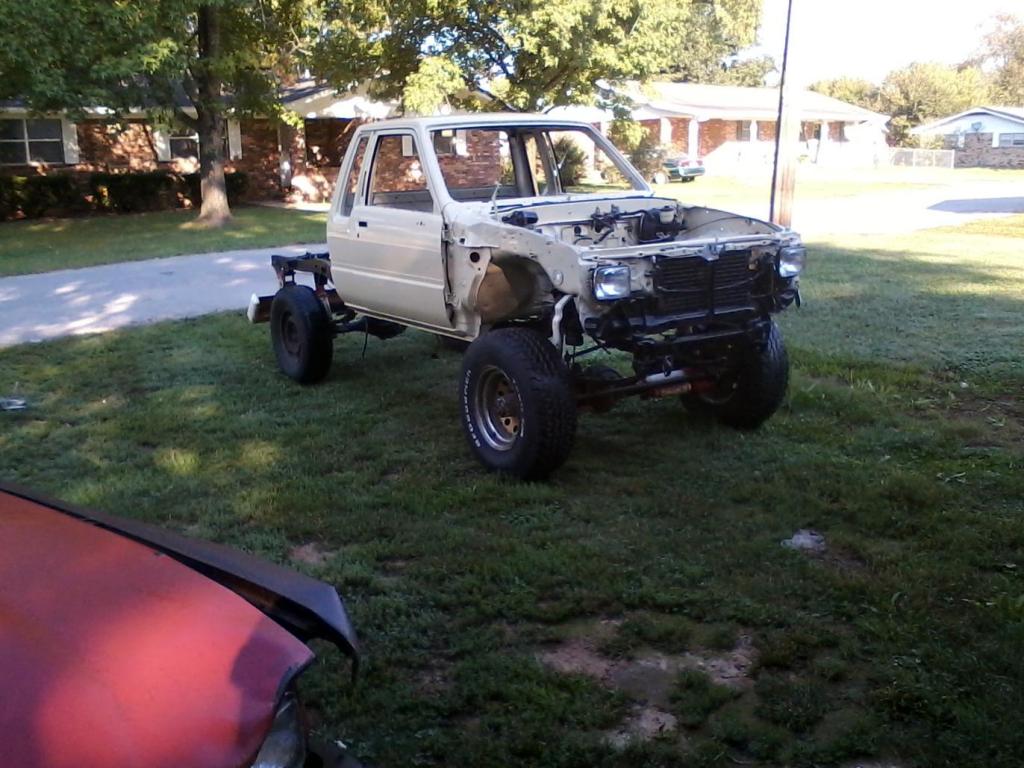
85 Extra Cab Saved from Crusher
 Sep 28, 2014 | 05:13 AM
#481
Nice info Terry, I've never had to remove one, that will come in handy in the future! That ignition cylinder you posted, I wonder if you can get matching key'ed door lock cylinders as well?
Last edited by rustED; Sep 28, 2014 at 05:14 AM.
Sep 30, 2014 | 07:54 AM
#482
Thread Starter
Super Moderator
iTrader: (1)
Joined: Aug 2008
Posts: 11,787
Likes: 28
From: Anderson Missouri
Thanks Ed... I know there are several ignition switches that need replaced and it is and easy and cheap fix. When I do go and order me a few, I will ask if they have complete sets. It would be nice.
Sep 30, 2014 | 08:01 AM
#483
Thread Starter
Super Moderator
iTrader: (1)
Joined: Aug 2008
Posts: 11,787
Likes: 28
From: Anderson Missouri
Truck is kicked out of the shop so I can get the bed painted. Hoping to get it painted in the next couple of days. I got some work to do on it. The bed is in the back yard and I need help getting it on my trailer so I can roll it in the shop. That will be later today so I am getting the shop cleaned back up and doing some work on the truck as well.
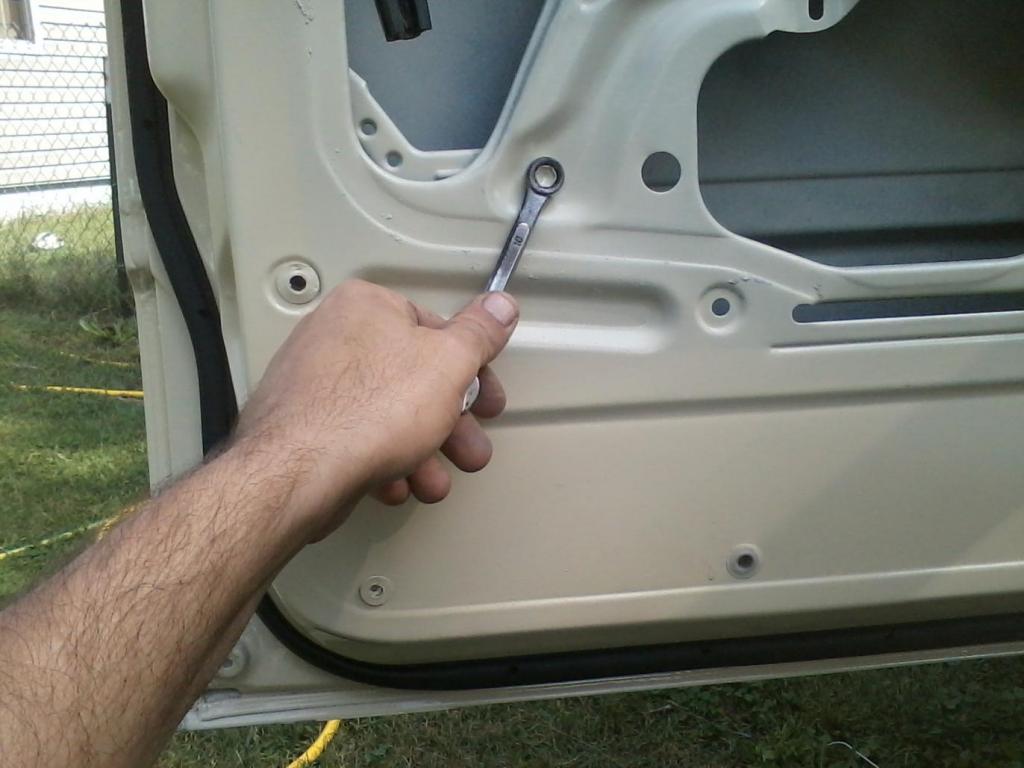
To install the window lift assembly, I loosely installed these bolts first.

Then I dropped the window in diaganolly, making sure the edges are in the tracks. Also roll the window assembly to where you can access this hole for the front bolt.
Then I worked the window and the slider assembly to where I could get this bolt in. After I got all the bolts in. I rolled the window up tight and then tightened all the bolts that hold the window assembly to the door. After that I rolled the window down and tightened the bolts that hold the window to the lift assembly.
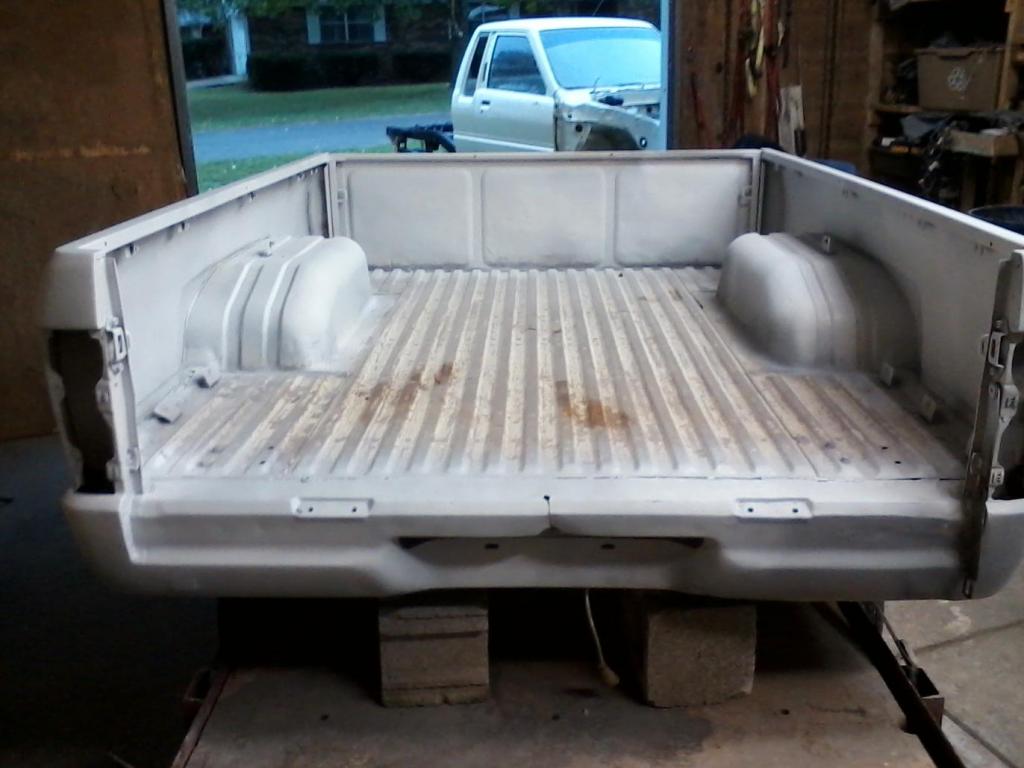
I had the bed stored outside so I spent alot of time getting all of the grime cleaned and sanded back off. When I last worked on the bed, I just did the major damages. Now I am getting down to the finer side. I still need to do alot of work where the tail gate sits, I think I have the passenger side of the bed ready for block sanding and hoping to get it in sealer tomorrow.

I had to replace my door latch as the bar coming from the outside handle down to the mechanisim was broken.
You need to lift the window seal up first.
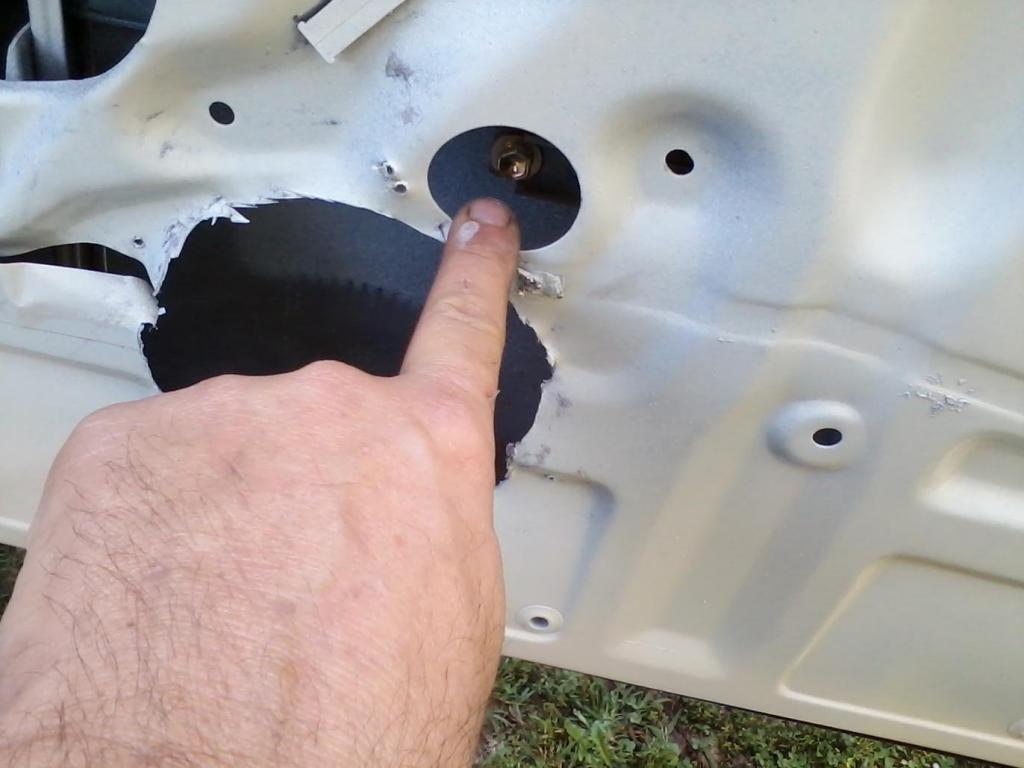
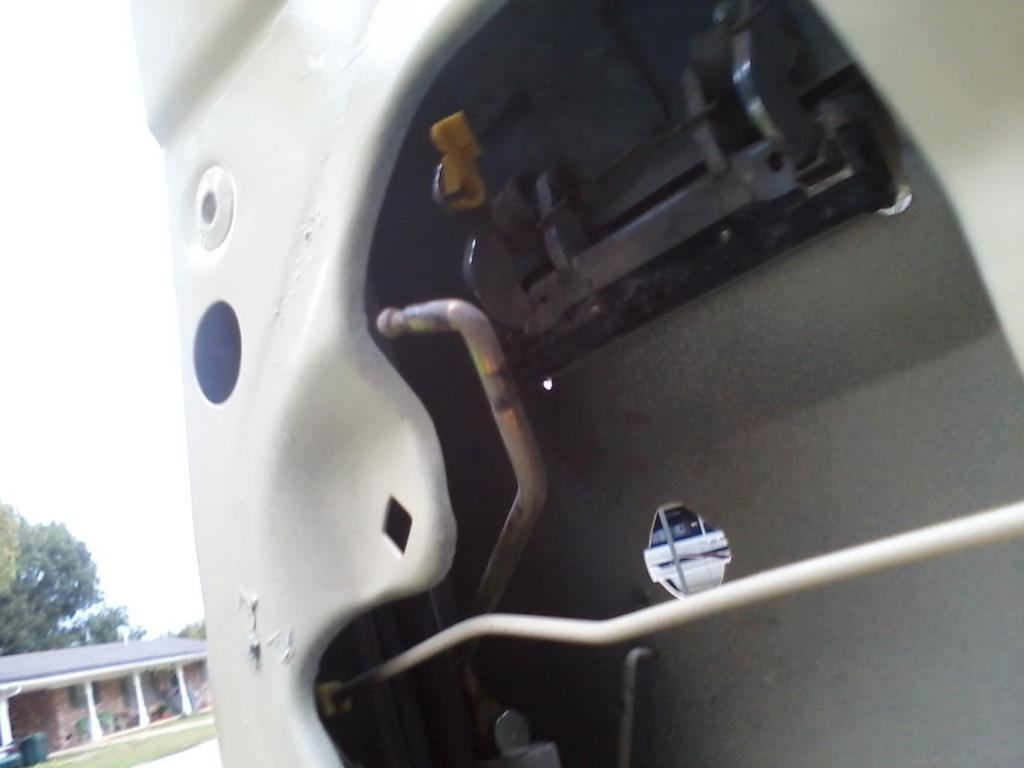
To replace the door latch assembly, you need to first remove the bolt that my thumb is on.

Here is the bracket that helps hold the window seal in.

When you remove the bolt my thumb is on, this bracket will slide down and helps hold the window seal.

Then remove the 3 screws holding the latch assembly. You will need to go and remove the clips that attach different bars to the assembly.
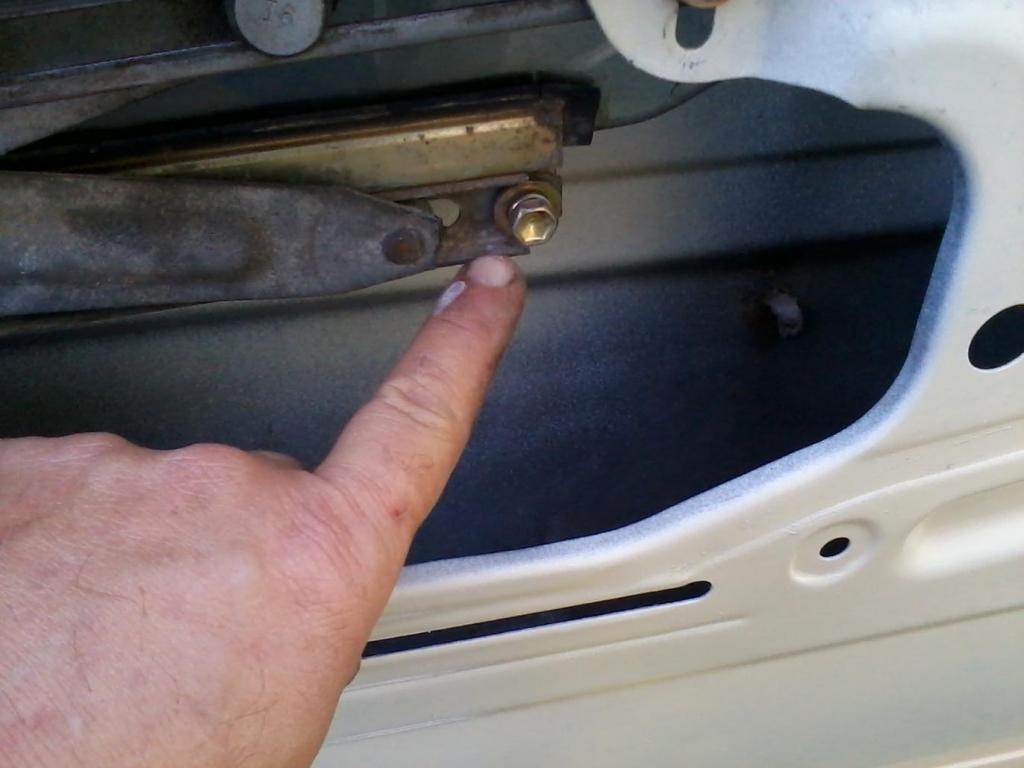
Here is another bolt that holds the door assembly in.
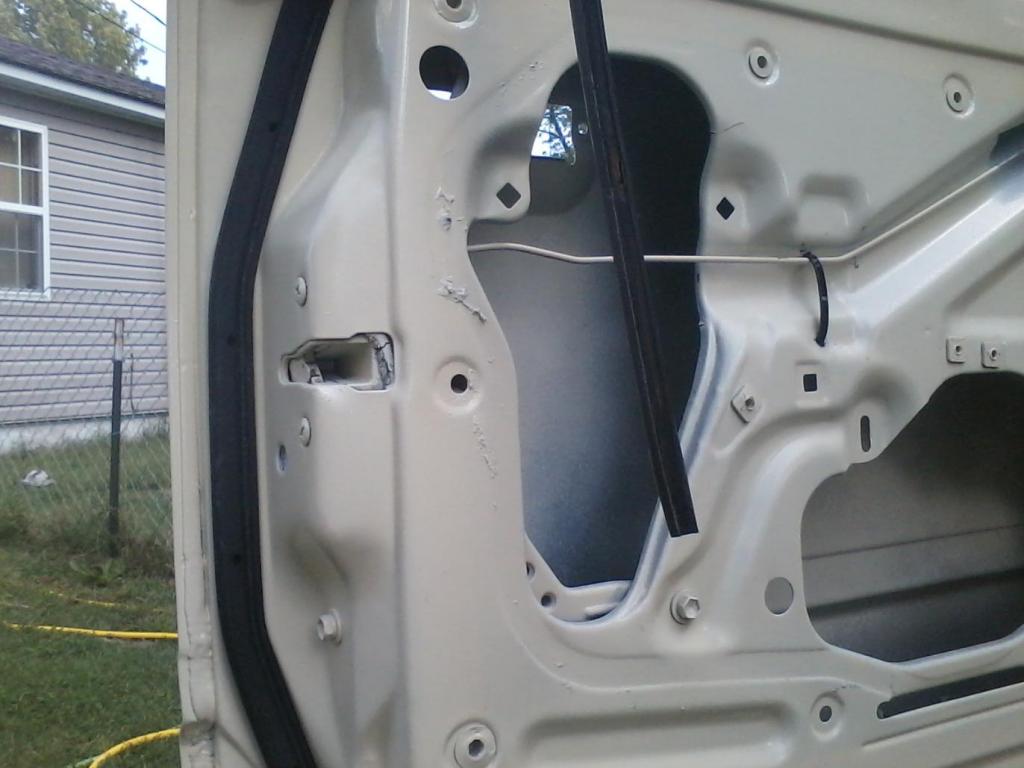
When you get the latch assembly out. You have the option of installing an electric door lock. I am not installing it as I think your main harness in the dash has to be wired for it. I removed the electric motor as I wont be using it.

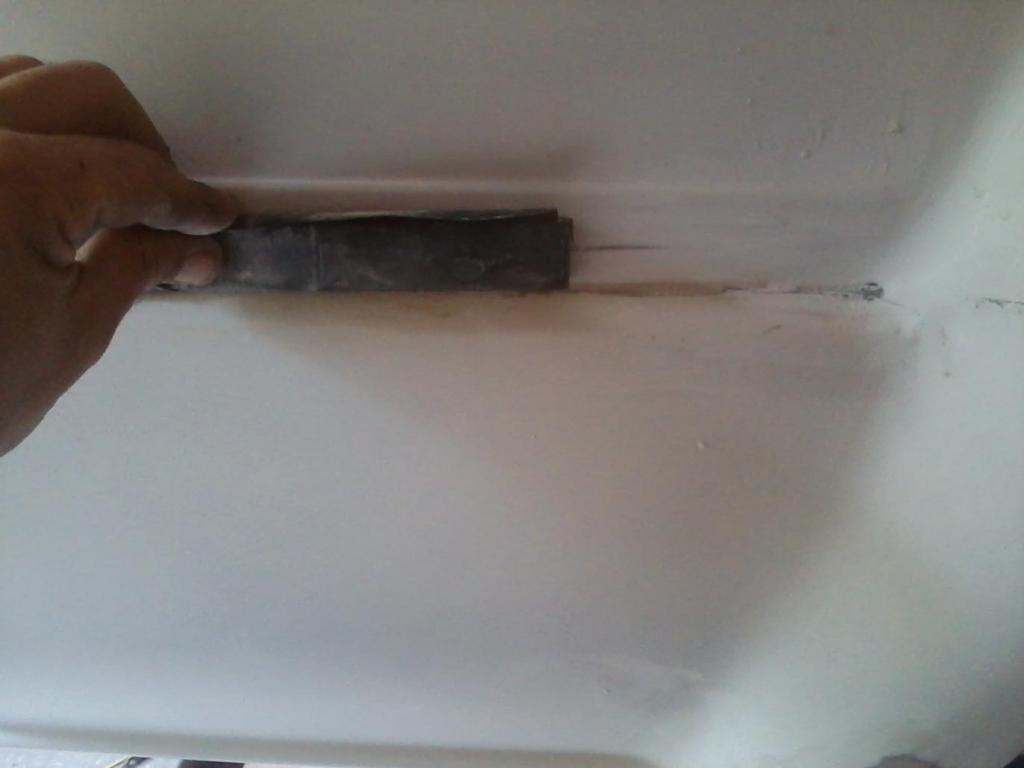
Not really a good picture, but my bar was broken and it is riveted in and it is easier to replace the whole thing.


To install the window lift assembly, I loosely installed these bolts first.

Then I dropped the window in diaganolly, making sure the edges are in the tracks. Also roll the window assembly to where you can access this hole for the front bolt.

Then I worked the window and the slider assembly to where I could get this bolt in. After I got all the bolts in. I rolled the window up tight and then tightened all the bolts that hold the window assembly to the door. After that I rolled the window down and tightened the bolts that hold the window to the lift assembly.

I had the bed stored outside so I spent alot of time getting all of the grime cleaned and sanded back off. When I last worked on the bed, I just did the major damages. Now I am getting down to the finer side. I still need to do alot of work where the tail gate sits, I think I have the passenger side of the bed ready for block sanding and hoping to get it in sealer tomorrow.

I had to replace my door latch as the bar coming from the outside handle down to the mechanisim was broken.
You need to lift the window seal up first.

To replace the door latch assembly, you need to first remove the bolt that my thumb is on.

Here is the bracket that helps hold the window seal in.

When you remove the bolt my thumb is on, this bracket will slide down and helps hold the window seal.

Then remove the 3 screws holding the latch assembly. You will need to go and remove the clips that attach different bars to the assembly.
Here is another bolt that holds the door assembly in.

When you get the latch assembly out. You have the option of installing an electric door lock. I am not installing it as I think your main harness in the dash has to be wired for it. I removed the electric motor as I wont be using it.

Not really a good picture, but my bar was broken and it is riveted in and it is easier to replace the whole thing.

Last edited by Terrys87; May 31, 2015 at 07:49 AM.
Oct 2, 2014 | 02:52 AM
#486
Thread Starter
Super Moderator
iTrader: (1)
Joined: Aug 2008
Posts: 11,787
Likes: 28
From: Anderson Missouri
Hello kornhuskerwizard... I feel like I am the Slow Poke of Missouri this week. I have been busting myrear trying to get things done and it is just going slow. I am having a tough time getting some of the body work done. It is just a few areas, but it just wont do what it is supposed to do. Some how I plan on getting the bed in paint today.
Hello Cyberhorn..That bolt holds that bracket. That bracket is probably laying in the bottom of the door. I don't think there will be any damage caused unless the window seal somehow gets caught. My outside door handle was broken and swapping the whole assembly is about the best way to fix it on mine due to it being pop riveted. It isn't to bad a of a fix if you have to go that route. You will need another top clip for the door handle. All of the other clips will pop up without breaking.
Hello Cyberhorn..That bolt holds that bracket. That bracket is probably laying in the bottom of the door. I don't think there will be any damage caused unless the window seal somehow gets caught. My outside door handle was broken and swapping the whole assembly is about the best way to fix it on mine due to it being pop riveted. It isn't to bad a of a fix if you have to go that route. You will need another top clip for the door handle. All of the other clips will pop up without breaking.
Oct 2, 2014 | 06:50 AM
#487
Thread Starter
Super Moderator
iTrader: (1)
Joined: Aug 2008
Posts: 11,787
Likes: 28
From: Anderson Missouri
I ran out of sealer so am waiting on it to be delivered locally. I got most of the bed sealed and will be doing some touch up on a few areas. It is starting to rain here so I might have to hold off on painting until tomorrow.
When it is starting to sprinkle on you, I do believe that helps you work a little faster. I got the passenger rear side glass, drivers window and the rear back glass in quickkkk.

I also got my door handles in. I just color sanded around them and will have to do the rest of the truck later. Before I was not able to open the door from the outside and had to use the inside handle to open it. With my little zip tie fix to keep the rod in place, it is working great. So am making some accomplishments.
What is a pain in the rear to get out, the door clip, it took less then 10 seconds to install. I just pop the clip in at the Up position and slid the rod in. It wont come out that easy.
 Oct 2, 2014 | 08:11 AM
#488
Nice work Terry, its really coming along. I'd like to be able to completely go through a project like you have someday! Nice work!
Thanks for explaining the door window crank assembly install, I need to do that soon!
Thanks for explaining the door window crank assembly install, I need to do that soon!
Oct 2, 2014 | 11:58 AM
#489
Thread Starter
Super Moderator
iTrader: (1)
Joined: Aug 2008
Posts: 11,787
Likes: 28
From: Anderson Missouri
Your welcome Ed... It isnt anything to be worried about. It is actually pretty easy. Even the latch assembly is not to bad to do as well. Toyota did something right on the door. I am looking forward to getting it on the road. I did recieve two different compliments on the color today when some people were walking by.
Oct 2, 2014 | 12:05 PM
#490
Thread Starter
Super Moderator
iTrader: (1)
Joined: Aug 2008
Posts: 11,787
Likes: 28
From: Anderson Missouri
The drivers side has been giving me a lot of trouble. I think I have it about done but now we are getting rain and the humidity is high.
Here I used a mixing stick and some sand paper to cut the body line in.
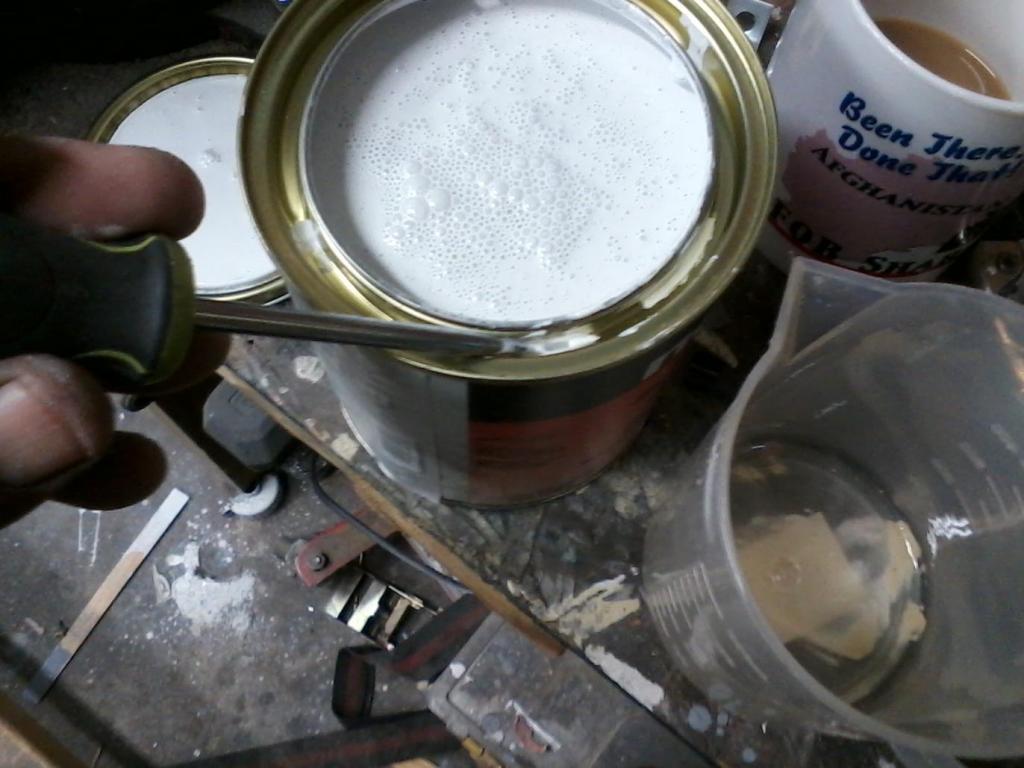
I didnt get it in the picture, but I think I have it listed in my Tools, Tips, and Tricks thread about using masking tape to make a spout for pouring fluids. Also I got another tip from Stacey David, to pop some holes in the container for the fluids to run back in the container. The lid will seal the holes.
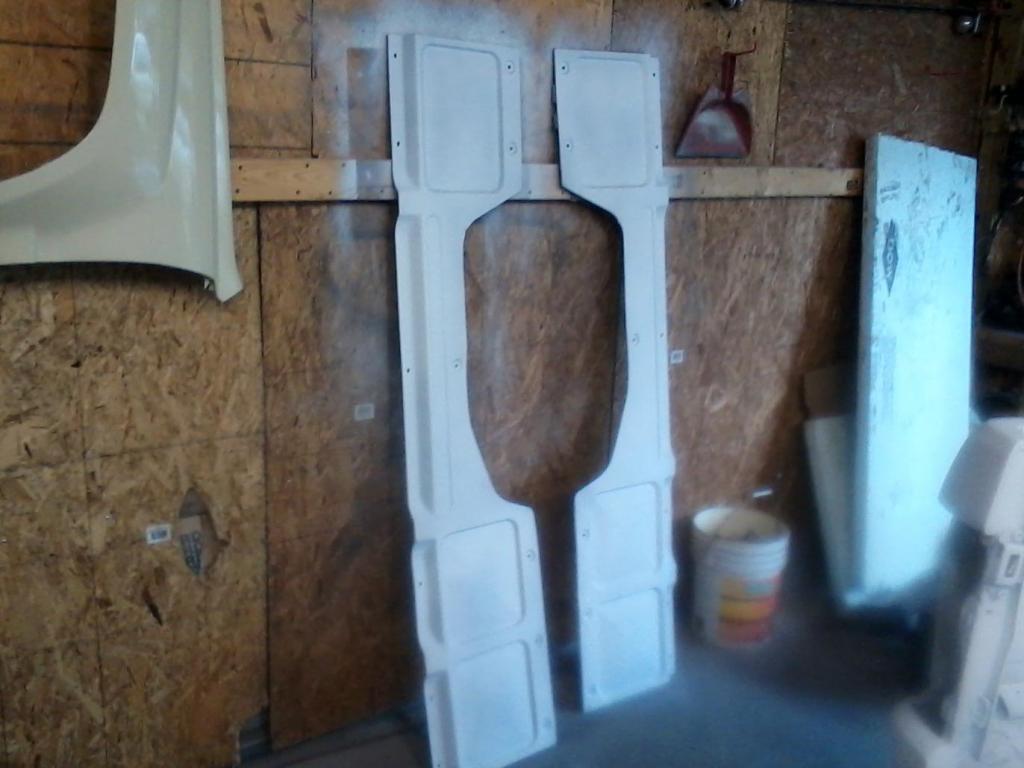
Got the side panels in sealer and the tailgate as well. I trhink I just have to final sand and it should be ready for paint. Just waiting on the humidity. Not sure if I am going to get it painted today or not. It is getting close. May not get the front of the tail gate and the windshield cowl, but I can do them later.
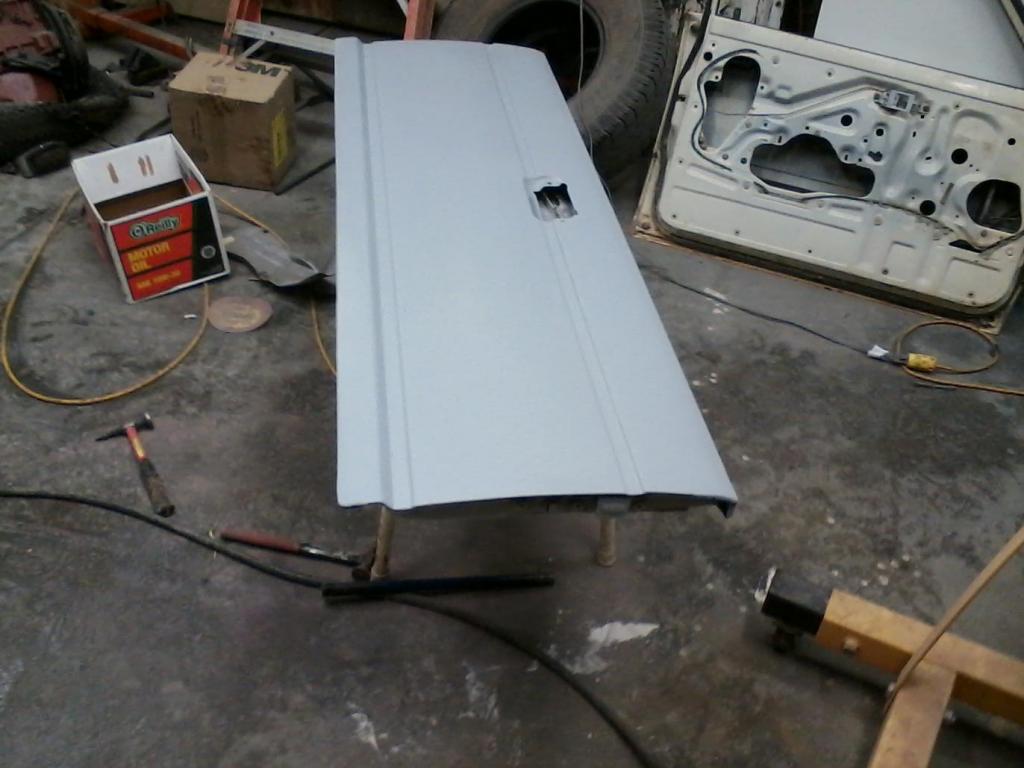
I am getting close on body working supplies. I think I have just enough to finish what I have. I am down to 3 sheets of 180 grit and 3 sheets of 80 grit. I have enough 400 and 600 grit to finish the job. Also got less then a quart of primer. When the rolls are new and the primer can is full it will last forever, but when you get down to the last few sheets, the rolls go quick. Another thing I will have to fix later as I dont have a welder and will be redoing is the center of the bed has a rip in the metal. He can weld it up for me and I will just touch that area up later. The very back end is in bad shape but the tail gate will hide the damage. A roll in bed liner should hide the rest of the flaws.

Should be the last piece with the exception of the windshield cowl and I still need to order me a 4Runner valance. I will take care of them at that same time. We are under Tornado warning and a chancve of hail, grrr... Was looking good earlier today and now this, to late to get the cab in the shop. If it does hail, I have a few rugs to throw on the roof of the cab. Everything else should be okay.

Last edited by Terrys87; Oct 2, 2014 at 12:55 PM.
Oct 2, 2014 | 01:52 PM
#491
Thread Starter
Super Moderator
iTrader: (1)
Joined: Aug 2008
Posts: 11,787
Likes: 28
From: Anderson Missouri
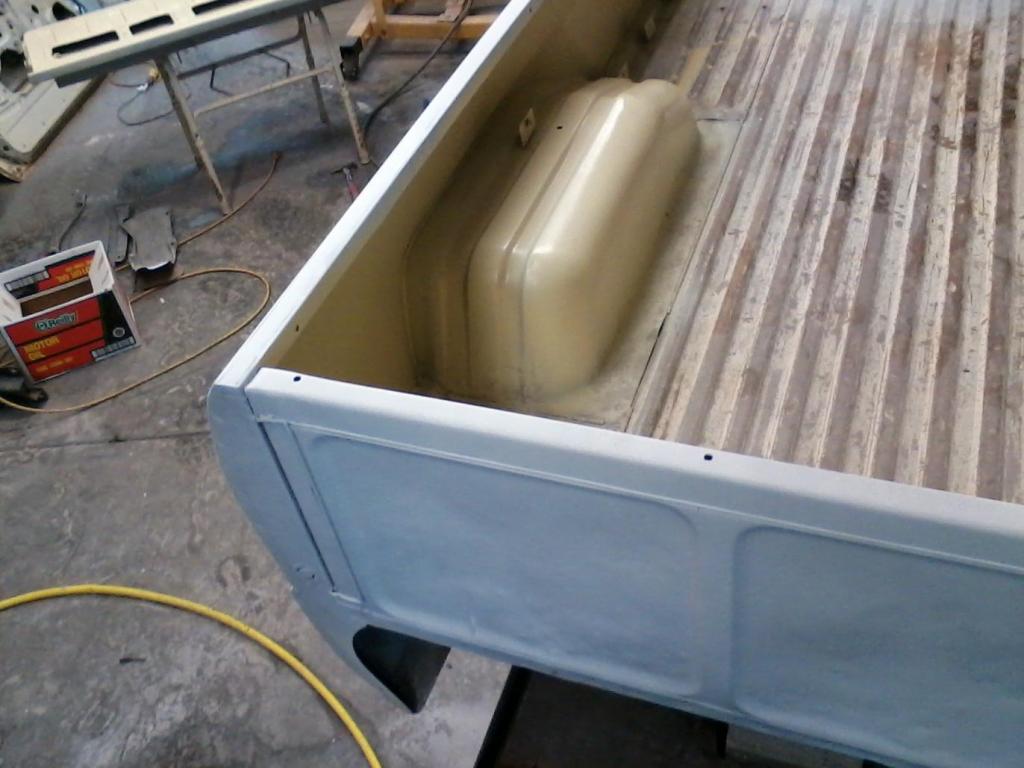
I put a coat of paint on the inside of the bed and the wheel wells. The inside bed panels will be covering them up, but wanted to get some protection on them and to help hide any of the previous color. It may look white in the picture, but the bed rail is white and the inside is tan. Hopefully the contrast shows. This will save me having to mess with the inside of the bed tomorrow.
I did the inside of the tail gate. I will probably bed line it as well. The inside was in alot worse shape but think bed liner will hide the roughness or if I come across a better tail gate later on I will replace it. We missed any tornadoes and hail damage, Whew!! Also I will be on the lookout for the piece that covers the tail gate handle. That will get covered later on as well.


I did the inside of the tail gate. I will probably bed line it as well. The inside was in alot worse shape but think bed liner will hide the roughness or if I come across a better tail gate later on I will replace it. We missed any tornadoes and hail damage, Whew!! Also I will be on the lookout for the piece that covers the tail gate handle. That will get covered later on as well.
 Oct 2, 2014 | 04:30 PM
#492


You are really plugging away as this project!! Great job terry. I love your attention to detail!! Not many people could do the work how you do.
You have more patience than anyone I know.
You have more patience than anyone I know.
Oct 3, 2014 | 07:00 AM
#494
Thread Starter
Super Moderator
iTrader: (1)
Joined: Aug 2008
Posts: 11,787
Likes: 28
From: Anderson Missouri
Thanks Mark...It doesnt look like it but in the past 3 days I have over 30 hours in the shop. A few areas have been giving me some trouble and I have also been trying to get a few other things around the house done while waiting on things to dry. Seems like I should be so much further ahead but I have gotten several things done. Still need to fix a stove burner and get the fuel filter on the 3rd gen runner. Will be glad to get those things done. I will say standing on concrete for several hours, I feel it in my legs and today I am having a tough time getting outside to get things done. It is cool this morning so that is a great excuse. I will be getting busy here in an hour or so.
Hello Cyberhorn.. I am still working on that project. I got distracted from it and actually forgot about it until just recently. I will try to finish it on my lunch break at work tonight if all goes as planned.
Hello Cyberhorn.. I am still working on that project. I got distracted from it and actually forgot about it until just recently. I will try to finish it on my lunch break at work tonight if all goes as planned.
Oct 3, 2014 | 07:11 AM
#495
Thread Starter
Super Moderator
iTrader: (1)
Joined: Aug 2008
Posts: 11,787
Likes: 28
From: Anderson Missouri
We have been taking what would be a months worth of carpayments and putting them into the trucks for maintaince or upgrades. Last month I put a new set of tires, front brakes, O2 Sensor, AFM and some other things I cant recall on Mistys Runner. Will be ordering her a new TPS here later on as it still has a slight Cherry manifold. She hasnt been driving it other then the mile to work every now and then. Have put some into my runner as well and cant recall right off what all it has gotten.
I did get a new set of upper and lower ball joints for the 3rd Gen. I am way over due on ball joints for it and just got them from Sam Stewart at 678-783-2654 South Atlanta Toyota. Being a member of Ihmud will get you a discount and it is recommended to use OEM ball joints. The Upper and lowers are $250 for all 4 of them. I forget which is which but is 90 for one pair and 35 for the other pair.
Here is the part numbers if some one needs them
Upper Ball Joints 43310-39015
Lower Ball joints have two different part numbers and not sure which one is left or right but here they are.
43330-39585
43340-39465

 Oct 3, 2014 | 07:34 PM
#498
Thread Starter
Super Moderator
iTrader: (1)
Joined: Aug 2008
Posts: 11,787
Likes: 28
From: Anderson Missouri
Thanks 775Toy... I have been putting a lot of work into it and hope it turns out great. will be trying to take care of several issues along the way. I didnt get to paint the bed today as we had a cold spell to come thru. It will be Suday or Monday before I paint now. It is cold. Supposed to get into the high 30s tonight. After the warm weather we have had, I will want to hibernate.
Oct 4, 2014 | 01:10 AM
#499
Thread Starter
Super Moderator
iTrader: (1)
Joined: Aug 2008
Posts: 11,787
Likes: 28
From: Anderson Missouri
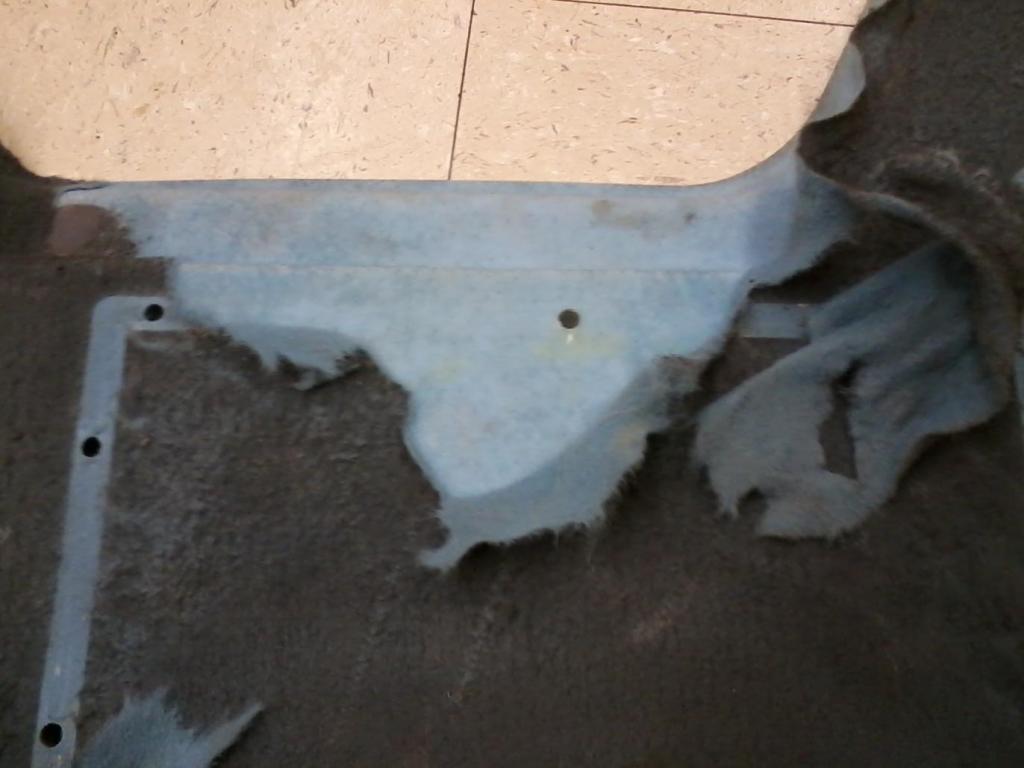
My back panel is looking ratty. I tried to use some interior paint on it and it did not help it. I plan on using some spray adhesive to the back panel and will see if I can find some material at Hobby Lobby, Joannes Fabric or some place like that to recover it.
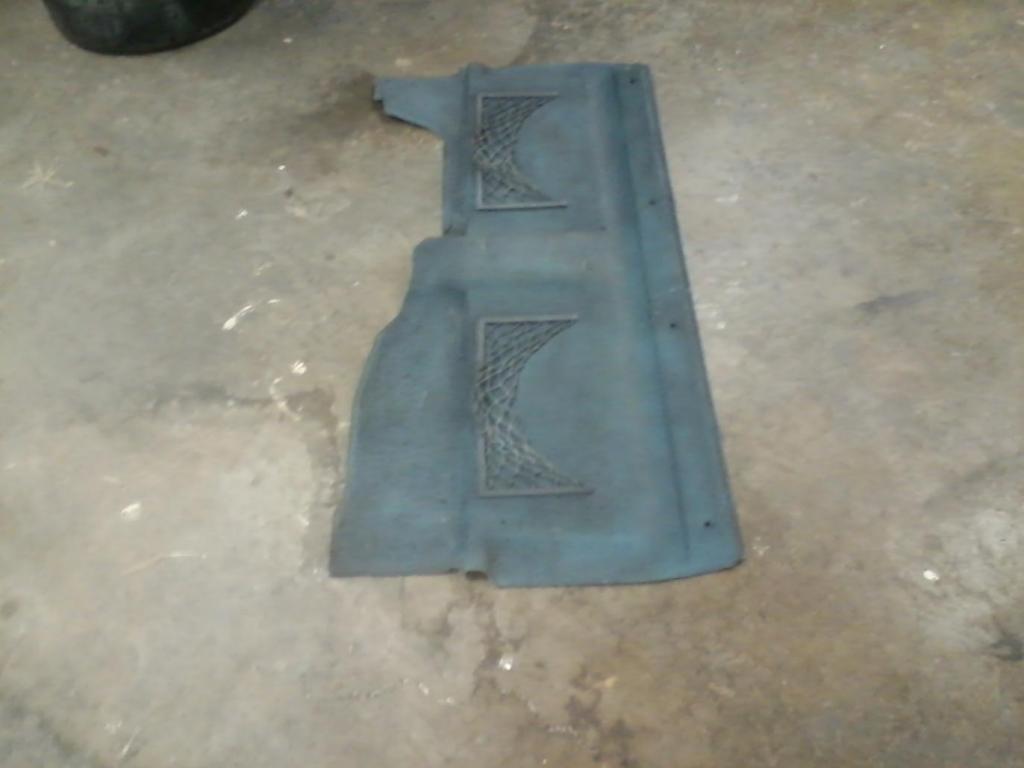
These little studs with the metal circle clips are difficult to come off. I tried to save them but the plastic studs broke off on me on a few of them. I will use some decorative screws from the front or some small sheet metal screws from the back to re-install the net pockets at a later time.

I used a razor blade to get under the clip and then slid a flat blade screw driver under the razor. I eventually wound up using a pair of pliers to get the clips off as the plastic studs broke on a few of them.

Here you can see where the bungee cord is so stretched that the net pocket just sags.
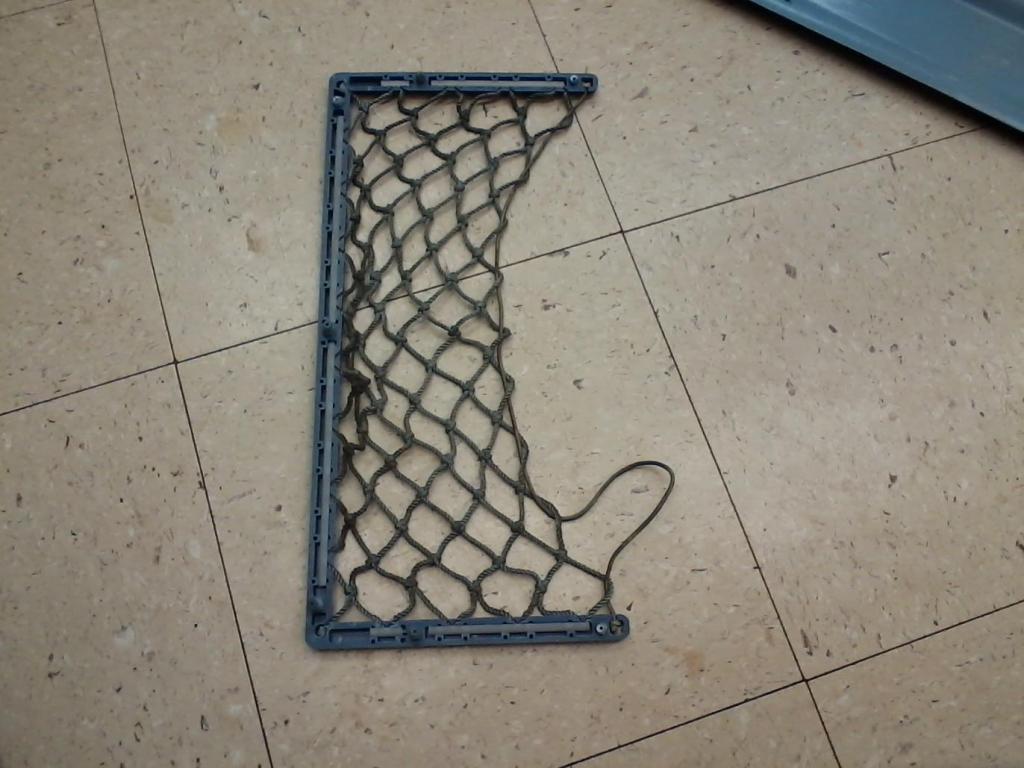
I eventually will replace the bungee cord with new cord as this one is stretched and will not tighten up at all. Here is how to replace it.

Peeling the old fabric off is slow going. Before I put the panel back in the truck, I am going to Peel and Seal the cab and doors. Hopefully it wont be to much longer until I can start doing the interior.

Last edited by Terrys87; Aug 16, 2015 at 09:43 AM.
Oct 4, 2014 | 08:00 AM
#500
What kind of fabric are you going to put back on the panel? Or are you going to just paint it? I think either way would look good.
I think I might have a back panel from the reg cab parts truck at the school. I can stop there today as take a look if you want.
I think I might have a back panel from the reg cab parts truck at the school. I can stop there today as take a look if you want.


