
Terrys87 83 Build Restore
 Dec 19, 2011 | 04:50 AM
#241
Thread Starter
Super Moderator
iTrader: (1)
Joined: Aug 2008
Posts: 11,787
Likes: 28
From: Anderson Missouri
I finally got the cab painted. Really happy how it turned out. Still have to get the bed painted.
Really want to Thank Jason,DirtDobber and Skypilot. Painting takes patience and glad you guys gave it your best shot. Thanks again. Really appreciated it.
I will update this post later, but to give a look at what was done and how it turned out. The picture doesnt do it justice.

Really want to Thank Jason,DirtDobber and Skypilot. Painting takes patience and glad you guys gave it your best shot. Thanks again. Really appreciated it.
I will update this post later, but to give a look at what was done and how it turned out. The picture doesnt do it justice.
Dec 20, 2011 | 02:59 AM
#244
Thread Starter
Super Moderator
iTrader: (1)
Joined: Aug 2008
Posts: 11,787
Likes: 28
From: Anderson Missouri
Thanks guys.. This has been one of the most frustrating paintings I have done, but in some ways the most rewarding. I have learned a thing or two on this one.
First off, If in doubt about temperture, dont even mess with spraying anything. Second one is I had always heard of Sealer. The guy that taught me didnt believe in it and I have even seen some TV shows on painting and some were for it and others against it.
This other guy that helped me get this figured out really turned me around on Sealer. I always thought it was a finer grade of primer. It is actually alot tougher and somewhat feels like hard plastic to the touch.
It will all be one color in when the Sealer is on with no shadows or different shades of primer. Really does great on hiding sanding scratches and smoe other small imperfections.
The Sealer I used came in 2 parts. The guy provided it had spilled all ove the can so I am not able to get the brand name. It also came in 2 parts. The Sealer and an activator. He says if you have to use activator is a better brand of Sealer. I can agree with that.
You spray it on in one coat and if done right has a wet look to it until it is dry and then will be shiney. It takes 20 minutes til you can paint it. We did go back and wet sand it to knock off the gloss and with 2 of us on the cab, I dont think it took more then 20 minutes for the both of us to have the whole cab ready for paint. It was just enought to rough it up.
If you do get a run in the Sealer, you have to wet sand it. Dry sanding wont work. I would not have gotten any runs in the Sealer except the nut that holds my trigger on the primer gun came loose.
I was very impressed with this stuff and think it helped my results 10 times better then what it would of been.
Hoping tonite we get the bed painted. This has been holding me up on my truck. After this truck is done, you should see my build speed up quite a bit. I am ready to get started on mine.
They are to put my garage up today. We are getting alot of rain, so am hoping the weather gives them a break and get my garage done today.
I was really hoping to have my truck running before the new year so as I could say I had 2 different projects running in one year. Just dont see it happening
Dec 20, 2011 | 04:26 AM
#245
Registered User
Joined: Aug 2011
Posts: 654
Likes: 2
From: Swamp east MO
Good luck on getting the shop up today if its raining there like it is here I wouldnt want to be putting it up.
Glad you figured out the paint it had me stumped also, as for the sealer I have never used a all sealer I have always used a two part sealer primer 60 bucks from NAPA, you know it might be the same thing because it kinda looks like a plastic coating when applied...
cant wait till you get started on yours lots of good info.....
Dec 20, 2011 | 11:50 AM
#247
Registered User
Joined: Dec 2011
Posts: 43
Likes: 0
don't know how far you are at this point but i suggest if you have access to random aluminum pieces , scraps,, put them under the cab whre it mounts up to support a bigger section of floor, its easy to cut to shape under there, then you won't tear the floor under flex as easy and less future problems, i sandwiched my floor top and bottom and never had a problem since, it may not look the nicest but nothing carpet cannot hide , weld pieces by the fuel tank too for reinforcement and oil the heck out of the isides of the frame, another place that is good to spray oil in too is insdie the rocker panels even if you have to drill a hole or 2 in it , it REALLY pays off in the long haul
 Dec 20, 2011 | 11:24 PM
#250
Thread Starter
Super Moderator
iTrader: (1)
Joined: Aug 2008
Posts: 11,787
Likes: 28
From: Anderson Missouri
Thanks Chef.. I was worried about how it was going to turn out and am actually proud how it looks. Better then I could of hoped for.
Muddy chevota..welcome to my build. I agree with you on the floor and rockers. I also spend alot of time getting inside of my frame clean. I have put drain holes in the rockers before. Then hit it with a sprayer and see all kinds of dirt come out.
Hello dirtdobber...I sent another PM, hopefully it will go thru this time. Call when you get a chance. I have a dentist appointment at 10:30, but other then that anytime should be good.
Hello Tinman..I am a big believer in sealer now. I will look into the epoxy. I had never seen sealer used before and from here on out I will never go without it.
Dec 20, 2011 | 11:55 PM
#251
Thread Starter
Super Moderator
iTrader: (1)
Joined: Aug 2008
Posts: 11,787
Likes: 28
From: Anderson Missouri
The shop builders were to be at the house before noon. I had to leave and paint my friends truck at 5pm and they showed up at 7pm. It was to late to start the build but they left the materials and will be there at 7 in the morning.
I dont get home from work til 9 so will miss out on some of the build. I have to be at the dentist office at 10:30 and wont be able to see the complete project from start to finish.
I had a tooth pulled about a month ago and thought everything was fine, but today it has an infection so had to set an appointment to get it looked at. I am thinking it is a dry socket.
I left the house and got started on getting my friends truck painted. It took a little longer then I had expected, but am really pleased with how it has turned out. I can say this has been one of the more stressful paints I have done as I was going for perfection. I have a few flaws in the paint and body work, but overall it has turned out better then I could of hoped for. Think he will be quite pleased how it turns out. It will be a few days before we get it back together and buffed out and will get some pics of it completed. I think this truck will look great. It RUNS great.
I get to work over the Christmas season so the wife and kids will be at the grandparents for most of the time as they have alot of time off. They will be home for Christmas but will be gone for quite awhile. That means I will have alot of time to work on my truck.
Getting my friends truck painted has been my biggest concern but now it is done, I really plan on hitting it hard and making some serious progress. After seeing how my friends truck has turned out I really want to make mine into something as nice as his.
My build thread has came to a stop for awhile, but that is getting ready to change. I see the potential in mine and I enjoy the challenge. Also want to show that a rough truck can be built reasonably cheap staying stock and doing it yourself.
Bed finished
Dec 21, 2011 | 10:08 PM
#253
Had dry socket after an Army butcher, I mean dentist pulled a tooth..
Not fun from what I remember...
Truck bed came out nice, curious to see what it looks like with bigger tires under it..
Not fun from what I remember...
Truck bed came out nice, curious to see what it looks like with bigger tires under it..
Dec 22, 2011 | 05:42 AM
#254
Thread Starter
Super Moderator
iTrader: (1)
Joined: Aug 2008
Posts: 11,787
Likes: 28
From: Anderson Missouri
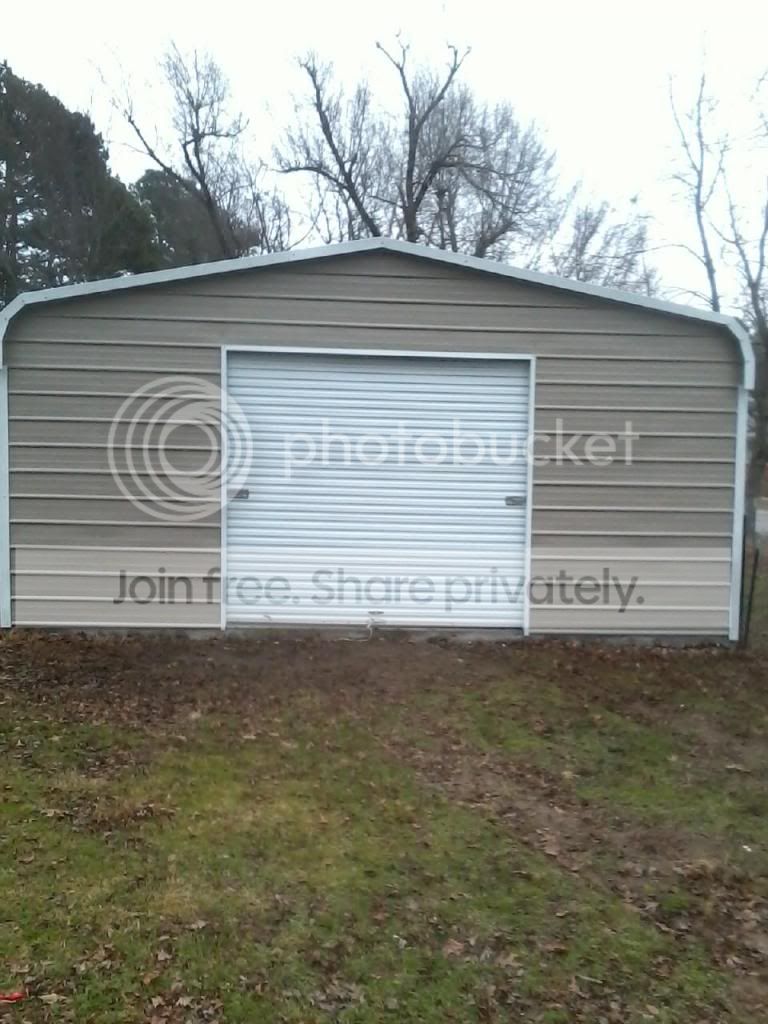
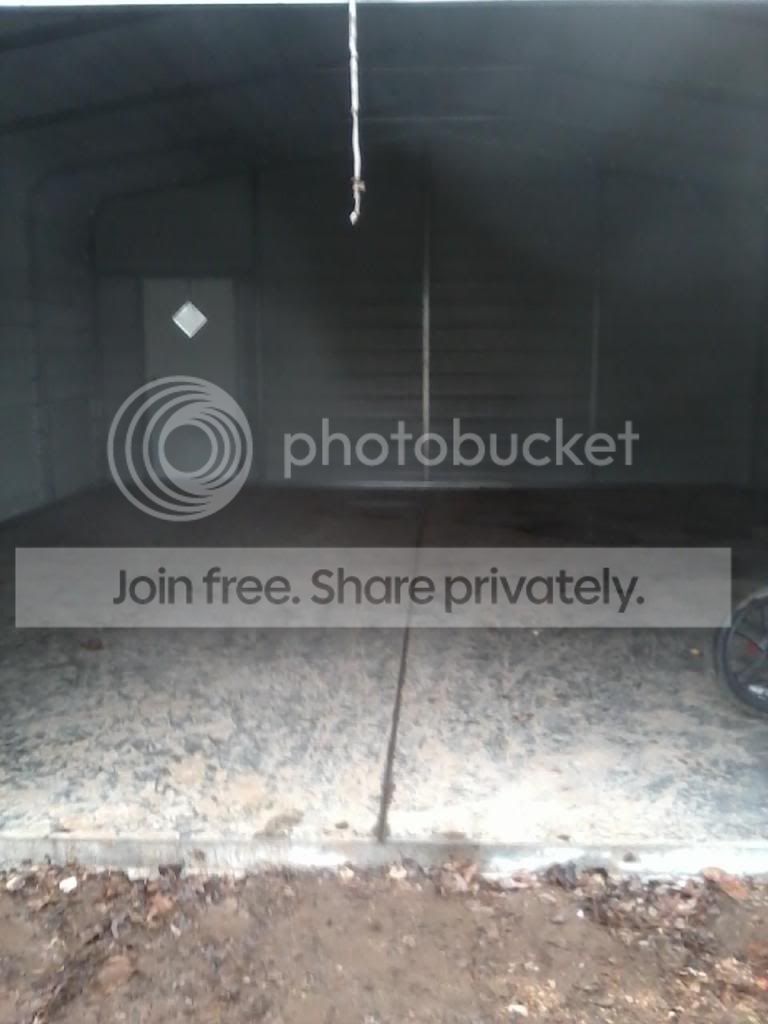
Finally got the shop up. Been waiting for a long time for one. Wanting to gt the truck in there before the weather gets bad, but we got some rain yesterday and have one big mud pit in front of it.
Its up!!!
Inside. Needs cleaned up.
Its up!!!
Inside. Needs cleaned up.
Last edited by Terrys87; Sep 25, 2016 at 01:18 AM.
Dec 22, 2011 | 05:46 AM
#255
Thread Starter
Super Moderator
iTrader: (1)
Joined: Aug 2008
Posts: 11,787
Likes: 28
From: Anderson Missouri
Hello 1986.. I got done. Was wondering if it ever was going to happen.Yahooo!!
Hello ocdropzone..Thats what mine turned out to be was a dry socket. I had it pulled on October 26th and it took this long to cause problems. I thought it was healing well. When they got done with me yesterday I spent the rest of the time in bed. Feel great now.
I will get a picture of it with bigger tires and put together. I think this truck is going to look great. Got me excited about getting mine done.


