
83Toyota88's 1983 Pickup Build-Up Thread
 Feb 17, 2014 | 09:27 AM
#482
Registered User
Joined: Oct 2012
Posts: 34
Likes: 0
From: Tullahoma,TN
My plan was to cut it in half and rivet a piece of metal inside with some heavy rivets and then either fiberglass or bondo over the outside.I got the topper for free so its worth a shot I guess.
Feb 18, 2014 | 05:30 AM
#484


no, especially since it's not structural
basically:
-remove the windows
-sand the inside of the shell, about 1-2 inches around the opening
-(sand it well, tapering to about 1/2 the original thickness)
-clamp a flat surface (covered in tin foil) on the outside of the opening. this will keep the outside nice and flat.
-epoxy and fiberglass the hole, overlapping where you sanded
-keep pressure on both sides of the patch, wiping away excess epoxy
-once dry, sand away sharp edges and smooth with body filler
Feb 18, 2014 | 03:08 PM
#485
Thread Starter
Registered User
iTrader: (1)
Joined: Apr 2011
Posts: 1,220
Likes: 4
From: Memphis, TN
no, especially since it's not structural
basically:
-remove the windows
-sand the inside of the shell, about 1-2 inches around the opening
-(sand it well, tapering to about 1/2 the original thickness)
-clamp a flat surface (covered in tin foil) on the outside of the opening. this will keep the outside nice and flat.
-epoxy and fiberglass the hole, overlapping where you sanded
-keep pressure on both sides of the patch, wiping away excess epoxy
-once dry, sand away sharp edges and smooth with body filler
basically:
-remove the windows
-sand the inside of the shell, about 1-2 inches around the opening
-(sand it well, tapering to about 1/2 the original thickness)
-clamp a flat surface (covered in tin foil) on the outside of the opening. this will keep the outside nice and flat.
-epoxy and fiberglass the hole, overlapping where you sanded
-keep pressure on both sides of the patch, wiping away excess epoxy
-once dry, sand away sharp edges and smooth with body filler
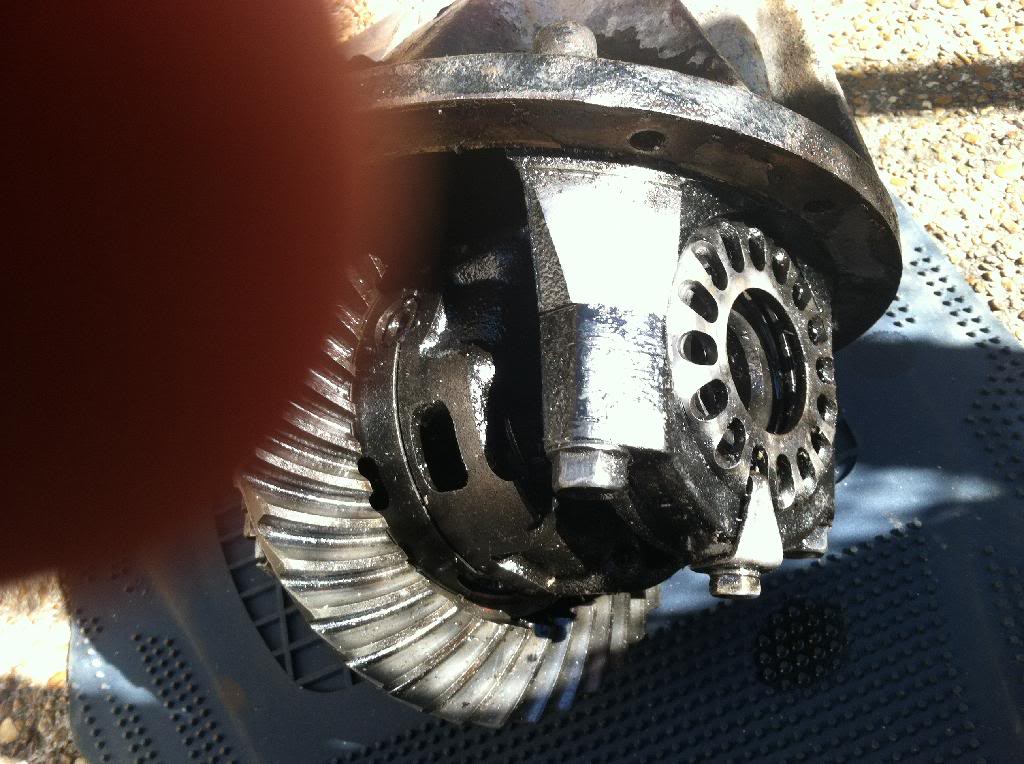
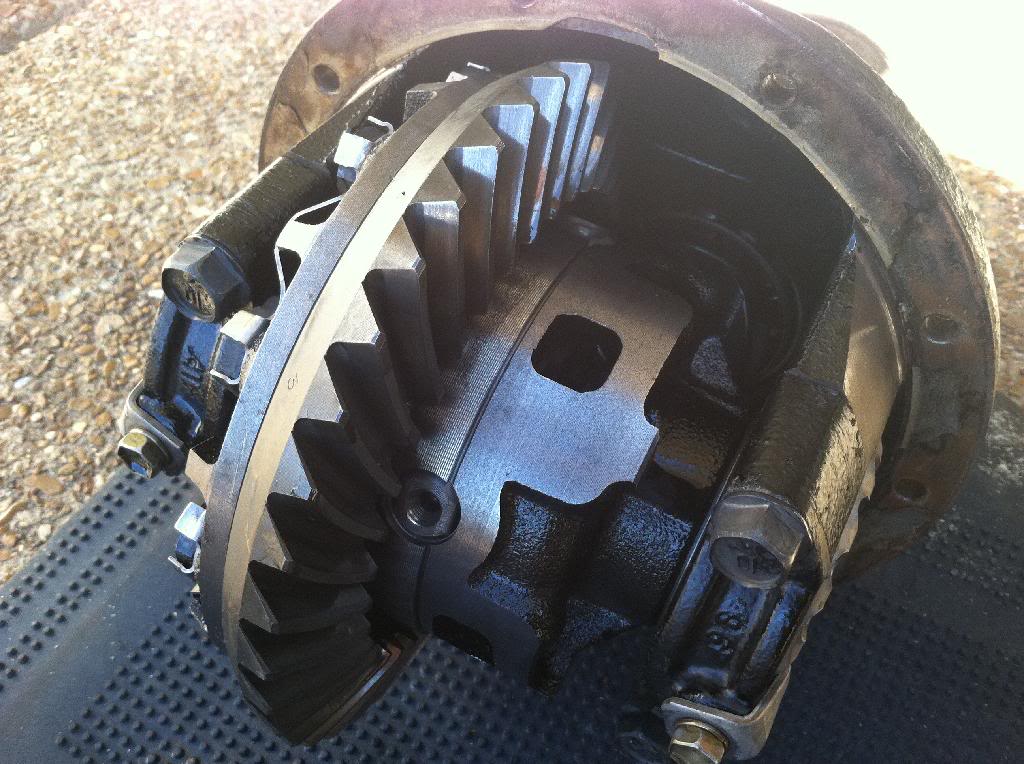
Also got my 4.88 3rd member in today and it looks good. Lots of dirt particles to clean out. Gonna try and get pictures soon.
Feb 18, 2014 | 06:53 PM
#486
Thread Starter
Registered User
iTrader: (1)
Joined: Apr 2011
Posts: 1,220
Likes: 4
From: Memphis, TN
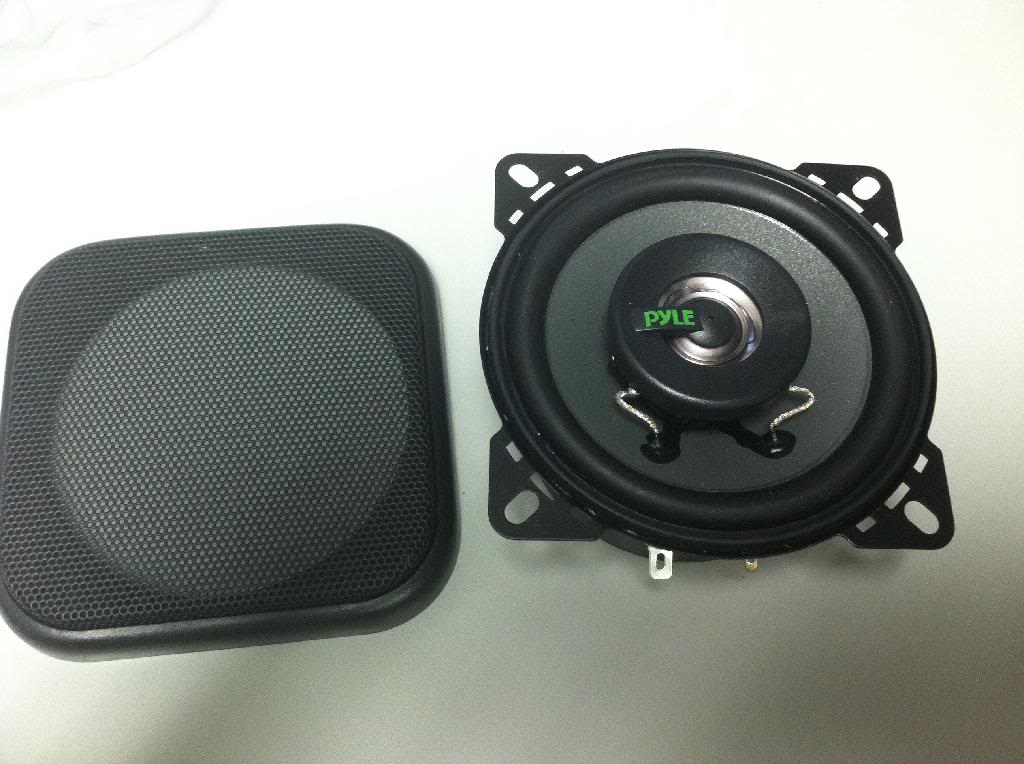
I bought these tonight:
Tired of my drivers side speaker barely working. I like me some country radio while I'm cruising in the truck. I mainly got these because they come with new speaker grilles that are plain ones like the factory had. I will use them in case the new speaker holes don't line up with the factory speaker grille holes.
Tired of my drivers side speaker barely working. I like me some country radio while I'm cruising in the truck. I mainly got these because they come with new speaker grilles that are plain ones like the factory had. I will use them in case the new speaker holes don't line up with the factory speaker grille holes.
Feb 19, 2014 | 03:06 AM
#487
Registered User
Joined: Oct 2012
Posts: 34
Likes: 0
From: Tullahoma,TN
my plan was to rivet a piece of metal inside then fiberglass it and then drill out the rivets and patch the holes. might not be the best way, but I'm going to give it a try. I've never worked with fiberglass before tho, but my dad is good with it so hopefully I can learn from him. its all a learning experience lol
Feb 19, 2014 | 04:54 AM
#488
my plan was to rivet a piece of metal inside then fiberglass it and then drill out the rivets and patch the holes. might not be the best way, but I'm going to give it a try. I've never worked with fiberglass before tho, but my dad is good with it so hopefully I can learn from him. its all a learning experience lol
Feb 22, 2014 | 04:37 PM
#489
Thread Starter
Registered User
iTrader: (1)
Joined: Apr 2011
Posts: 1,220
Likes: 4
From: Memphis, TN
Installed my the new door speakers today. They sound good, I ended up using the stock speaker covers for now. I couldn't figure out how to use the new covers with these weird clips they came with and after I finished putting them on, I realized how I was supposed to do it. Problem is they use screws and factory covers use bolts to mount the speakers to the door panel. The speakers don't actually screw into the door frame itself. So I'm going to go buy some bolts to replace the screws with and put the new covers on hopefully tomorrow. If anyone is interested in the stock speaker covers PM me or they are gonna end up on eBay.
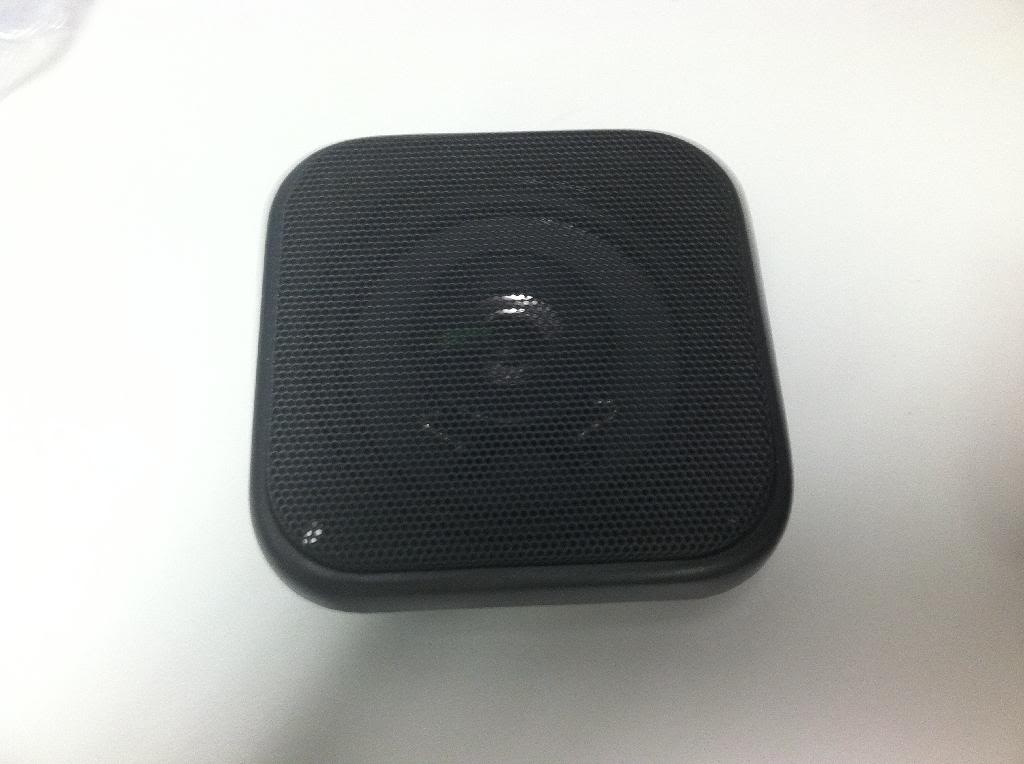
I also have this if anyone is interested. I'm not going to use it. PM me if interested or its going on eBay too.

Also cleaned the new 3rd member with brake cleaner today. Looks pretty good to me.

Last thing I did today was put the winch controller back on. Still have to hook the main leads up to my battery. I'm going to try and go tomorrow morning to Auto-Slut and see if I can find a battery with top and side/front terminals. I want the top for the normal connections and the front/side for the winch leads. The front/side terminals are usually bolt terminals and not the studs, so that's helpful to hook the winch up with.
This is my side project right now.
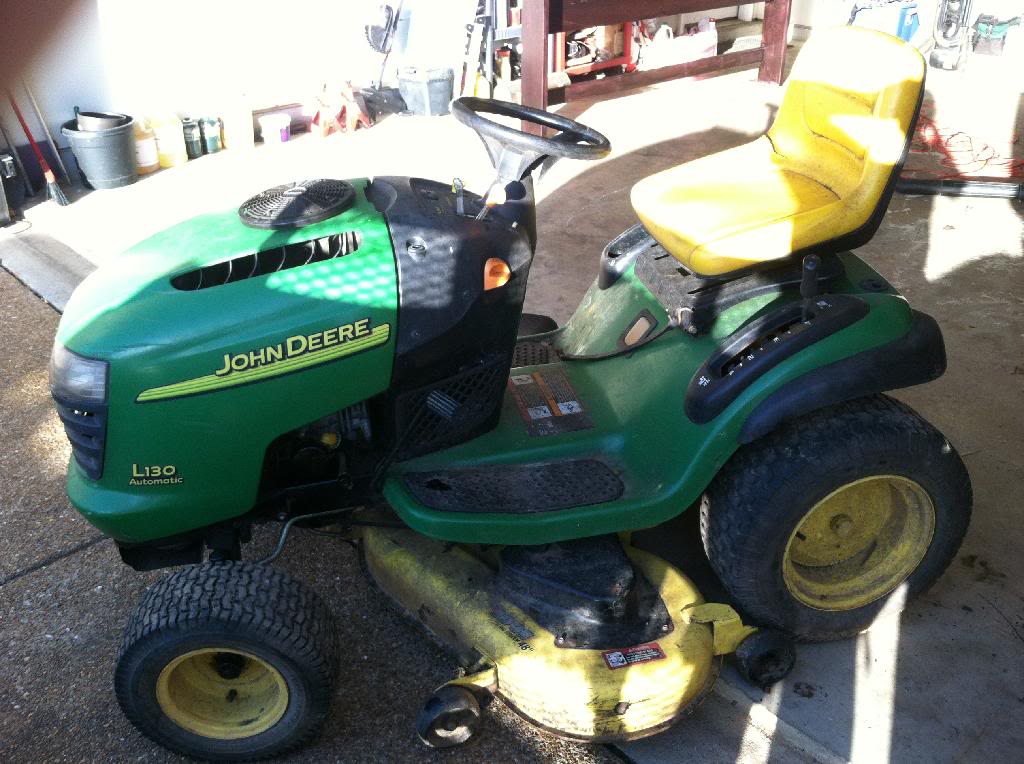
This was also my grandfathers, same as my truck. I bought a tune up kit and did all of that today. Got a few cut wires to figure where they go and needs a new battery and a serious bath. Probably gonna put some sea foam in it.


I also have this if anyone is interested. I'm not going to use it. PM me if interested or its going on eBay too.


Also cleaned the new 3rd member with brake cleaner today. Looks pretty good to me.


Last thing I did today was put the winch controller back on. Still have to hook the main leads up to my battery. I'm going to try and go tomorrow morning to Auto-Slut and see if I can find a battery with top and side/front terminals. I want the top for the normal connections and the front/side for the winch leads. The front/side terminals are usually bolt terminals and not the studs, so that's helpful to hook the winch up with.
This is my side project right now.

This was also my grandfathers, same as my truck. I bought a tune up kit and did all of that today. Got a few cut wires to figure where they go and needs a new battery and a serious bath. Probably gonna put some sea foam in it.
Feb 23, 2014 | 04:29 PM
#490

Registered User
Joined: Nov 2011
Posts: 48
Likes: 0
From: Auckland
So funny seeing this picture. My topper is held on the exact same way after picking up one last weekend. Mine was 55 bucks so close to being free. I will take a pic when i get home.
How do you intend in attaching it to the bed fulltime ?

How do you intend in attaching it to the bed fulltime ?
Feb 23, 2014 | 04:33 PM
#491
Thread Starter
Registered User
iTrader: (1)
Joined: Apr 2011
Posts: 1,220
Likes: 4
From: Memphis, TN
Well the one my truck used to have was bolted down through the lip of the truck bed. This one was the same way. I don't see any other way to do it. We can't use modern clamps for toppers since the bed lip is reversed from modern beds.
I would love to see some pictures of your topper. Especially the rear window. Do you have a build thread? If not post the pics here.
I would love to see some pictures of your topper. Especially the rear window. Do you have a build thread? If not post the pics here.
Feb 23, 2014 | 04:37 PM
#492
Registered User
Joined: Nov 2011
Posts: 48
Likes: 0
From: Auckland
Well the one my truck used to have was bolted down through the lip of the truck bed. This one was the same way. I don't see any other way to do it. We can't use modern clamps for toppers since the bed lip is reversed from modern beds.
I would love to see some pictures of your topper. Especially the rear window. Do you have a build thread? If not post the pics here.
I would love to see some pictures of your topper. Especially the rear window. Do you have a build thread? If not post the pics here.
I will put up a build thread this week. I have not had the toyota for long and so far i spent most of my time getting it registered as i bought it out of state.
Will post a link when i set it up. Will keep an eye on your thread .
Mar 9, 2014 | 04:32 PM
#495
Thread Starter
Registered User
iTrader: (1)
Joined: Apr 2011
Posts: 1,220
Likes: 4
From: Memphis, TN
Dug into rear brakes today to get ready to do the gear swap. Looks like my parking brake might have been dragging a little. I measured the inside thickness of the drum and it's fine so I don't have to buy new ones. Now I have to figure out how to slide the axle shafts out to be able to pull the chunk out. 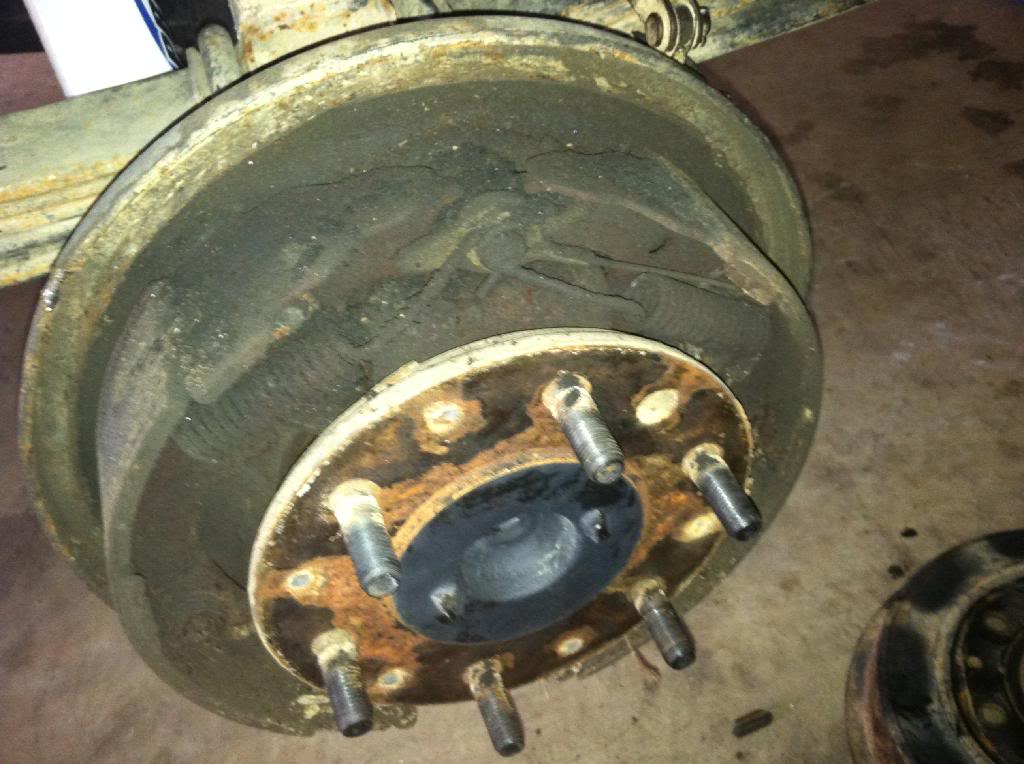

Last edited by 83Toyota88; Mar 9, 2014 at 07:42 PM.
Mar 9, 2014 | 07:44 PM
#496
Thread Starter
Registered User
iTrader: (1)
Joined: Apr 2011
Posts: 1,220
Likes: 4
From: Memphis, TN
Ordered new front rotors and loaded calipers from Rock Auto using my monthly 5% discount email. Also ordered the small squishy breather things and a new 22R sticker from low range off-road.
Mar 10, 2014 | 11:16 AM
#497
Dug into rear brakes today to get ready to do the gear swap. Looks like my parking brake might have been dragging a little. I measured the inside thickness of the drum and it's fine so I don't have to buy new ones. Now I have to figure out how to slide the axle shafts out to be able to pull the chunk out.
Mar 10, 2014 | 12:02 PM
#498
Thread Starter
Registered User
iTrader: (1)
Joined: Apr 2011
Posts: 1,220
Likes: 4
From: Memphis, TN
Axle shafts slide out really easily. There are 4 bolts on axle housing (right behind the drum back plate) that attaches the bearing cup to the axle housing. Unbolt those bolts and the axle shaft will slide right out with a good tug. Be careful not to loose the o-ring that goes between the bearing cup and axle housing - you'll see it.
Mar 10, 2014 | 12:11 PM
#499
it should be a fairly common size, since most bed caps (over multiple years) have the same windows. try going to a place that sells them (like a truck-cap dealer, not a sam's-truck-accessory-palace) and take a few measurements between your topper and theirs, seeing if anything will line up.
Mar 10, 2014 | 12:22 PM
#500
Thread Starter
Registered User
iTrader: (1)
Joined: Apr 2011
Posts: 1,220
Likes: 4
From: Memphis, TN
it should be a fairly common size, since most bed caps (over multiple years) have the same windows. try going to a place that sells them (like a truck-cap dealer, not a sam's-truck-accessory-palace) and take a few measurements between your topper and theirs, seeing if anything will line up.


