
1JZ GTE VVT-i into 22R 84 Runner
 Feb 22, 2014 | 03:29 AM
#121
Thread Starter
Registered User


Joined: May 2010
Posts: 415
Likes: 6
From: Anne Arundel,MD
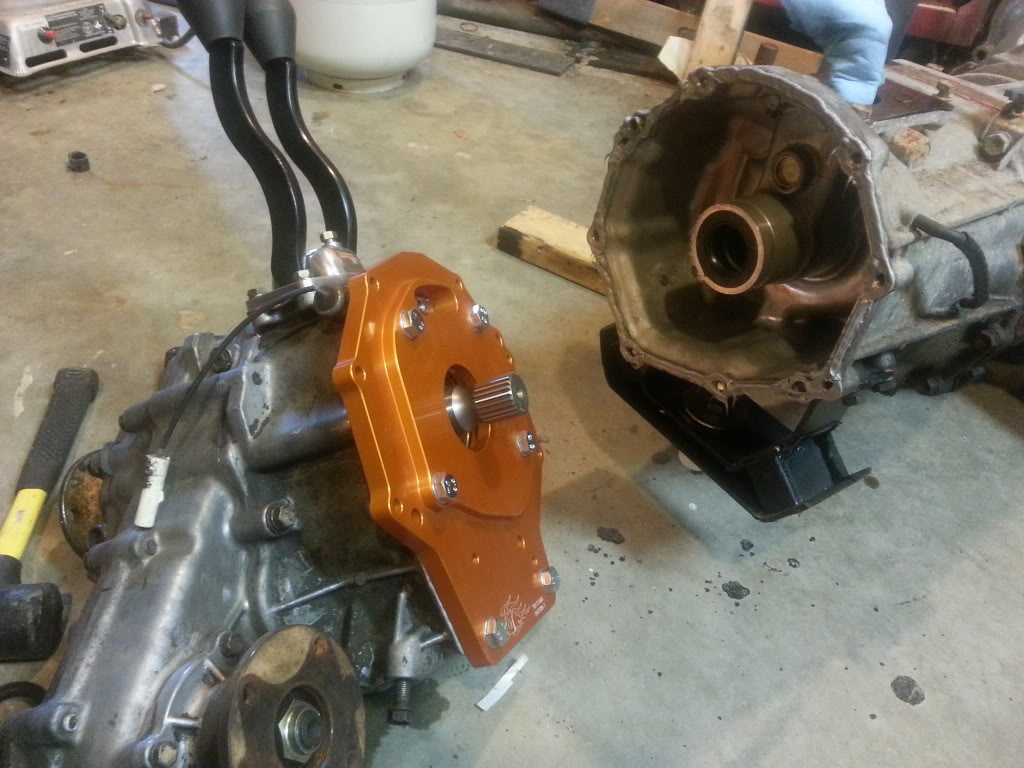
Been awhile since I updated anything, making somewhat of good progress. This is the adapter I used from trailgear to bolt a 87 transfercase to my 97 5speed Tacoma transmission.

Last edited by 8784 runner; Feb 22, 2014 at 03:32 AM.
 Feb 22, 2014 | 03:41 AM
#123
Thread Starter
Registered User
Joined: May 2010
Posts: 415
Likes: 6
From: Anne Arundel,MD
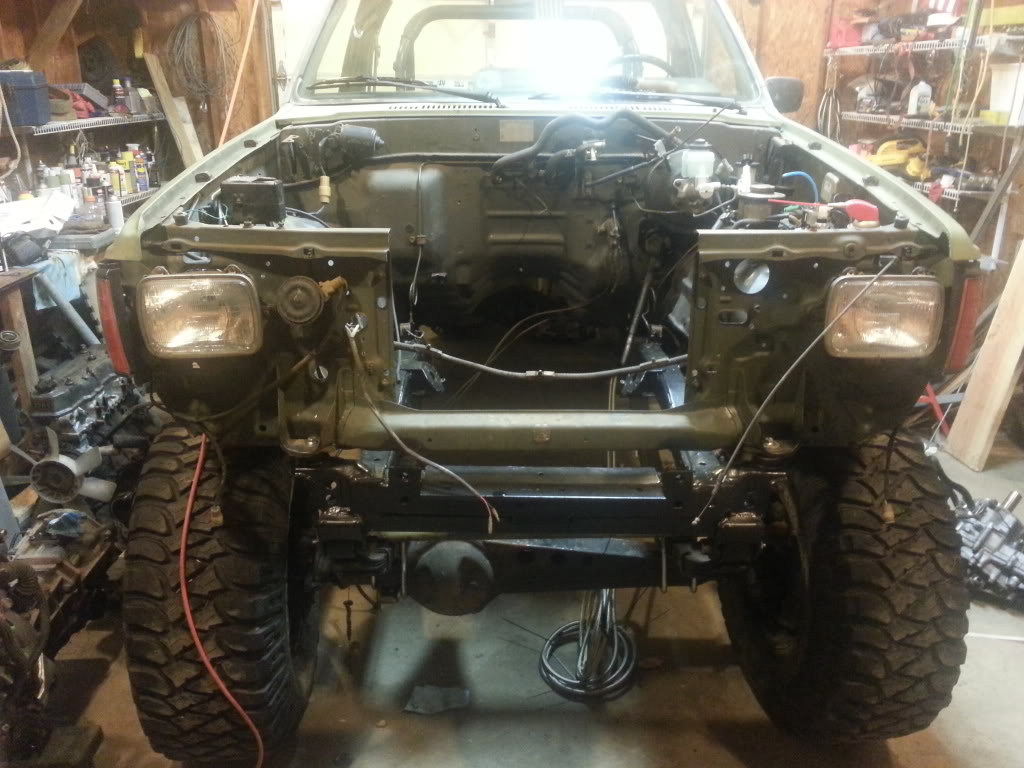
So after some debate with myself, I finally decided to just pull the grill off and cut the top core support out. I was gonna hook two chain falls to my gantry to try and pick the motor and trans up vertical and level it back out as I dropped it in. But since I'd be doing this as with everything else on the truck by myself. The much much safer and easier way was to just cut it out and slide straight in through the front. It only took maybe 5mins to cut the support out how I wanted and another 20 to drop the assembly in bolted up. For now I have a jack stand and some wood holding it at the angle I want. I will half to build and entirely new crossmember to catch the trans and transfercase. The mounts are slotted and I slammed the motor as far back as I could get it without hitting the firewall. Room is extremely limited up front for my radiator so I needed as much as I could get.

Feb 22, 2014 | 03:46 AM
#124
Thread Starter
Registered User
Joined: May 2010
Posts: 415
Likes: 6
From: Anne Arundel,MD
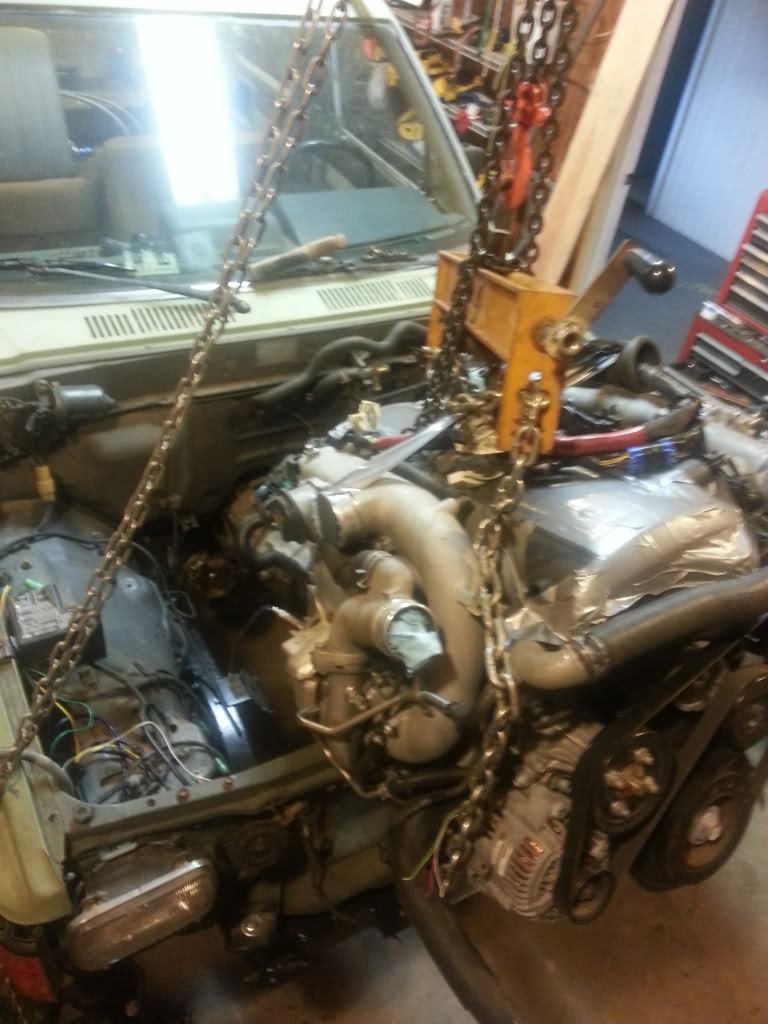
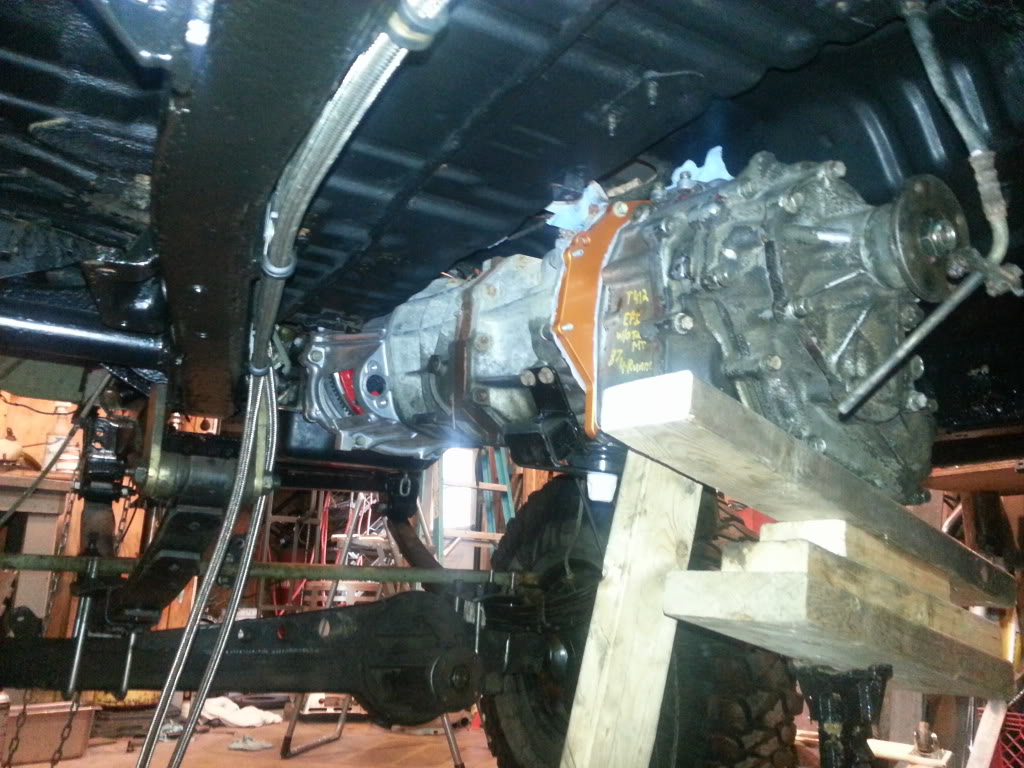
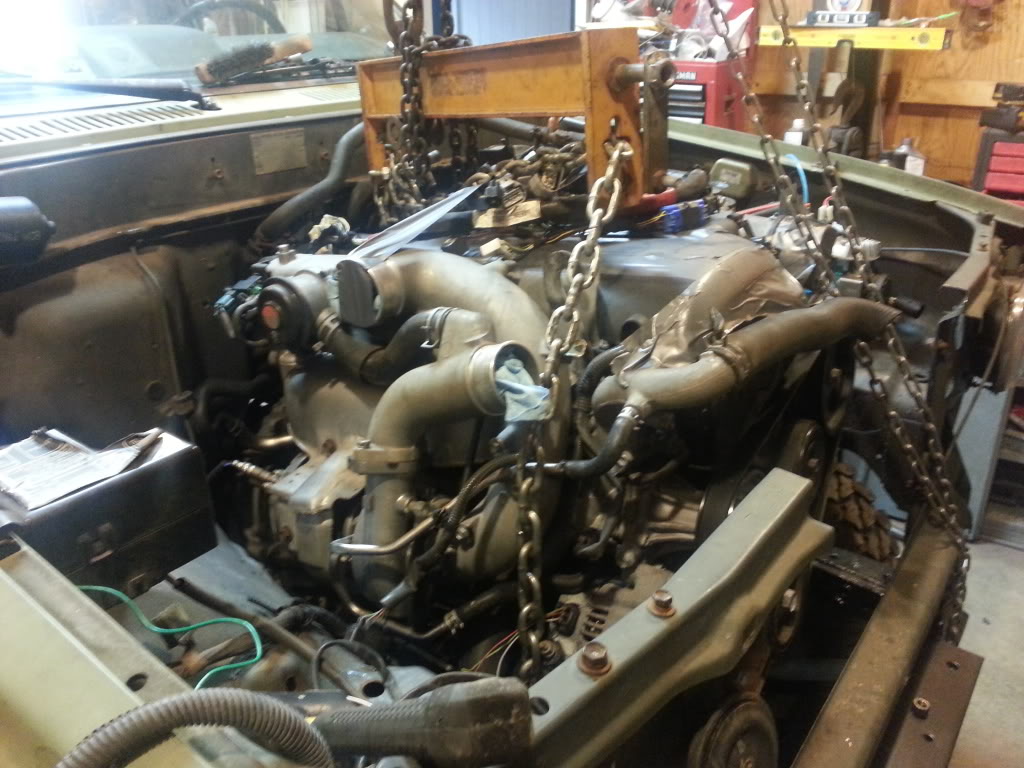
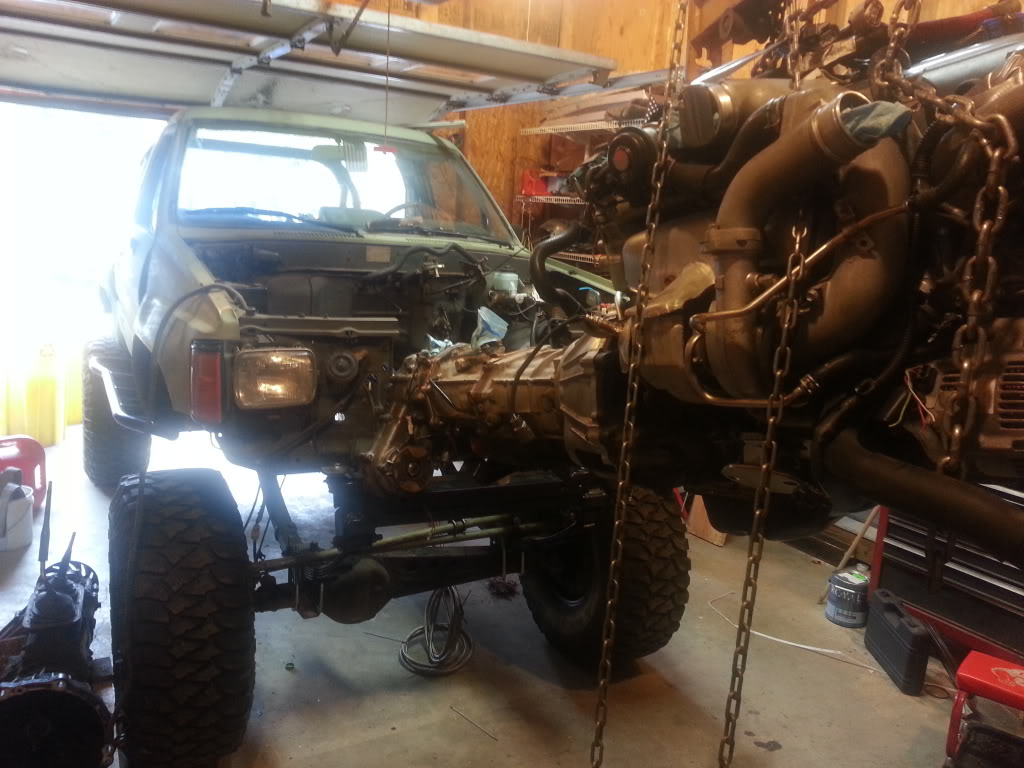
These are while I was still bolting it in. The finished angle only has about maybe half an inch of clearence between the floor and the transfercase adapter. It was still a tight fit squeezing the turbo through the opening i cut out up front.
Feb 22, 2014 | 03:50 AM
#125
Thread Starter
Registered User
Joined: May 2010
Posts: 415
Likes: 6
From: Anne Arundel,MD
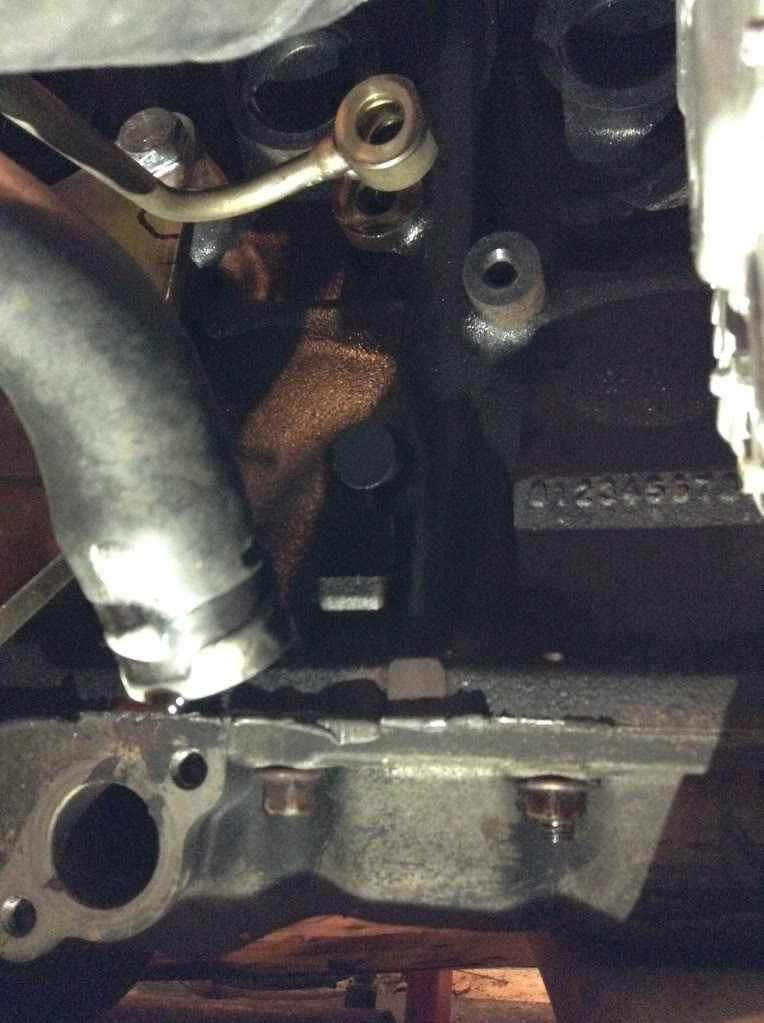
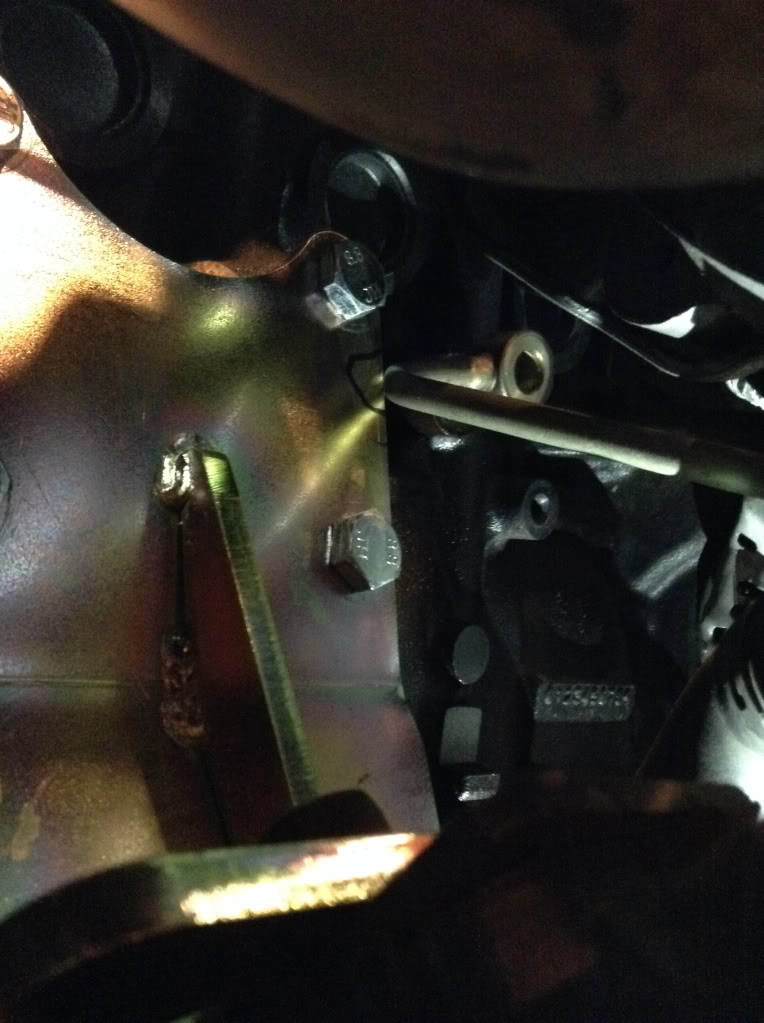
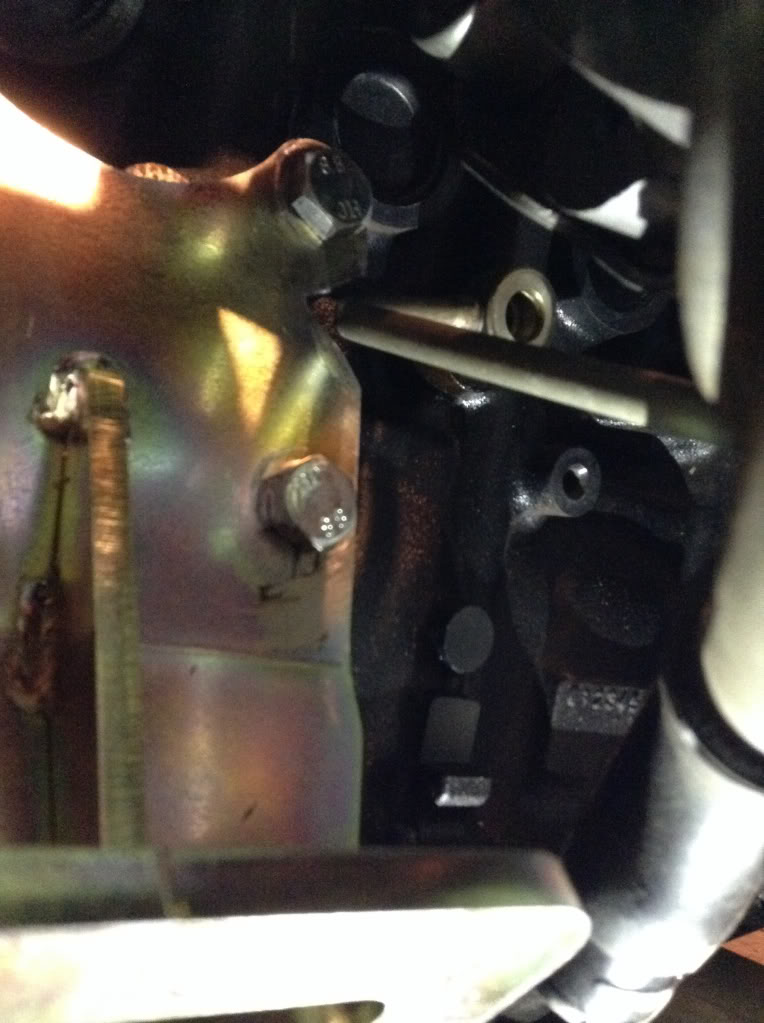
Forgot to put this up. The mounts I ordered from excessive did have a clearence issue with the oil pickup for the turbo. I had to put the turbo assembly on and off a few times. Each time it came back off I would just unbolt the motor mount put it back on the bench grinder until finally it would allow the pickup to lineup with its spot on the block.
Mar 22, 2014 | 05:35 AM
#127
Thread Starter
Registered User
Joined: May 2010
Posts: 415
Likes: 6
From: Anne Arundel,MD
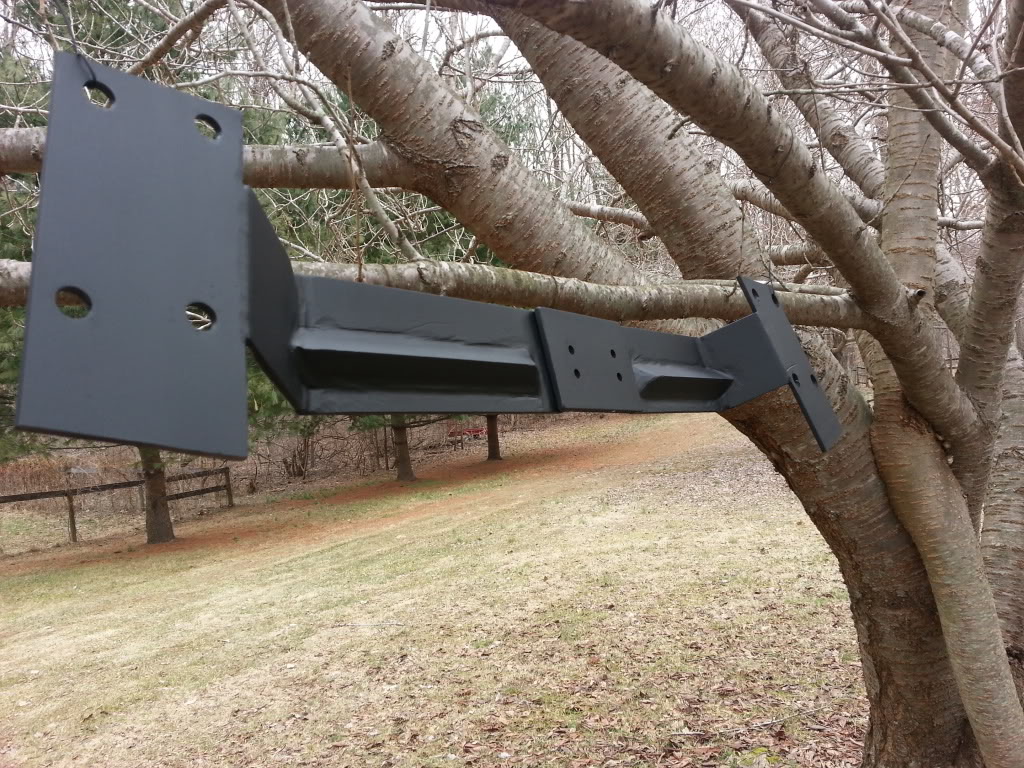
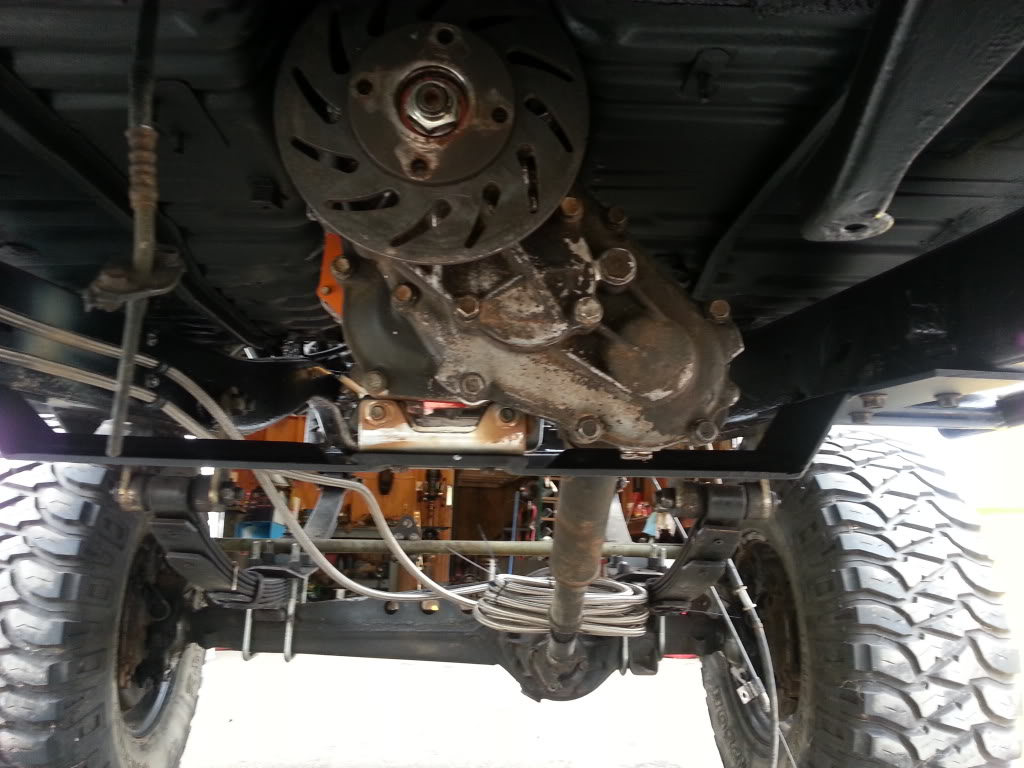
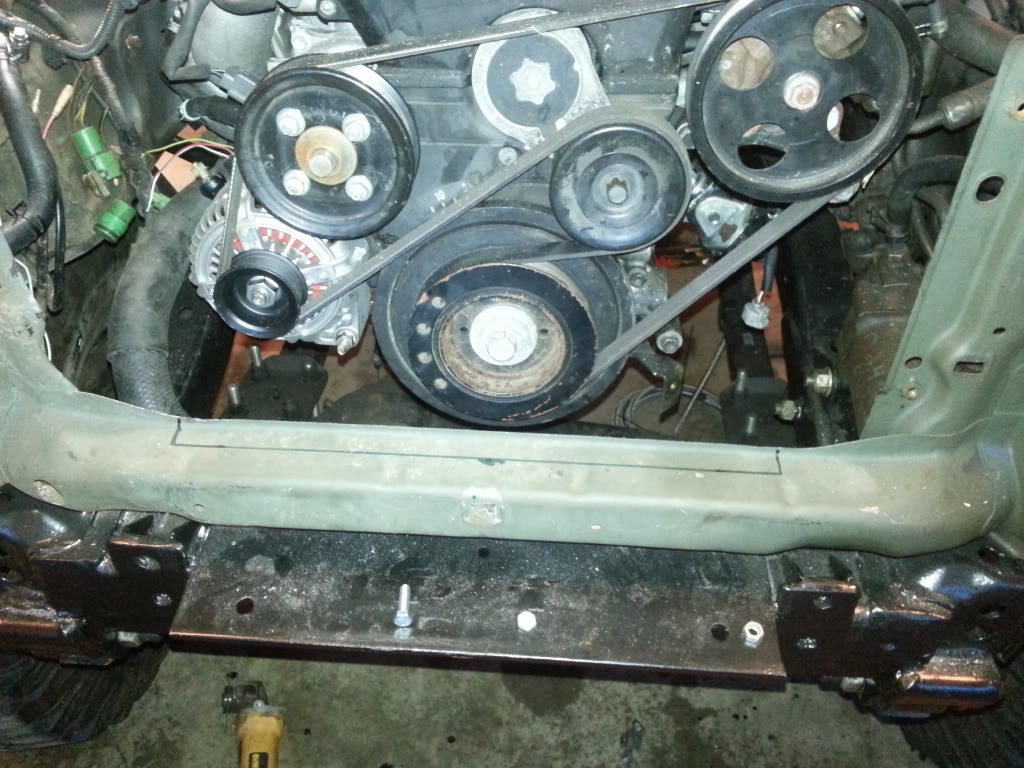
Been awhile since I put anything up just been busy but have been slowly getting work done. This is the crossmember I built. Originally I was going to to do it with my tube bender but once I actually looked at it. I decided it didn't really need it plus this one out of plate is simple,clean and tucked up into the frame pretty good I thought. Later on I may bend a few pipes as protected tigon for the transmission and exhaust once it's in.i did kind of give it a ruff square with the rear axle. I pulled a tape from both sides of the flange of the transfer to the flange on my diff and got as close as I could. It's about 3/16 off. The adapter for the trans to transfer was hitting the transmission tunnel keeping it from being perfectly straight. It's close enough but not a 100%. Gotta remember the adapter is made to go under Tacoma's not first generation pickups and 4Runners. Also before as a reminder. Make sure you keep in mind the angle of slope you need for the drivetrain assembly. Most motor mounts are bolt in and that's it there's no adjustment from sided to side back and fourth or up and down. We'll lol I unwantingly got all 3 with these mounts for this motor to bolt in. Before I could still the trans mount I had to make sure the motor was right where I want/need it. It's the trans mount that will hold this solid and stationary not the motor mounts since they are slotted for adjustment. So first I pushed the motor almost as far back as it would possibly go. Left only about a half inch if that between the motor and firewall. I need as much as possible up front for my radiator and fan. For square as I mentioned I just did measures off the output flange to the diff. Not super critical since that's what joints are for. But still wanted to get it close to eliminate any potential for vibration. As for the angle, I used my dial. Set the magnet on the flange and jack till about 6.5-7. I made mine a little bit lower then stock. Off memory I'm pretty sure it was 5.5-6.0.
Last edited by 8784 runner; Mar 22, 2014 at 06:05 AM.
Mar 22, 2014 | 06:15 AM
#128
Thread Starter
Registered User
Joined: May 2010
Posts: 415
Likes: 6
From: Anne Arundel,MD
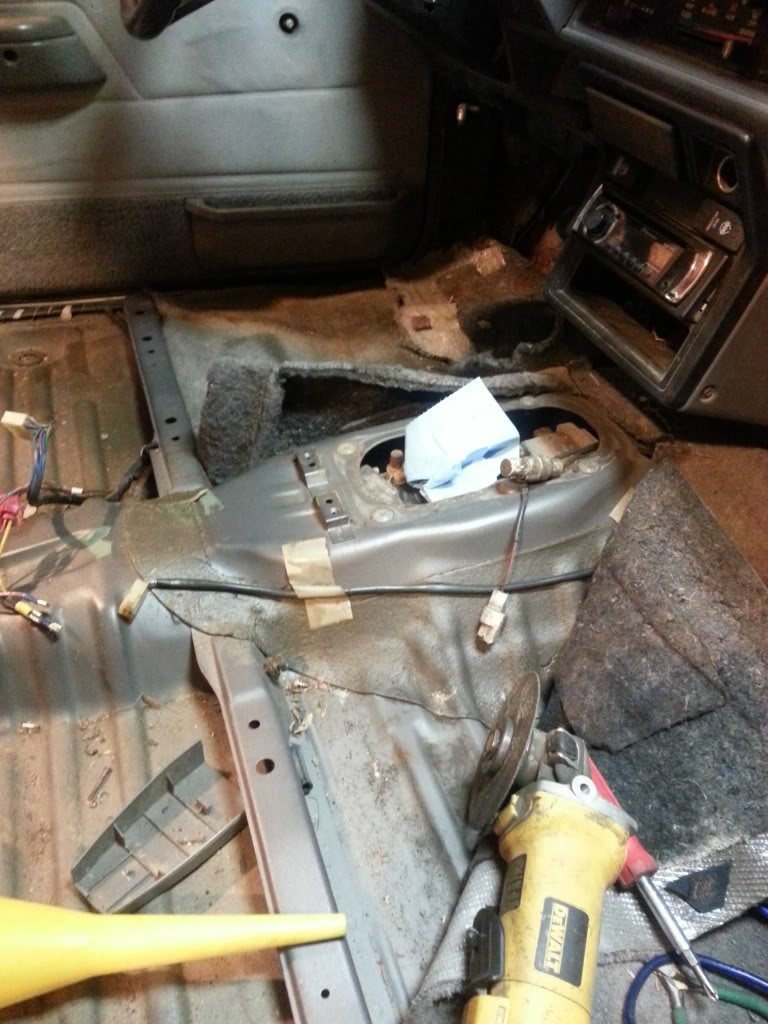
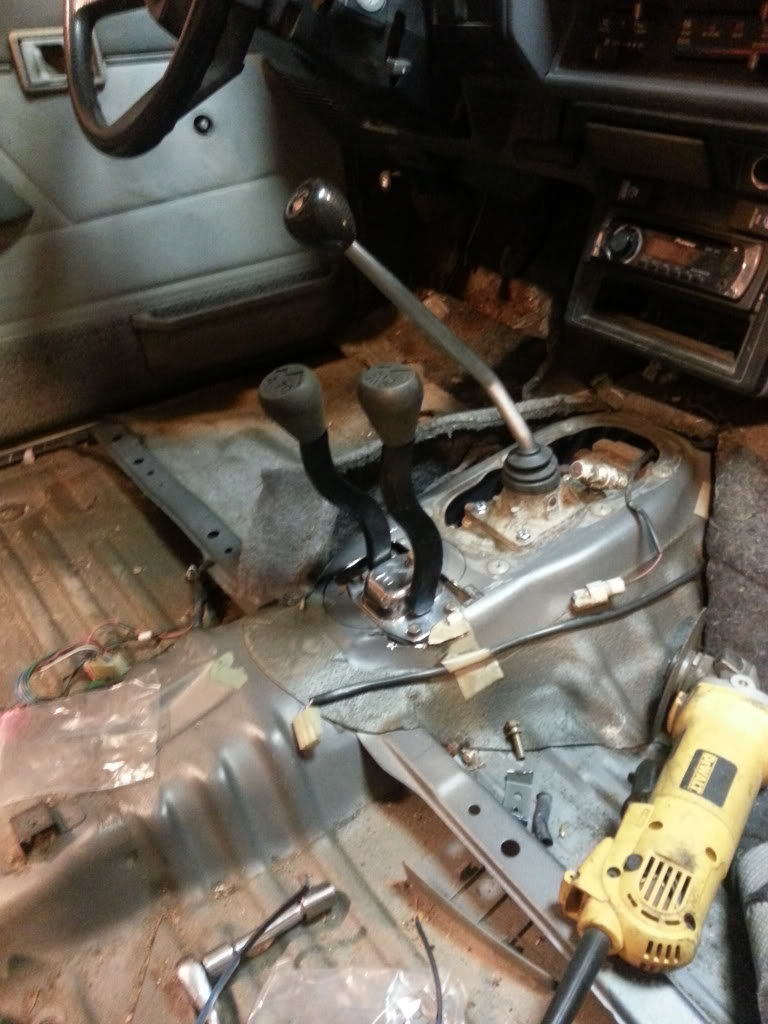
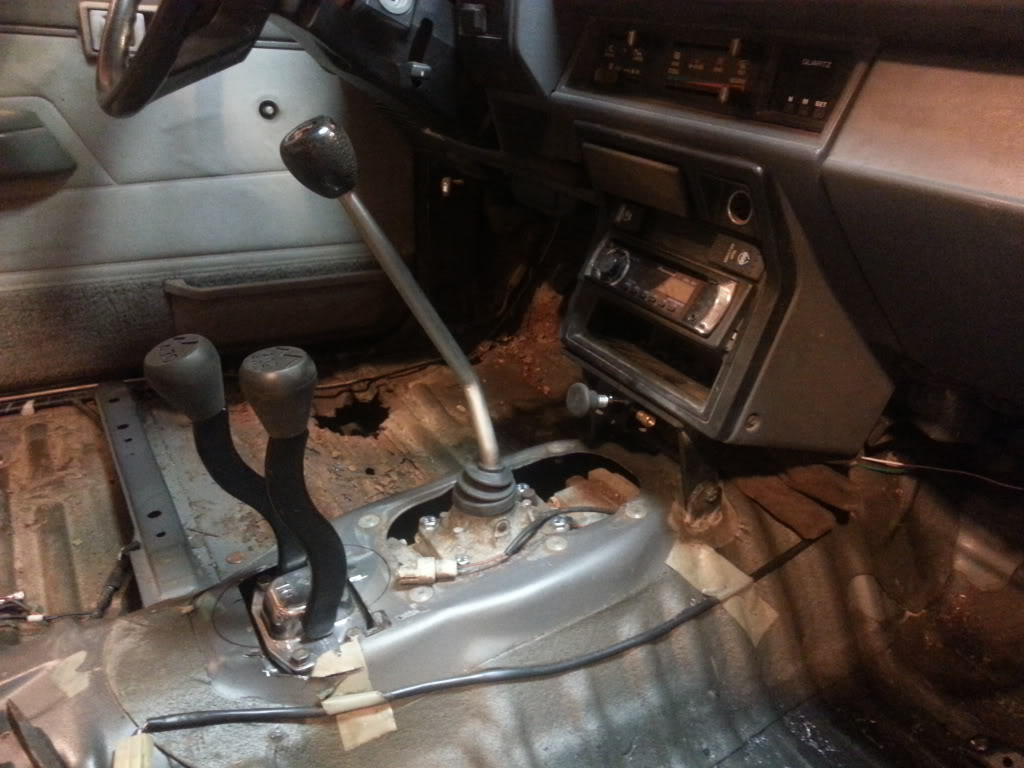
I had been wanting to put all my shifters on to. Since I had orders a short shifter for the trans I was curious has to whether or not it would clear my shifters for the transfercase. The shortshifter was simple. Pulled the shifter out the shift tower. Set the shim on the trans then gasket and the trowel on top of that. Bolted it all down and pop in the shifter. For the trans lol obviously had to do some cutting. Started out with a small hole to see where I was in relation with the transfercase. Luckily I thought ahead and when I put everything in I stuffed the top of the transfer with some shop towels otherwise metal shaving would have been puring into it. So either way with the cut off wheel. I kind of dead eyed my way around it and just kept nipping away until finally it dropped right it. In the long run when finishing touches come into play ill problem trim everything out you see around the shifters with some aluminum diamond plate.
Mar 22, 2014 | 06:25 AM
#129
Thread Starter
Registered User
Joined: May 2010
Posts: 415
Likes: 6
From: Anne Arundel,MD
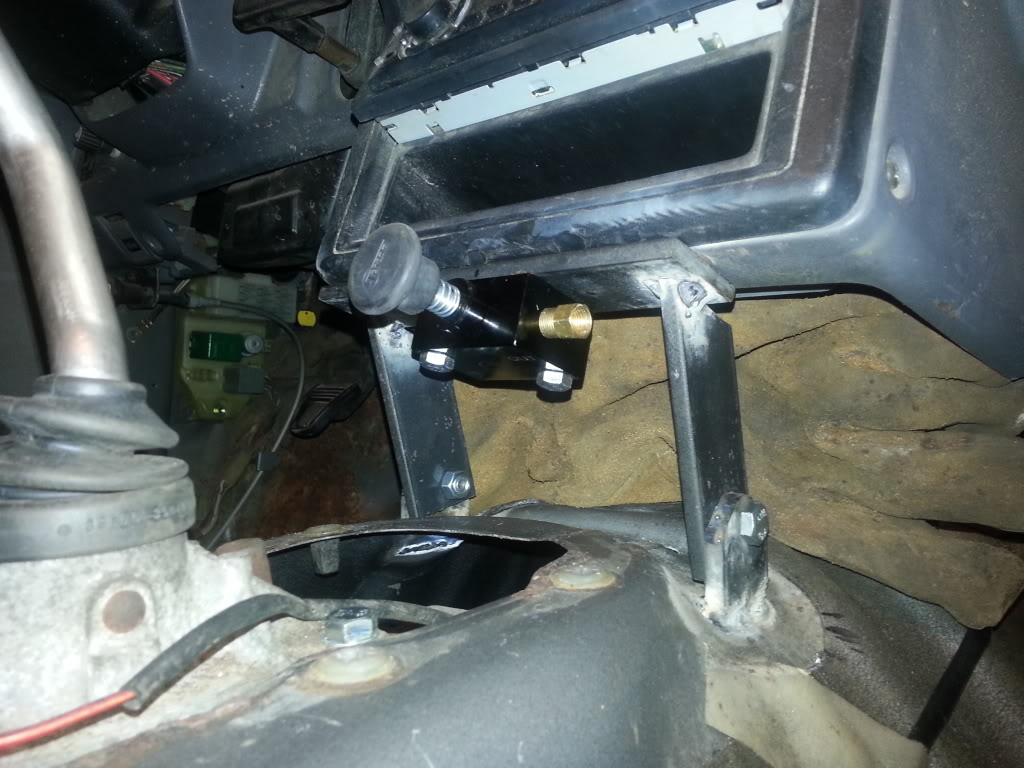
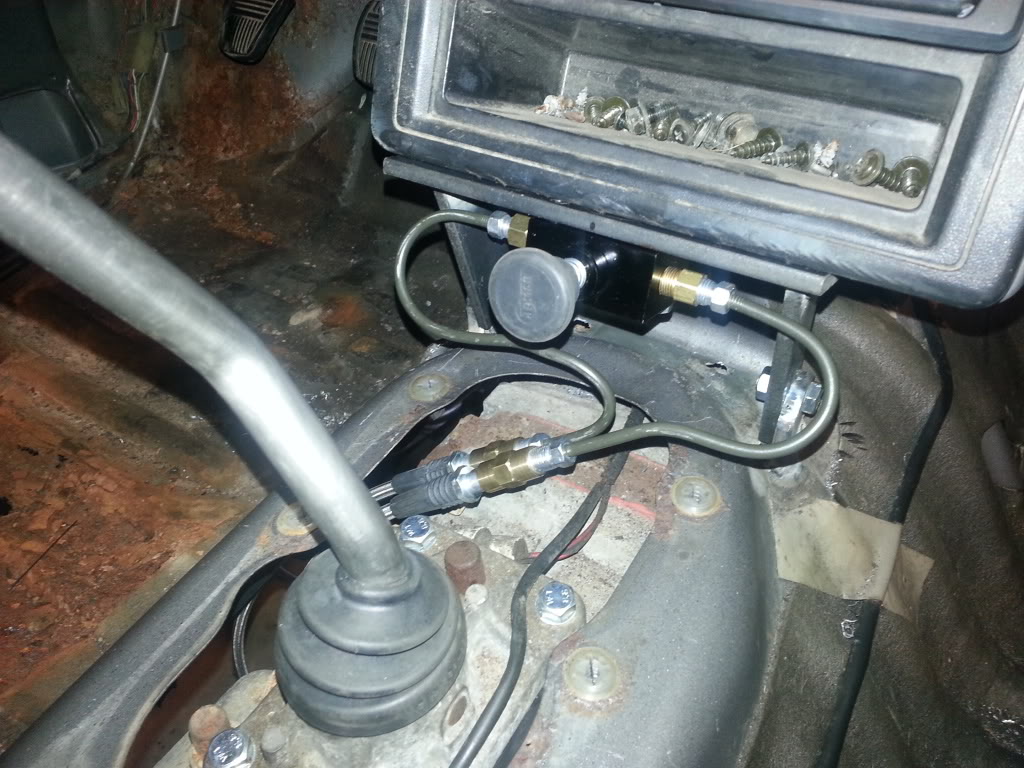
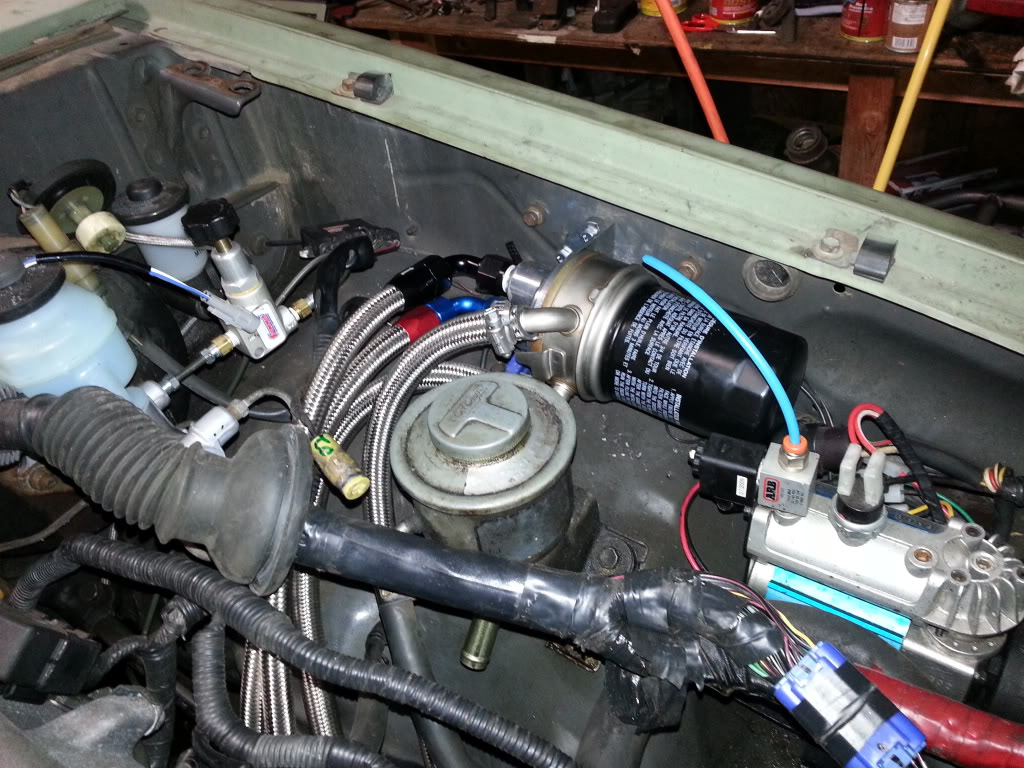
My line lock was next. I already knew where I wanted to put it. Had to put it up before I could run my brake line to the rear. I cut off factory tabs that help the trim piece around the stock shifters. Welded two small tabs to the body for my bracket to bolt to. Once it was mounted I had to make some minor bends in the line to meet the flex hoses that would connect to the main brake line. Just as a FYI the stock brake line fittings are M10x1.00 pitch
Mar 30, 2014 | 06:52 AM
#130
Thread Starter
Registered User
Joined: May 2010
Posts: 415
Likes: 6
From: Anne Arundel,MD

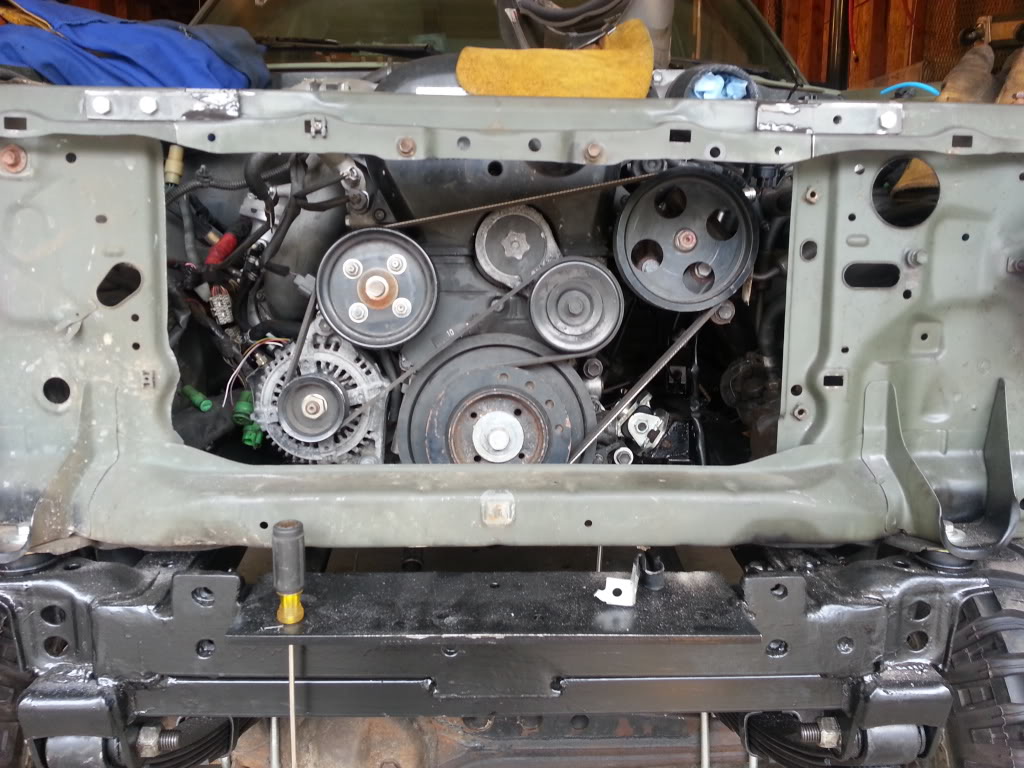
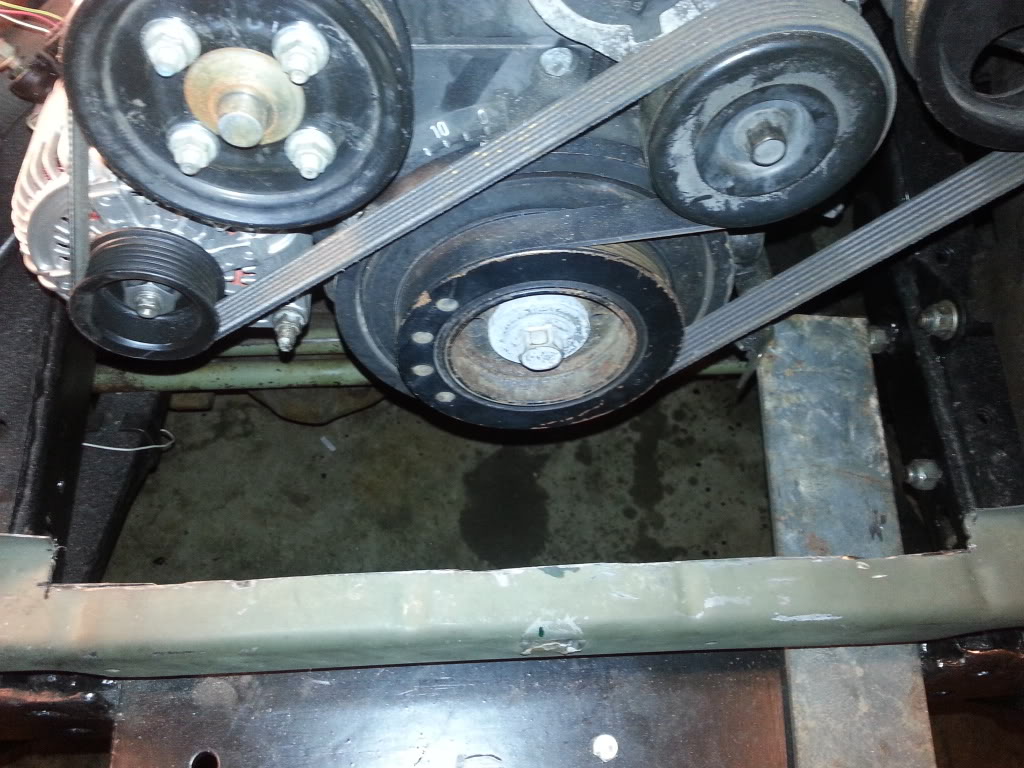
Nothing big really, took the stock alternator out and replaced it with driftmotion's 230 amp one. Might as well while it's easy to get to before it gets covers up with the radiator
Mar 30, 2014 | 07:13 AM
#131
Thread Starter
Registered User
Joined: May 2010
Posts: 415
Likes: 6
From: Anne Arundel,MD
The radiator is a good challenge. I needed it tight and snug so I could at least try and retain my stock grill over the radiator and fan. Whatever I cut up I wanted to look factory. If you know where the stock radiator bolts up you'll notice pretty easily what I cut up. Notice the right side then take a look at the left. With a cut off wheel I followed the factory line of the core support and cut out the stock bolt holes for the stock radiator, I needed the extra width for the new one. A friend of mine came over to give me a hand. We just kinda held in place where it was clear of everything and looked good. Bolted our brackets we made out of aluminum to the body. Slid the radiator in place and scribed the outline of the brackets onto the radiator. Took it to his place and welded everything together. Very happy with how it turned out.
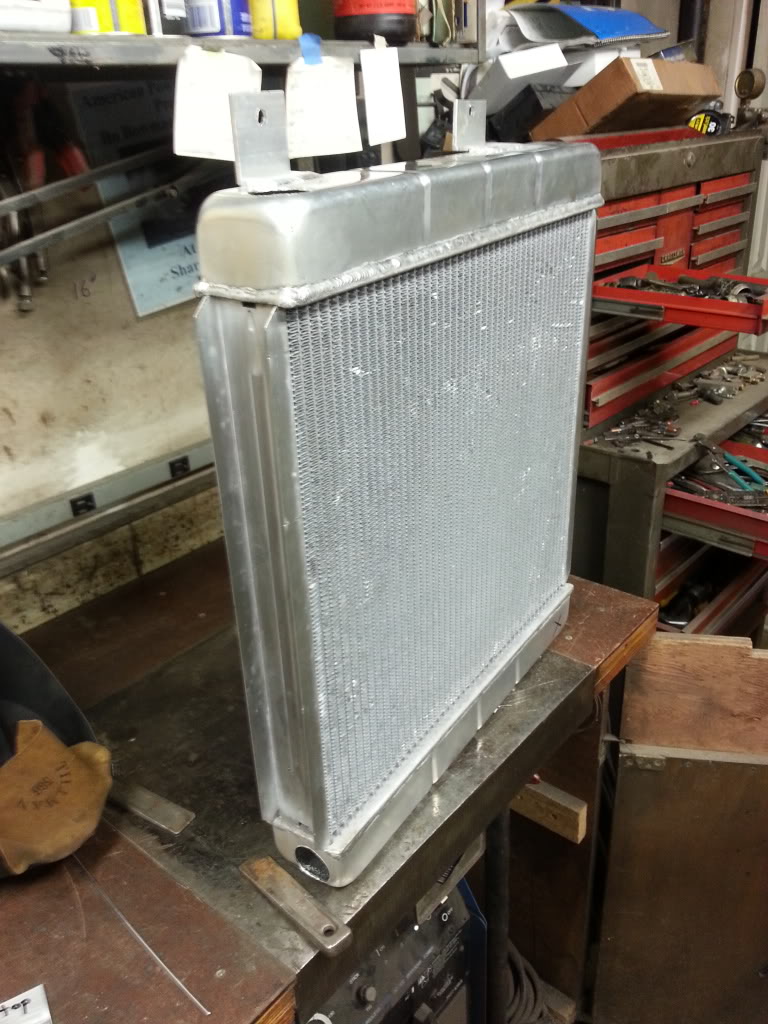
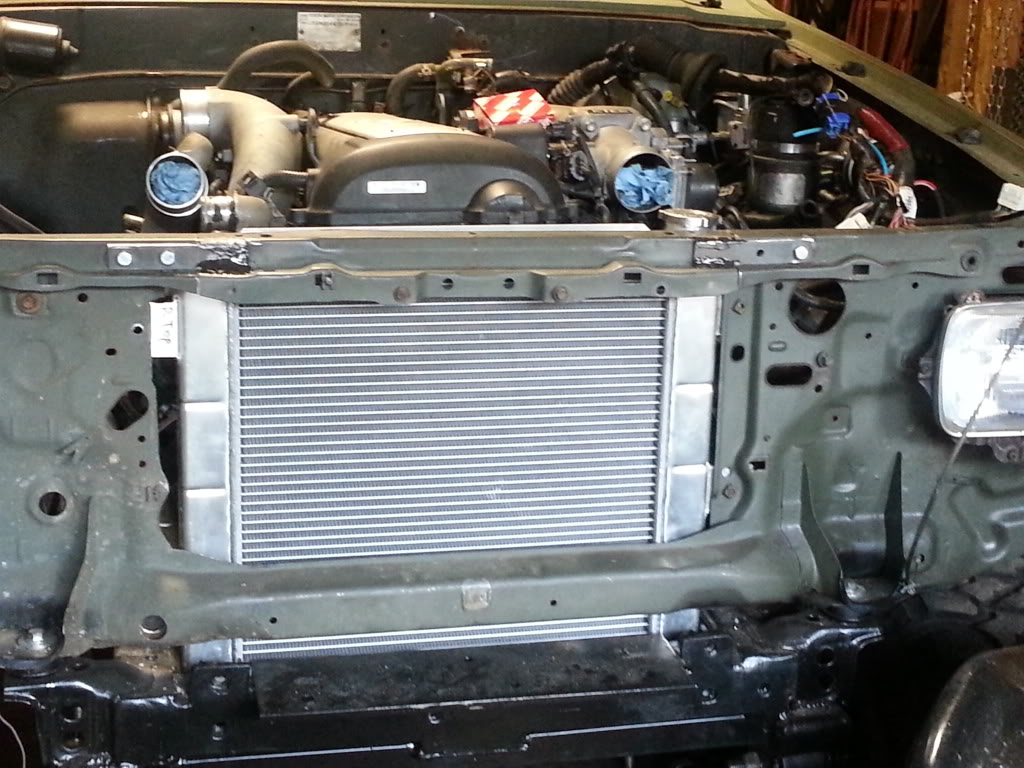
I have just uneder a half inch of clearence from being contact with the motor
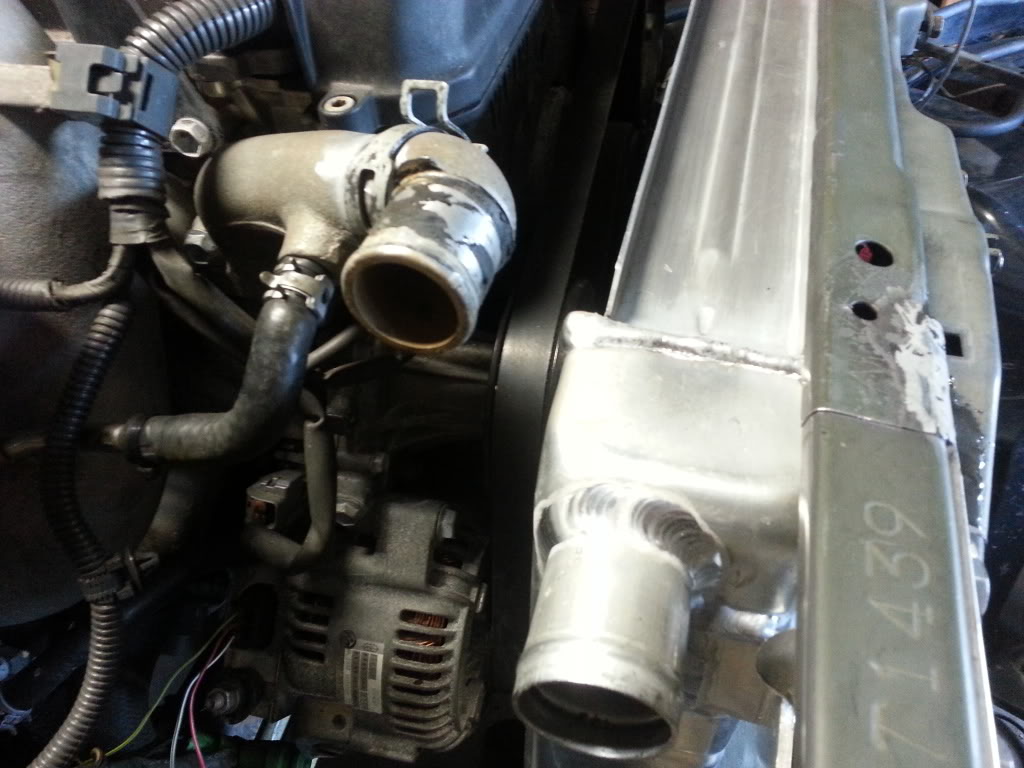
We also went ahead and took the discharge pipe off the water pump cut the neck and spun 180 degrees then welded it back. All I need to do now for it a simple 180 bend out of some flex hose.
I have just uneder a half inch of clearence from being contact with the motor
We also went ahead and took the discharge pipe off the water pump cut the neck and spun 180 degrees then welded it back. All I need to do now for it a simple 180 bend out of some flex hose.
Mar 30, 2014 | 07:33 AM
#132
Thread Starter
Registered User
Joined: May 2010
Posts: 415
Likes: 6
From: Anne Arundel,MD
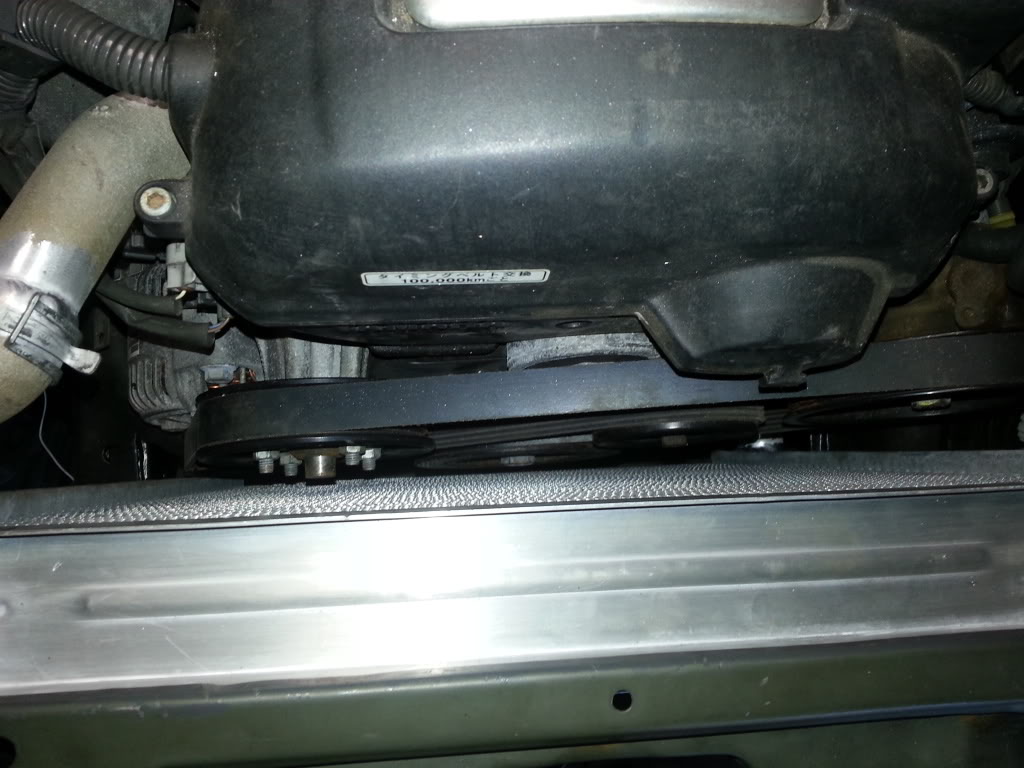
So once the rad was in I noticed that I might actually be able to get the fan in and keep my factory front end 
Just some simple measuring I payed out what I wanted to cut out of this crossmember, but just to let every one know this member on the body is reinforced and has another piece of lightweight steel going threw the middle of it. So measured and cut right at the seam of where the two met. I wanted to keep the reinforcement in their if possible.
Sorry but for whatever reason I didn't take a picture of the inside of it last night before I put the rad and fan back in it.
Once my cutting was done I put a few tacks on the two pieces of steel. Then ran a good amount of POR15's epoxy caulk down the entire length of my cut. Since I couldn't get paint in their I had to do something to help keep rust out of their. It goes on very thin and easy to work with but dries to an absolute rock hard finish. Felt very good about using it once I saw how it dried. Might be hard to follow without a picture I know, sorry.
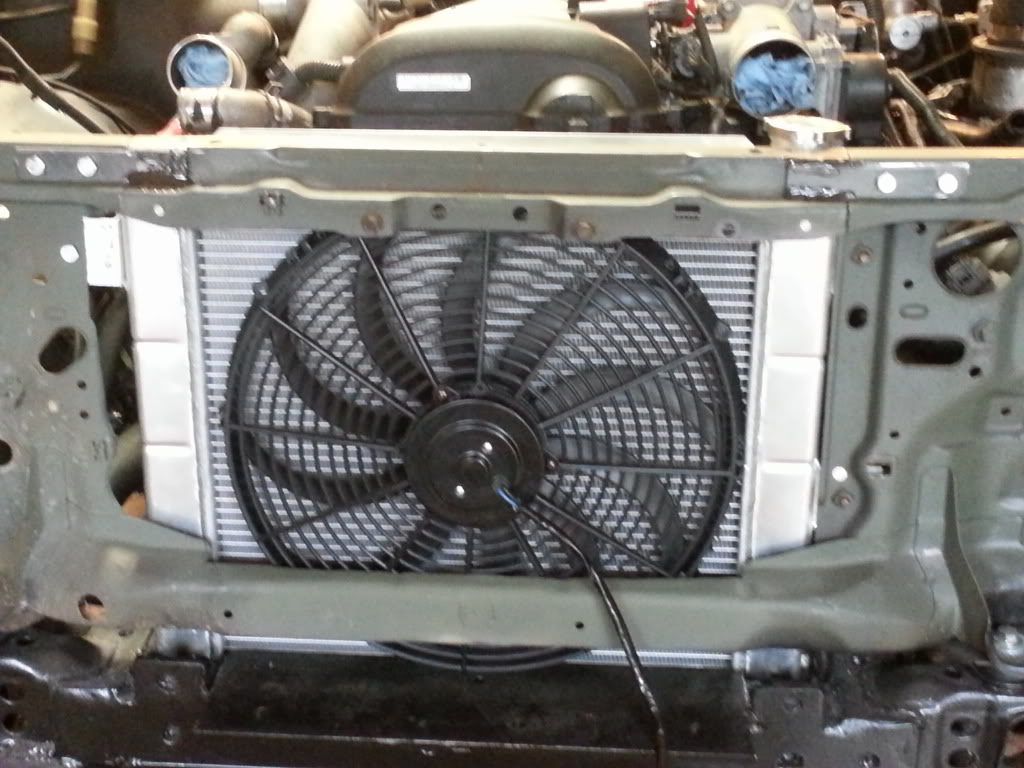
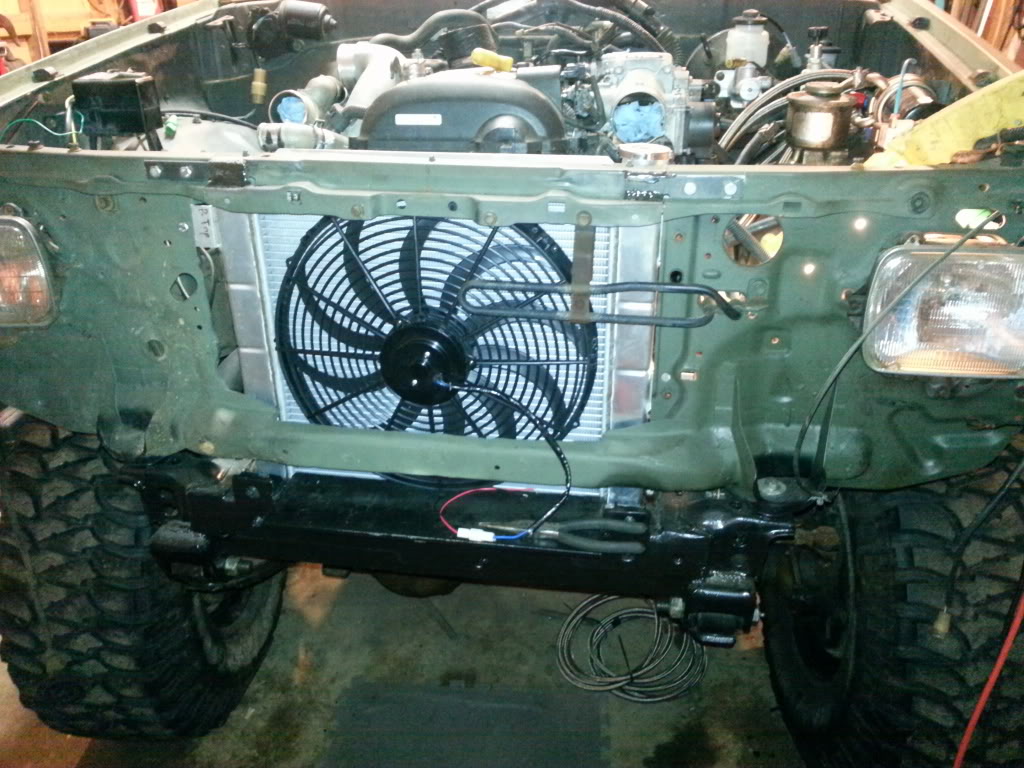
Very excited when I put the power steering cooler back in its original spot with over an inch of clearence on the fan. The stock grill need a little bit of cutting but will go back on no problem
Just some simple measuring I payed out what I wanted to cut out of this crossmember, but just to let every one know this member on the body is reinforced and has another piece of lightweight steel going threw the middle of it. So measured and cut right at the seam of where the two met. I wanted to keep the reinforcement in their if possible.
Sorry but for whatever reason I didn't take a picture of the inside of it last night before I put the rad and fan back in it.
Once my cutting was done I put a few tacks on the two pieces of steel. Then ran a good amount of POR15's epoxy caulk down the entire length of my cut. Since I couldn't get paint in their I had to do something to help keep rust out of their. It goes on very thin and easy to work with but dries to an absolute rock hard finish. Felt very good about using it once I saw how it dried. Might be hard to follow without a picture I know, sorry.
Very excited when I put the power steering cooler back in its original spot with over an inch of clearence on the fan. The stock grill need a little bit of cutting but will go back on no problem
Mar 30, 2014 | 07:46 AM
#133
Thread Starter
Registered User
Joined: May 2010
Posts: 415
Likes: 6
From: Anne Arundel,MD
I finally mounted my oil filter and ran the lines for that. I poped off my driver side fender. Drilled and mounted it then tacked the nuts to the body put some paint on them and put my fender back on. If I ever need to move just unbolts and don't half to worry about the nuts. Problem not the best placement for it but I want to keep everything tight so I have the room for when I decide to start adding stuff under the hood.
Apr 25, 2014 | 12:29 AM
#134
Thread Starter
Registered User
Joined: May 2010
Posts: 415
Likes: 6
From: Anne Arundel,MD
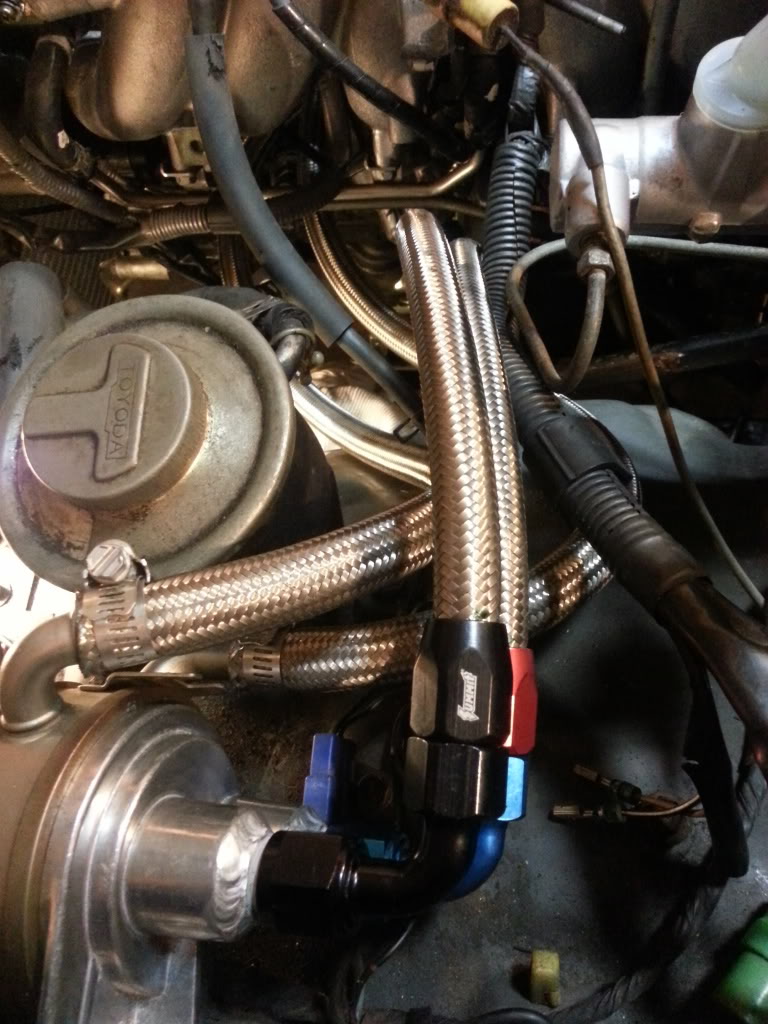
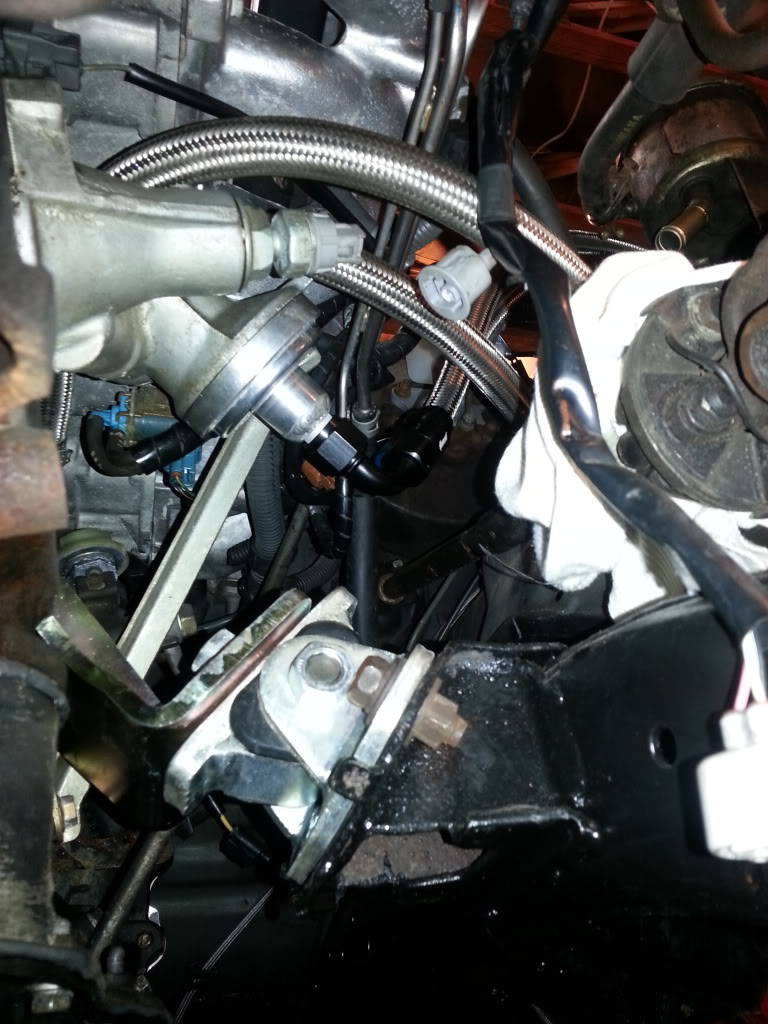
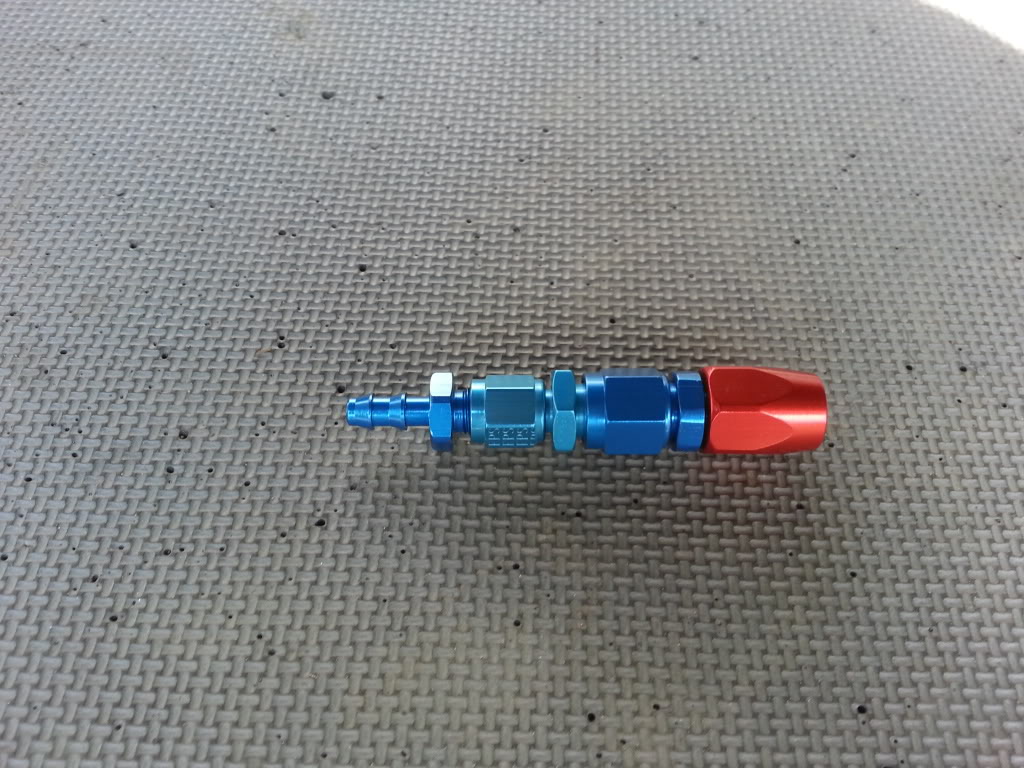
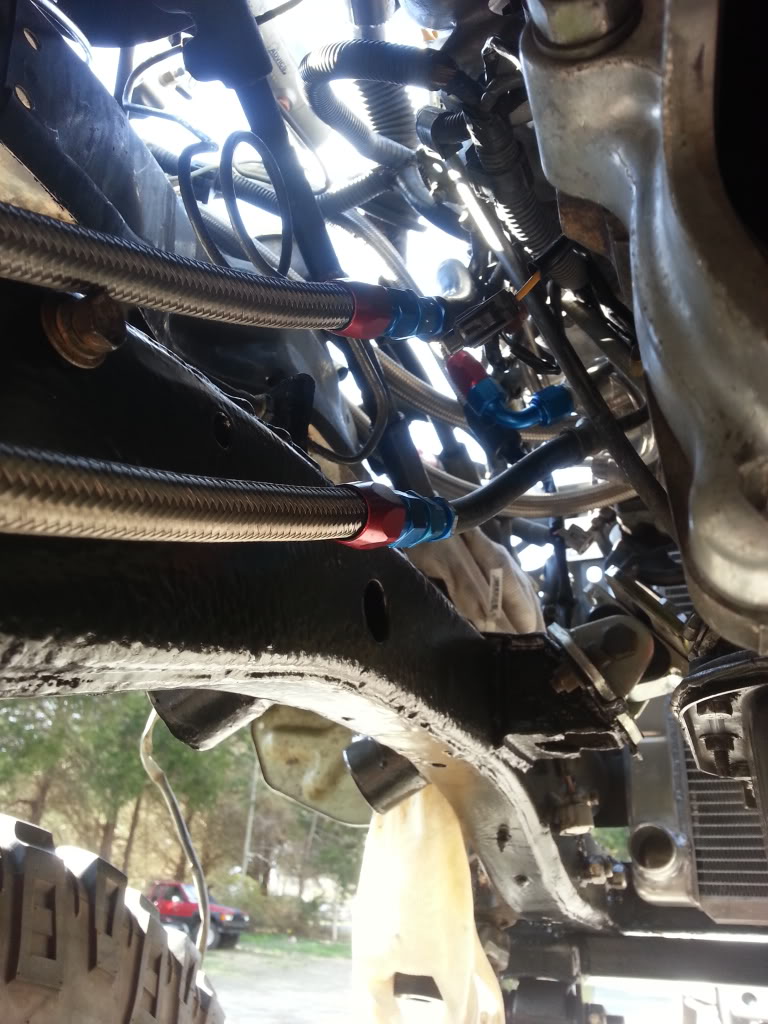
Did this a few weeks ago but finally hooked up the fuel lines to the motor. Nothing really complicated just one more thing out of the way. To get from the hose I ran to the stock lines on the motor. I used a Hose End Straight,-6AN to a #4nut x #6 Male fitting which went to a -4 Barbed end to 4AN Adapter.
Apr 25, 2014 | 12:30 AM
#135
Thread Starter
Registered User
Joined: May 2010
Posts: 415
Likes: 6
From: Anne Arundel,MD
I've also mounted the starter. I have the motor so tight to the firewall that just to the right of the gas pedal I had to wholesaw a 1inch hole to get to the top bolt of the starter in.
Apr 25, 2014 | 12:40 AM
#136
Thread Starter
Registered User
Joined: May 2010
Posts: 415
Likes: 6
From: Anne Arundel,MD
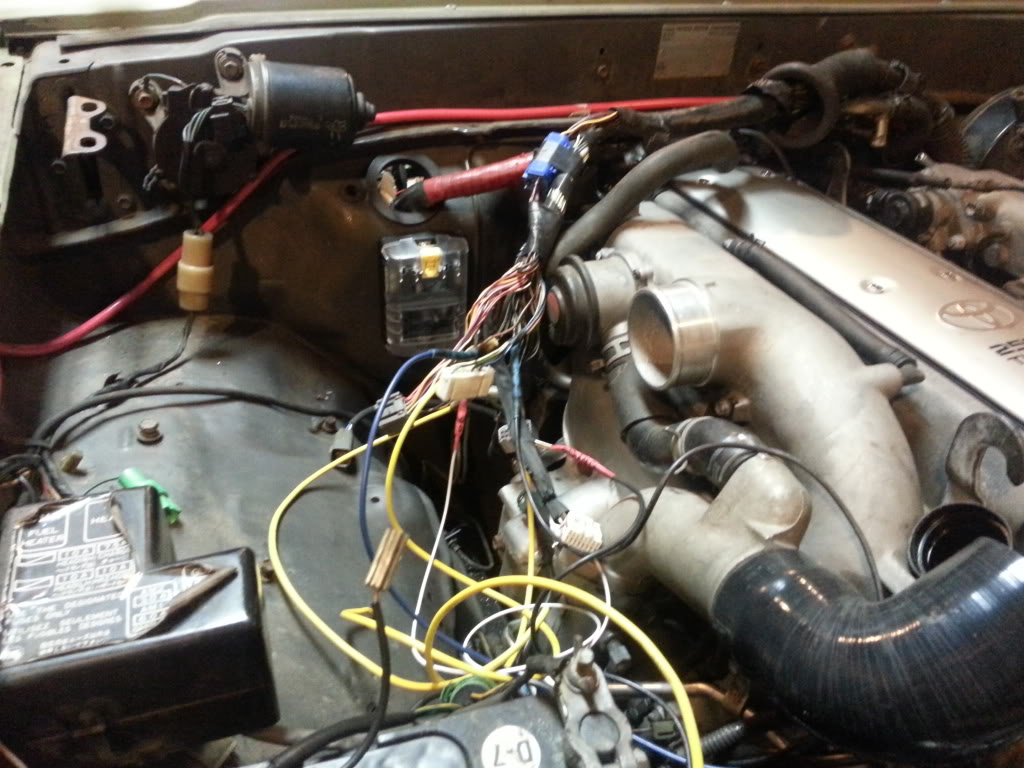
So I've finally started with the wiring. You can see the three holes I drilled. One for the main harness into the cab. The other two are for all the small wires you see to come out of the cab and to the fuse box I mounted. The truck itself with all chassis components and motor will have there on separate fused power sources. The motor currently turns over. But I don't have power to the ecu yet. Most of it isn't too bad. The only thing I'm having trouble with is where to wire the o2 sensor to the computer. Once done and running I will post a detailed post of what I did for splicing and landing all the wires.
Jun 9, 2014 | 08:53 AM
#137
Thread Starter
Registered User
Joined: May 2010
Posts: 415
Likes: 6
From: Anne Arundel,MD
So I know its been awhile since an update.
I did finish the wiring per the instructions I printed off supraforums but did not have any luck with it working. I thought I followed everything pretty clearly but I do not have any spark, my injectors are not receiving a signal to pulse and the fuel regulator is not allowing gas to go back to my tank. There is a constant 12v confirmed on the ignitor, coil packs and injectors but still cant get it to fire. I was put in contact by a friend with someone that can get it going just half to wait for an open slot at his drift shop.
I also deleted all unnecessary wires from the stock harness out from under the hood. All that is left is my signal wire for the starter, oil pressure sensor for the stock gauge cluster and the wire for the temp sensor. Im pretty confident in that ill be able to use my entire stock gauge cluster.
Jun 9, 2014 | 09:00 AM
#138
Thread Starter
Registered User
Joined: May 2010
Posts: 415
Likes: 6
From: Anne Arundel,MD
Half to wait till this afternoon, im unable to upload pics from my phone without wifi.
I will go through with the wiring ive done on the stock harness, brackets ive built for the intercooler which is now mounted, power I ran for the starter, rear suspension I finished over the weekend. Hopefully this evening I can finish the piping for the radiator. Its so tight that rubber flex hose would not work, ill be sweating what I need together then putting it in connected by a short piece of hose and hose clamps.
I will go through with the wiring ive done on the stock harness, brackets ive built for the intercooler which is now mounted, power I ran for the starter, rear suspension I finished over the weekend. Hopefully this evening I can finish the piping for the radiator. Its so tight that rubber flex hose would not work, ill be sweating what I need together then putting it in connected by a short piece of hose and hose clamps.
Jul 13, 2014 | 09:52 AM
#139
Registered User
Joined: Jun 2011
Posts: 42
Likes: 0
From: fort riley
so not to beat a dead horse but just to clarify for me that transmission will work on a 1jz and i wont have to change the input shaft? just the adapter for the tcase correct?
 Jul 13, 2014 | 03:25 PM
#140
Thread Starter
Registered User
Joined: May 2010
Posts: 415
Likes: 6
From: Anne Arundel,MD
The only reason I didn't buy my motor with the 154 was simply cause they were wayyyyy more expensive compared to buying one with the automatic. To the point that it probly saved me money by having to buy the actual bell housing separately.


