
HOw do i replace head gasket?
 Apr 7, 2007 | 08:58 AM
#1

Thread Starter
Registered User
Joined: Nov 2005
Posts: 40
Likes: 0
HOw do i replace head gasket?
Help! Need advice on how to replace head gasket! Well, I was told when you have milky color junk inside the oil cap and white smoke coming out of tail pipe. Those are signs of HG?
Thanks for your help!


Thanks for your help!
Apr 7, 2007 | 09:42 AM
#4


Joined: Jan 2003
Posts: 17,692
Likes: 58
From: Marysville, WA
take off the head, put a new gasket on, get head checked/surfaced/replaced if needed, put head back on. Tada you're done.
You need to get a repair manual, or try searching for head gasket replacement on here. It would take a helluva long time to type out all the steps required in doing it, and everyone has their own method.
Main things to do are get the head checked for cracks, pitting in the coolant passages, and leaking in the valves. Make sure to have it professionally done, and check for warpage in the head and the block.
Apr 7, 2007 | 09:49 AM
#5
Contributing Member
Joined: Apr 2006
Posts: 4,787
Likes: 36
From: TENN Native Languishing in Virginia
http://www.brian894x4.com/Scannedmanual.html
Here's a link to an online FSM for 89 4x4. Yes, those are indicators of blown HG.
Here's a link to an online FSM for 89 4x4. Yes, those are indicators of blown HG.
Apr 7, 2007 | 09:52 AM
#6
Registered User
Joined: Apr 2007
Posts: 252
Likes: 0
From: Cascade Mountains, SW-WA
Disconnect battery ground cable, then drain coolant from radiator and engine block.
On turbo models, remove turbocharger assembly. On carbureted models, remove air cleaner. On fuel injected models less turbo, disconnect air cleaner hose from air cleaner.
Disconnect exhaust pipe from exhaust manifold.
Disconnect all electrical connectors, fuel lines, vacuum, emission and heater hoses from intake manifold, carburetor (if equipped) and cylinder head. On carbureted models, remove fuel pump.
Remove oil dipstick, distributor, spark plugs and radiator inlet hose, then disconnect heater water inlet hose from heater water inlet pipe.
Disconnect cruise control actuator (if equipped), accelerator cable and engine ground strap from cylinder head. Disconnect throttle cable, if equipped, from cylinder head.
Remove EGR vacuum modulator and bracket from cylinder head (if equipped).
On fuel injected models, remove bolts, air intake chamber and throttle body.
On fuel injected models, remove pulsation damper and disconnect fuel hose from fuel line.
On fuel injected models, disconnect air bypass hose from air valve and remove air valve from intake manifold.
On fuel injected models, remove auxiliary air valve.
On fuel injected turbo models, disconnect oil cooler hose from intake manifold.
On vehicles equipped with power steering, remove drive belt, bolts and pulley. Remove power steering pump mounting bolts and position pump aside. Do not disconnect power steering pump hoses.
Remove ground strap and cylinder head cover.
Rotate crankshaft until No. 1 cylinder is set at TDC compression stroke. Place reference marks on timing chain and camshaft sprocket.
Remove semi-circular plug, camshaft sprocket bolt and distributor drive gear and fuel pump drive cam on carbureted models, or distributor drive gear and thrust plate on fuel injected models.
Remove camshaft sprocket and timing chain from camshaft, leaving lower part of chain engaged on lower sprocket. Remove timing chain cover bolt from front inside of cylinder head. The timing chain cover bolt must be removed prior to removing head bolts.
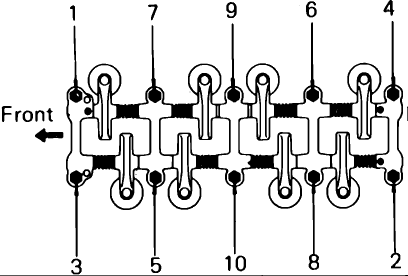
Gradually loosen and remove cylinder head bolts in two or three steps as shown in Fig. 45.
Remove rocker arm assembly from cylinder head, then remove cylinder head. If rocker arm assembly is difficult to remove, a pry bar can be inserted at the front or rear of rocker arm assembly to aid in separation.
Remove intake manifold.
Remove EGR valve and exhaust manifold, if not previously removed.
Remove engine hangers, ground straps and cylinder head rear cover.
*the above are steps as defined in the manual, but some can be skipped.
like these 2: the egr valve can stay on.
instead of removing the intake manifold, just take off the plenum. it will be easier to R+R the wires.
i sugggest you dont attemp this repair if your mechanical skills are limited.
On turbo models, remove turbocharger assembly. On carbureted models, remove air cleaner. On fuel injected models less turbo, disconnect air cleaner hose from air cleaner.
Disconnect exhaust pipe from exhaust manifold.
Disconnect all electrical connectors, fuel lines, vacuum, emission and heater hoses from intake manifold, carburetor (if equipped) and cylinder head. On carbureted models, remove fuel pump.
Remove oil dipstick, distributor, spark plugs and radiator inlet hose, then disconnect heater water inlet hose from heater water inlet pipe.
Disconnect cruise control actuator (if equipped), accelerator cable and engine ground strap from cylinder head. Disconnect throttle cable, if equipped, from cylinder head.
Remove EGR vacuum modulator and bracket from cylinder head (if equipped).
On fuel injected models, remove bolts, air intake chamber and throttle body.
On fuel injected models, remove pulsation damper and disconnect fuel hose from fuel line.
On fuel injected models, disconnect air bypass hose from air valve and remove air valve from intake manifold.
On fuel injected models, remove auxiliary air valve.
On fuel injected turbo models, disconnect oil cooler hose from intake manifold.
On vehicles equipped with power steering, remove drive belt, bolts and pulley. Remove power steering pump mounting bolts and position pump aside. Do not disconnect power steering pump hoses.
Remove ground strap and cylinder head cover.
Rotate crankshaft until No. 1 cylinder is set at TDC compression stroke. Place reference marks on timing chain and camshaft sprocket.
Remove semi-circular plug, camshaft sprocket bolt and distributor drive gear and fuel pump drive cam on carbureted models, or distributor drive gear and thrust plate on fuel injected models.
Remove camshaft sprocket and timing chain from camshaft, leaving lower part of chain engaged on lower sprocket. Remove timing chain cover bolt from front inside of cylinder head. The timing chain cover bolt must be removed prior to removing head bolts.
Gradually loosen and remove cylinder head bolts in two or three steps as shown in Fig. 45.
Remove rocker arm assembly from cylinder head, then remove cylinder head. If rocker arm assembly is difficult to remove, a pry bar can be inserted at the front or rear of rocker arm assembly to aid in separation.
Remove intake manifold.
Remove EGR valve and exhaust manifold, if not previously removed.
Remove engine hangers, ground straps and cylinder head rear cover.
*the above are steps as defined in the manual, but some can be skipped.
like these 2: the egr valve can stay on.
instead of removing the intake manifold, just take off the plenum. it will be easier to R+R the wires.
i sugggest you dont attemp this repair if your mechanical skills are limited.
Apr 8, 2007 | 05:50 PM
#7
Registered User
Joined: Sep 2005
Posts: 1,481
Likes: 6
From: Northern IL
Trending Topics
Apr 8, 2007 | 06:33 PM
#8
Registered User
Joined: Aug 2006
Posts: 220
Likes: 0
From: Austin, TX
When you do it right, it can be done in about 4 hours (with a 3" body lift) if you have the cylinder head ready to be installed. I cut corners and leave everything attached that I can...takes longer the first time but shorter once you know what to expect. It's really pretty easy to do.
One thing I will point out that I didn't see for hours the first time and almost broke stuff is the bolt in the very front of the cylinder head, it will be covered up with oil and can't see it until you sop up the oil with a rag. There's another allen bolt that attaches the thermostat housing to the cylinder head under the fuel rail. Someone probably has pictures here of them both.
One thing I will point out that I didn't see for hours the first time and almost broke stuff is the bolt in the very front of the cylinder head, it will be covered up with oil and can't see it until you sop up the oil with a rag. There's another allen bolt that attaches the thermostat housing to the cylinder head under the fuel rail. Someone probably has pictures here of them both.
 Apr 23, 2007 | 06:25 AM
#11
Registered User
Joined: Sep 2005
Posts: 1,481
Likes: 6
From: Northern IL
I didn't want to make a new thread but I have a question about the head ground strap. My truck hasn't had one the whole time I've had it because it was removed since it has a body lift. I have the materials to make a new one, but would like to see pictures of where it installs on the firewall and head if anyone has them.
Thanks,
Rob
Thanks,
Rob
Apr 23, 2007 | 08:27 AM
#13
Registered User
Joined: Sep 2005
Posts: 1,481
Likes: 6
From: Northern IL
I have some 4 gauge stereo power wire I'm going to use. Hopefully that's thick enough. I just wanted to know which hole I should bolt it to on the back of the head. Is there a hole just for the ground, or does it share a bolt hole with something else?
Rob
Rob

Thread
Thread Starter
Forum
Replies
Last Post
TURBOrunnerNM
86-95 Trucks & 4Runners
4
Jul 22, 2015 11:01 AM
Jnkml
95.5-2004 Tacomas & 96-2002 4Runners
3
Jul 6, 2015 01:20 PM


