

 Feb 9, 2016, 09:59 AM
Last edit by: IB Advertising
See related guides and technical advice from our community experts:
Browse all: Exterior Guides
- Toyota 4Runner 1984-1995 How to Eliminate Windshield Rust
Step by step instructions for do-it-yourself repairs
Browse all: Exterior Guides

Eliminating the metal windshield trim aka rust maker
Jun 23, 2014 | 12:31 PM
#141
Registered User


Joined: Mar 2012
Posts: 7,125
Likes: 681
...What my glass guy is going to do is reset the glass in glue, then use a universal rubber trim to bridge the gap and take the place of the chrome stuff. The universal stuff has a channel that the end of the windshield slides into, then it bridges the gap between glass and body.
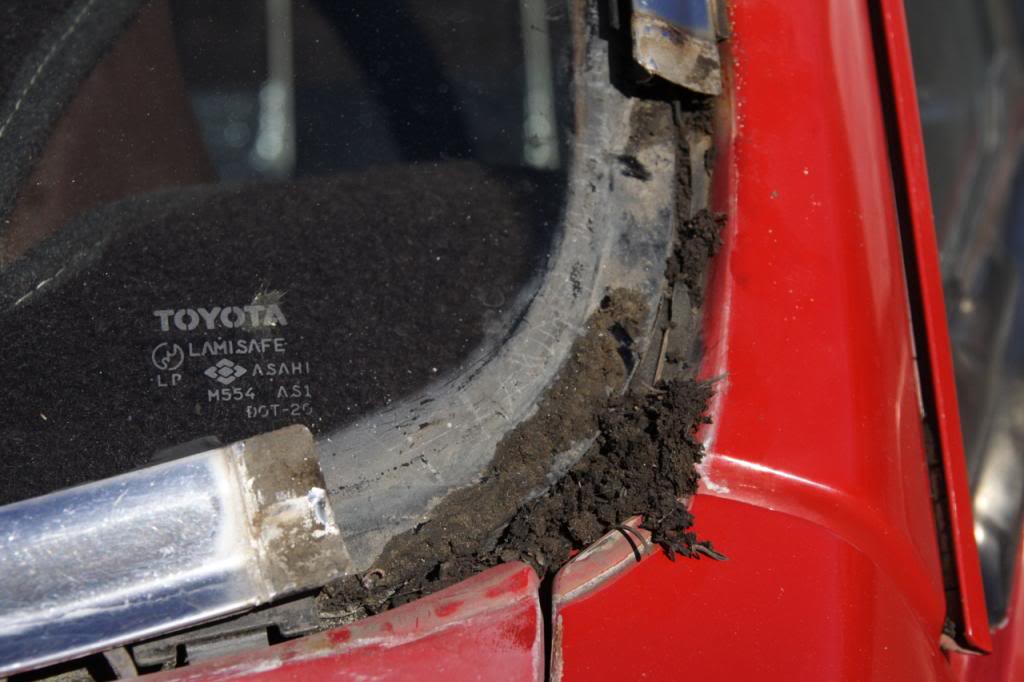
I'm done fixing rust spots the the chrome caused, and tomorrow glass shop will come in an install replacement. I asked shop to use the trim that FGZ shows ^^ as follows (also on my build post):
Last edited by rworegon; Jun 23, 2014 at 06:08 PM. Reason: Edited one letter of a certain word.
 Jun 24, 2014 | 04:00 PM
#143
Registered User
Joined: Mar 2012
Posts: 7,125
Likes: 681

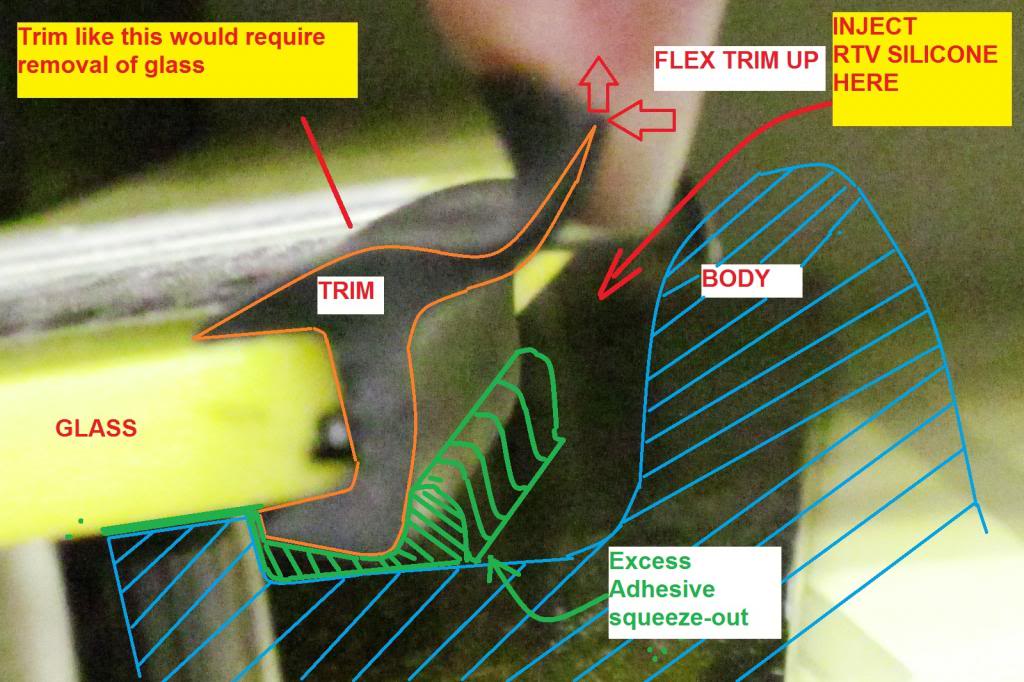
Here it is installed on edge of 1/4-inch think plexiglas:

BTW, Safelite will install replacement glass on mine tomorrow. I will ask for that trim to protect the edge of glass. However, after install, I will cut off the "wings", so I will have full access to gap in order to fill it thoroughly with silicone.
Does anyone know part number / type that is UV-resistant? We already know silicone is water-proof.
Jul 5, 2014 | 06:51 AM
#144

Registered User
Joined: Sep 2011
Posts: 32
Likes: 0
BTW, Safelite will install replacement glass on mine tomorrow. I will ask for that trim to protect the edge of glass. However, after install, I will cut off the "wings", so I will have full access to gap in order to fill it thoroughly with silicone.
Does anyone know part number / type that is UV-resistant? We already know silicone is water-proof.
Does anyone know part number / type that is UV-resistant? We already know silicone is water-proof.
Jul 5, 2014 | 08:57 AM
#145
Registered User
Joined: Mar 2012
Posts: 7,125
Likes: 681
Went really well. post here. Thanks!
Now I need to trim the rubber trim flap to expose the gap. I'm still researching what to use...
Now I need to trim the rubber trim flap to expose the gap. I'm still researching what to use...
- Silicone IF and only IF I can find one that's perfectly acid-free, OR
- Urethane like the windshield shop uses, OR
- Whatever they use on aircraft windshields- seriously.
Jul 7, 2014 | 02:11 PM
#146
Registered User
Joined: Sep 2011
Posts: 32
Likes: 0
Went really well. post here. Thanks!
Now I need to trim the rubber trim flap to expose the gap. I'm still researching what to use...
Now I need to trim the rubber trim flap to expose the gap. I'm still researching what to use...
- Silicone IF and only IF I can find one that's perfectly acid-free, OR
- Urethane like the windshield shop uses, OR
- Whatever they use on aircraft windshields- seriously.
It looks like it is available in black also:
http://www.skygeek.com/ac-tech-ac251...FM7hoCZdXw_wcB
Jul 7, 2014 | 03:19 PM
#147
Registered User
Joined: Mar 2012
Posts: 7,125
Likes: 681
The sealant we use on C130 aircraft windshields ... It looks like it is available in black also:
http://www.skygeek.com/ac-tech-ac251...FM7hoCZdXw_wcB
http://www.skygeek.com/ac-tech-ac251...FM7hoCZdXw_wcB
Will check that out. In your experience, approximately how many of that 25-gram package will take to fill the gap? If too expensive, I may just trim the flap/"wing" on the rubber trim and expose the gap; it does not bother me aesthetically, anyway. And it would always be accessible for cleaning.
Last edited by RAD4Runner; Jul 7, 2014 at 03:21 PM.
Jul 7, 2014 | 06:44 PM
#148

Registered User
Joined: Jan 2009
Posts: 245
Likes: 0
Christ, this is an epic thread, considering the subject. Props to the effort! (want a 'raising a beer in salute' emoji gif)
After reading through, however, I'm convinced that I should set aside some scratch and get a replacement set for my deteriorating "chrome" windshield trim. I'm filing this expense under 'What Would David Bowie Do?'. Glammy chrome all the way (want a 'sashaying 1970's dude in tights' emoji gif)
After reading through, however, I'm convinced that I should set aside some scratch and get a replacement set for my deteriorating "chrome" windshield trim. I'm filing this expense under 'What Would David Bowie Do?'. Glammy chrome all the way (want a 'sashaying 1970's dude in tights' emoji gif)
 Nov 16, 2015 | 12:58 PM
#151

Registered User
Joined: Feb 2015
Posts: 33
Likes: 0
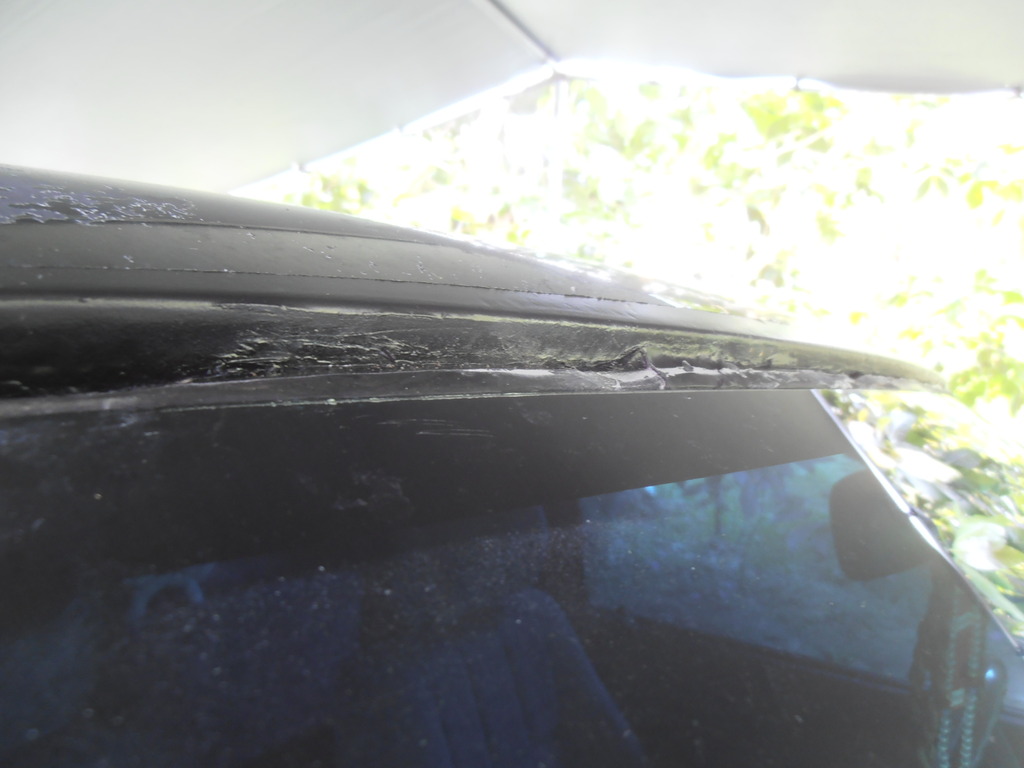
Bringing this thread back! I got my glass replaced by our local installer, he used the glue-in method with rubber trim. He said he wasn't all that pleased with the results and I'm not super thrilled with it either.
He had to use really thick trim because he said anything thinner would leave a gap at the bottom of the windshield. It looks a bit sloppy to me especially in the corners. I replaced the entire glass for $120 because the metal trim that came on my truck was bent, loose and parts of it were missing. Nothing wrong with the windshield itself aside from being old and pitted so I paid $120 just to fix the cosmetic trim really. After all that it still looks kind of half-assed.
Glass guy said he'd work with me to find a better method because he was not happy with how it turned out.
Sooooo, can anyone who used the glue in method tell me what width/type of trim they used and share a pic of the end results? I'd really appreciate it.
Last edited by rusty904; Nov 16, 2015 at 12:59 PM.
Nov 16, 2015 | 01:15 PM
#152
Registered User
Joined: Mar 2012
Posts: 7,125
Likes: 681
Rusty,
I'm afraid that's about the best width rubber trim you could get for your truck. The reason for the ugly corners is because the corners are supposed to be square and a rubber trimming "wrapping" around glass corner could not be as square as the stock chrome.
I'm afraid that's about the best width rubber trim you could get for your truck. The reason for the ugly corners is because the corners are supposed to be square and a rubber trimming "wrapping" around glass corner could not be as square as the stock chrome.
Nov 16, 2015 | 01:40 PM
#153
Registered User
Joined: Feb 2015
Posts: 33
Likes: 0
Yeah, I think I got my expectations raised because of these pics off of expedition portal. Turns out the trim does leave a gap at the bottom but it isn't very visible because of the black paint. Just looks so much better than how mine turned out.
Mar 17, 2016 | 02:20 PM
#154

Registered User
Joined: Mar 2013
Posts: 123
Likes: 2
From: VA
Necro'ing this thread and subbing to it.
Looked like the press in Aussie gasket worked well for a few... but others are saying it shouldn't be used due to structural reasons? I don't follow...
I need to pull my windshield and weld up the huge holes that have developed around it... right now I have duck tape.
Looked like the press in Aussie gasket worked well for a few... but others are saying it shouldn't be used due to structural reasons? I don't follow...
I need to pull my windshield and weld up the huge holes that have developed around it... right now I have duck tape.
Apr 3, 2016 | 04:21 PM
#155
Registered User
Joined: Apr 2005
Posts: 299
Likes: 0
From: Fayetteville, Arkansas
For those of you who have installed the Aussie gasket did you have trouble getting the rubber to fit over the glass? Mine seems to be too short/small. I have to stretch/pull just to get all three corners on. I'm afraid if I force it I'll break it. I held the rubber up to the windsheild frame and it looks too small.
URL=http://s6.photobucket.com/user/soarerjzz30/media/Mobile%20Uploads/image_1.jpg.html] [/URL]

URL=http://s6.photobucket.com/user/soarerjzz30/media/Mobile%20Uploads/image_1.jpg.html]
[/URL] Apr 4, 2016 | 06:34 AM
#156
Registered User
Joined: Mar 2009
Posts: 34
Likes: 0
For those of you who have installed the Aussie gasket did you have trouble getting the rubber to fit over the glass? Mine seems to be too short/small. I have to stretch/pull just to get all three corners on. I'm afraid if I force it I'll break it. I held the rubber up to the windsheild frame and it looks too small.
Leave the gasket in the sun all day so that the rubber will soften up.
Start installing the gasket on one side. I used 3m electrical tape (it's what was around me at the time) to help hold the gasket on the glass. Tape perpendicular to the rubber - from outside the glass, over the gasket, and to inside the glass. Tape as much and as often as needed. Then do the bottom of the glass, the 2nd side and then finally the top of the glass.
I left it for a few days to let the rubber stretch out. When it's time to install it - remove the tape and install it similar to an old vw bug windshield.
Mine still looks good after a couple years always exposed to the elements. Good luck!
Apr 4, 2016 | 04:19 PM
#157
Registered User
Joined: Apr 2005
Posts: 299
Likes: 0
From: Fayetteville, Arkansas
It seems small but it'll fit. Here's how I did mine.
Leave the gasket in the sun all day so that the rubber will soften up.
Start installing the gasket on one side. I used 3m electrical tape (it's what was around me at the time) to help hold the gasket on the glass. Tape perpendicular to the rubber - from outside the glass, over the gasket, and to inside the glass. Tape as much and as often as needed. Then do the bottom of the glass, the 2nd side and then finally the top of the glass.
I left it for a few days to let the rubber stretch out. When it's time to install it - remove the tape and install it similar to an old vw bug windshield.
Mine still looks good after a couple years always exposed to the elements. Good luck!
 Apr 4, 2016 | 04:45 PM
#158

just to let people know ... we have these as well for the 2nd gen .. http://www.toyotafiberglass.com
https://www.yotatech.com/forums/f209...ew-bed-242508/
they fit perfect


.
https://www.yotatech.com/forums/f209...ew-bed-242508/
they fit perfect
.
May 2, 2016 | 09:17 PM
#159
Registered User
Joined: Jan 2016
Posts: 159
Likes: 26
From: Big Island, Hawai'i
Here's how i did mine
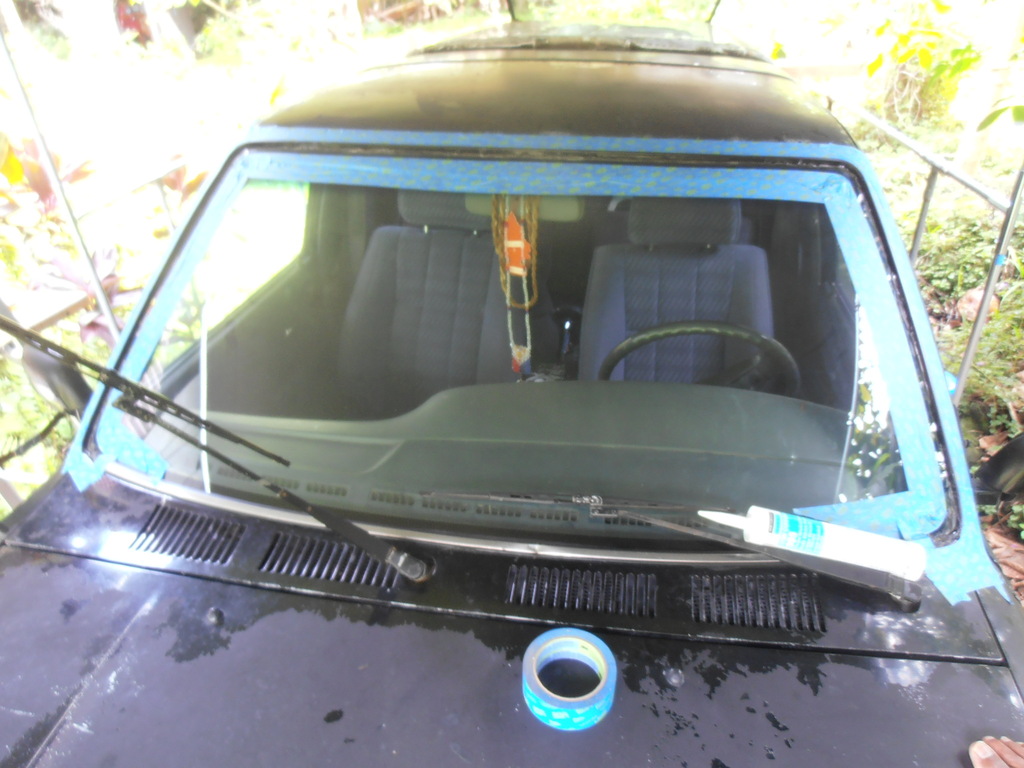
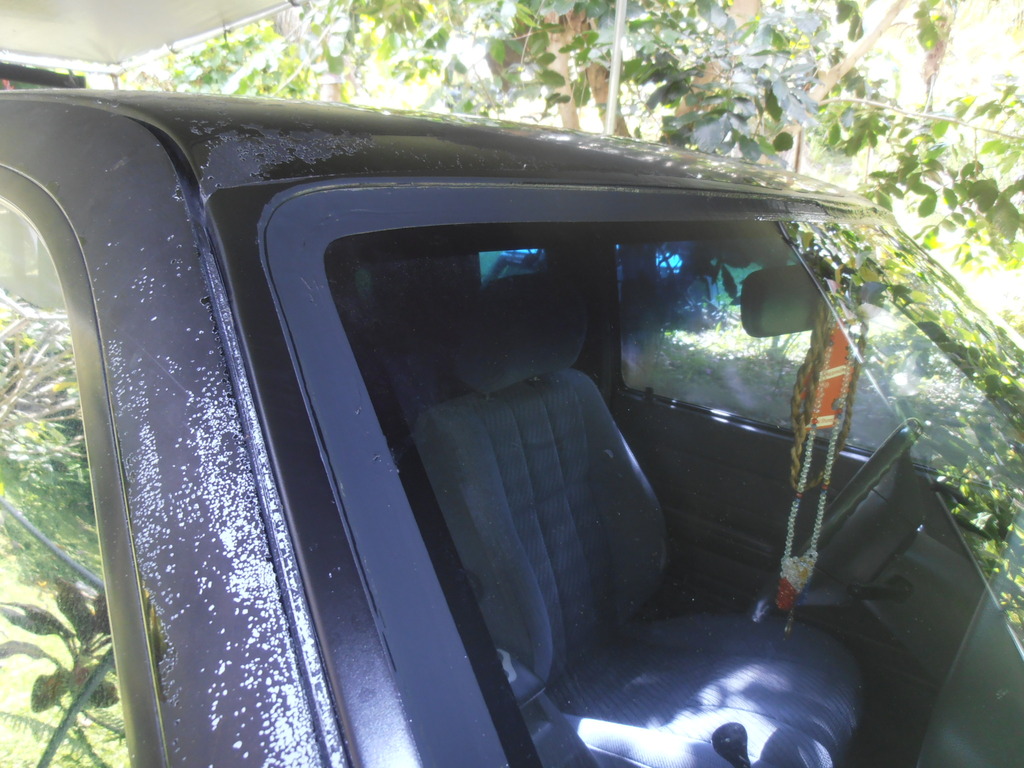
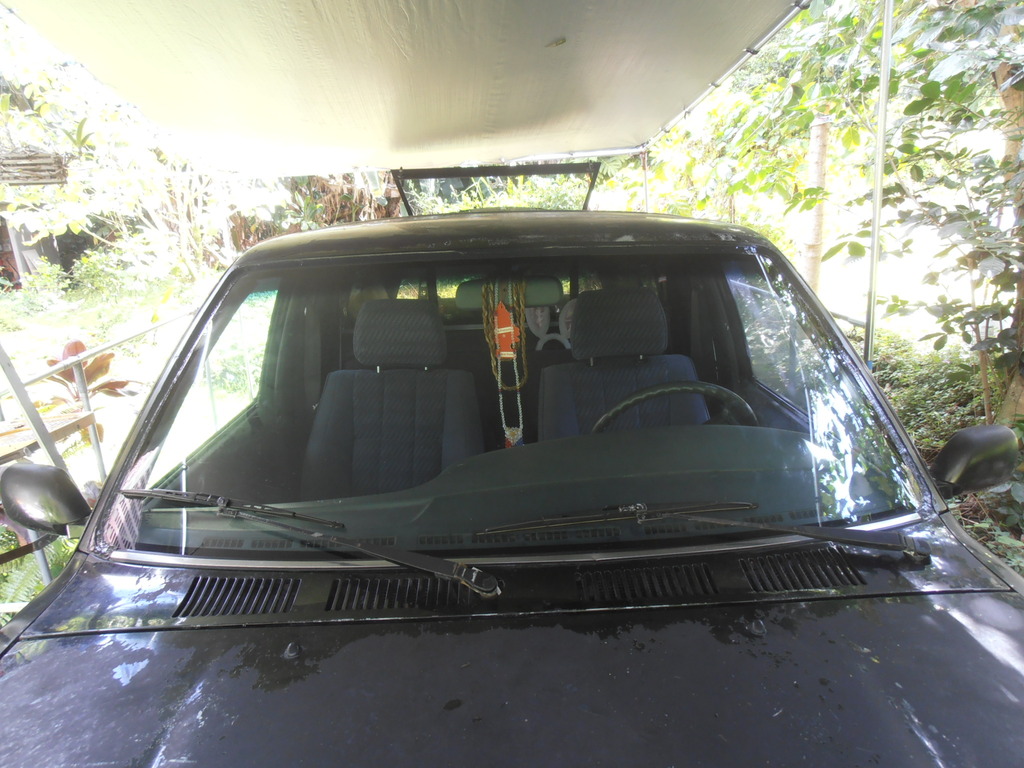
One day as i was going down the yotatech rabbit hole, i came upon this thread and learned about the rust issues of the windshield chrome. With my mission to keep my truck rust-free, I decided to remove the chrome as I noticed there was small kine hidden rust on the lower corners. So i did the sanding/grinding, ospho, jbweld, primer, paint method and decided to just do my best to keep water out of the channel by filling it with the Dow Corning 995. It didn't turn out perfect but I think that stuff will keep the water out.
Here's how:

the materials
the PO was a bit of DIY'er and he told he replaced the windshield himself after he dropped an alternator on it. I don't know what it's supposed to look like under there but i used a razor to trim off any of the windshield goop that i thought would be high spots (i know i need a paint job)
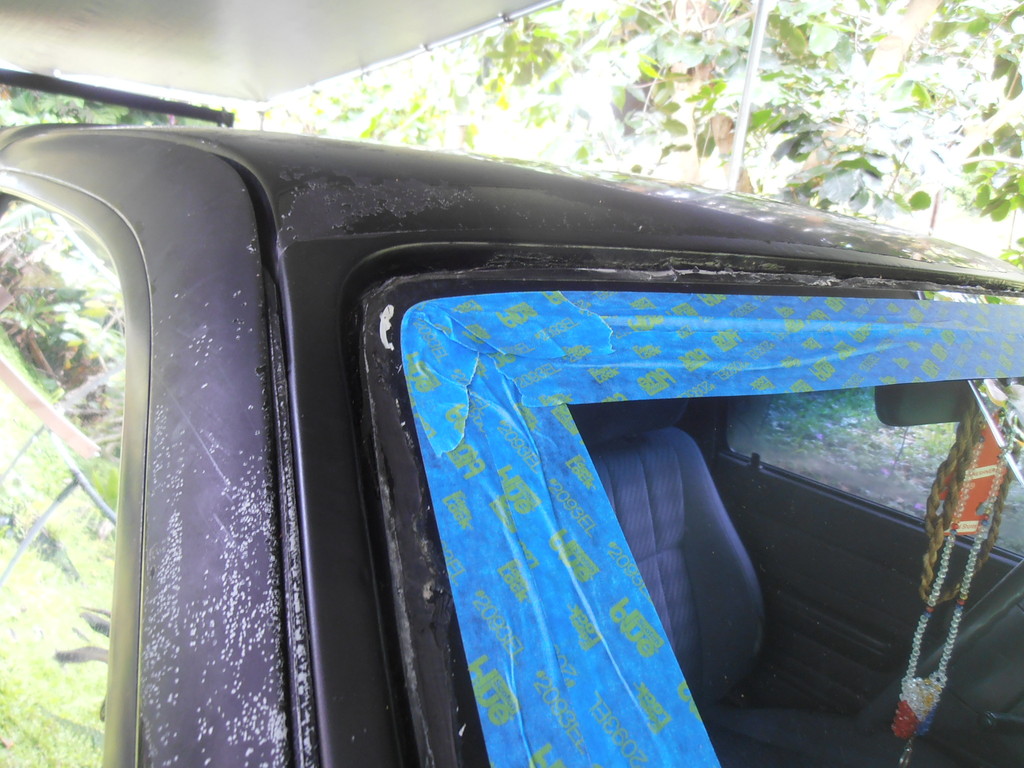
i taped where i wanted the inside edge to be
then the outside; i went overkill on the tape because according to the interwebs, you don't want to smear the 995 on anything that you don't want it to be on
tape is your friend
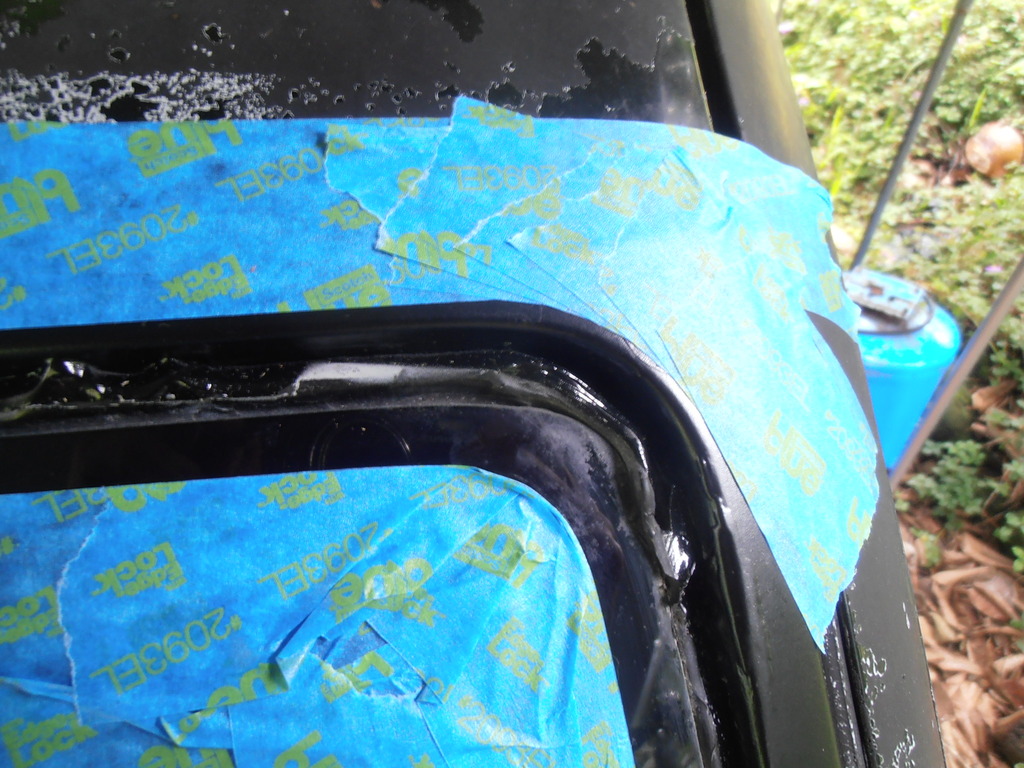
after a few tries, i made a template for the squeegee. i wanted to try* to create a little lip on the outside edge to to ensure that water doesn't go in that way
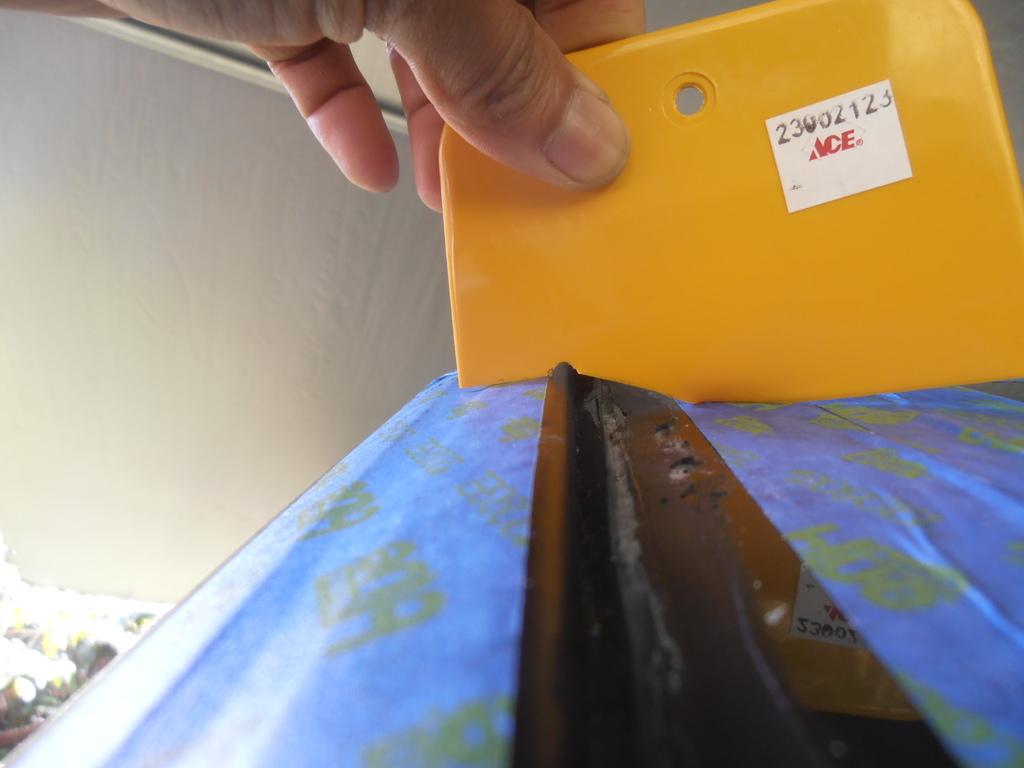
*that was the theory anways
i didn't take pictures of the application because i know that i was pressed for time but if i can impart some advice:
- cut the hole from the tube big, the stuff is really thick and i spent too much time getting enough of it to fill the channel and have enough to tool it in the desired shape
- ideally one pass is best. i did the driver side first because i felt i was taking too long to squeeze it out and i didn't want the stuff to set. i kept having to put more goop on then re-tooling resulting in not so smooth spots. when i did the passenger side i made sure there was excess and more or less did it all in 1 pass. i was more stoked on that side
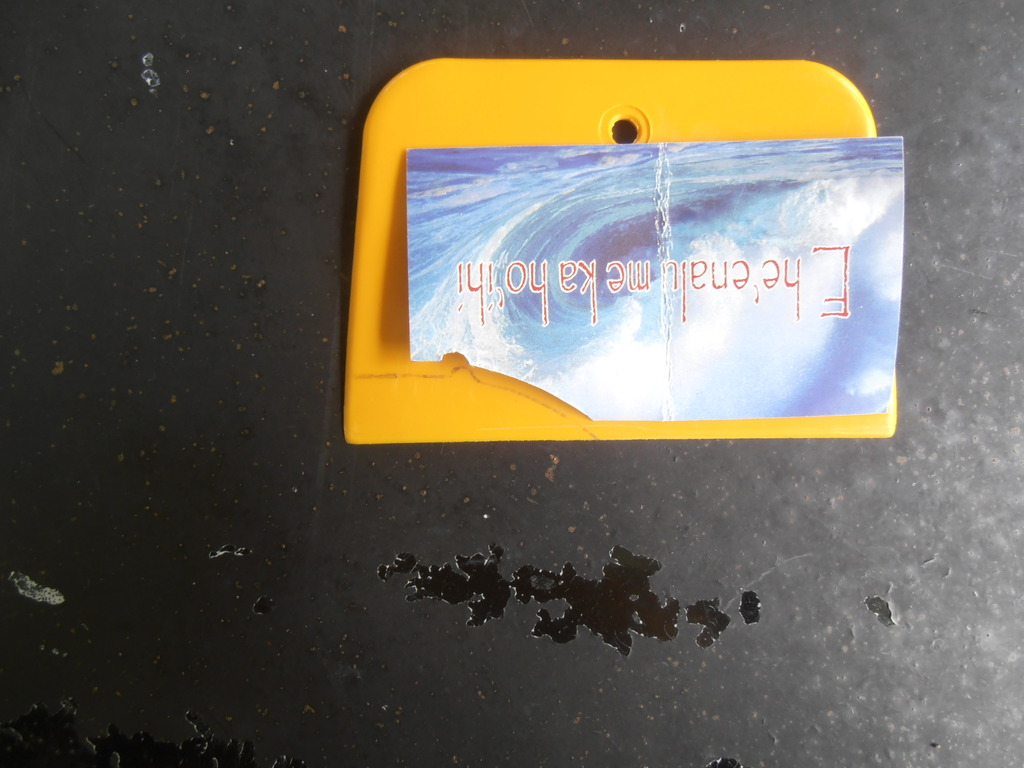
- the stuff sets up quick so if you're a perfectionist and the stuff is already starting to set, going back and scraping it is not a good idea because it won't be smooth
- practice the tooling motion and where you're going to position yourself because time is of the essence
the finished product: i give myself a low B
Here's how:

the materials

the PO was a bit of DIY'er and he told he replaced the windshield himself after he dropped an alternator on it. I don't know what it's supposed to look like under there but i used a razor to trim off any of the windshield goop that i thought would be high spots (i know i need a paint job)

i taped where i wanted the inside edge to be

then the outside; i went overkill on the tape because according to the interwebs, you don't want to smear the 995 on anything that you don't want it to be on

tape is your friend

after a few tries, i made a template for the squeegee. i wanted to try* to create a little lip on the outside edge to to ensure that water doesn't go in that way

*that was the theory anways
i didn't take pictures of the application because i know that i was pressed for time but if i can impart some advice:
- cut the hole from the tube big, the stuff is really thick and i spent too much time getting enough of it to fill the channel and have enough to tool it in the desired shape
- ideally one pass is best. i did the driver side first because i felt i was taking too long to squeeze it out and i didn't want the stuff to set. i kept having to put more goop on then re-tooling resulting in not so smooth spots. when i did the passenger side i made sure there was excess and more or less did it all in 1 pass. i was more stoked on that side
- the stuff sets up quick so if you're a perfectionist and the stuff is already starting to set, going back and scraping it is not a good idea because it won't be smooth
- practice the tooling motion and where you're going to position yourself because time is of the essence
the finished product: i give myself a low B


