
Low Air Volume through Dashboard Vents - Evaporator
 Aug 25, 2014 | 10:26 PM
#1
Thread Starter
Registered User
Joined: May 2014
Posts: 23
Likes: 0
Low Air Volume through Dashboard Vents - Evaporator
Hey Guys,
I've been suffering with super low air volume through the dash vents in my 1994 22re pickup. I do have factory air and despite it being very cold the low air volume prevented it from cooling the cab down sufficiently this summer. It's been a real bummer. So I want to share my experience with you all in case this is a problem you encounter sometime in the future.
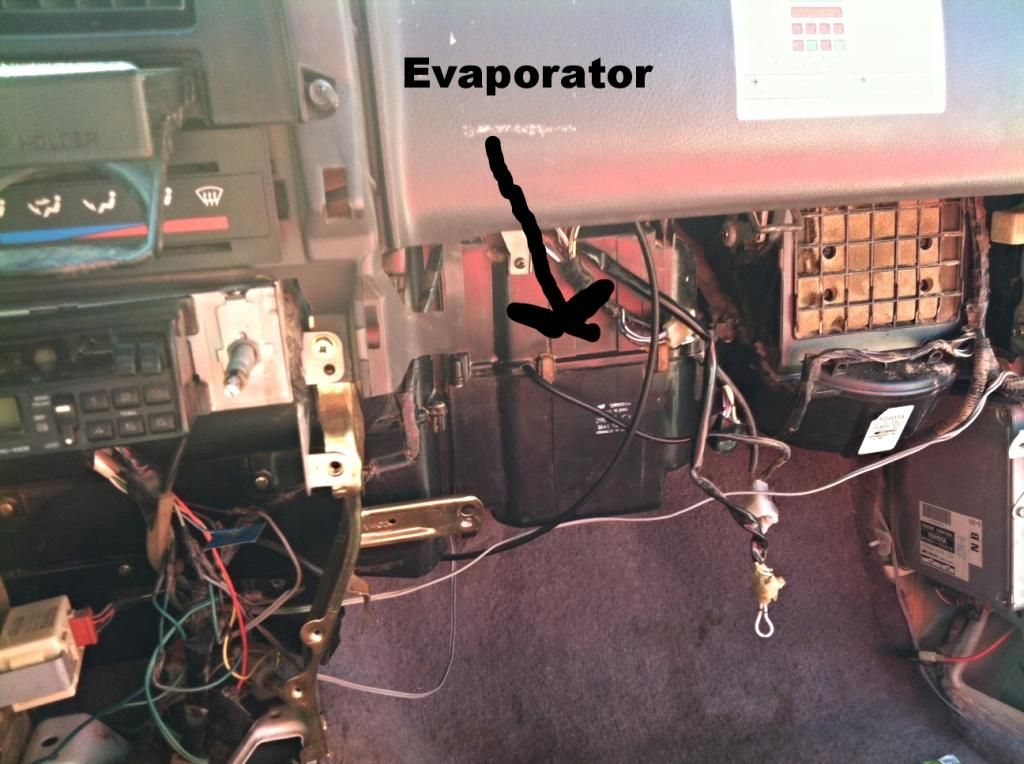
After searching the YotaTech site and through a process of elimination I was positive it was the evaporator. Since I have never seen an evaporator I learned that it sits inder the glove box between the blower motor and the heater. You need to remove some trim and the glove box to access it. Also before you remove the evaporator, the ac system will need to be evacuated. Since I don't have the equipment necessary to do this, I paid a shop $30.00 to do it.

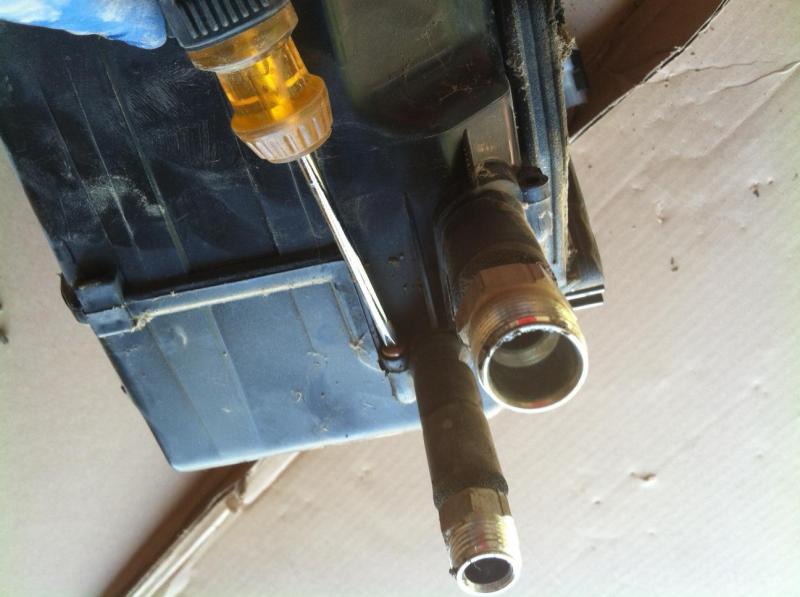
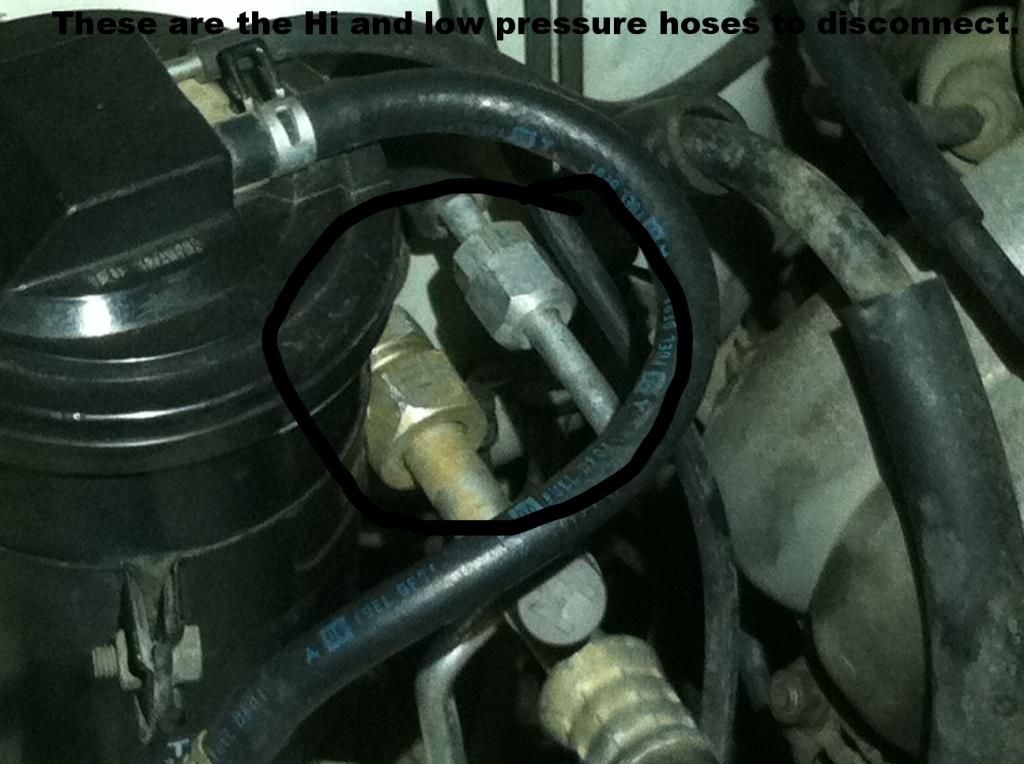
First I diconnected the High and Low pressure hoses closest to the firewall. I left them connected to the compressor. Once disconnected, I sealed them with some tape to prevent moisture from entering the system.
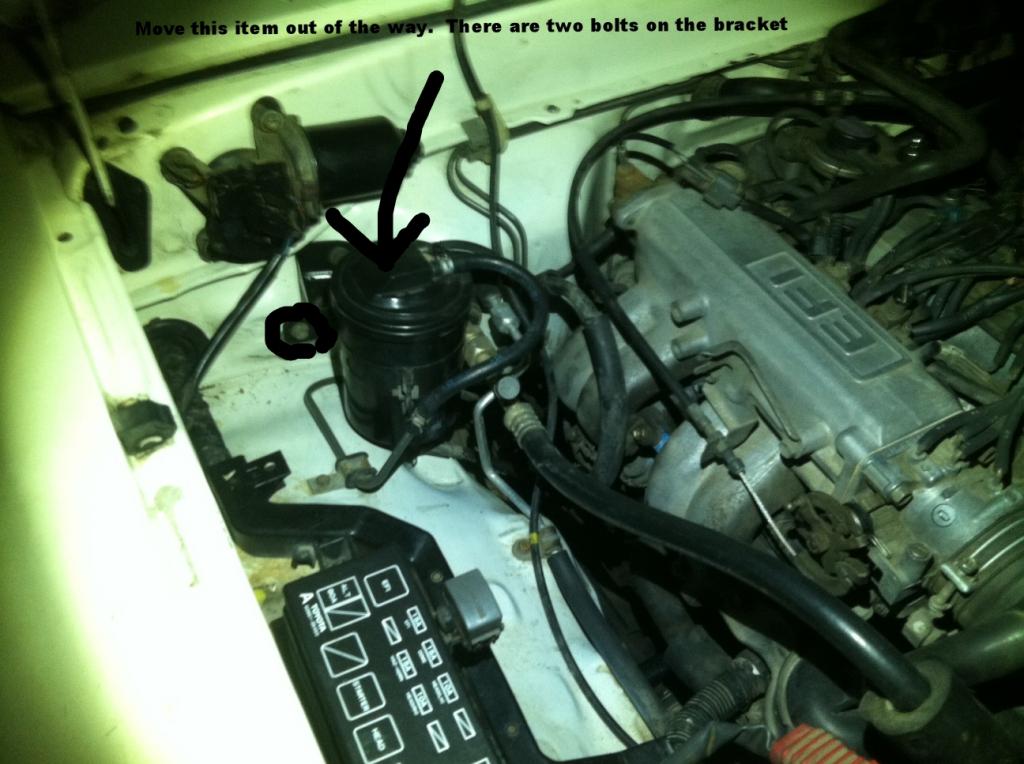

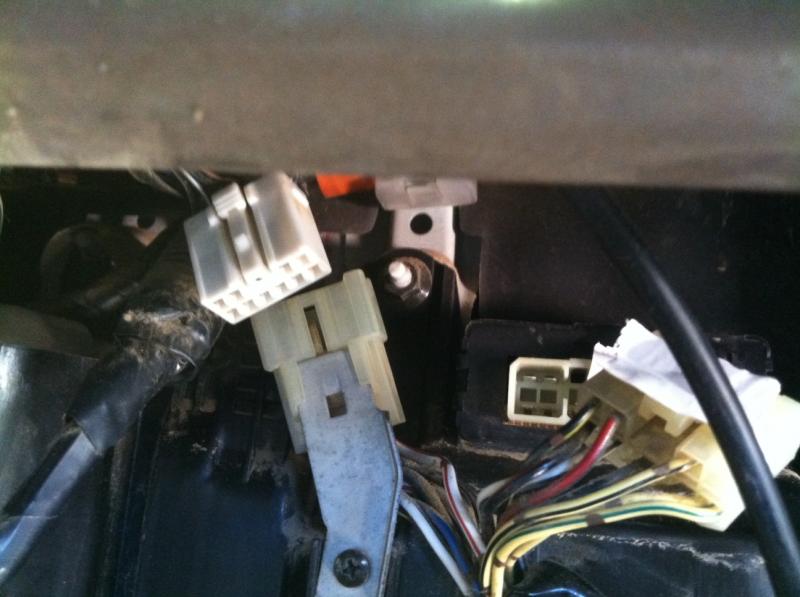
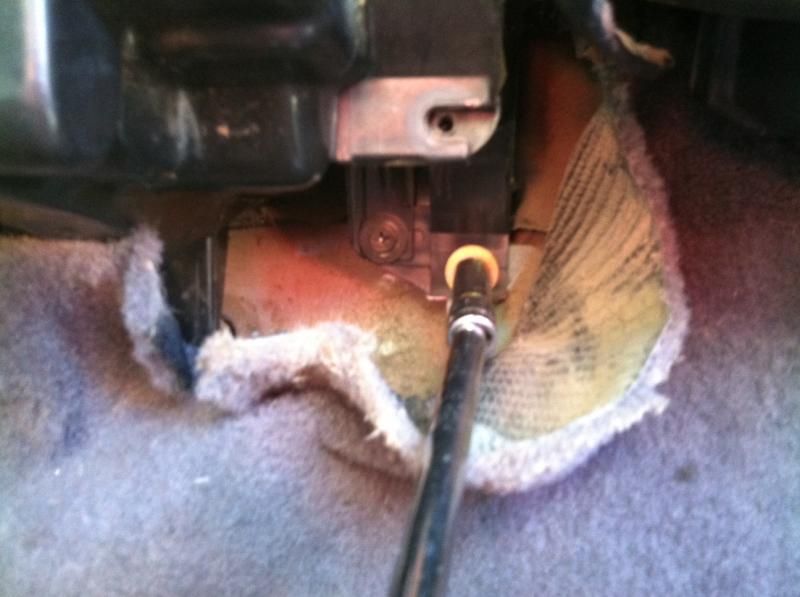
Next I started removing the screws that attach the evaporator to the inside of the cab. There are a series of 10mm screws surrounding the evaporator and one nut on a post at the upper left side of the unit. Also don't forget to remove the screws that are below the carpet. There are several electrical connectors to disconnect as well. I labeled mine just in case.


My evaporator came right out with just a couple gentle wiggles. Don't yank it out! If you get alot of resistance, you probably forgot a screw or the nut in the upper left corner. Once you get the evaporator out, It time to open the housing and remove the evaporator itself. There's a few screws and small clamps.

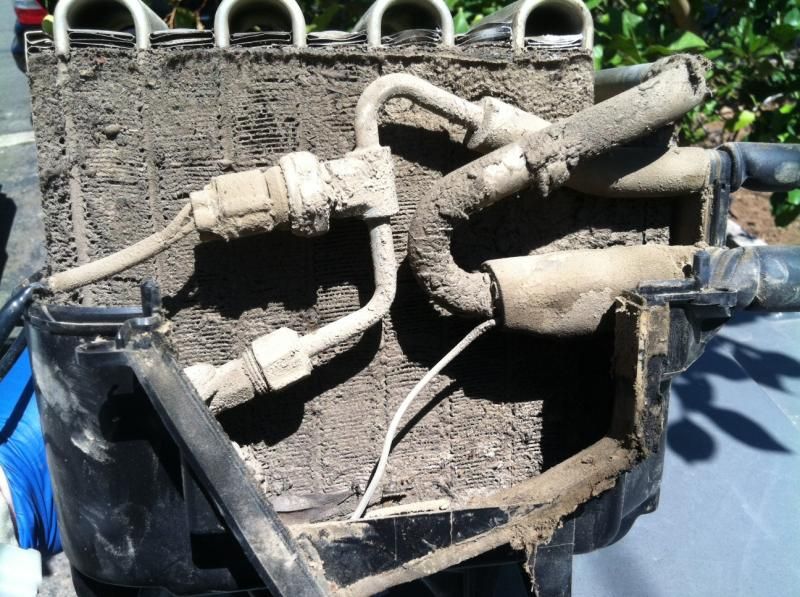
Yikes! Twenty years of neglect. I could tell as soon as I looked in the the housing that this was the problem.
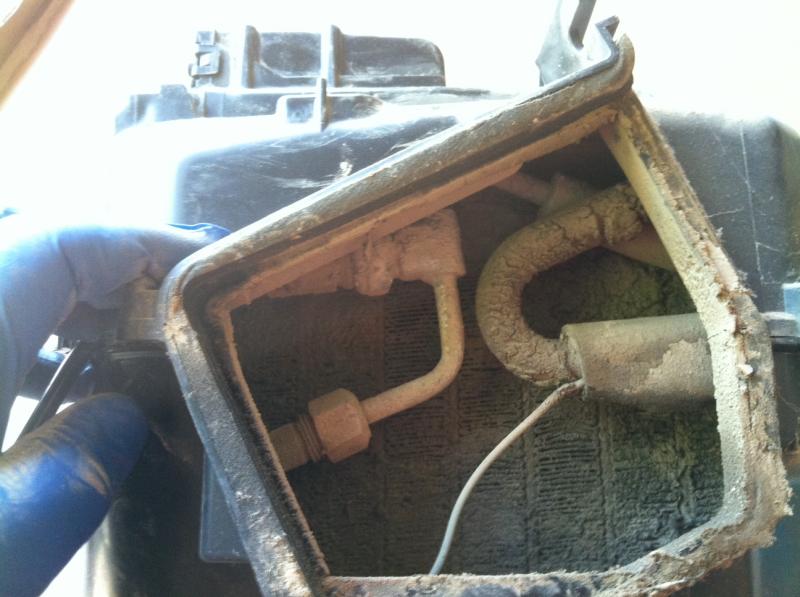
Even some leaves made it down in there.
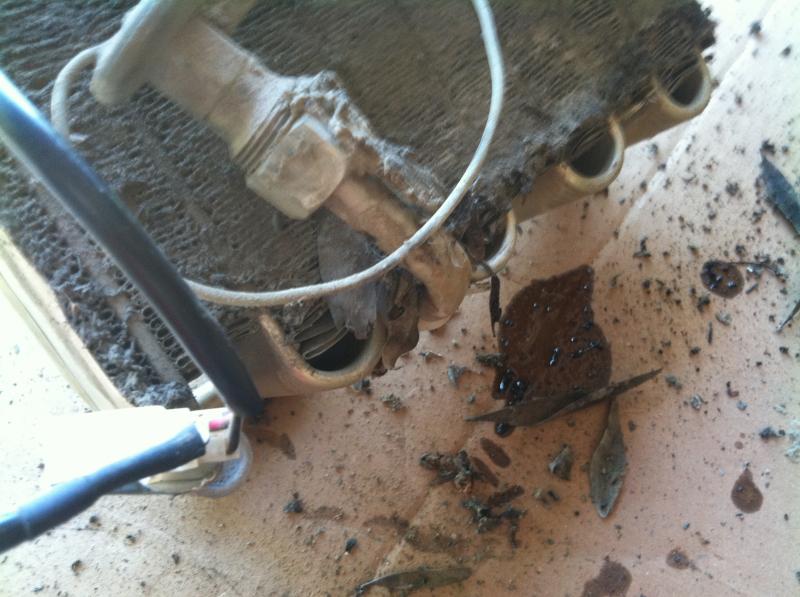
Another view

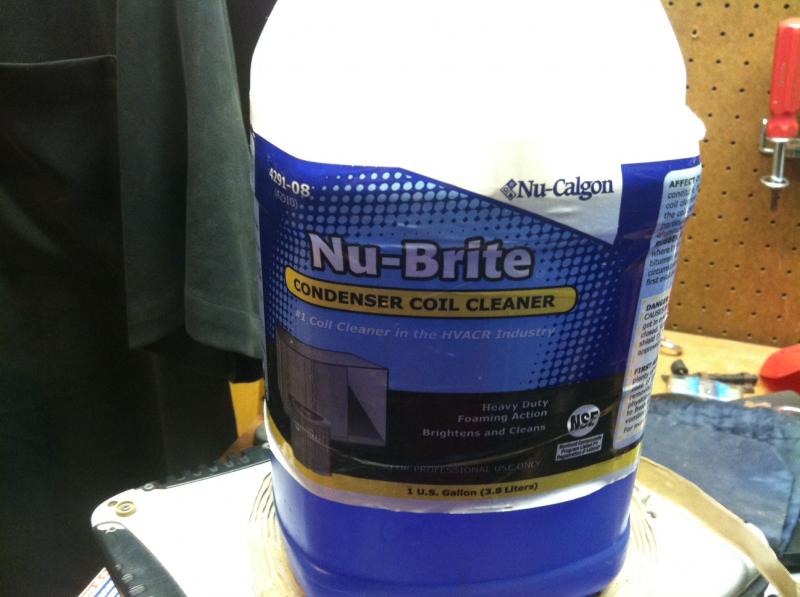
I used a cleaner that I saw on youtube. It was $25.00 from Grainger.
I followed the directions and the foaming action was incredible.
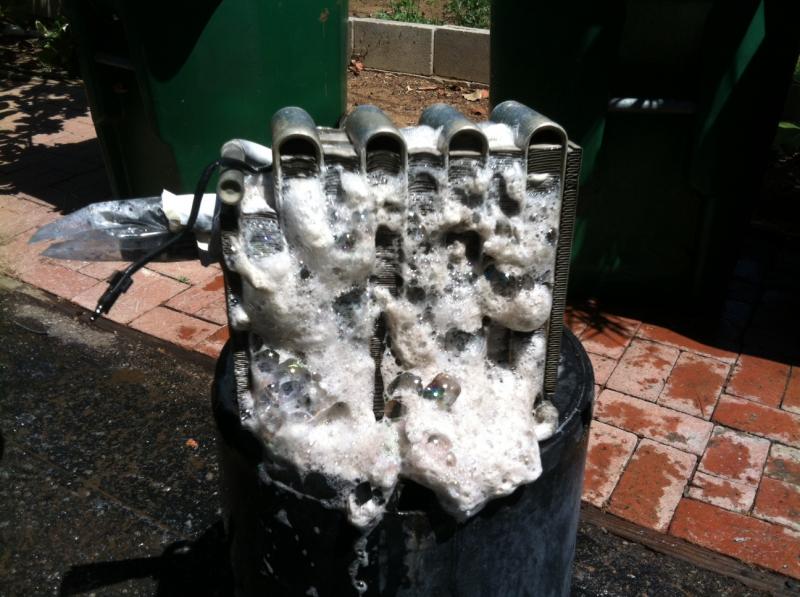
Although I bent some of the grids, It cleaned up pretty good after a couple rounds of the cleaner. I let it dry then reinstalled it.

Once it got it back in the truck, I was amazed at the air flow. Problem solved! It was back to normal. Now I can't wait to et my ac recharged.
Thanks YotaTech and to all the members who share their expertise!
I've been suffering with super low air volume through the dash vents in my 1994 22re pickup. I do have factory air and despite it being very cold the low air volume prevented it from cooling the cab down sufficiently this summer. It's been a real bummer. So I want to share my experience with you all in case this is a problem you encounter sometime in the future.
After searching the YotaTech site and through a process of elimination I was positive it was the evaporator. Since I have never seen an evaporator I learned that it sits inder the glove box between the blower motor and the heater. You need to remove some trim and the glove box to access it. Also before you remove the evaporator, the ac system will need to be evacuated. Since I don't have the equipment necessary to do this, I paid a shop $30.00 to do it.
First I diconnected the High and Low pressure hoses closest to the firewall. I left them connected to the compressor. Once disconnected, I sealed them with some tape to prevent moisture from entering the system.
Next I started removing the screws that attach the evaporator to the inside of the cab. There are a series of 10mm screws surrounding the evaporator and one nut on a post at the upper left side of the unit. Also don't forget to remove the screws that are below the carpet. There are several electrical connectors to disconnect as well. I labeled mine just in case.
My evaporator came right out with just a couple gentle wiggles. Don't yank it out! If you get alot of resistance, you probably forgot a screw or the nut in the upper left corner. Once you get the evaporator out, It time to open the housing and remove the evaporator itself. There's a few screws and small clamps.


Yikes! Twenty years of neglect. I could tell as soon as I looked in the the housing that this was the problem.

Even some leaves made it down in there.
Another view
I used a cleaner that I saw on youtube. It was $25.00 from Grainger.

I followed the directions and the foaming action was incredible.
Although I bent some of the grids, It cleaned up pretty good after a couple rounds of the cleaner. I let it dry then reinstalled it.
Once it got it back in the truck, I was amazed at the air flow. Problem solved! It was back to normal. Now I can't wait to et my ac recharged.
Thanks YotaTech and to all the members who share their expertise!
 Aug 26, 2014 | 10:08 AM
#4

Registered User

Joined: Sep 2007
Posts: 8,380
Likes: 871
From: San Francisco East Bay
Very nice work (and timely for me; I think I need to extract my evaporator today).
Now for the hard part: how are you going to recharge it? R-12 is still available, but costs more than Cognac. You can convert to R-134a. Some say you have to flush all the mineral oil out first. Some say you can use "Ester" oil, which will cohabitate with the mineral oil. Toyota says http://tms.ccar-greenlink.org/NewsLetter/ac002t98.pdf (in 1998) "don't worry about compatibility; just use ND-9" (ND-9, so far as I can tell, is really PAG 46). You DO have to replace the O-rings, so you'll have a few more connections to open.
Or there are "conversion" kits that use neither R-12 nor R134a. http://www.es-refrigerants.com/produ...it/details.asp (My guess is that the main ingredient is propane, so I wouldn't advise smoking in the cab any more.) Unfortunately, the EPA is pretty clear about this: strictly illegal.
I just removed my compressor, so I am very interested in what you find out!
PS Nu-Brite is not recommended for indoor use. http://www.nucalgon.com/products/coi...nsers/nu-brite It's for condensers (the hot part) not evaporators (the inside part). Calgon doesn't say why; could it have a strong odor?
Last edited by scope103; Aug 26, 2014 at 10:13 AM.
Aug 26, 2014 | 04:29 PM
#7

Registered User
Joined: Sep 2013
Posts: 1,631
Likes: 110
Oh crap, is that mud?
Scope, I wouldn't worry about the refrigerant. Just have it properly evacuated (takes like 45 minutes) and filled with r134 with the two new fitting. From reading around here, and my own experience it works very well. It's been running with no issues for a few months (other than an electrical issue which we took care of ).
Scope, I wouldn't worry about the refrigerant. Just have it properly evacuated (takes like 45 minutes) and filled with r134 with the two new fitting. From reading around here, and my own experience it works very well. It's been running with no issues for a few months (other than an electrical issue which we took care of ).
Trending Topics
Aug 26, 2014 | 04:40 PM
#8
Registered User
Joined: Sep 2007
Posts: 8,380
Likes: 871
From: San Francisco East Bay
Gevo -
Did you replace all/any of the o-rings? Did you add any lubricant? (and if so, what flavor: PAG 46/100/150 or Ester or something else? What amount?)
I'm having trouble getting "definite" answers, but the sense I get is that PAG 46 doesn't get along with mineral oil (Toyota says in the TSB to not worry about it), and the o-rings used in an R-12 system will not tolerate R143a (or is it the lubricant that worries the o-rings?) (Toyota says to replace them all, so far as I can tell.)
Enquiring minds want to know.
Aug 26, 2014 | 05:39 PM
#9
Registered User
Joined: Sep 2013
Posts: 1,631
Likes: 110
Scope,
I did not replace any o-rings as part of the R134 conversion. The mechanic added ester and dye.
I think the key is a good evacuation of the system. If my stock orings start to fail, I'll let everyone know. But, it's a 23 year old system and other than one new hose, everything is workign perfectly.
I did not replace any o-rings as part of the R134 conversion. The mechanic added ester and dye.
I think the key is a good evacuation of the system. If my stock orings start to fail, I'll let everyone know. But, it's a 23 year old system and other than one new hose, everything is workign perfectly.
Sep 4, 2014 | 03:37 PM
#10
Thread Starter
Registered User
Joined: May 2014
Posts: 23
Likes: 0
Hi everyone-
I just wanted to post a follow up to the project and inform y'all that I had my AC System recharged on Tuesday and it's blowing ice cold with incredible air volume. I was concerned that the system wouldn't hold a vacuum, but it did. So all in all the project cost me a grand total of $115 and a couple of hours to remove and clean the evaporator. Here's the breakdown:
$30 for ac system recovery
$25 for coil cleaner
$60 for ac system recharge
Having a refrigerator for a cab....$Priceless
Then mechanic who recharged my ac also mentioned that it's recommended to replace the drier when draining the ac system. I didn't know that.
Good luck guys and I hope my post will help you with your project.

 Nov 24, 2014 | 08:55 AM
#12
Question:
On your first picture just above the blower there's a piece of foam that is falling apart. Is this some kind of filter or just a seal? I've seen it before on my truck and wondered if it is worth trying to replace with fresh foam.
On your first picture just above the blower there's a piece of foam that is falling apart. Is this some kind of filter or just a seal? I've seen it before on my truck and wondered if it is worth trying to replace with fresh foam.
Nov 24, 2014 | 09:26 AM
#13
One more thing: did the fitting for the evaporator lines require o-rings? How about the receiver drier? Looking at the factory parts diagrams it looks like they do not, except the drier has a little o-ring under some fitting on the side that you may or may not need to remove:

Nov 24, 2014 | 10:32 AM
#14
Registered User
Joined: Sep 2007
Posts: 8,380
Likes: 871
From: San Francisco East Bay
You should oil the o-rings before you put them in. While a post-1994 R134a system uses PAG 46 as the lubricant, at least one website I found said you can use r12-era mineral oil. Which looks to be the same as unscented baby oil. Your choice.
Nov 24, 2014 | 12:01 PM
#16
Registered User
Joined: Sep 2007
Posts: 8,380
Likes: 871
From: San Francisco East Bay
Do you have the R134a adaptor fittings? If so, I'd leave the valve core alone. It only gets used, what, once every 5 years? And removing/replacing the core is probably harder on the adaptor than just using it.
The cap is just a dust cap; unless it has visibly cracked I'm sure it's still doing its job.
The cap is just a dust cap; unless it has visibly cracked I'm sure it's still doing its job.


