
kelvin 1989 4runner build
 Aug 28, 2012 | 07:27 AM
#1

Thread Starter
Registered User
Joined: Aug 2012
Posts: 388
Likes: 9
From: denver colorado
kelvin 1989 4runner build
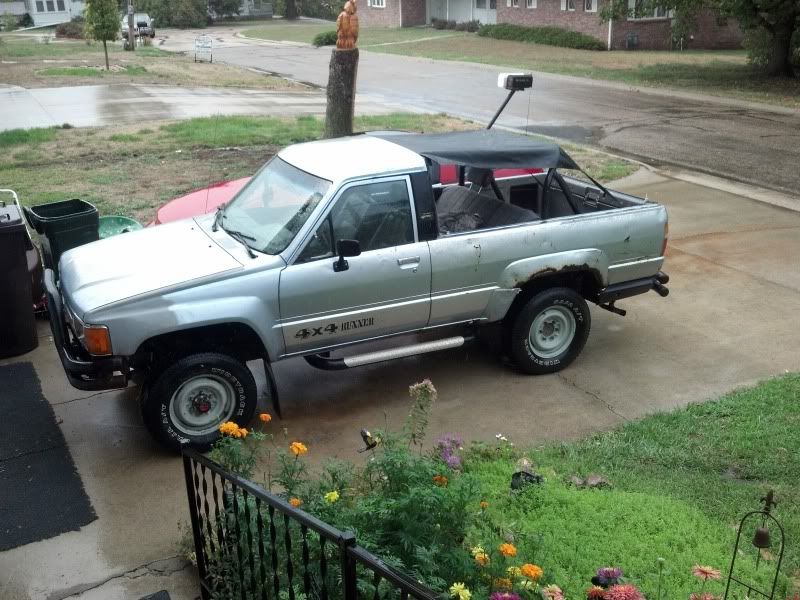
hi im kelvin, and i recently acquired a stock 1989 4runner. after getting tons of ideas off multiple sites and tech articles, i decided to build a work log.
so far ive removed the emissions, replaced the bearings, fuel filter, and friday will be replacing the driveline fluids.
some of these pictures are large, so instead of using all the bandwith here you can view by clicking the links.
http://sphotos-b.xx.fbcdn.net/hphoto...98950097_o.jpg
http://sphotos-a.xx.fbcdn.net/hphoto...86616648_o.jpg
http://sphotos-a.xx.fbcdn.net/hphoto...60684869_o.jpg
http://img338.imageshack.us/img338/8...0624092914.jpg
http://img443.imageshack.us/img443/5...0624092927.jpg
http://desmond.imageshack.us/Himg35/...pg&res=landing
http://i5.photobucket.com/albums/y15...-55-58_799.jpg
i have purchased 3/4 chevy axles to install, as well as a bikini top. since i use a plasma cutter at work daily (hpr260) i will be able to cut alot of parts for it, such as the bracket for the bikini top and maybe some bumpers/brackets.
Aug 30, 2012 | 04:57 PM
#3
Thread Starter
Registered User
Joined: Aug 2012
Posts: 388
Likes: 9
From: denver colorado
186k now. bought it with 184k. today i adjusted the valves. pretty simple and was the easiest ohc valve cover removal ive encountered. cylinder 2 intake was to tight, 2-3 exhaust were right on but retorqued anyway, the rest were to loose and adjusted properly. today i started looking for wheels and tires for the axle swap im going to be doing soon. i found the drawing for the rear disc brake brackets and spacers for the 8 lug 14 bolt full float so ill cut those tomorrow. i plan on using 1 3/8 spacer welded to the bracket so its all 1 piece. if im reading it right its offset 3/4. correct me if im wrong!
 Aug 30, 2012 | 06:11 PM
#5
186k now. bought it with 184k. today i adjusted the valves. pretty simple and was the easiest ohc valve cover removal ive encountered. cylinder 2 intake was to tight, 2-3 exhaust were right on but retorqued anyway, the rest were to loose and adjusted properly. today i started looking for wheels and tires for the axle swap im going to be doing soon. i found the drawing for the rear disc brake brackets and spacers for the 8 lug 14 bolt full float so ill cut those tomorrow. i plan on using 1 3/8 spacer welded to the bracket so its all 1 piece. if im reading it right its offset 3/4. correct me if im wrong!
 I'm just starting the rebuild thing
 wait for some of the other guys to join in and let there experience and opinions fly. And that bracket looks good. What's it for?


Trending Topics
Sep 9, 2012 | 05:08 PM
#8
Thread Starter
Registered User
Joined: Aug 2012
Posts: 388
Likes: 9
From: denver colorado
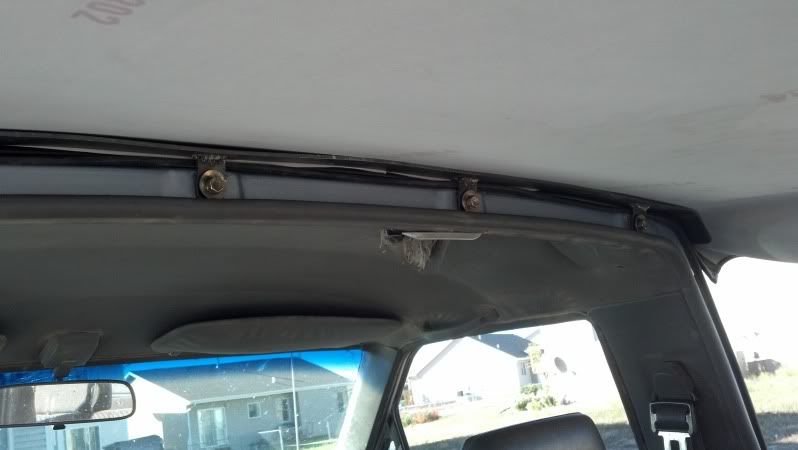
soft top test on friday. i noticed people at work running out to there vehicles to roll windows up. it took me about 5 minutes to get it bolted on and strapped down so i was happy.
my friend joe welding the bracket for the soft top

bracket i cut at work for the soft top is 48" long 2" wide and i bent it on a brick to a similar contour of the runner. the edge of the topper hangs off so i think if i made it 60" long it would be good. im happy witrh it.
my friend joe welding the bracket for the soft top
bracket i cut at work for the soft top is 48" long 2" wide and i bent it on a brick to a similar contour of the runner. the edge of the topper hangs off so i think if i made it 60" long it would be good. im happy witrh it.
Sep 19, 2012 | 05:33 PM
#9
Thread Starter
Registered User
Joined: Aug 2012
Posts: 388
Likes: 9
From: denver colorado
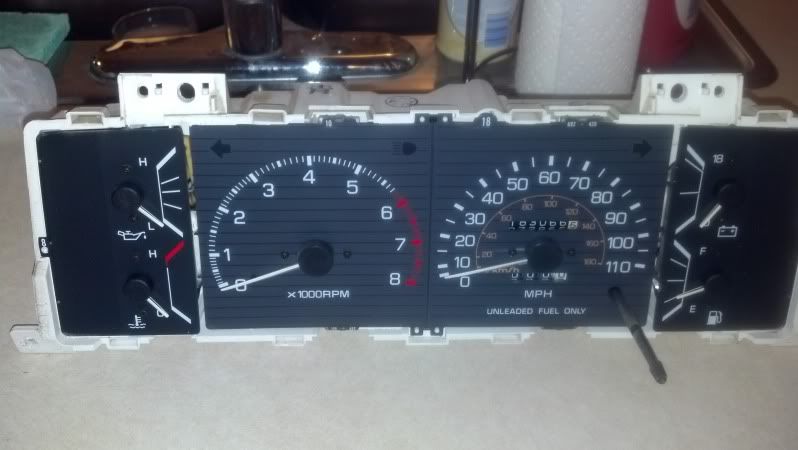
my audi developed a really bad misfire saturday so i went to the local upullit to see if i could find an ignition control unit for it. right next to the 97 a4 was a newly acquired 87 sr5. only thing i could see missing was the 3rd member. i was able to get the sr5 cluster that was 2k miles less than mine, the stock roll bar cover and the passenger window handle.
after reading the multiple FAQs and how-to's on the sr5 cluster swap, i forgot to disconnect the dummy oil pressure switch. i turned the key to on and started it. since i had just driven it, the water temp gauge rose along with the fuel gauge. tach/oil pressure did nothing. shut it off, disconnected and reconnected the connections and tried it again. same thing. i remembered reading about a tach wire and figured i needed to connect it where i came across the oil pressure sender switch and the possibility of burning it up.....whooooops.
a user error on my part possibly burnt up a gauge in my gauge cluster, so i decided to take it apart and see if i could find anything burnt.
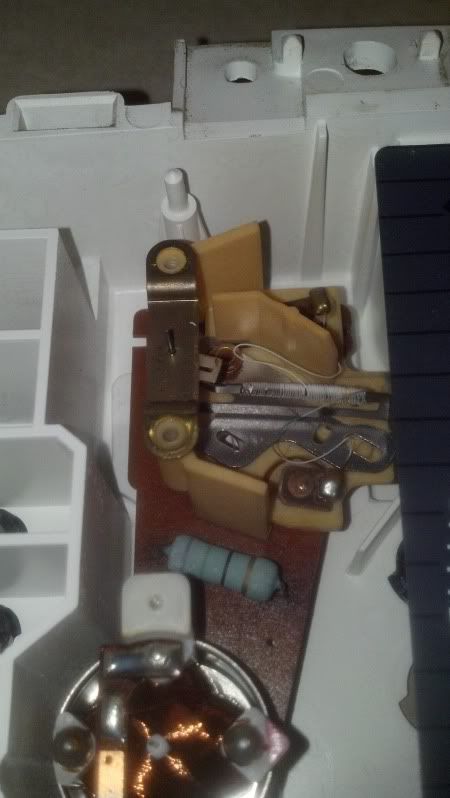
it looks darker under the resistor because of the leads on the board, it is not burnt (from what i can tell)
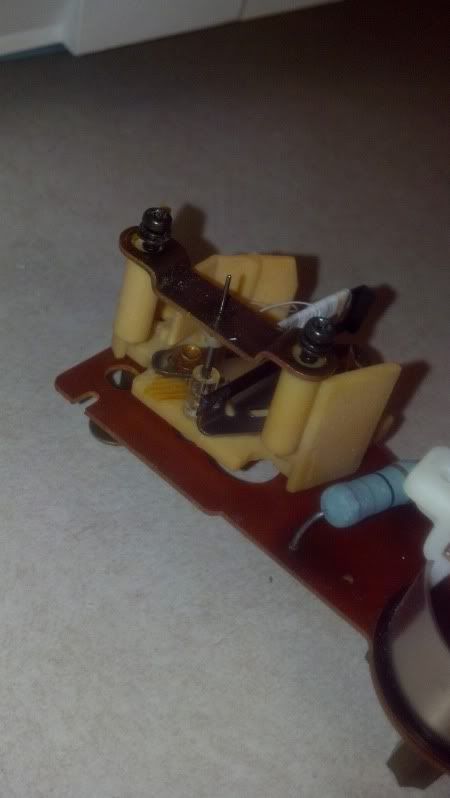
other side
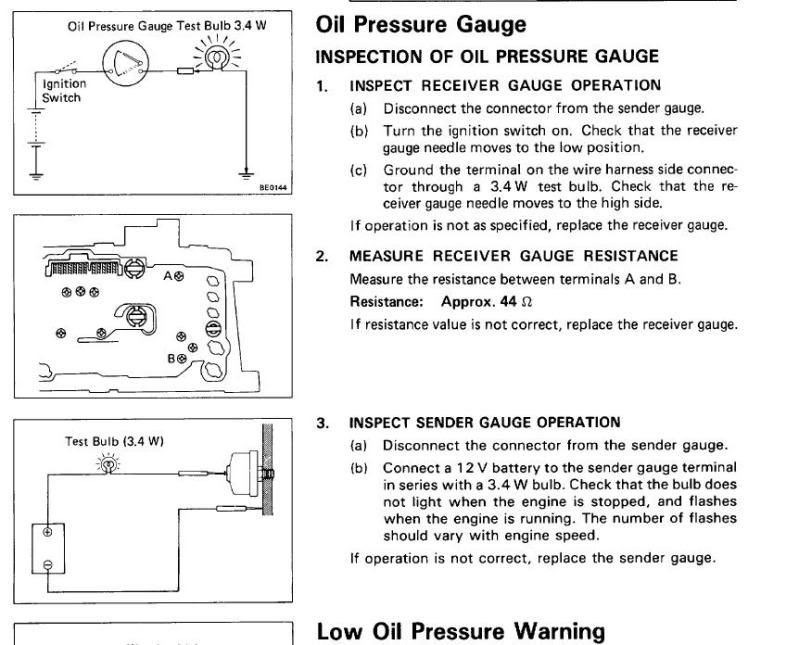
so today i got a volt meter and did some checking. gauge moves reducing resistance. pressure sensor to be acquired
tested the reciever gauge resistance. its suppose to be 44 ohm
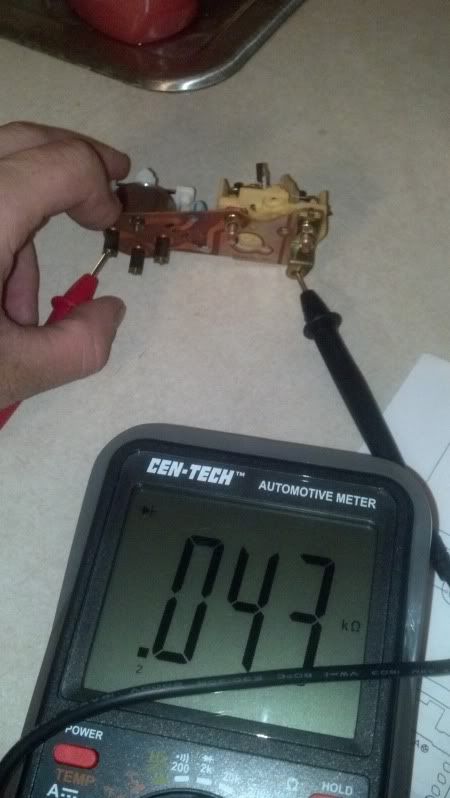
set rheostat to max resistance (0v)

slowly turned voltage up, i dont know exactly what i was getting for voltage, but at the 20k setting on ohm it goes to 5.00
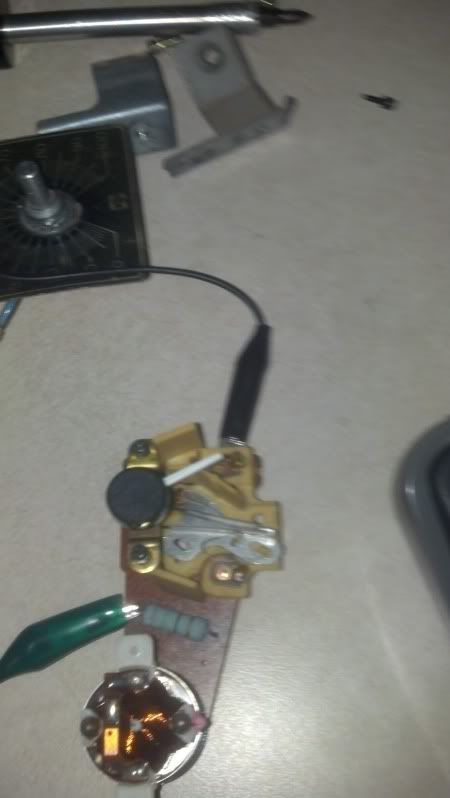
so according to this ˟˟˟˟, i should be ok.
after reading the multiple FAQs and how-to's on the sr5 cluster swap, i forgot to disconnect the dummy oil pressure switch. i turned the key to on and started it. since i had just driven it, the water temp gauge rose along with the fuel gauge. tach/oil pressure did nothing. shut it off, disconnected and reconnected the connections and tried it again. same thing. i remembered reading about a tach wire and figured i needed to connect it where i came across the oil pressure sender switch and the possibility of burning it up.....whooooops.
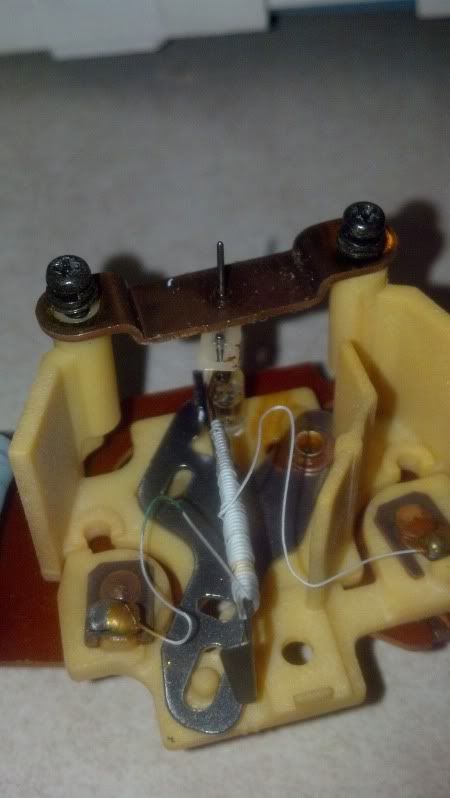
a user error on my part possibly burnt up a gauge in my gauge cluster, so i decided to take it apart and see if i could find anything burnt.
it looks darker under the resistor because of the leads on the board, it is not burnt (from what i can tell)
other side
so today i got a volt meter and did some checking. gauge moves reducing resistance. pressure sensor to be acquired
tested the reciever gauge resistance. its suppose to be 44 ohm
set rheostat to max resistance (0v)
slowly turned voltage up, i dont know exactly what i was getting for voltage, but at the 20k setting on ohm it goes to 5.00
so according to this ˟˟˟˟, i should be ok.
 Sep 24, 2012 | 07:45 AM
#11
Thread Starter
Registered User
Joined: Aug 2012
Posts: 388
Likes: 9
From: denver colorado
yesterday i hit the local upullit to where i found the sr5 i pulled the cluster out of, and someone took the pressure sensor out of it before i could get it. fortunately for me another sr5 was a few rows back and already had the engine yanked out and on the ground, pressure sensor side facing up. i also stole got a new tail light lense as mine was cracked. total spent = 21.00
my tach doesnt work, which i have yet to deal with and the connector for my oil pressure sensor had to be modified to clip on to the new pressure sensor. oil pressure, volt meter and speedo works. i didnt drive it long enough to see if the water temp moved, and i cannot confirm whether the fuel gauge works.
i was invited saturday to go run through another part of the river, good thing i didnt go
Sep 25, 2012 | 12:48 AM
#14
I had a place to change my oil on my flat bed and they connected knocked the wire off of the sending unit and put it on the ground plug of the sending unit which in turned ruined the guage, If you do get a sending unit that has the ground on it remove it. Was you able to get the oil guage working again?
On your tachometer, some of the trucks seem to be prewired for a tach and some dont. Just seems to be luck of the draw. You need a wire running from the ground side of the coil to the spot on the back of your guage set. I have a picture some where on my 88 Runner build showing the ground on the coil for the EFI. Just not sure where I got it at this time. Here is a link to my build that shows where you need to put the wire and how I did it.>>>>>>>>>>>>Link.. https://www.yotatech.com/forums/f199...85/index9.html
On your tachometer, some of the trucks seem to be prewired for a tach and some dont. Just seems to be luck of the draw. You need a wire running from the ground side of the coil to the spot on the back of your guage set. I have a picture some where on my 88 Runner build showing the ground on the coil for the EFI. Just not sure where I got it at this time. Here is a link to my build that shows where you need to put the wire and how I did it.>>>>>>>>>>>>Link.. https://www.yotatech.com/forums/f199...85/index9.html
Sep 25, 2012 | 10:03 AM
#15
Thread Starter
Registered User
Joined: Aug 2012
Posts: 388
Likes: 9
From: denver colorado
I had a place to change my oil on my flat bed and they connected knocked the wire off of the sending unit and put it on the ground plug of the sending unit which in turned ruined the guage, If you do get a sending unit that has the ground on it remove it. Was you able to get the oil guage working again?
On your tachometer, some of the trucks seem to be prewired for a tach and some dont. Just seems to be luck of the draw. You need a wire running from the ground side of the coil to the spot on the back of your guage set. I have a picture some where on my 88 Runner build showing the ground on the coil for the EFI. Just not sure where I got it at this time. Here is a link to my build that shows where you need to put the wire and how I did it.>>>>>>>>>>>>Link.. https://www.yotatech.com/forums/f199...85/index9.html
On your tachometer, some of the trucks seem to be prewired for a tach and some dont. Just seems to be luck of the draw. You need a wire running from the ground side of the coil to the spot on the back of your guage set. I have a picture some where on my 88 Runner build showing the ground on the coil for the EFI. Just not sure where I got it at this time. Here is a link to my build that shows where you need to put the wire and how I did it.>>>>>>>>>>>>Link.. https://www.yotatech.com/forums/f199...85/index9.html
thanks for the response terry. yes, the oil pressure gauge worked when i fired it up after i modified the clip to work. ill have to fill it with gas and drive it around a little bit to see if the fuel gauge works along with the engine temp gauge. reading the tach wire mod now.
also some good news about the truck thats underwater. it runs, just cant rev it as it tries to kill itself. no knock or rattles. we changed out the AFM, coil, cap, ECU, and found no vaccuum leaks or problem with the egr. alternator is not charging so maybe thats the problem? voltmeter is holding 11.8v, and the fuse in the fuse box is good. still looking for a fix on that.
Last edited by kelvinb; Sep 25, 2012 at 10:06 AM.
Oct 1, 2012 | 01:34 PM
#16
Registered User
Joined: Dec 2008
Posts: 2,391
Likes: 1
From: tecumseh nebraska
nice build thread kelvinb. welcome to yotatech. by the way the white and blue toy sunk in the river is out and since then has all new fluids, different mass air meter, different bench seat and carpet delete option due to the fishy smell...oh yeah! and a new car scent air freshener, its damn hard to kill a toyota, even when the electrical is completely submerged for 30minutes.
didnt help it was at wot on the way inn.
Cheerio mate!!!
didnt help it was at wot on the way inn.
Cheerio mate!!!
Oct 3, 2012 | 05:48 AM
#17
Thread Starter
Registered User
Joined: Aug 2012
Posts: 388
Likes: 9
From: denver colorado
small update.
i fixed the gauge cluster problem. i dont know why it didnt work in the first place but i didnt burn up the gauge. after some tests it checked out fine. all the gauges work now.
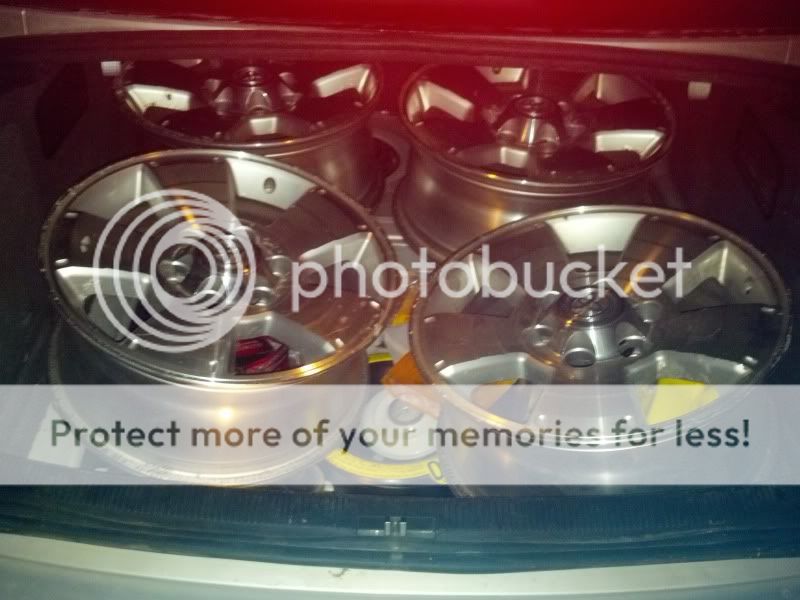
a few weeks ago i came across a pretty good deal on some newer 17in sr5 wheels so i bought them. previous owner put newer lexus wheels on and didnt want these anymore. they have some peeling/corrosion but look way better than the runner itself anyway. $100
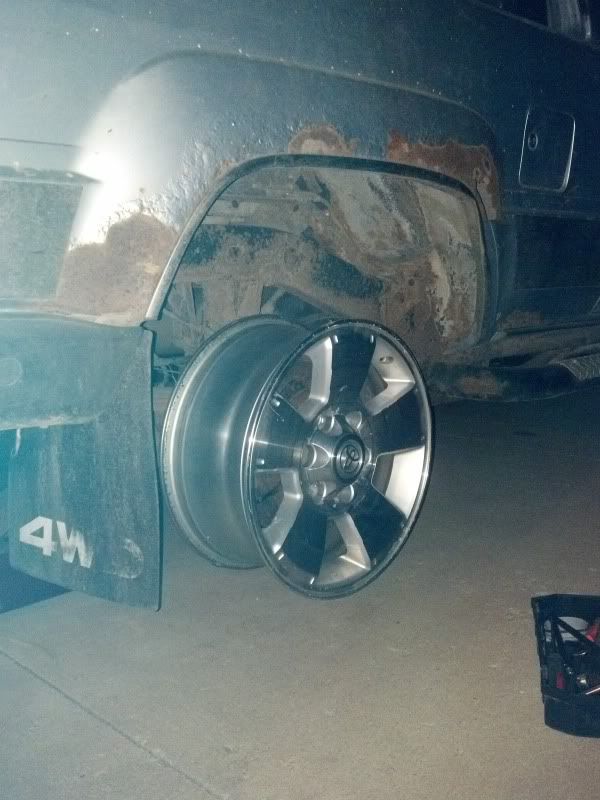
test fit. 3in or so of space between the wheel and the frame.
i found a cheap set of used hankook dynapro MT 285s for these wheels as well. the previous owner complained of road noise. ill have a total of 250 into this setup.
i fixed the gauge cluster problem. i dont know why it didnt work in the first place but i didnt burn up the gauge. after some tests it checked out fine. all the gauges work now.
a few weeks ago i came across a pretty good deal on some newer 17in sr5 wheels so i bought them. previous owner put newer lexus wheels on and didnt want these anymore. they have some peeling/corrosion but look way better than the runner itself anyway. $100
test fit. 3in or so of space between the wheel and the frame.
i found a cheap set of used hankook dynapro MT 285s for these wheels as well. the previous owner complained of road noise. ill have a total of 250 into this setup.
Oct 12, 2012 | 11:17 AM
#20
Thread Starter
Registered User
Joined: Aug 2012
Posts: 388
Likes: 9
From: denver colorado
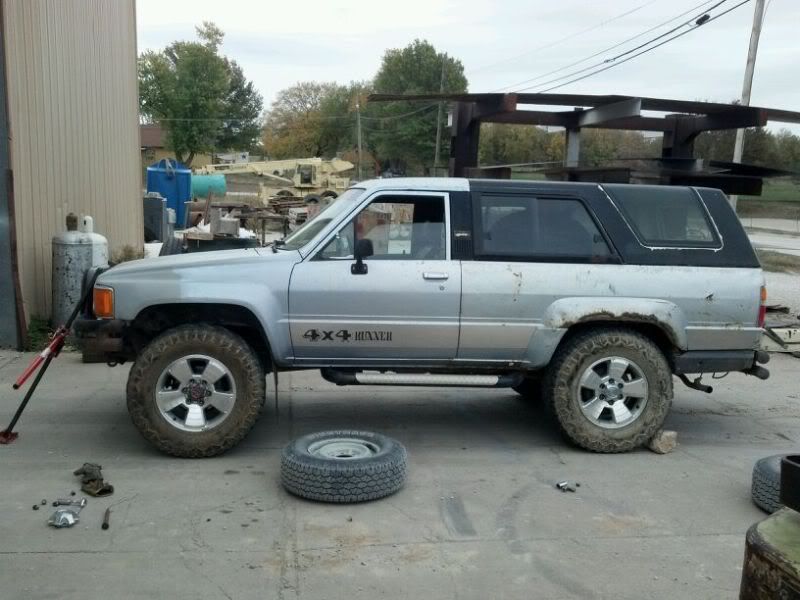
test fitting the new wheel/tire setup. the tire is just barely sitting on the ground here.
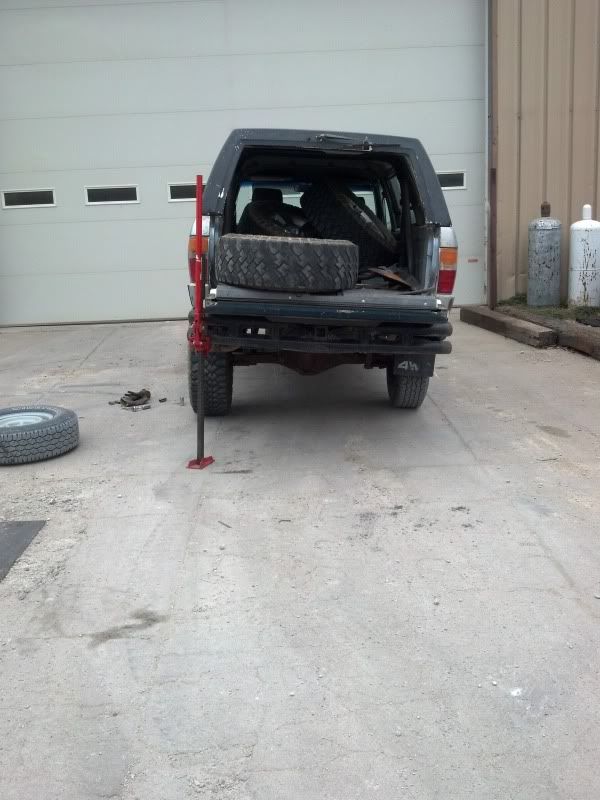
only place it rubs right now is the sway bar. it will need a zuk/bj spacer to even drive it. i was also informed that one of the tires was about to blow, so i will need to find another tire. i like how it looks.
only place it rubs right now is the sway bar. it will need a zuk/bj spacer to even drive it. i was also informed that one of the tires was about to blow, so i will need to find another tire. i like how it looks.


