
habanero's 1996 4Runner Build-Up Thread
 May 13, 2018 | 06:59 PM
#3501
Thread Starter
Contributing Member


Joined: Sep 2005
Posts: 8,247
Likes: 497
From: mo
Also thanks a lot for the input, excellent information!
May 14, 2018 | 03:36 AM
#3502
Registered User

Joined: Aug 2016
Posts: 115
Likes: 13
From: Tennessee
Awsome to know, thanks Chuckles! Two smaller bottles is a great idea. I'll have to go ahead and do the small hole then....maybe I'll try putting one on the high side a smidge below the screw threads so it will sit just under the lip of the cap. How did you end up securing yours, or assuming they're in front of the air box, did you secure yours? I missed this mod in your build thread.
Also thanks a lot for the input, excellent information!
Also thanks a lot for the input, excellent information!
May 14, 2018 | 05:31 AM
#3504
Thread Starter
Contributing Member
Joined: Sep 2005
Posts: 8,247
Likes: 497
From: mo
Thanks Chuckles! How I ended up with the square nalgene was that I couldn't fit one of those round ones in front of the airbox so I looked for a solution and thought nalgene would be durable. I still really like how you did your grille.

 May 15, 2018 | 06:03 AM
#3507
Thread Starter
Contributing Member
Joined: Sep 2005
Posts: 8,247
Likes: 497
From: mo
So far it's been alluded to....
I was looking at a Lil Skips skid to help keep my gas tank in its only slightly dented state but
apparently my husband has plans to make it a challenge to not knock parts off the trucks in the tight overgrown Missouri woods....
Well, he was right about the front hitch, so maybe a snorkel will be okay too? Clouds of dust is often an issue for us.
Personally I thought the solution was- keep the '99 behind me = not so much dust for the '96.
May 16, 2018 | 05:23 AM
#3508

Registered User

Joined: Feb 2010
Posts: 748
Likes: 135
From: St. Louis MO
The only time the 99 has been slower than the 96 is when it got dusted half to death!
(Lots of very dusty roads on our road trip out west, dust overwhelmed the Airaid filter, oily dust fouled the MAF, CEL and power loss ensued)
(Lots of very dusty roads on our road trip out west, dust overwhelmed the Airaid filter, oily dust fouled the MAF, CEL and power loss ensued)
May 16, 2018 | 05:34 AM
#3509
Thread Starter
Contributing Member
Joined: Sep 2005
Posts: 8,247
Likes: 497
From: mo
Which was awesome because I actually had to SLOW DOWN TO WAIT FOR THE '99 which is generally unheard of.
May 21, 2018 | 05:42 PM
#3510
Thread Starter
Contributing Member
Joined: Sep 2005
Posts: 8,247
Likes: 497
From: mo
96 4Runner, 298,685 miles
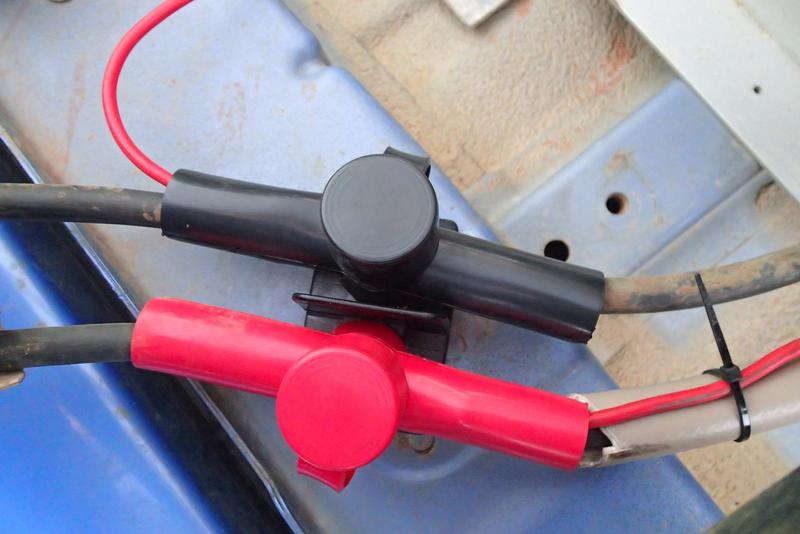
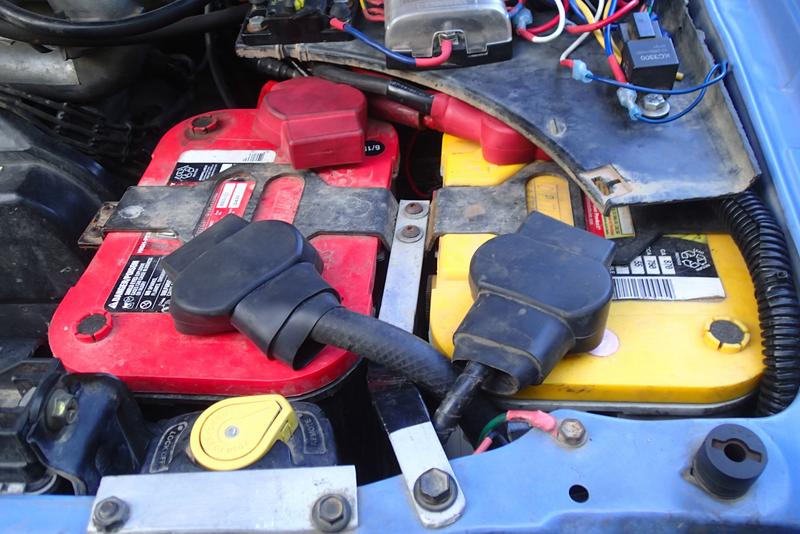
Added a Blue Sea dual power post to the rear since I still have the winch wiring back there, then moved the wiring for the oba from the battery to the power post. Still need to run loom on that little red wire. No power runs to it until I switch on the safety solenoid, the same one I use for the winch power. OBA wiring (little red one) was routed all the way up front to the house battery, now it is a much shorter distance to the 2g wire that runs to the house battery.
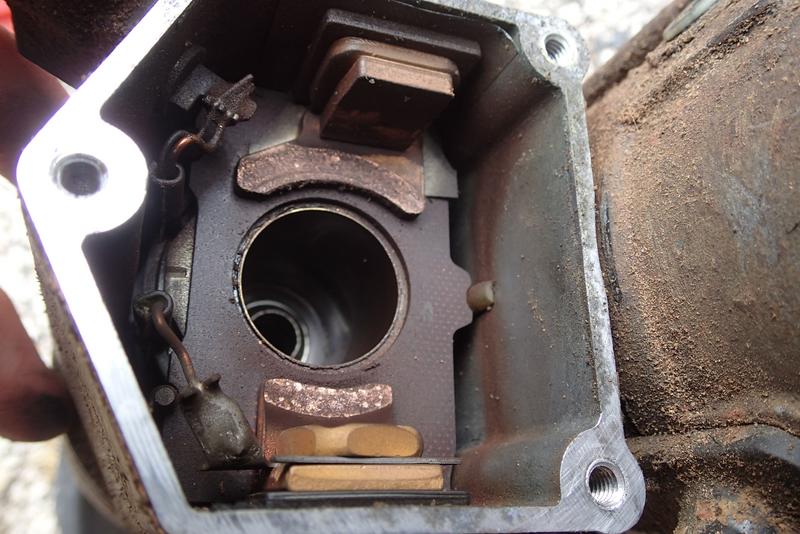
Pulled my starter and changed out the contacts and plunger mostly for giggles. Found some corrosion at one of the terminals and cleaned it off. Plunger was original and pretty scored, contacts had a little wear at about 110,000 miles, but not nearly as bad as when I changed them at about 190,000.
Removing the two bolts that hold the brake line brackets to the frame make getting the starter out a lot easier.

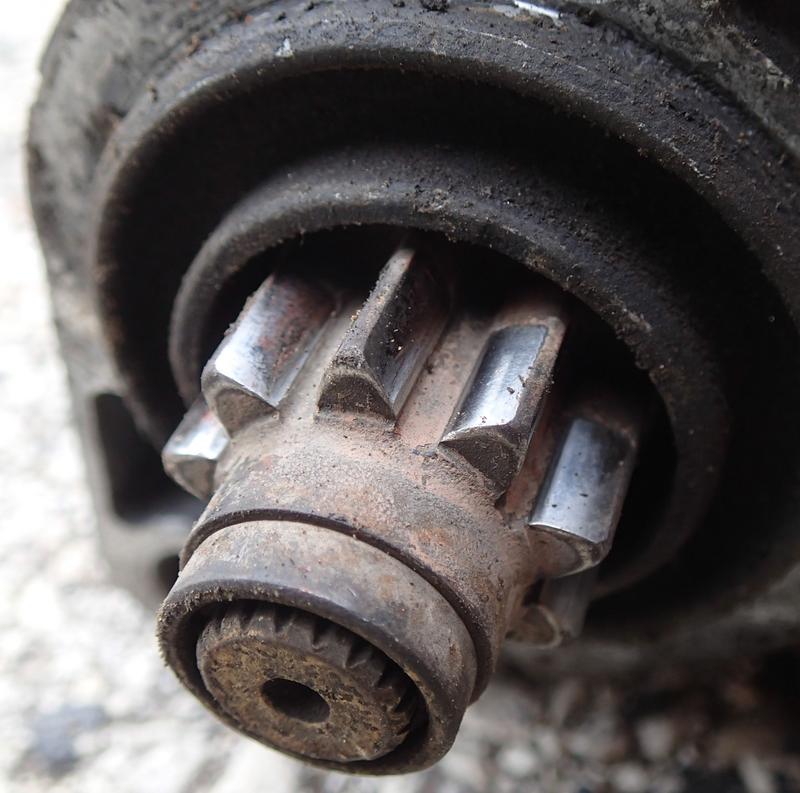
Starter bendix with almost 300,000 miles on it
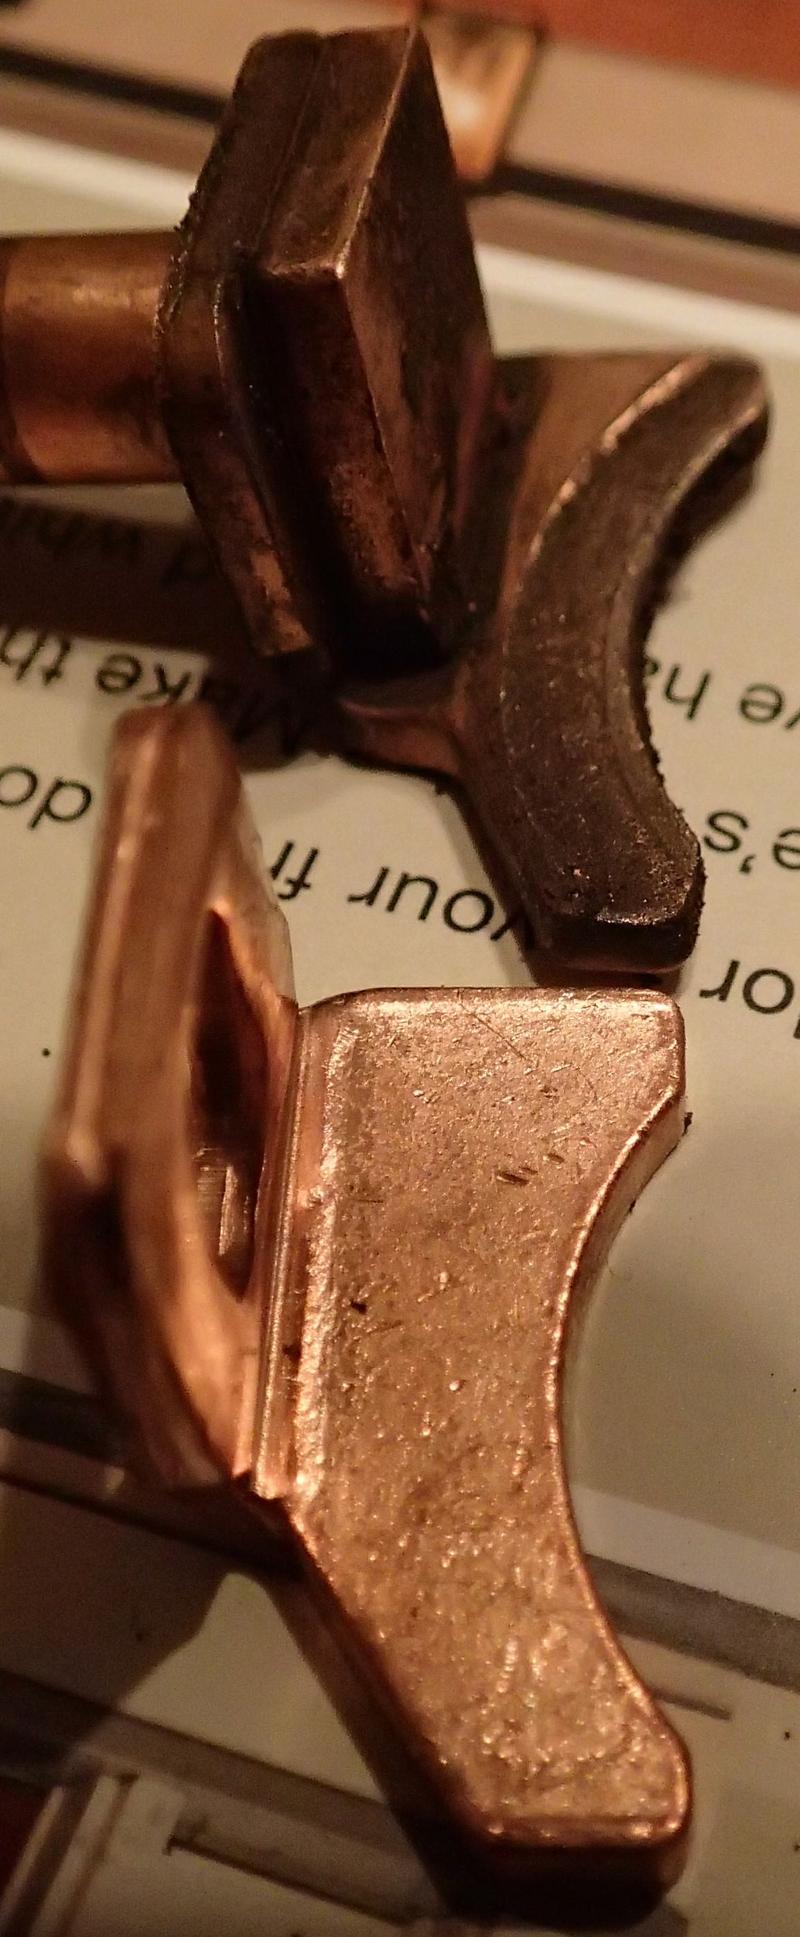
Starter contacts with about 110,000 miles on them. Still in pretty good shape and causing no issues
Plunger with almost 300,000 miles on it, not in the best shape, truck's still starting okay. You can see it's quite worn.
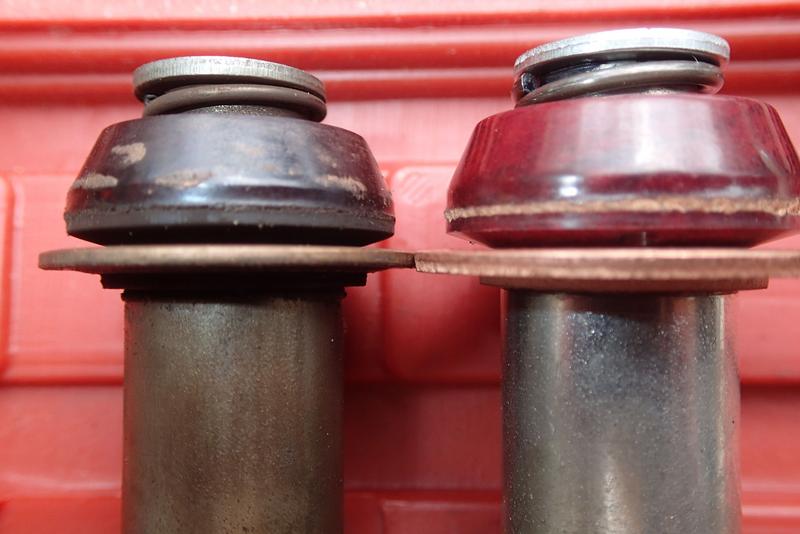
Part numbers I used for the starter re-do:
Toyota-
KIT REPAIR SERVICE 28226-22050 1 contact kit for one side
KIT REPAIR SERVICE 28226-74070 1 contact kit for other side
PLUNGER MAGNET SWIT 28235-54380 1 plunger
Added a Blue Sea dual power post to the rear since I still have the winch wiring back there, then moved the wiring for the oba from the battery to the power post. Still need to run loom on that little red wire. No power runs to it until I switch on the safety solenoid, the same one I use for the winch power. OBA wiring (little red one) was routed all the way up front to the house battery, now it is a much shorter distance to the 2g wire that runs to the house battery.
Pulled my starter and changed out the contacts and plunger mostly for giggles. Found some corrosion at one of the terminals and cleaned it off. Plunger was original and pretty scored, contacts had a little wear at about 110,000 miles, but not nearly as bad as when I changed them at about 190,000.
Removing the two bolts that hold the brake line brackets to the frame make getting the starter out a lot easier.
Starter bendix with almost 300,000 miles on it
Starter contacts with about 110,000 miles on them. Still in pretty good shape and causing no issues
Plunger with almost 300,000 miles on it, not in the best shape, truck's still starting okay. You can see it's quite worn.
Part numbers I used for the starter re-do:
Toyota-
KIT REPAIR SERVICE 28226-22050 1 contact kit for one side
KIT REPAIR SERVICE 28226-74070 1 contact kit for other side
PLUNGER MAGNET SWIT 28235-54380 1 plunger
Last edited by habanero; May 21, 2018 at 05:46 PM.
May 21, 2018 | 05:50 PM
#3511
Thread Starter
Contributing Member
Joined: Sep 2005
Posts: 8,247
Likes: 497
From: mo
96 4Runner 298,685 miles
Made a new start ground cable from left over dual battery wiring. been putting it off for awhile but it needed a couple more inches since the battery was moved. Went ahead and put 4g wire from the alternator to the fuse block. I already have 2g battery ground as part of the dual battery system. I do need to replace the wire from fuse block to battery but don't yet have a 120v circuit breaker so left the (assuming) fuseable link in place for now.
Finally made a longer ground for the start battery, 2g, and added the last military terminal.
(that's not a crazy huge ground wire, it's a piece of hose to protect the wire from the bracket it almost touches)
Replaced the front dif brackets with those from a junkyard today, too.
Oh, and the husbandio got something from fedex.
I'm not entirely sure about this:
The template is pretty horrible, certainly I wouldn't use it to figure out where you actually need to drill. holes. in. the. fender.
THE FENDER!
HOLES!!
oh poo.
Last edited by habanero; May 21, 2018 at 05:53 PM.
May 22, 2018 | 05:38 AM
#3514
Thread Starter
Contributing Member
Joined: Sep 2005
Posts: 8,247
Likes: 497
From: mo
Certainly that's never happened

 May 22, 2018 | 05:15 PM
#3516
Registered User
Joined: Aug 2016
Posts: 115
Likes: 13
From: Tennessee
May 22, 2018 | 06:06 PM
#3517
Thread Starter
Contributing Member
Joined: Sep 2005
Posts: 8,247
Likes: 497
From: mo
I'd better get it right the 1st time.
May 22, 2018 | 06:26 PM
#3519
Thread Starter
Contributing Member
Joined: Sep 2005
Posts: 8,247
Likes: 497
From: mo
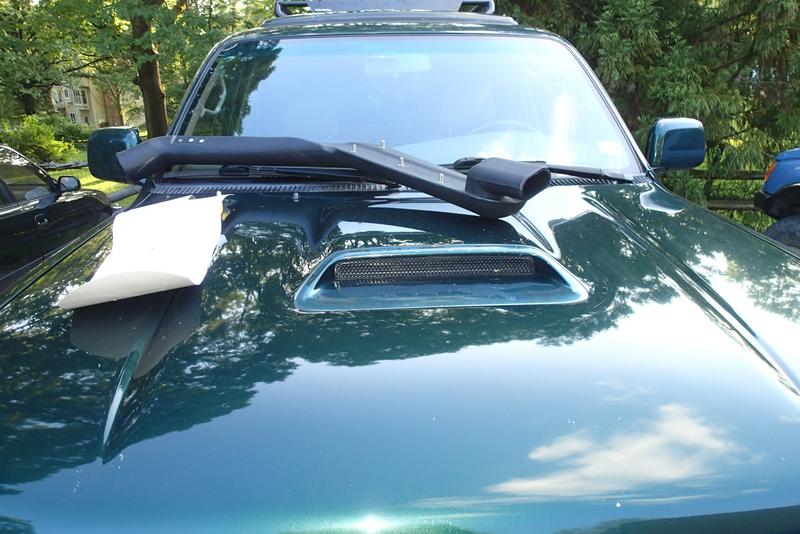
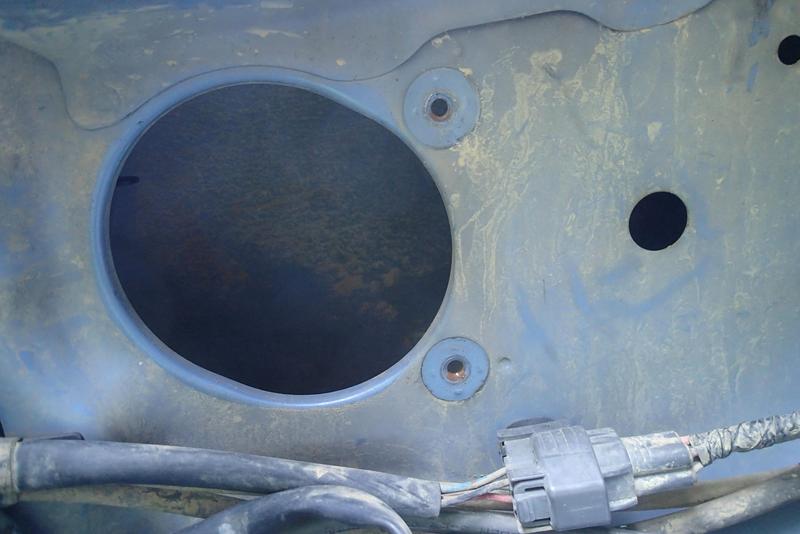
96 4Runner 298,691 miles
Snorkel install step one(s). Mowing and dinner making so didn't get anywhere near done.
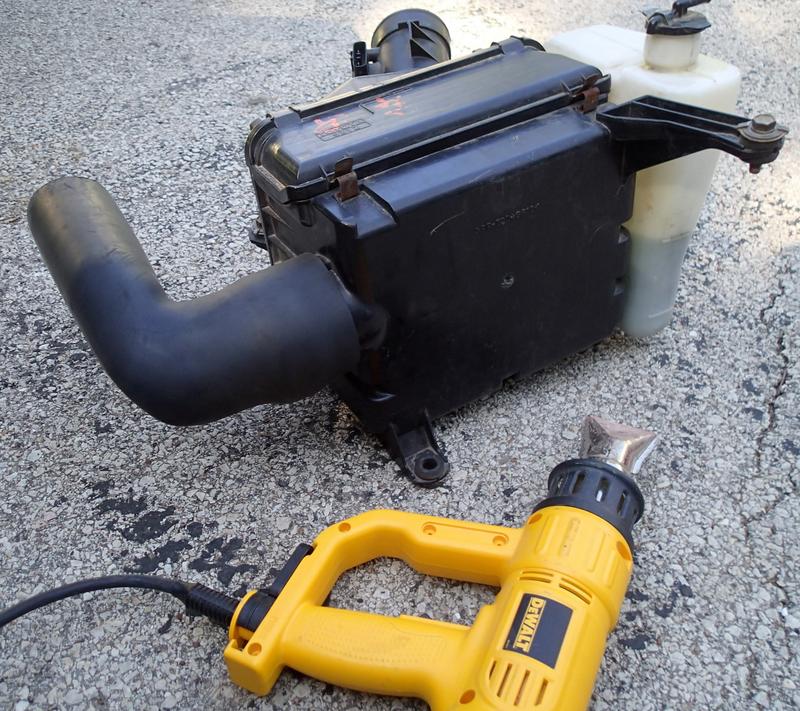
Anywho, I pulled out the airbox. Three 12mm bolts plus the 10mm intake air hose clamps, pull the maf sensor plug and a couple of lines too.
This comes out:
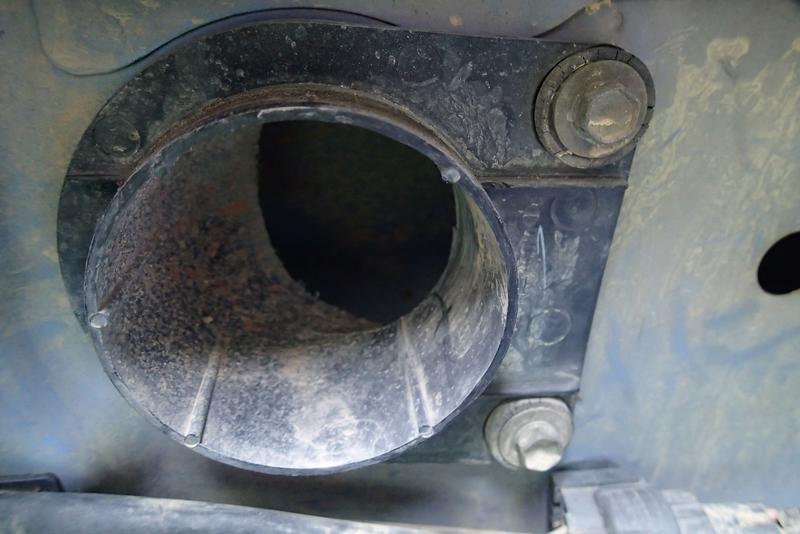
This thick rubber elbow has to go on here:
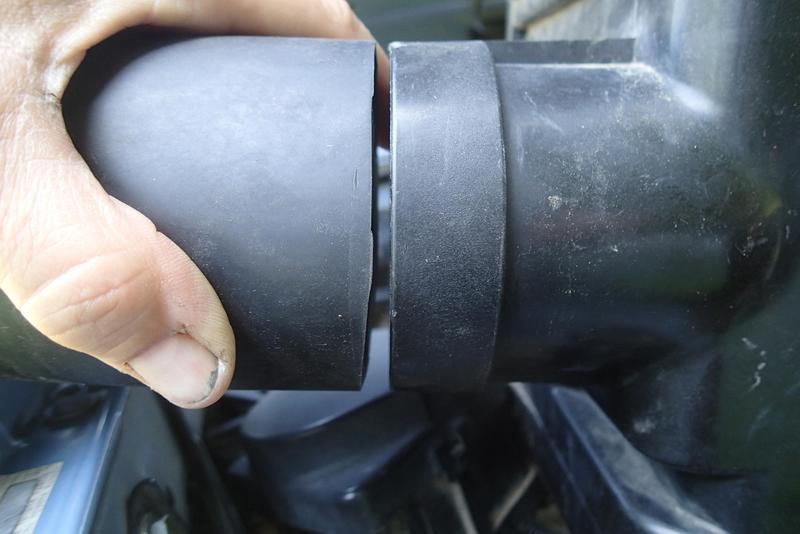
And of course they are the same size.
A bit of heat (enough to get it warm and pliable, but not hot) some patience and a flat blade screwdriver
One of the two provided silver hose clamps on the elbow and re-install the air box. Even with the coolant reservoir attached to the airbox and the washer fluid reservoir attached to the core support I was able to puzzle the elbow/airbox into place.
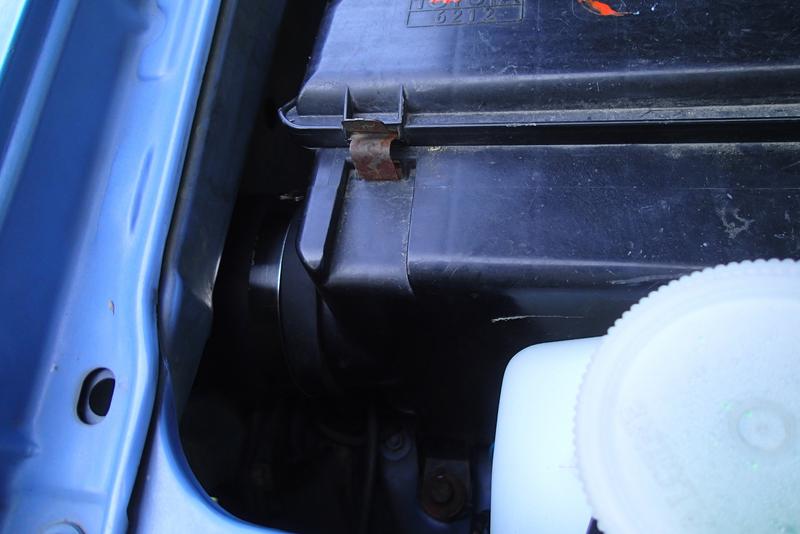
And that part is done. Hopefully tomorrow will be Step 2.
Snorkel install step one(s). Mowing and dinner making so didn't get anywhere near done.
Anywho, I pulled out the airbox. Three 12mm bolts plus the 10mm intake air hose clamps, pull the maf sensor plug and a couple of lines too.
This comes out:
This thick rubber elbow has to go on here:
And of course they are the same size.
A bit of heat (enough to get it warm and pliable, but not hot) some patience and a flat blade screwdriver
One of the two provided silver hose clamps on the elbow and re-install the air box. Even with the coolant reservoir attached to the airbox and the washer fluid reservoir attached to the core support I was able to puzzle the elbow/airbox into place.
And that part is done. Hopefully tomorrow will be Step 2.
May 22, 2018 | 06:31 PM
#3520
Thread Starter
Contributing Member
Joined: Sep 2005
Posts: 8,247
Likes: 497
From: mo


