
Gizler00's 1999 4Runner Build Thread


 May 25, 2017 | 04:01 PM
#62
Thread Starter

Joined: Aug 2007
Posts: 3,276
Likes: 7
From: Pennsylvania
May 25, 2017 | 04:02 PM
#63
Thread Starter
Joined: Aug 2007
Posts: 3,276
Likes: 7
From: Pennsylvania
Cut all the swingout stuff off until I can make a better plan to tackle it. And hope that comp4x4 actually comes through and it doesn't turn into a disaster.
Last edited by Gizler00; May 25, 2017 at 04:04 PM.
Jun 2, 2017 | 05:46 AM
#64
Thread Starter
Joined: Aug 2007
Posts: 3,276
Likes: 7
From: Pennsylvania
OK......... So after not hearing anything from Comp4x4 for a 12 days, I received a shipping notification in my email saying the part was on its way!! I am guessing that Comp4x4 is a one man show or something smaller scale and thats why the communication is bad.
All I have to say is........It was worth the wait! The part is very well made.
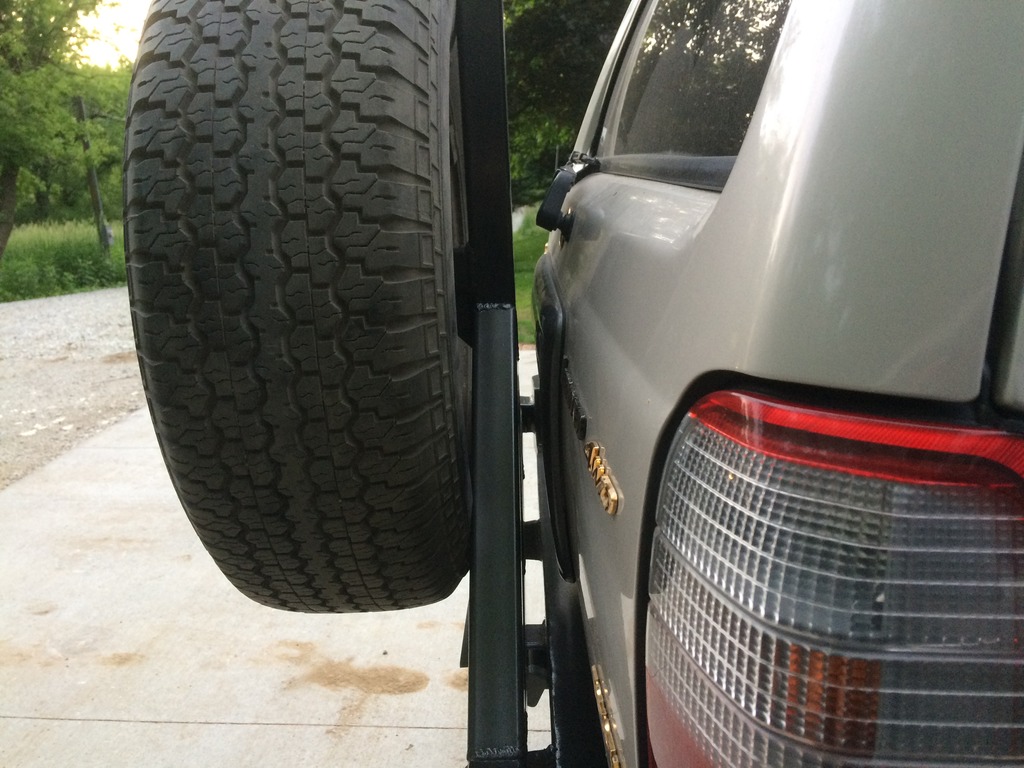
I got it tacked on and mocked up to start the swingout rebuild.
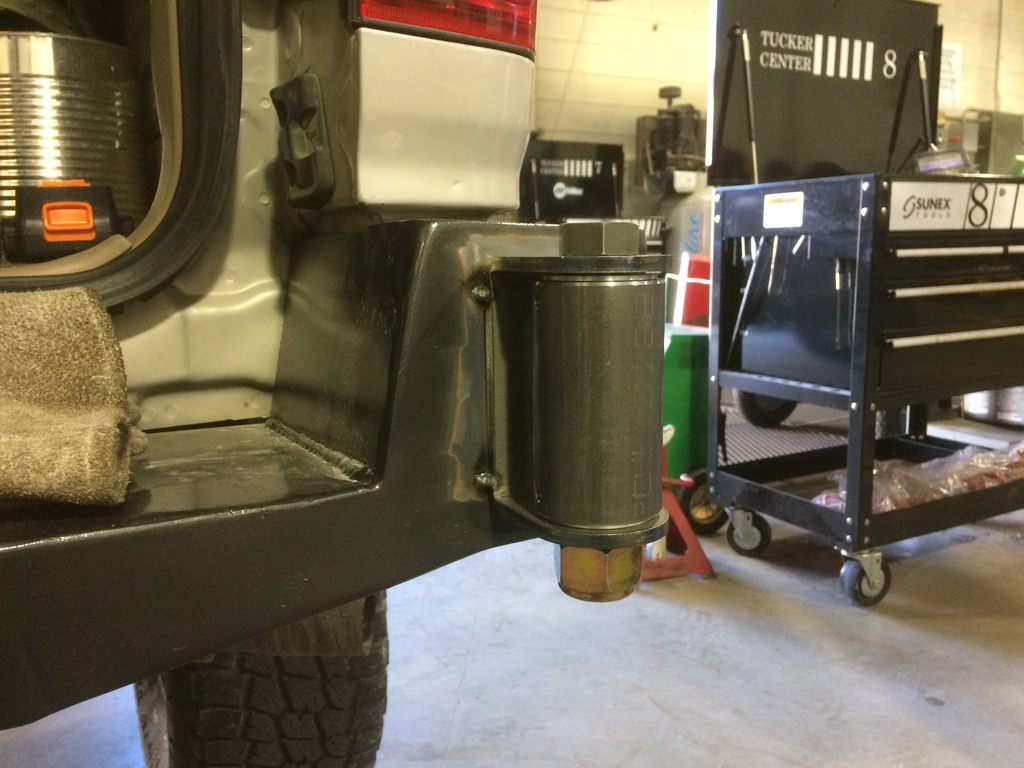
Like the last time, I started with the main bar and worked from there. I wanted to be able to use the 90 Degree latch instead of buying another one and waiting for its arrival.
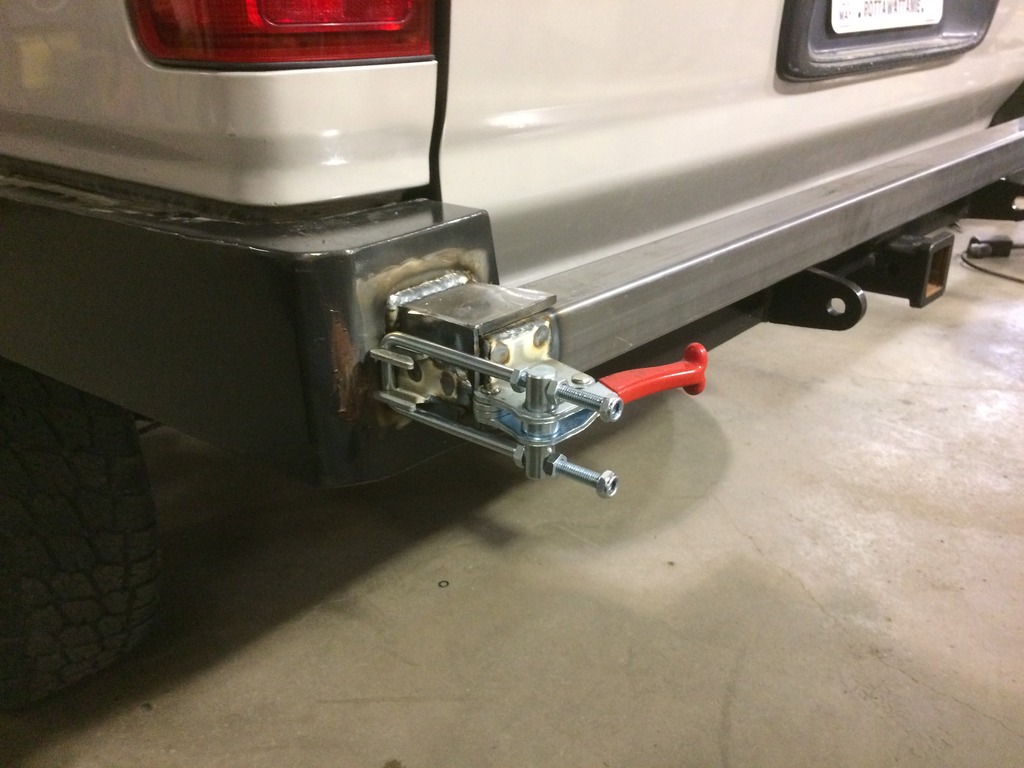
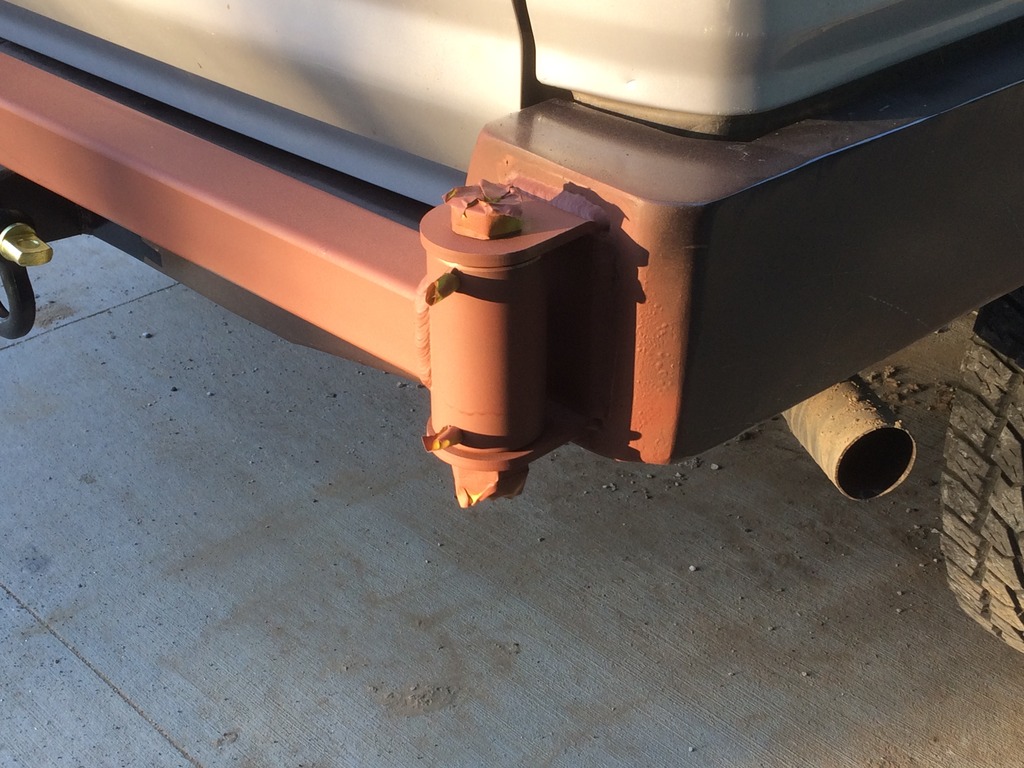
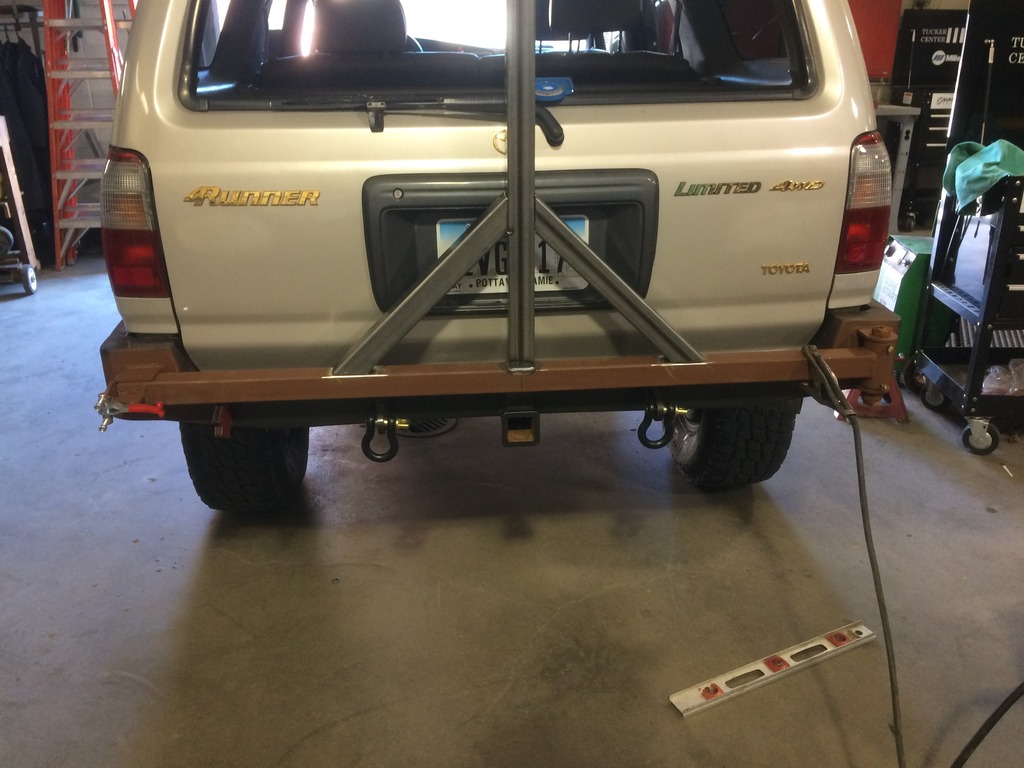
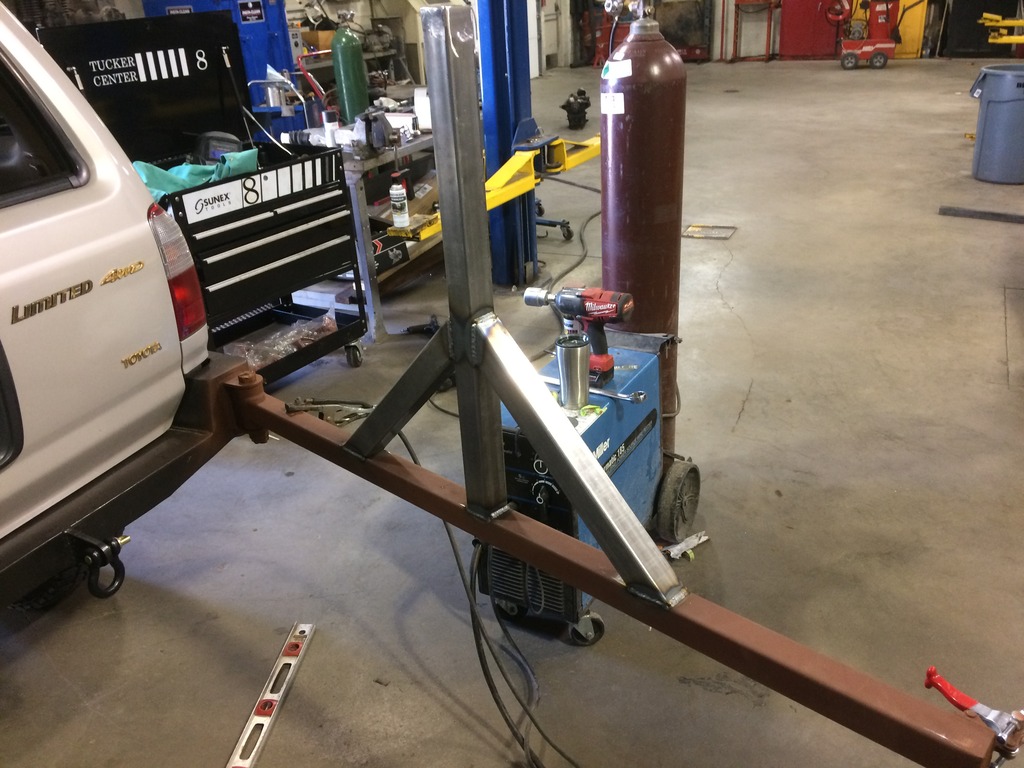
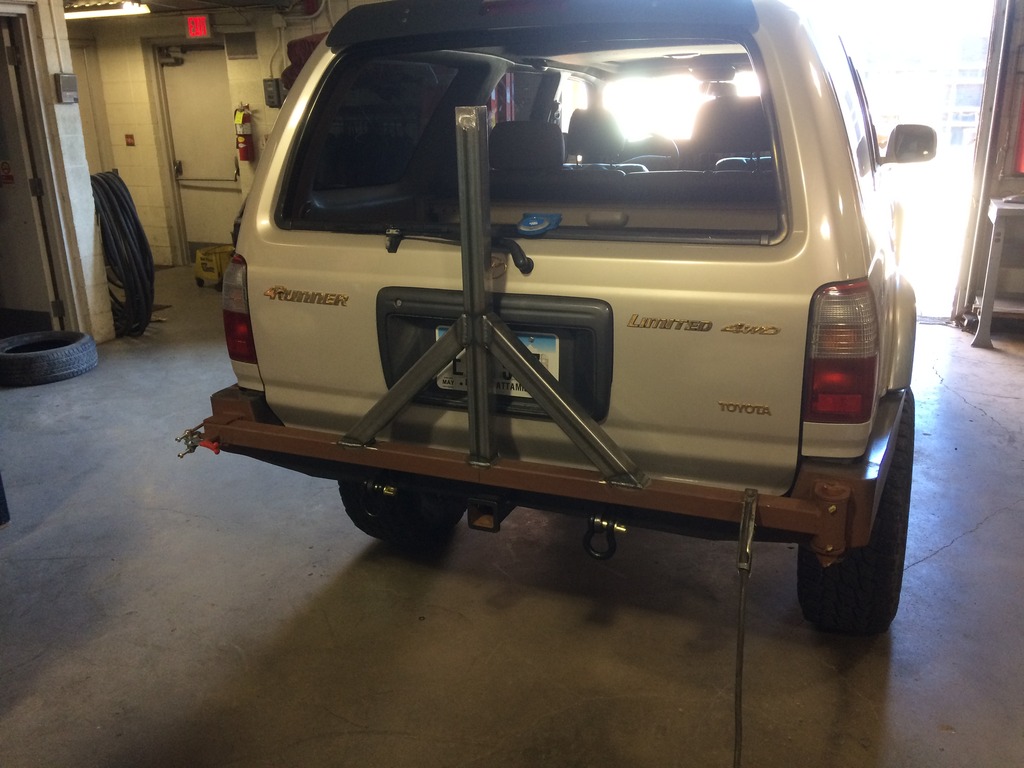
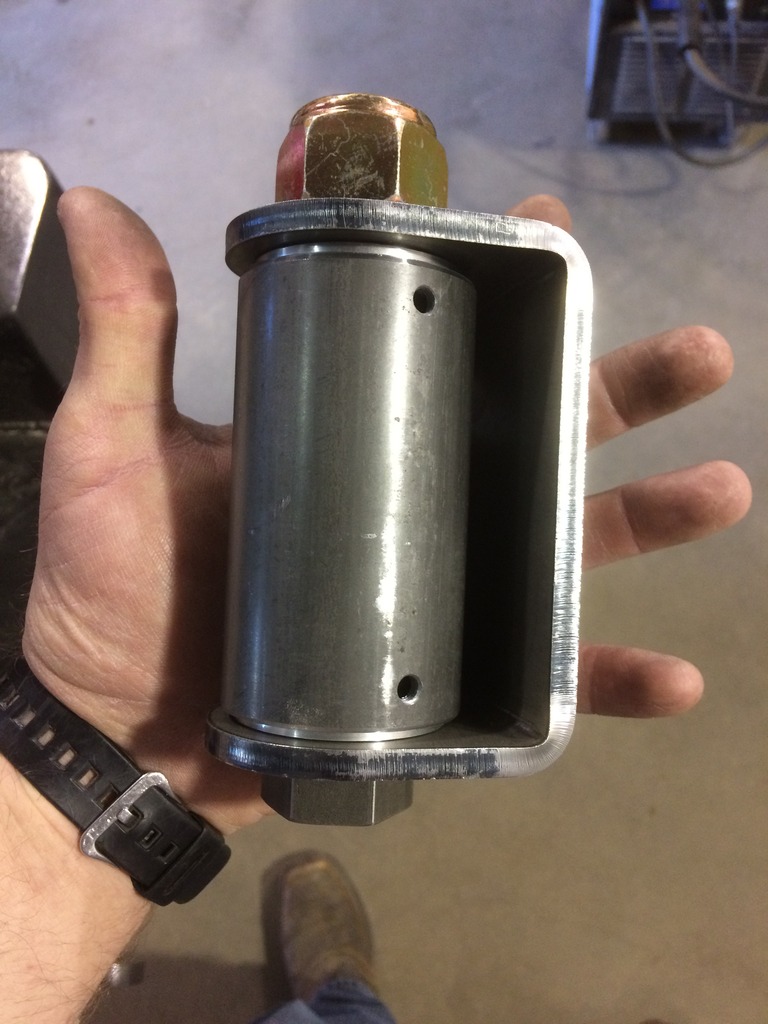
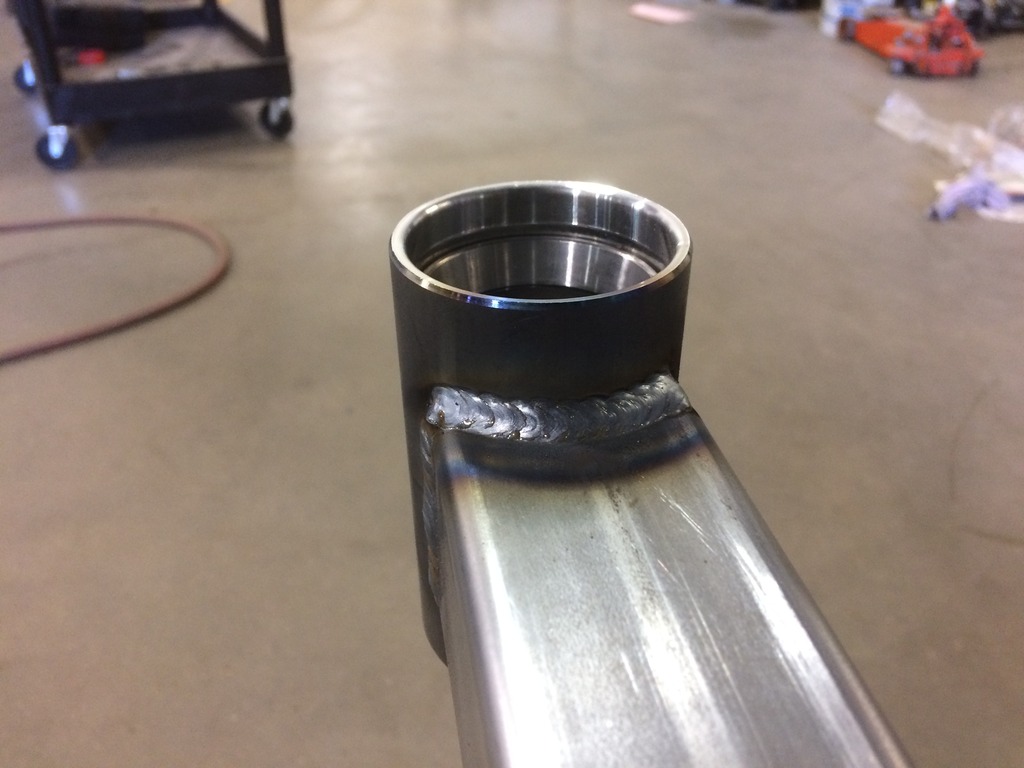
I was able to spend an hour and get the swingout all mocked up and welded.
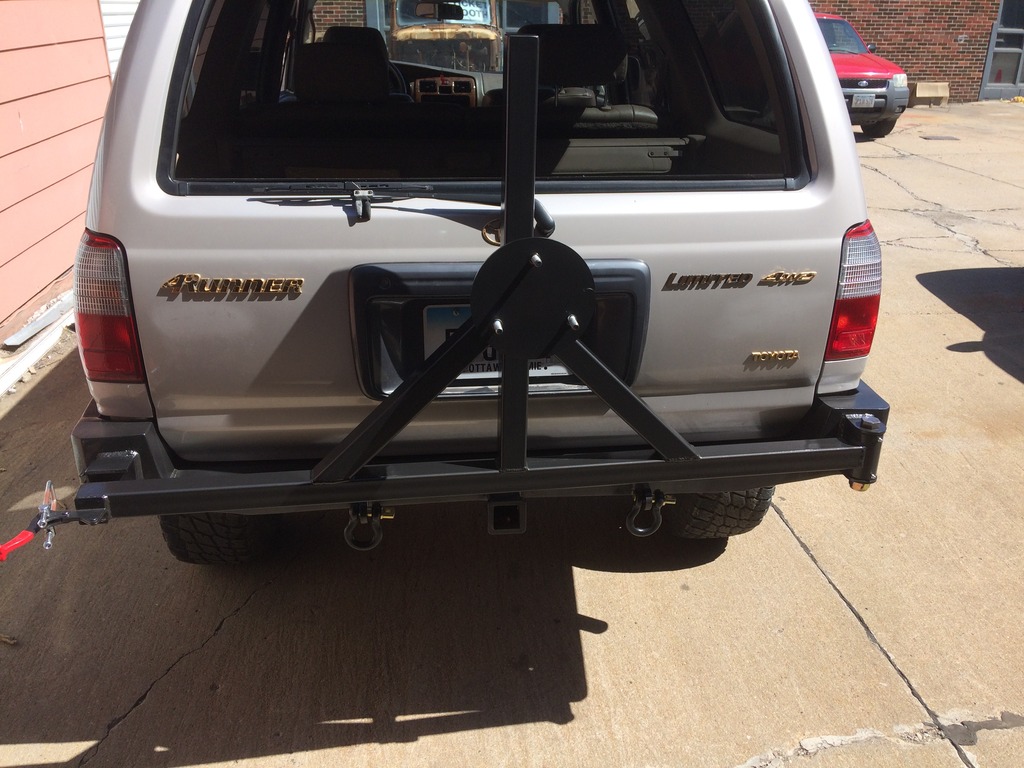
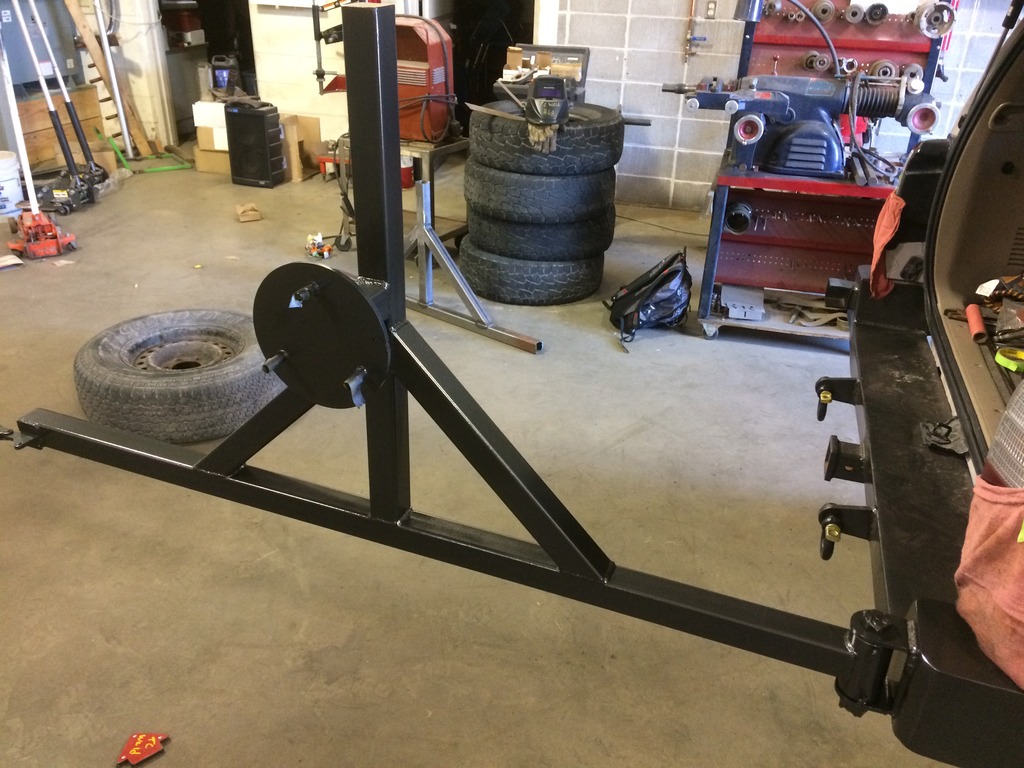
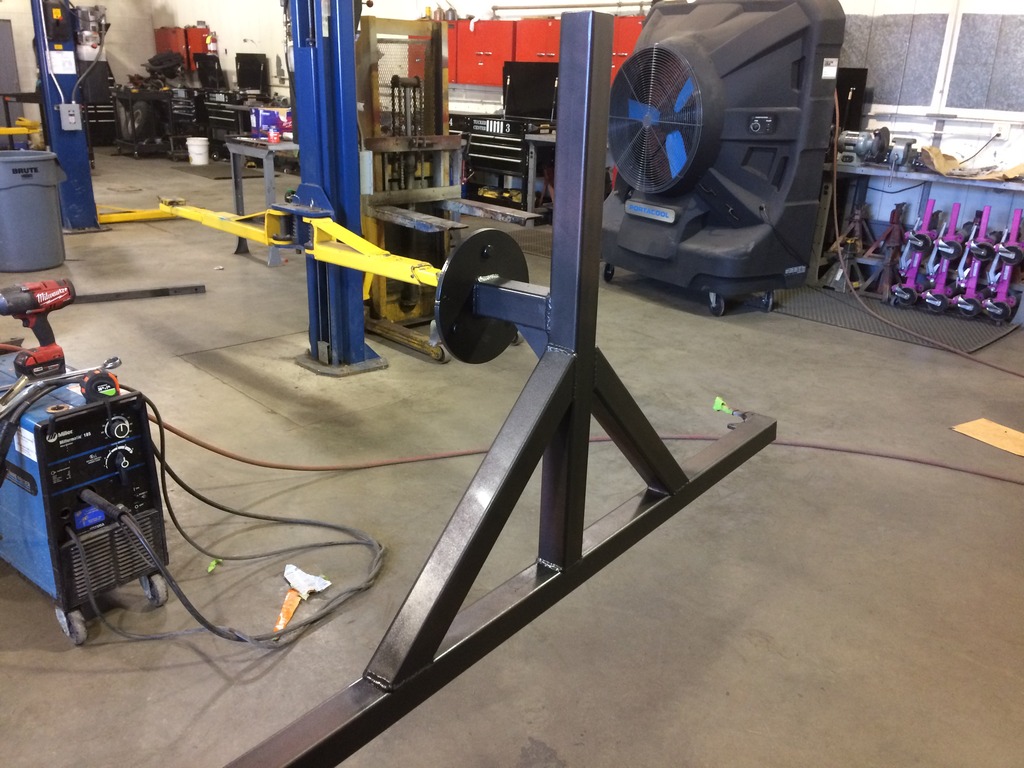
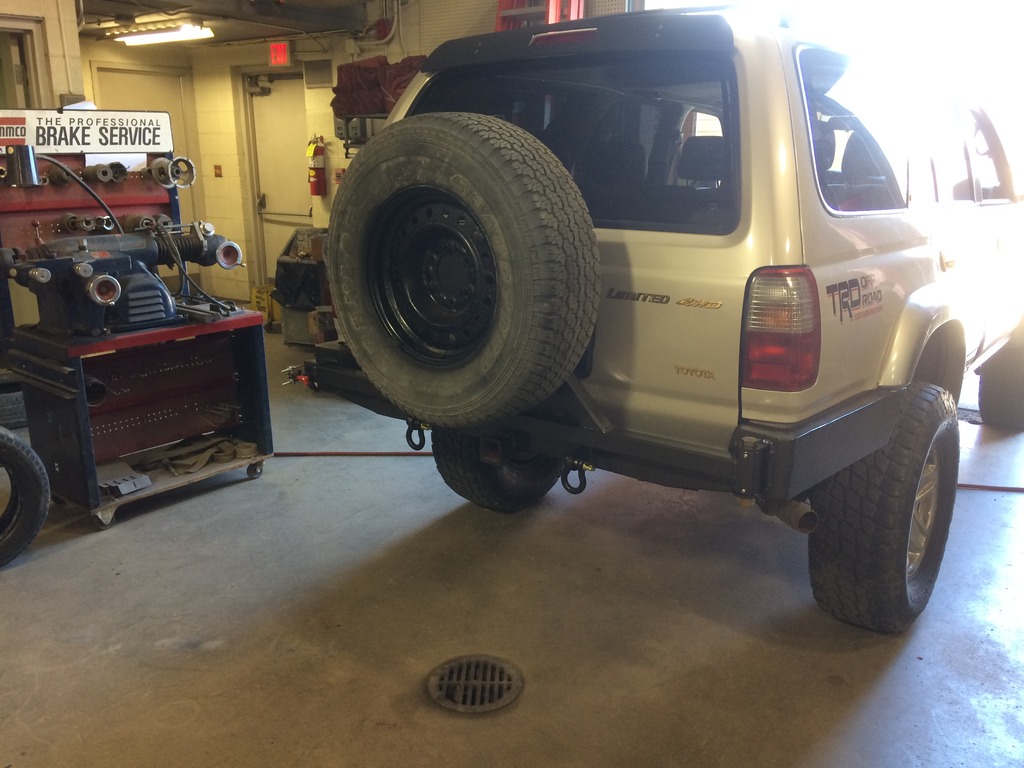
It holds the weight of the tire so much better now with this bearing. I cant even explain how well it works.
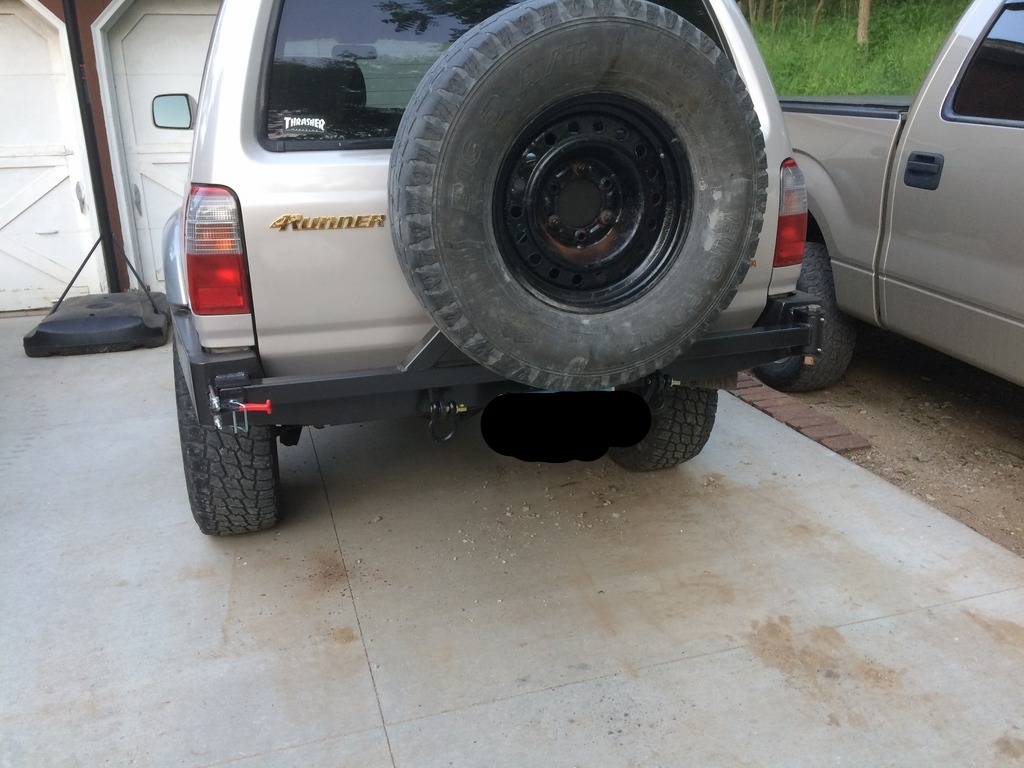
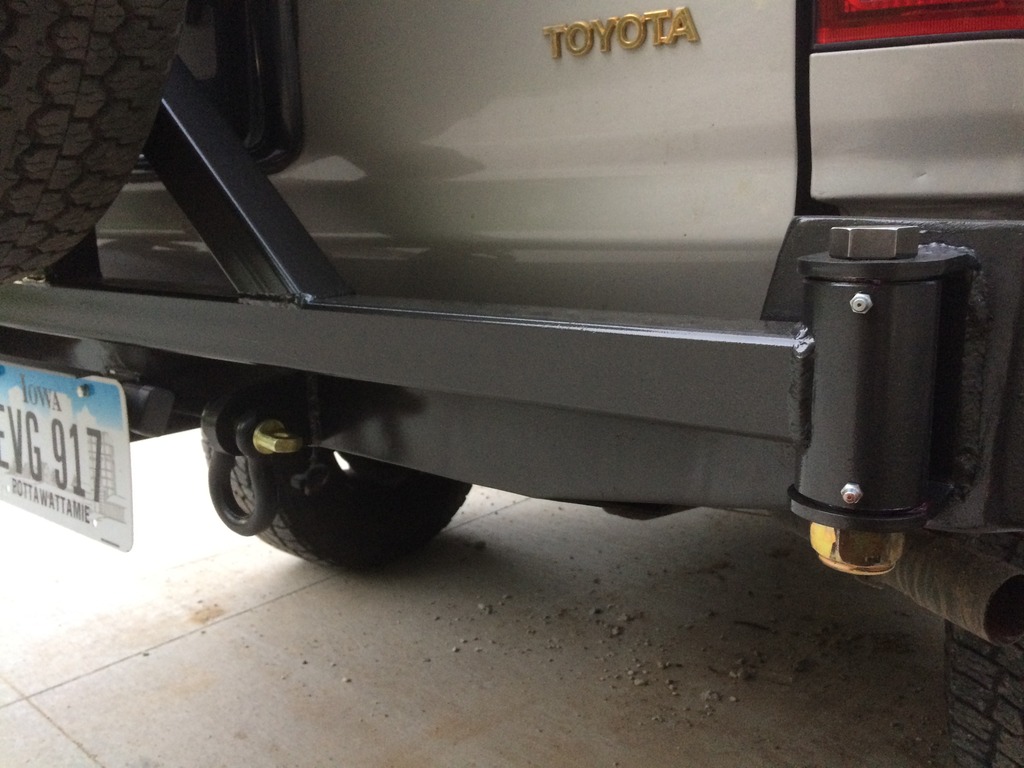
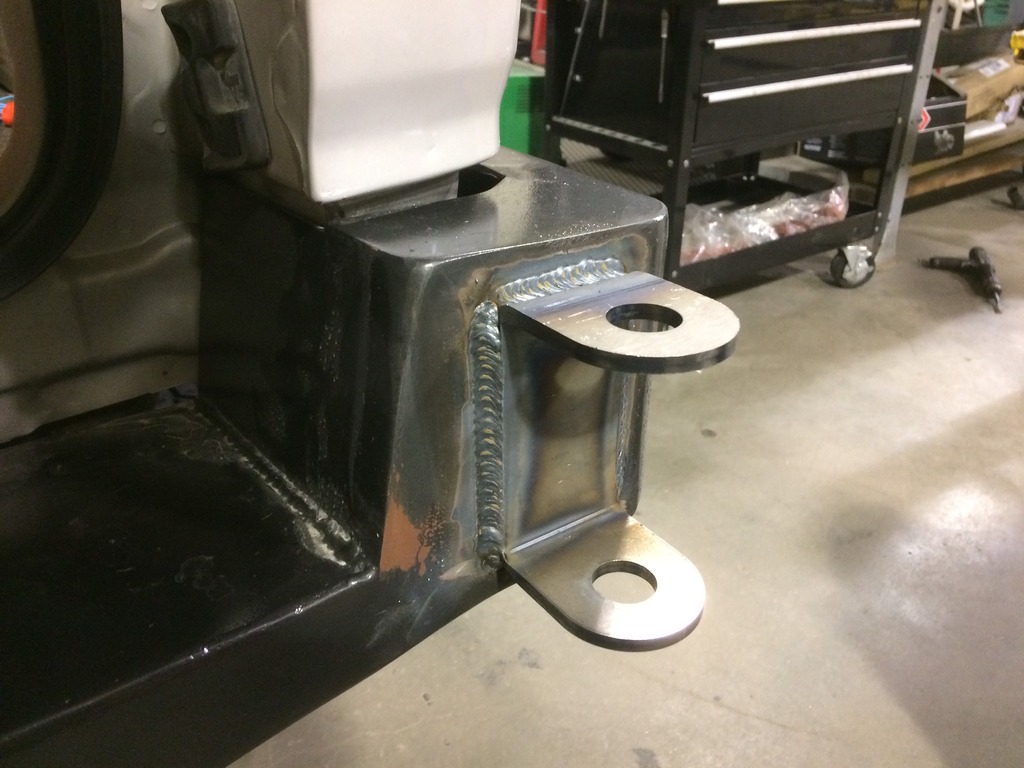
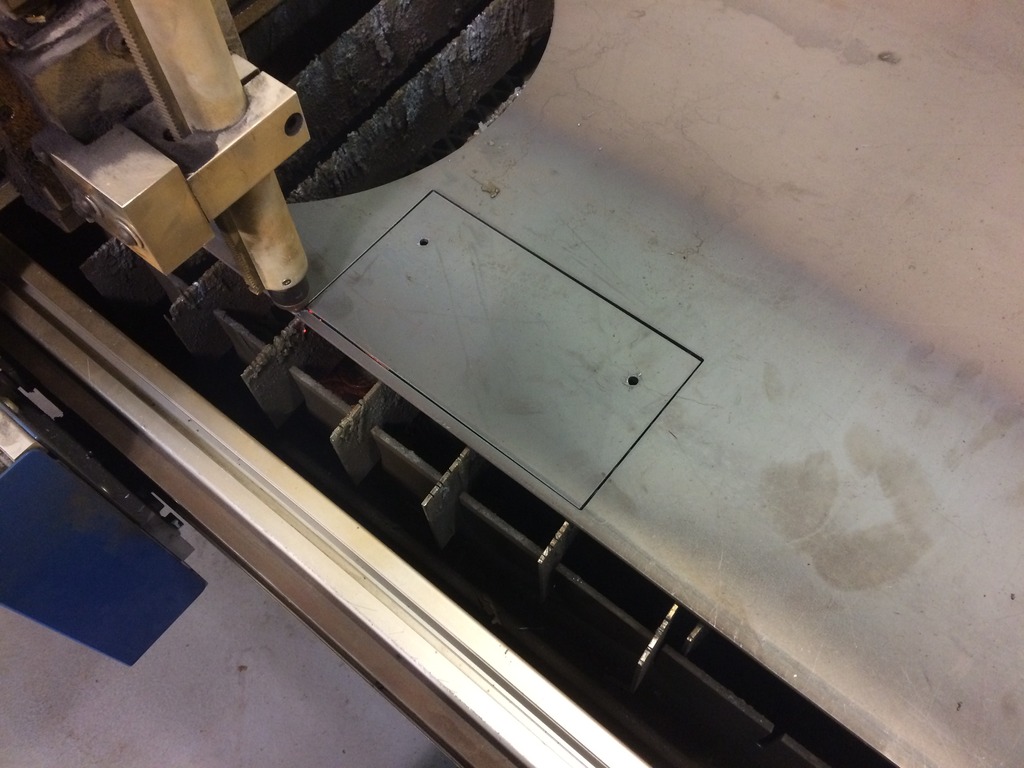
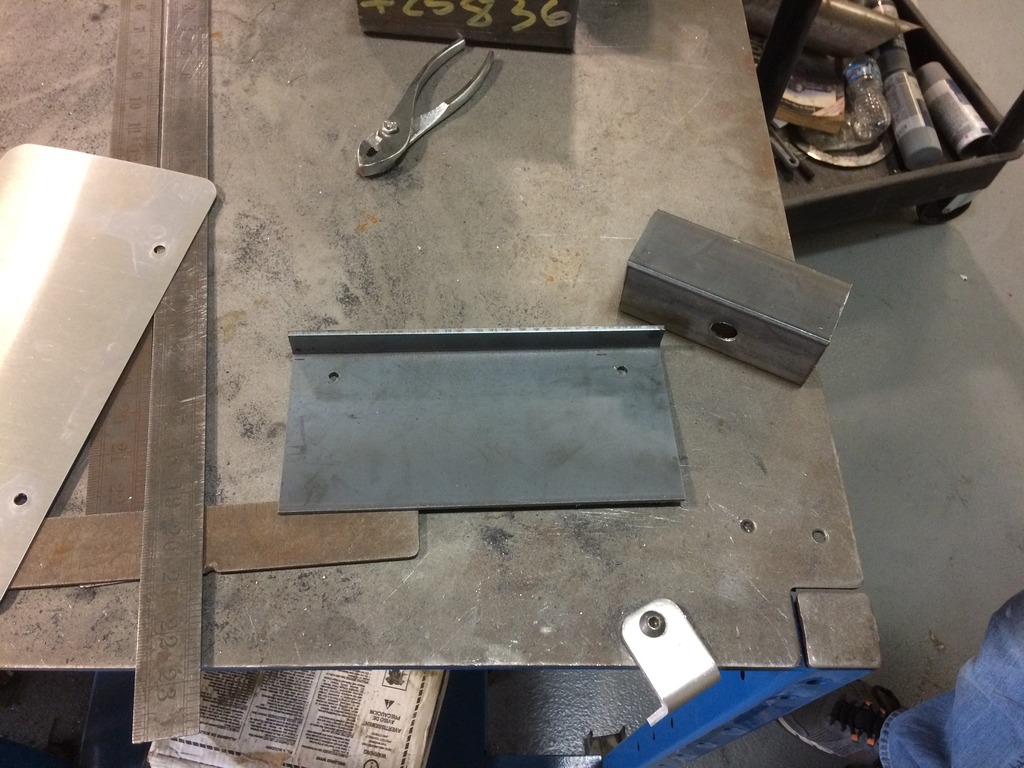
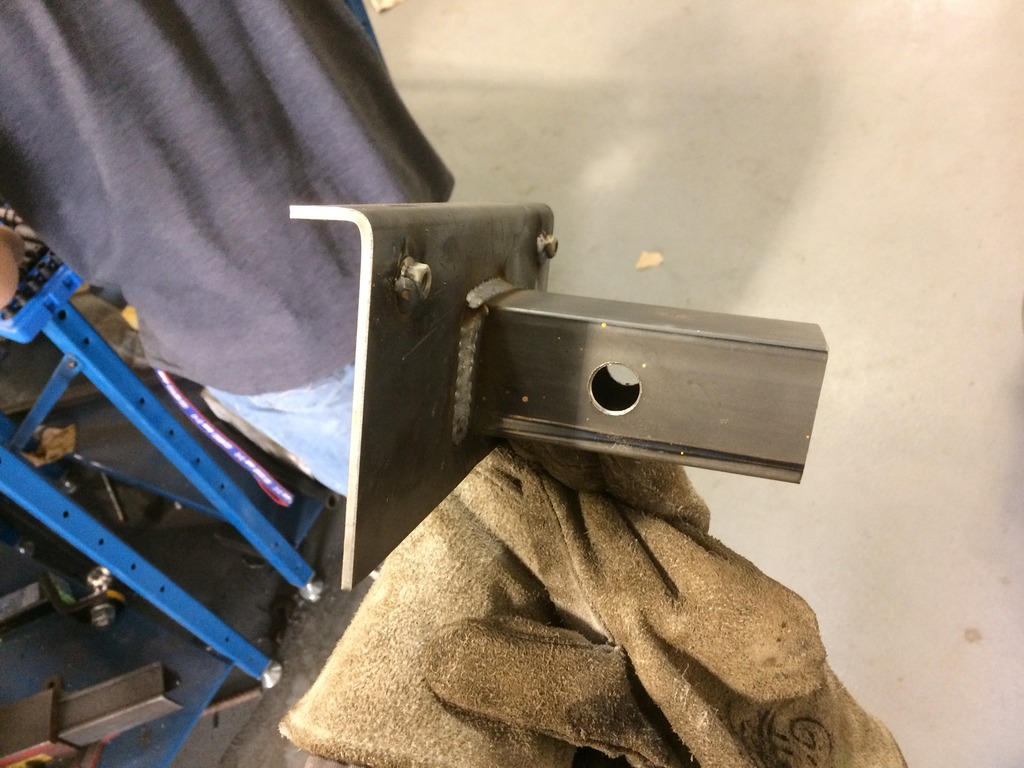
Could not decide what I wanted to do with the Plate, so I made a quick bracket that I can put in the Hitch portion of the bumper. I used the brake to make a 90 on the top to hold some lights that I can run off my trailer harness.

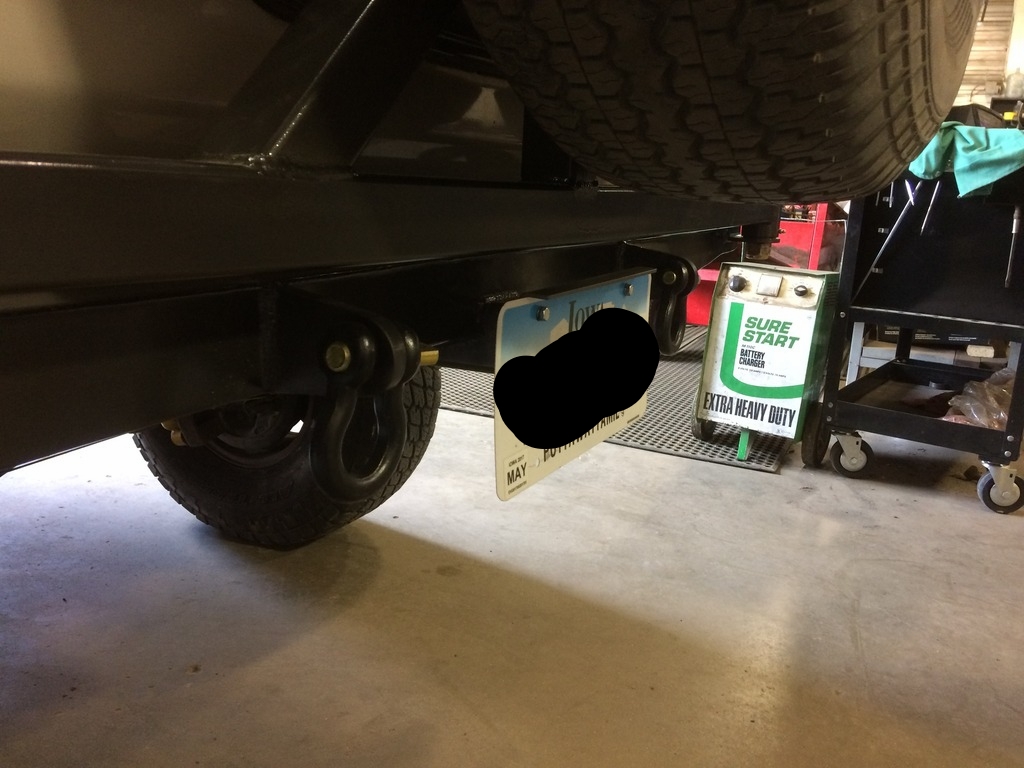
So glad that this is done and functional. Now on to the front!!!!!
All I have to say is........It was worth the wait! The part is very well made.

I got it tacked on and mocked up to start the swingout rebuild.


Like the last time, I started with the main bar and worked from there. I wanted to be able to use the 90 Degree latch instead of buying another one and waiting for its arrival.


I was able to spend an hour and get the swingout all mocked up and welded.


It holds the weight of the tire so much better now with this bearing. I cant even explain how well it works.


Could not decide what I wanted to do with the Plate, so I made a quick bracket that I can put in the Hitch portion of the bumper. I used the brake to make a 90 on the top to hold some lights that I can run off my trailer harness.


So glad that this is done and functional. Now on to the front!!!!!
Last edited by Gizler00; Jun 2, 2017 at 05:47 AM.
Jun 2, 2017 | 06:55 AM
#65
Thread Starter
Joined: Aug 2007
Posts: 3,276
Likes: 7
From: Pennsylvania
The one thing that pains me is having to take my vehicle somewhere to get an alignment done. I used to me an alignment Tech back in the early 2000's before I started teaching, So I have a hard time just letting anyone twist onmy front end.
And.......An alignment machine is the one piece of equipment that I do not have at the school shop. So....I have to outsource this to someone who understands that I have a lift and the measurements may need to be fudged a little to make things jive.
I ended up finding a decent place thats not far from my work who were willing to do what I wanted.
I was rolling with a lot of Positive camber after the lift that was putting quite a bit of extra strain on the drivers side CV.
I actually had to replace the Side bearing because it was growling so much.
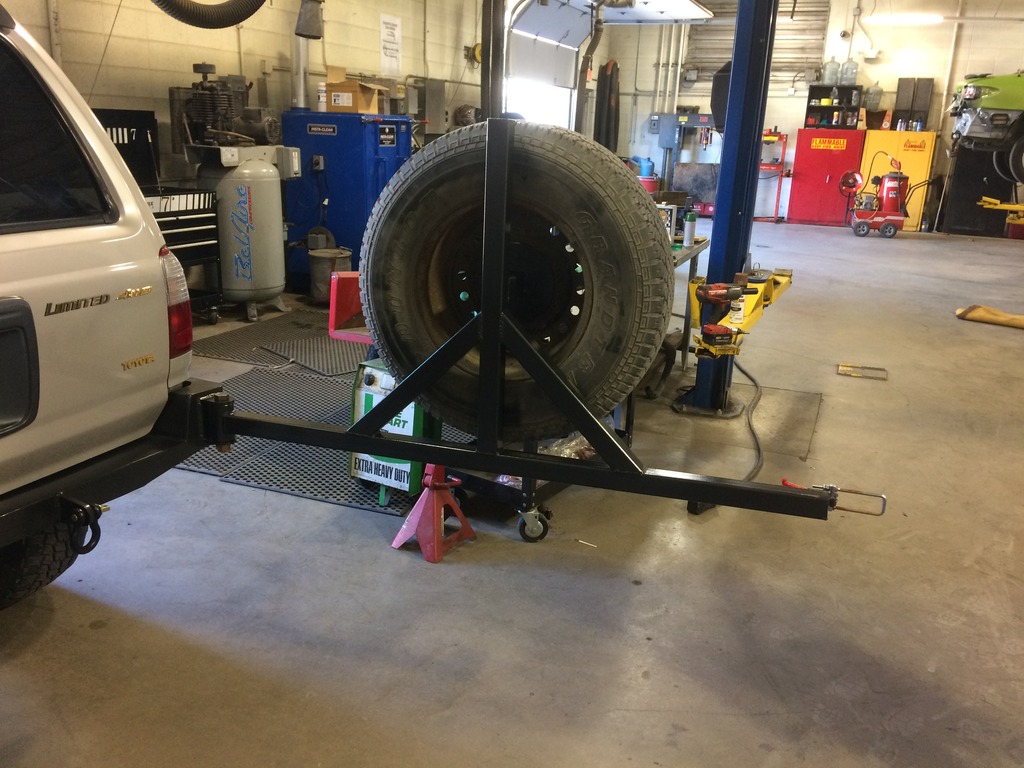
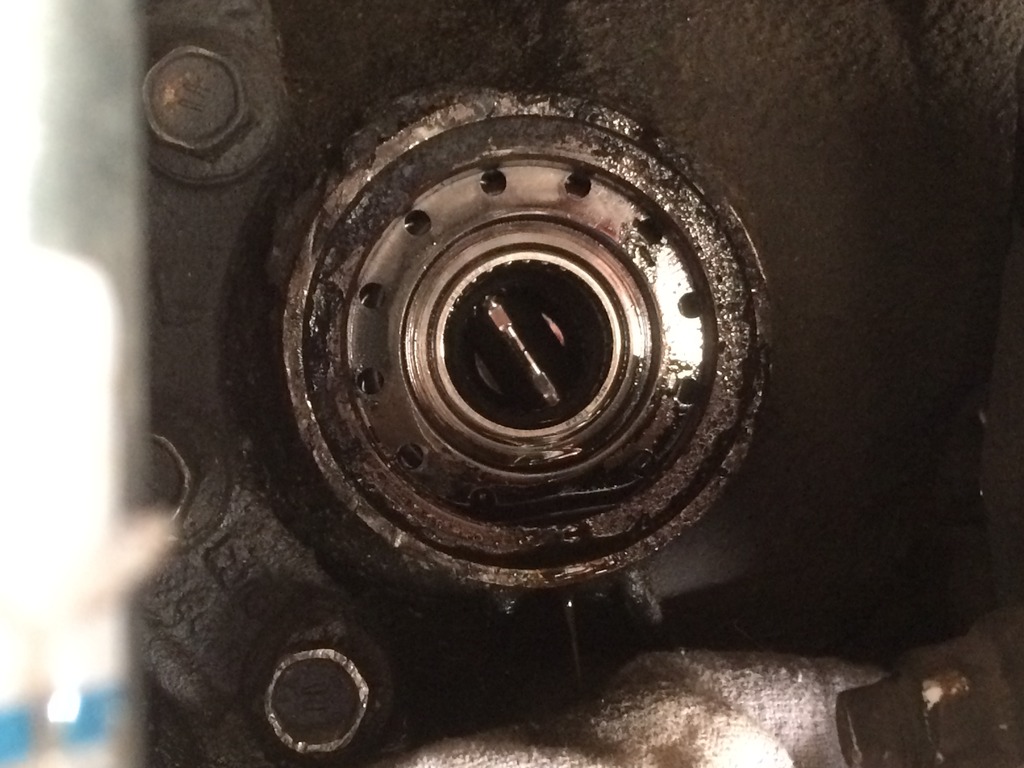
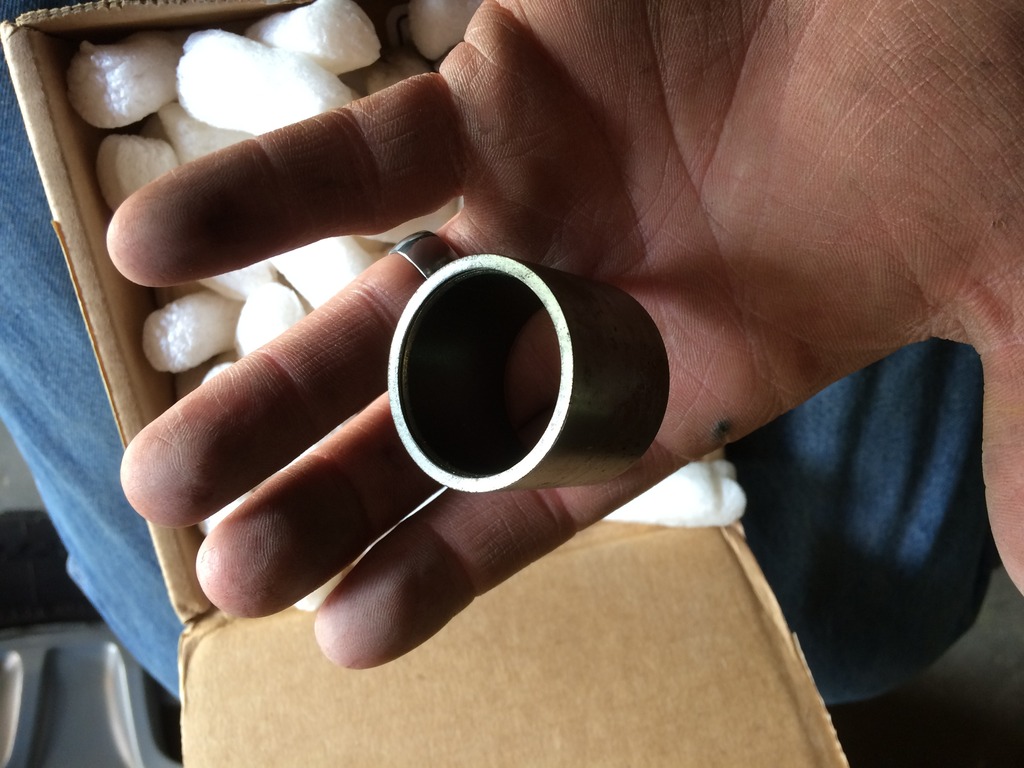
I decided to go with the ECGS Bushing. Pretty easy install. Here are some pictures for you guys.
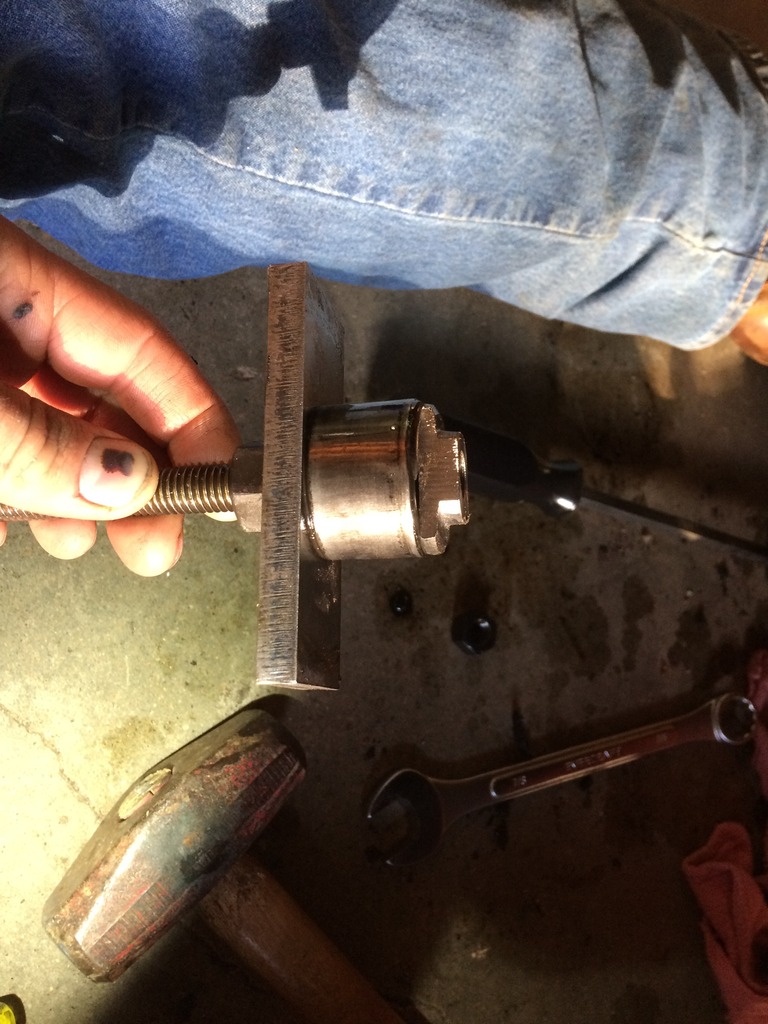
Here you can see the old seal removed and the old needle bearing still in the diff, Then the removal tool setup, bearing pulled out, and the new bushing in my hand.
Unfortunately, I did not take any pictures of the after with the bushing in and new seal installed. My kids were needing my attention so I skipped that part.
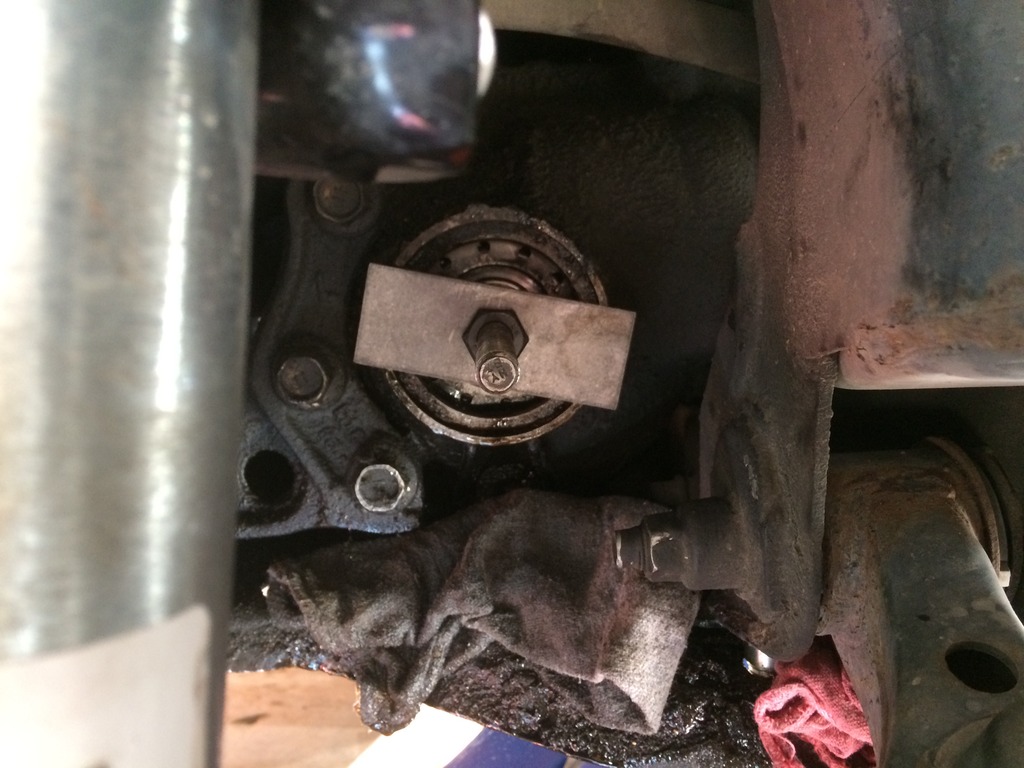
If you are attempting to do this repair, all you have to do is loosen the 4 LBJ bolts to give yourself room to swing the spindle out of the way after you remove the brakes and CV.
Here you go.
And.......An alignment machine is the one piece of equipment that I do not have at the school shop. So....I have to outsource this to someone who understands that I have a lift and the measurements may need to be fudged a little to make things jive.
I ended up finding a decent place thats not far from my work who were willing to do what I wanted.
I was rolling with a lot of Positive camber after the lift that was putting quite a bit of extra strain on the drivers side CV.
I actually had to replace the Side bearing because it was growling so much.
I decided to go with the ECGS Bushing. Pretty easy install. Here are some pictures for you guys.
Here you can see the old seal removed and the old needle bearing still in the diff, Then the removal tool setup, bearing pulled out, and the new bushing in my hand.
Unfortunately, I did not take any pictures of the after with the bushing in and new seal installed. My kids were needing my attention so I skipped that part.
If you are attempting to do this repair, all you have to do is loosen the 4 LBJ bolts to give yourself room to swing the spindle out of the way after you remove the brakes and CV.
Here you go.


 Jun 2, 2017 | 10:25 AM
#66
Nice work buddy on the tire swing out 2.0...looks awesome, glad that Comp4x4 came through with the part, better late than never! I like the licence plate relocating receiver plate, nice work! You've made a lot of progress in a short amount of time, the rig is looking great!
Last edited by rustED; Jun 2, 2017 at 10:29 AM.
Jul 26, 2017 | 04:31 AM
#67
Thread Starter
Joined: Aug 2007
Posts: 3,276
Likes: 7
From: Pennsylvania
This photobucket thing stinks. I do not have the time to go back and transfer all the pictures over in all 3 threads I have, and I sure as heck am not paying 400$ just to be able to see them.
Thanks ED!!
Thanks ED!!
Aug 25, 2017 | 01:55 AM
#69
Might I suggest moving the tire portion of the swingout over to the passenger/bearing side of the bumper and using the drivers side for a Jerry can mount or 2. Clear up some space and move some of the weight inboard of the arm and easier to move with a full size spare on it.


