
Twistedyota's '87 4Runner Build thread
 Jun 3, 2013 | 12:14 AM
#501
Looks like you are getting alot done. I have gone on some long runs for parts as well. Sometimes it is just something you have to do to get a good deal or hard to find parts.
Jul 6, 2013 | 11:29 PM
#502
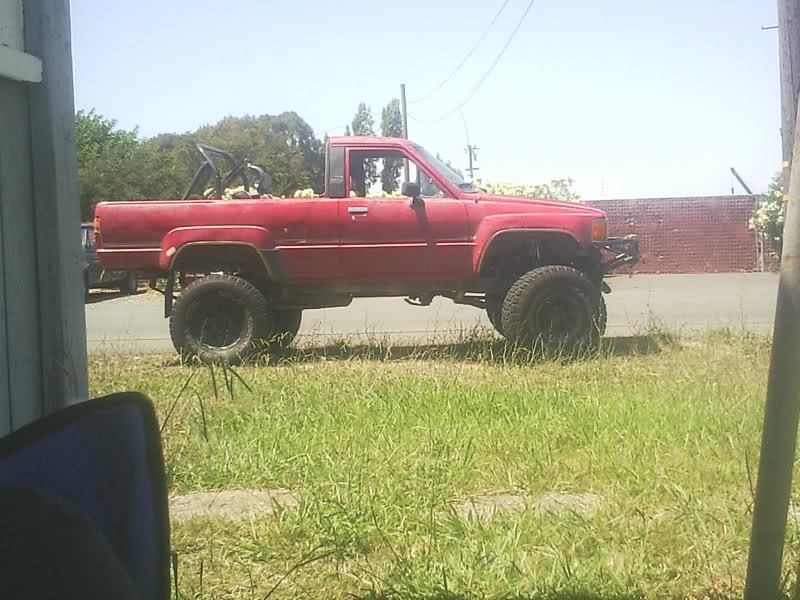
Took the top of to enjoy the warm weather.
It was great to lay in the back and watch the fireworks
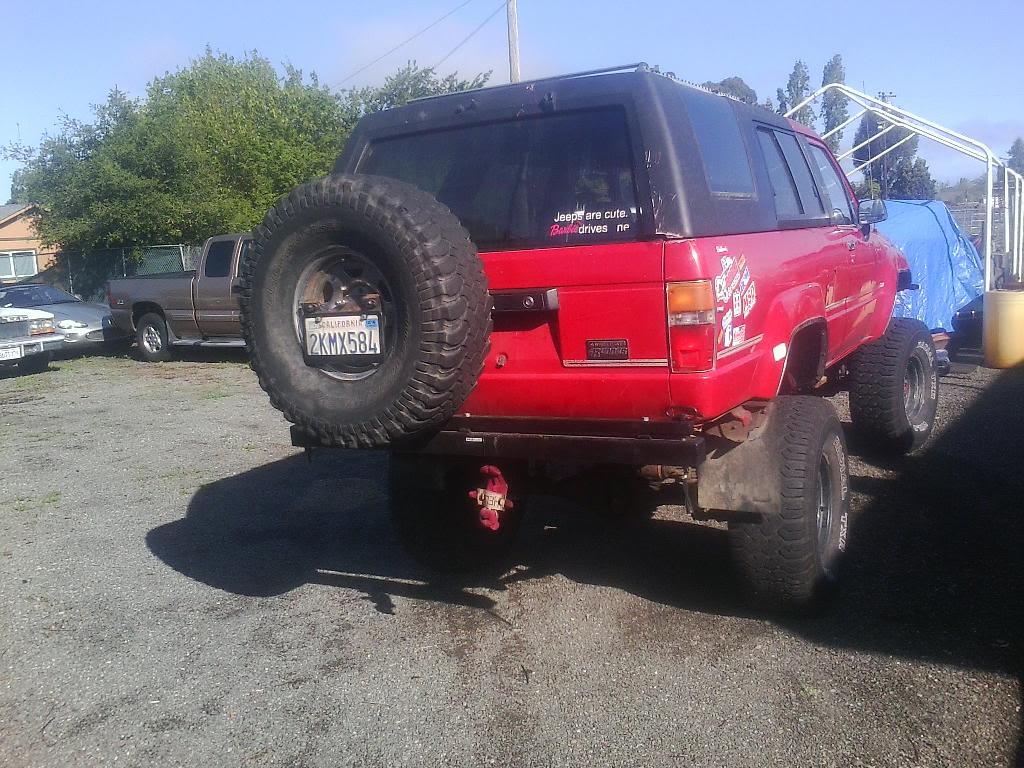
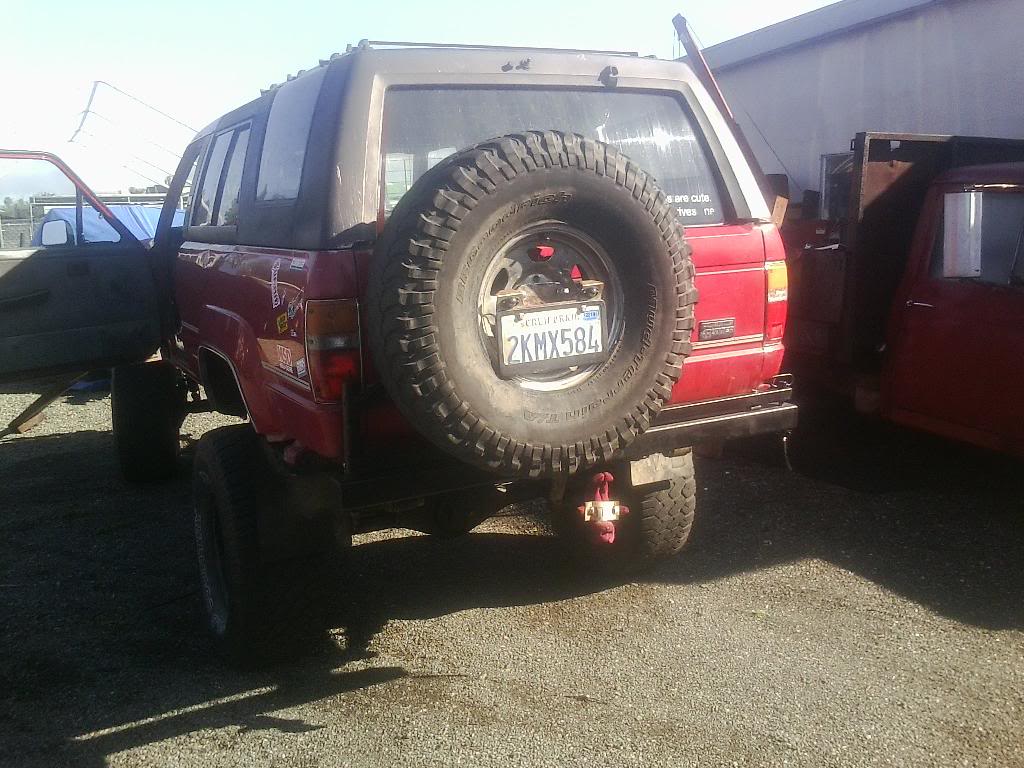
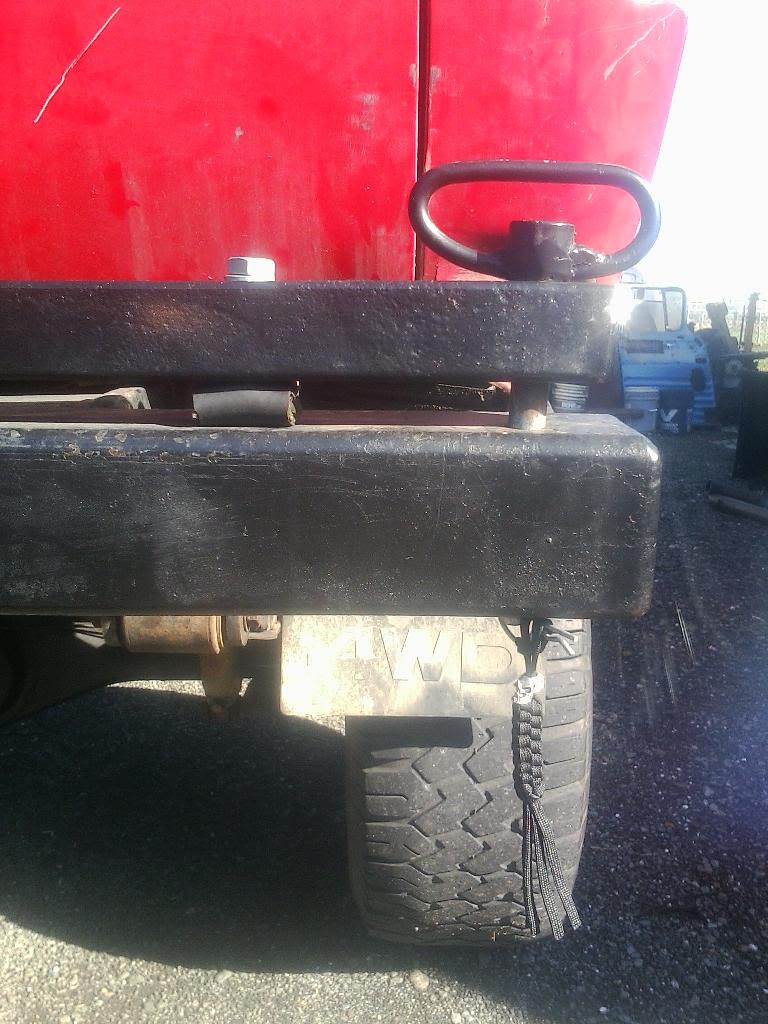
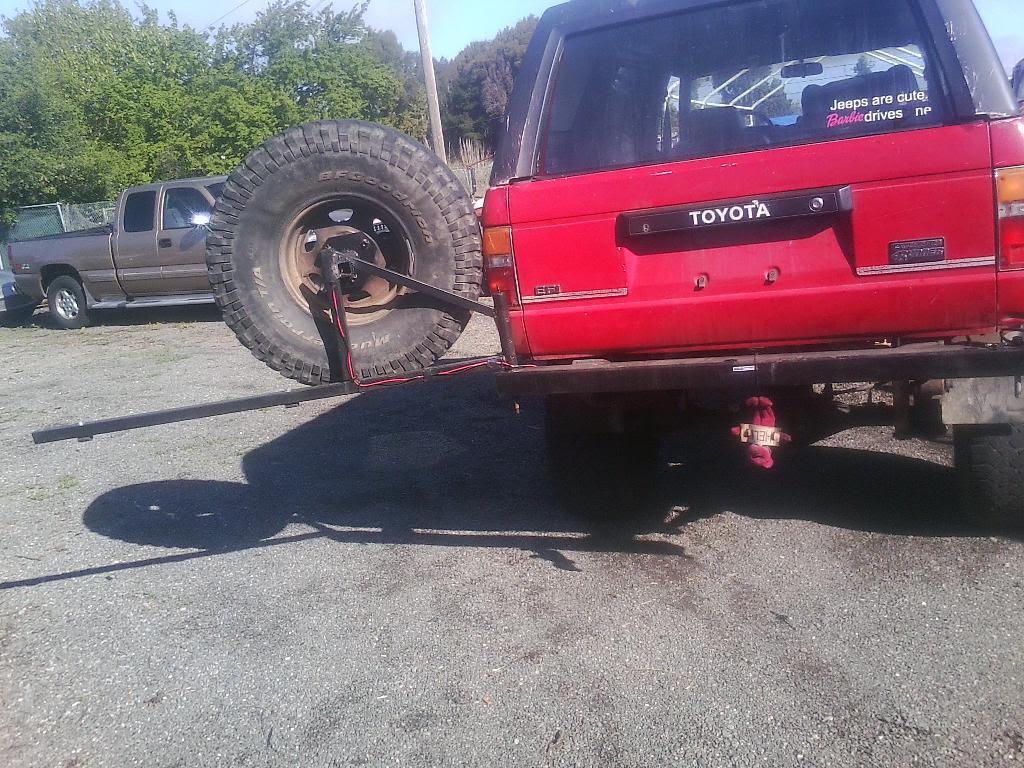
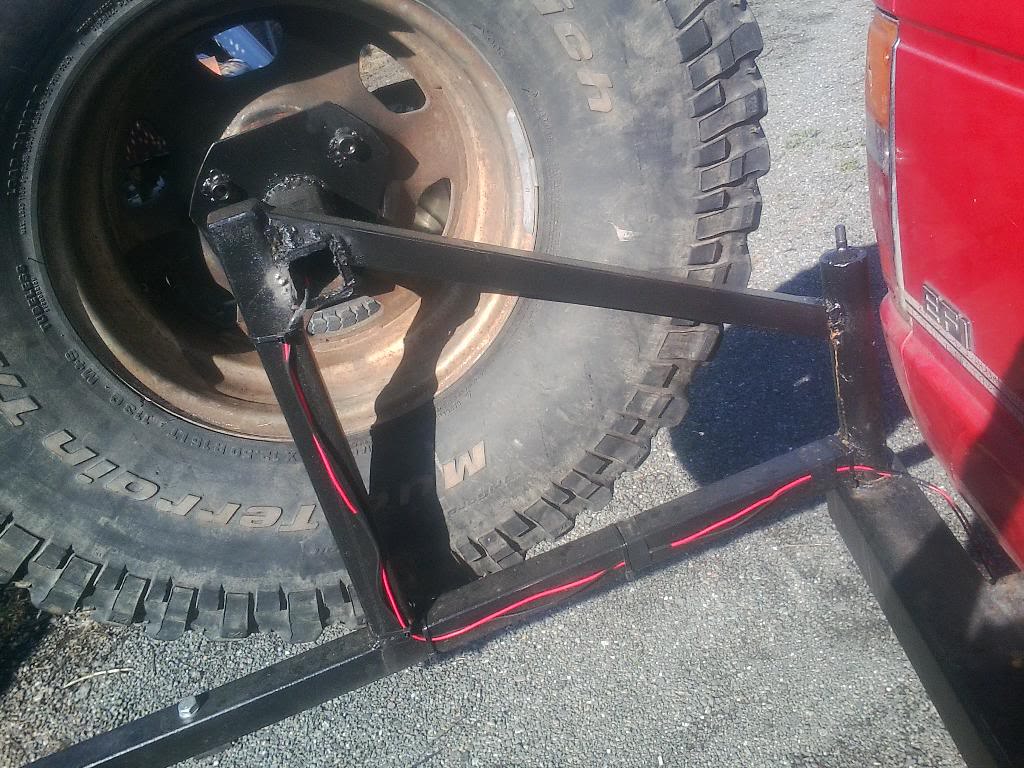
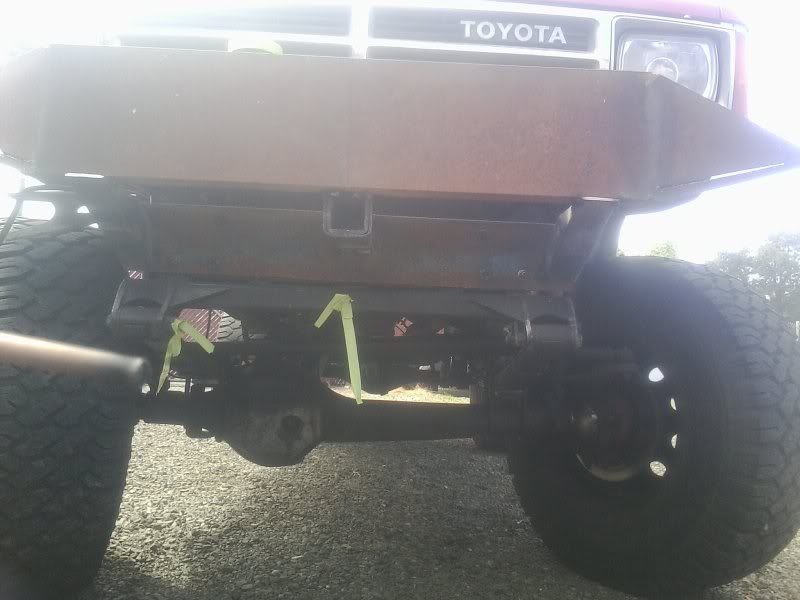
Also bought a bumper at pick-n-pull for the rear, it came off a toyota pickup and once I got it home I ran into a prooblem, it was bolted to the outside of the frame on the pickup but can't be done on the 4runner due to the body mount is in the way. So I had to cut these 1/2" mounts and modify them to fit in the frame then had to add a 1/4" plate onto the mounts to simulate the frame so the bumper would fit snug again, plus I had to raise the bumper 2" due to my body lift. So I got it all welded and bolted on today.
Will be working on a swing out tire carrier and some sides to it also plus possible a reciever
O yea, I don't have any pics of it, but a couple of weekends ago I started to build a soft top, didn't get very far but got a metal frame built tht bolts all the way around the truck still need to do a middle and rear hoop plus some side bars but thts another weekend
It was great to lay in the back and watch the fireworks
Also bought a bumper at pick-n-pull for the rear, it came off a toyota pickup and once I got it home I ran into a prooblem, it was bolted to the outside of the frame on the pickup but can't be done on the 4runner due to the body mount is in the way. So I had to cut these 1/2" mounts and modify them to fit in the frame then had to add a 1/4" plate onto the mounts to simulate the frame so the bumper would fit snug again, plus I had to raise the bumper 2" due to my body lift. So I got it all welded and bolted on today.
Will be working on a swing out tire carrier and some sides to it also plus possible a reciever
O yea, I don't have any pics of it, but a couple of weekends ago I started to build a soft top, didn't get very far but got a metal frame built tht bolts all the way around the truck still need to do a middle and rear hoop plus some side bars but thts another weekend
Last edited by twistedyota; Jul 6, 2013 at 11:38 PM.
Oct 19, 2013 | 06:52 PM
#504
Haven been on my thread in a couple of months, but have been tinkering and gathering some parts here and their, my home made twin stick leaks form the sides where the shifter rods go through the housing, so one day I may build another.
Ever since the SAS I have had a death wobble, I made a steering stabilizer for the truck and it helped a lot but I still hade a wobble in a certain mph range, then I went from the 31's to the 35's and the wobble reduced due to it taking more force to wobble the 35's, and last week I in stalled some degree shims and it looks promising, before I had a managable wobble between 35-45 and after their is none, I haven't been above 55 since but it should be good.
I also bought a factory 4runner top for $40 tht I'm in the process of making a half top out of, I have pics but you all willl have to wait until I'm done to see it I want it to be a suprise.
Dec 23, 2013 | 05:31 PM
#505
need to update with some pics soon, I've added a tire swing out to my rear bumper, bought a new chevy leaf spring conversion kit/ a used spartan locker/ and some vented rotors for the truck, then I won wab xmas give away got my self a knuckle rebuild kit.
I was gonna install the vented rotors over the weekend but once I had the tuck on the lift and the wheels off I saw and remembered tht u have to tear a good part of the axle apart to change them so I decided to wait and install them on my spare solid axle when I tear it done and rebuild it.
O and The shims worked perfect no more wobble.
Last edited by rworegon; Aug 21, 2014 at 03:31 PM.
Feb 22, 2014 | 09:16 AM
#506
Got in the truck last week, went to blocks and the truck started bucking jerking and sputtering. took it home, later tht night and found code 7 and 11, replace my tps with a new one and was left with code 11, which is tps wiring orr the ecu. At a bit of a stand still, don't have a spare comp to test and don't have my wiring diagrams to test the wires
Mar 8, 2014 | 03:02 PM
#507
Hopped in the truck today and decided to start it to keep everything working since it has just been sitting without moving, well when I started it none of my problems occured, so I reved it up a few times and still nothing, so I took it around a few blocks and still nothing, took it back home and checked the codes, still got the same codes as before code 7 and code 11, plugged my new tps in and code 11 disappeared, disconnected the battery cables for a few minutes and even touch them together to get rid of any voltage in the system then hooked it back up and tested again. Still got code 7(1.open and/or shorted tps circuit 2.Faulty tps 3.faulty ecu) I know its not the tps. So its either the ecu or the wiring, well I got a ecu coming my way next week tht I'm gonna try.
But in the mean time just drove it 20miles on the freeway with the old tps sensor and both codes in the system and no problems at all. I'm guess mybe some moister got in my ecu and cause it to short or something, but since my truck has been sitting in the sun with all windows closed and the ecu just laying on the floorboard tht mybe the moisture disapated.
But in the mean time just drove it 20miles on the freeway with the old tps sensor and both codes in the system and no problems at all. I'm guess mybe some moister got in my ecu and cause it to short or something, but since my truck has been sitting in the sun with all windows closed and the ecu just laying on the floorboard tht mybe the moisture disapated.
Mar 9, 2014 | 10:26 AM
#508
Hope you get the code 7 & 11 figured out. Do you have any pics of the spare tire carrier, I'd like to see how it turned out! Are you still working on making a soft top? I would like to build my own soft top this summer, if I can finish up some other projects first, lol.
Mar 10, 2014 | 04:09 PM
#509
I'll try and get some pics of the tire carrier this week for you. As for the soft top its been put on the back burner until summer comes closer when I'm able to leave the top off for more then a day or so
 Mar 14, 2014 | 07:28 AM
#511
Well my memory card fried in my phone and becauuse my phone is stupid I cannot take pics without a memory card so the bumper pics will have to wait until I gget a new memory card.
Latest update started to get a real bad vibration when on the throttle at high speeds, I know its a u-joint but its never been to bad until last night when it got reall bad, crawled undet the truck last night and the u-joint in the rear drive line connected to the diff had 2 sides destroied, missing all the bearings in 2 caps and the caps are broken and got so hot they started to turn blue.
So ima replace the u-joints in it today and tomarrow. Did the 63 chevy rears a month or so ago and it rides a little nicer, But I'm thinking about removing a leaf from the fron(5leafs) and 1 from the rear(4leafs+overload) to make it a lil softer and a lil more flexy
Mar 15, 2014 | 11:08 AM
#512
Originally Posted by 2manyprojects:5592349
Made a twin stick for "free" out of the spare parts I had. Would only work for a single gear case with forward shift. Steal a top shift fork/rail from friend who did duals. Pull the interlock pin and run one forward shift for high/low and top shift for 2/4wd.
Some key stock still needs to be welded to the forward shift rail to keep the shifter engaged.
The rails would be switched if your getting leftovers from a friend who went duals.
Some key stock still needs to be welded to the forward shift rail to keep the shifter engaged.
The rails would be switched if your getting leftovers from a friend who went duals.
Cool idea
Apr 5, 2014 | 11:23 PM
#513
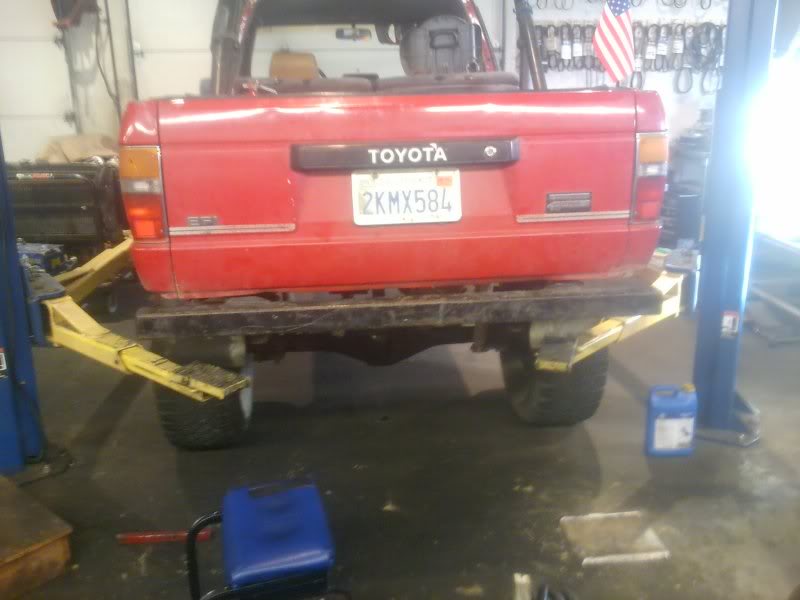
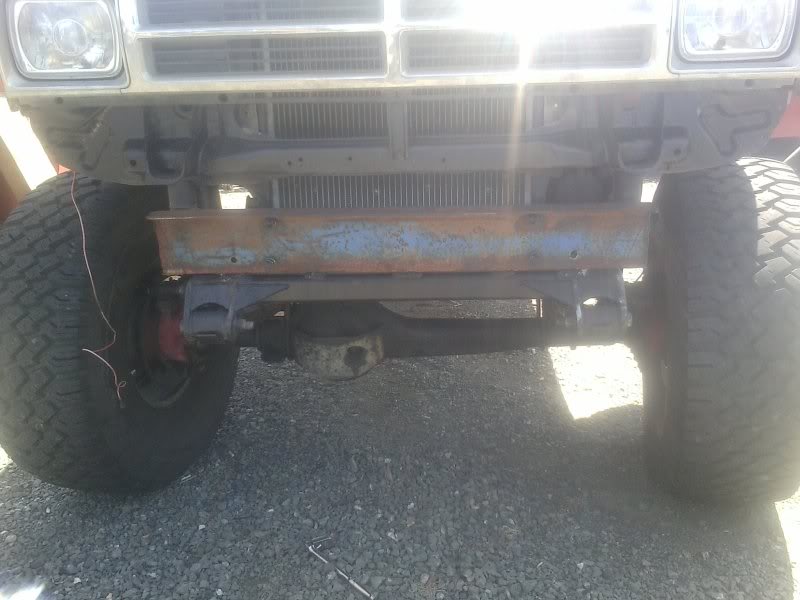
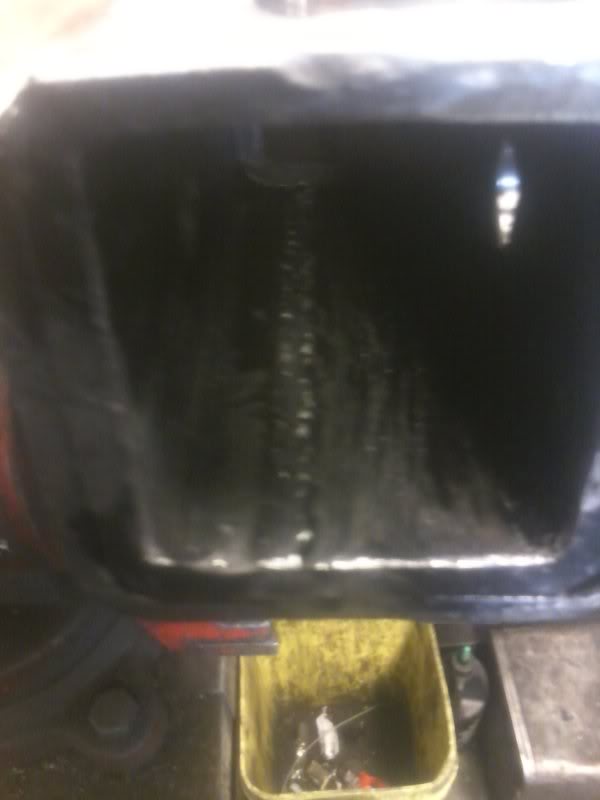
Finally got sum pics of my rear bumper:

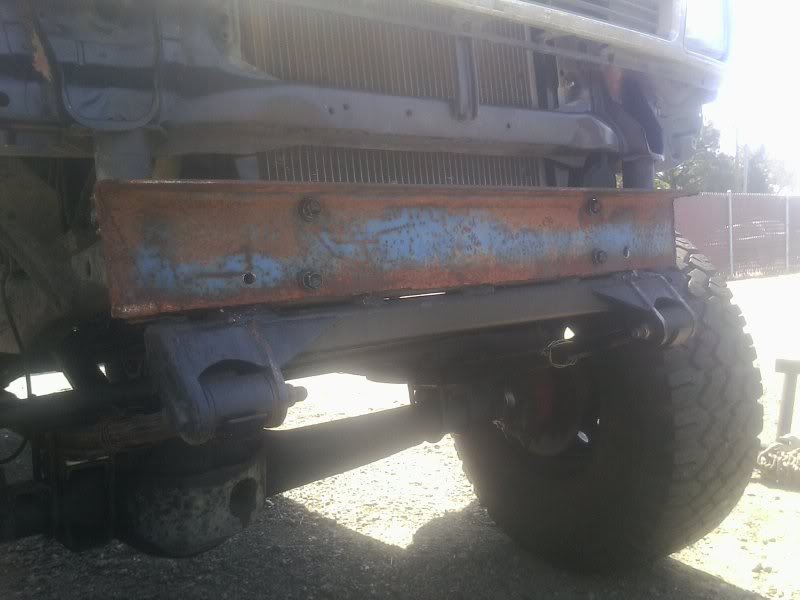
Front bumper before:
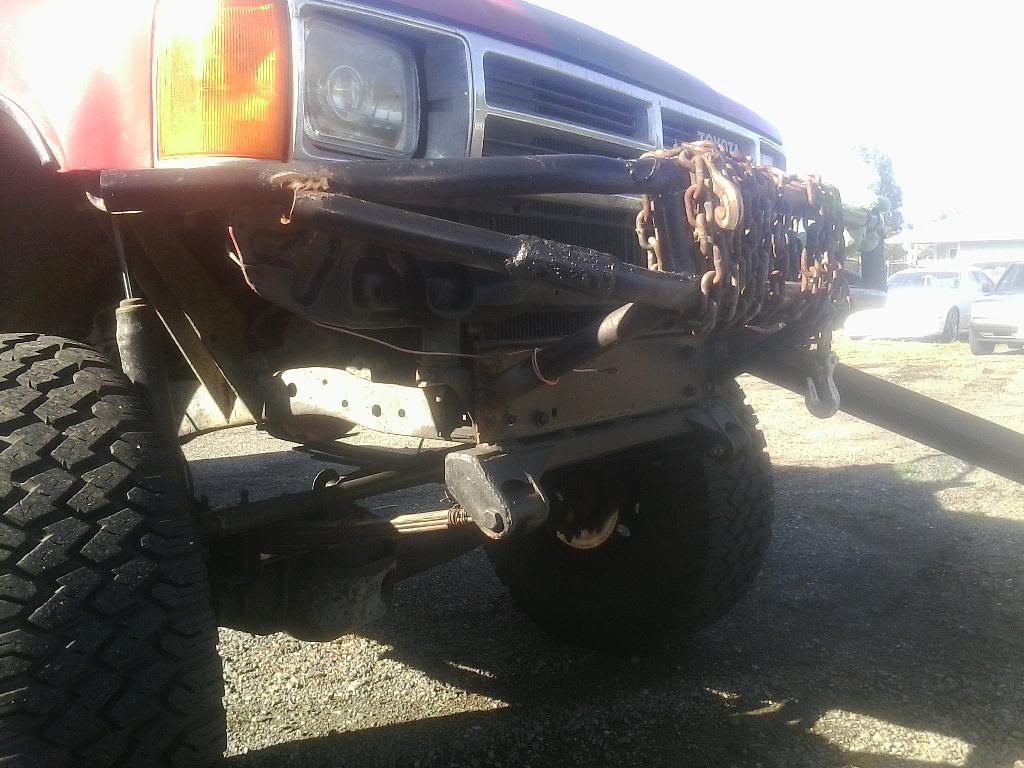
It was never finished, I was gonna add a bar to go side to side then 2 bars going from the side bar down to the bottom mount then mount my winch in it but my parts are in my other yota that I don't have everyday access to so o well, thinking I may cut the 2" out of it that was incorporated in for my body lift and put it on the white runner, since I am now keeping it so the wife will have a vehicle to drive once she sells her pos.
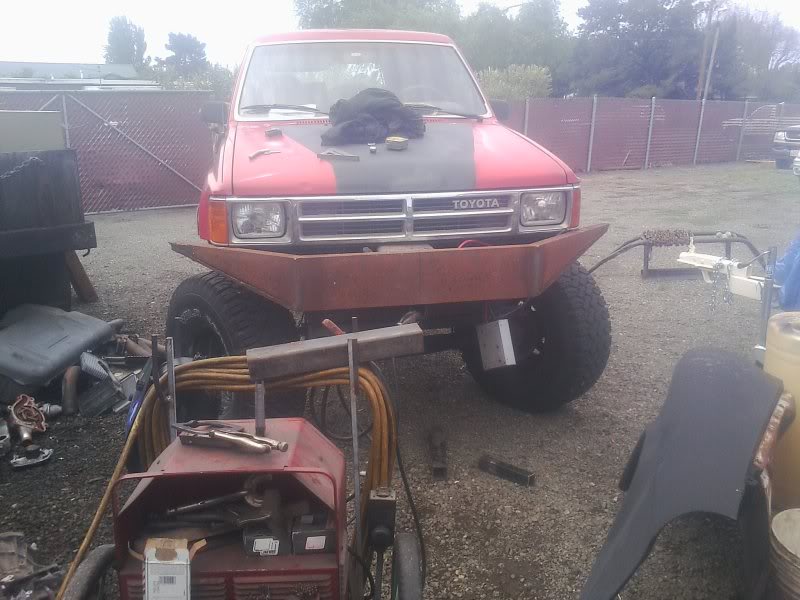
The bumper I started working on, since I've never been a real big fan of tube style bumpers:
8"wide c channel
Using the old bumper to help with leverage after notching the metal and heating it up
After that pic I mocked it up on the truck and then cut the sides to angle upward for rock clearance to tire, bad idea since I haven't made any mounts and now that the bottom sides are bent upwards it won't stand up straight which is gonna make the rest a lot harder
Been scouring yotatech classifieds pirate classifieds and clist for yota parts and found an sr5 cluster on pirate
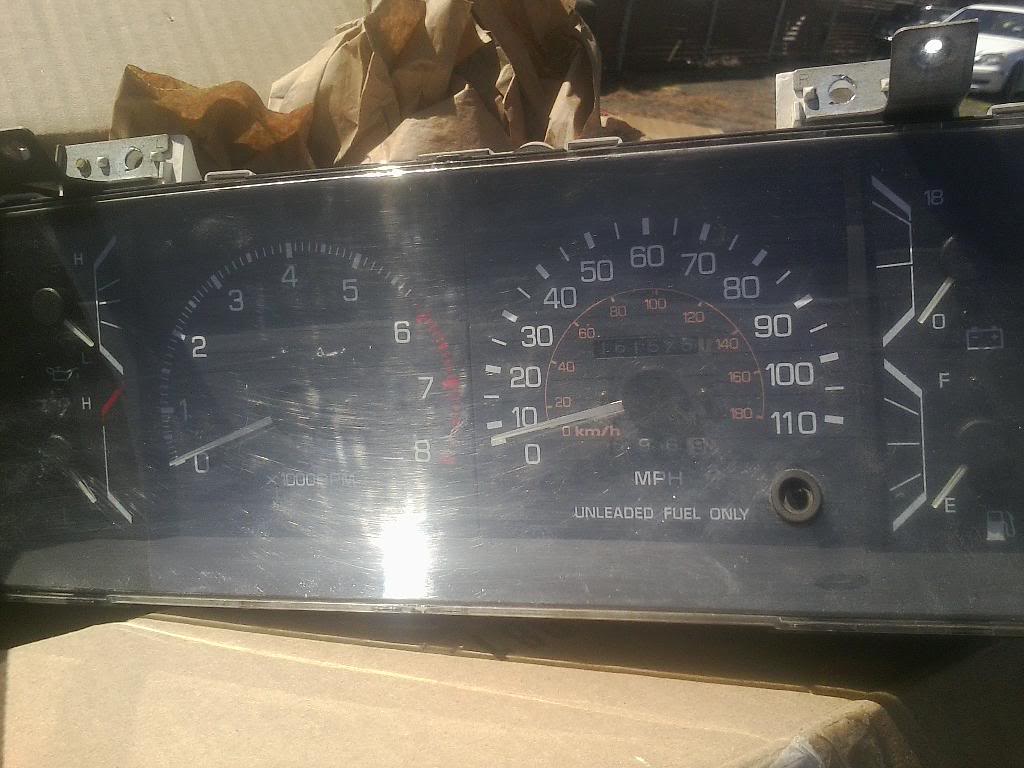
For a Wapping $68 shipped!!!!! Now I just got to buy the oil psi sender for it
Then found a guy selling almost a whole ifs suspension minus the locking hubs torsion bars and calipers for $100, told the guy that was to much for me to spend last week, yesterday he sent me a msg saying $50 for it all, so:
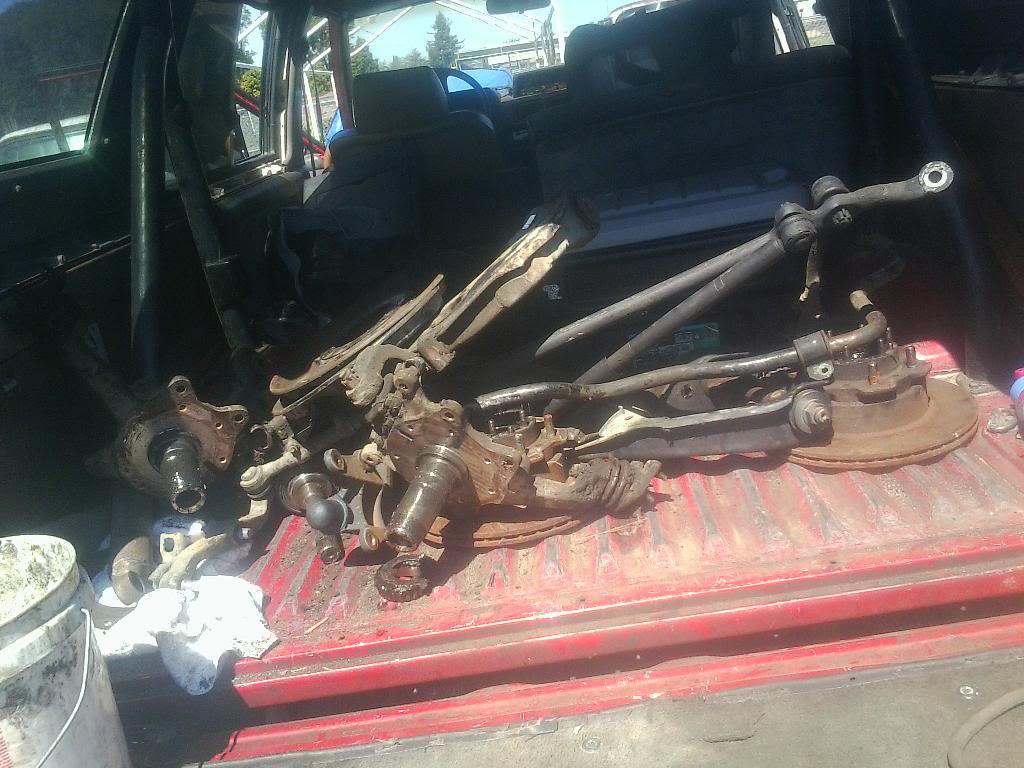
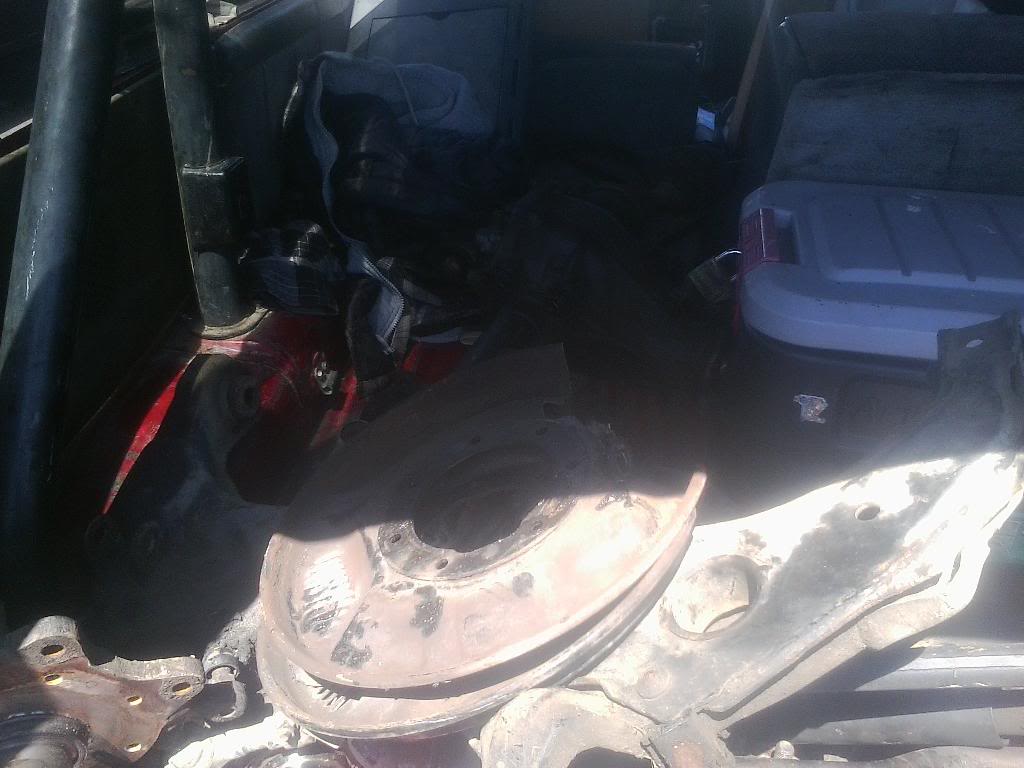
Figure they will be great spares for the white runner, plan on keeping it ifs. Also I wanted to buy some cheap control arms to look at making homemade long travel, think it would be cool to have a SAS runner and a Long Travel runner
Also in the last pic you can see my action pack storage container, I found it next to a dumpster at my work, so I unpacked my giant metal tool box inside of the berry and reorganized and removed a few things then stuck it all in the action pack and put my tool book in my dads truck, inside the action pack is my ammo box full of all the tools I need to work on the runner, a 12v air compressor, jumper cables, tire patch kit, grease, silicone, propane torch and a bunch of small little things like flash lite or mirror or magnet.


Front bumper before:


It was never finished, I was gonna add a bar to go side to side then 2 bars going from the side bar down to the bottom mount then mount my winch in it but my parts are in my other yota that I don't have everyday access to so o well, thinking I may cut the 2" out of it that was incorporated in for my body lift and put it on the white runner, since I am now keeping it so the wife will have a vehicle to drive once she sells her pos.
The bumper I started working on, since I've never been a real big fan of tube style bumpers:
8"wide c channel


Using the old bumper to help with leverage after notching the metal and heating it up

After that pic I mocked it up on the truck and then cut the sides to angle upward for rock clearance to tire, bad idea since I haven't made any mounts and now that the bottom sides are bent upwards it won't stand up straight which is gonna make the rest a lot harder
Been scouring yotatech classifieds pirate classifieds and clist for yota parts and found an sr5 cluster on pirate

For a Wapping $68 shipped!!!!! Now I just got to buy the oil psi sender for it
Then found a guy selling almost a whole ifs suspension minus the locking hubs torsion bars and calipers for $100, told the guy that was to much for me to spend last week, yesterday he sent me a msg saying $50 for it all, so:


Figure they will be great spares for the white runner, plan on keeping it ifs. Also I wanted to buy some cheap control arms to look at making homemade long travel, think it would be cool to have a SAS runner and a Long Travel runner
Also in the last pic you can see my action pack storage container, I found it next to a dumpster at my work, so I unpacked my giant metal tool box inside of the berry and reorganized and removed a few things then stuck it all in the action pack and put my tool book in my dads truck, inside the action pack is my ammo box full of all the tools I need to work on the runner, a 12v air compressor, jumper cables, tire patch kit, grease, silicone, propane torch and a bunch of small little things like flash lite or mirror or magnet.
Last edited by twistedyota; Apr 5, 2014 at 11:55 PM.
Apr 7, 2014 | 07:25 PM
#514
Nice work on the rear bumper/tire carrier, it turned out really good! Look forward to seeing how your front bumper comes out! Man you got that SR5 gauge cluster for a steal, I've been pricing them on eBay (don't see them much on CL and don't have any pick n pulls near by) and the "buy it now" price ranges from $120-$200, nice find!
Last edited by rustED; Apr 7, 2014 at 07:43 PM.
Apr 7, 2014 | 08:22 PM
#515
Nice work on the rear bumper/tire carrier, it turned out really good! Look forward to seeing how your front bumper comes out! Man you got that SR5 gauge cluster for a steal, I've been pricing them on eBay (don't see them much on CL and don't have any pick n pulls near by) and the "buy it now" price ranges from $120-$200, nice find!
Apr 18, 2014 | 03:17 PM
#516
Installed the sr5 cluster in my yota last Friday when I found out I already had an oil psi gauge in the block, but it didn't seem to work so I bought a new one and installed it and it still didn't seem to work, so I figured the oil psi gauge was bad but after driving around the gauge started to move, but it only moves an 1/8 of an inch. So I don't know.
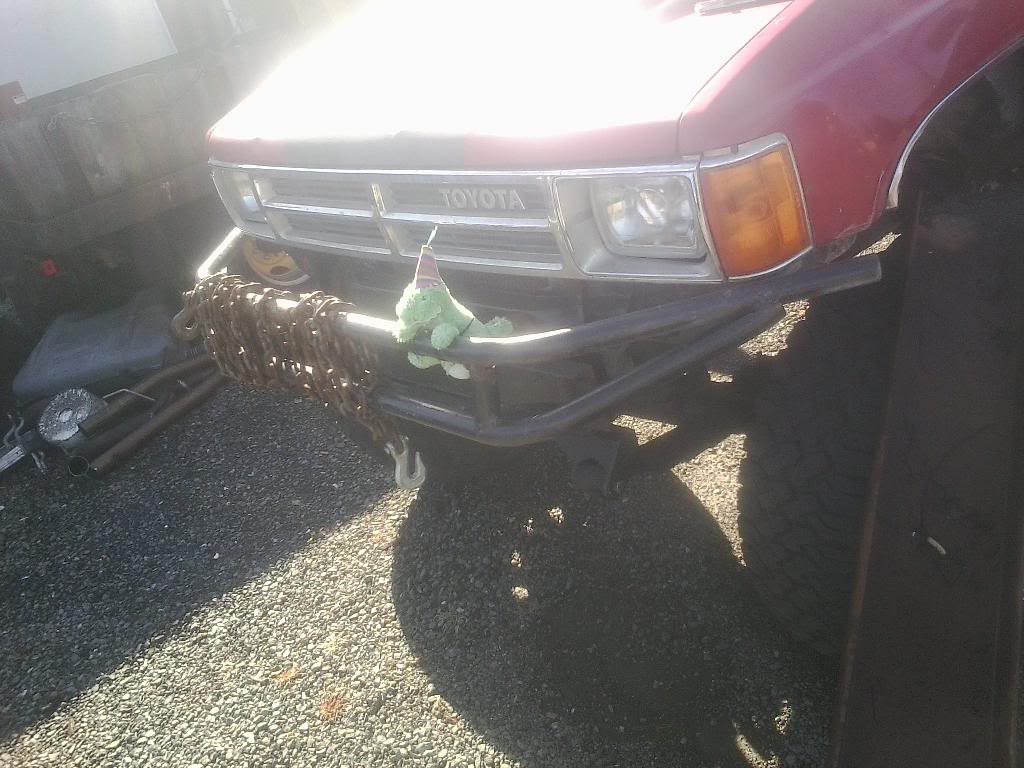
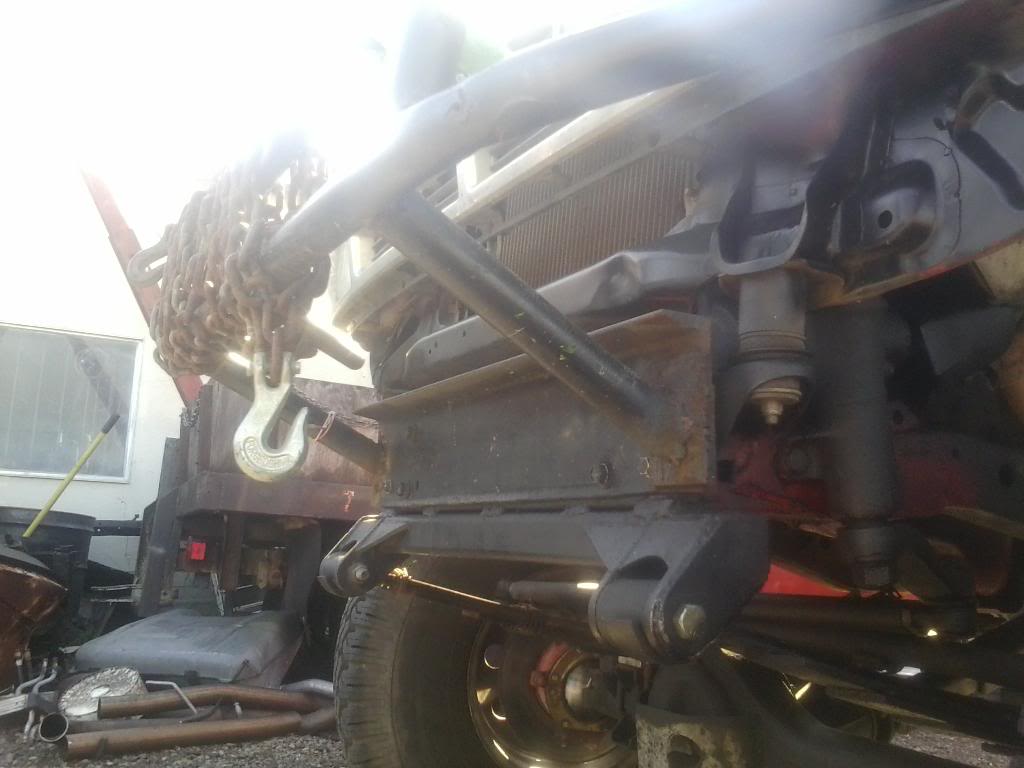
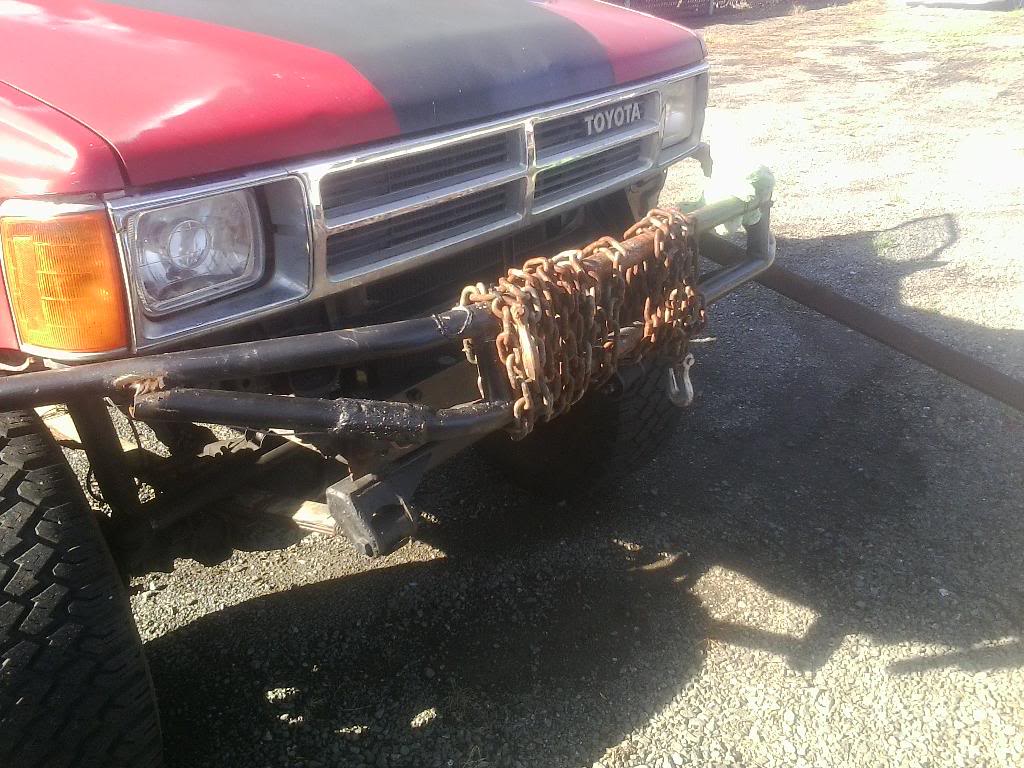
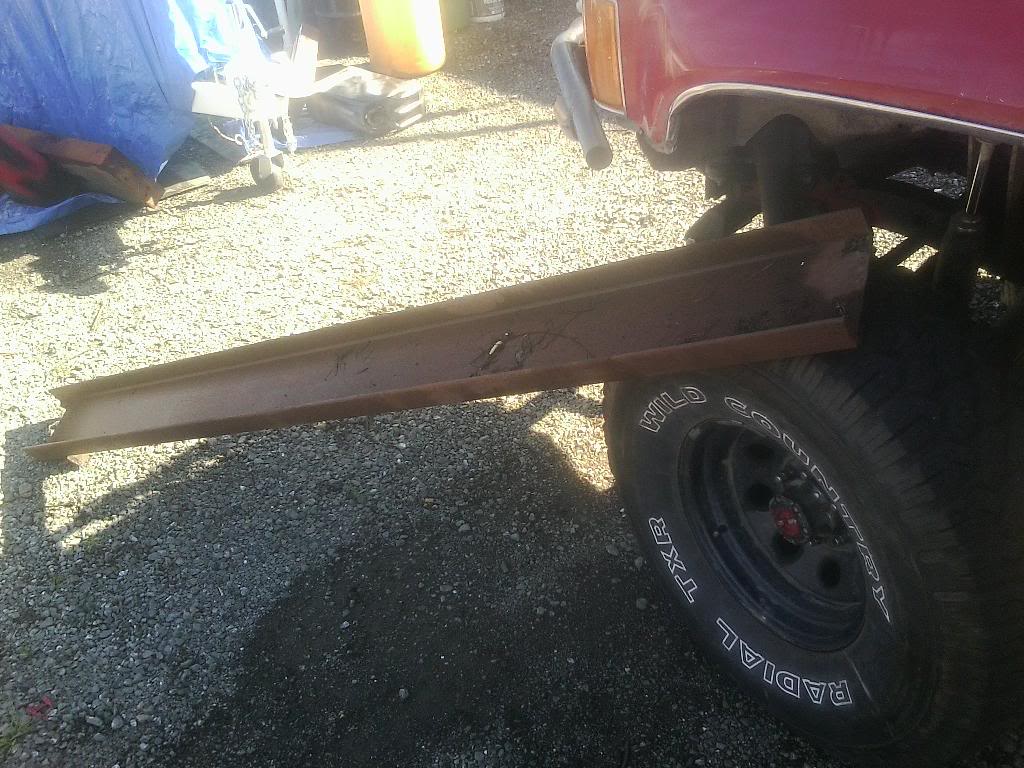
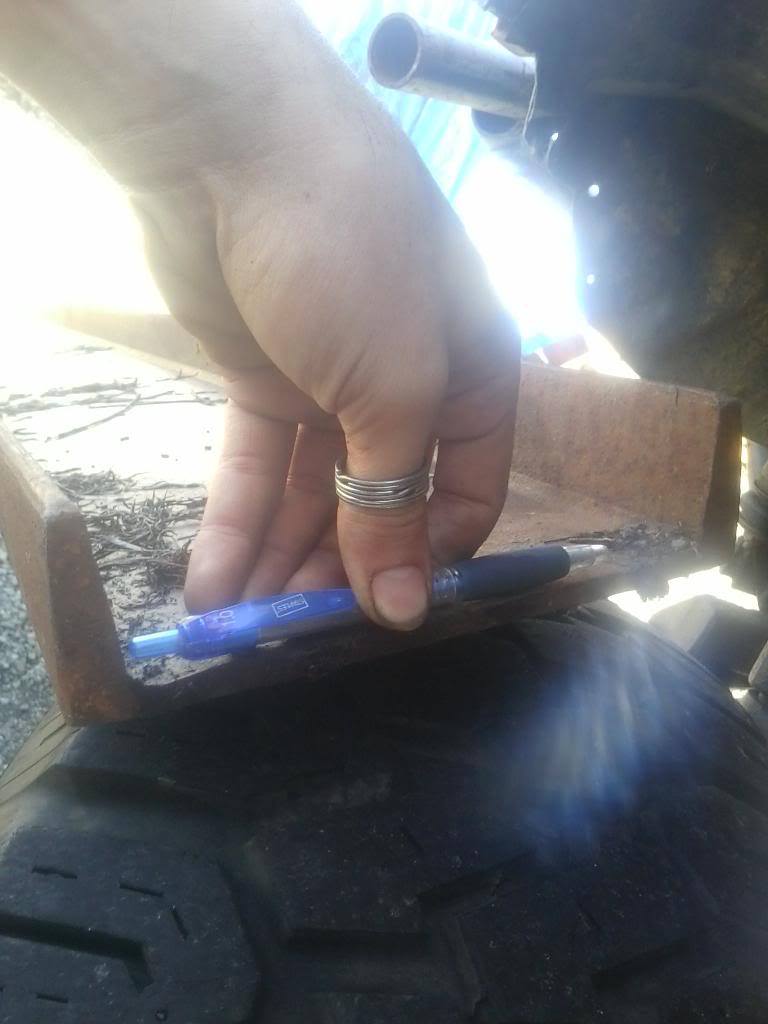
Then on sat I took the old bumper of and mocked the new one up, then I started to try and find a way to tack the front to the mount so I didn't hhave to keep doing wild mock ups, at first I was think a piece of flat steel but relized it would bend then started thinking about angle iron then relized we had some square stock, after looking at it with the square stock in my hand i decided that i was gonna mount a reciever in front, so I went to harbor freight and looked around, their 21" reciever was 23$ but their 12" extender was only 20$ and I only need 9" so ill cut it and then I can take the piece tht slides in to a hitch and make a receiver out of it, ill take pics later, but tomarrow I should be cutting it up and then tacking parts of the bumper together
Then on sat I took the old bumper of and mocked the new one up, then I started to try and find a way to tack the front to the mount so I didn't hhave to keep doing wild mock ups, at first I was think a piece of flat steel but relized it would bend then started thinking about angle iron then relized we had some square stock, after looking at it with the square stock in my hand i decided that i was gonna mount a reciever in front, so I went to harbor freight and looked around, their 21" reciever was 23$ but their 12" extender was only 20$ and I only need 9" so ill cut it and then I can take the piece tht slides in to a hitch and make a receiver out of it, ill take pics later, but tomarrow I should be cutting it up and then tacking parts of the bumper together
Apr 19, 2014 | 10:06 AM
#517
On the SR5 gauge cluster did you reuse your original oil pressure sending unit? I believe you have to use the SR5 oil sending unit to make it work correctly, here's a link to a write up about it, they have a pic that shows the difference between the two:
http://www.siestaoffroad.com/clustertech.html
http://www.siestaoffroad.com/clustertech.html
Apr 19, 2014 | 07:41 PM
#518
On the SR5 gauge cluster did you reuse your original oil pressure sending unit? I believe you have to use the SR5 oil sending unit to make it work correctly, here's a link to a write up about it, they have a pic that shows the difference between the two:
http://www.siestaoffroad.com/clustertech.html
http://www.siestaoffroad.com/clustertech.html
Apr 19, 2014 | 07:48 PM
#519
My progress from last sat
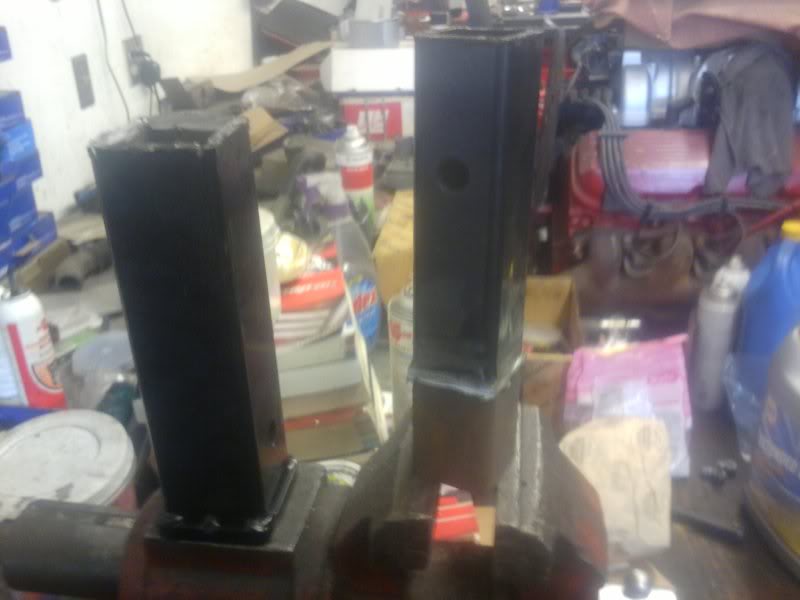
Making a new plat that bolts to the frame
Laid it on my old one so I could trace the holes onto it
Bolted on the truck
You can see my sharpie line in this one that shows she I plan to trim the sides of the back to blend well
Then this weekend I don't get much done had to go to the recycling then smog the commuter car then do an oil change and replace the front brakes
But here are some pics
The hitch extender I was talking about

Where I was talking about cutting it
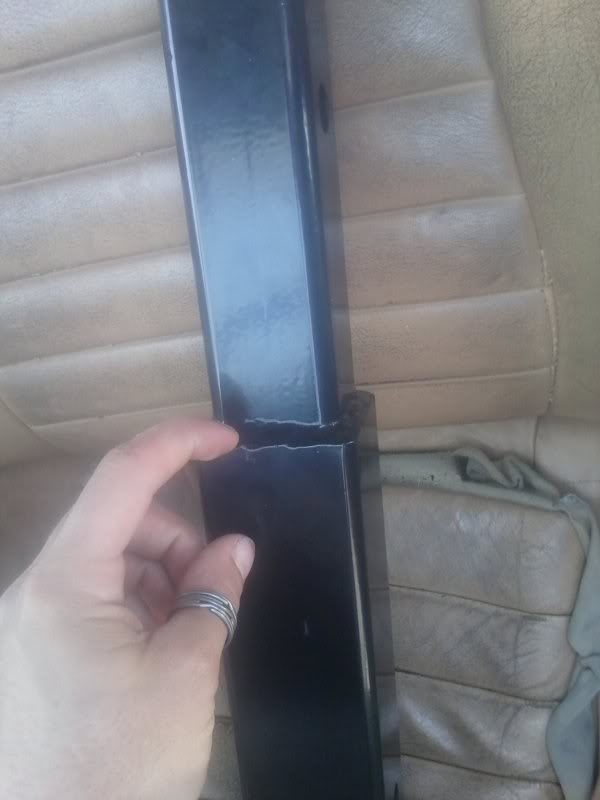
After cutting the weld and separating the 2 pieces
I then grounded down the welds on the small square tubing, and cut the received to my 9" piece I needed
Then got annoyed, on receivers the piece that actually holds the ball is welded on the inside to make the outside smooth then the part it slides into (hitch) is welded on the outside to make sure the both slide together nice, well harbor freight is cheap and welded both on the inside, so I had to file down the welds on the receiver so the other part would slide in
That's all for this weekend, hopefully next weekend I'll get it tacked together.
Making a new plat that bolts to the frame

Laid it on my old one so I could trace the holes onto it
Bolted on the truck

You can see my sharpie line in this one that shows she I plan to trim the sides of the back to blend well

Then this weekend I don't get much done had to go to the recycling then smog the commuter car then do an oil change and replace the front brakes
But here are some pics
The hitch extender I was talking about

Where I was talking about cutting it

After cutting the weld and separating the 2 pieces

I then grounded down the welds on the small square tubing, and cut the received to my 9" piece I needed
Then got annoyed, on receivers the piece that actually holds the ball is welded on the inside to make the outside smooth then the part it slides into (hitch) is welded on the outside to make sure the both slide together nice, well harbor freight is cheap and welded both on the inside, so I had to file down the welds on the receiver so the other part would slide in

That's all for this weekend, hopefully next weekend I'll get it tacked together.
Last edited by twistedyota; Apr 19, 2014 at 08:04 PM.
May 3, 2014 | 07:12 PM
#520
Just realized I posted this reply in the wrong build so this is from last weekend
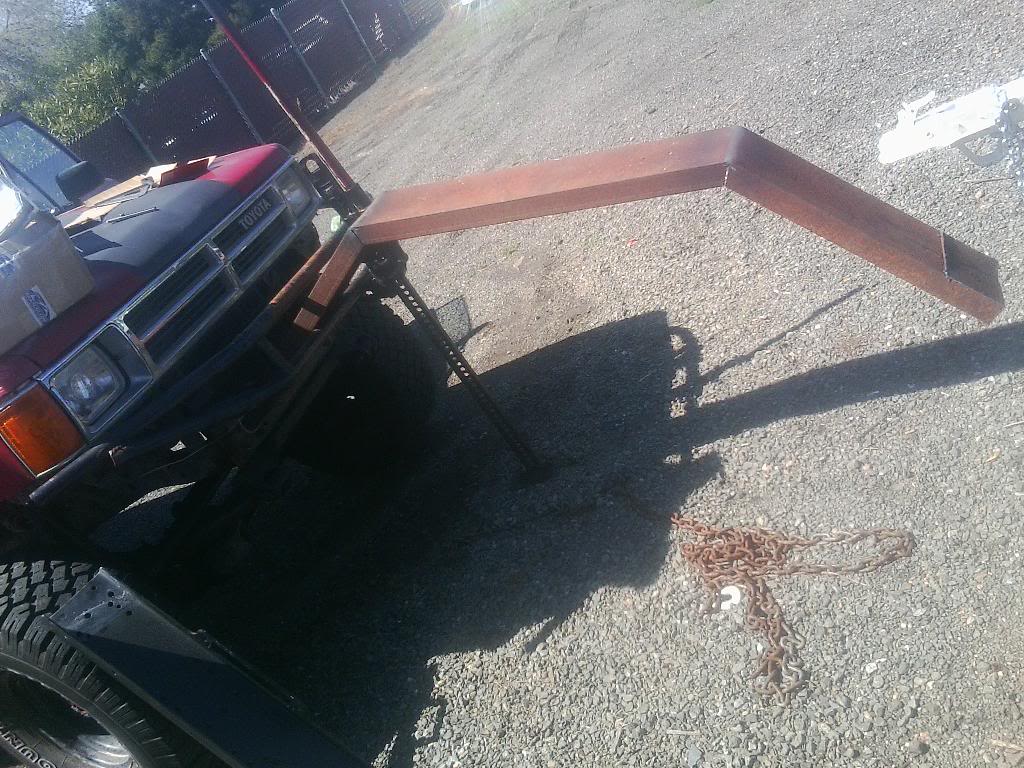
Worked on the front bumper some more yesterday.
The plate that bolts to the front of the frame, with the receiver mounted to it
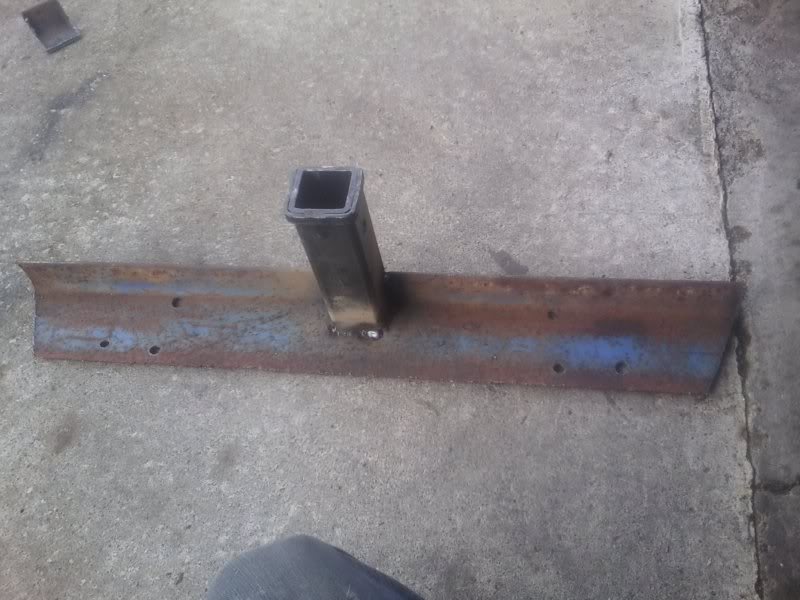
Plate mounted and the bumper tacked to the received
You can also see in the picture that I put my winch in place to see if it would stick out, and as long as I don't mount the control box on top it will be below the top of the bumper
Then I took some masking tape and taped it from the bumper to the mounting plate to find my angles I needed, then cut out some support braces, my angles were slightly off but it all still works
That is as far as I got, but on a side note I bought some parts a week and a half ago.
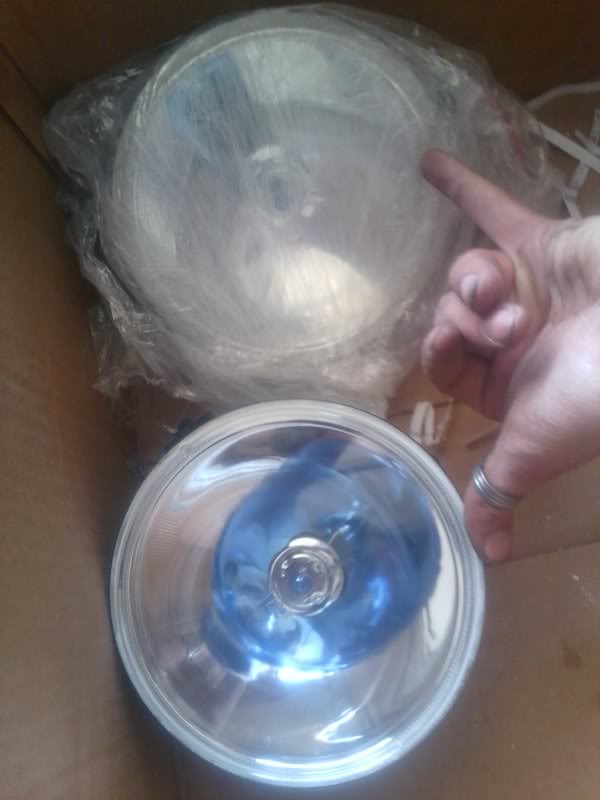
Thinking about using the compressor for OBA and using the 7" PIAA's in the bumper
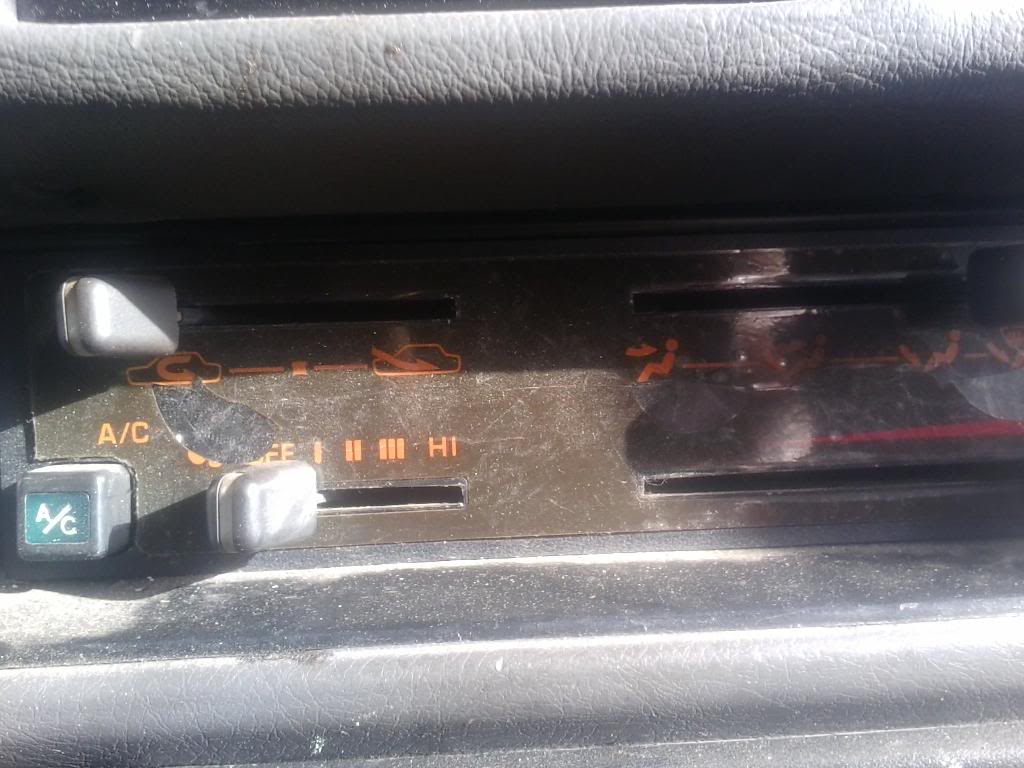
And a little homemade trick, I've had these done for over a year and it works great, on the heater face plate since the graphic is so old and brittle to keep from putting any more holes in it, I put a price of clear packing tape acroos it the cut out all of the openings and trimmed it to fit.
O yea and for my bday earlier this month my dad bought me this
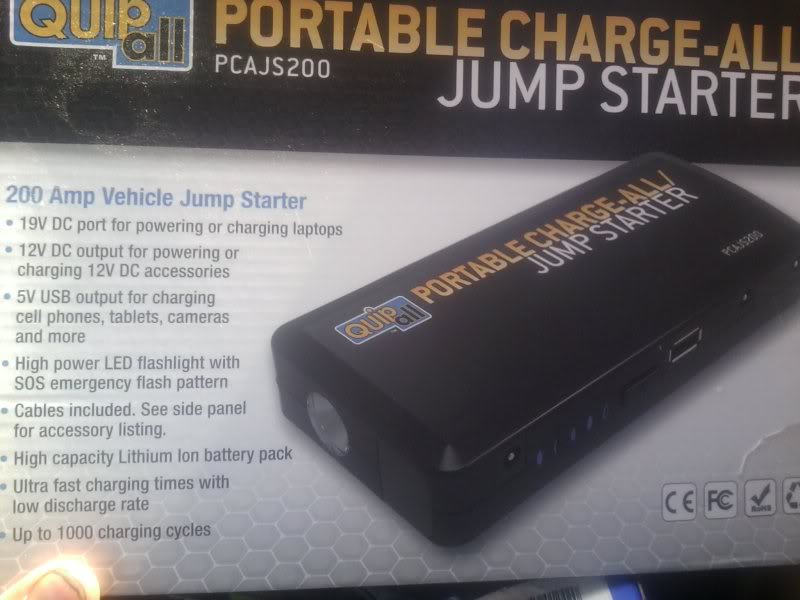
It can jump start a vehicle like multiple times from being completely dead, or fully an iPhone 5 3or5 times, it comes with 20 some odd adapters to charge all sorts of things and can sit for up to 6months before its recommended to charge it, the device itself is about as thick as 2 I phones and as long as one and a half and was about the same as 2 iphones. My dad used one and said it jump started a completely dead v12 jag, that use to take 2jumper boxes, and they only cost 120-160 depending on who you buy it from.
Worked on the front bumper some more yesterday.
The plate that bolts to the front of the frame, with the receiver mounted to it

Plate mounted and the bumper tacked to the received

You can also see in the picture that I put my winch in place to see if it would stick out, and as long as I don't mount the control box on top it will be below the top of the bumper
Then I took some masking tape and taped it from the bumper to the mounting plate to find my angles I needed, then cut out some support braces, my angles were slightly off but it all still works

That is as far as I got, but on a side note I bought some parts a week and a half ago.

Thinking about using the compressor for OBA and using the 7" PIAA's in the bumper
And a little homemade trick, I've had these done for over a year and it works great, on the heater face plate since the graphic is so old and brittle to keep from putting any more holes in it, I put a price of clear packing tape acroos it the cut out all of the openings and trimmed it to fit.

O yea and for my bday earlier this month my dad bought me this

It can jump start a vehicle like multiple times from being completely dead, or fully an iPhone 5 3or5 times, it comes with 20 some odd adapters to charge all sorts of things and can sit for up to 6months before its recommended to charge it, the device itself is about as thick as 2 I phones and as long as one and a half and was about the same as 2 iphones. My dad used one and said it jump started a completely dead v12 jag, that use to take 2jumper boxes, and they only cost 120-160 depending on who you buy it from.


