
Terrys87 88 4Runner Restoration/Build thread
 Aug 17, 2011 | 09:55 AM
#421
Hey Terry.... just saw that "some kind of stripes"... Just discussed this with someone the other day... They gave me a link to a guy who sells the whole 87 Stripes kit, including hood, for 245$ or so! ....
http://www.jamesdeancreations.com/1987-88.htm
http://www.jamesdeancreations.com/1987-88.htm
Aug 18, 2011 | 10:46 AM
#422
Thread Starter
Super Moderator
iTrader: (1)
Joined: Aug 2008
Posts: 11,787
Likes: 28
From: Anderson Missouri
Thanks Chef.. I eventually want to get mine striped. It will have to wait awhile. It will get done though. Yours looks sharp, I really like your truck. I went to the bone yard and was looking on C-list and several of these trucks are getting parted out. I want to get one looking orginal so that someday might remember what one looked like.
I was wanting to get a light assembly from a standard cab pick up and found the only one that they had left. It was an 86 model 2WD but it was grey. I thought no big deal, I will just paint it. Everything is the same except the mirror mount. Mine is square and the replacement is round. So I get to move all of the connections over. I am getting this down. Cant find my brass screw so off to Lowes I go for more.
I drive alot at night and need the front light, more than I do the back light. Always chasing something around in the cab and it is nice when getting in at night. These 84-88 are a little more complicated then the 89-95 model lights and they wont interchange without a little modification. I just dont want to go that route.
Got my other coil in. I am hoping to get them in Friday or Saturday. Really looking forward to the ride improvement and getting rid of my saggy butt. Will have to wait and see. Been getting house repairs done. I do not care for house repairs, but it is getting there. Just got the drain left to do. It should go quick, but I have a tough time with plumbing and no leaks.
New parts just waiting on me.
Aug 20, 2011 | 02:23 AM
#423
Thread Starter
Super Moderator
iTrader: (1)
Joined: Aug 2008
Posts: 11,787
Likes: 28
From: Anderson Missouri
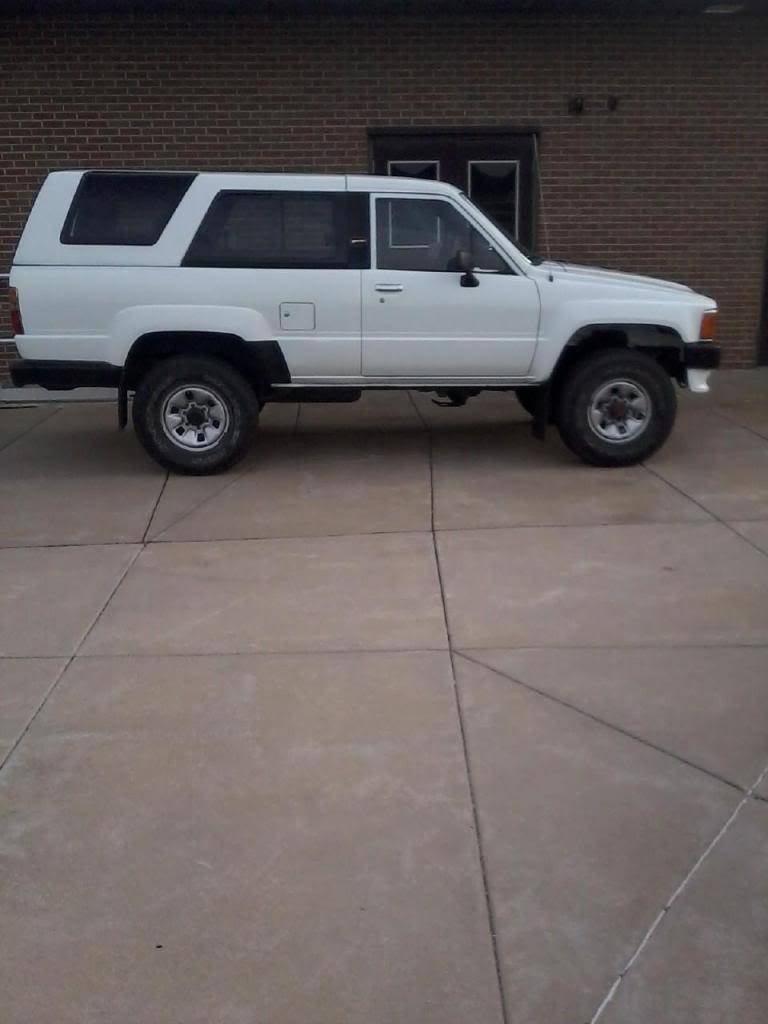
I got my Zuk mod done. No more saggy butt for me. It does sit a little higher then the front more then I would like. I will just convince myself that I am into the 70s hotrod mode where the back is taller then the front. lol. I am hoping the springs settle some. I will do a write up when I post pics later today. I am on my laptop and it is easier to use my home computer.
I had a run of good luck the past few days. Got another exhuast nut and fixed my exhaust noise. I am happy with that.
My new valve cover gasket seemed to have fixed my oil leak.
Got my mirror dome light in and working. Also been working on getting under the motor and front axle cleaned up and looking better under there
I ordered some more interior paint and pick it up tomorrow. I got 2 more pieces that are really cracked up and will replace them with some new grey ones. Planning on getting them done tomorrow. It will be 2 pieces closer to getting done.
Still need to do my transfer case and it is probably going to be my next big project and next month I might get new carpet.
Seems like some days everything goes right and the next I cant get anything done. So all in all I am really satisfied with how things have gone lately.
Aug 20, 2011 | 04:37 AM
#424
Thread Starter
Super Moderator
iTrader: (1)
Joined: Aug 2008
Posts: 11,787
Likes: 28
From: Anderson Missouri
The way I did the Zuk Mod I used a 4 ton jack, one to raise the truck quite high when under a solid support of the bumper. I still had to use a 1 foot square chunk of wood to get it high enough.When I had the tires about 3 inches off of the ground I used jack stands to set under the axle and then used a cutoff wheel and left about an inch on the top bumpstop.
I then raised the truck a little higher to get some of the weight off of the jack stands but not completely. I tried putting my Toyota bottle jack in front of the axle with a 6 inch long 4x4 against the frame and could not get the distance far enough for the coil to go between the rubber bump stop and the cut upper bumpstop. When I put the bottle jack on the spring behind the axle it went in really easy. I put the bottom part on first and was able to use my hand to get the top part in.
It took me an hour on the drivers side and about 10 minutes on the passenger side as I figured out what I need to know on the drivers side.
I would suggest starting on the drivers side as you will have more room to practice what you need to know on the passenger side.
One thing I didnt like about using a cut off wheel on passenger side is sparks flying around the gas tank. I didnt have a sawsall so had to use a cutoff wheel. I did have some fire extingusers handy. Make sure you have no fuel leaks.
Didnt post pics of underneath of truck, but there are several threads on this and I will put some links in later. I hope this helps. The bottle jack behind the axle was something I wish I would of known earlier. Hope this helps.
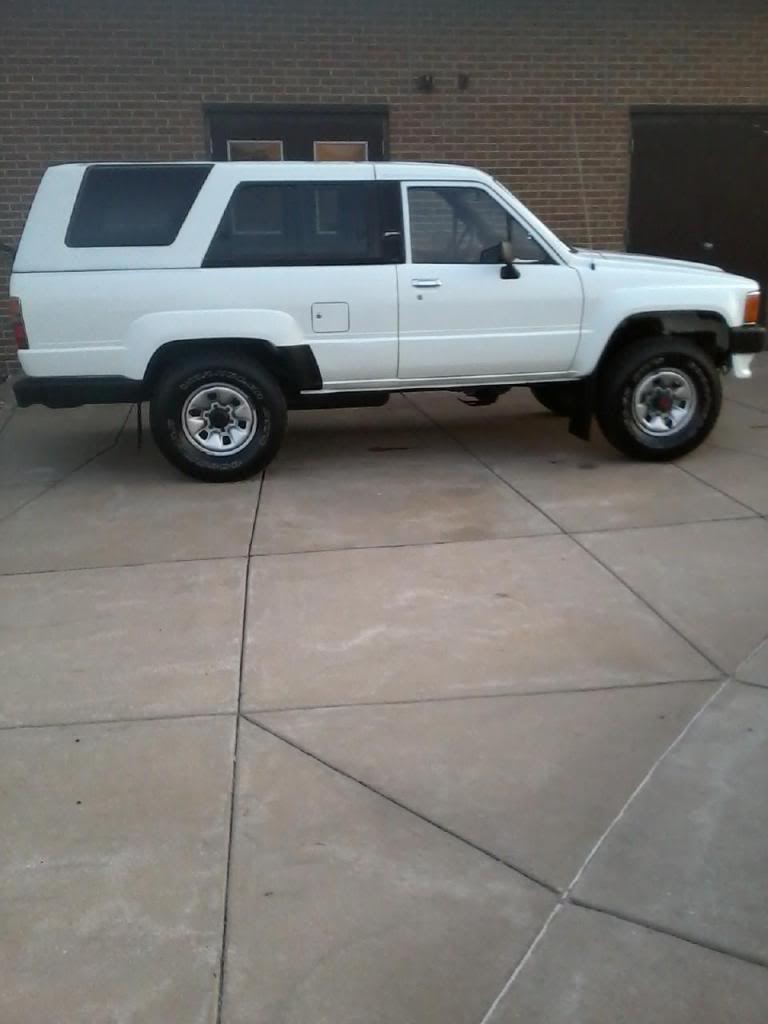
Mine has a little rake to it. I am hoping the springs will settle a some and level it out. Here is where I got the info for my coils. I got the 12 x125. http://www.gearinstalls.com/coilinfo.htm UPDATE: After 3 weeks, the back end settled an inch or so. Getting better.
Chef has some good pics of the Zuk Mod. Here is a link: https://www.yotatech.com/forums/f116...uk-mod-215876/
Here is the before pic.
Here is the after
I then raised the truck a little higher to get some of the weight off of the jack stands but not completely. I tried putting my Toyota bottle jack in front of the axle with a 6 inch long 4x4 against the frame and could not get the distance far enough for the coil to go between the rubber bump stop and the cut upper bumpstop. When I put the bottle jack on the spring behind the axle it went in really easy. I put the bottom part on first and was able to use my hand to get the top part in.
It took me an hour on the drivers side and about 10 minutes on the passenger side as I figured out what I need to know on the drivers side.
I would suggest starting on the drivers side as you will have more room to practice what you need to know on the passenger side.
One thing I didnt like about using a cut off wheel on passenger side is sparks flying around the gas tank. I didnt have a sawsall so had to use a cutoff wheel. I did have some fire extingusers handy. Make sure you have no fuel leaks.
Didnt post pics of underneath of truck, but there are several threads on this and I will put some links in later. I hope this helps. The bottle jack behind the axle was something I wish I would of known earlier. Hope this helps.
Mine has a little rake to it. I am hoping the springs will settle a some and level it out. Here is where I got the info for my coils. I got the 12 x125. http://www.gearinstalls.com/coilinfo.htm UPDATE: After 3 weeks, the back end settled an inch or so. Getting better.
Chef has some good pics of the Zuk Mod. Here is a link: https://www.yotatech.com/forums/f116...uk-mod-215876/
Here is the before pic.
Here is the after
Last edited by Terrys87; Sep 14, 2011 at 11:27 AM.
 Aug 21, 2011 | 01:38 AM
#429
Thread Starter
Super Moderator
iTrader: (1)
Joined: Aug 2008
Posts: 11,787
Likes: 28
From: Anderson Missouri
Chef.. I like the springs really good. Did wish it didnt sit so high in the rear, but when I hit a bump, I dont bottom out no more which helps saves the back.
Im hoping they will settle some. I can live with this for awhile,Like it better then the saggy butt. I always thought I wanted a lifted truck until I had to use one of our company trucks that sits high and getting in and out of it was getting old. I like the looks of lifted trucks, just dont want one now.
Jason.. I just glad there are others working on these trucks besides me. Always like seeing others progress. Lookng forward to seeing you back on yours.
Outsane..I did get a kick out of that. Wish I would of gotten it 5 years ago. Wouldnt had so much work. But it has been a good learning experience.
Aug 21, 2011 | 06:11 AM
#430
Thread Starter
Super Moderator
iTrader: (1)
Joined: Aug 2008
Posts: 11,787
Likes: 28
From: Anderson Missouri
I worked on a couple of interior pieces. I replaced and painted the pieces that set on thefloor behind the front seats. My pieces were really cracked and faded. The paint might be a shade off, but against the vinyl I really dont notice a difference.
Also I used some weather strip compound to keep my front door window seals in place. This stuff seems to be working great. I used my finger to smear it into the door channel and got some on me and a little on the truck. You dont want to get this on either. It is tough to get off. I bet I could make a car tire out of this stuff.
I will try and get some good interior shots to show how it is coming along
Old cracked red pieces.
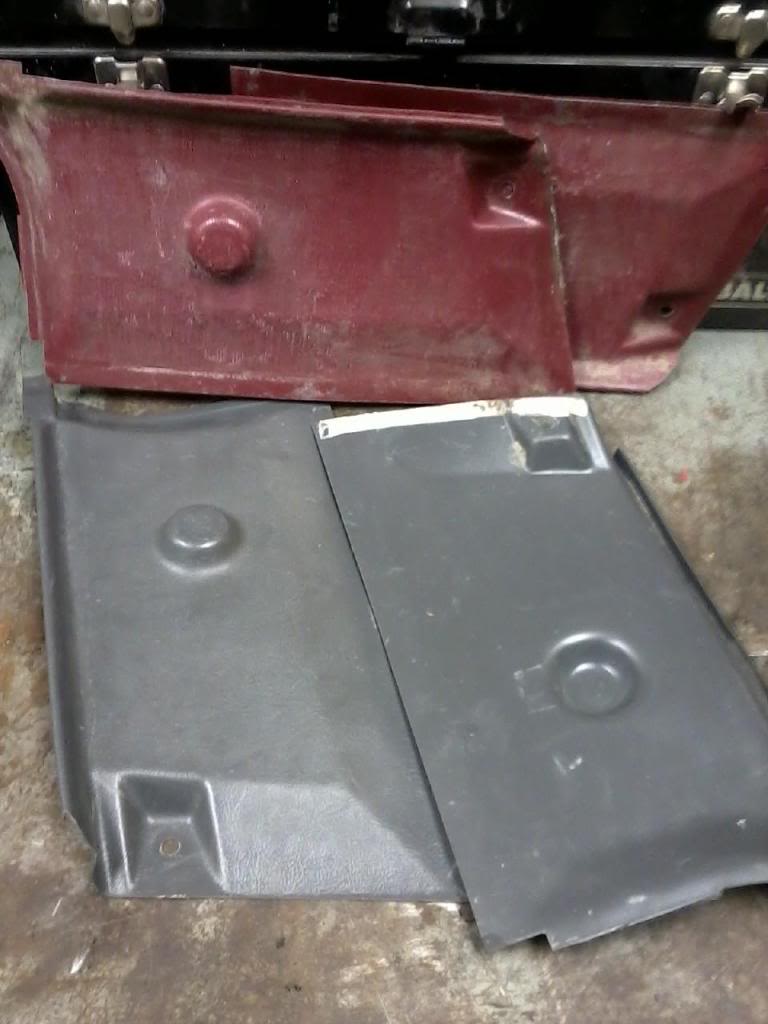
New painted pieces with some new clips and window compound. Will get a better pic later.
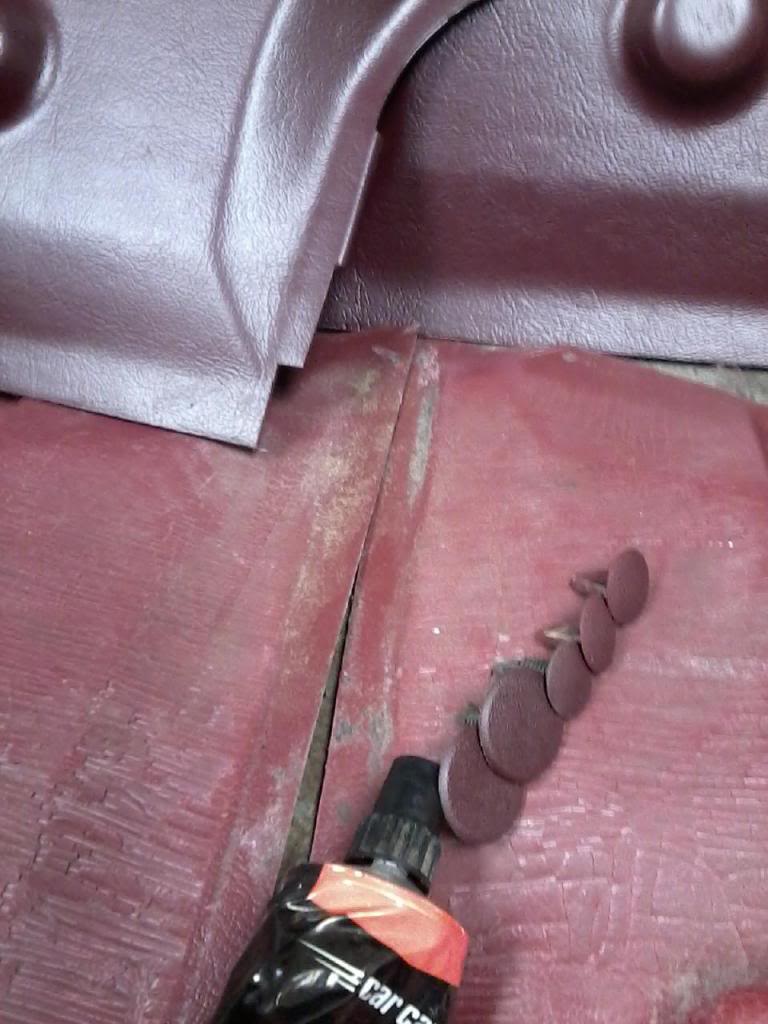
Also I used some weather strip compound to keep my front door window seals in place. This stuff seems to be working great. I used my finger to smear it into the door channel and got some on me and a little on the truck. You dont want to get this on either. It is tough to get off. I bet I could make a car tire out of this stuff.
I will try and get some good interior shots to show how it is coming along
Old cracked red pieces.
New painted pieces with some new clips and window compound. Will get a better pic later.
Aug 21, 2011 | 11:05 AM
#431
Hey, nice job, man! That thing's gonna be suweeet! Can't wait to see you doing a video of the entire thing! lol.
What's that stuff/where from/product name? I wanna seal up my window seam by just doing the corner on my driver/pass windows.(the corner is separated.... JUST A TEEENY bit! lol) Actually, it's still in one piece, but BARELY, ya know? That lil 'sweeeeeeeshhhhhh' is really annoying! lol.
What's that stuff/where from/product name? I wanna seal up my window seam by just doing the corner on my driver/pass windows.(the corner is separated.... JUST A TEEENY bit! lol) Actually, it's still in one piece, but BARELY, ya know? That lil 'sweeeeeeeshhhhhh' is really annoying! lol.
Aug 21, 2011 | 12:07 PM
#432
Registered User
Joined: Apr 2011
Posts: 428
Likes: 0
From: Southern Ontario
Huge difference before and after the Zuk mod. Looks like you went from a rake in one direction to a rake in another, lol. Seriously looks much better, so I hope the ride smooths out for you. Keep it up on the interior, soon it'll look as clean as the exterior does.
Aug 21, 2011 | 11:07 PM
#433
Thread Starter
Super Moderator
iTrader: (1)
Joined: Aug 2008
Posts: 11,787
Likes: 28
From: Anderson Missouri
Thanks Chef and Dutchbelly. I am hoping to have it done my the end of the year. I have put alot of work into it. Been waiting for the cabbage patch to grow, but seems like everytime something comes along and gets the biggest part. Soon as funds get take available I would like to get some more big projects done on it. So the little things help keep me moving forward.
When I bought it, it was advertised for parts or a crawler. It was rougher then what the first pics appear. I really appreciate the compliments, it really helps. I have a couple of old fogey neighbors that have seen my other projects and they always make some comments, but later compliment when I get them done.
Couple of friends called it a pile of crap and I have to admit I was embrassed for someone to see the inside. It was bad from the PO. Exterior wasnt much better. This is my 3rd restore and it getting funner to drive and nicer with each piece now. They thougt this one was bad, wait til they see one of my next ones.hehehe
Chef..Here is a pic of the glue. It should have several other uses, you know, like save a sinking ship. You dont want to get it on you.lol
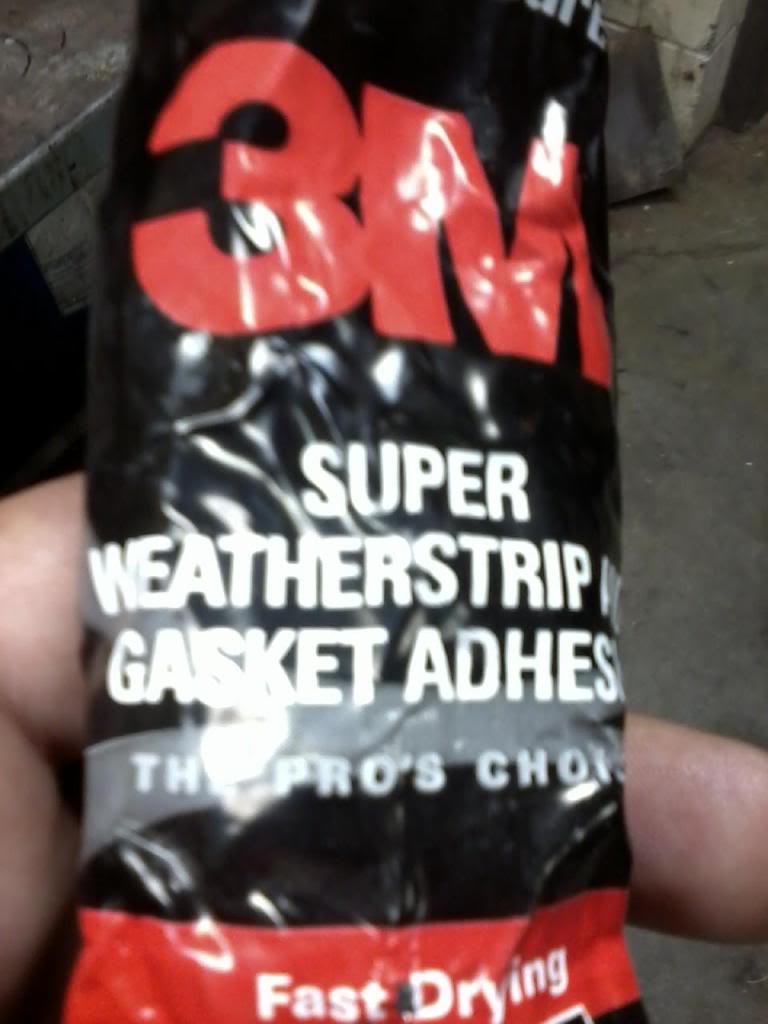
Last edited by Terrys87; Aug 22, 2011 at 06:32 AM.
Aug 22, 2011 | 06:29 AM
#434
Thread Starter
Super Moderator
iTrader: (1)
Joined: Aug 2008
Posts: 11,787
Likes: 28
From: Anderson Missouri
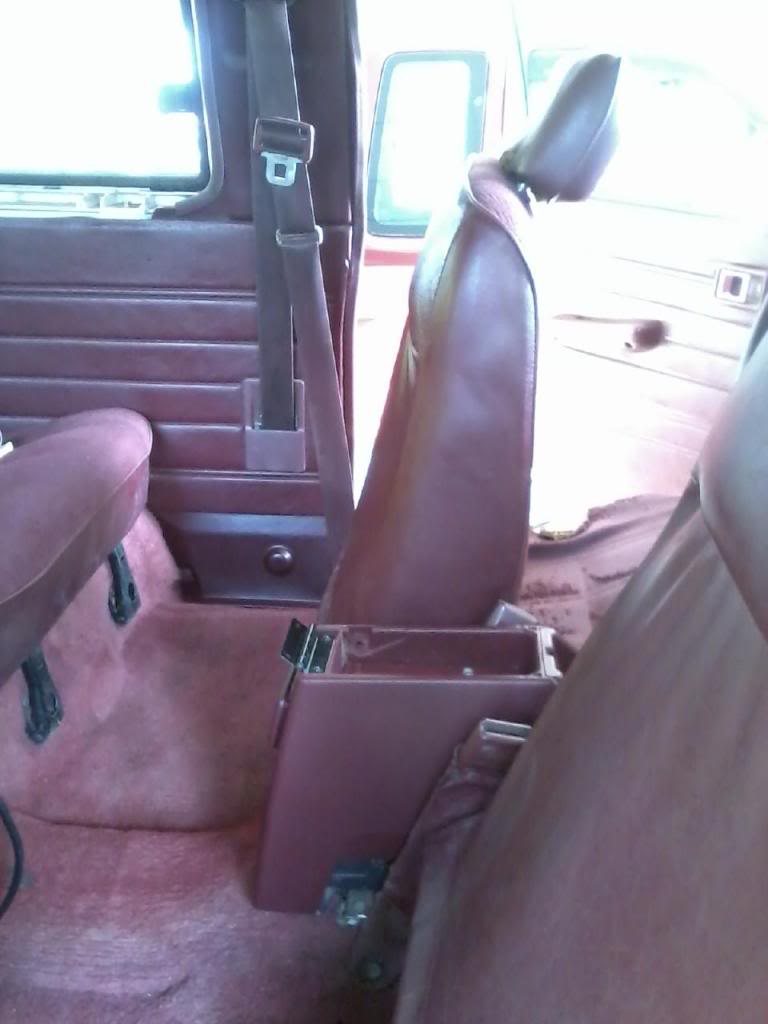
My center console was broken, so I fixed it with metal plate. I didnt get the top right corner as well as I would of liked, but it will work for me. When I find some felt/veltet like material, I will just unbolt it and cover he metal so as if any metal or coins wont rattle.
I tried to take some good picture of some of the painted pieces against the vinyl and unpainted pieces. I could not avoid the glare no matter how hard I tried and moved around.
Hope this gives you an idea of what it would look like if you decided to go this route. I would like to have new piece, but that just isnt going to happen. So this is the next best thing for me. I will be replacing my carpet and getting my seats reupholstered in the future. It should all come together then.
Broken Console and my fix for it.
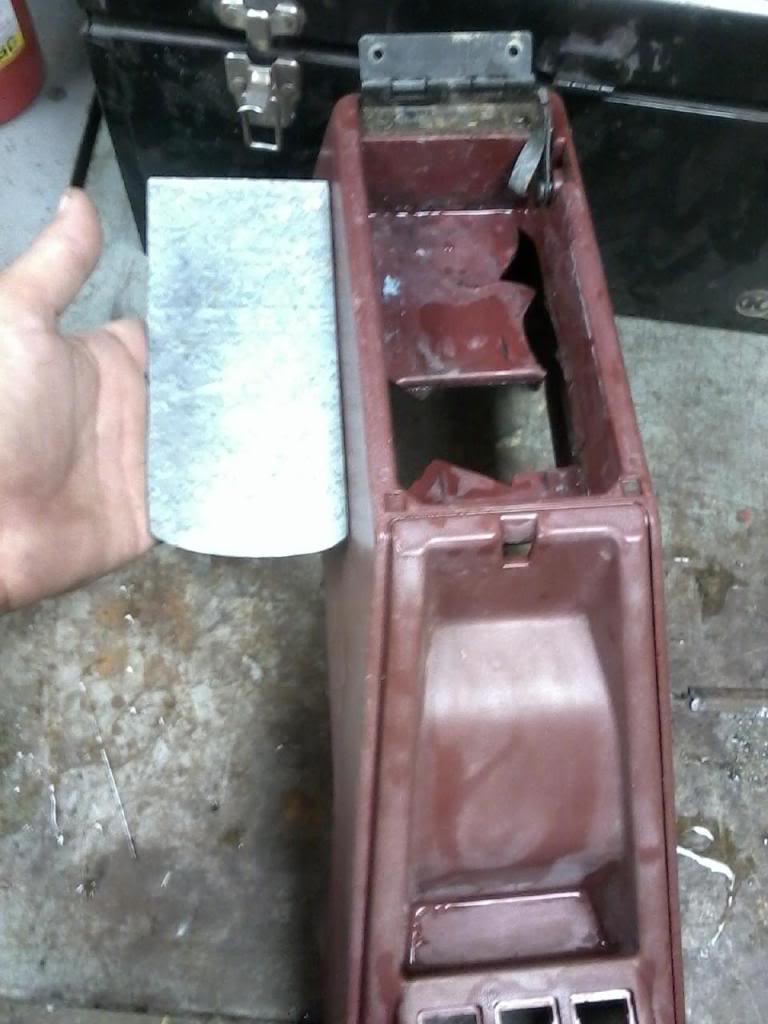
Fixed and painted console. I need a cover, but am thinking of making one that would work for an arm rest.
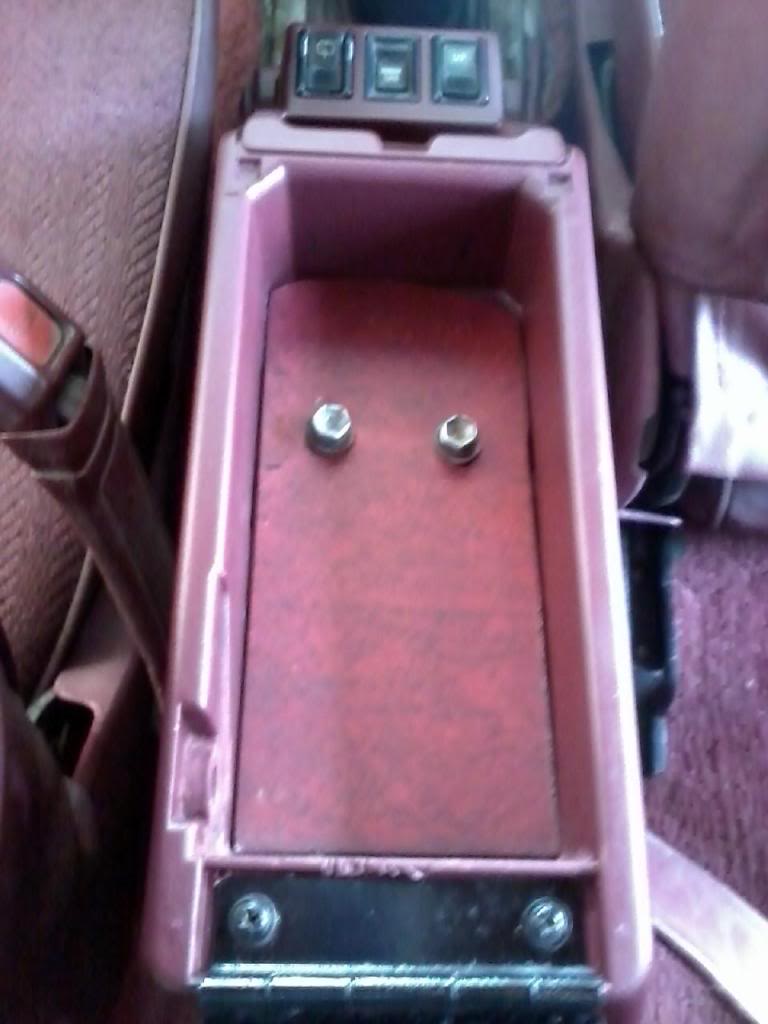
Some old and new. You can see the difference where the center of the seat belt in the side panel is faded. Also the piece where the seat belt attches to the door post has been painted and the small piece sitting on top of the carpet.
I tried to take some good picture of some of the painted pieces against the vinyl and unpainted pieces. I could not avoid the glare no matter how hard I tried and moved around.
Hope this gives you an idea of what it would look like if you decided to go this route. I would like to have new piece, but that just isnt going to happen. So this is the next best thing for me. I will be replacing my carpet and getting my seats reupholstered in the future. It should all come together then.
Broken Console and my fix for it.
Fixed and painted console. I need a cover, but am thinking of making one that would work for an arm rest.
Some old and new. You can see the difference where the center of the seat belt in the side panel is faded. Also the piece where the seat belt attches to the door post has been painted and the small piece sitting on top of the carpet.
Aug 22, 2011 | 11:32 AM
#435
Hey Terry.... I had this guy near me reupholster mine, gray leather, adding 2.5" or more of Medium-Hard Foam. If you can find an actual toyota door for that(You're saying you don't have it, right?... The console lid?) Anyway, if you DON'T have one and you wanna get it done up, IT'S WORTH IT! LOl. Mine is now an EFFECTIVE arm rest that I can rest my arm on without leaning over>>>>
Aug 22, 2011 | 11:33 AM
#436
PS> .... That's not the 2 door console? Sorry, I just looked at your pic again.... noticed that is only the lower storage............ Can we start over? hahahaha.
Show me all you have, maybe? lol.
Show me all you have, maybe? lol.
Aug 23, 2011 | 06:44 AM
#437
Thread Starter
Super Moderator
iTrader: (1)
Joined: Aug 2008
Posts: 11,787
Likes: 28
From: Anderson Missouri
Hello Chef..I tried to do a video, it will be something else I get to learn. Something didnt go right. Looks like my phone only has 15 seconds. I am a little behind the times on video, but want/need to learn it.
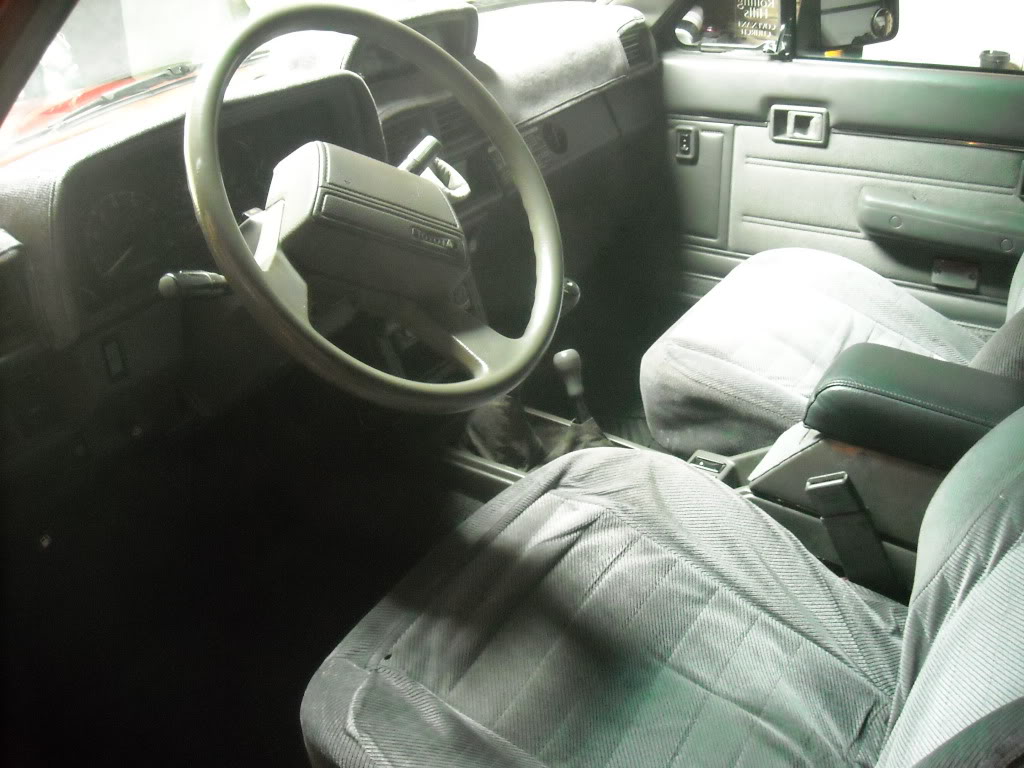
On your passenger door, I see a light. Was that factory or something you added? Your interior looks great.
I am missing the lid to my console. I need to get one, and I definitely want an arm rest.
On your passenger door, I see a light. Was that factory or something you added? Your interior looks great.
I am missing the lid to my console. I need to get one, and I definitely want an arm rest.
Aug 23, 2011 | 06:57 AM
#438
Thread Starter
Super Moderator
iTrader: (1)
Joined: Aug 2008
Posts: 11,787
Likes: 28
From: Anderson Missouri
Didnt get much done yesterday. Did do some little detailing and it is getting harder to find stuff to do on it. Everything is coming down to parts, which involves the green stuff. But when I do get these items it will go fast, so guess it is a good thing.
The major things left is,
Carpet
Seats
AC
Transfer Case
Shocks
Stereo
Trunk Compartment Covers 1'x1' for both sides.
Driver Front Mud Flap
The major things left is,
Carpet
Seats
AC
Transfer Case
Shocks
Stereo
Trunk Compartment Covers 1'x1' for both sides.
Driver Front Mud Flap
Aug 23, 2011 | 07:22 AM
#439
Thread Starter
Super Moderator
iTrader: (1)
Joined: Aug 2008
Posts: 11,787
Likes: 28
From: Anderson Missouri
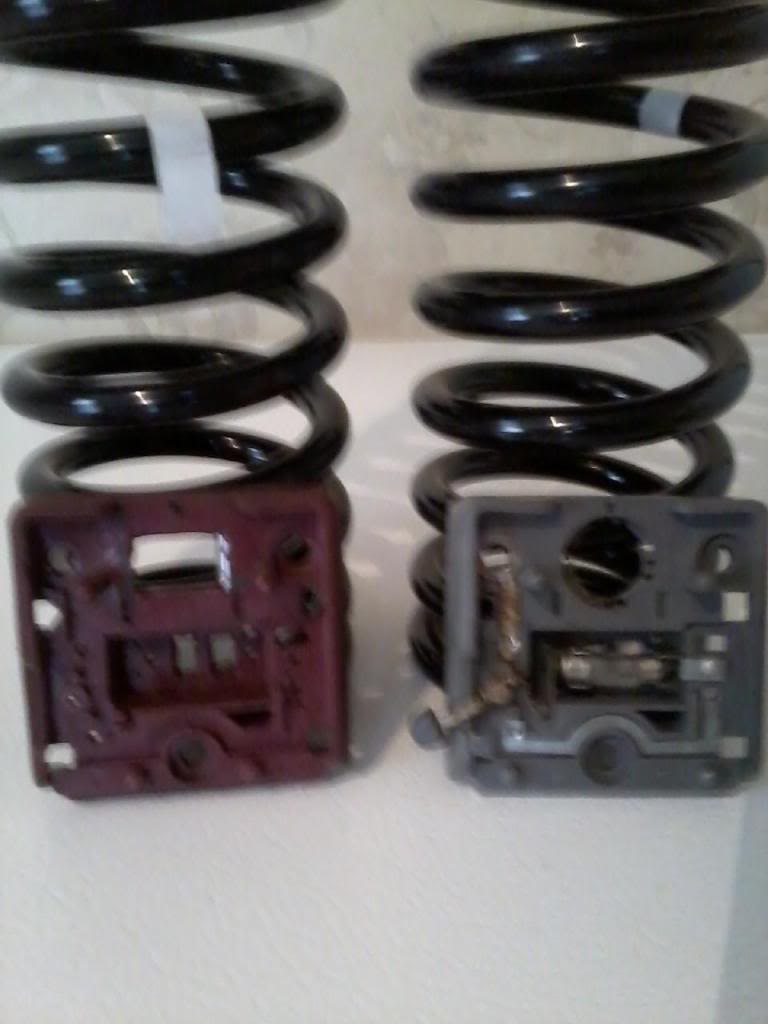
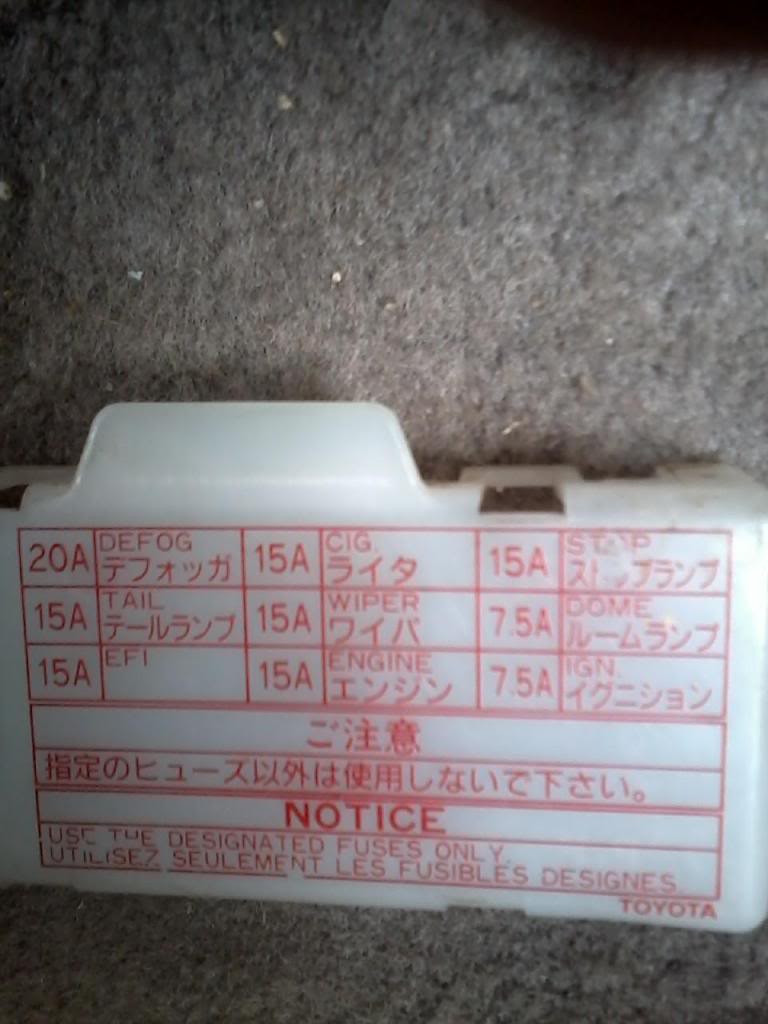
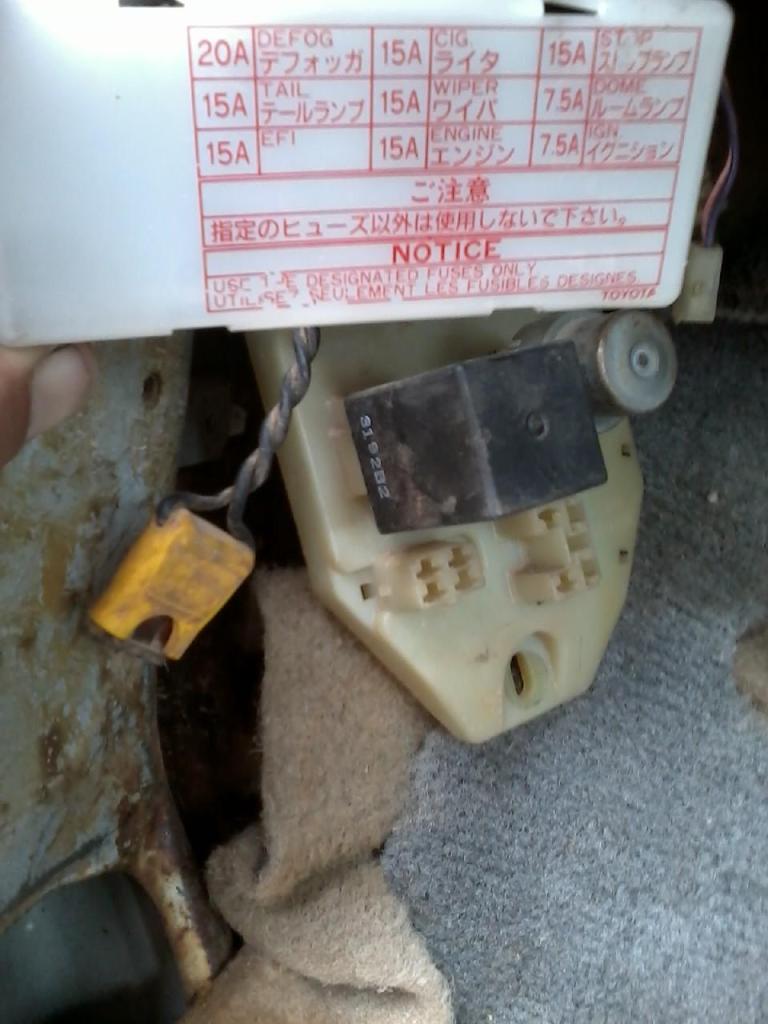
I want to post a pic of fuse locations for the drivers kick panel for others reference.
How to Remove Fuse box.
To get the fuse box out, if you have never done it, slide your finger tip in the cutout until it goes against it or slighty under it. Then gentle upward pressure will releas the clip. Also remove the bottom bolt first. Will need to grasp it on the sides and work off of its mounting tabs.
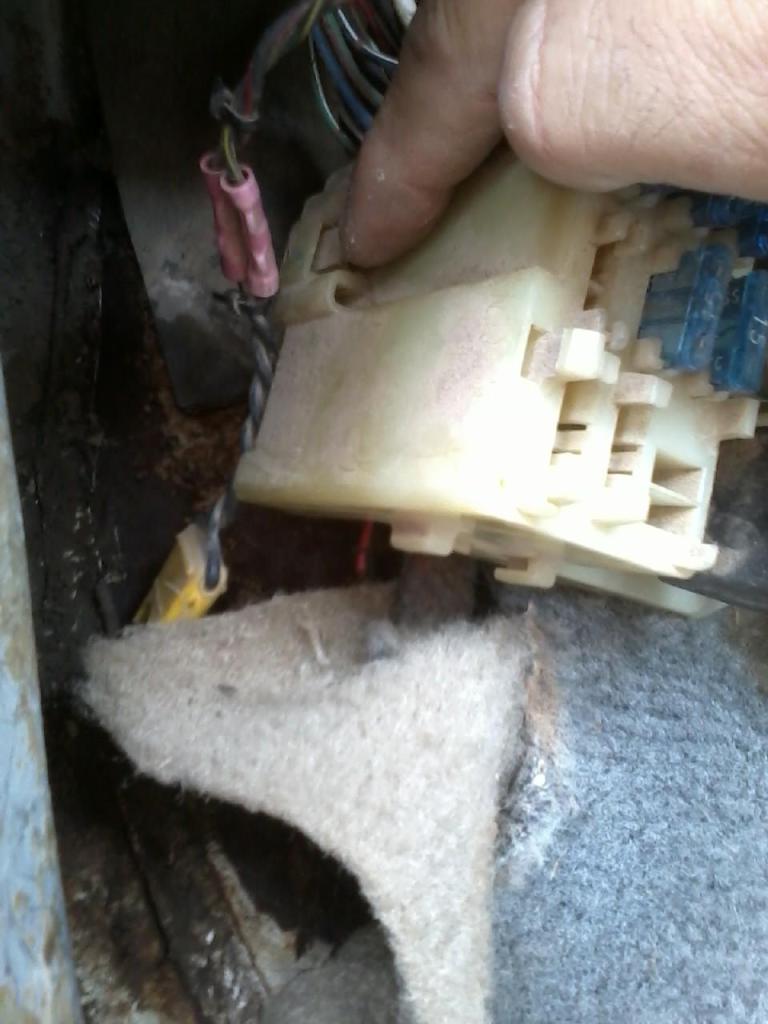
The silver barrel is the relay and a pic of the fuse cover for those that may not have one as most are missing.
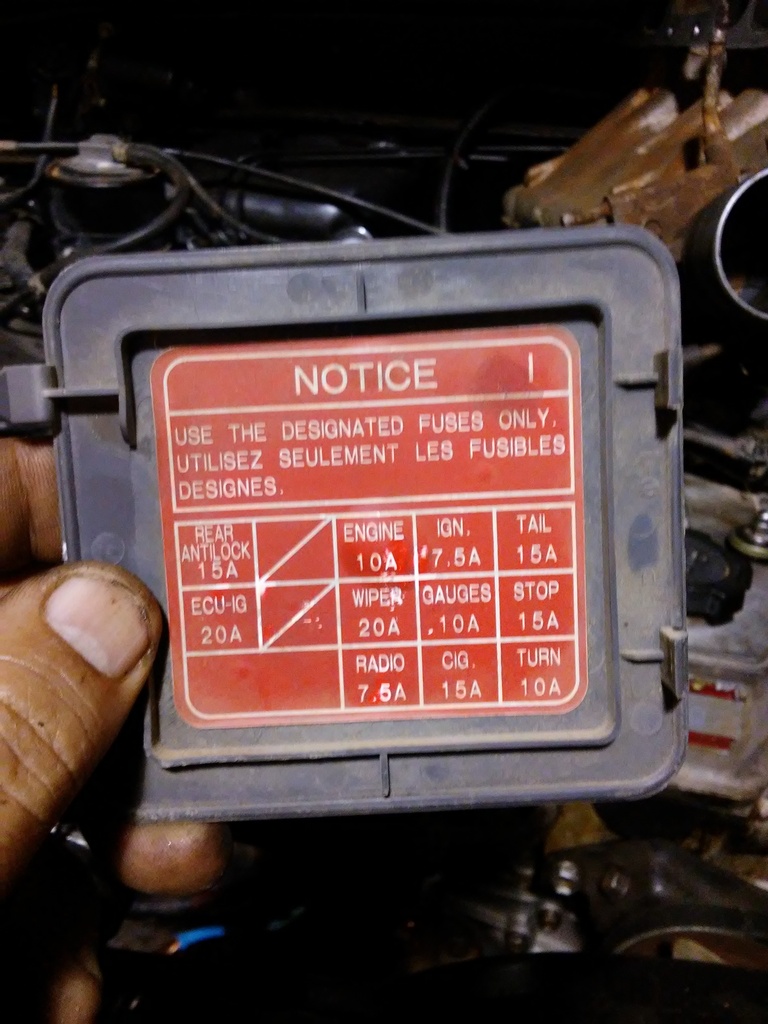
89-95 Fuse panel cover. Left Kick Panel.
How to Remove Fuse box.
To get the fuse box out, if you have never done it, slide your finger tip in the cutout until it goes against it or slighty under it. Then gentle upward pressure will releas the clip. Also remove the bottom bolt first. Will need to grasp it on the sides and work off of its mounting tabs.
The silver barrel is the relay and a pic of the fuse cover for those that may not have one as most are missing.
89-95 Fuse panel cover. Left Kick Panel.

Last edited by Terrys87; Sep 8, 2016 at 01:42 PM.
Aug 23, 2011 | 11:16 AM
#440
Yep, that 'Door' light's purpose is 2 fold(from the factory).... 2 let oncoming cars know it's open, and 2, and PRIMARILY, to light up the 'way in' to the rig for the passenger.... AND DRIVER. Yep, I have one too on my side. the reason I think it's for oncoming cars is obvious, right? hahaha. But also, cuz it has that "red" section. Just to put some depth perception to it for oncoming cars.
Far as the console.... good luck on that.. Can't be too hard to fine. You'll most likely wind up with the whole thing, then you can just re-do the tippy top cover. I LOVE that it has two separate sections for storage. The lower one I keep stuff I don't often go for... The upper is for my MP3 connectors, FM transmitter(soon to be Not Needed!, lol), Remington Multi-Purpose Tool w/pliers, drivers, knife, etc... you know what i mean! lol.
CAN'T WAIT to see that come together! Any thoughts about moving back to CA? Not sure what made me ask... just curious. You seem to miss it(geographically, of course, being the primary portion you miss, lol)


